What is Class in WordPress
Understanding what a class is in WordPress can be the key to enhancing your website, whether you’re a beginner or have some experience.
In WordPress, a class is a set of CSS rules used to define the appearance and layout of elements across your site. These classes help you style specific parts of your site without changing the HTML structure.
Classes in WordPress are essential for developers and those looking to customize their site’s design. By using CSS classes, you can ensure a consistent look and feel across different pages and sections.
For beginners, learning how to identify and apply these classes can make web design much more accessible and fun.
Moreover, WordPress has made it easier to work with these classes by centralizing layout definitions and reducing code duplication.
This simplifies the process, especially with the latest updates like WordPress 6.1, which introduced new semantic class names and streamlined the layout framework.
What is class in WordPress
A class in WordPress is used to style and control the appearance and behavior of elements on your website. In WordPress, classes play a crucial role in theme development, plugin functionality, and custom coding with PHP. Below, you’ll find a breakdown covering the most important aspects of WordPress classes.
The basics of classes in WordPress
What is class in WordPress? A CSS class in WordPress is a way to apply specific styles to HTML elements. You define a class in your CSS file. Then, you assign it to HTML elements using the class attribute.
<div class="my-custom-class">Content here</div>
You can view and edit these classes through the WordPress editor by switching to the Text tab.
CSS classes are important because they let you create a consistent style across your entire site. Instead of styling each element individually, you can create a class once and reuse it.
You can also use classes to help identify different sections in your theme for styling or JavaScript functions.
Classes in theme development
In theme development, classes are essential. When creating a WordPress theme, you’ll often add classes to your HTML elements in template files.
A typical way to add classes is in the functions.php file. This file allows you to add custom PHP code to your theme.
<body <?php body_class(); ?>>
The body_class() function will automatically add useful classes to your body tag, such as the page’s template or category names. This makes styling different pages much easier.
Developers also add their own custom classes in the theme’s CSS file. By doing this, you can manage and organize styles for different parts of your theme more efficiently.
Utilizing classes in plugins
Plugins use classes to enhance functionality. For example, many plugins add their own CSS classes to your pages to style forms, buttons, or other elements.
To add a CSS class in WordPress to a plugin’s output, you can usually do this via plugin settings or hooks in the plugin’s code.
If you want to add an additional CSS class to a specific block, you can do the following:
- Click the block you are editing.
- In the block settings, find the “Advanced” section.
- Enter your CSS class name in the “Additional CSS Class” field.
Some plugins might also generate classes dynamically based on user inputs or plugin-specific settings. This allows for a high degree of customization and functional enhancement for your WordPress site.
Working with CSS classes in WordPress
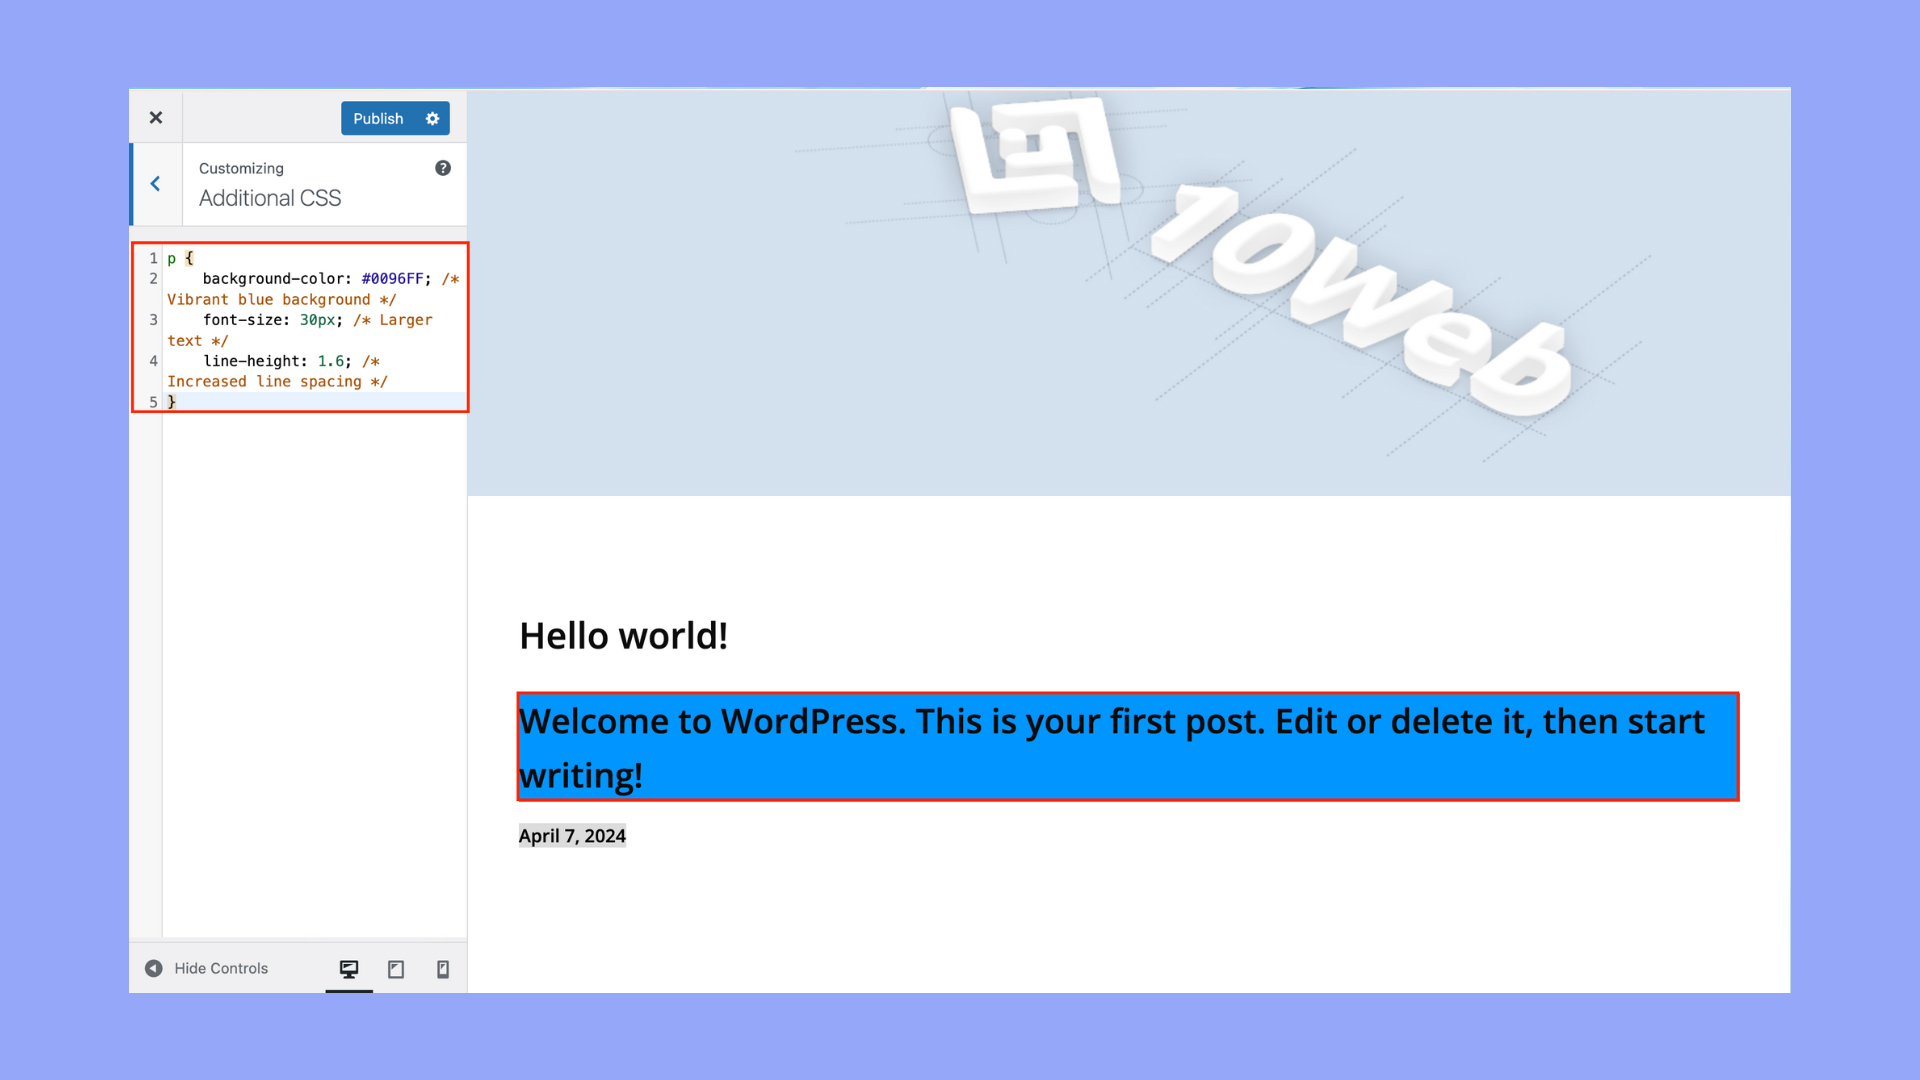
CSS classes in WordPress allow you to style specific elements on your site easily. You can assign a custom class in WordPress to various elements and manage these classes within your theme’s stylesheet.
Assigning custom CSS classes
To add a custom CSS class to a post or page, you need to use the WordPress editor.
Start by navigating to the post or page you want to edit. Click on the Edit button to open it.
In the editor, switch to the Text tab if you’re using the Classic Editor, or go to the Block settings if using the Block Editor.
From there, you can add the class attribute to the desired HTML elements.
<div class="my-custom-class">Content goes here</div>
This adds the class my-custom-class to the div. You can then define this class in your CSS to apply specific styles.

CSS classes and selectors
CSS selectors are used to apply styles to elements with specific classes, IDs, or attributes. When you add a custom CSS class, you’ll need to create a CSS rule for it in your stylesheet (style.css).
.my-custom-class {
    color: blue;
    font-size: 18px;
}
Selectors can be more complex, combining multiple classes or elements. For instance:
body .my-custom-class {
    background-color: yellow;
}
This targets only the elements with my-custom-class within the body tag, offering precise control over your site’s appearance.
Managing CSS classes in theme files
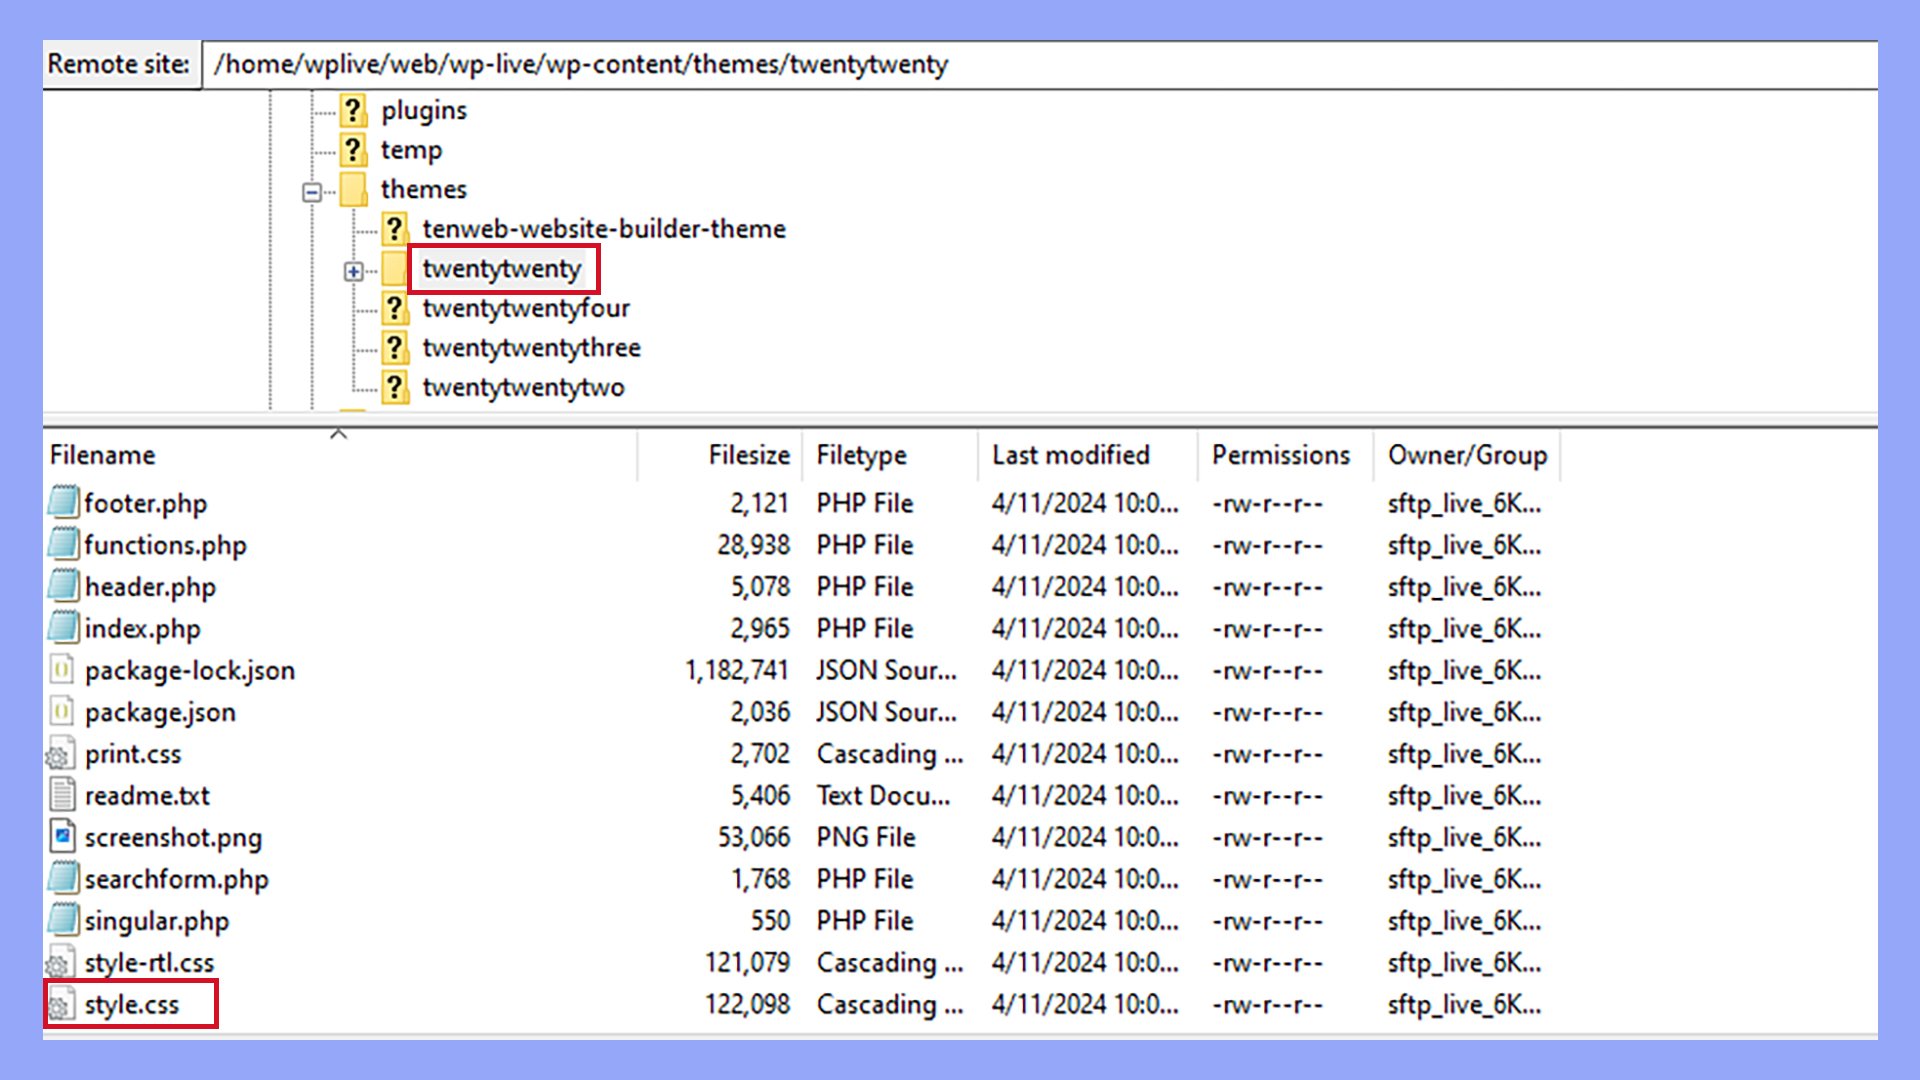
You can add and manage CSS classes in WordPress directly in your theme files. This usually involves editing the style.css file, located in the wp-content/themes/your-theme-name/ directory.
Using an FTP client like FileZilla, navigate to this directory, open the style.css file.

From here, you can add or modify CSS classes in a text editor as needed.
.page-title {
    text-align: center;
    margin-bottom: 20px;
}
This CSS rule centers the text of elements with the page-title class and adds a margin at the bottom. Managing CSS in this way helps you consistently style your site according to your brand’s design requirements.
Leveraging PHP functions and filters
Using PHP functions and filters can help you add a custom class in WordPress, making it more flexible and tailored to your needs. This section explores how to add custom classes with functions and use the add_filter() method.
Adding custom classes with functions
You can add a custom class in WordPress by editing the functions.php file in your theme. This file acts as a central hub for all custom PHP code related to your theme.
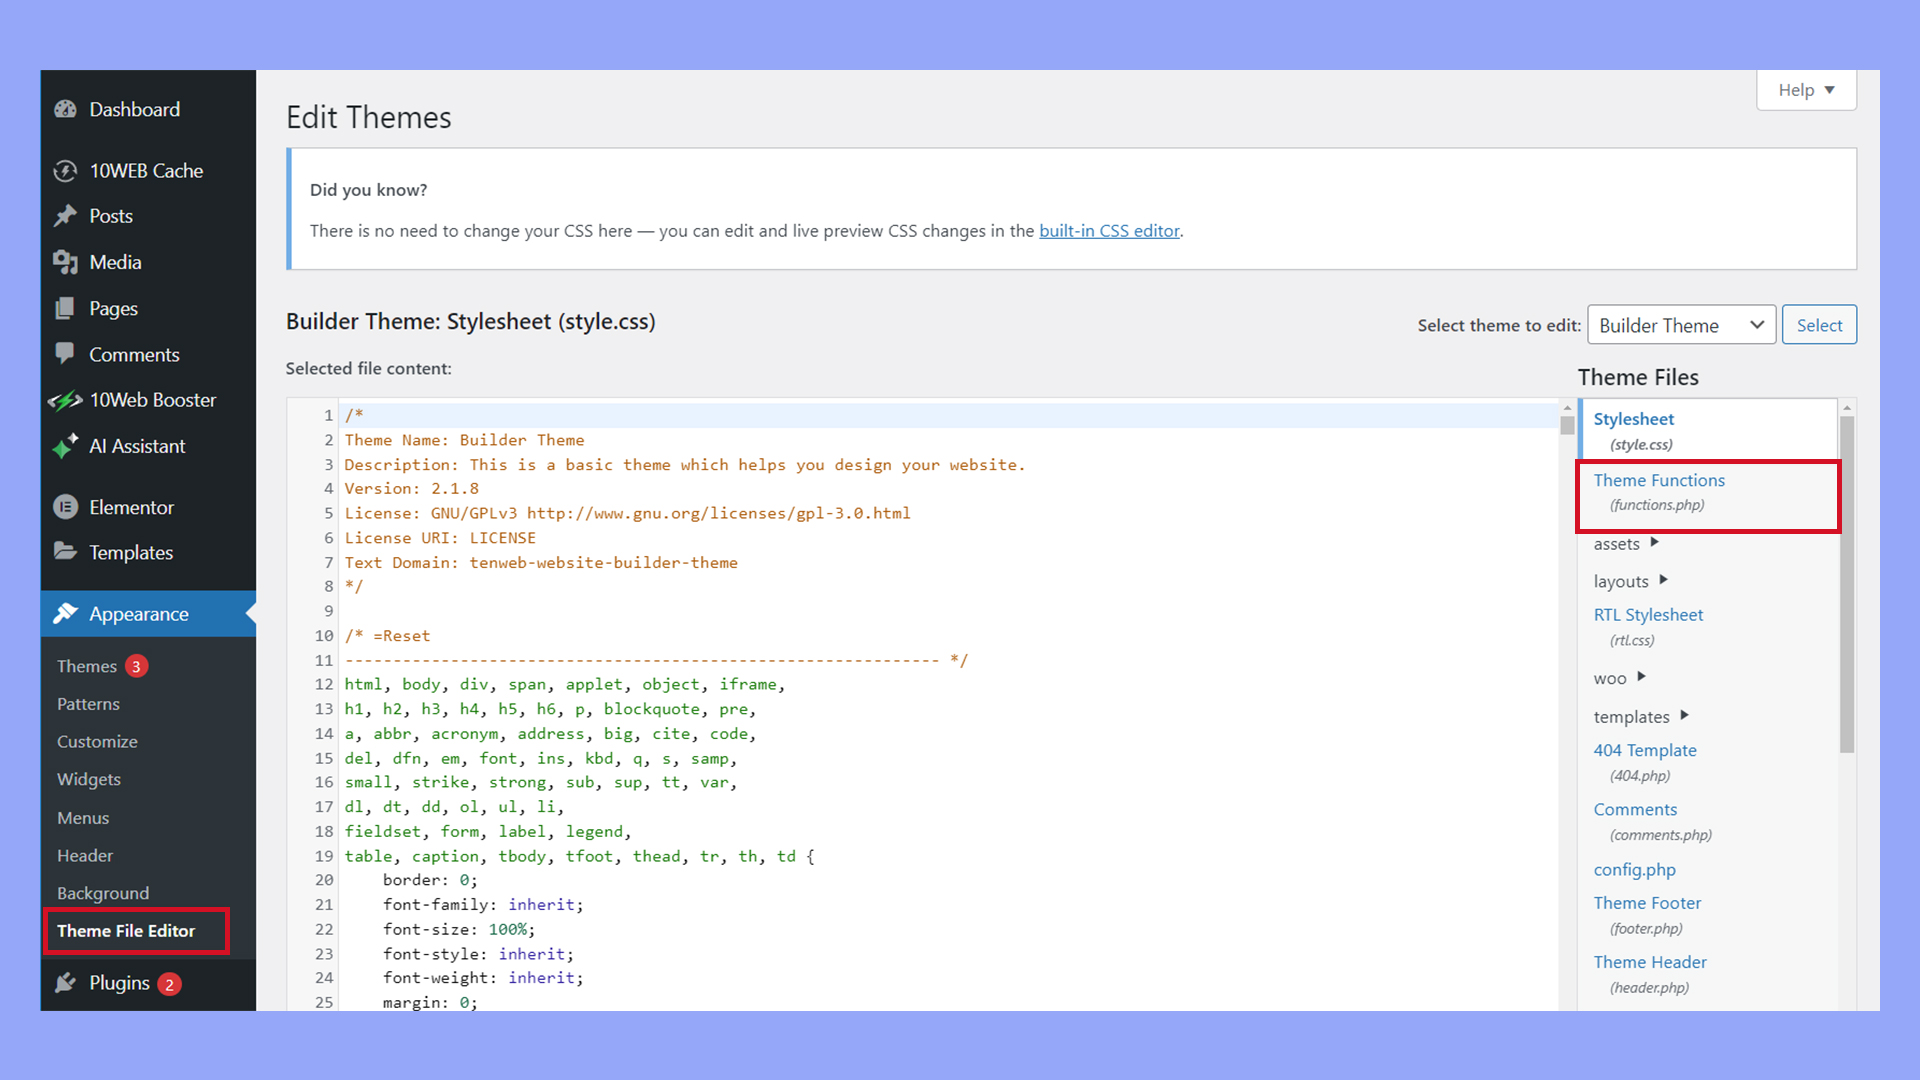
First, open the functions.php file from your WordPress dashboard by going to Appearance → Theme File Editor.

Choose the Theme Functions (functions.php) file.
function my_custom_class($classes) {
    $classes[] = 'my-new-class';
    return $classes;
}
This function adds a new class called my-new-class to your site’s body or another element.
Next, you’ll need to hook this function to an appropriate filter. For example, if you want to add it to the body class, use this:
add_filter('body_class', 'my_custom_class');
This code snippet ensures that every page loads with your new class added to the body tag. This method helps you easily control styles and scripts across your site.
Understanding add_filter() for classes
The add_filter() function is essential to customizing class behavior in WordPress. It connects your custom functions to pre-defined hooks, allowing you to alter or extend core functionality without modifying core files.
add_filter('hook_name', 'your_function_name', [priority], [accepted_args]);
- hook_name: The specific filter hook to which you want to attach.
- your_function_name: The name of your custom function.
- priority (optional): Determines the order in which the functions associated with a particular action are executed (default is 10).
- accepted_args (optional): The number of arguments the function accepts (default is 1).
For example, to modify post classes, you can use:
function customize_post_class($classes) {
    $classes[] = 'custom-post-class';
    return $classes;
}
add_filter('post_class', 'customize_post_class');
This method ensures that your custom class in WordPress is added to each post’s class list. By using add_filter(), you gain granular control over your site’s functionality and appearance.
Advanced techniques and best practices
Understanding advanced techniques and best practices for using classes in WordPress can help you improve your site’s performance and ensure your code is clean and maintainable. These tips are essential for anyone looking to enhance their WordPress development skills.
Optimizing class usage for performance
To improve the performance of your site, it’s important to be mindful of how you use CSS classes in WordPress.
One key technique is to minimize the number of class selectors. Too many class selectors can slow down page load times. Instead, use specific, meaningful class names that directly relate to the HTML elements they style.
Another best practice is to group commonly used styles under shared classes.
By reusing class names across different elements, you reduce redundancy and keep your CSS file size smaller. It also makes your site easier to maintain.
Use !important sparingly. Overusing it can lead to specificity issues that make your stylesheets difficult to debug. Only use !important when absolutely necessary and no other solution is viable.
WordPress coding standards for classes
Following WordPress coding standards helps ensure your code is clean, readable, and consistent with other WordPress projects.
One key standard is to use lowercase letters and hyphens for class names. This improves readability and aligns with common CSS naming conventions.
When naming classes, be descriptive but concise. For example, use .post-title instead of .pt to clearly indicate what the class is for.
Avoid overly generic names that could conflict with other styles or plugins.
Comment your CSS files to describe the purpose of your classes and any important changes. This makes it easier for others (or you in the future) to understand why certain styles were added.
Lastly, keep your classes organized and follow a logical structure. Group related classes together and use comments to separate different sections. This makes your stylesheet easier to navigate and maintain.
In conclusion, understanding what a class is in WordPress is fundamental for both beginners and experienced developers. Classes in WordPress allow you to control the appearance and functionality of your site, providing a consistent and customizable design. By mastering CSS classes, theme development, and plugin integration, you can significantly enhance your WordPress site’s performance and aesthetics.


