What is WordPress Cron
Ever wondered how your WordPress site keeps running smoothly with tasks like checking for updates or publishing scheduled posts? This is where WordPress Cron comes into play.
WordPress Cron (WP-Cron) is a system that handles the scheduling of time-based tasks on your website, ensuring everything happens seamlessly without manual intervention.
In traditional systems, cron jobs are used for scheduling tasks at specific times. WordPress Cron works a bit differently; it uses intervals to simulate these scheduled tasks.
Every time someone visits your site, WordPress checks if any scheduled tasks need to run. This approach helps keep your site up-to-date and efficient.
Understanding how to manage WordPress Cron tasks can be crucial for site performance. By knowing where to look and what to tweak, you can take full control of scheduled tasks on your WordPress site, optimizing it further for your needs.
Whether you’re publishing posts at strategic times or running regular maintenance, mastering WordPress Cron can unlock new levels of site management for you.
Understanding WordPress Cron
WordPress Cron is a vital part of how WordPress schedules and automates tasks. This section will explain what WordPress Cron is, compare it to Unix Cron, and detail how it functions.
What is WordPress Cron?
WordPress Cron, also known as WP-Cron, is a built-in feature in WordPress that handles time-based tasks. These tasks include checking for updates, publishing scheduled posts, and more.
Unlike traditional cron jobs that run on the server, WordPress Cron relies on site traffic to trigger the execution of these tasks.
When someone visits your WordPress site, wp-cron.php is called, and WordPress checks if there are any scheduled tasks that need to be run.
This can be less reliable if your site doesn’t get much traffic.
WordPress Cron vs. Unix cron
Unix cron is a time-based job scheduler in Unix-like operating systems. It schedules tasks to run at specific times or intervals using the system clock.
In contrast, WordPress Cron relies on site visits to execute scheduled tasks, as it doesn’t use the system clock.
While Unix cron runs independently of user visits, WordPress Cron only runs when someone visits the website. As a result, WordPress Cron can miss tasks on low-traffic sites, whereas Unix cron ensures tasks run on time, regardless of site traffic.
How WordPress Cron works
WordPress Cron works by scheduling tasks that are stored in the WordPress database. These tasks have specified intervals, like every hour or twice a day.
When a user visits your site, wp-cron.php checks for any due tasks and runs them.
You can set up custom intervals and tasks using hooks and filters.
For instance, you might set tasks to optimize your database or send email notifications.
If your site has low traffic or you need more precise control, you might consider using a real cron job on your server to call wp-cron.php at regular intervals, ensuring tasks are executed reliably.
Setting up and managing WordPress Cron jobs
Setting up and managing cron jobs in WordPress allows you to automate tasks like backups, updates, and more. This section guides you through using WP-Cron functions, plugins, creating custom intervals, and editing or deleting cron jobs.
Using WP-Cron functions
WP-Cron is WordPress’s own cron system, allowing you to set up scheduled tasks. You can manage these tasks using functions like wp_schedule_event. This function lets you specify the time for tasks to run.
The add_action function hooks your custom tasks to WP-Cron. For example:
add_action('my_daily_event', 'my_daily_function');
You also need to define the function:
function my_daily_function() {
    // Your code here
}
This way, your task gets added to the schedule and executed accordingly.
Managing WordPress Cron with plugins
Managing cron jobs can be easier with plugins like WP Crontrol.
First, install and activate the WP Crontrol Plugin from the WordPress dashboard.
- Go to Plugins → Add New
- Search for “WP Crontrol”
- Click Install Now and then Activate


After activating, navigate to Tools → Cron Events. Here you’ll see a list of all scheduled cron tasks.
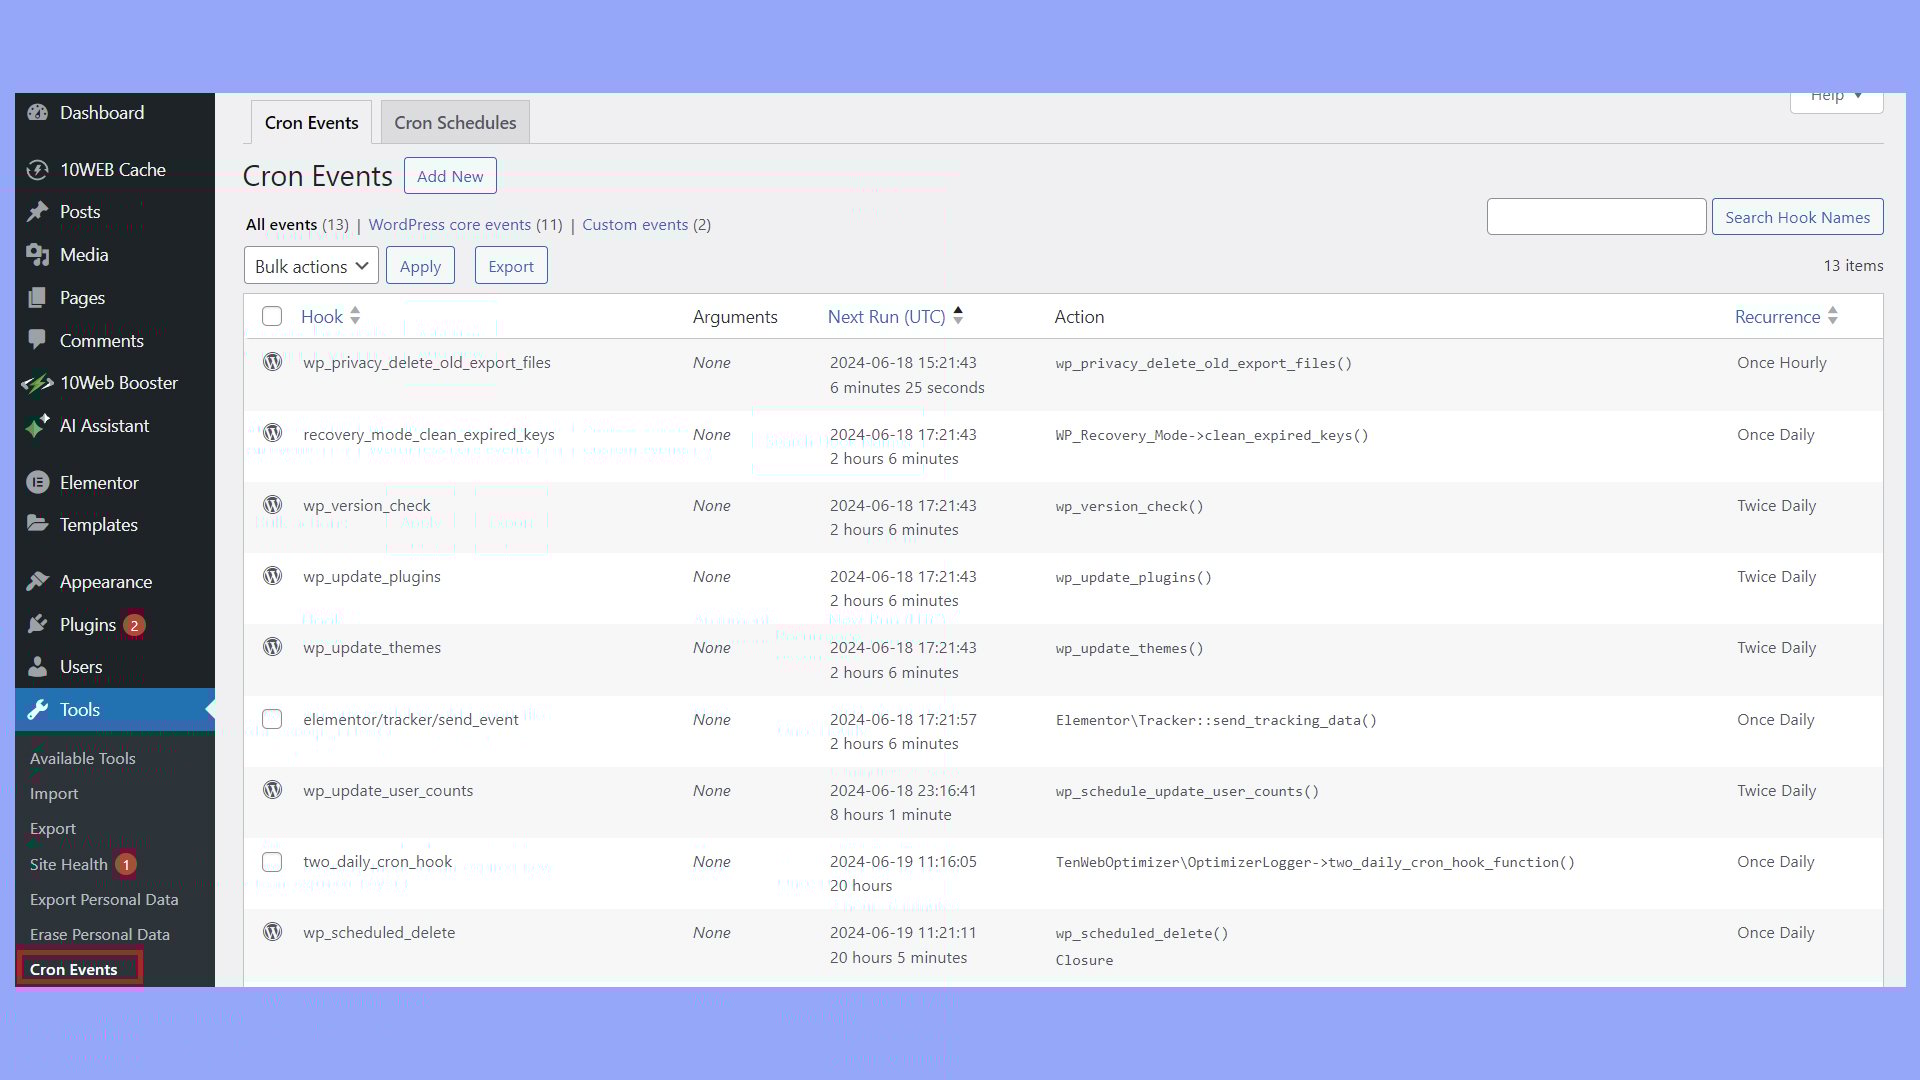
These plugins provide an interface for adding, editing, and managing your cron jobs without touching code.
Creating custom intervals
Sometimes the default intervals like hourly, twice daily, or daily don’t suit your needs. You can add custom time intervals by adding code to your functions.php file.
Use cron_schedules filter to add new intervals. For example:
function example_add_cron_interval($schedules) {
    $schedules['every_five_minutes'] = array(
        'interval' => 300,
        'display' => __('Every 5 Minutes')
    );
    return $schedules;
}
add_filter('cron_schedules', 'example_add_cron_interval');
Then, use wp_schedule_event to schedule tasks using your custom interval.
Editing and deleting cron jobs
Editing or deleting cron jobs is straightforward with plugins like WP Crontrol.
To edit a cron job:
- Go to Tools → Cron Events
- Locate the task you want to edit
- Click Edit
You can change the hook, schedule, or arguments.
To delete a cron job:
- Still in Tools → Cron Events
- Find the task
- Click Delete
This removes the task from the schedule.
Optimizing WordPress Cron for performance
Optimizing cron jobs in WordPress can significantly enhance your site’s performance and server efficiency. This involves controlling cron execution, implementing server-level cron, and troubleshooting common issues.
Controlling cron execution
By default, WordPress triggers cron jobs based on site visits, which can lead to unpredictable performance.
One way to optimize this is by adjusting when and how often these jobs run.
To start, you can configure WordPress to use a real cron job instead of the default pseudo-cron. This involves disabling WP-Cron and setting a system cron on your server.
Here are the steps:
- Edit your wp-config.php file to add
define('DISABLE_WP_CRON', true);. - Add a system cron job using cPanel, Crontab, or similar tools.
This ensures better control over the timing and frequency of your scheduled tasks, helping to prevent high server load.
Server-level cron implementation
Implementing server-level cron (or System Cron) can improve reliability and performance by handling cron jobs outside of your WordPress environment.
On a shared hosting environment, this might be a bit challenging due to limited access, but on a dedicated or managed WordPress hosting plan, you have more control.
Here’s a quick guide:
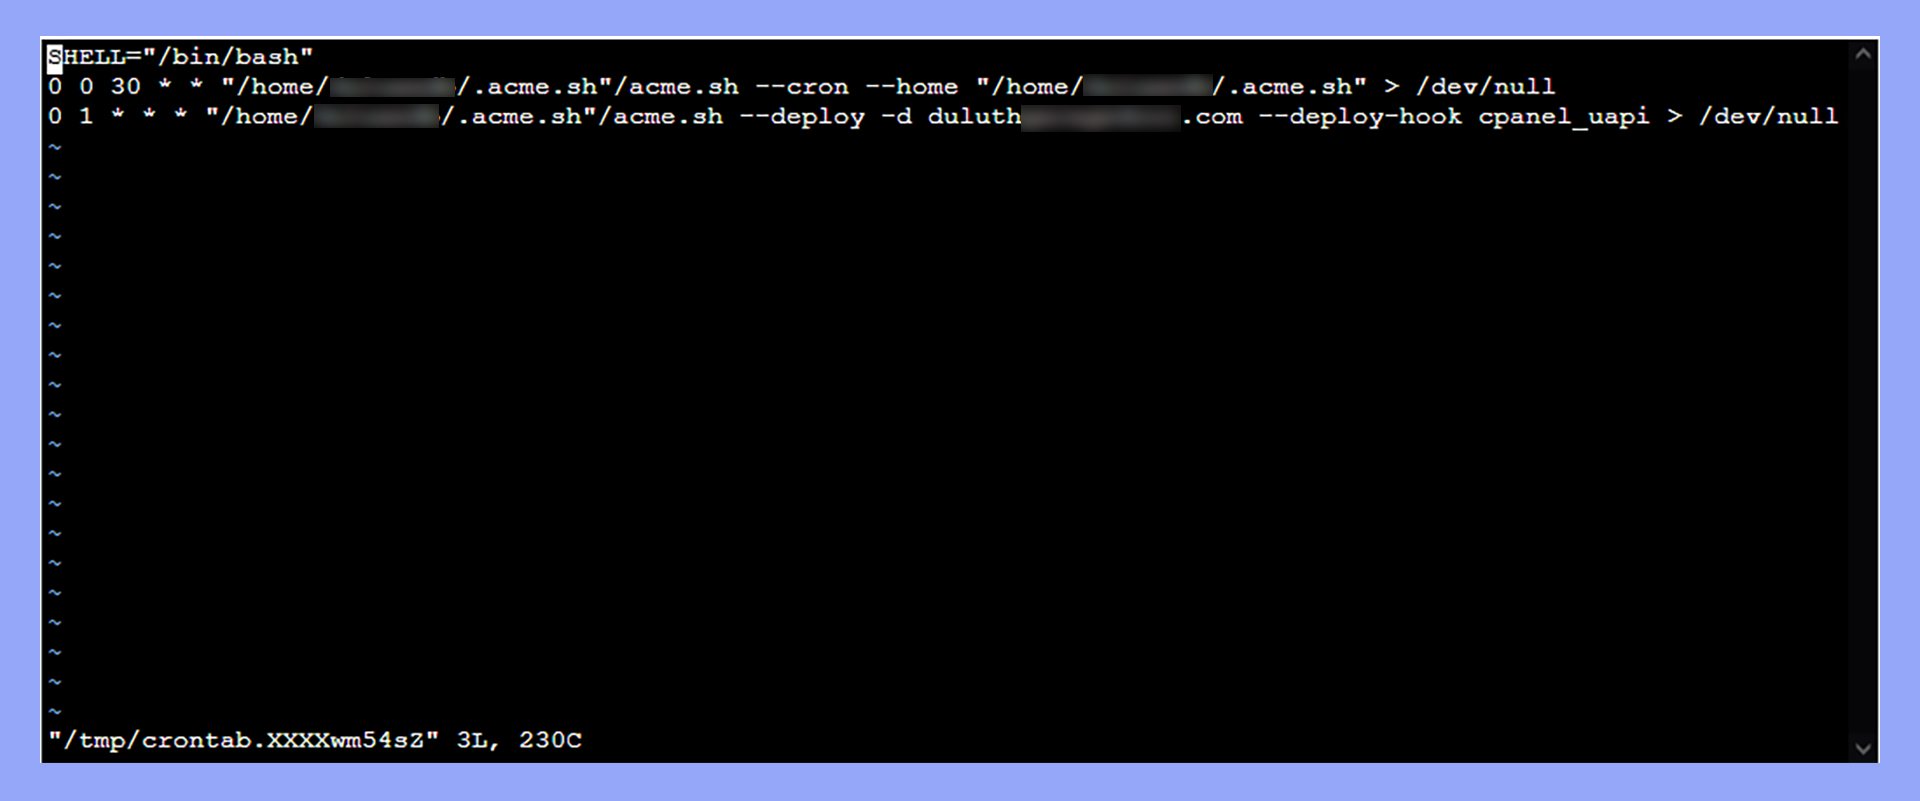
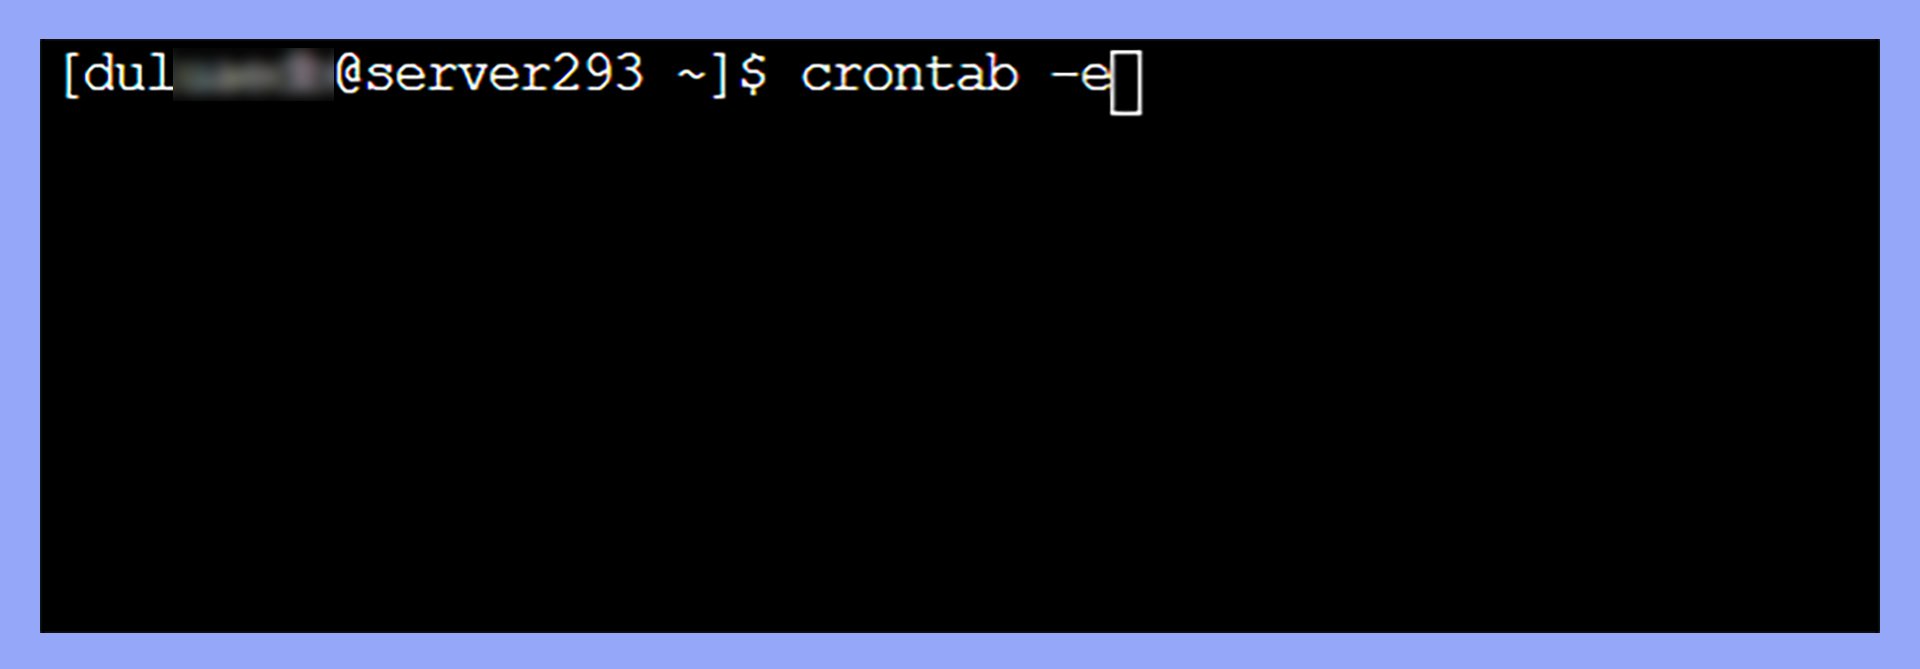
- Access your server’s crontab by typing
crontab -ein your terminal.

- Add a line to schedule your cron job, for example:
*/15 * * * * wget -q -O - https://yourwebsite.com/wp-cron.php?doing_wp_cron > /dev/null 2>&1.
This setup runs the WP-Cron every 15 minutes, reducing load times by ensuring tasks are spread out and not all executed on page loads.
Troubleshooting common issues
While setting up and optimizing cron jobs, you might run into issues like cron jobs not firing, WP-Cron conflicts, or high server loads.
To fix cron jobs not firing, check your wp-config.php for syntax errors and verify your hosting provider’s cron support.
Additionally, plugins like WP Crontrol can help:
- Navigate to Plugins -> Add New
- Install and activate WP Crontrol
- Use it to monitor and manage your cron jobs, ensuring they run as expected.
If you encounter high server load issues, ensure your cron job frequency is set appropriately, and avoid running too many heavy tasks simultaneously.
Advanced techniques for WordPress Cron
Mastering advanced cron techniques can help take your WordPress site to the next level. You will learn how to handle command-line tools to streamline tasks and automate job scheduling to keep your site running smoothly.
Working with WP-CLI
WP-CLI is a powerful tool that allows you to manage your WordPress site from the command line.
To use WP-CLI for cron jobs, you’ll need access to your server via SSH. Once connected, you can list all scheduled cron events by using the command:
wp cron event list
This command will display a table with columns for Hook Name, Next Run (UTC), and Schedule.
You can also run a specific cron event manually with:
wp cron event run <hook-name>
Where <hook-name> is the name of the hook you want to execute.
Setting up WP-CLI in your wp-config.php file allows you to automate scripts for WooCommerce and other plugins.
This can streamline your workflow and reduce manual intervention.
Automation and hook-based scheduling
Automation is key to managing time effectively. You can split up your tasks using hooks in WordPress. These hooks allow you to create scheduled tasks that run at specific intervals.
Add your custom functions to these hooks to perform actions like cleaning up the database or sending out periodic emails.
For instance, to schedule a daily email, you can add a custom hook in your theme’s functions.php file:
if ( ! wp_next_scheduled( 'send_daily_email' ) ) {
  wp_schedule_event( time(), 'daily', 'send_daily_email' );
}

add_action( 'send_daily_email', 'send_daily_email_function' );

function send_daily_email_function() {
  // Your email sending script here
}
This code sets up a new cron event send_daily_email that triggers the send_daily_email_function every day.
You can also use the WP Crontrol plugin or Advanced Cron Manager to visualize and manage these cron events from your dashboard.
In conclusion, understanding what WordPress Cron is and how it operates can significantly enhance your site’s performance and management capabilities. By mastering WP-Cron, you can efficiently schedule tasks like updates, backups, and post publishing, ensuring your WordPress site runs smoothly and reliably. With the right tools and techniques, you can optimize and customize cron jobs to suit your specific needs, leading to better site performance and user experience.
Subscribe to AI insights
- The latest trending AI news
- How AI boosts efficiency at 10Web
- In-depth reviews of AI tools
- Entrepreneurial wisdom and insights
- Valuable business growth tips
Share article
-
 Copy
Copy
-
-
-