Creating a WordPress website is a straightforward process that can empower you to build a professional online presence. WordPress is a powerful, flexible platform that powers a significant portion of the internet, from small blogs to large corporate sites. To begin, you need to select a reliable web hosting provider that offers strong performance and support for WordPress installations.
Once you’ve chosen your hosting, the next step is to install WordPress, which is often a simple click-away with hosting providers offering one-click installations. Further customization is possible through the use of plugins which extend the functionality of your WordPress website.
FAQ
What steps should I take to launch a WordPress site?
Which hosting providers offer cheap WordPress hosting solutions?
What do I need to create and host a WordPress website for beginners?
Is it possible to transfer an existing WordPress site to a new hosting provider?
Can I set up and run my WordPress website on a local server?
Choosing a WordPress hosting provider
Selecting the right hosting provider is crucial for the performance and reliability of your WordPress website. This choice will influence your site’s uptime, scalability, and ease of management.
Types of WordPress hosting services
There are several types of hosting options available to suit different needs and budgets:
Shared hosting: This is the mostcost-effective option where you share server resources with other websites. It’s suitable for small sites with limited traffic.
Managed WordPress hosting: A service tailored for WordPress with features like automatic updates, enhanced security, and expert support.
Cloud hosting: Offers scalability by allowing you to use resources from multiple servers on a cloud infrastructure.
VPS (Virtual Private Server) hosting: A middle ground between shared hosting and a dedicated server, providing more control and resources.
Dedicated hosting: You get an entire server for your website, giving you maximum control and resources.
Evaluating hosting providers
When assessing hosting providers, check for:
WordPress-specific features: One-click installation, automatic updates, and staging environments.
Performance enhancements: Look for caching, CDN integration, and advanced performance tuning.
Support: Ensure that the provider offers expert WordPress support 24/7.
Security: Look for SSL certificates, backups, firewalls, and malware scanning services included in the package.
Uptime and reliability
Uptime refers to the time your website is operational and accessible to visitors. High uptime percentages are critical – aim for a hosting provider with at least 99.9% uptime.
Reliability relates to how consistently a host maintains high performance and uptime. Consider reviews, and test response times and loading speeds before making a decision.
Setting up your WordPress website
Launching a WordPress website involves three key steps: choosing your domain name, selecting the right hosting plan, and installing WordPress. Each step lays the foundation for creating a robust online presence for your new website.
Registering a domain name
Your domain name is the unique web address where visitors can find your site. It’s important to choose a domain name that reflects your brand and is easy to remember. 10Web WordPress plans come with a free domain for the first year. You can register a domain through various registrars or sometimes directly through your hosting provider.
Steps to register:
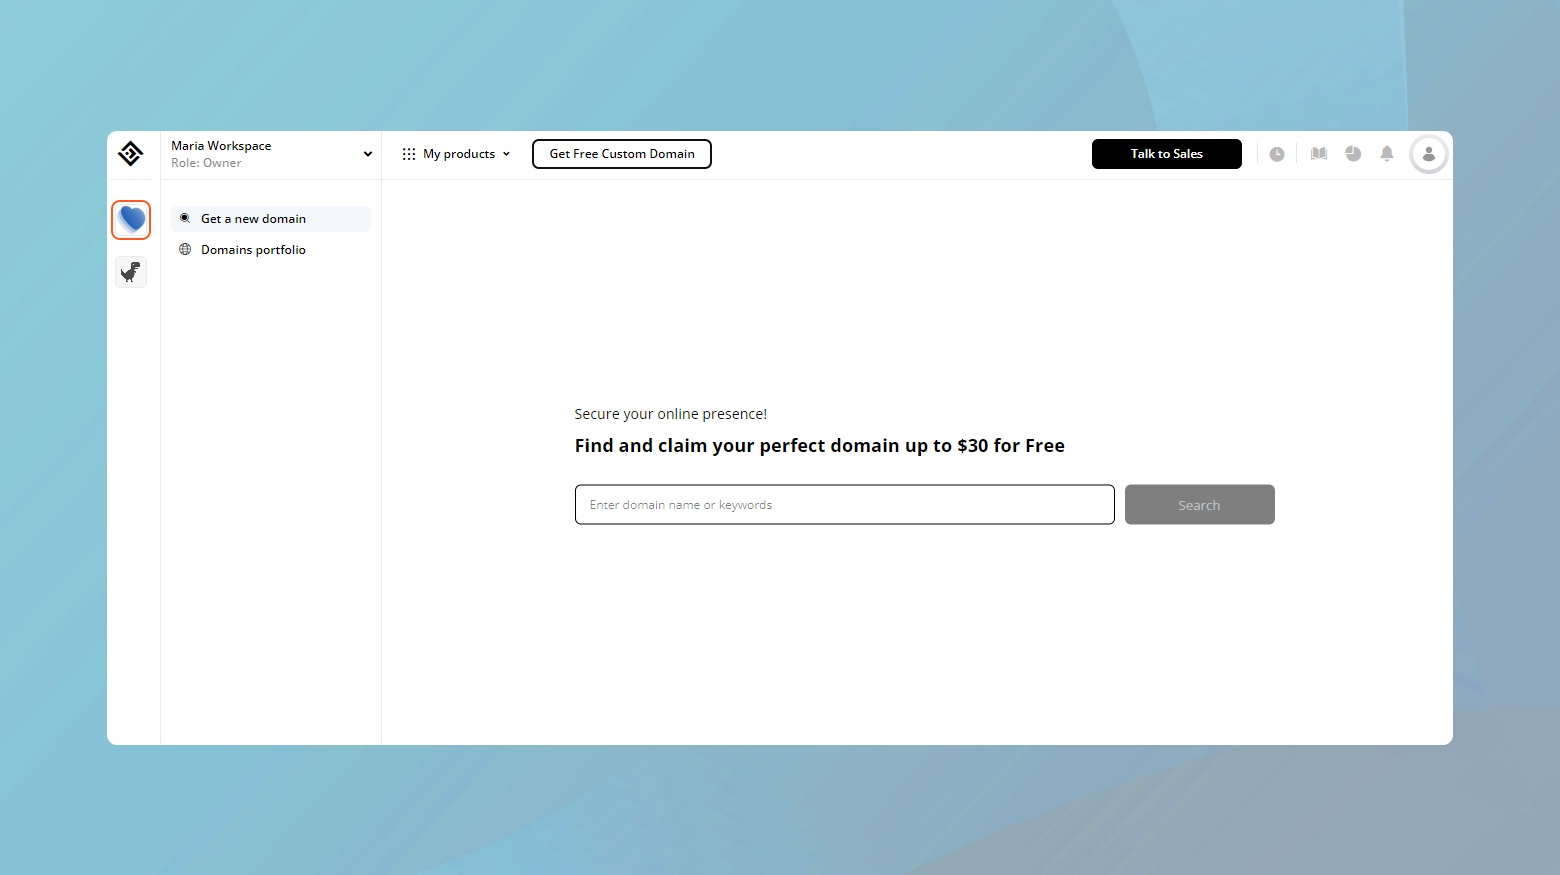
- Choose a domain registrar or web hosting service.
- Search for your desired domain name to check availability.
- Follow the instructions to register the domain.
Selecting your WordPress plan
Choose a WordPress hosting plan that suits the scale and needs of your website. 10Web offers a variety of plans, including free and paid options, with different levels of customization and support.
10Web plans:
Business: Best for a basic blog or website.
Ecommerce: Best for online stores, with integrated payment solutions.
- AI Ecommerce Starter
- AI Ecommerce Premium
- Dedicated Hosting
Agency: Best for Agencies from newly starting to large scale.
WordPress installation
Once you’ve secured your domain and selected a plan, it’s time to install WordPress. Many hosting services offer one-click installations for WordPress, streamlining this process. After installation, you can access the WordPress dashboard where you can manage your site’s content and settings. The dashboard also allows you to choose a theme—an essential part of your site’s design.
Installation steps with one-click installers
- Log in to your hosting control panel.
- Navigate to the WordPress installation section.
- Click on the one-click installer and follow instructions.
Installation steps with 10Web
10Web automatically installs WordPress any time you create or generate a website.
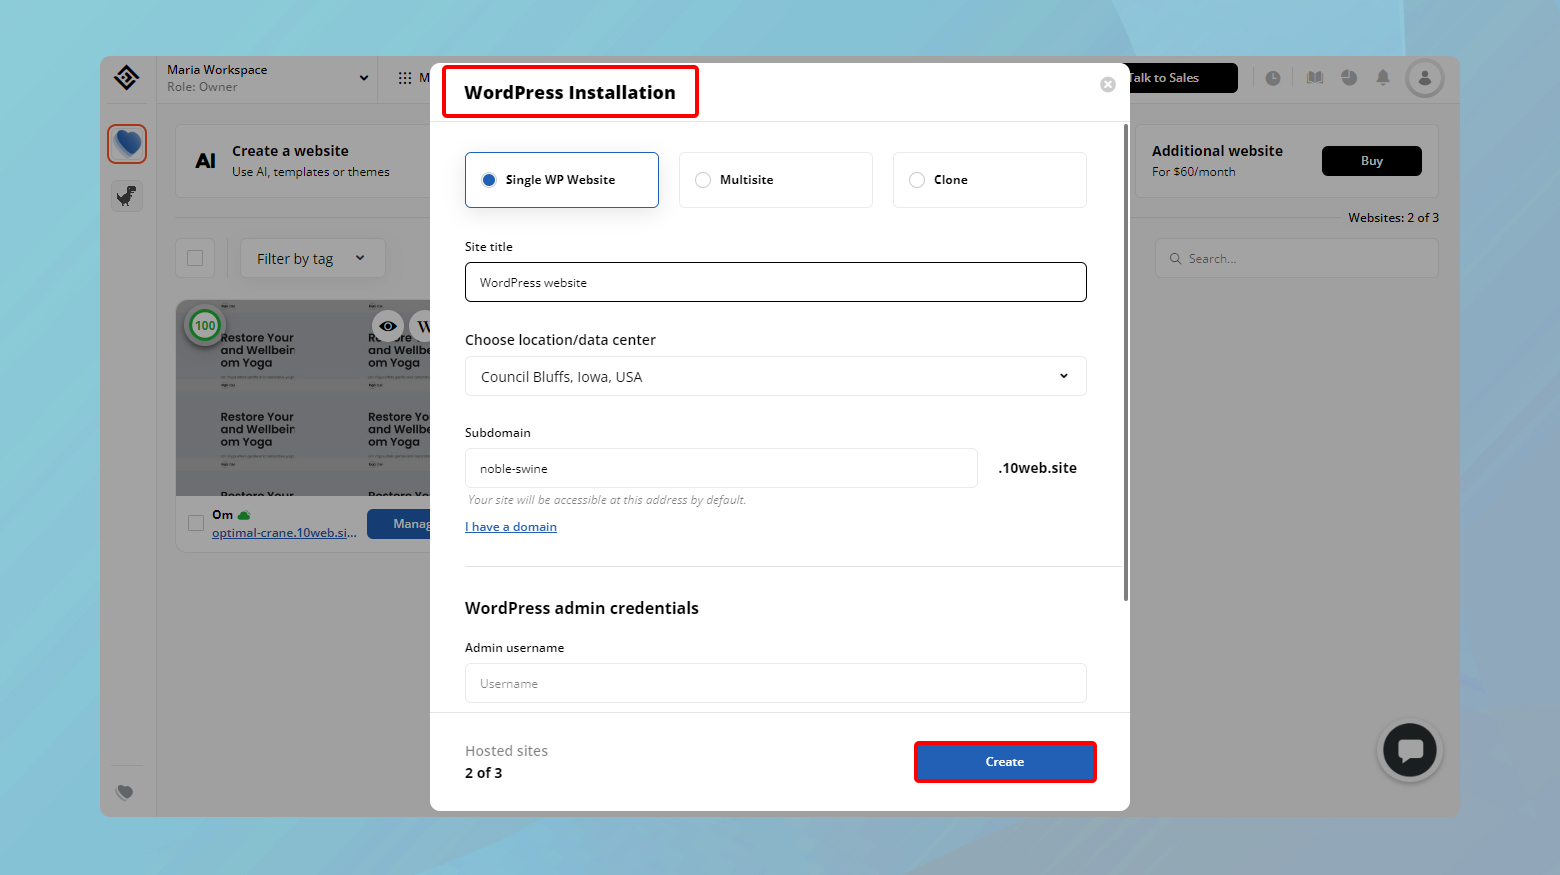
- From your 10Web dashboard, click Create a website.
- Choose the type of WordPress installation you want, Single WP Website or Multisite.
- Fill in the rest of the information.
- Enter a username and generate a strong password for your WP login.
Make sure to store your username and password in a secure location. These are the credentials you will need to log in to your WordPress admin through WordPress.
- Click Create.
Accessing your WordPress dashboard
- Find your login URL, which is typically yourdomain.com/wp-admin
- Use the credentials created during the installation to log in.
If you are logged into your 10Web dashboard, you can click on the W icon located on your website thumbnail.
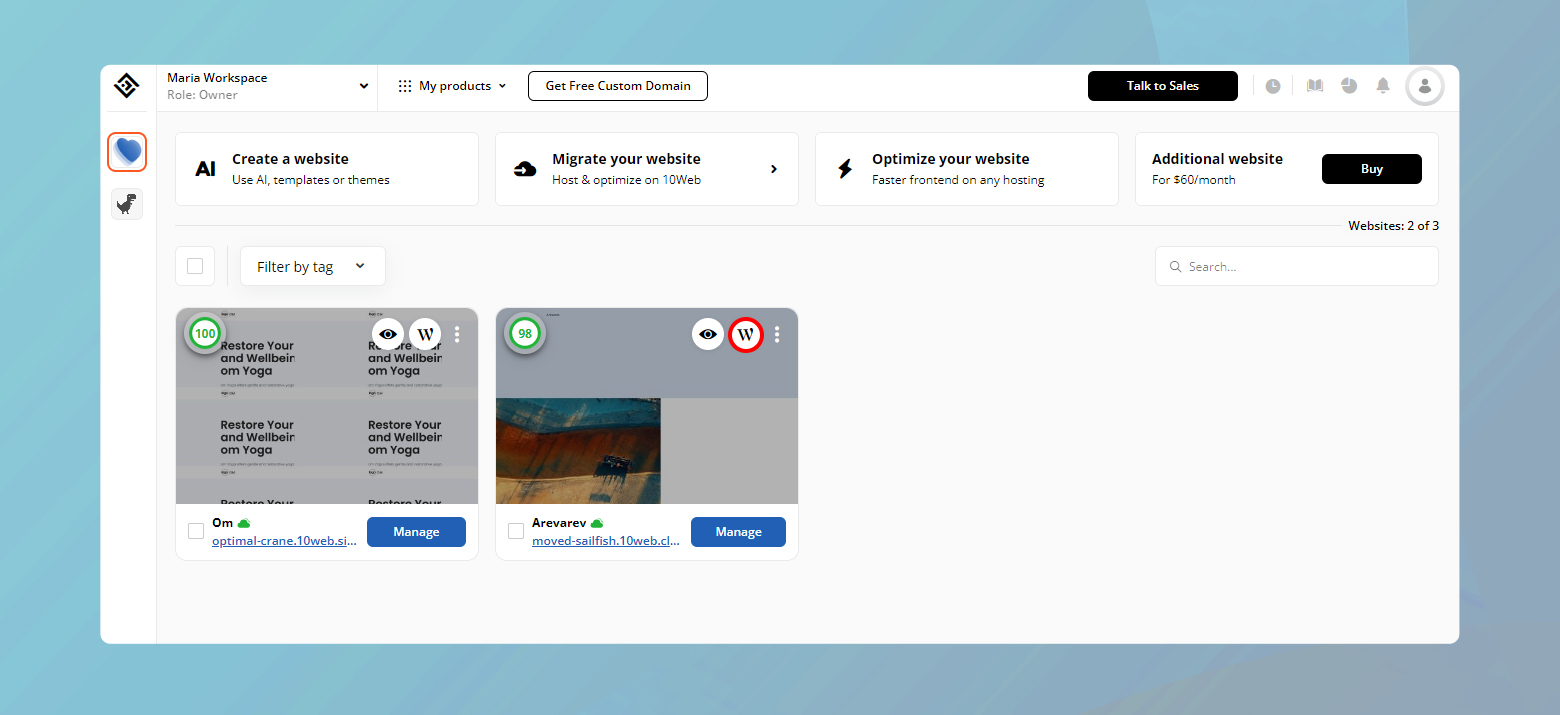
Now, with these steps complete, you can begin customizing your new WordPress site by selecting themes and adding content through your dashboard.
Design and customization
Crafting an engaging online presence with WordPress begins with thoughtful design and personalization. You will strategically select themes and plugins, design your layout, and populate your site with original content.
Planning your website
Before diving into details, outline your site’s purpose and desired user experience. Consider your audience, the information or services you want to provide, and the impression you want to make.
Choosing a theme
Your theme sets the foundation for your site’s look and feel. To choose a theme:
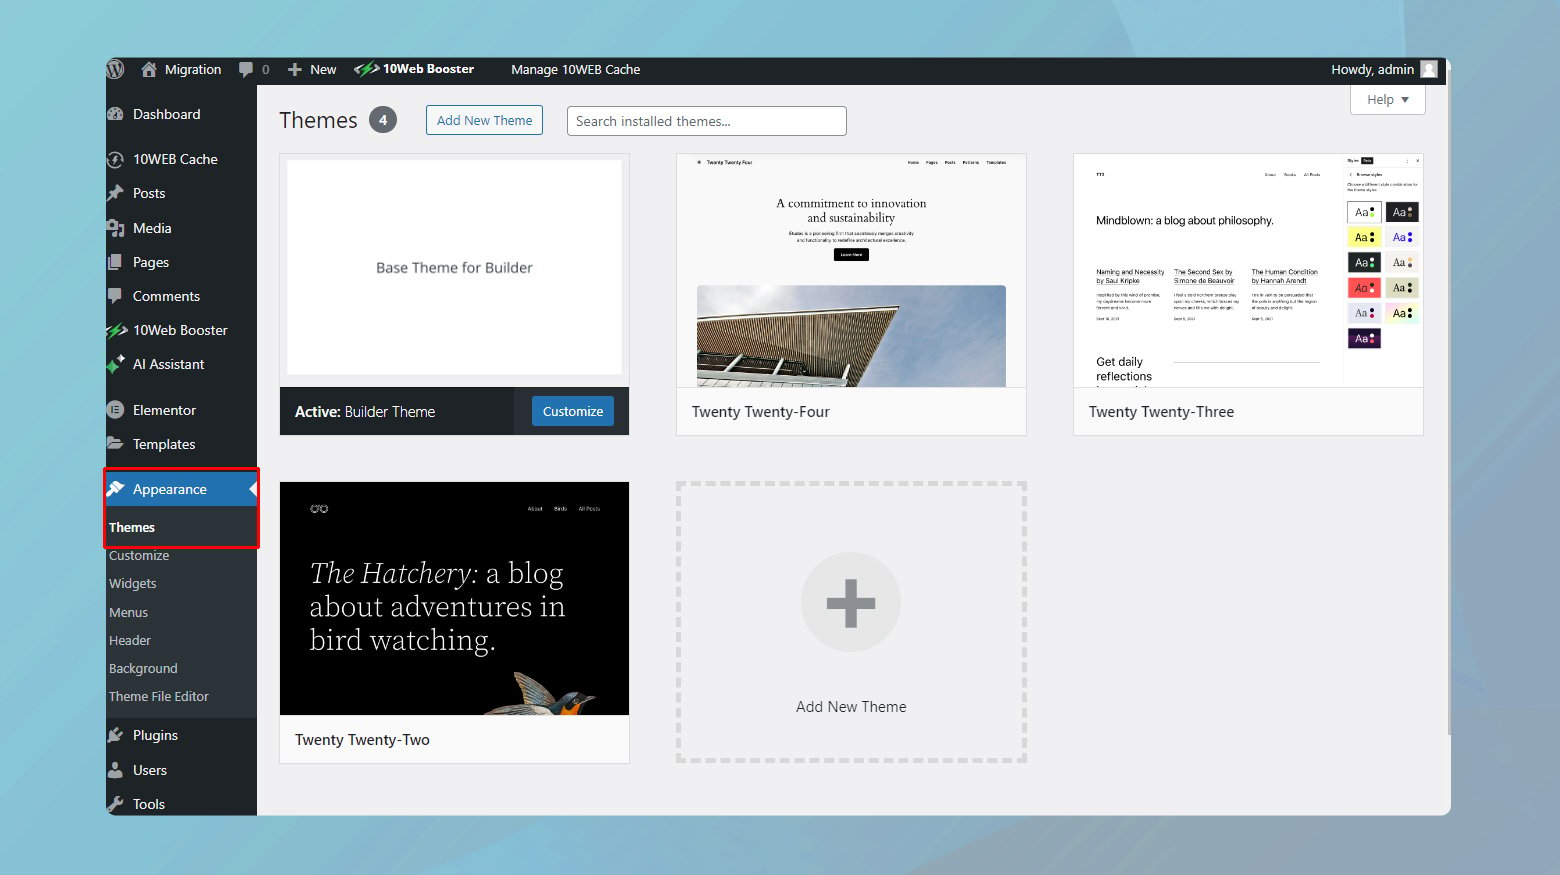
- In your WordPress admin dashboard, navigate to Appearance, then Themes.
- Click Add New Theme and browse for a theme that aligns with your vision; either a pre-designed layout or a blank slate.
- After installation, Activate the theme to apply it to your site.
Content creation
Creating compelling content is just as crucial as the visual design of your WordPress site. Effective content not only engages and retains visitors but also helps in improving your site’s SEO and overall user experience.
Adding new pages
To expand your site’s structure with more content, adding new pages is essential.
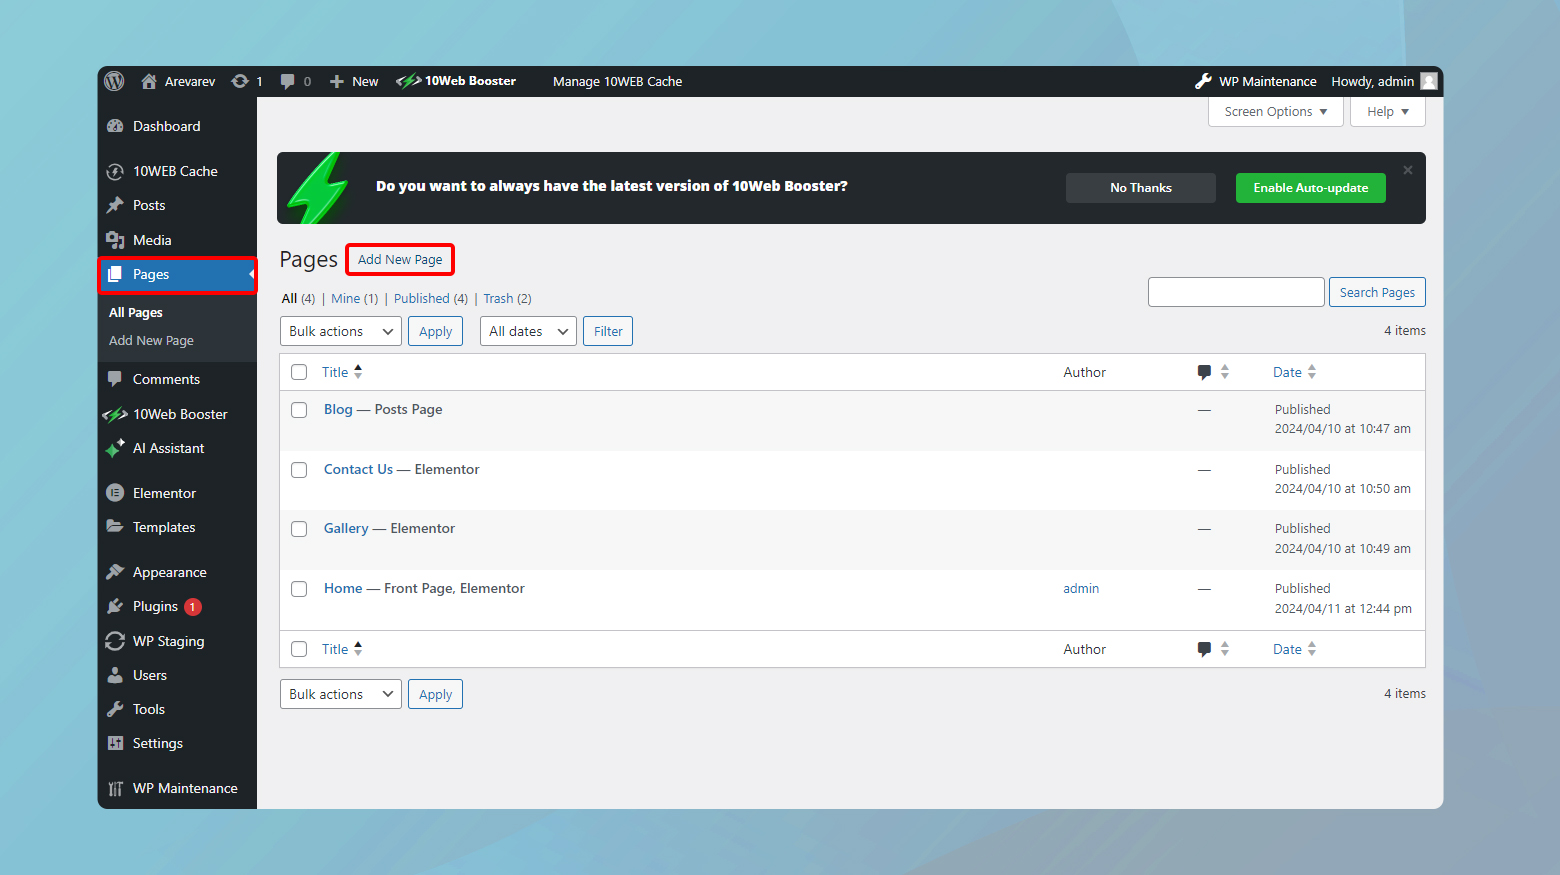
- Log in to your WordPress admin panel.
- Click on Pages > Add New Page.
- Use the WordPress editor to add text, images, and customize the layout according to your needs. The editor’s intuitive interface allows you to drag and drop components, format text, and more.
Incorporating media
Media plays a pivotal role in making your content more engaging. WordPress comes with a powerful block editor that makes it easy to insert and manage different types of content.
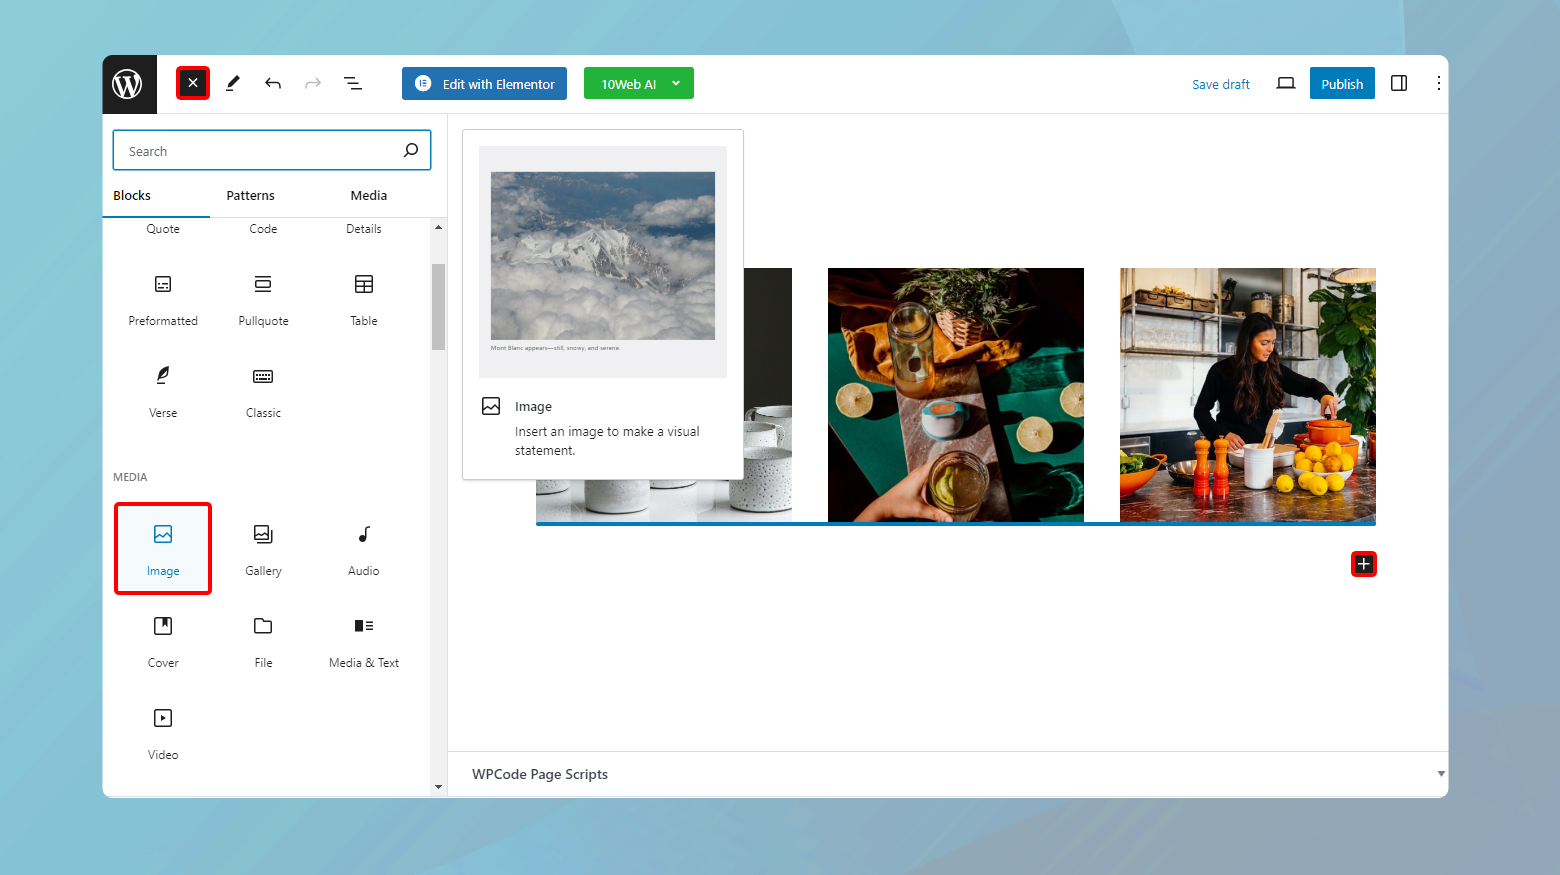
- Add an Image block by clicking on the + icon in the editor and selecting Image. You can upload images from your device or select from the media library.
- Similarly, for videos, add a Video block and upload your video files or embed videos using URLs from platforms like YouTube or Vimeo.
- To add a gallery, choose the Gallery block from the block selector. You can then upload multiple images or select from existing images in your media library.
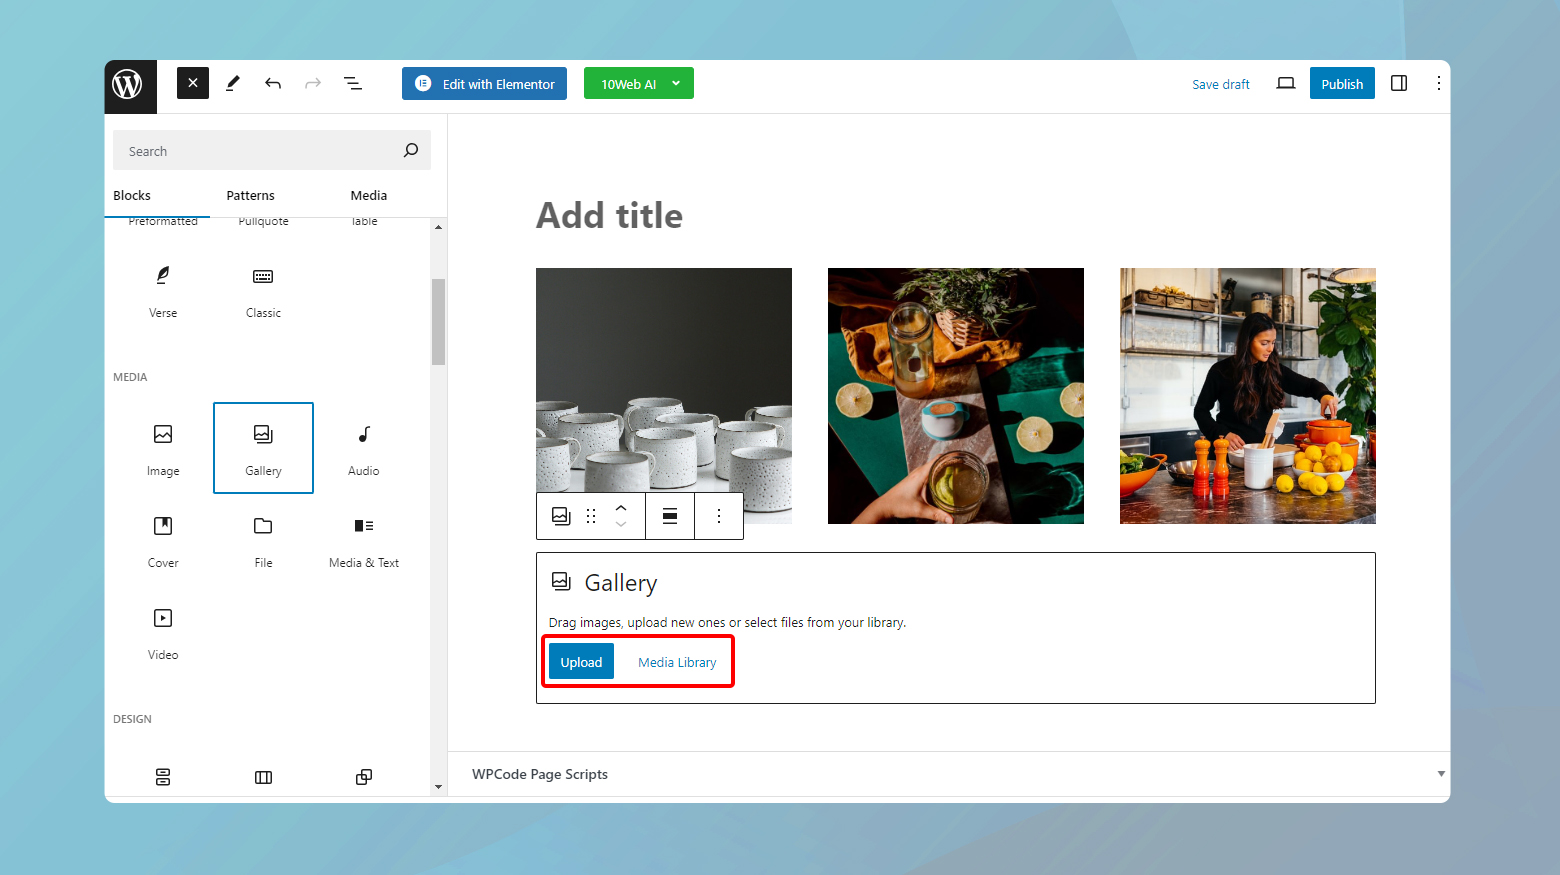
- Lastly, adjust the layout and how images are displayed, such as columns and image sizes, to best fit your page’s design.
Customizing pages and layout
Personalize your site by tweaking page elements and the layout.
Block Editor: Harness the flexibility of blocks to design each page—drag and drop elements such as text, images, and widgets.
10Web Builder: The 10Web Builder is a user-friendly drag and drop editor that offers professional functionality and premium widgets for customizing your site.
Templates: Select from existing templates or craft custom layouts to suit individual pages.
Using WordPress plugins
Plugins extend the functionality of your WordPress site. To install and use plugins:
- Go to Plugins > Add New in your dashboard.
- Search for specific functionality like Classic Editor.
- Click Install Now, then Activate to enhance your site’s capabilities.
Remember: always keep your plugins up to date to ensure security and compatibility.
Enhancing website performance
Improving the performance of your WordPress site not only enhances the user experience but also contributes positively to SEO rankings. Focus on speed, responsiveness, and mobile optimization to ensure users across all devices enjoy a seamless experience.
Optimizing speed and responsiveness
To achieve a quick and responsive WordPress site, you must streamline every component that impacts load time. One critical step is optimizing your images; large files can significantly slow down your site. Ensure images are compressed without sacrificing quality. Additionally, regularly monitor your website’s speed using tools that provide detailed performance insights, enabling you to make data-driven optimizations.
- Compress images: Use plugins to automatically compress images.
- Monitor speed: Utilize speed testing tools for ongoing performance checks.
If your WordPress website is hosted on 10Web, your website is automatically optimized with the 10Web Booster. The Booster uses compression and minification as well as other techniques to optimize your website.
Utilizing CDNs and caching
Content Delivery Networks (CDNs) distribute your site’s content across a global network of servers, reducing the distance it travels to reach the user, which in turn improves loading times. Select a CDN that integrates seamlessly with WordPress. Caching stores a version of your site on the user’s device upon the first visit, reducing load times for subsequent visits.
- Choose a CDN: Integrate a CDN like Cloudflare or MaxCDN with WordPress for improved global reach.
- Implement caching: Configure caching plugins for WordPress to store static page versions.
10Web has seamlessly integrated Cloudflare’s Enterprise-tier CDN into their dashboard, enabling users to effortlessly activate Cloudflare CDN services.
Optimizing for mobile
Given the ever-increasing mobile internet usage, your WordPress site must perform optimally on mobile devices. Responsive design is crucial, but also consider implementing Accelerated Mobile Pages (AMP) for faster loading times. Furthermore, utilize plugins to optimize your site’s mobile performance and ensure that themes and images load effectively on mobile devices.
- Responsive Design: Adopt themes that are responsive and mobile-friendly.
- AMP: Consider adding AMP support to your WordPress site to speed up mobile loading times.
Securing your WordPress site
Ensuring the security of your WordPress site is paramount in maintaining both your data integrity and the trust of your visitors. Strong security measures help protect against data breaches and ensure a safe environment for users to interact with your content. Below are specific actions that can be implemented to enhance the security of your site.
Implementing SSL certificates
SSL (Secure Sockets Layer) certificates are a foundational security feature for any WordPress site. They encrypt the data exchanged between your server and your visitor’s browser, making it difficult for hackers to intercept this information.
- Acquire an SSL certificate: Obtain an SSL certificate from a reputable authority.
- Activate it on your hosting: Follow your hosting provider’s instructions to install and activate the SSL certificate on your server.
- Enforce HTTPS: Ensure that all versions of your site redirect to HTTPS by modifying your .htaccess file or using a plugin designed for this purpose.
All websites hosted on 10Web can generate a Let’s encrypt free SSL certificate from the 10Web dashboard.
Dealing with DDoS attacks and firewalls
DDoS (Distributed Denial of Service) attacks can overwhelm your website with traffic to the point where it becomes inaccessible.
- Implementation of a Web Application Firewall (WAF): A firewall will filter out malicious traffic before it can affect your site’s performance.
- Choose between a DNS-level firewall, which reroutes traffic through a cloud proxy, or an application-level firewall that filters traffic once it reaches your server.
- Regular monitoring: Employ WordPress experts or utilize security plugins to monitor for unusual traffic patterns and DDoS threats.
- 10Web malware removal program: 10Web closely monitors all websites. In case of any suspicious activity, the security team takes appropriate action.
By integrating SSL certificates and robust firewall defenses, you can fortify your WordPress site against common threats and maintain a secure environment for your visitors.
Monitoring and maintaining your website
Effective monitoring and maintenance assure that your WordPress website remains secure, user-friendly, and aligned with your business goals. Striking a balance between robust backups and insightful analytics will empower you to respond quickly to issues and understand user behavior.
Regular backups and restoration
Backups are non-negotiable for maintaining the integrity of your website. Implement a regular backup schedule:
- Daily: For dynamic sites with frequent changes.
- Weekly: For most standard sites.
Ensure easy restoration so you can recover your site within minutes:
- Choose a reliable plugin or hosting feature for backups.
- Verify backups periodically by running restoration tests.
Record the backup schedule and keep multiple copies, ideally in different locations (cloud and physical).
Site analytics and user feedback
Analyzing traffic data is crucial for understanding your users and enhancing their experience.
- Google Analytics: Track page views, user behavior, and more.
- Heatmaps: Visualize where users click and how they navigate your site.
Incorporate user feedback to refine your business strategy:
- Surveys: Inquire directly about user satisfaction.
- Support Tickets: Monitor customer issues to identify recurring problems.
Use this data to inform your content strategy, improve customer support, and foster a community around your brand.
Conclusion
Creating a WordPress website is straightforward and enables users to establish a professional online presence tailored to their needs. The process involves choosing a reliable hosting provider, installing WordPress, selecting themes, and using plugins for customization. Key considerations include selecting a hosting option that suits budget and traffic needs, and ensuring the provider offers essential features like security measures and technical support. Ultimately, WordPress allows for flexible and scalable website solutions, catering to everything from small blogs to large corporate sites.
Accelerate your WordPress website creation with AI
Create a custom WordPress website tailored to your business needs 10X faster with 10Web AI Website Builder.
Simplify WordPress with 10Web
Simplify WordPress with 10Web
Skip and automate manual work with 10Web Managed WordPress Hosting and the 10Web AI Website Builder.