Installing WordPress is a straightforward process whether you’re setting up a personal blog, a portfolio, or a business site. WordPress is an open-source content management system known for its flexibility and ease of use. It powers a significant portion of the internet and has become a go-to platform for users ranging from novice bloggers to advanced web developers.
To start, you’ll need a domain name and web hosting. Many hosting providers offer one-click WordPress installation, which simplifies the process. If your host doesn’t provide this, you can manually install WordPress from the official site.
FAQ
What are the steps to install WordPress on my local machine?
To install WordPress locally, you’ll need to download and install a software stack like WAMP for Windows or MAMP for Mac, then download the latest version of WordPress from the official website. Extract the files to your new server environment and create a database for WordPress using a tool like phpMyAdmin. After that, run the WordPress installation script by accessing your localhost in a web browser.
How do I initiate the WordPress installation on a cPanel hosting service?
If you’re using a cPanel hosting service, look for an auto-installer like Softaculous, Fantastico, or QuickInstall. They provide an easy installation process where you typically select WordPress, fill in the domain information, set the directory, administer the site settings, and then install. If your host provides WordPress pre-installed, that’s even more straightforward.
What is the process for installing WordPress on Ubuntu?
Installing WordPress on Ubuntu requires you to have LAMP (Linux, Apache, MySQL, and PHP) installed. Once LAMP is configured, you must download WordPress and copy the files to your web server directory. Create a MySQL database and user for WordPress, configure the wp-config.php file with your database information, and then complete the installation by running the WordPress setup script.
What do I need to know to install WordPress on XAMPP?
Installing WordPress on XAMPP involves setting up XAMPP on your machine first. Once XAMPP is running, create a MySQL database for WordPress via phpMyAdmin. Then, download and extract the WordPress files to the ‘htdocs’ folder within your XAMPP installation directory. Access the WordPress files through your browser to initiate the installation script and follow the instructions to complete the setup.
Choosing a hosting provider
When setting up a WordPress site, selecting the right hosting provider is a pivotal step that ensures your site’s performance, security, and reliability. Let’s explore the available hosting options and some of the top providers recommended for WordPress websites.
Understanding different hosting options
Shared hosting: Ideal for beginners and small sites, shared hosting is cost-effective, with multiple sites hosted on a single server.
VPS (Virtual Private Server) hosting: Offers more power and flexibility than shared hosting, with fewer sites on one server.
Dedicated hosting: Provides a server solely for your site, granting maximum control and resources, suitable for large, high-traffic sites.
Managed WordPress hosting: Tailors specifically to WordPress with features like one-click installs, automatic updates, and expert support.
In identifying the ideal hosting provider, consider factors like uptime guarantees, customer service, scalability options, and the ease of managing your domain name and site resources. Your hosting provider is the foundation upon which your WordPress site will grow and operate, so make an informed decision based on your specific needs.
10Web managed WordPress hosting
10Web elevates the managed WordPress hosting experience with features like real-time backups, advanced security, and website management tools. With a one-click installation and migration service, 10Web takes much of the technical burden off your shoulders. Automating all stages of your website creation, starting from WordPress installation to website creation with the Ai Website Builder, 10Web has cultivated its processes to serve you best at any level.
Simplify WordPress with 10Web
Automate manual work with 10Web Managed WordPress Hosting and 10Web AI Website Builder. Optimize your WordPress website effortlessly.
Setting up a domain name
Setting up a domain name for your WordPress site is a foundational step that establishes your site’s identity and web address. A thoughtfully chosen domain becomes your website’s online brand and impacts visibility.
Selecting the perfect domain
Site title relevance: When selecting a domain, ensure it’s closely aligned with your site title or the brand you want to build. Your chosen domain should be memorable, concise, and give an instant idea of what your website is about.
Keyword incorporation: If possible, include relevant keywords that describe your website’s content or service, which can help improve SEO rankings.
Avoid complications: Steer clear of hyphens and numbers, as they can complicate spelling and make your URL harder to remember.
Domain registration process
-
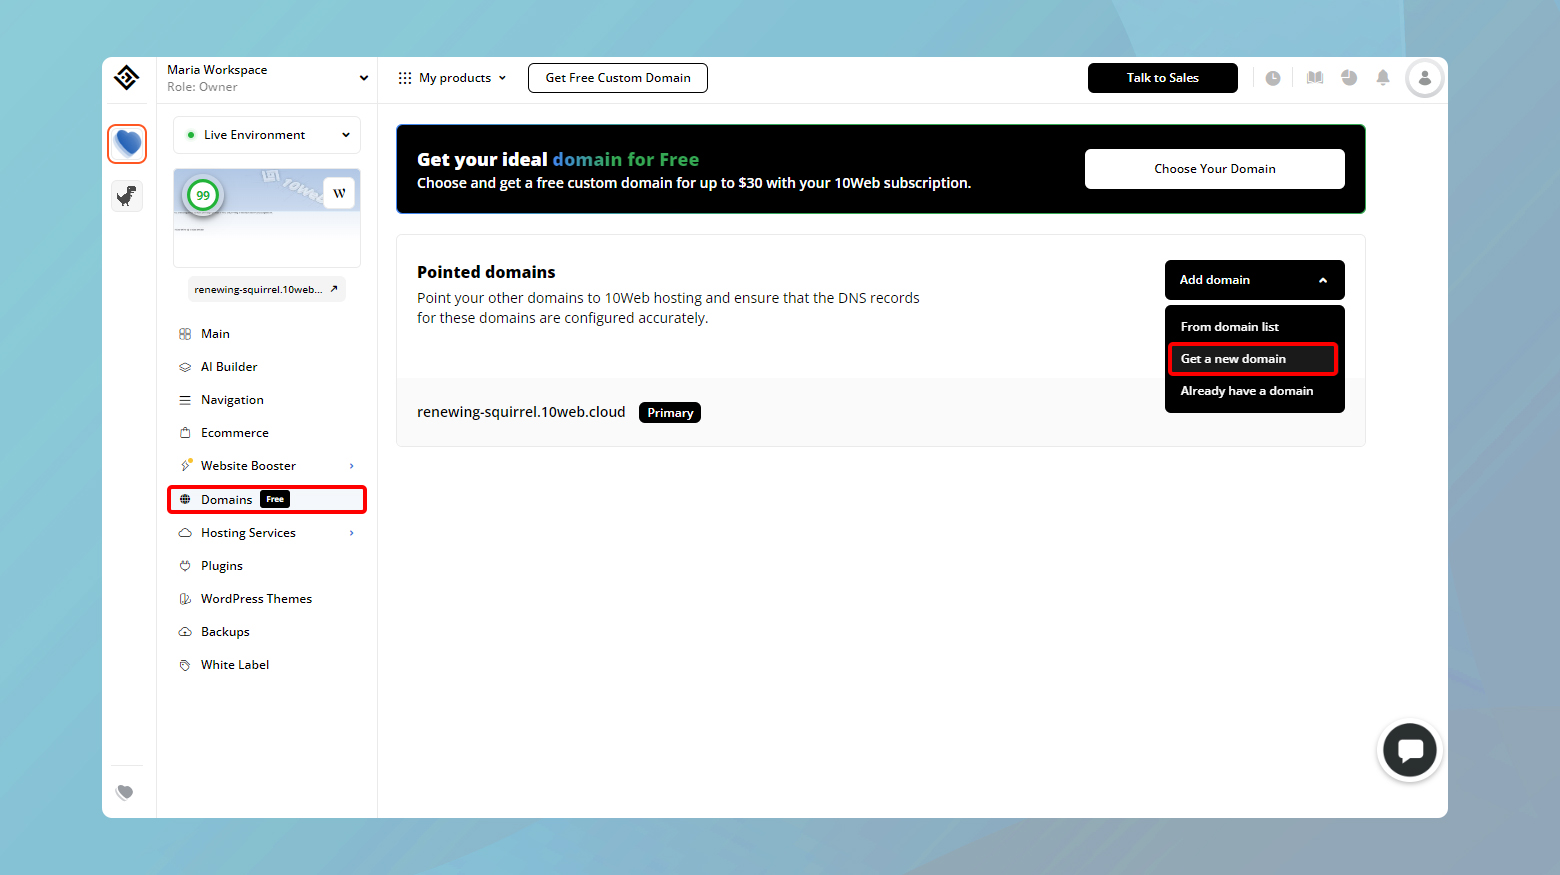
- Choose a domain registrar: Select a trusted domain registration service. You can find a list of ICANN-accredited registrars or consider connecting a domain to 10Web if looking for an all-in-one solution.
- Check domain availability: Use the registrar’s search tool to ensure your new domain isn’t already taken. If it is, try slight variations or different domain extensions (like .com, .net, .org).
- Finalize and register: Once you’ve settled on an available domain, proceed to purchase. During registration, you’ll provide contact information and decide on the length of the registration period.
10Web has made the process of purchasing a domain and pointing it accessible through its dashboard with just a single click.
Simplify WordPress with 10Web
Automate manual work with 10Web Managed WordPress Hosting and 10Web AI Website Builder. Optimize your WordPress website effortlessly.
How to install WordPress via cPanel
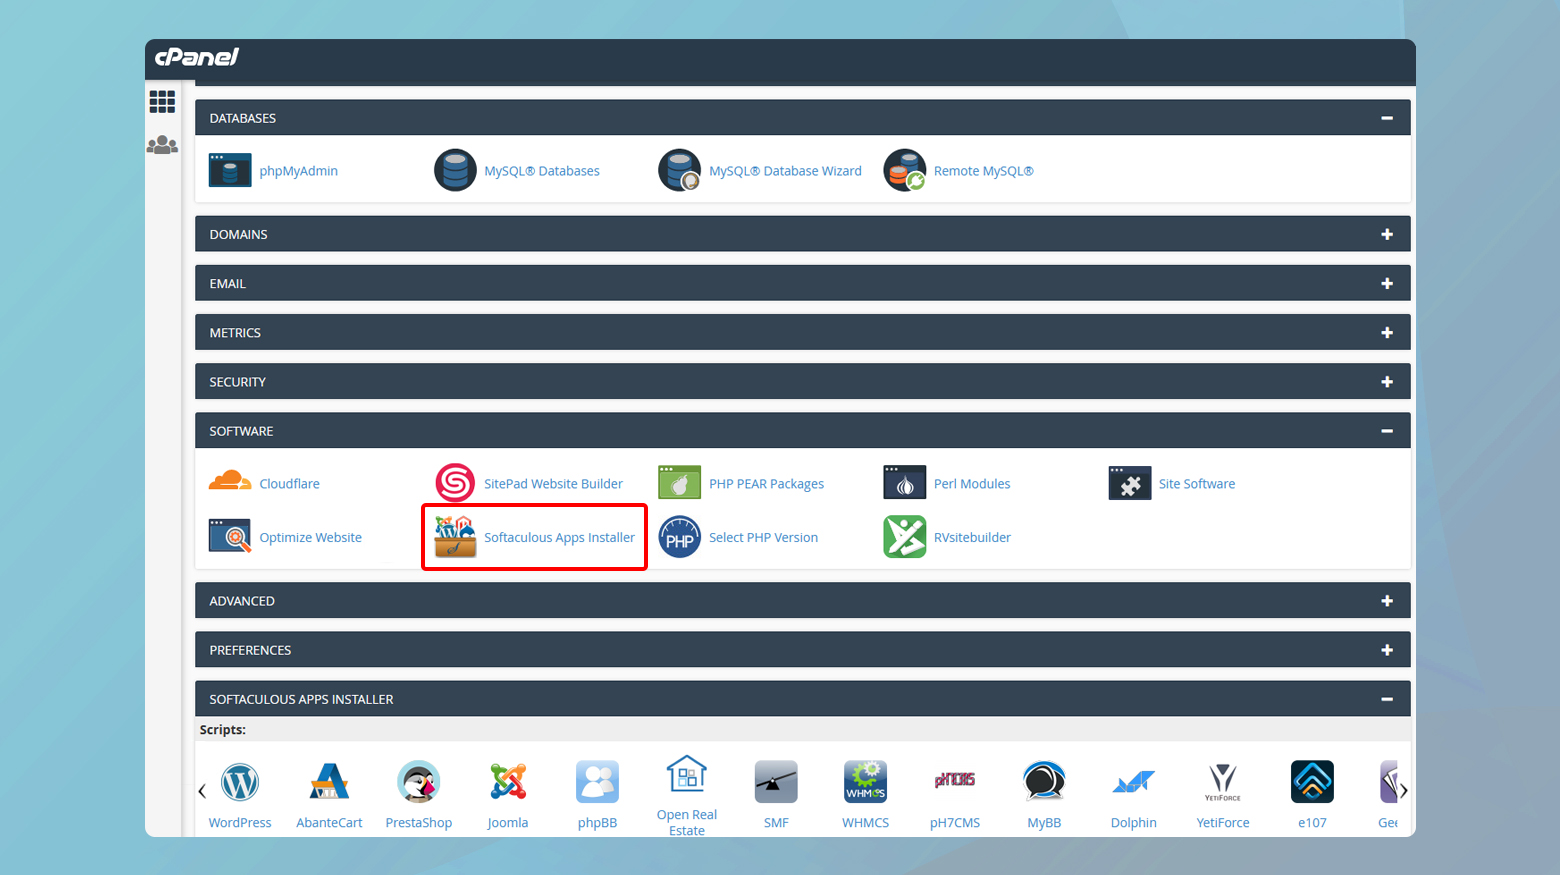
cPanel offers a variety of auto-installers that can streamline the installation of WordPress for you. These installers handle the background tasks of setting up databases and connecting necessary files without the need for manual intervention. When you log in to your cPanel dashboard, look for sections like Software or Softaculous Apps Installer. Here, you’ll find WordPress listed among the top scripts for quick installation.
Softaculous quickInstall steps
-
- First, locate the Softaculous icon in your cPanel and open it.
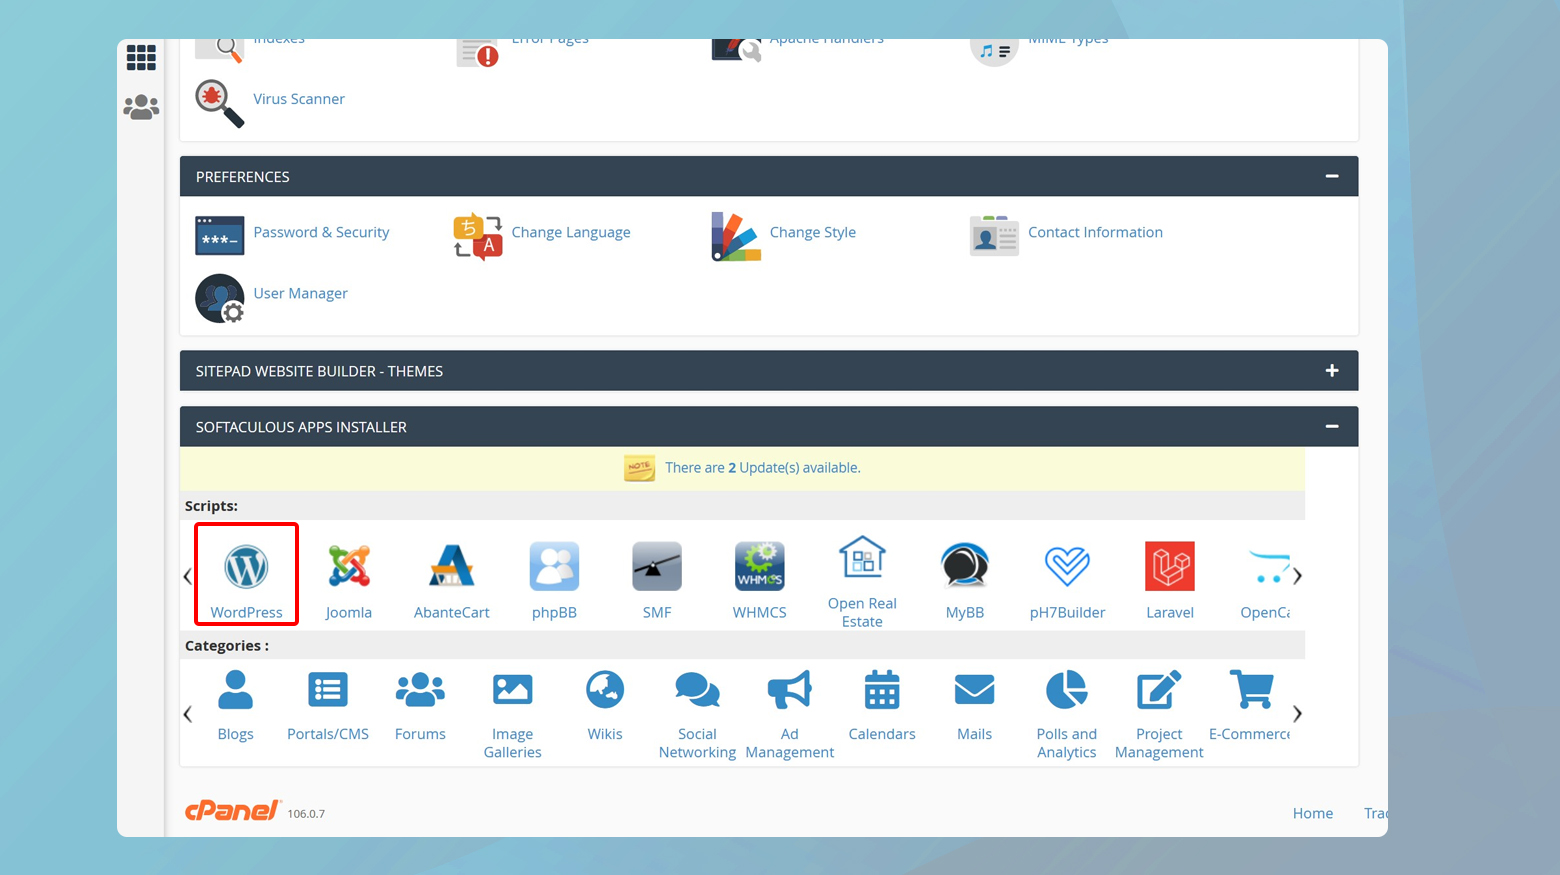
- Within Softaculous, find and select WordPress to begin the installation process.
- Select if your site will use http:// or https://.
- Specify the domain you wish to install WordPress on.
- Leave the In Directory blank to install on your domain directly or specify a subfolder.
- Enter your website’s name and a brief description.
- Enter a secure username and password for your WordPress dashboard.
- Provide a valid email address for admin notices.
- Review all settings, and if everything is in order, click Install to complete installation. Softaculous will carry out the installation, and you’ll receive a confirmation when the process is complete.
How to install WordPress manually
Before diving into the WordPress installation process, ensure that you have a MySQL database ready and access to an FTP client with the necessary credentials. Both are crucial components for a successful WordPress setup.
First, visit wordpress.org and download the latest version of WordPress. The package will come in a .tar or .zip file. Save this file to your local machine, as you will need to upload it to your web host shortly.
Creating a MySQL database
Your WordPress website relies on a MySQL database to store all your content and site information. To create one:
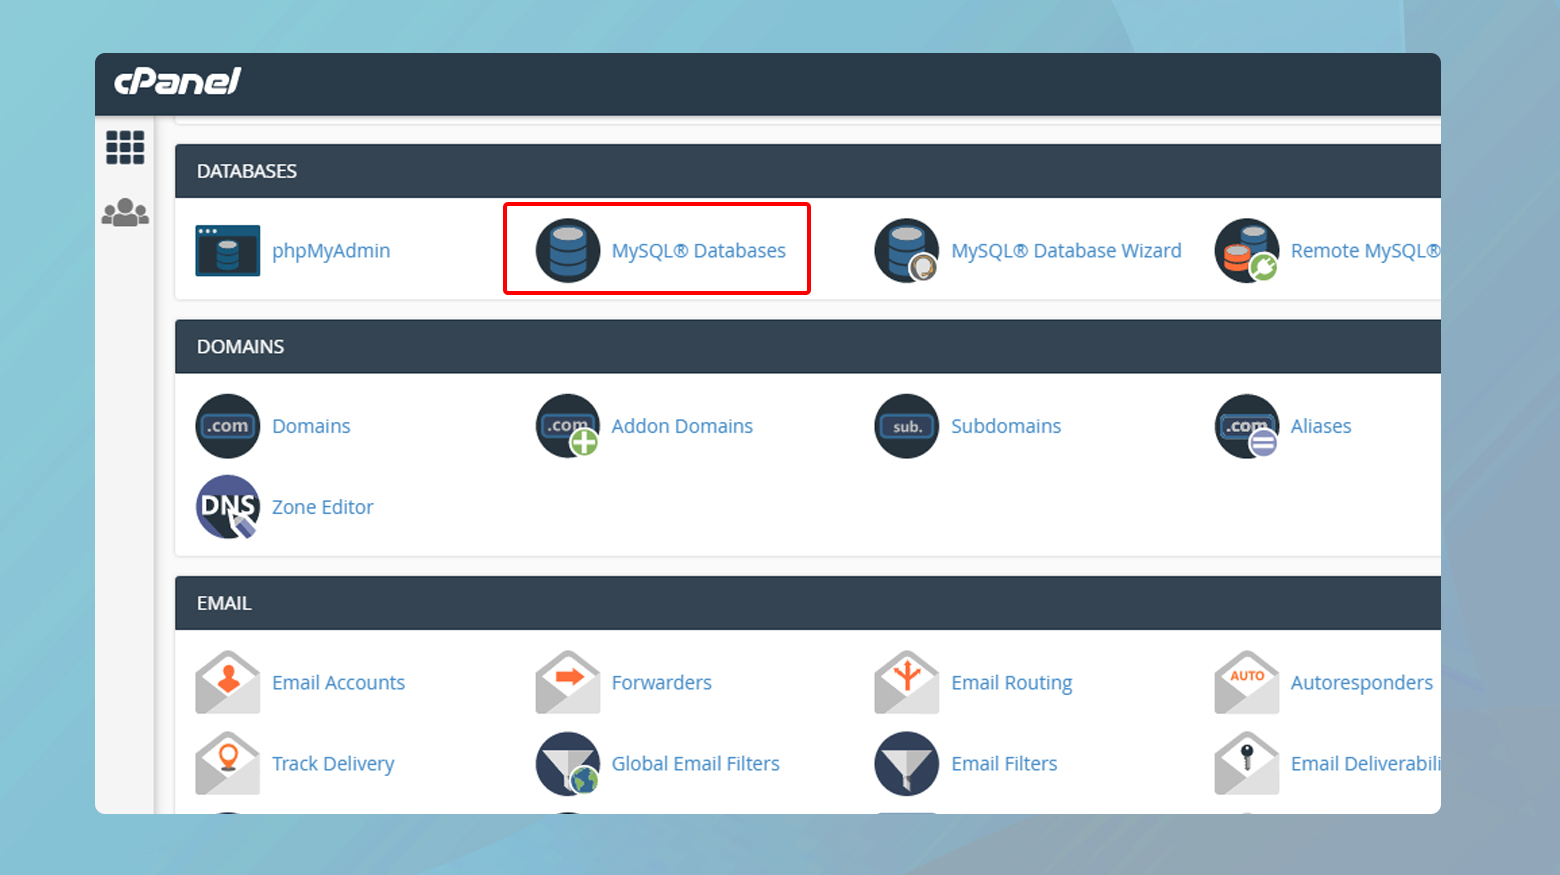
- Log in to your hosting account’s cPanel or equivalent control panel.
- Navigate to the MySQL databases section.
- Choose a database name that’s unique and creates a new database.
- Create a MySQL username and password, ensuring the password is strong for security purposes.
- Add the user to the database and assign All Privileges for full access.
Remember, keeping the database name, username, and password noted down is vital as you’ll need them during the WordPress setup.
Simplify WordPress with 10Web
Automate manual work with 10Web Managed WordPress Hosting and 10Web AI Website Builder. Optimize your WordPress website effortlessly.
FTP client and credentials
An FTP client is software that allows you to transfer files from your computer to your hosting server. To use one:
-
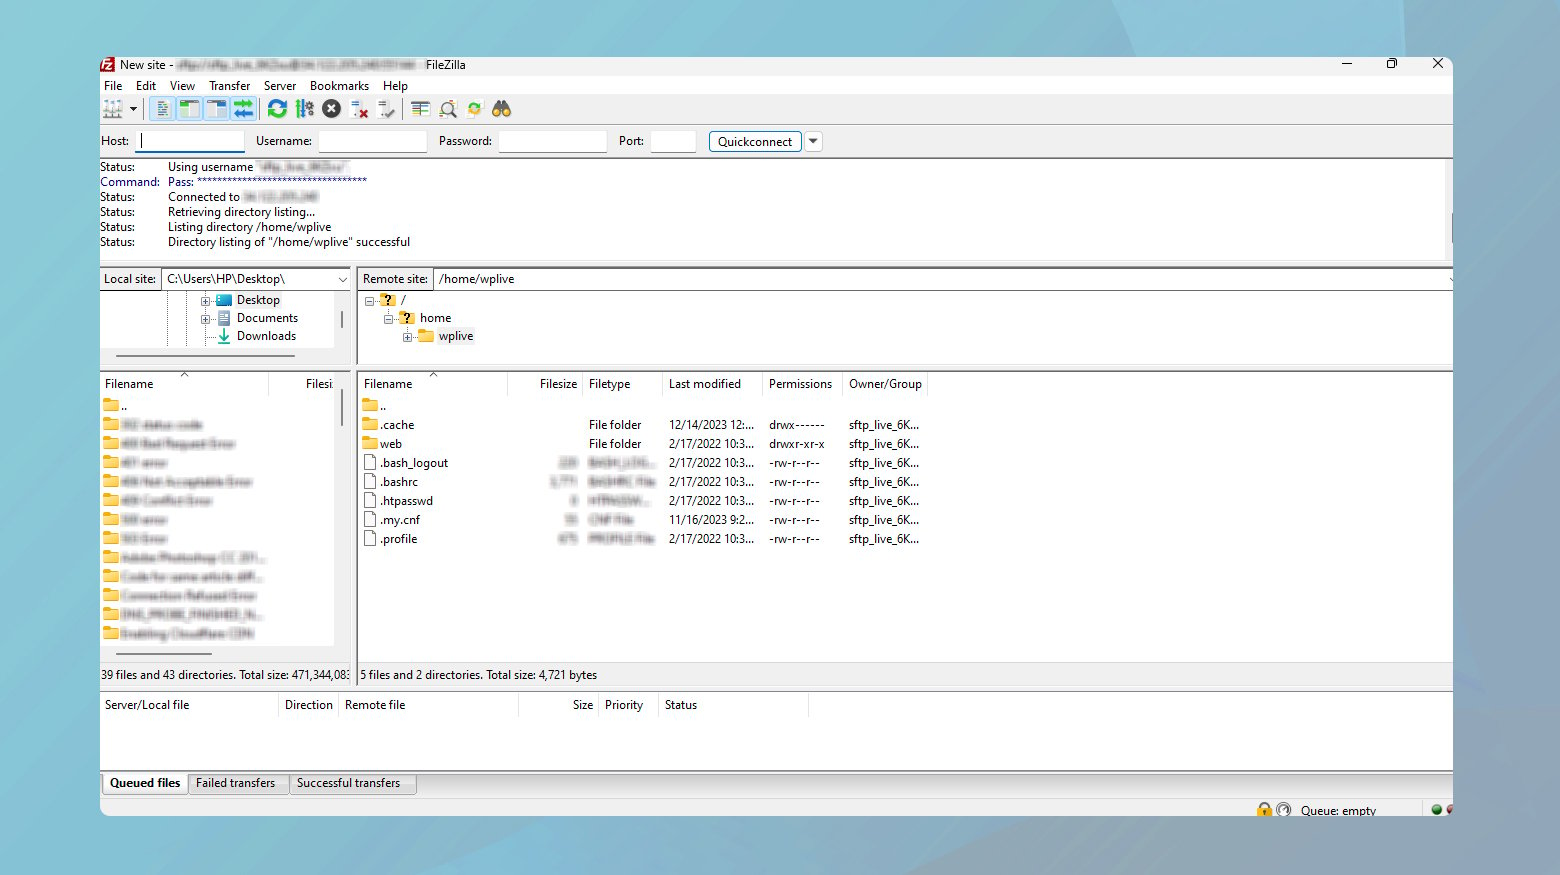
- Download and install an FTP client of your choice. Popular options include FileZilla or WinSCP.
- Obtain the following FTP credentials from your hosting provider, usually found in your account’s control panel:
- FTP username
- FTP password
- Hostname (often your website’s URL or an IP address)
- Port number (typically 21 for FTP)
With these credentials, connect to your server and upload the WordPress files to the correct directory, usually public_html or www.
Uploading WordPress via FTP
Once you’ve connected to your server, you can now upload the WordPress files to the correct directory, usually public_html or www.
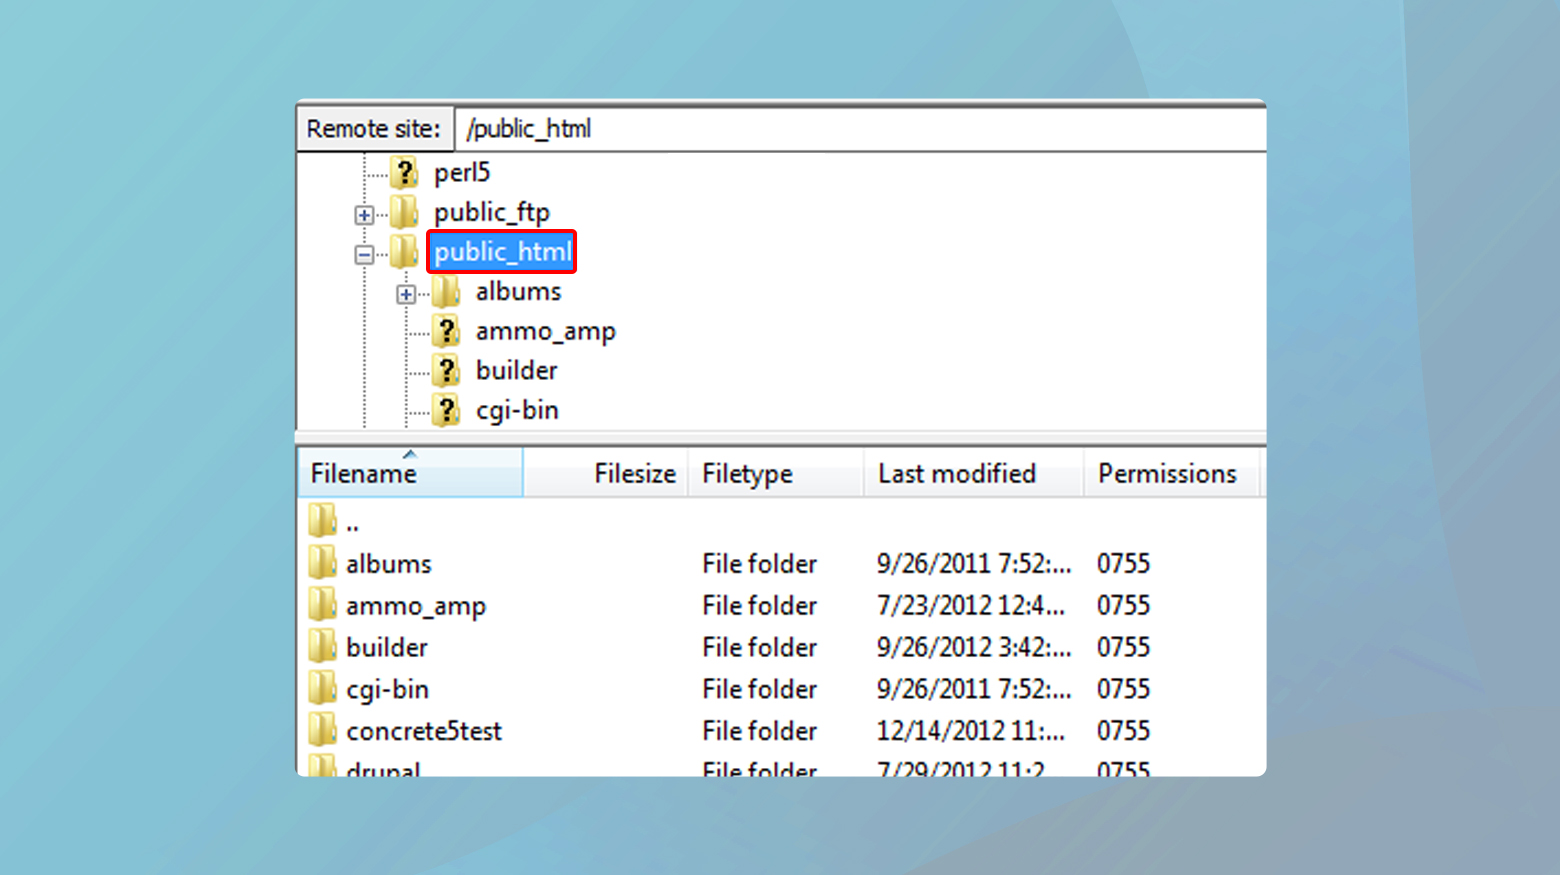
- Go to the root directory or the directory where you want WordPress to reside.
- Upload the WordPress .tar or .zip file that you downloaded.
- If necessary, extract the files. On FileZilla, right-click the file and choose Extract.
Configuring wp-config.php
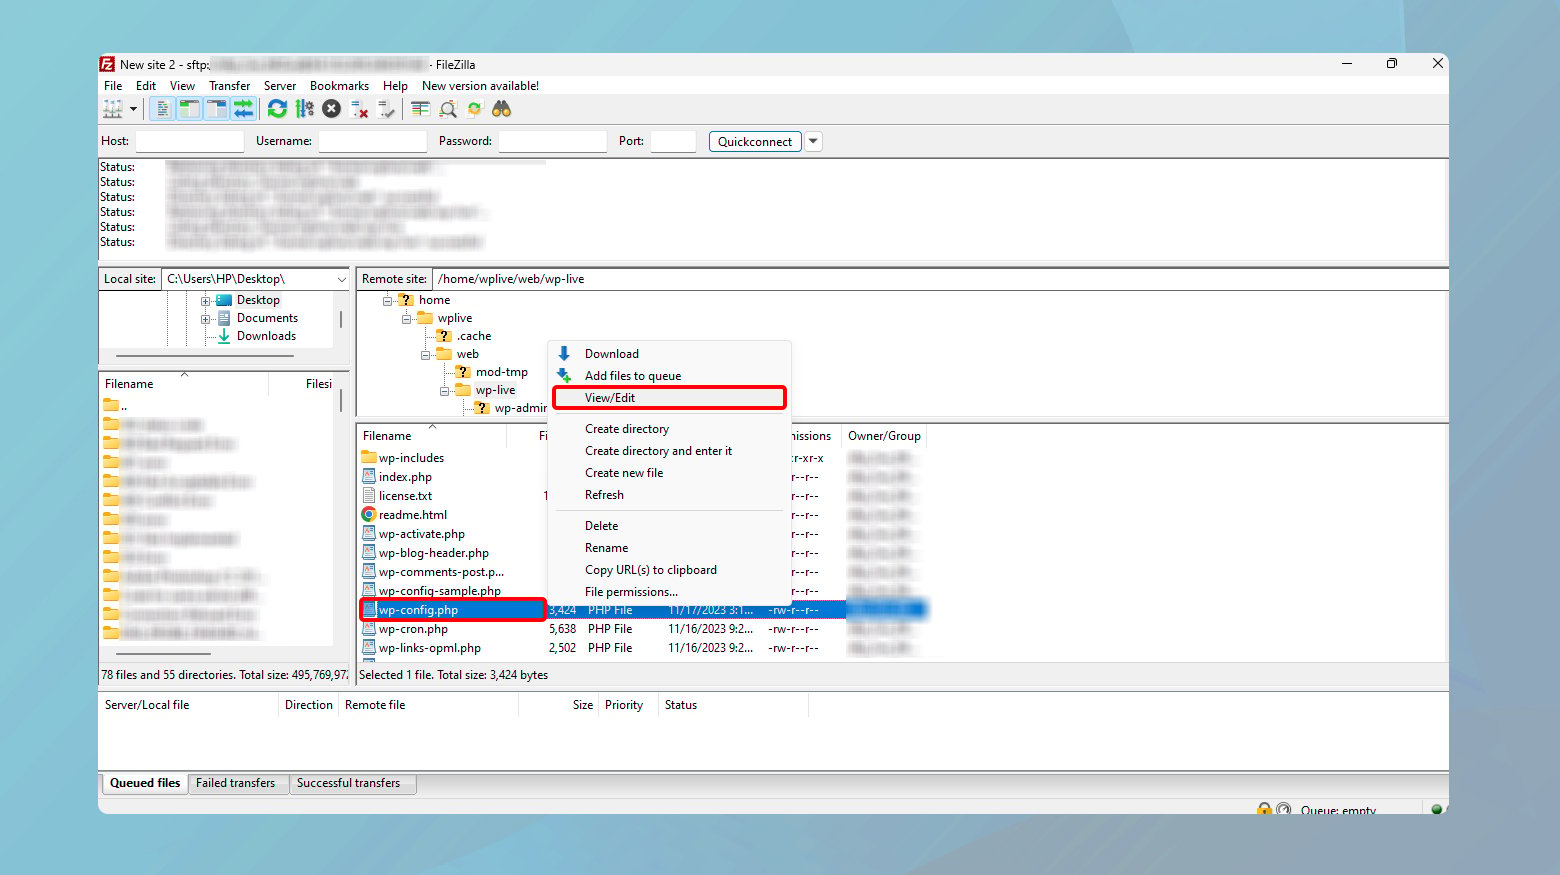
Once all WordPress files are in the root directory, locate the file named wp-config-sample.php.
-
- Rename this file to wp-config.php.
- Open the wp-config.php file in a text editor or through the file manager’s editor.
- You’ll need to enter details for the database name, user, and password.
- Find the section that looks like this:
define('DB_NAME', 'database_name_here');

define('DB_USER', 'username_here');

define('DB_PASSWORD', 'password_here');

define('DB_HOST', 'localhost');
- Replace the placeholders with your actual database details. Save and close the file after making the necessary changes.
By completing these steps, you’ll have manually installed WordPress on your hosting account, giving you the foundation to build your website.
Simplify WordPress with 10Web
Automate manual work with 10Web Managed WordPress Hosting and 10Web AI Website Builder. Optimize your WordPress website effortlessly.
How to install WordPress on your computer
Installing WordPress locally on your computer is a practical step if you’re developing plugins, experimenting with changes, or learning WordPress. Local installations allow you to test themes, plugins, and updates without affecting a live website.
Before diving into WordPress installation, it’s important to understand that WordPress requires a server environment to run. This environment typically consists of a web server, a database, and PHP. Luckily, software packages like MAMP (for Mac) and WAMP (for Windows) bundle these components together, simplifying the setup process.
Here is what the abbreviations mean:
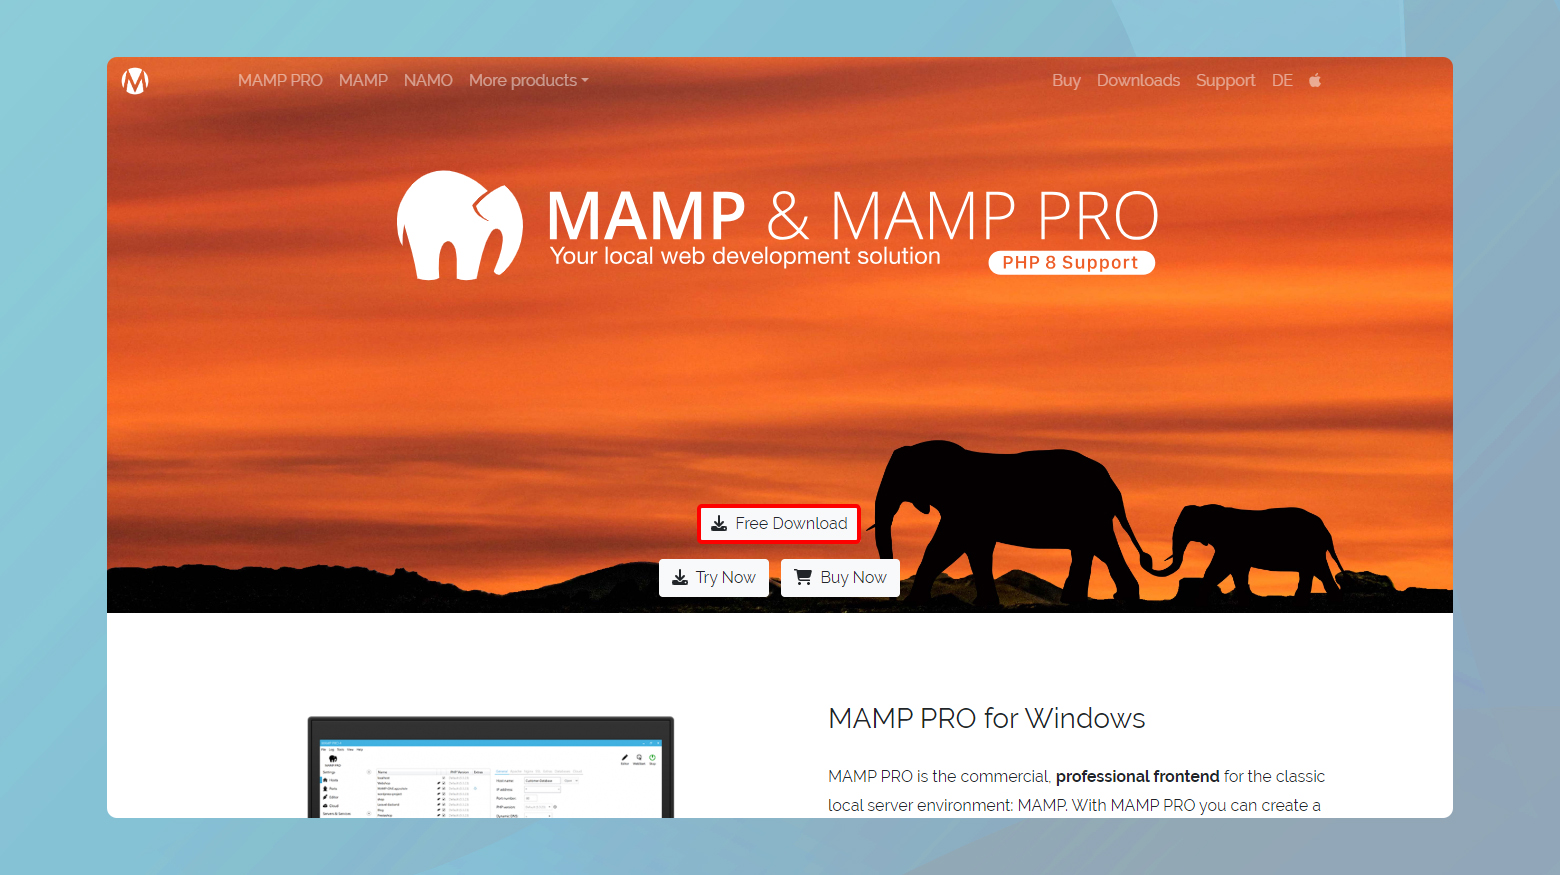
MAMP: Standing for Mac, Apache, MySQL, and PHP, MAMP brings the same functionality as WAMP but is tailored for MacOS environments.
WAMP: This stands for Windows, Apache, MySQL, and PHP. By using WAMP, you can set up a local server environment to run WordPress on a Windows computer.
Mac users
Download and install MAMP
-
- Visit the MAMP website and download the free version of MAMP.
- Open the downloaded file and follow the installation instructions to install MAMP on your Mac.
- Launch MAMP from your Applications folder.
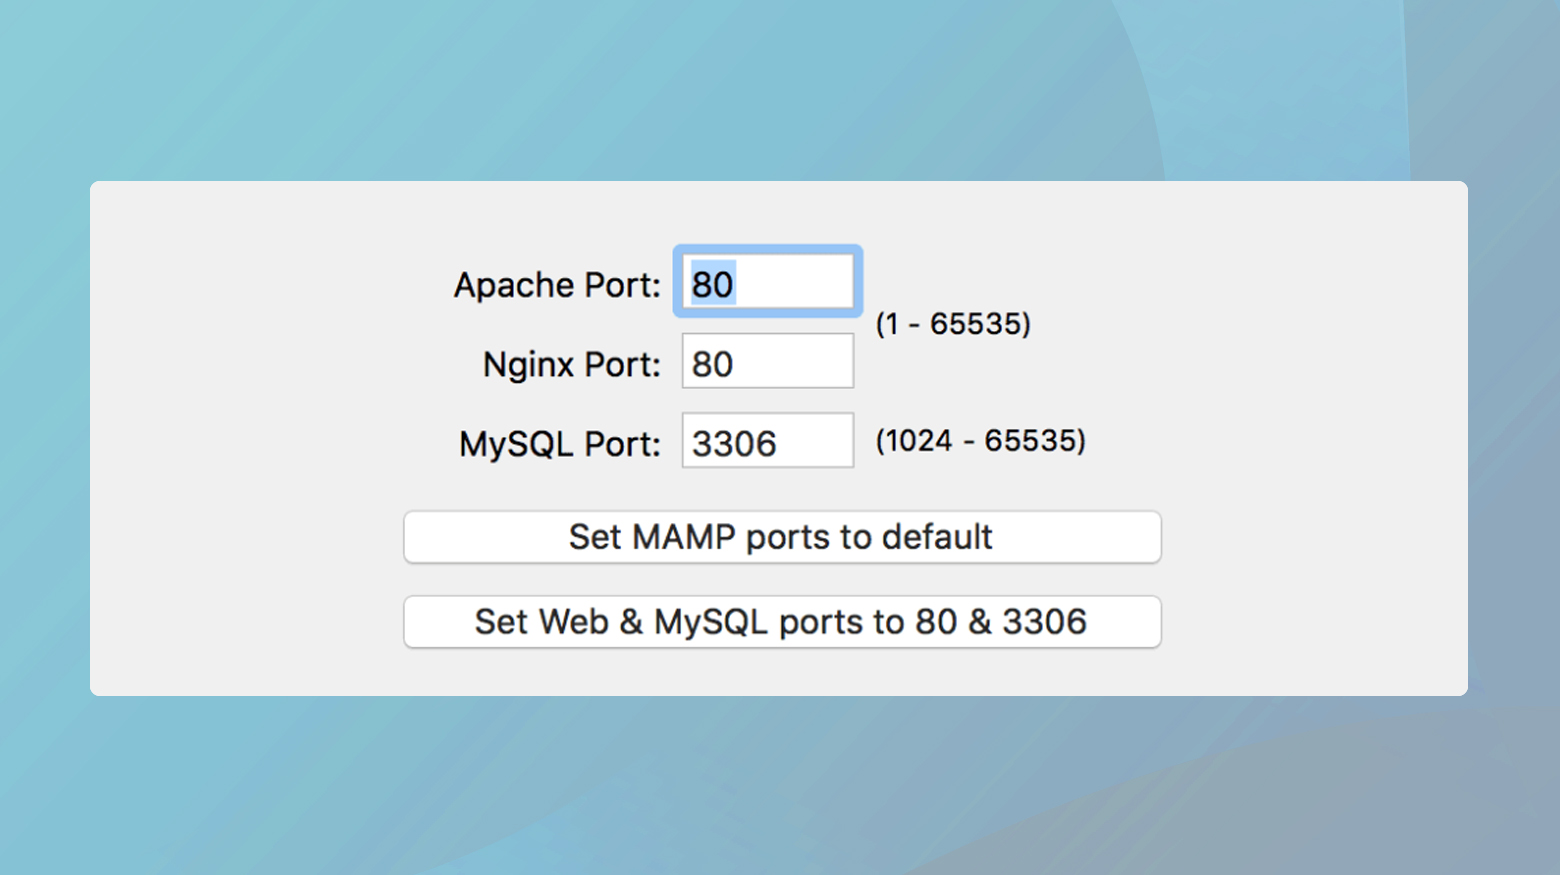
- Click on Preferences and adjust the ports to the default Apache 80 and MySQL 3306 ports to simplify URL access. You can leave them as the defaults if you prefer.
- Set the Document Root to the folder where you want to install WordPress, typically in the htdocs directory inside the MAMP folder.
- Click on Start Servers in MAMP to start both Apache and MySQL servers.
- Verify that the servers are running by checking the MAMP dashboard for a green light.
Download WordPress
- Go to the WordPress.org website and download the latest version of WordPress.
- Extract the downloaded zip file and move the WordPress folder to your MAMP document root (set in step 2).
Create a database and install WordPress
- Access phpMyAdmin from the MAMP web start page.
- Create a new database for WordPress.
- Open a web browser and go to http://localhost/wordpress (or the respective URL if you changed the document root or port).
- Follow the WordPress installation steps, entering the database name, username (root), and password (root or blank, depending on your MAMP settings) when prompted.
- Complete the installation by filling in your site details and setting up an admin account.
Windows users
Download and install WAMP
- Visit the WAMP website and download the version compatible with your Windows (32-bit or 64-bit).
- Follow the on-screen instructions to install WAMP.
- Launch WAMP and ensure the WAMP icon turns green, indicating all services are running.
- You can access the www directory by clicking the WAMP icon and selecting www directory, which is where you’ll install WordPress.
- Download the latest WordPress version from WordPress.org and extract it into the WAMP www directory.
Create a database
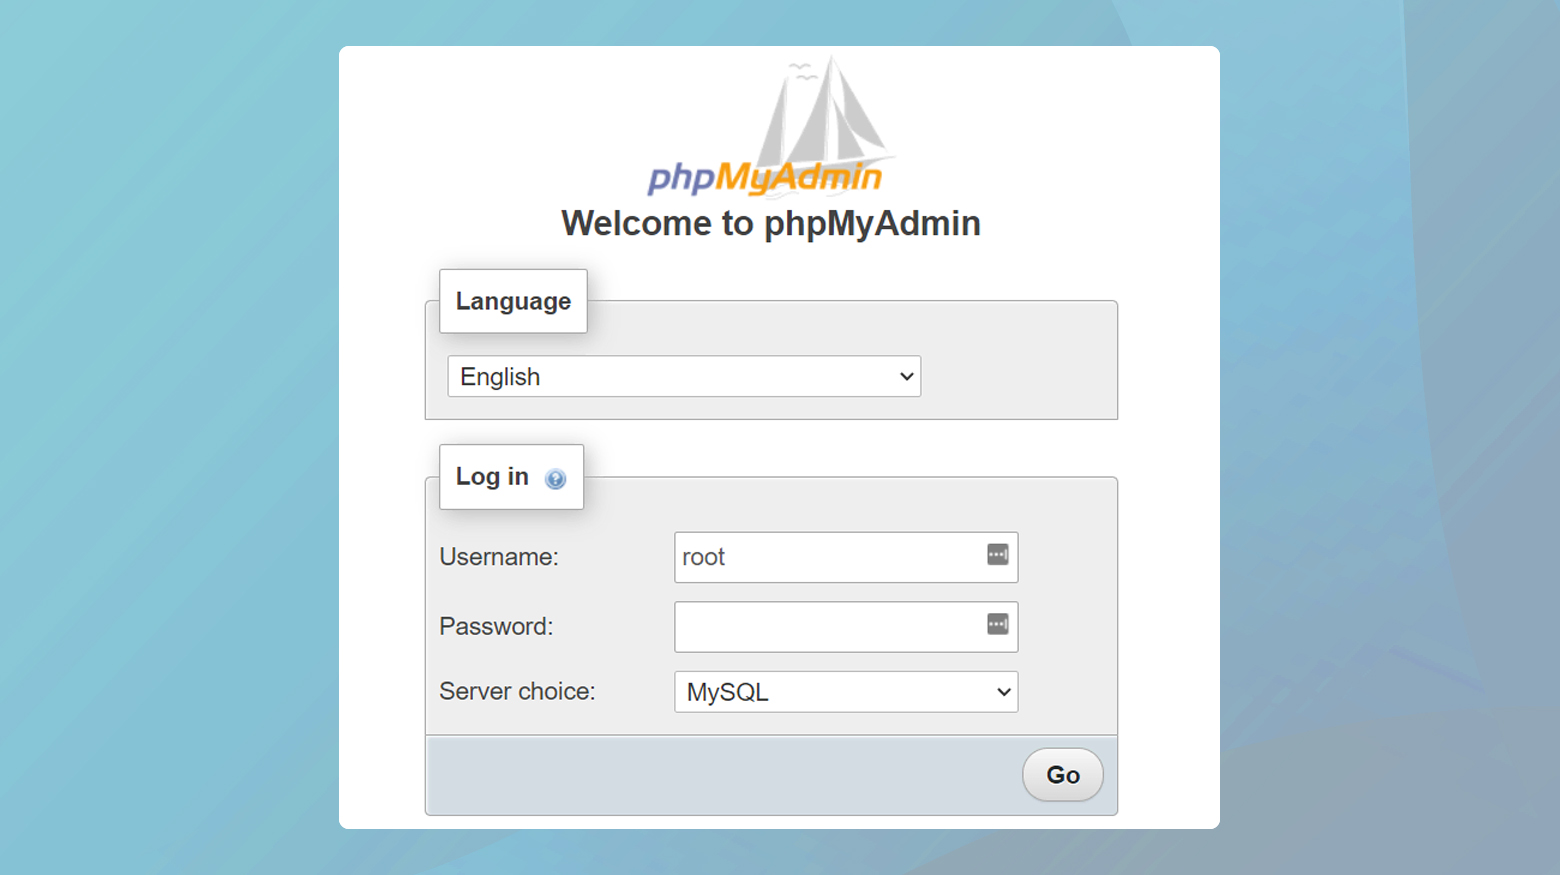
- Access phpMyAdmin from the WAMP menu (click the WAMP icon, then phpMyAdmin).
- Log in with username root and no password unless you set one during installation.
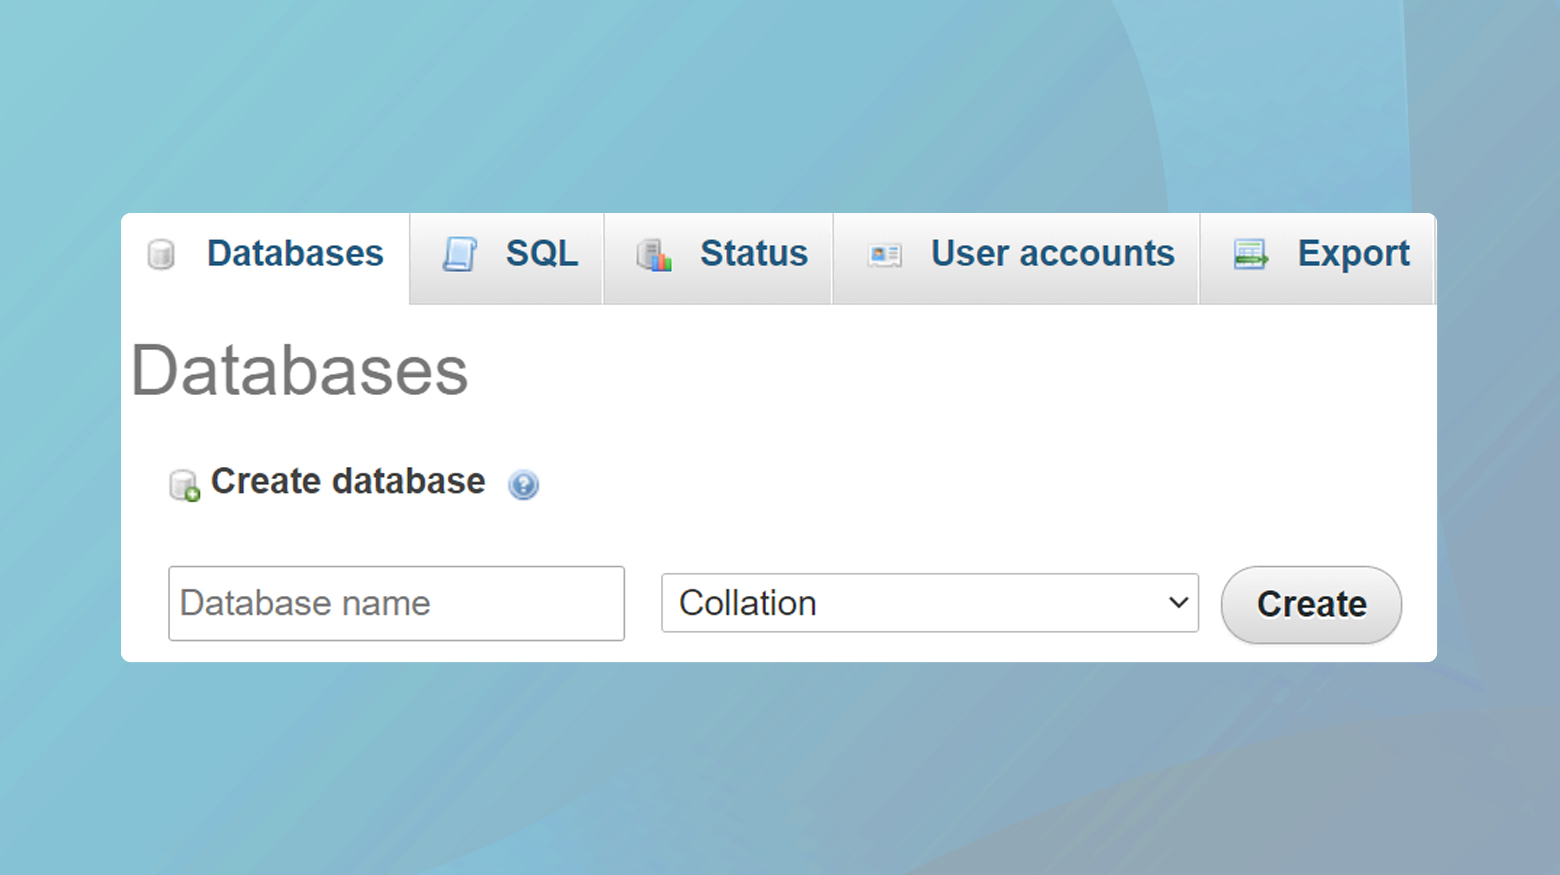
- Create a new database for your WordPress installation.
Install WordPress
- In your browser, navigate to http://localhost/wordpress to start the installation process.
- Provide the database details you set up in phpMyAdmin, and follow the prompts to complete the WordPress installation.
WordPress configuration and setup
After successfully installing WordPress, it’s vital to configure it properly to ensure your site runs smoothly. This includes running the installation script and setting up your admin account.
Running the WordPress installation script
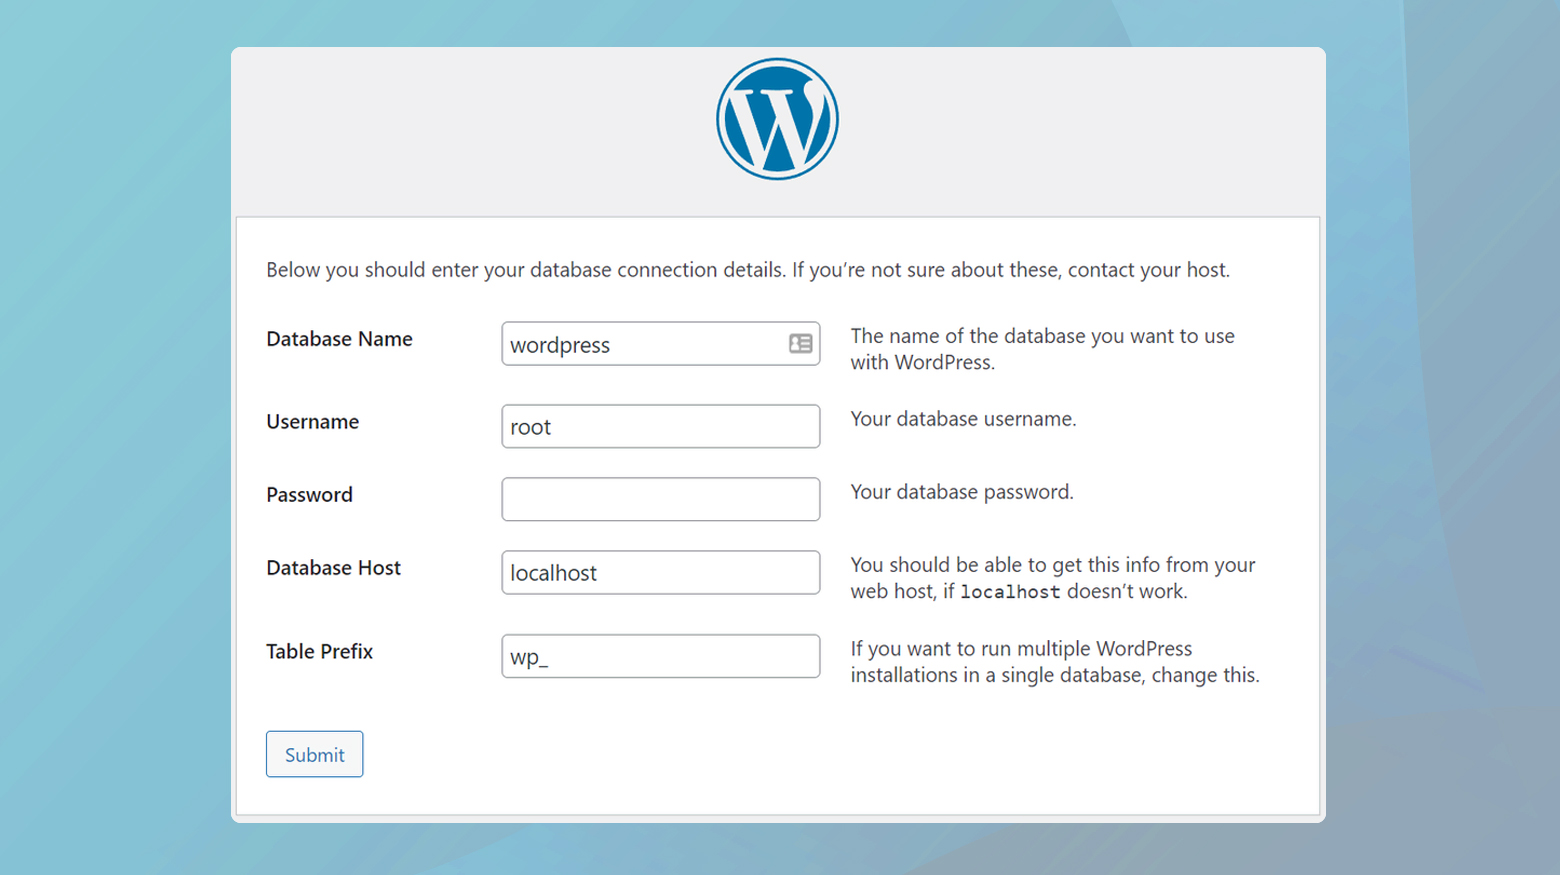
Once the WordPress files are uploaded to your domain’s hosting account, initiating the installation process is straightforward. Navigate to your website by entering your domain into a web browser. This triggers the WordPress installation wizard. You’ll first encounter a language selection page, followed by the necessity to configure the wp-config.php file.
If the configuration file doesn’t exist, the wizard assists in creating it. You’ll be asked for your database details—database name, username, password, and server information. It’s crucial that you have this information from your hosting provider as it links WordPress to your database where all site content is stored.
Setting up admin account
The final step in the installation process involves setting up your administrator account. This is a critical step, as the admin account has full control over your WordPress site. Here’s what you need to prepare:
- Admin Username: Choose a unique username for your admin account to enhance security.
- Password: Create a strong password. WordPress provides a strength meter to help you.
- Email Address: Use a reliable email since WordPress will send important notifications here.
Upon providing this information, you finalize the installation by setting your website’s title and deciding if you want search engines to index your site. Once you submit the form, you will be directed to the wp-admin page where you can log in with your new admin account and start managing your WordPress site.
Conclusion
Installing WordPress is an accessible process that caters to a variety of user needs. The flexibility of WordPress as an open-source platform, combined with extensive customization options, makes it a preferred choice for web developers and novices alike.
Whether installing WordPress through a one-click installer on a hosting service or manually configuring it on a local machine, the process is designed to be straightforward with numerous guides and resources available to assist users.
Ultimately, by following this step by step guide and detailed installation instructions and understanding the underlying settings, users can efficiently establish a secure and robust online presence with WordPress.
Simplify WordPress with 10Web
Simplify WordPress with 10Web
Skip and automate manual work with 10Web Managed WordPress Hosting and the 10Web AI Website Builder.