In WordPress, menus are an important navigation tool that helps website visitors quickly find the information they are looking for. They are located in the header, footer, or sidebar sections of your website and contain links that point to specific sections.
Menus guide your users through your content and can significantly enhance the usability and functionality of your site. WordPress allows you to customize menus to suit your website’s needs and your audience’s preferences.
In this A-Z guide, we will discuss how to add a menu in WordPress websites and provide your audience with a good user experience. Following a few simple steps, you’ll have a fully functional navigation menu tailored to your site’s unique style.
WordPress menu basics
Besides providing structure to your site, menus serve as a quick attention grabber for important information, by customizing the menus you create. WordPress offers a variety of navigation menus to fit different design needs.
The two primary types are:
Primary menus: The main navigation system is usually located at the top of your website. It’s the first element users interact with to browse through the major sections of your site. For instance, Home, About Us, Services, Shop, etc.
Secondary menus: These can include footer menus, social links, or any additional navigational structures that support the primary menu. They’re typically used for supplementary navigation and not for the website’s main content sections.
With an understanding of the importance of WordPress menus and the types that there are, let’s learn how to add a menu in WordPress.
Simplify WordPress with 10Web
Automate manual work with 10Web Managed WordPress Hosting and 10Web AI Website Builder. Optimize your WordPress website effortlessly.
How to add menus in WordPress
Adding menus you have the freedom to structure your site’s navigation according to your preferences. Working from the WordPress dashboard you are flexible to create various types of menus. Let’s discuss adding menus for different purposes and customizing them accordingly.
Creating a primary menu in WordPress
To create a new primary menu, go to your WordPress dashboard > Appearance > Menus. Here, click on Create Menu. It’s essential to name your menu for easy identification—this is visible to you, not your site visitors. 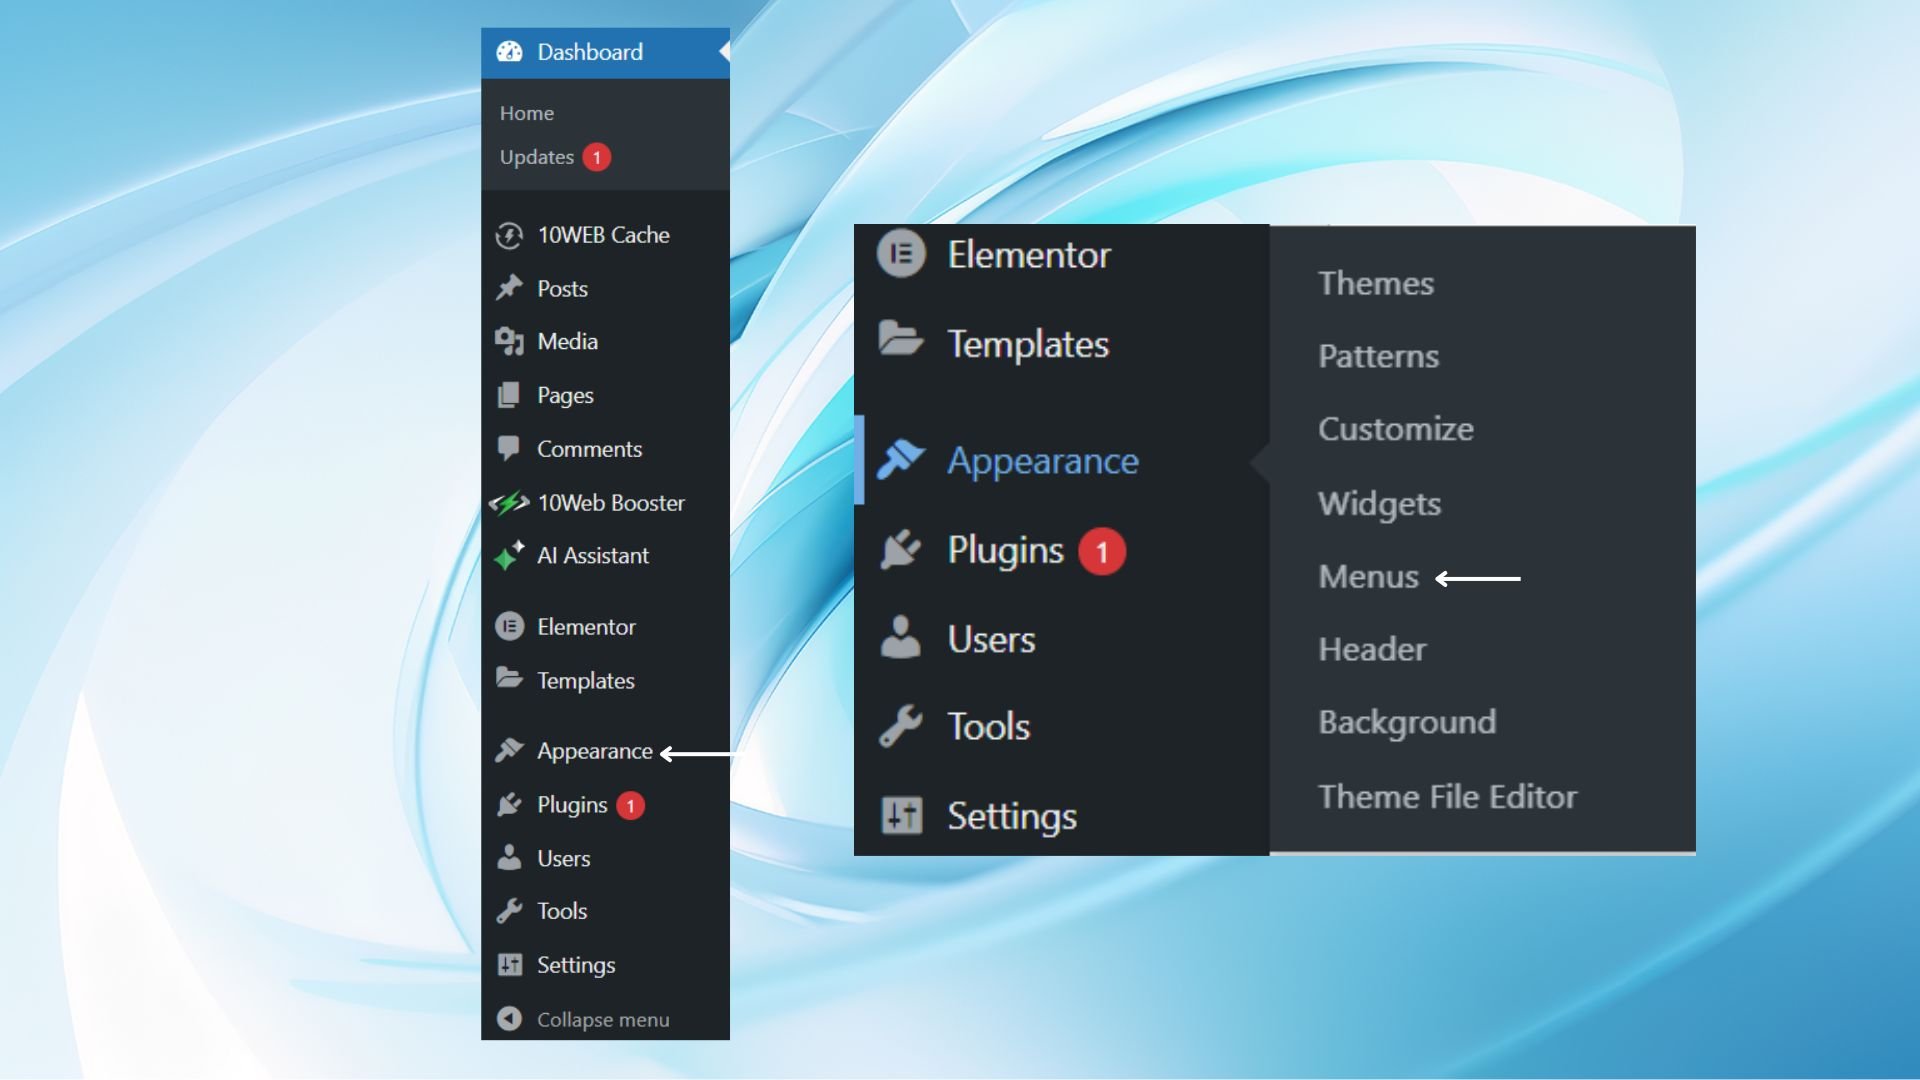
After naming it, you can begin adding pages, categories, or custom links by selecting items and pressing Add to Menu. Once you’ve arranged your items, save your changes.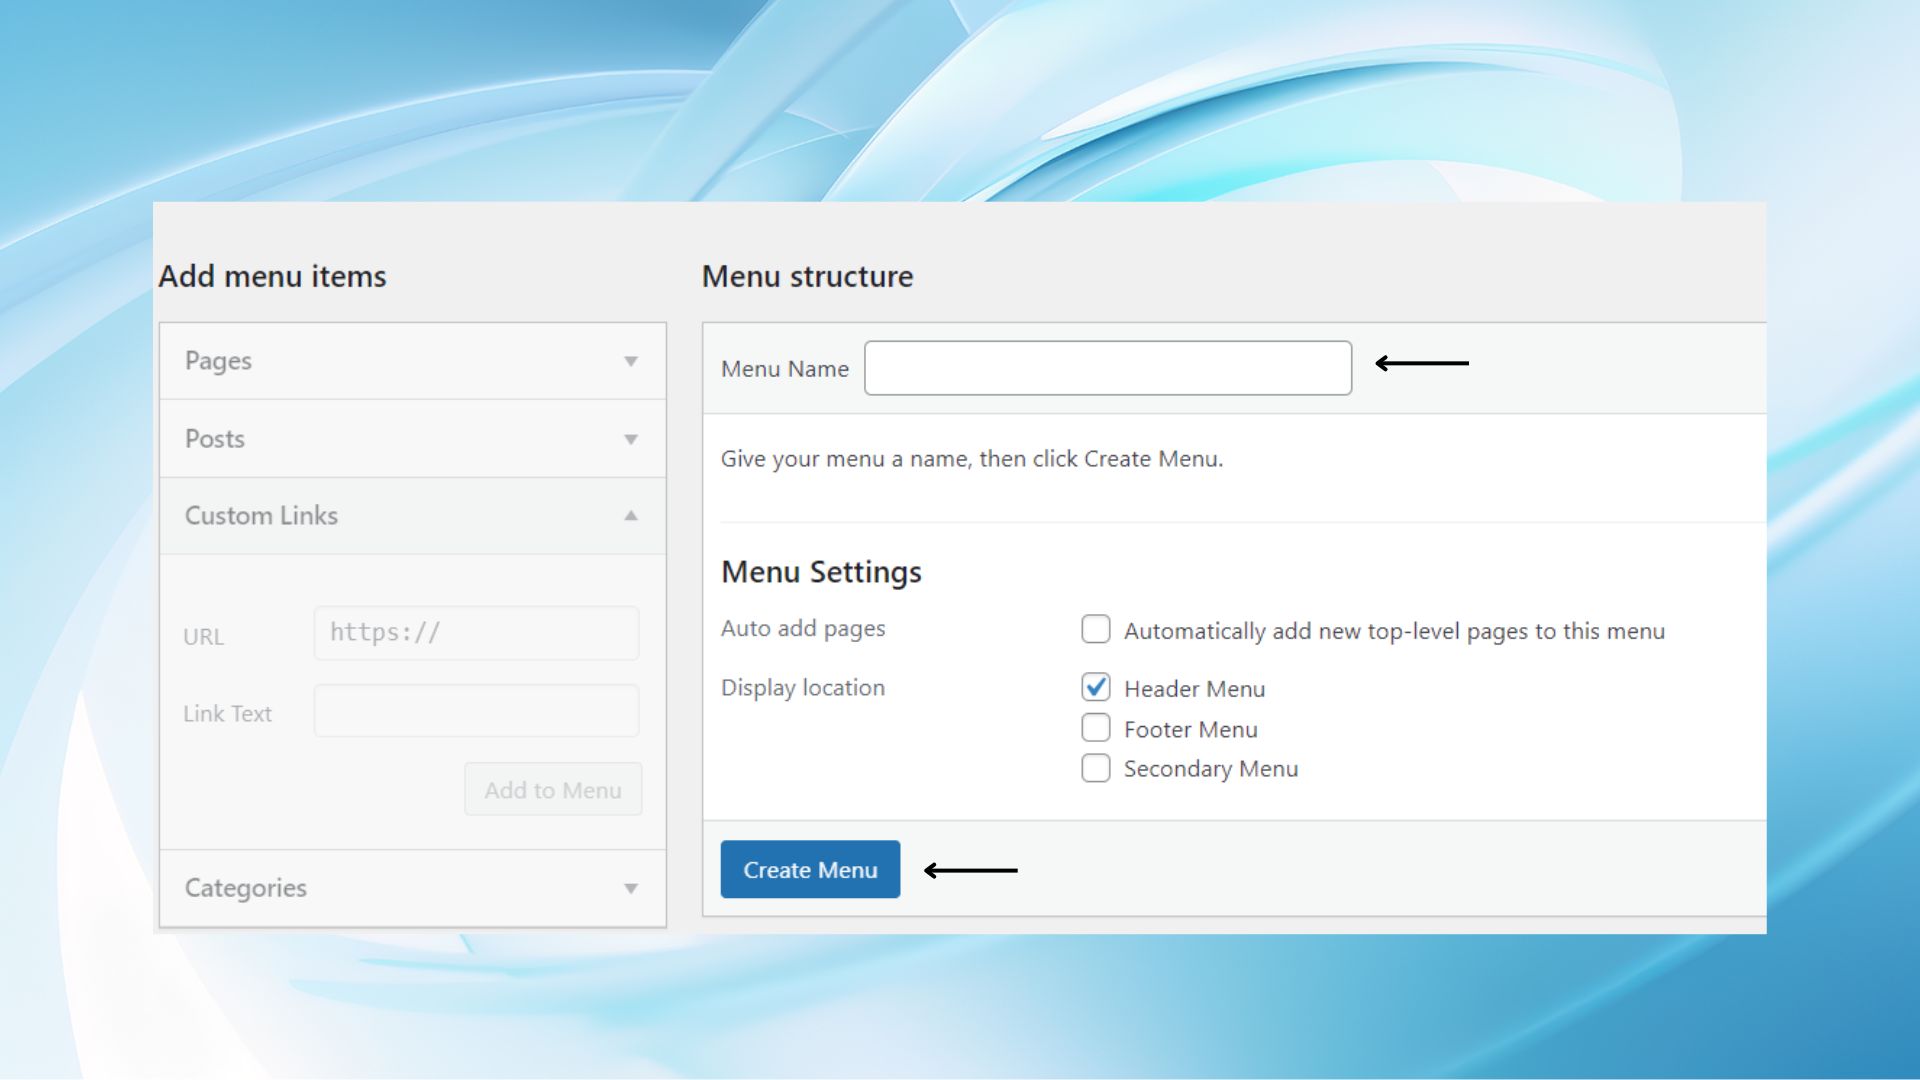
Creating a secondary menu in WordPress
Secondary menus, often used for footer navigation or secondary pages, are set up similarly. After you’ve created a new menu like your primary one, assign it to a secondary menu location which is often defined by your theme.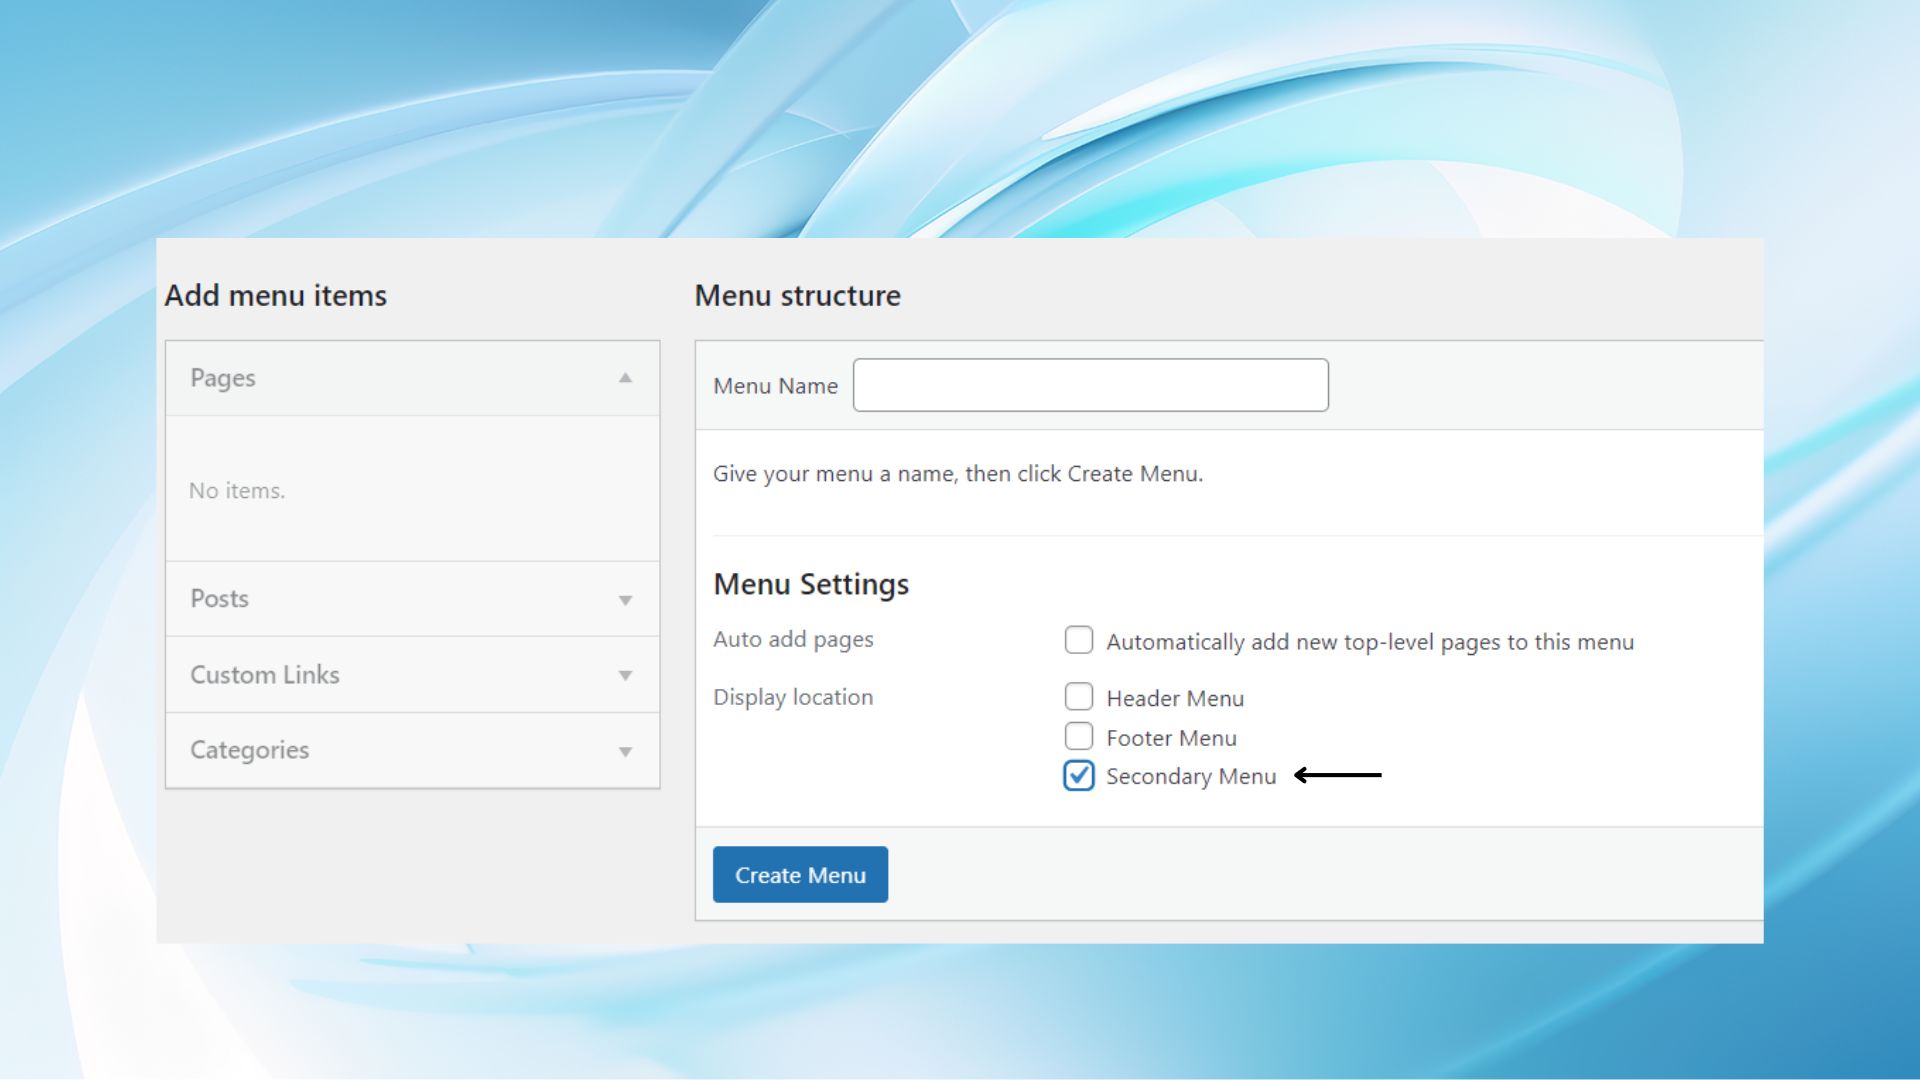
Creating a dropdown menu in WordPress
To create a dropdown menu in WordPress, go to Appearance > Menus in your dashboard. Here you’ll create or select the menu to edit.
-
- Click on ‘+ Add Items’ to introduce new elements to your menu structure.
- Position the items by dragging them into the desired order. Submenu items nest under parent items, creating your dropdown structure.
- Pull the item slightly to the right under the parent item to transform it into a submenu entry.
- Preview and save.
When deciding on a parent item for your dropdown, ensure it is a static link if your theme doesn’t support clickable parent menu items. It’s crucial for the parent item to be non-functional to make the dropdown accessible.
Customize the appearance of the dropdown by selecting the individual items and adjusting their Navigation Label or CSS Classes under the ‘Screen Options’.
If you use the Block Editor, menus may derive from the Navigation block. Adjustments can then be made in the Site Editor.
Simplify WordPress with 10Web
Automate manual work with 10Web Managed WordPress Hosting and 10Web AI Website Builder. Optimize your WordPress website effortlessly.
Creating menu categories in WordPress
When managing your WordPress website, organizing content into menu categories can make user navigation easier.
-
- Log into your WordPress dashboard. Go to Appearance > Menus.
- Identify your Main Menu. If it’s not already created, select Create a new menu.
- Look for the Categories box on the left-hand side.

- Choose which categories you’d like to add by checking the corresponding boxes.
- Hit the Add to Menu button.
-

Once added, you can drag and drop the categories within the menu structure to order them to your preference. This is done on the right side of the menu editor screen.
How to customize menu appearance
Now you know how to add a menu in WordPress for different purposes. Mastering the appearance of your WordPress menu will increase your website’s usability and aesthetic appeal. It’s essential to align your menu’s design with your site’s overall style and functional requirements.
Themes: the theme you choose significantly influences your menu’s appearance. Themes in WordPress often come with predefined menu locations and styles. Ensure you select a WordPress theme that supports custom menus and includes options for header and footer menu placements. Some themes offer additional sidebar options, providing flexibility in how your menu integrates with the rest of your site’s layout.
Menu locations: Your theme determines available menu locations where you can display your menus, such as the header, footer, or sidebar. Go to Appearance > Menus in your dashboard to assign your custom menu to one of these locations. Proper menu location and alignment can impact the navigation flow and overall layout of your site.
Widgets and plugins: Widgets and plugins expand your customization options beyond what’s available in the theme. Add menus to your sidebar through Appearance > Widgets by dragging and dropping the Navigation Menu widget into your chosen area. Plugins can add sophisticated features like mega menus, responsive designs, and more intricate control over typography and background color.
How to add links to your WordPress navigation menu
You’ve learned how to add a menu in WordPress. After you’ve created your WordPress menus, you can add links to them. The process is easy and consists of a few simple steps.
- From your WordPress dashboard go to the Appearance > Menus, where you created your navigation menus.
- To add a page already existing on your site, check the box next to the page title under the Pages section and click Add to Menu.
- You can add individual blog posts by selecting the desired post from the Posts tab similarly.
- If you want to link to external websites or custom URLs, click Custom Links. Enter the URL and link text, then click Add to Menu.
- To add an entire category or tag select the corresponding option and add it to the menu.
Once you’ve added your items, you can drag and drop them to reorder or create a hierarchy (sub-menus) by dragging items to the right, indenting them under the parent menu item. After arranging the items to your satisfaction, save your menu by clicking the Save Menu button.
Simplify WordPress with 10Web
Automate manual work with 10Web Managed WordPress Hosting and 10Web AI Website Builder. Optimize your WordPress website effortlessly.
Summary
Adding a menu to your WordPress site is a simple process that can greatly enhance your website’s navigation and user experience. Once you’ve learned the hows it becomes a simple flow of actions.
This guide suggested actionable methods to learn how to add a menu in WordPress. By following these steps, you will have a functioning navigation menu that aligns with your site’s layout and design. Keep in mind that a well-structured menu can help visitors find content more efficiently and improve the overall functionality of your site. So, master the methods we discussed to provide the best experience possible.
Simplify WordPress with 10Web
Simplify WordPress with 10Web
Skip and automate manual work with 10Web Managed WordPress Hosting and the 10Web AI Website Builder.