If you’re having email deliverability issues and/or for have decided to use a third party email provider for sending emails from your WordPress website, Sendgrid is one very easy-to-set and popular option for your problem.
With this service you get a free trial including an overall of 40000 absolutely free emails in the first month of use. After the free month, you get 100 free emails daily. Their plugin has already caught the eye of over 90000 active users and gained a rating of 4.5 stars.
Sendgrid’s most famous customers include Uber, Booking.com, Spotify, Airbnb, Mint, etc.
Here you can read the pricing of different plans offered by Sendgrid and their respective limitations. The main plans are Free, Essentials, Pro, and Premier.
To set up your WordPress website with Sendgrid emailing service, you will have to follow the steps listed below:
Configuring Sendgrid
1. Sign up for a Sendgrid account.
The first and the most trivial thing to do is signing up for a Sendgrid account. There are different plans varying in price and limitations. 
Once you select the pricing plan you want, you’ll be required to fill in your personal information.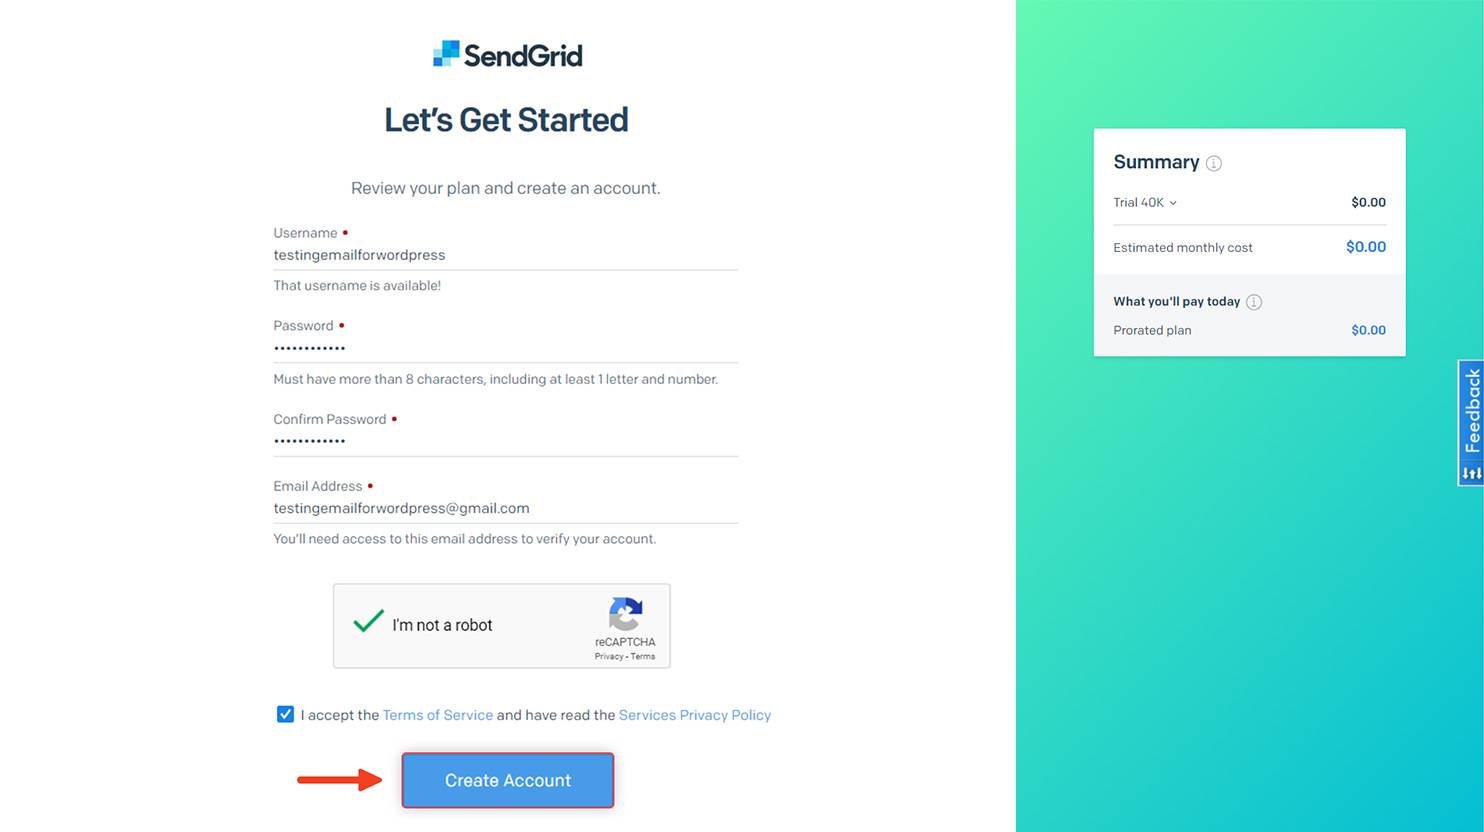
Afterwards, you will have to click on “Confirm Email Address” to finish the signup process.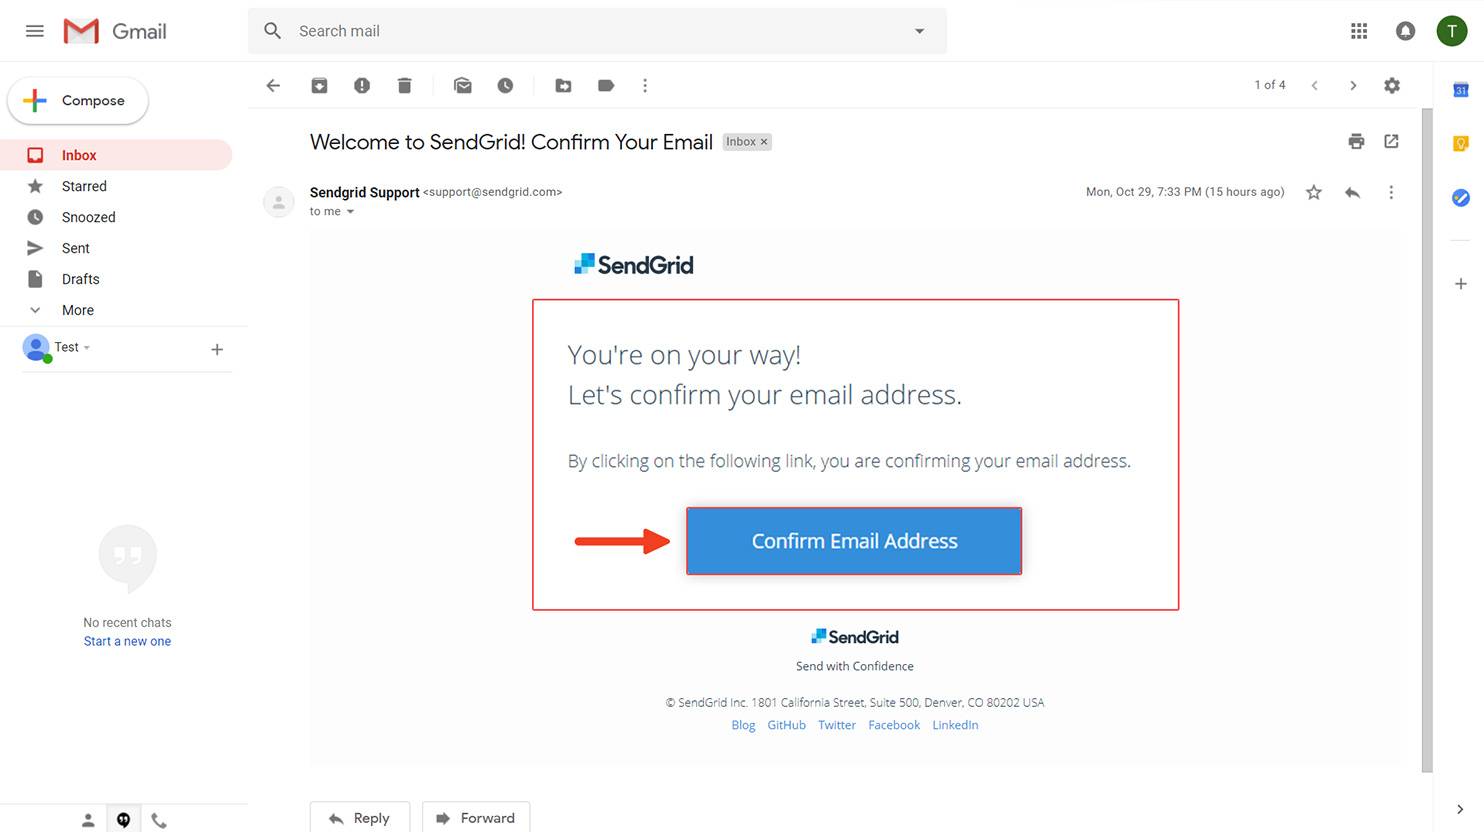
2. Install/Activate WordPress plugins.
Not much to worry about in this step. All you gotta do is install and then activate the Sendgrid plugin, which can easily be done from your WordPress dashboard.
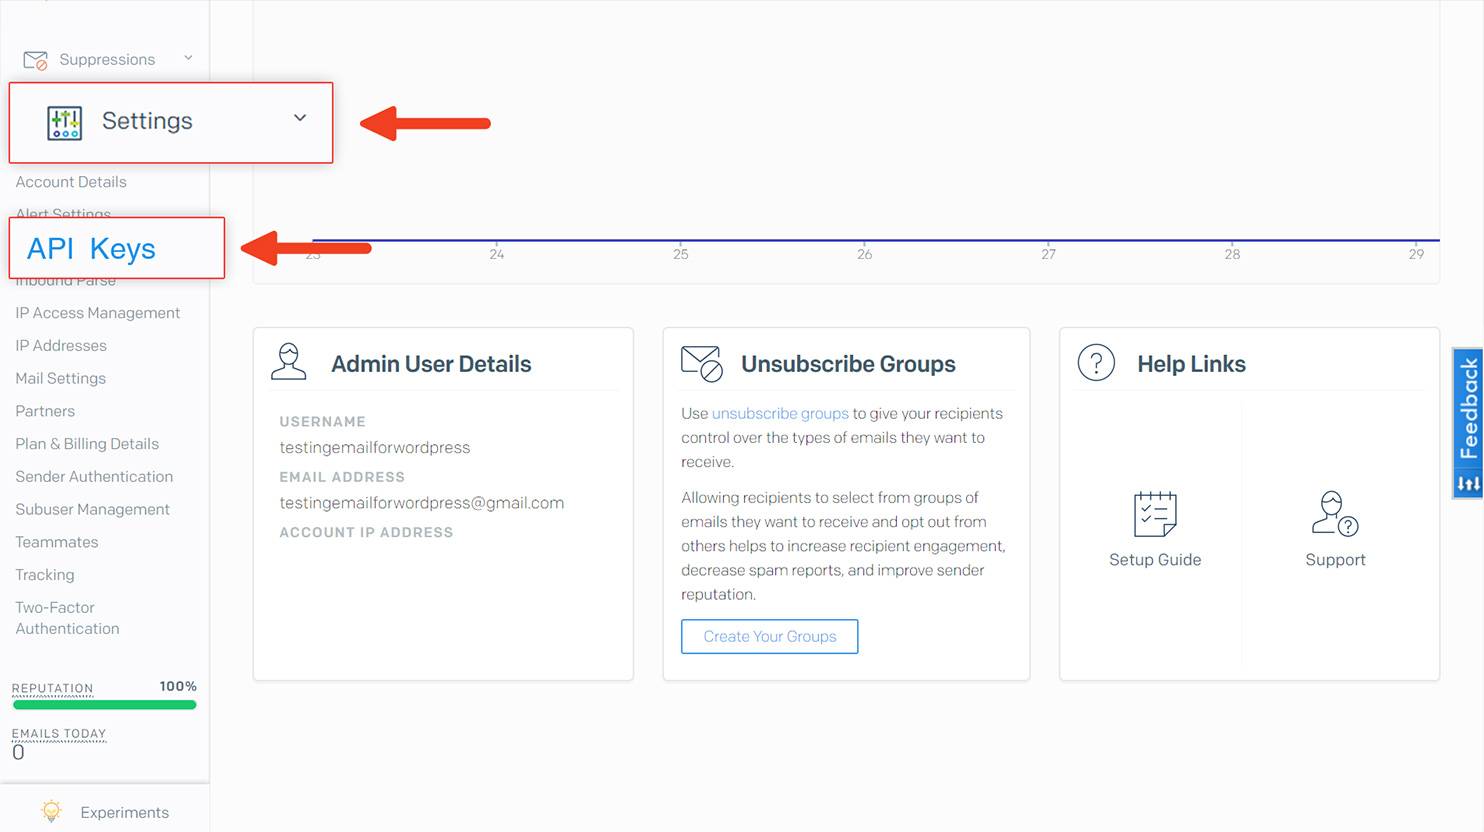
3. Enter API credentials.
At this point you’ll need to create an API key and update the settings. Here you can find the API documentation of Sendgrid.
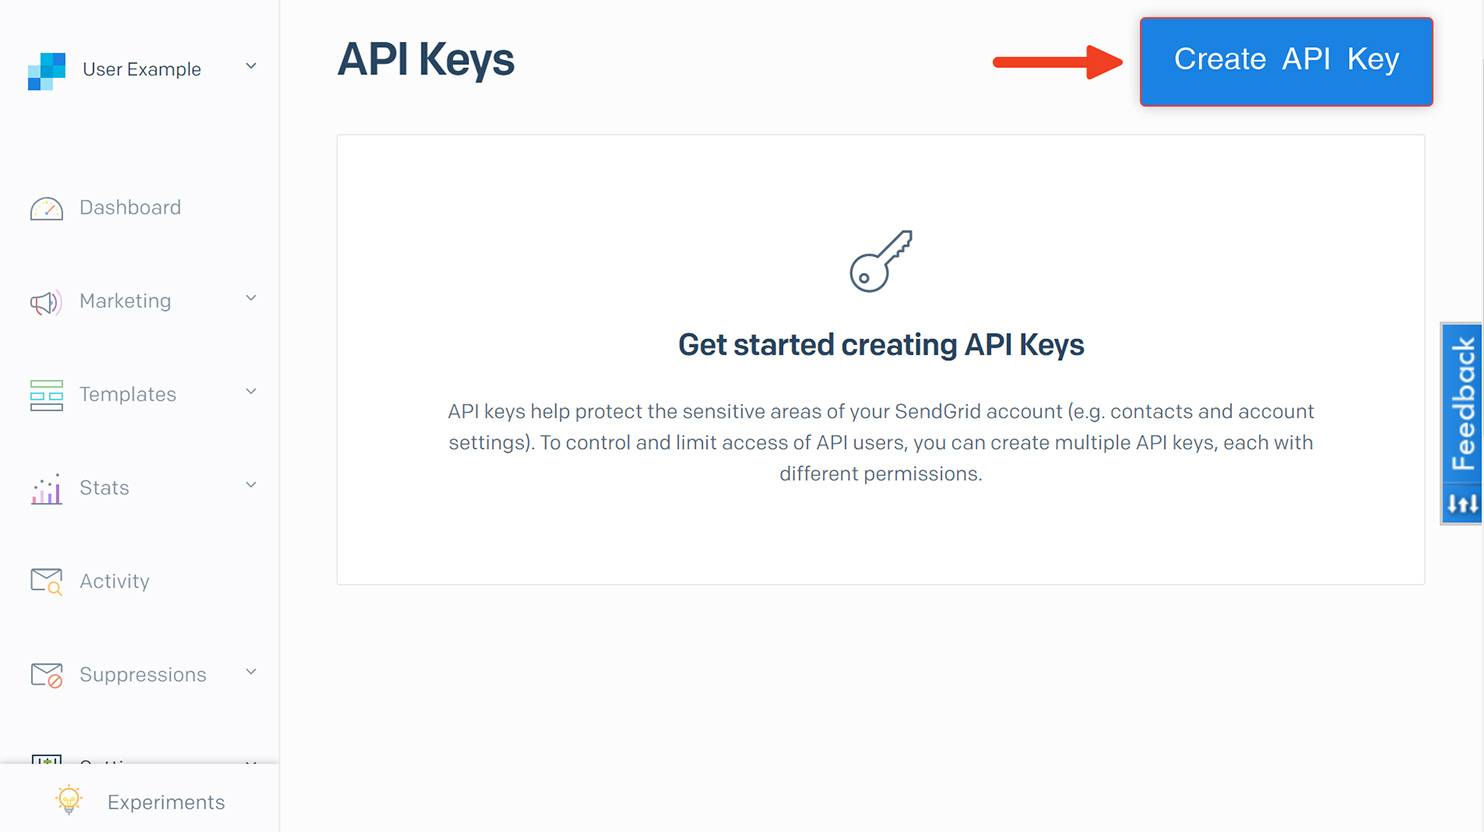
- Simply go back to Sendgrid dashboard and therefrom, choose “Settings” from the left-side menu and click on the “API Keys.”

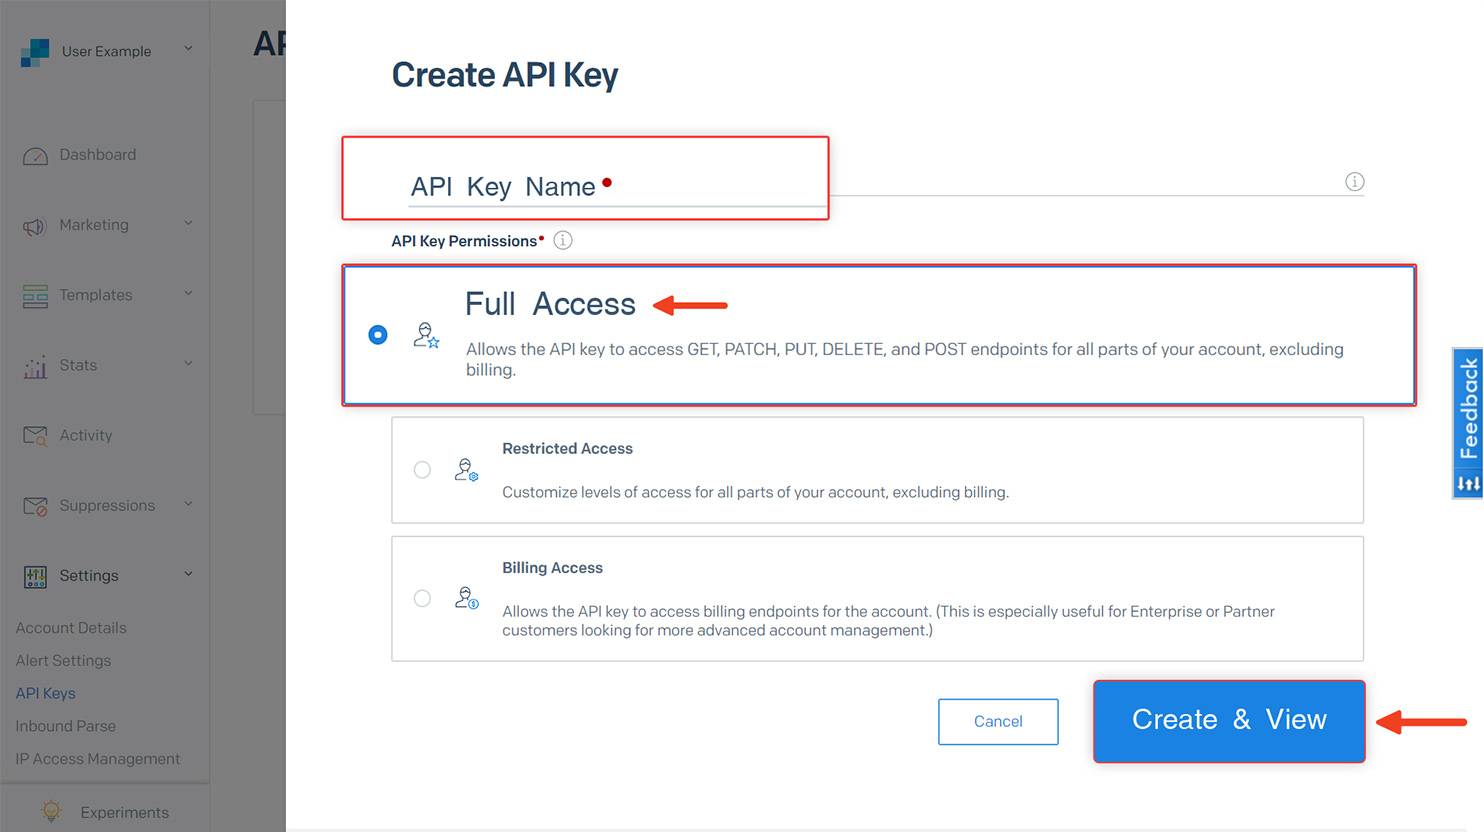
- Select “Create an API key” with “full access permissions.”
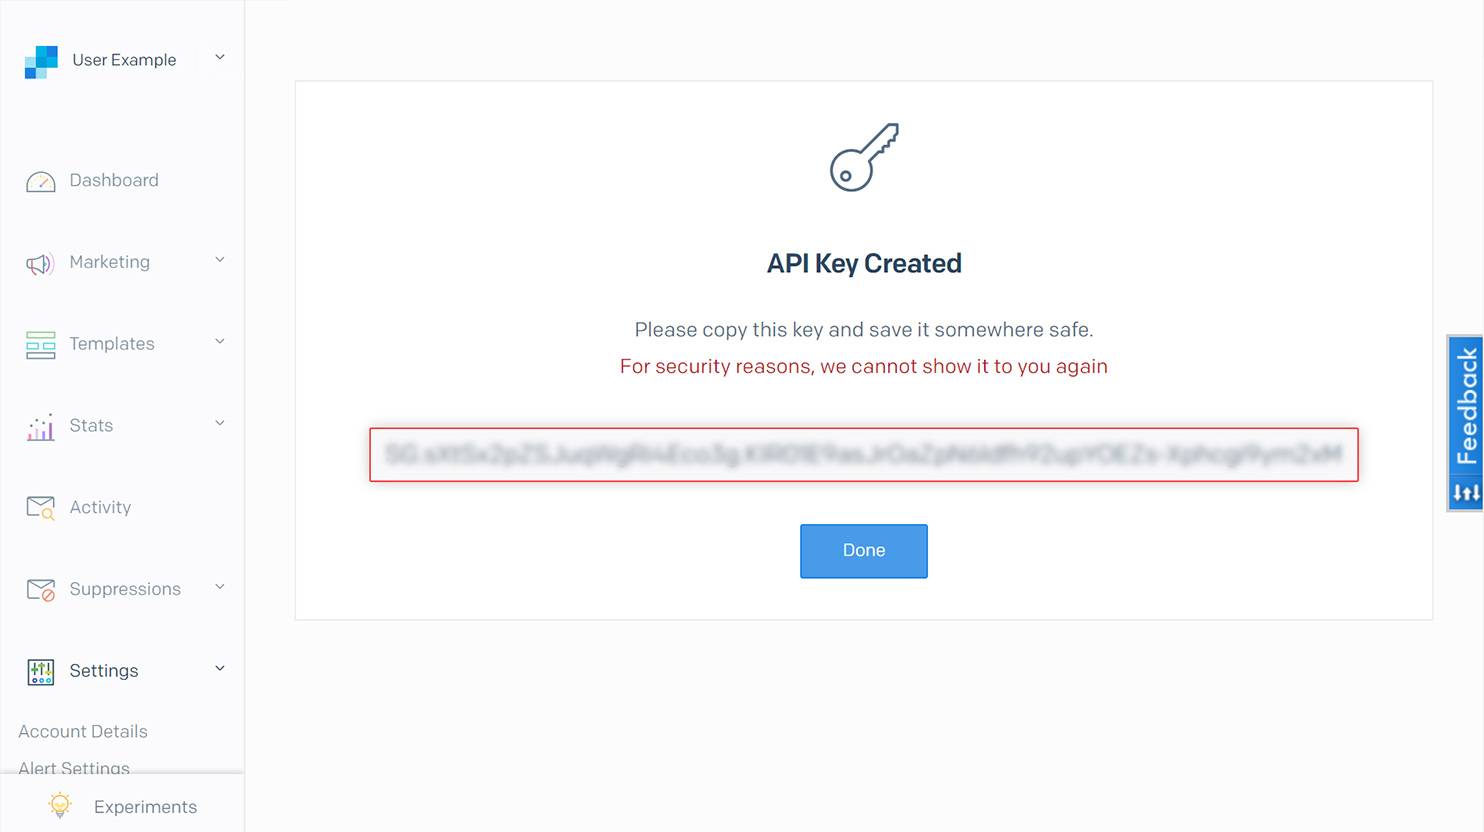
- After you hit “create and view”, Sendgrid will display your API key, which you better save in a secure place, as it’ll only be displayed once.
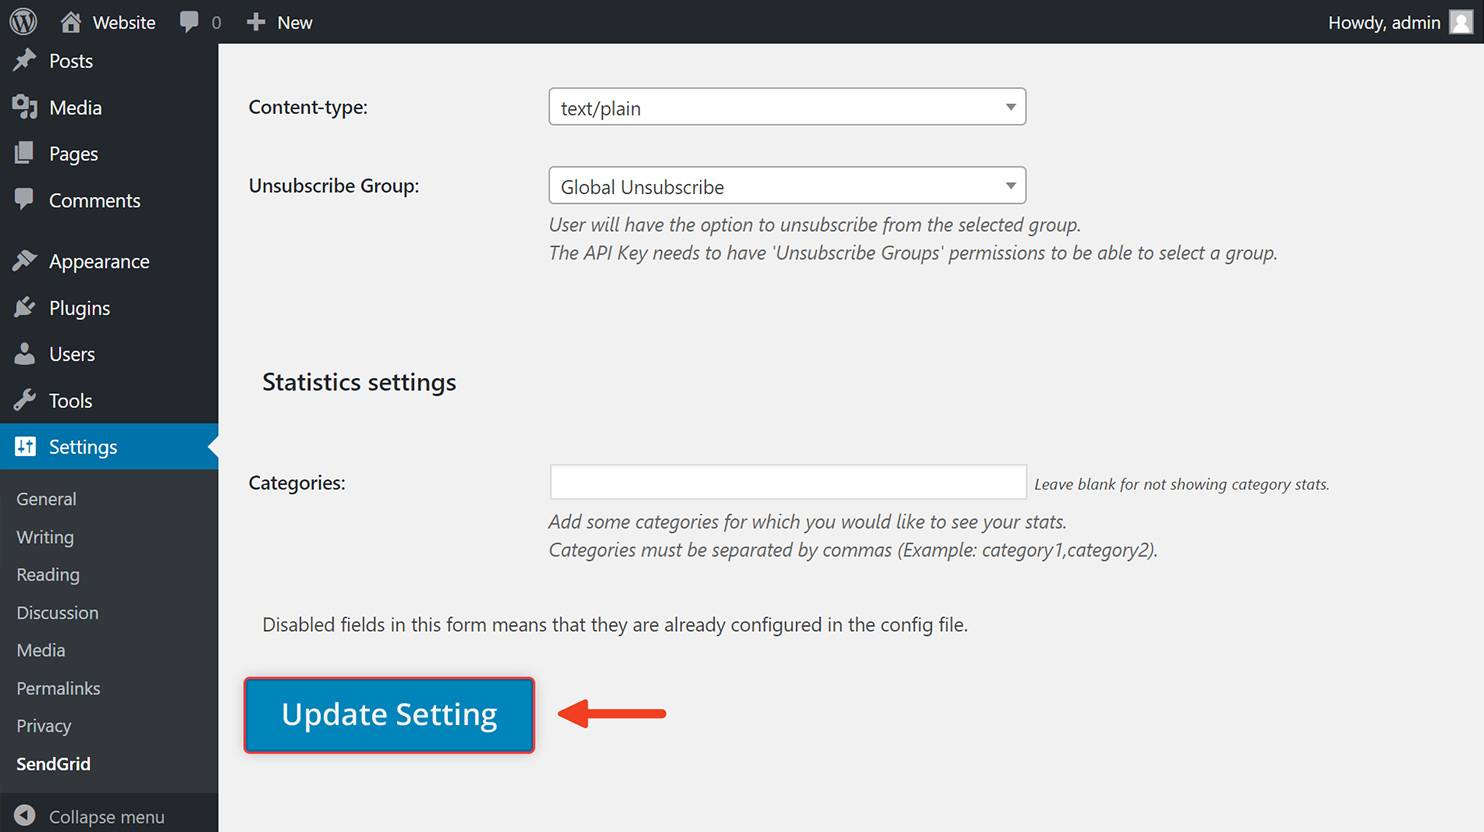
- You’ll need to copy/paste the key to your WordPress dashboard, under the section Sendgrid in your Settings.In the second box, you need to select “API.”
- Once you have changed and updated all the settings below, click “Update the settings.”
 In the second box, you need to select “API.”
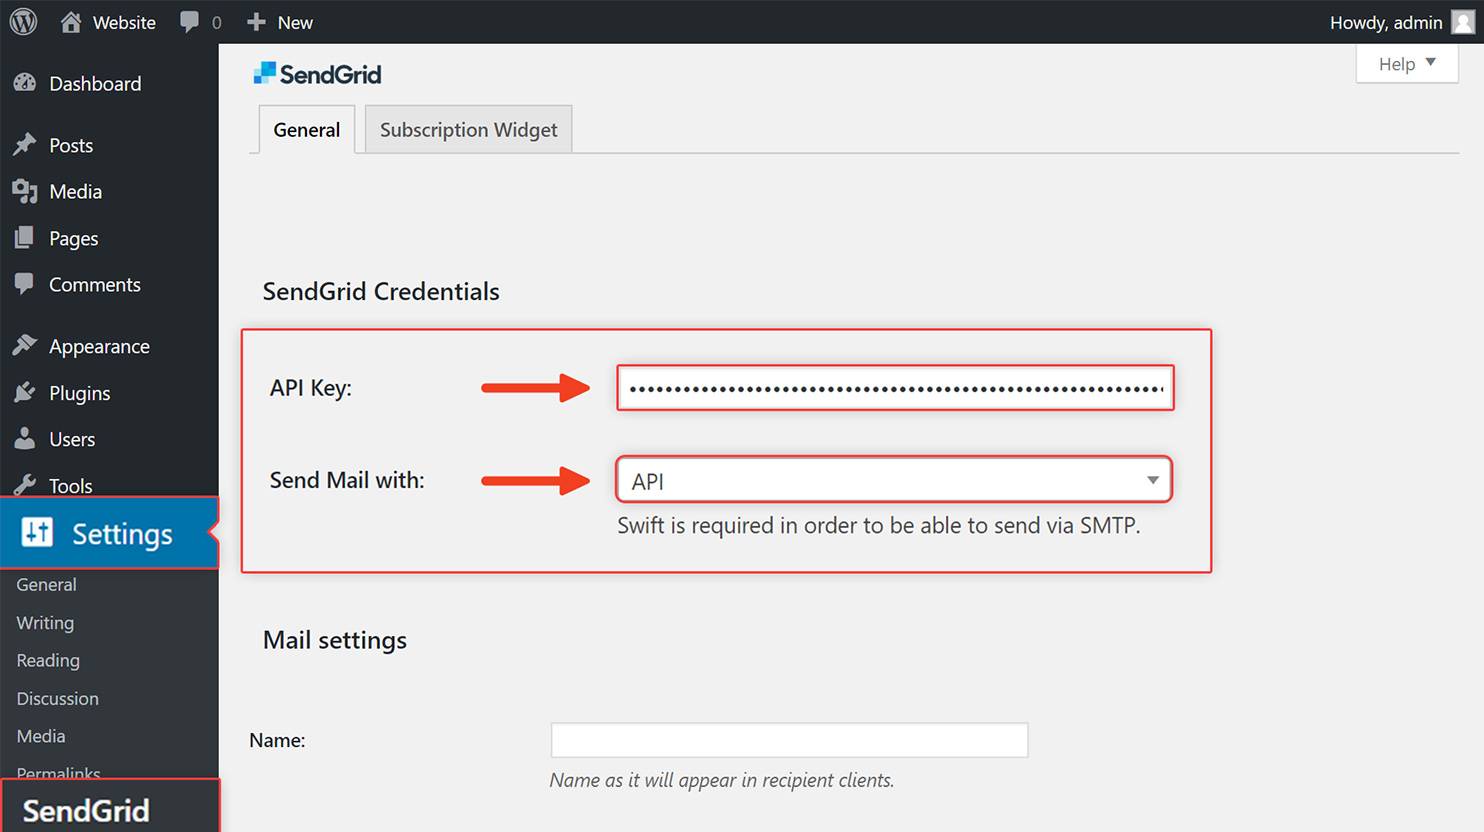
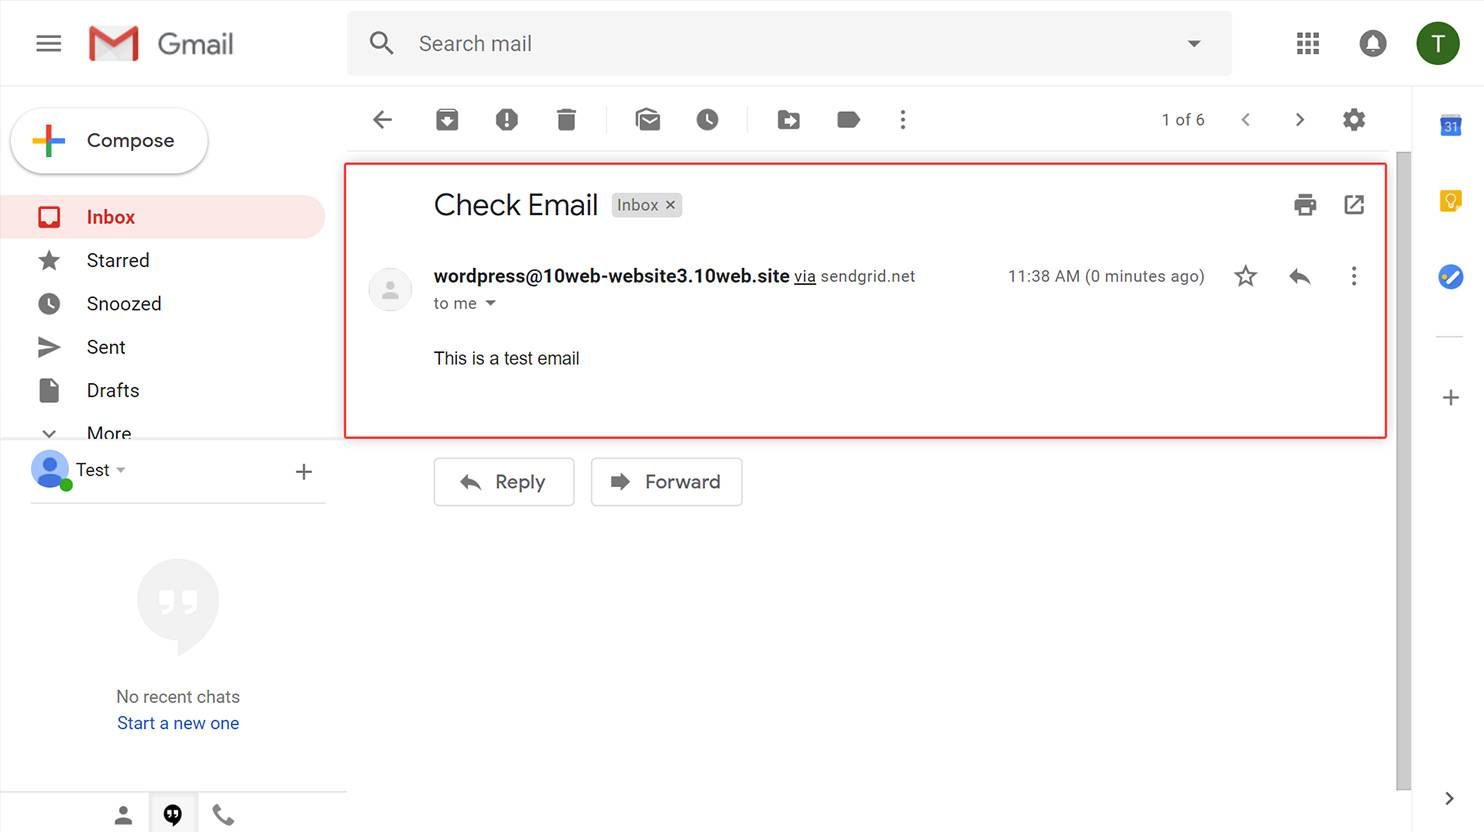
4. Test email.
In order to make sure everything is properly set up, you should then send a test email.
- Go back to your WordPress dashboard. From the Settings, choose Sendgrid page you’ll see a box below the page, for entering the email receiver, the subject and the body and hit “Send.”
- Then you should check your receiver email inbox.

5. Domain validation [optional step]
After you have an account you’ll need to add DNS records to your DNS host for validating it with Sendgrid. To do so, you’ll need to:
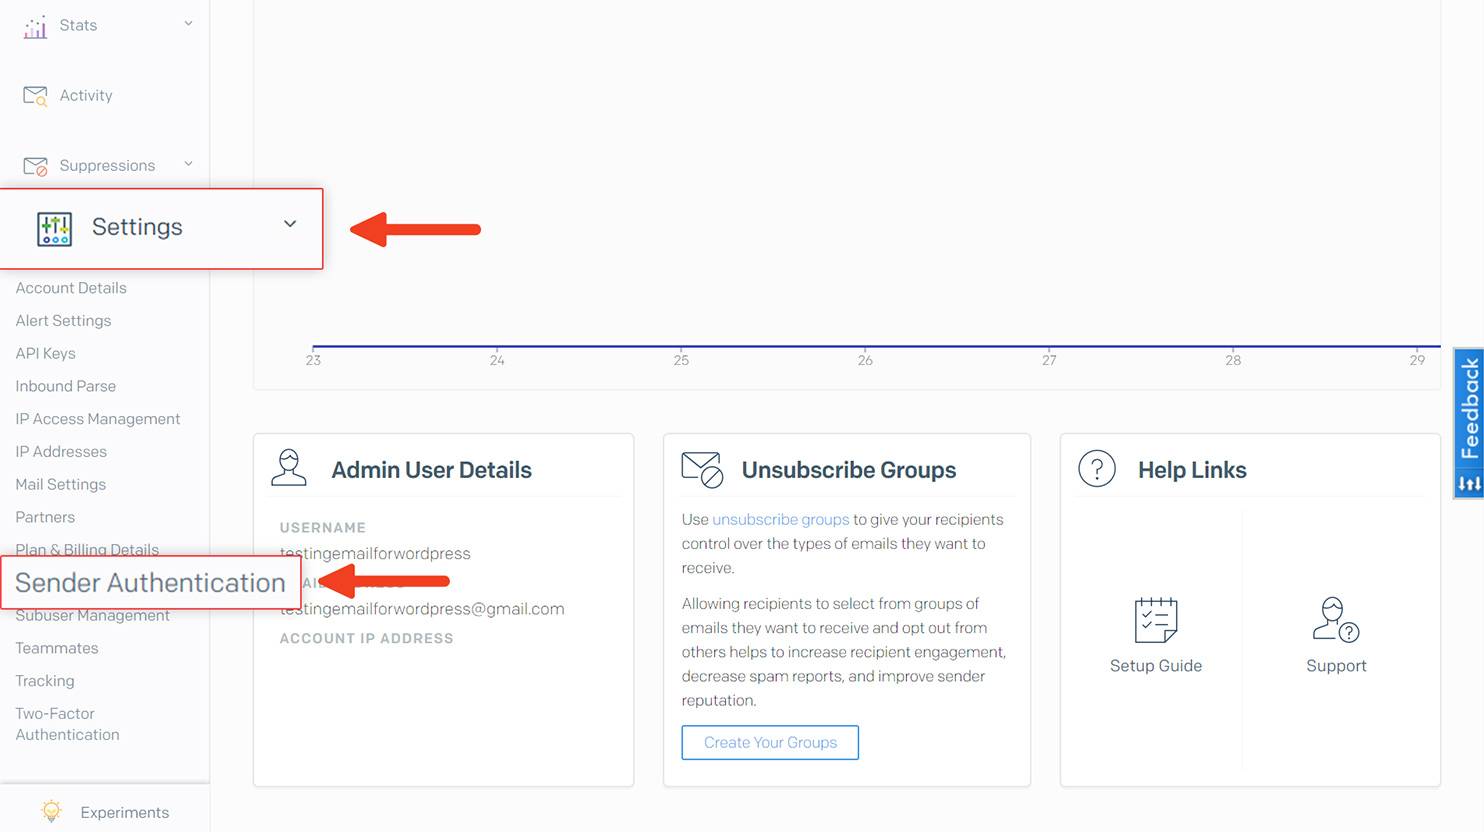
- Login to sendgrid.com.
- Go to Settings and from the left sided bar select the “Sender Authentication” field.
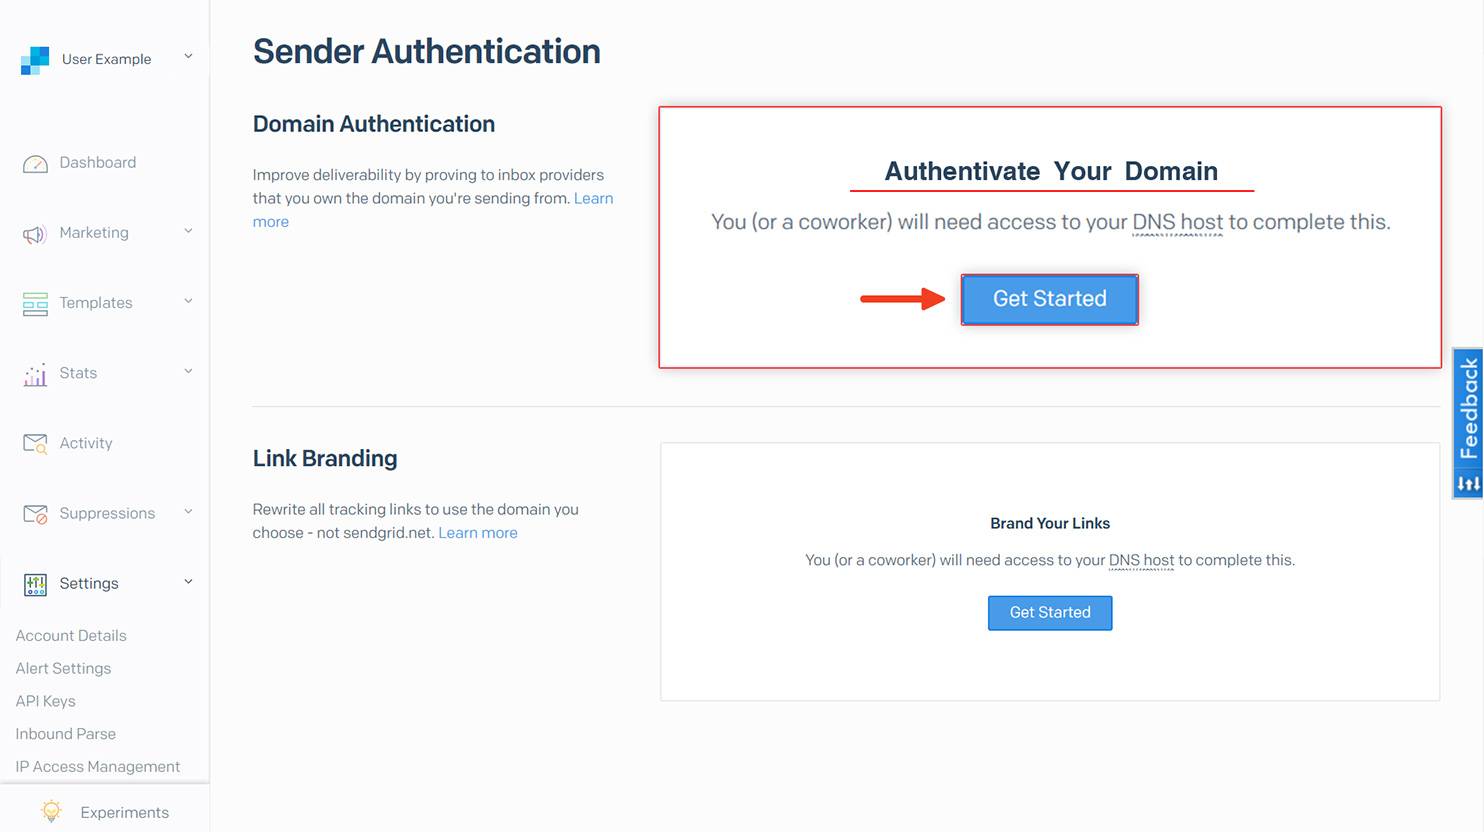
- On the page that will open, click on “Get started” from the “Authenticate your domain” box.
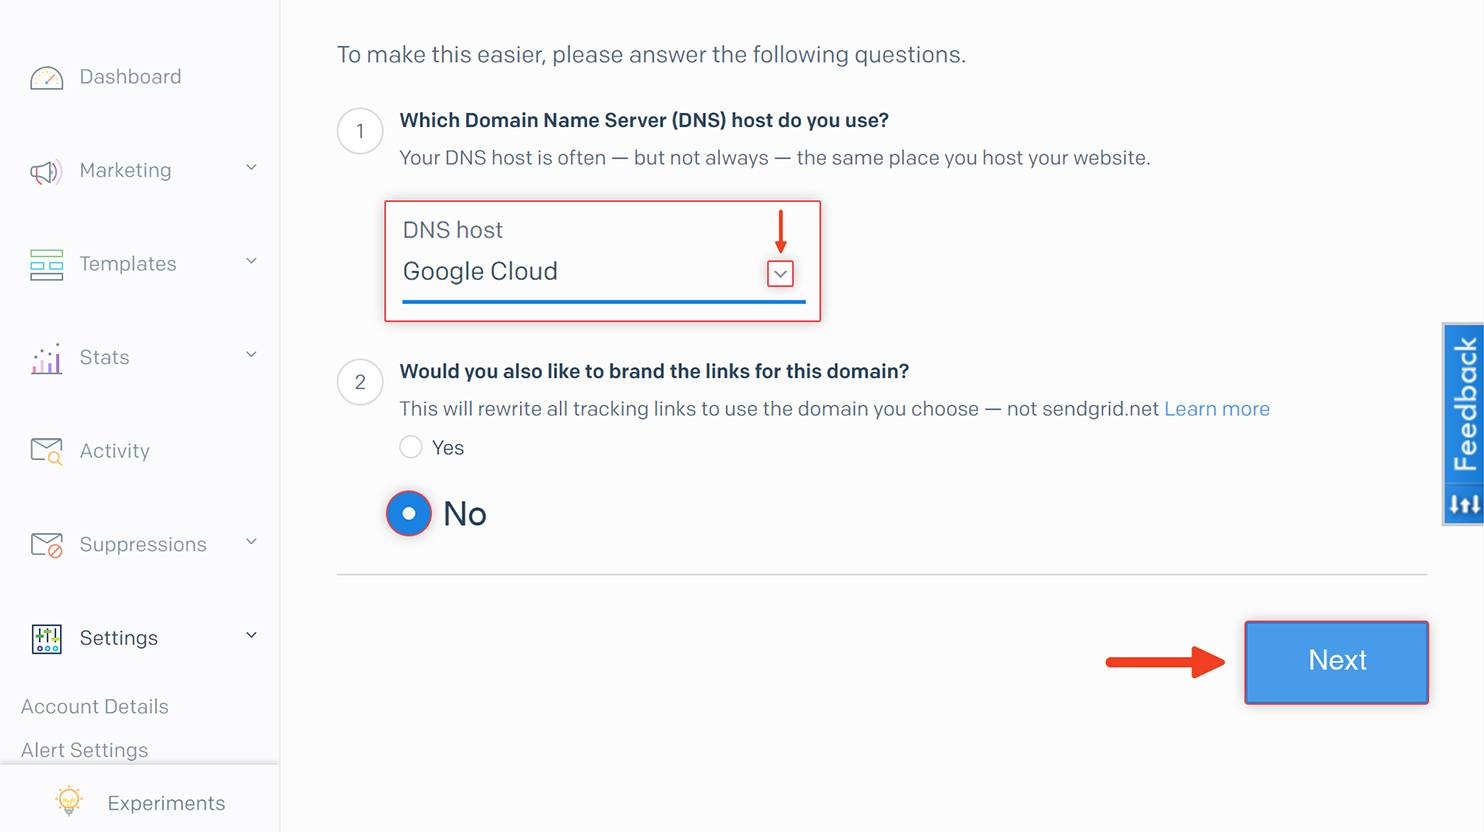
- On the next page, you have two boxes to fill in. On the first one you need to select the DNS host that you’re using from the dropdown menu.The second one is used to choose whether you want your links for the domain to be branded.
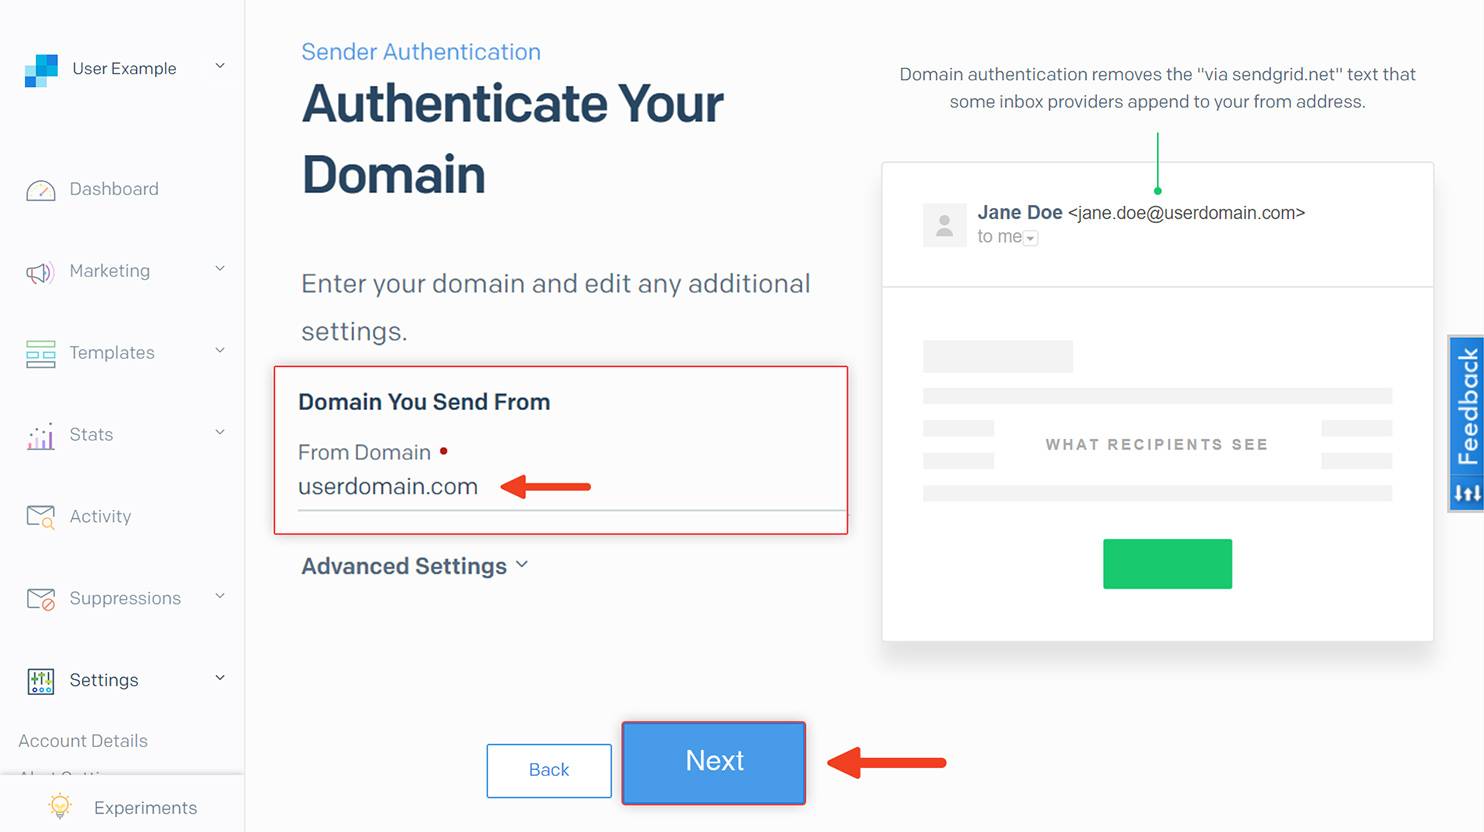
- In the “Authenticate your domain” field, you have to enter the domain from which you want the emails to be sent. Then click “Next.”
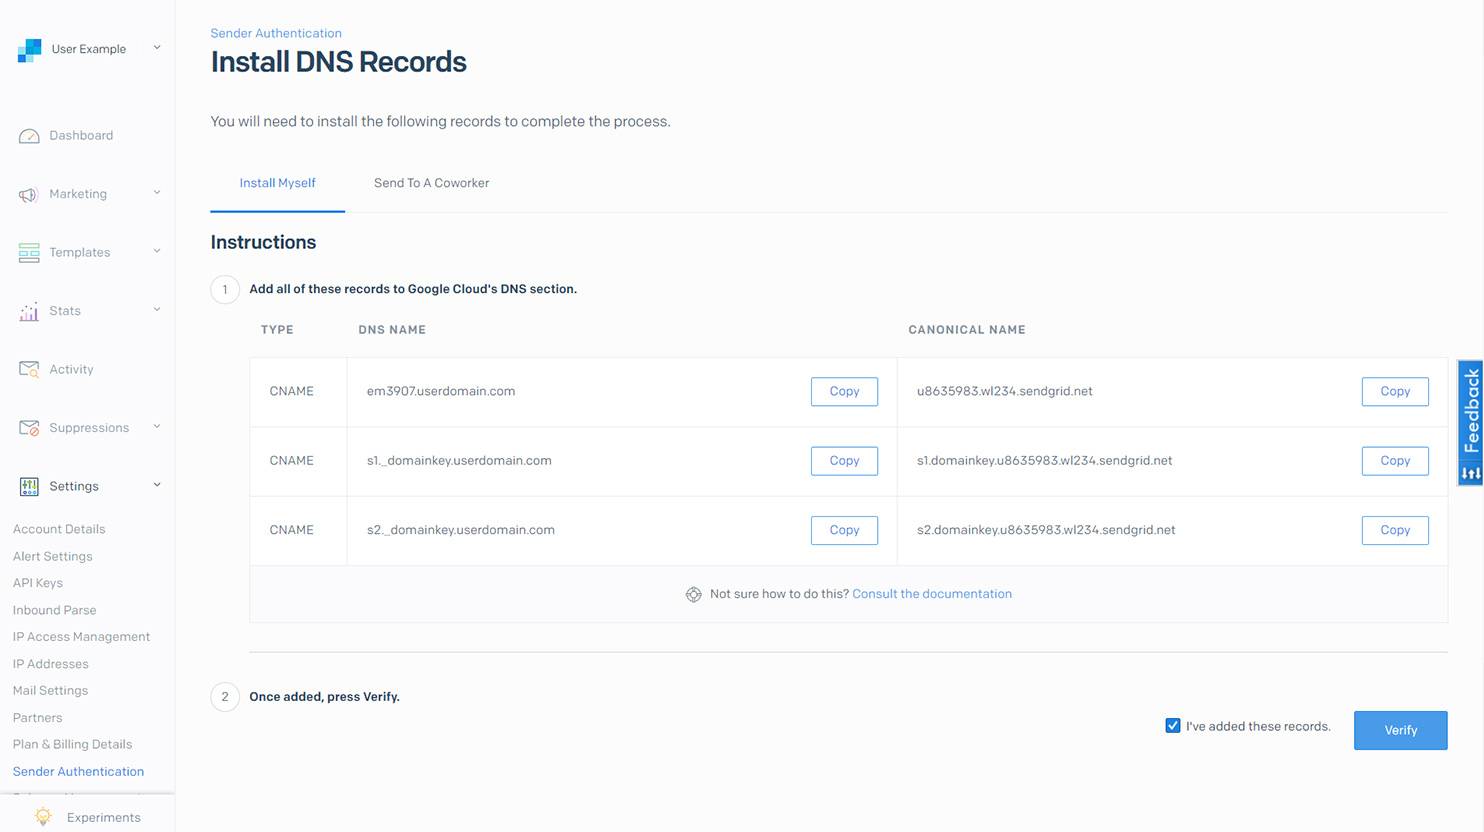
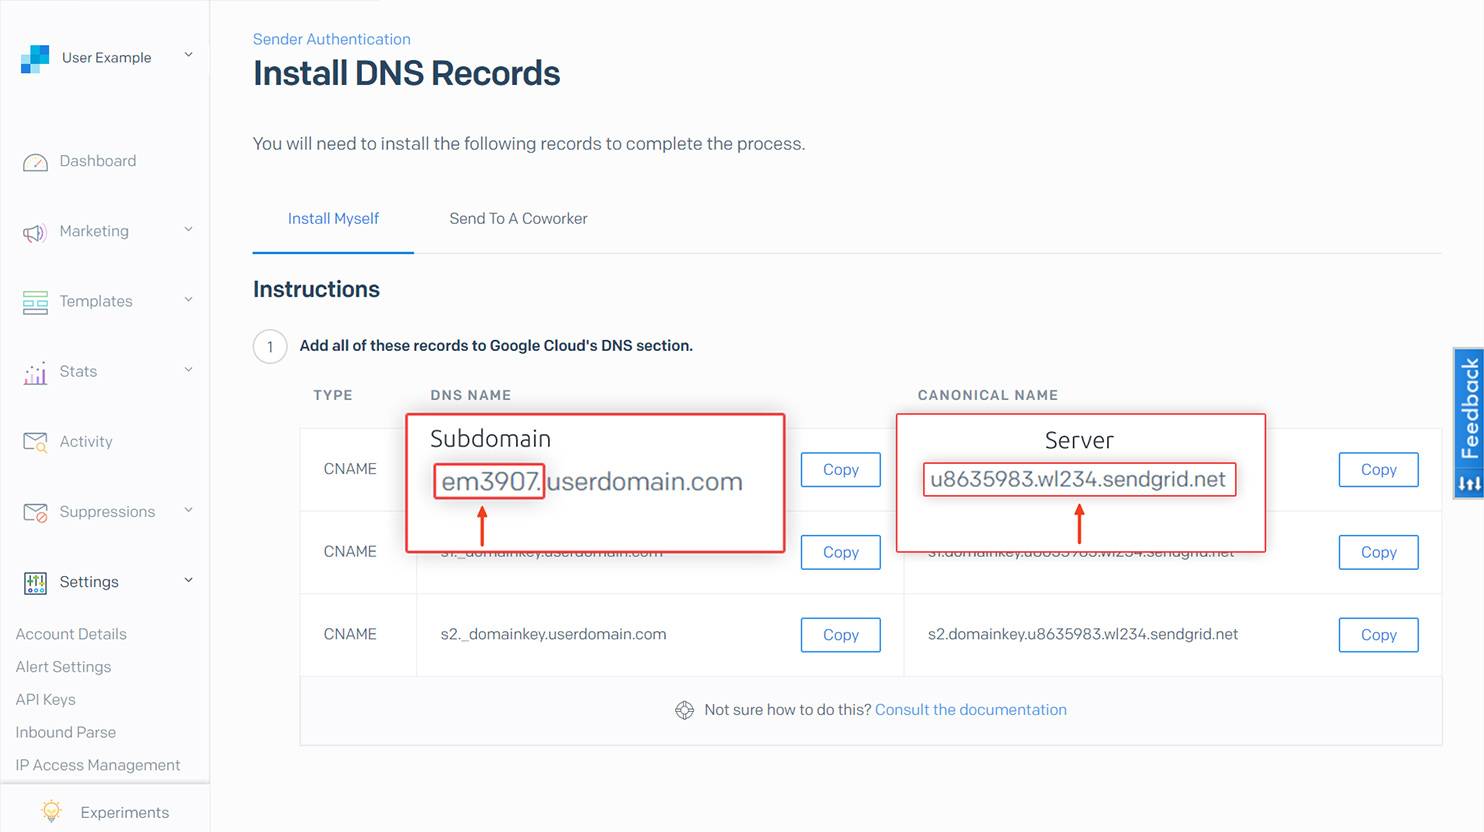
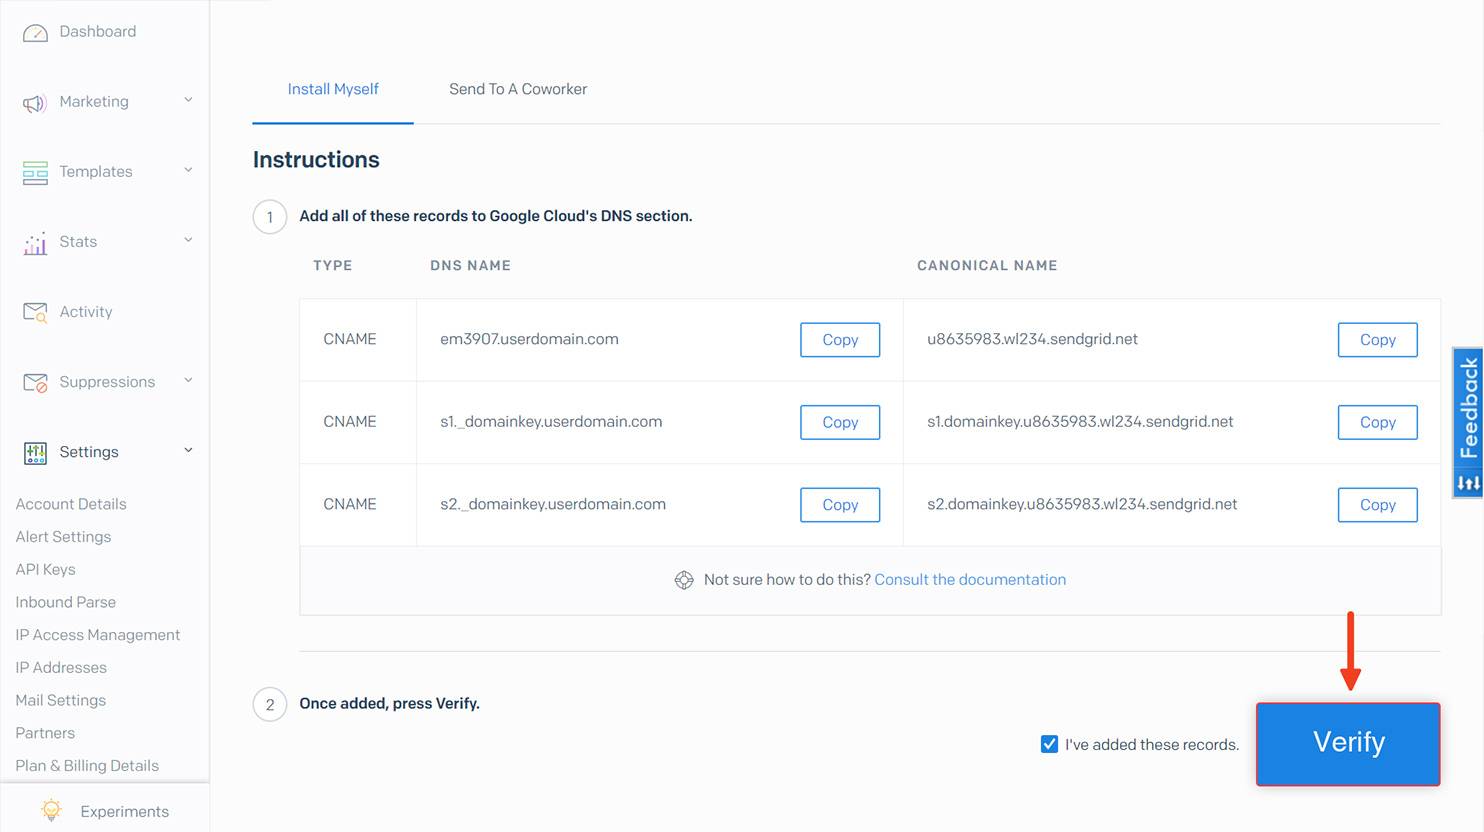
- At this point, Sendgrid will provide the necessary CNAME records that you need to add to your DNS host.
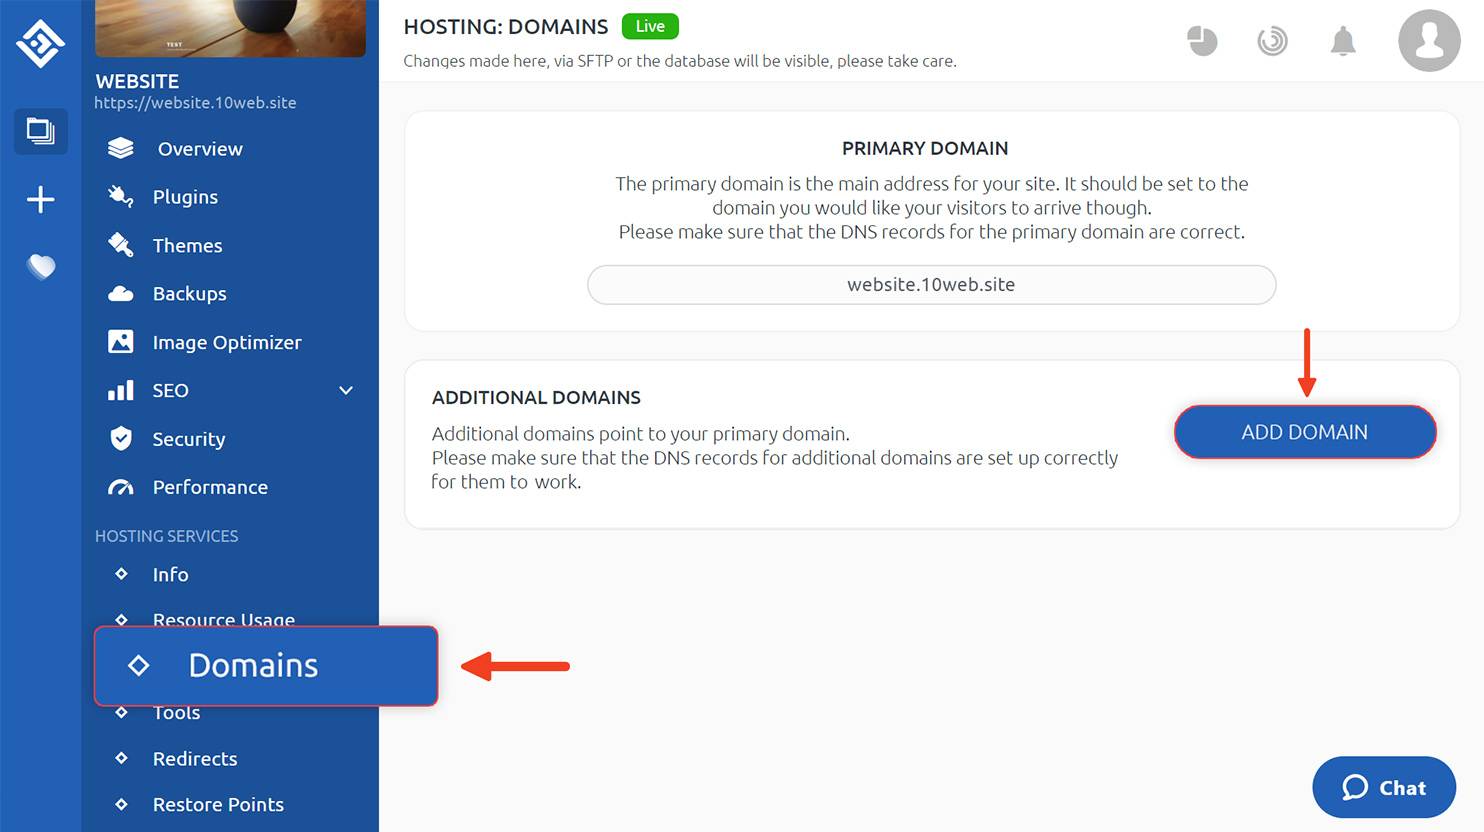
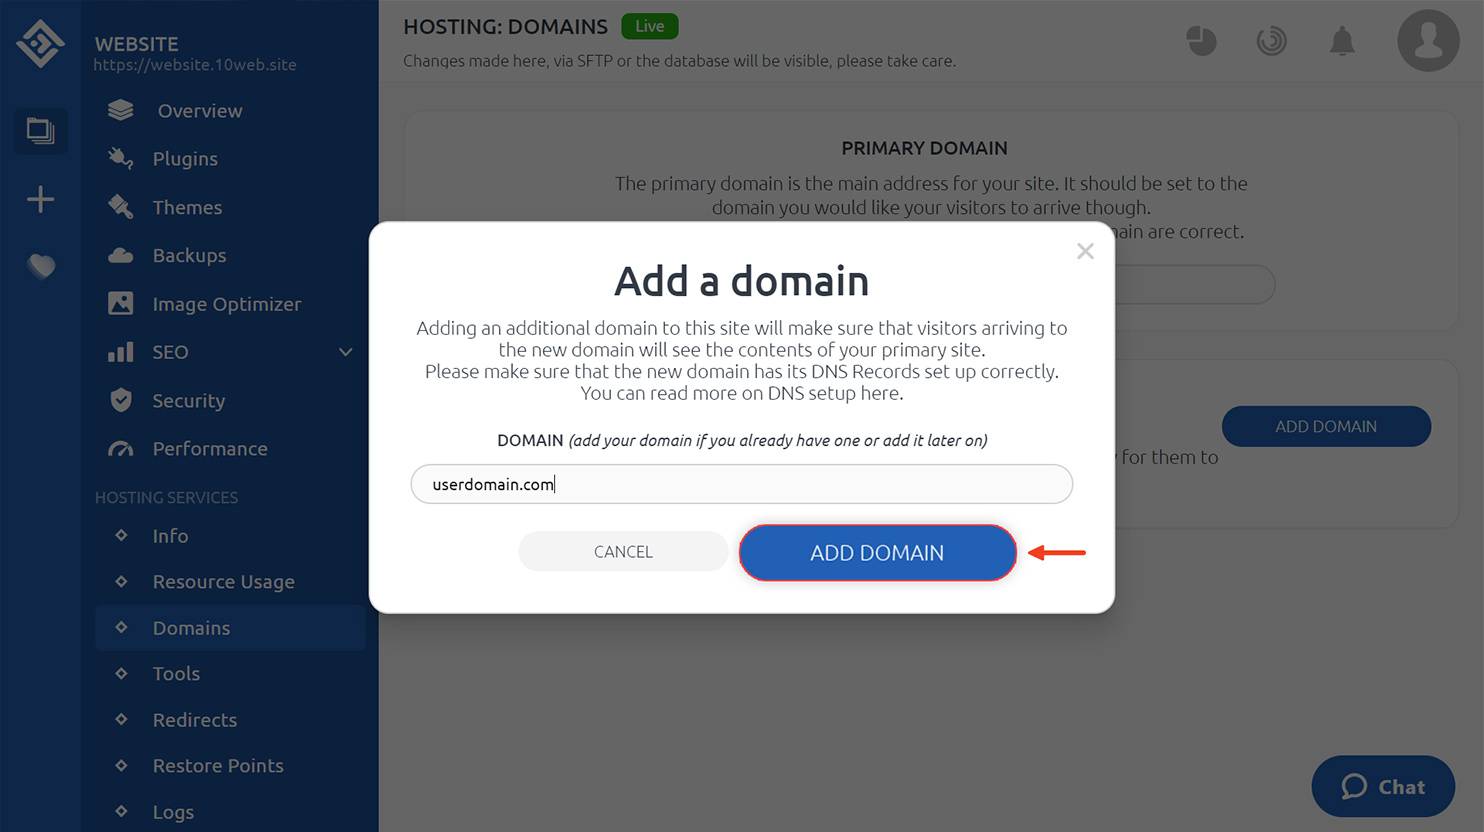
- Then go to your 10Web dashboard, choose “Domains” from the dropdown hosting menu, and select “Add new domain.”
- Write your domain name under “Add Domain.”
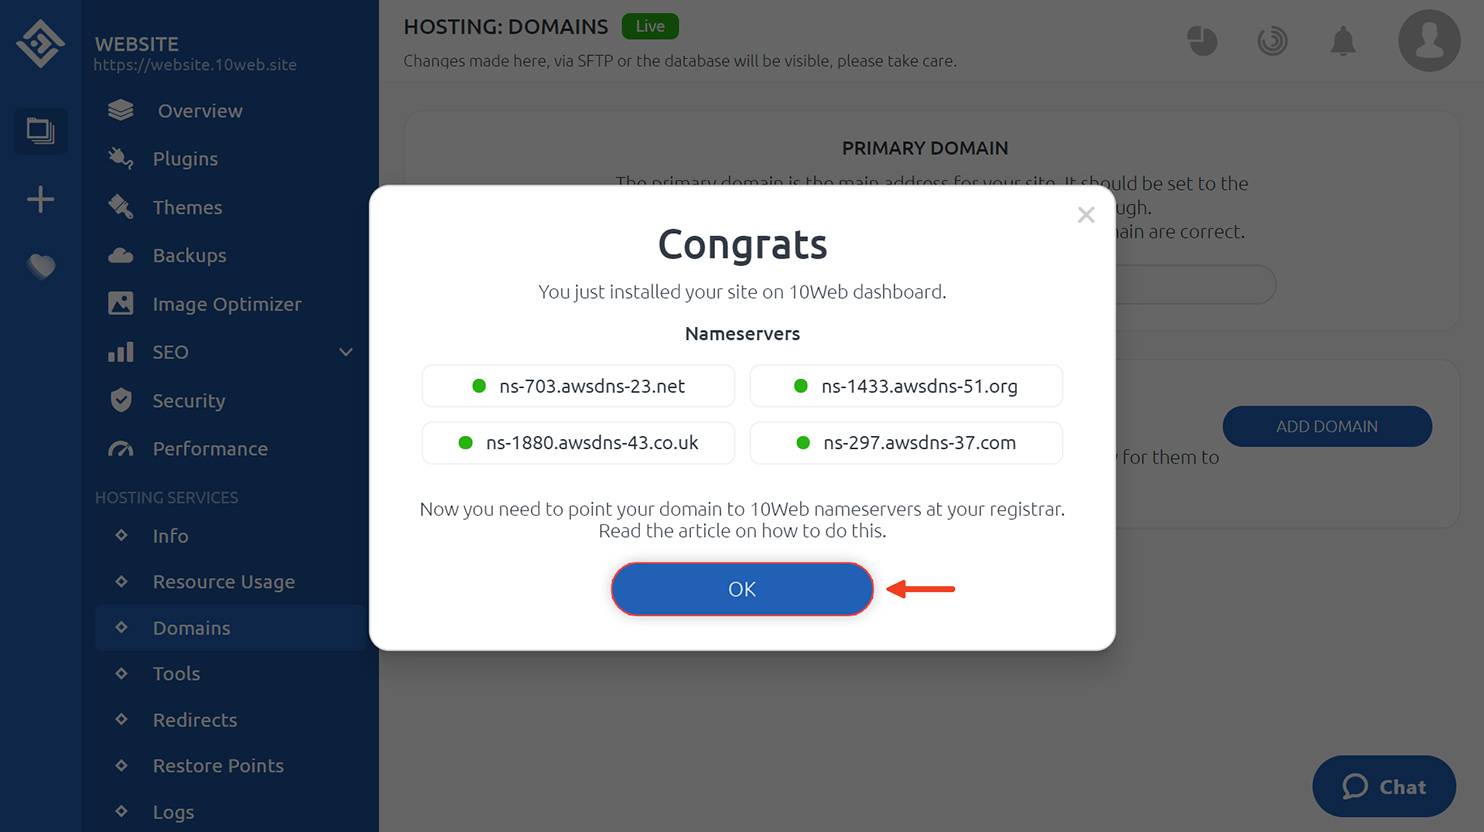
- The system will create name-servers for you. Hit “ok.”
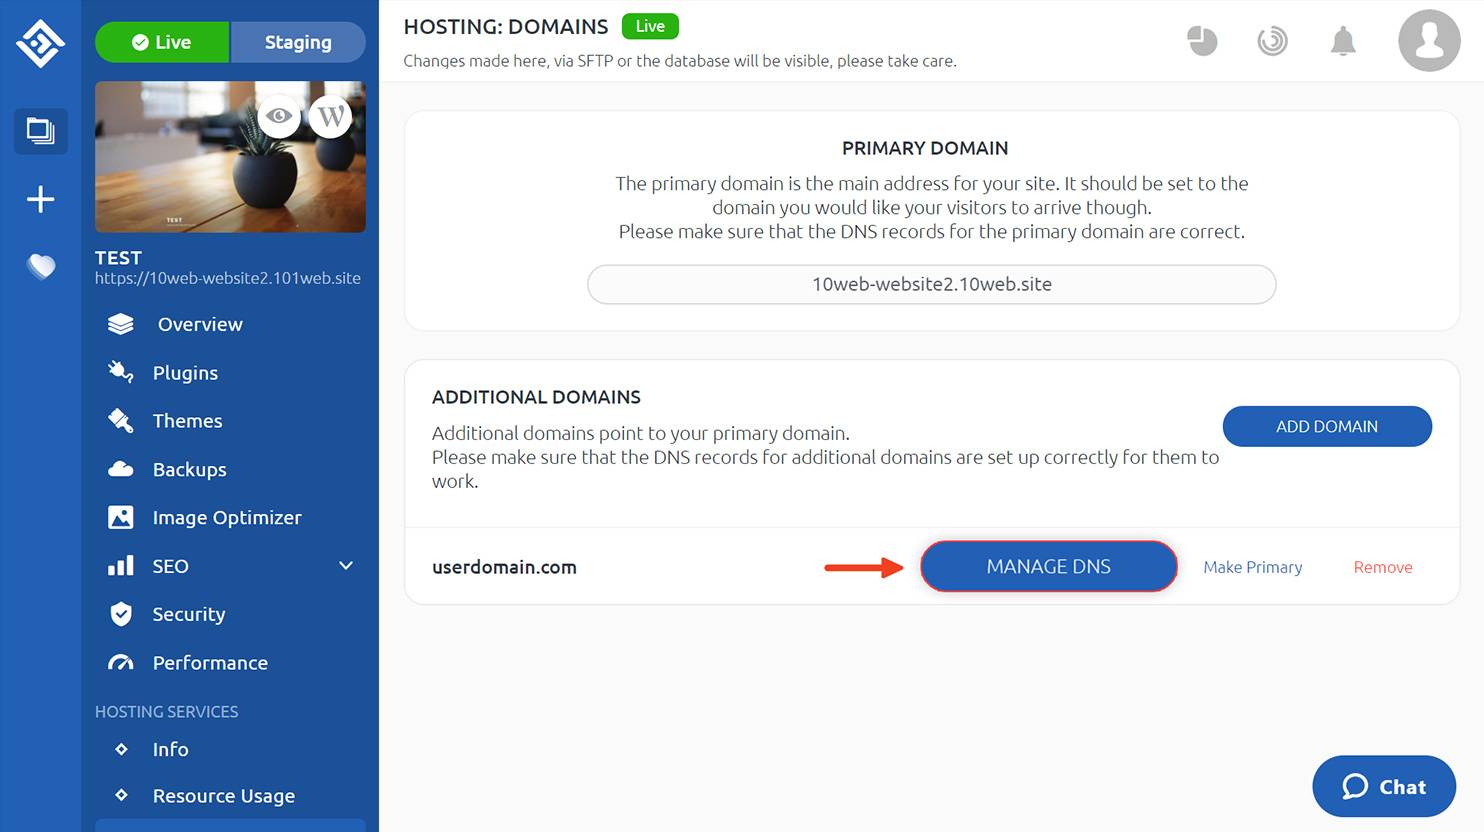
- On the next page, click on “Manage DNS.”
- Now you need to add the Sendgrid DNS records to your DNS host. You’ll need to copy the records provided by the Sendgrid and paste the records in the corresponding boxes of your 10Web dashboard selecting the type of the record beforehand. The first part of the record is added under “hostname,” the second one under “server.” Then click “Add a DNS Record.”
- Once the records are properly added, you should “Verify” from the Sendgrid dashboard and, if everything with the records is done correctly, you’ll receive a green check mark as a resulting message.
 Then click “Add a DNS Record.”
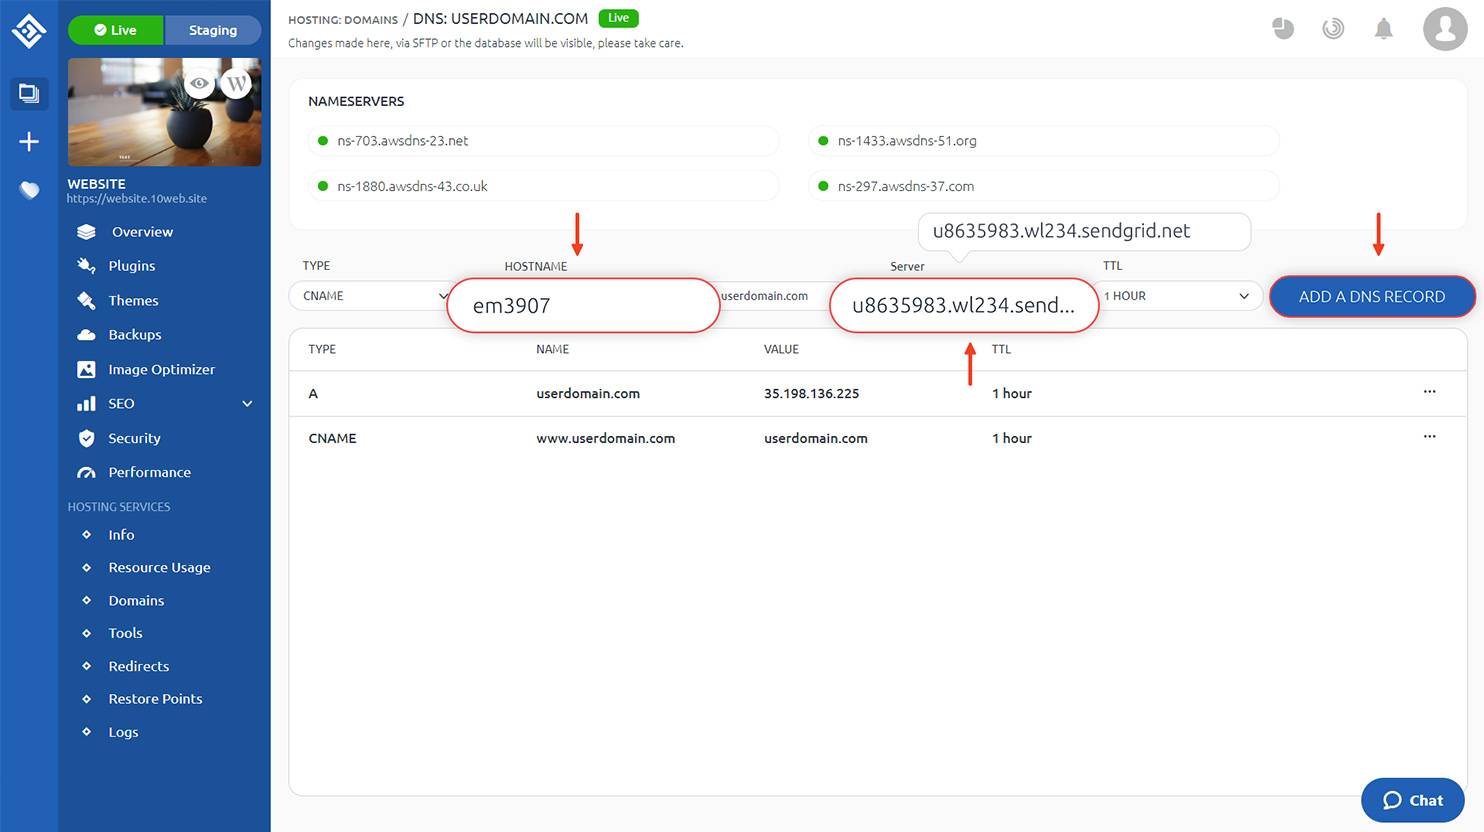

When you receive a confirmation email (at least in the spam or junk box), you’ll know that things are okay and you have officially configured your WordPress website to send emails through Sendgrid.
That’s it! Check out our articles for using Gmail or Mailgun instead if they fit you better. And please let us know in the comments if you run into any issues or have any question about Sendgrid.
Simplify WordPress with 10Web
Simplify WordPress with 10Web
Skip manual work with 10Web Managed WordPress Hosting.

Simplify WordPress with 10Web
Simplify WordPress with 10Web
-
 Experience automated website management
 -
Keep your site up-to-date with automatic updates
-
Forget about security threats and malware
 Experience automated website management