Namecheap is one of the top domain registrars of the world with a growing community using over 10.000.000 domains. This ICANN-accredited registrar is popular for its user-centric philosophy.
If you buy your domain name from Namecheap and use 10Web hosting, you can either point your domain to 10Web with an A record or use our premium DNS.
We recommend the premium DNS provided by Amazon route 53. To start using it, just change the nameservers on your Namecheap dashboard.
Here’s how you do it.
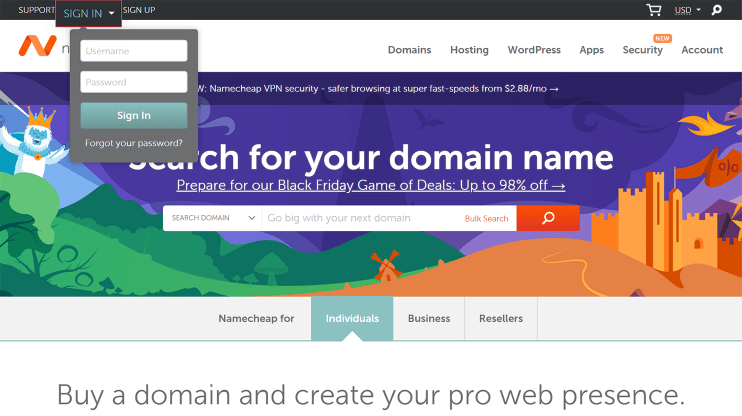
Step 1. Login to Namecheap
Enter your credentials to log in and you’ll be redirected to your dashboard․
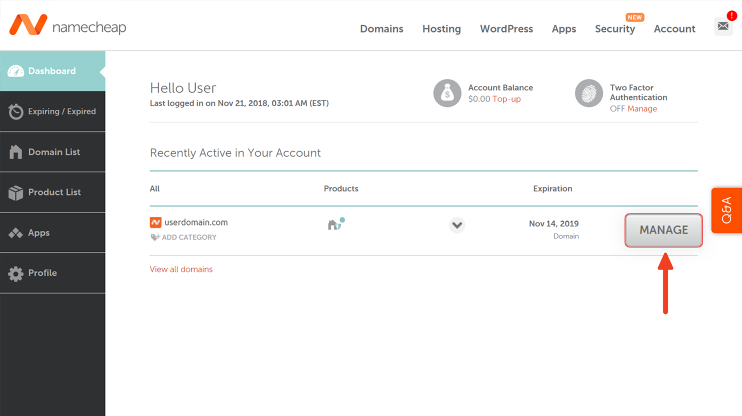
Step 2. Click “Manage”
Indicate the domain name you want to change the nameservers for.
Click “Manage” to go to the domain management page.
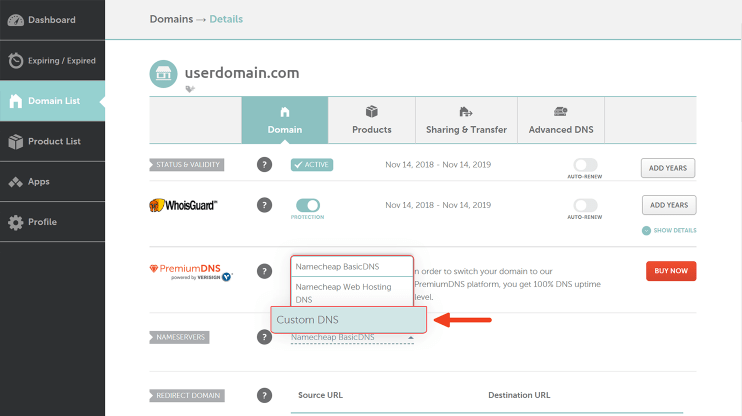
Step 3. Switch to “Custom DNS”
You’re got Namecheap’s DNS by default. To switch to 10Web’s premium service, click “Custom DNS” in the “Nameservers” section.
If you’re already using other custom nameservers, just skip this step.
Step 4. Fill in your nameservers’ addresses
First, locate your nameservers.
Go to 10Web dashboard, click “MANAGE DNS” on the “Domains” page of your dashboard, and you’ll see 4 addresses.
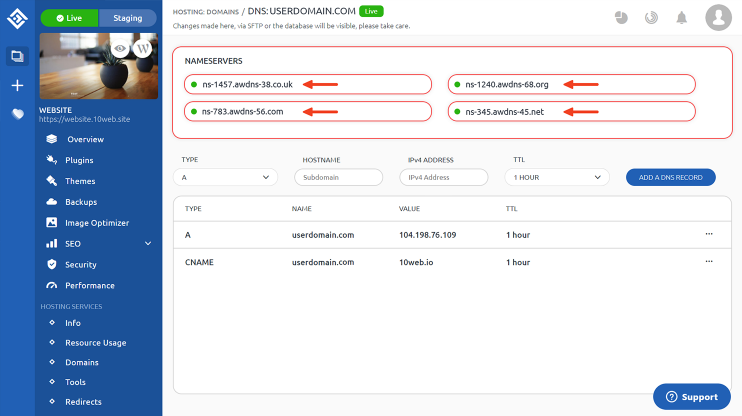
Copy those addresses and go back to your Namecheap dashboard to fill them in.
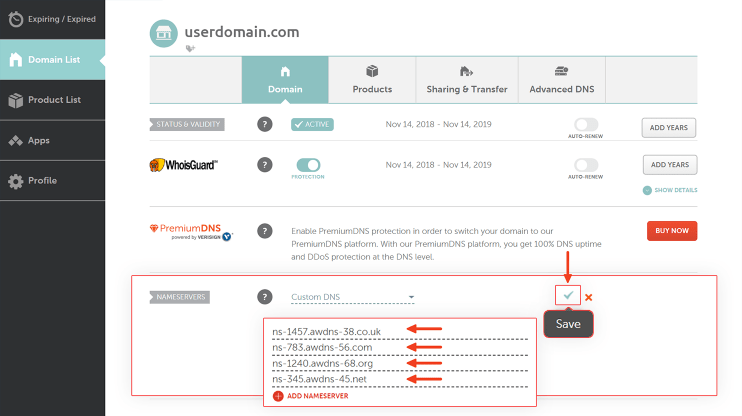
The default number of nameservers is 2 on Namecheap. Click “Add nameserver” twice to get all 4 fields for all your new nameservers.
Now copy and paste the addresses and click the check mark to save the changes.
That’s all you needed to do! 10Web hosting service automatically generates your A and CNAME records. So you’ve already done all it takes; now it’s time to relax and wait till your website goes live.
See How 10Web Can Benefit You
Visit our homepage to learn more about the ultimate AI-powered website builder.

Have any questions? Contact our customer care or leave your feedback in the comments below!


