Your WooCommerce thank you page is the friendly handshake that seals the deal. Most shops leave it blank, but that small page can keep customers engaged, reveal your brand’s personality, and encourage another purchase.
Changing the simple text for a quick thank-you, a coupon, or a product tip, and a plain receipt becomes a friendly invite to return. Use the page as marketing. Let’s see how to edit the WooCommerce thank you page simply and effectively.
Why edit your WooCommerce thank you page?
The default WooCommerce thank you page only shows the basics: order number, date, total, and payment info. It works, but it might be a wasted chance to engage shoppers. Personalize it and you can build loyalty, spark repeat sales, and learn more about your customers.
- Make it feel personal: A quick thank-you note or fun graphic sticks in customers’ minds.
- Invite them back: Drop a coupon, loyalty perk, or newsletter signup right on the page.
- Show what else you offer: Suggest related products, link your socials, or pop in a one-click survey.
- Ask for feedback: A tiny form tells you what to keep and what to fix.
- Spark word-of-mouth: Add share buttons so happy buyers can post their purchase.
- See what works: Connect analytics to track clicks and improve the page over time.
5 methods to edit your WooCommerce thank you page
Method 1: Edit your WooCommerce thank you page with plugins
Let’s look at how you can edit your WooCommerce thank you page using two popular plugins: WooCommerce Thank You Pages Customizer and FunnelKit.
WooCommerce thank you pages customizer allows you to add personal touches, such as special offers, social sharing buttons, and custom messages.
- Go to your WordPress Dashboard.
- Navigate to Plugins > Add New.
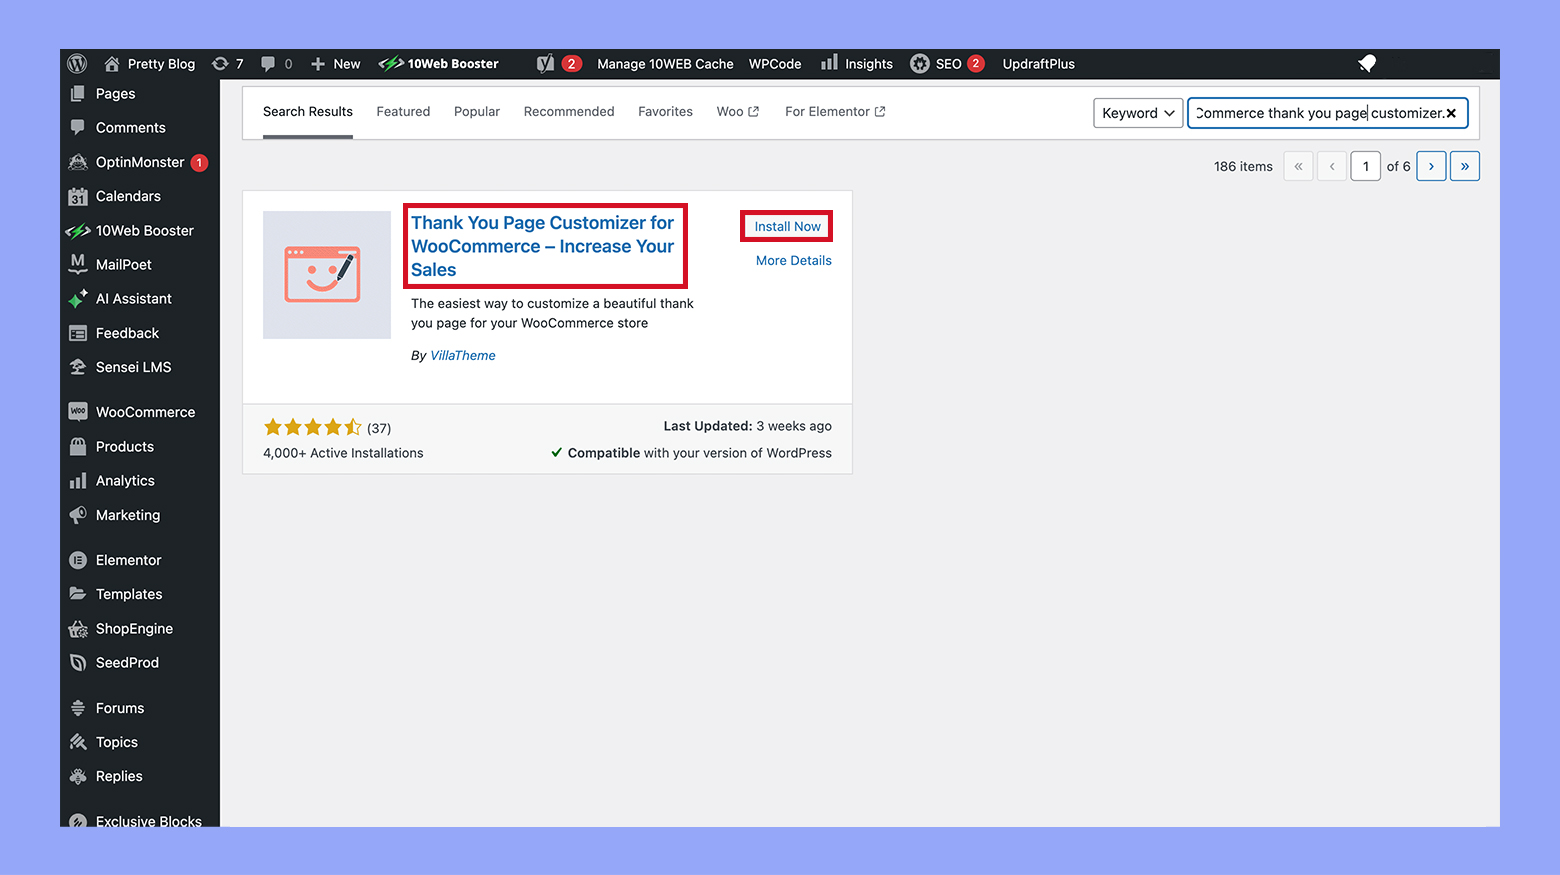
- Search for WooCommerce thank you page customizer.

- Click Install now, then Activate.
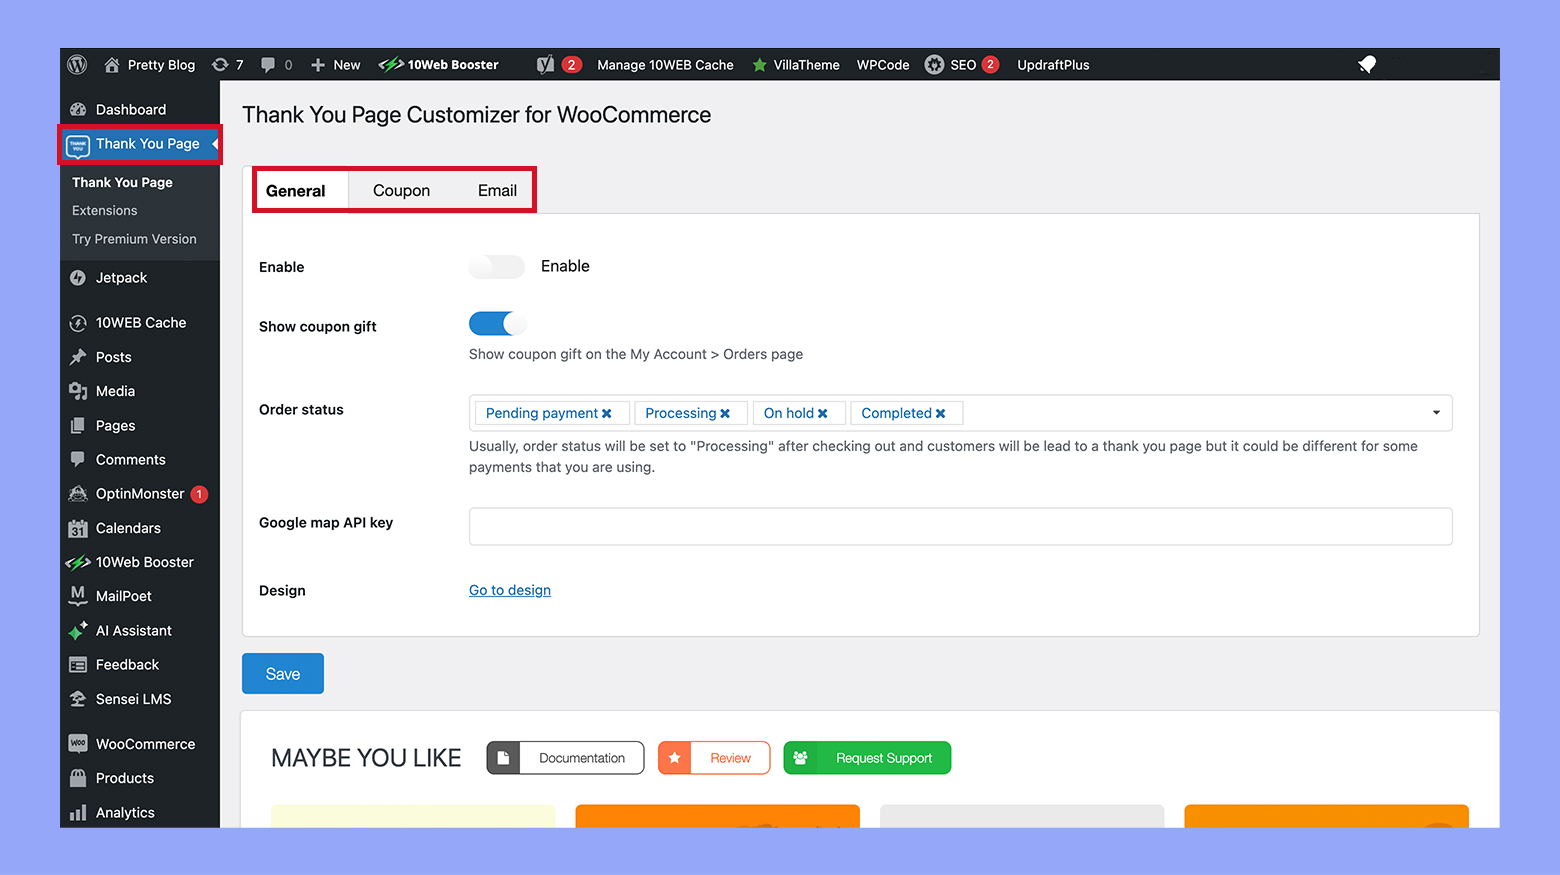
- In the Dashboard go to Thank you page.
- Here, you can choose different sections to customize, such as adding a thank you message, customer details, order details, and more.
- Use the visual builder to drag and drop elements you want to include or modify.
- Use the built-in preview function to see how your changes look in real-time.
- Once satisfied, click Publish to make your changes live.
FunnelKit is a more inclusive tool with functionalities beyond just customizing the thank you page, including building entire sales funnels.
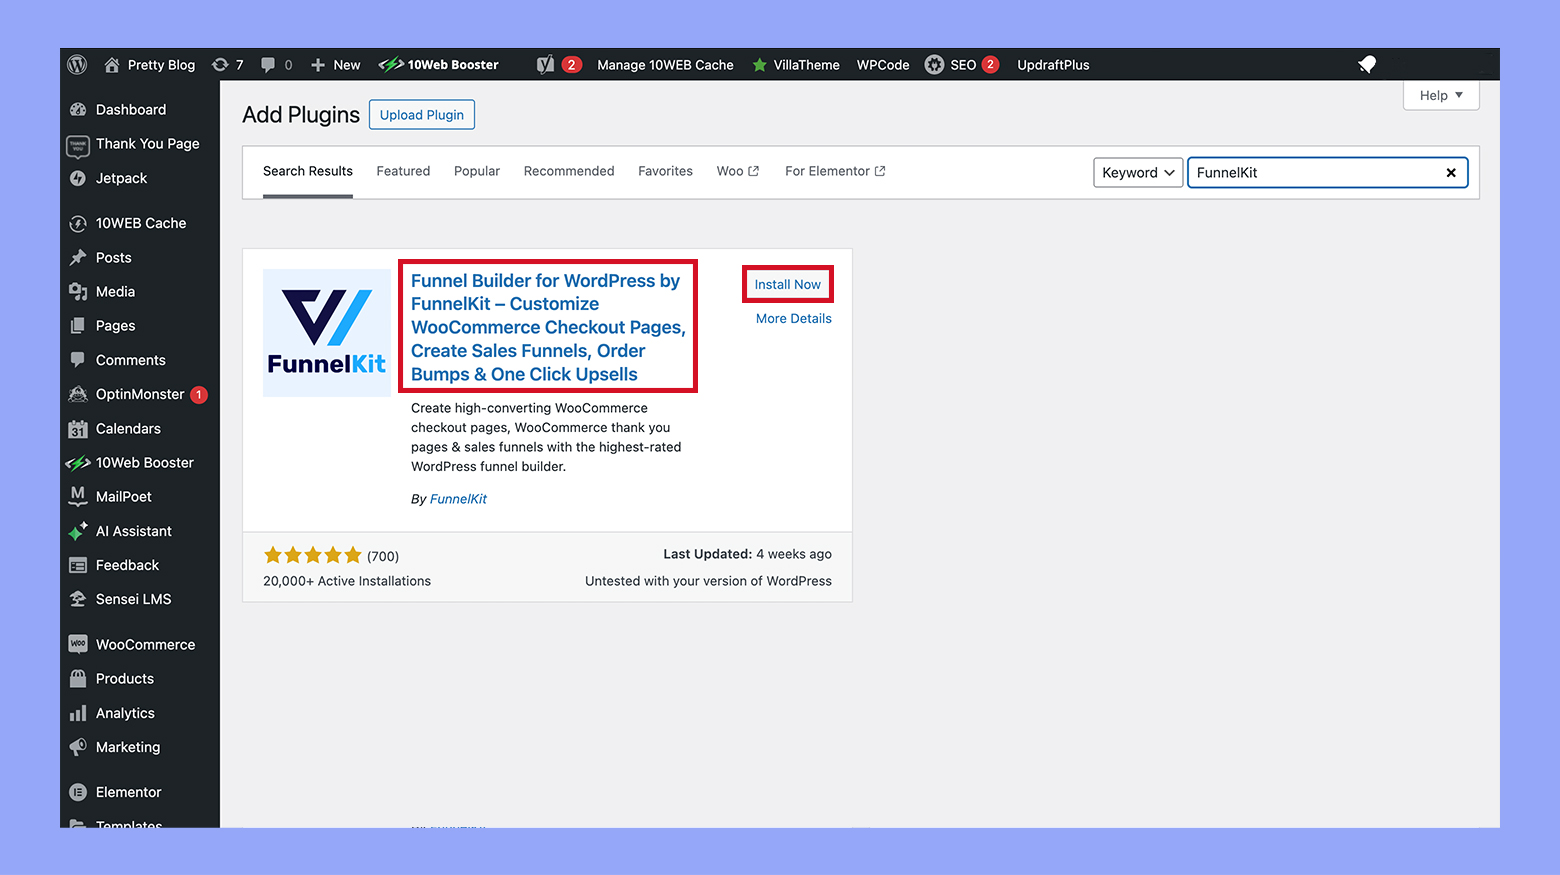
- Go to Plugins > Add new in your WordPress dashboard, search for FunnelKit.
- Install and activate the plugin.
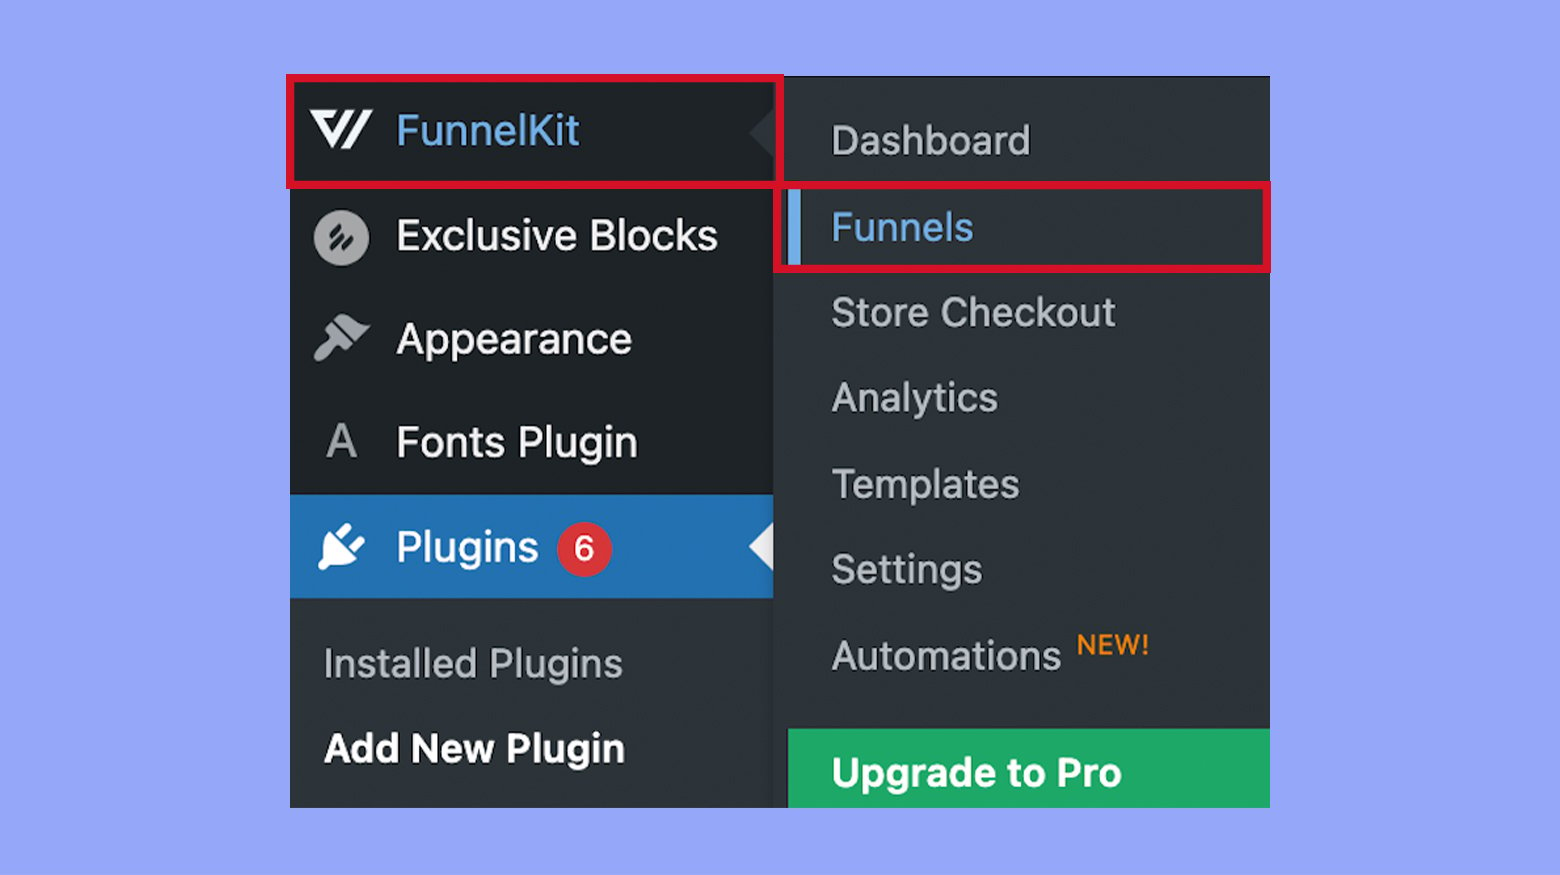
- Go to FunnelKit > Funnels.
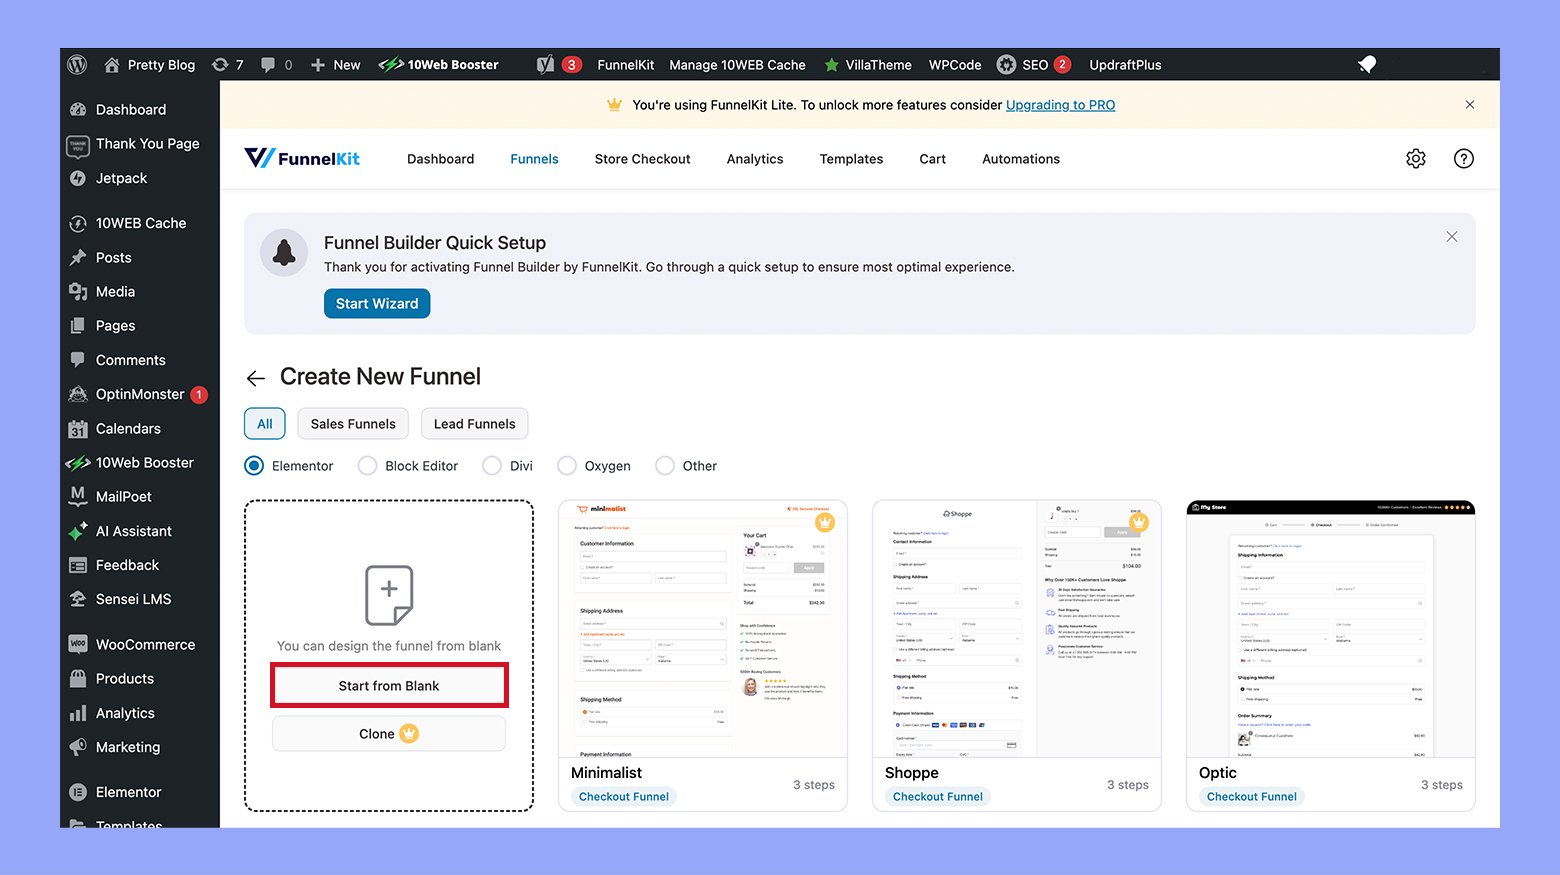
- Select Create funnel option.
- Choose thank you page from the available templates or start from scratch.
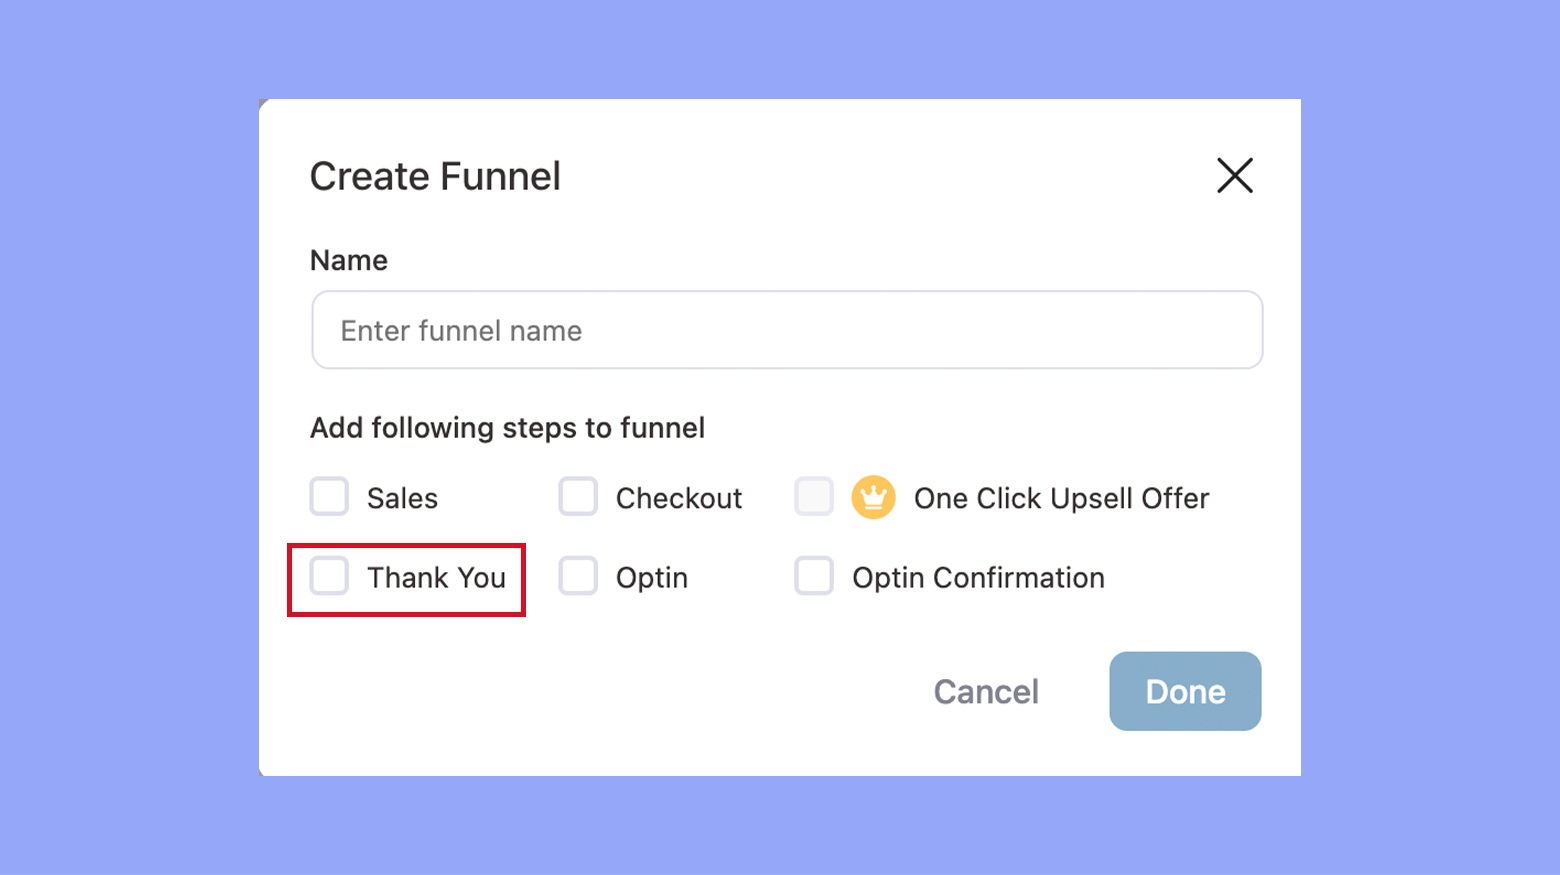
- Click on the template to import it or select Start from blank if you’re starting from scratch and check the thank you checkbox.
- Once the template is loaded, click on Edit to customize it.
- Optionally add or remove elements such as images, text blocks, buttons, and more using the WordPress block editor.
- Customize the layout, style, and content according to your brand and message.
- Go through the funnel setup to ensure that the thank you page is linked correctly to your checkout process.
- Save your changes.
Both plugins give you a simple drag-and-drop editor, so customizing the thank you page takes minutes. If you want quick, basic changes, choose WooCommerce Thank You Pages Customizer. And if you need deeper edits and full sales-funnel tools, choose FunnelKit.
Method 2: Edit your WooCommerce thank you page by creating a redirect
An easy option is to send shoppers to a different page altogether. Drop a short snippet into a small custom plugin or straight into your theme’s functions.php file (in wp-content/themes/your-theme-name/). Add the code at the very end of the file, and your thank you page will redirect wherever you choose.
add_action( 'template_redirect', 'woo_custom_redirect_after_purchase' );

function woo_custom_redirect_after_purchase() {

 global $wp;

 if ( is_checkout() && !empty( $wp->query_vars['order-received'] ) ) {

 wp_redirect( 'http://localhost:8888/woocommerce/custom-thank-you/' );

 exit;

 }

}
This script checks if the checkout process has concluded and then redirects to a custom URL. Redirecting to a custom thank-you page adds that personal touch, but don’t forget to copy over essentials (like the order summary) that the default WooCommerce page already shows.
Create your custom online store in minutes with 10Web AI Ecommerce Website Builder and take your business online. 
Looking to sell online?
Method 3: Edit your WooCommerce thank you page manually
Before starting, ensure you are working with a child theme rather than directly modifying the parent theme or WooCommerce files. Modifications to the parent theme or WooCommerce can be lost during updates.
Disclaimer: First, make a full backup of your site – files and database. If something goes wrong, a backup lets you restore everything with a click instead of scrambling to rebuild pages, settings, and customer orders from scratch.
Step 1: Find the thankyou.php file
Use an SFTP client or your web hosting’s cPanel to access your site’s file directory. Go to wp-content/plugins/woocommerce/templates/checkout and download the thankyou.php file to your computer.
Step 2: Modify the thankyou.php file
Open the thankyou.php file in a text editor. While simple text editors like Notepad or TextEdit can work, using a dedicated coding editor like Visual Studio Code, which supports multiple platforms (Windows, MacOS, Linux), is advisable for better functionality.
Original code snippet:
This default code snippet will be replaced in the child theme template.
<p class="woocommerce-notice woocommerce-notice–success woocommerce-thankyou-order-received"><?php echo apply_filters( 'woocommerce_thankyou_order_received_text', esc_html__( 'Thank you. Your order has been received.', 'woocommerce' ), $order ); ?></p>
New custom code:
Here’s the revised code for the custom thank you page.
<p class="woocommerce-notice woocommerce-notice–success woocommerce-thankyou-order-received"><?php echo apply_filters( 'woocommerce_thankyou_order_received_text', esc_html__( 'Thank you for placing an order with us!', 'woocommerce' ), $order ); ?></p>

<p class="thankyou-note">Please note that delivery times are currently estimated at 7-10 business days for U.S. delivery. Orders outside the United States may take between two weeks and 30 days to arrive and could face delays due to customs or other policies beyond our control. For queries regarding your order, please reach out to customerservice@yourstore.com.</p>
After making your changes, save the file as thankyou.php. Use your SFTP or cPanel to upload this file to wp-content/themes/your-child-theme/woocommerce/checkout within your child theme’s directory.
CSS customizations
To improve the appearance, add the following CSS customizations to your child theme’s style.css file:
.woocommerce-checkout p.woocommerce-notice {

 font-size: 20px;

 font-weight: 800;

 color: #3857F1;

}

.woocommerce-checkout p.thankyou-note {

 margin-bottom: 40px;

 padding: 0 0 5px 20px;

 border-left: solid 5px #c4401c;

}
Upload the updated style sheet back to your child theme folder to apply these styles.
With these steps, you can successfully customize your WooCommerce thank you page, adding a personal touch and relevant information based on your customers’ needs.
Method 4: Edit your WooCommerce thank you page with filters
Do you prefer to change the thank you page with code? Use a few filter snippets in your theme’s functions.php (or a tiny custom plugin), and WooCommerce will change in whatever you ask for on the user’s end. Here’s the quick how-to.
Step 1: Identify the right filter
Choose your filter: woocommerce_thankyou_order_received_text edits the thank-you message, and other hooks cover any other changes you need.
Step 2: Add custom code to your child theme or plugin
It’s best practice to place your custom code in a child theme’s functions.php file or a custom plugin to avoid losing changes when updating the parent theme or WooCommerce.
Here’s how you might use the woocommerce_thankyou_order_received_text filter:
add_filter('woocommerce_thankyou_order_received_text', 'customize_thank_you_message', 10, 2);

function customize_thank_you_message($thank_you_text, $order) {

 return "Thank you for your order, " . $order->get_billing_first_name() . "! We appreciate your business and hope you'll shop with us again soon!";

}
This function customizes the thank you message to include a personalized greeting using the customer’s first name.
Step 3: Modify other elements of the thank you page
You might want to modify other elements of the thank you page, such as adding additional content or custom styles. To do this, use other hooks such as woocommerce_thankyou. This action hook runs after the order details on the thank you page.
Here’s an example of how to add custom content:
add_action('woocommerce_thankyou', 'add_custom_content_to_thankyou_page', 20);

function add_custom_content_to_thankyou_page($order_id) {

 if (!$order_id) {

 return;

 }
Ensure the order exists.
 $order = wc_get_order($order_id);

 if (!is_a($order, 'WC_Order')) {

 return;

 }

 echo '<div class="custom-thank-you-content">';

 echo '<p>We have emailed your order confirmation to ' . $order->get_billing_email() . ' and will send you an update when your order has shipped.</p>';

 echo '</div>';

}
This code checks if there’s a valid order ID, fetches the order details, and then displays a custom message including the email address associated with the order.
Step 4: Add custom styles
If you need to style the new elements you’ve added or modify the existing styling, you can do this by adding CSS to your child theme’s style.css file:
.custom-thank-you-content {

 background-color: #f8f8f8;

 padding: 20px;

 margin-top: 20px;

 border-radius: 5px;

}
Step 5: Test your changes
After making these changes, make sure to test your thank you page thoroughly in different scenarios (e.g., different order types, logged-in vs guest users) to ensure that everything displays correctly and the page functions as expected.
Benefits of using filters:
- Non-destructive: Using filters does not require modifying the original template files, which means your changes are preserved during plugin updates.
- Customizable: You can tailor the modifications exactly to your needs without being confined to the limitations of a GUI as in some plugins.
- Scalable and maintainable: Code using filters is generally easier to maintain and can be easily extended or modified as requirements grow or change.
Method 5: Build a custom thank you page from scratch
Want a thank you page that feels like your brand? Sketch the design, implement with WordPress tools, and use it for purchases, form fills, or new subscribers -each one adds a little extra delight and keeps visitors engaged. Here’s the quick how-to:
Step 1: Plan your Thank you page
Before you start coding or designing, think about what you want to include on your Thank you page. Common elements include:
- A thank you message acknowledging the visitor’s action.
- Links to other relevant pages or products.
- Social media sharing buttons.
- A sign-up form for a newsletter.
- Contact information or a customer service link.
Step 2: Create a new page in WordPress
Log in to your WordPress admin dashboard and go to Pages > Add New. Give your page a title like Thank you. You don’t need to write anything in the content area if you plan to customize the page through code or a page builder.
Step 3: Design your page
Option A: Using a page builder
If you are using 10Web AI Website Builder, from your dashboard, hit Manage → AI Builder → + Add Page → Generate with AI. Give it a title like “Thank You” and type a quick prompt (e.g., “Post-purchase thank-you page with coupon and product recommendations”). In a few seconds, you’ll get a ready-made page – complete with sections for your thank-you message, order recap, upsell banner, and social-share buttons. No design skills required. Then, you can chat with the AI Co-Pilot to make further changes if needed.
Option B: Custom coding
If you prefer to code the page:
- Edit the page with the default WordPress editor and use HTML/CSS to style your elements.
- For more complex functionalities, consider creating a custom page template. You can do this by copying the page.php file in your theme, renaming it (e.g., page-thankyou.php), and then modifying the PHP and HTML to suit your needs.
Step 4: Redirect to the thank you page
After designing your thank you page, you need to redirect users to this page after they complete an action. The method depends on what the action is.
For form submissions:
- If using a plugin like Contact Form 7, Gravity Forms, or WPForms, set the redirect in the form settings. Most form plugins have a redirection option where you can enter the URL of your new thank you page.
For ecommerce transactions:
- If using WooCommerce, you can use the thank you page plugin or add custom code to your theme’s functions.php file to redirect users after purchase. Here’s a basic snippet for redirection:
add_action( 'woocommerce_thankyou', 'custom_thank_you_redirection' );

function custom_thank_you_redirection( $order_id ){

 $order = wc_get_order( $order_id );

 $url = 'https://yourdomain.com/thank-you/';

 if ( ! $order->has_status( 'failed' ) ) {

 wp_safe_redirect( $url );

 exit;

 }

}
Replace ‘https://yourdomain.com/thank-you/’ with the actual URL of your thank you page.
Step 5: Test your page
After setting everything up, test to make sure that everything works as expected. Fill out forms, complete purchases, or perform other actions to ensure that they redirect to the thank you page.
Step 6: Monitor and optimize
Use tools like Google Analytics to monitor how visitors interact with your thank you page. Analyzing this data can help you optimize the page to better meet your goals.
Conclusion
A plain thank you page ends the conversation; a customized one keeps it going. You just saw five easy methods for editing your WooCommerce thank you page -from quick plugins and simple redirects to hands-on code snippets and a full AI-built page with 10Web. Pick the method that matches your skills, add those personal touches (coupons, upsells, share buttons), then watch the data and keep changing.
FAQ
How do I edit the WooCommerce thank you page?
How do I edit a thank you page in WordPress?
How do I change the thank you page URL in WooCommerce?
How to view WooCommerce thank you page?
Create your online store in minutes with 10Web AI Ecommerce Website Builder.Looking to sell online?
Create your online store in minutes


![]()