Managing page redirects in WordPress is key to keeping a smooth user experience and strong SEO. Whether you’re addressing site migrations, changing URLs, or removing outdated content, properly implemented redirects are essential for directing traffic efficiently and preserving search rankings.
This guide provides you with a variety of methods and tools to effectively manage both temporary and permanent redirects. From user-friendly plugins like Redirection, Yoast SEO, All in One SEO, and 301 Redirects to more technical approaches involving manual edits to the .htaccess file, you have multiple options based on your comfort level and specific needs.
FAQ
What is a redirect?
How to do a page redirect in WordPress?
How do I redirect a page in WordPress without a plugin?
Main reasons to redirect page in WordPress
Redirects are important in maintaining an effective and user-friendly website. They guide visitors away from dead ends (404 pages) to relevant content, enhancing user experience and aiding in SEO. Here are the main reasons to redirect page in WordPress:
- URL changes: If a page’s URL has been changed, a redirect ensures that users who have bookmarked the old URL or clicked on a link pointing to it are taken to the new URL.
- Site migrations: When moving a site to a new domain, redirects preserve the browsing and search engine indexing history, helping maintain SEO value.
- Merging websites: If two websites are merged into one, redirects can be used to guide users from the old site’s URLs to the relevant content on the new site.
- Deleting pages: When a page is deleted, especially if it has inbound links or ranks well in search engines, a redirect can be used to send users to a replacement page or to a related topic, which helps preserve the user experience and minimize the loss of traffic.
- Avoiding duplicate content: Redirects can help prevent duplicate content issues by directing users and search engines from duplicate pages to the canonical page.
Different types of redirects
Permanent redirects (301 and 308)
A 301 redirect is used to indicate that a page has permanently moved to a new location. This type of redirect is essential in maintaining a site’s SEO value as it passes the majority of link equity (ranking power) from the original URL to the new URL. Here are scenarios when to use a 301 redirect:
- Changing domain names: When shifting from one domain to another, you want to permanently redirect old pages to their new locations on the new domain.
- Canonicalization: If your website can be accessed via multiple URLs (e.g., with and without ‘www’, or with ‘.com’ and ‘.net’), using 301 redirects helps to consolidate and direct all traffic to a single, preferred URL.
- Merging websites: When two sites become one, 301 redirects ensure that users accessing old URLs are taken to relevant pages on the new site.
308 is a permanent redirect, that functions like a 301 but also ensures that the method and body of the original request are not changed in the subsequent request.
Temporary redirects (302 and 307)
Temporary redirects are used when a URL is expected to return to its original location after a short period. Use temporary redirects in situations like:
- Content under maintenance: If a webpage is temporarily unavailable due to maintenance, a 302 redirect can direct visitors to a temporary page until the original page is back online.
- A/B testing: Temporarily redirect users to a new page layout or feature to test performance and user response without affecting the SEO of the original page.
- Promotional campaigns: For temporary marketing campaigns where special pages are created, use 302 redirects to return users to the regular content once the campaign ends.
How to redirect page in WordPress
Redirecting page in WordPress can be done in several ways, depending on your technical comfort level and specific needs. Here’s a breakdown of the main methods you can use.
Method 1: Using .htaccess file for redirects
Editing the .htaccess file is a common way to set up redirects on WordPress sites on Apache servers. Here’s a step-by-step guide to using .htaccess for redirects:
- Access your .htaccess file via FTP, cPanel’s File Manager, or a plugin that allows access to root files. The .htaccess file is located in the root directory of your WordPress installation.
- Before making any changes, it’s crucial to back up the existing .htaccess file to prevent issues if an error occurs.
- Open the .htaccess file with a text editor. To create a 301 redirect, add the following line at the end of the file:
Redirect 301 /old-page /new-page.
This line tells the server to permanently redirect visitors from /old-page to /new-page.
- For a temporary redirect, use:
Redirect 302 /old-page /new-page
- After saving changes, test the redirect by visiting the old URL to see if it properly redirects to the new one. Keep an eye on site functionality and user reports of broken links or unexpected behavior.
Method 2: Using plugins for easier redirection
- Plugins make it easier to manage redirects without having to edit system files directly.

Yoast SEO:
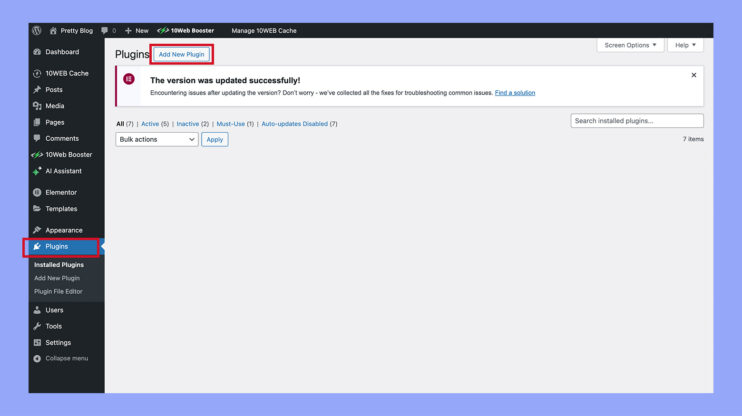
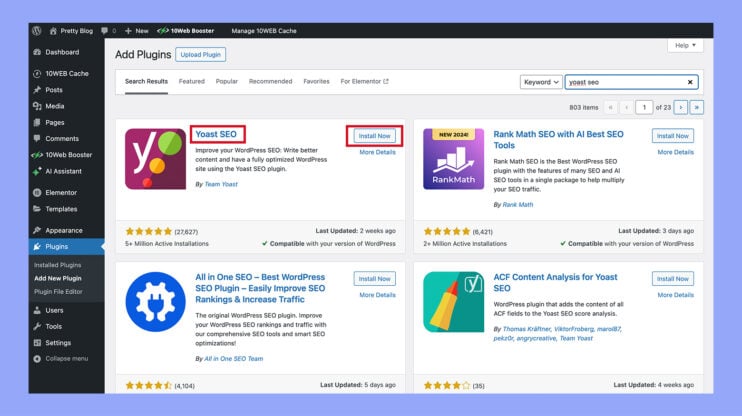
- Install the YoastSEO plugin.

- Access the Yoast menu from the left-hand toolbar by clicking on the SEO next to the Y symbol, and then select Redirects.
- In the Redirects section, you can choose the type of redirect needed:
- 301: indicates a permanent move to a new location.
- 302: signifies a temporary move.
- 307: also for temporary redirections, often used for things like shopping carts or temporary pages.
- 410: used for deleted content.
- 451: used when content is unavailable for legal reasons.
- Enter the old URL you wish to redirect from and the new destination URL, then click Add redirect.
- Test the redirect by entering the new URL in your browser’s address bar. If it doesn’t work initially, clear your browser’s cache and try again.
Simplify WordPress with 10Web
Automate manual work with 10Web Managed WordPress Hosting and 10Web AI Website Builder. Optimize your WordPress website effortlessly.
Redirection by John Godley:
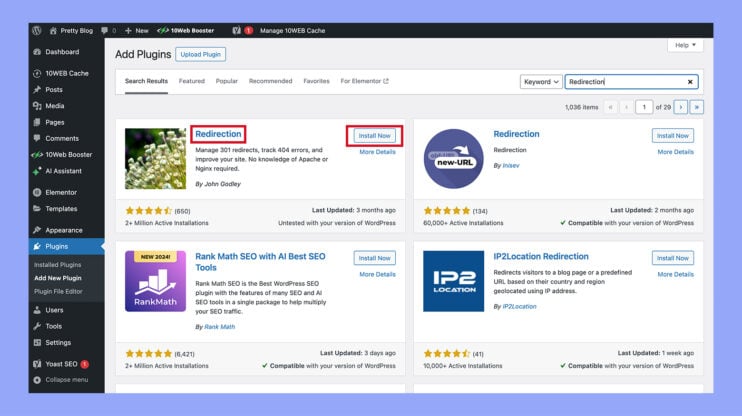
- Install the Redirection plugin.
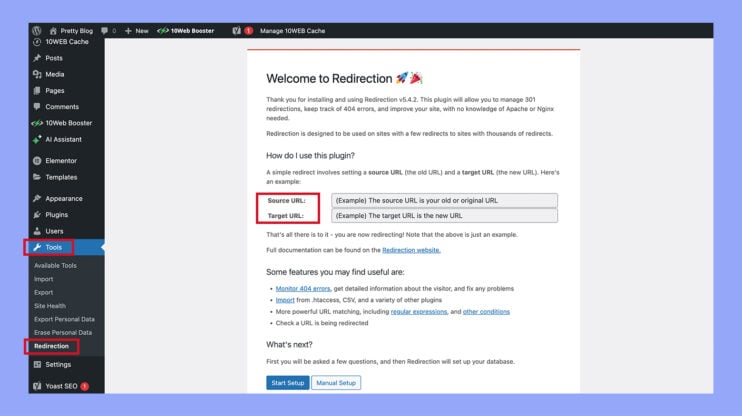
- Access the plugin by navigating to Tools in the left-side menu and selecting Redirection.
- In the Source URL field, input the slug of the URL you want to change. Then, enter the new URL in the Target URL field.
- To verify the redirect is functioning, go to the old URL to check if it redirects to the new URL. If the redirect fails, clear your browser’s cache and try again.
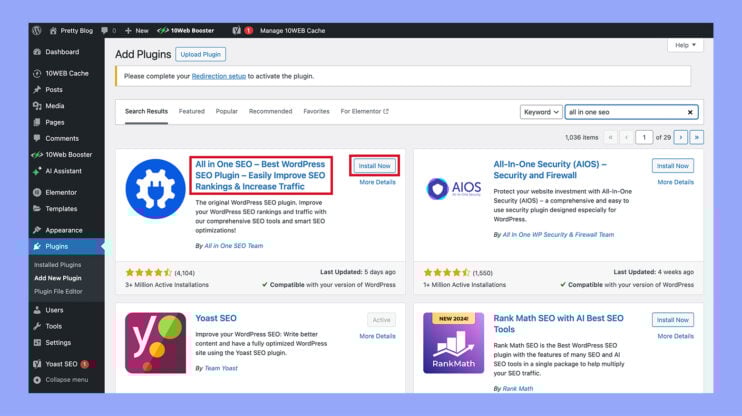
All in One SEO (AIOSEO)
- Begin by installing and activating the AIOSEO plugin on your WordPress site.
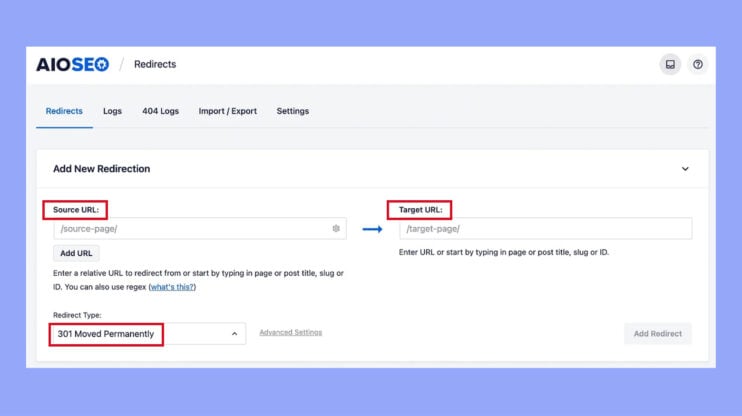
- In your WordPress dashboard, go to All in One SEO > Redirects to access the Redirects tab.
- In the Source URL field, input the path you want to redirect from, excluding your domain name and any prefix. For instance, if your source URL is “https://www.example.com/old-page/“, you should only enter “/old-page/”.
- In the Target URL field, type the URL where you want to redirect. This URL can be a relative or an absolute URL.
- From the Redirect type dropdown menu, select ‘301 Moved Permanently’.
- Click on Add redirect.
- Once added, your new redirect will appear in the list of redirects. You can deactivate it if necessary. To test the redirect, click Check Redirect to ensure it routes correctly to the target URL.
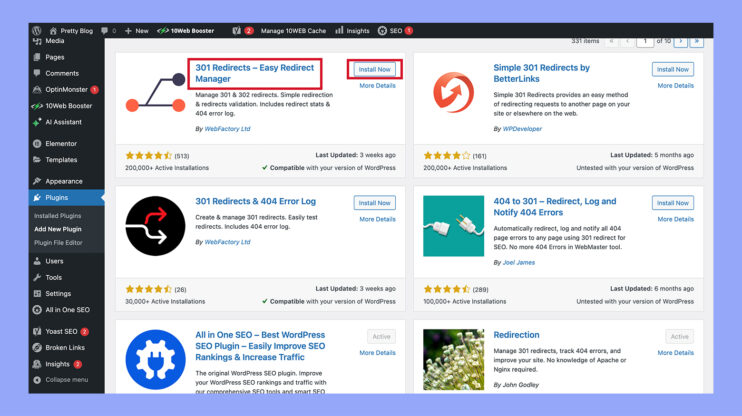
301 Redirects — Easy redirect manager:
- Download and activate the 301 Redirects plugin.
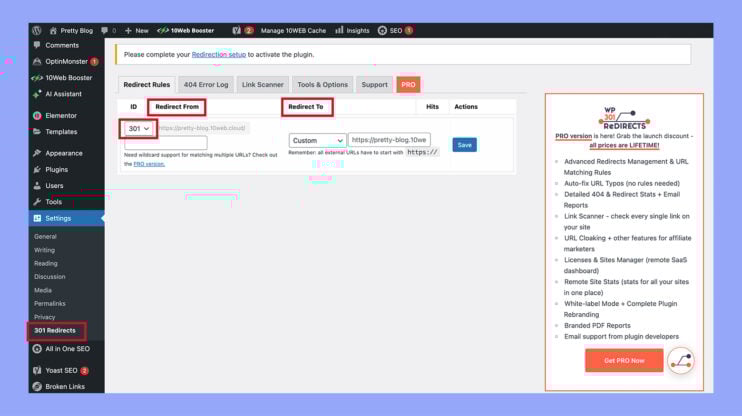
- In the settings on your WordPress dashboard, choose 301 Redirects.
- Select the type of redirect you need (301, 302, or 307).
- Enter the slug of the old URL in the Redirect from field, and the desired new URL in the Redirect to field.
- Click Save to apply the changes.
- After setting up, visit the old URL to check if it successfully redirects to the new URL.
- If it does not work, clear your browser’s cache and try again.
Simplify WordPress with 10Web
Automate manual work with 10Web Managed WordPress Hosting and 10Web AI Website Builder. Optimize your WordPress website effortlessly.
Method 3: Manually without plugins
For users with coding skills, redirects can also be managed by editing WordPress configuration files:
Edit functions.php:
- You can add redirect rules directly to your theme’s functions.php file using the wp_redirect() function. For example:
add_action('template_redirect', 'custom_redirect_function');

function custom_redirect_function() {

 if (is_page('old-page')) {

 wp_redirect(home_url('/new-page'), 301);

 exit;

 }

}
This method is powerful but use it carefully to avoid overloading your theme’s functions file and causing problems.
How to choose the right plugin for managing redirects
When selecting a plugin to manage redirects, consider these key factors:
- Ease of use: Opt for a plugin with an intuitive interface that you can navigate comfortably.
- Features: Ensure the plugin supports essential features like:
- Conditional redirects: Allows you to set redirects based on specific conditions (e.g., user login status).
- Bulk import/export: Useful for managing large numbers of redirects simultaneously, saving time and effort.
- Performance: Evaluate the plugin’s impact on your website’s loading speed. Use tools like GTmetrix or Pingdom to monitor any performance changes after plugin installation.
- Support and updates: Choose plugins that receive regular updates and support. This ensures compatibility with the latest WordPress versions and ongoing reliability.
Steps to identify and resolve broken links
Broken links and redirect errors can worsen the user experience and negatively impact SEO. If users encounter errors like 404s, they are likely to leave your site, reducing your site’s credibility and traffic. Conducting routine audits helps identify any issues that arise from updates to your website.
Step 1: Use a site auditing tool
- Navigate to your preferred site auditing tool and enter your domain in the Site Audit search bar.
- Configure the audit settings and start the site audit.
- Once the audit is complete, go to the Issues tab and use the search bar to enter broken to find all related errors, warnings, and notices.
- Prioritize fixing as many of these issues as possible to enhance site health.
Step 2: Check for temporary redirects
- In the same auditing tool, type Redirect in the search bar under the Issues tab to identify any temporary redirects.
- Since temporary redirects do not pass on page authority, converting them to permanent (301) redirects can help retain link equity and improve page rankings.
Step 3: Identify broken internal links
- Search for internal in the auditing tool’s search bar to spot any broken internal links.
- Fixing these links ensures that navigation across your site is smooth and efficient, enhancing both user experience and SEO.
Step 4: Set up recurring redirect audits
- To maintain continuous oversight, go to the Settings icon in the top right of the Site Audit dashboard.
- Scroll to the Schedule section and choose your preferred frequency for the audits.
- Enable notifications to receive an email every time an audit completes by checking the appropriate box and saving the settings.
Step 5: Act promptly on issues
Address any redirect issues immediately to avoid negative impacts on your site’s ranking. Regular monitoring and quick fixes help to keep your WordPress site running smoothly.
By following these steps, you can ensure that your WordPress site remains user-friendly and SEO-optimized. It minimizes the chances of users bouncing due to poor navigation or broken links.
Conclusion
Managing page redirects in WordPress is a vital skill for ensuring a smooth user experience and maintaining SEO health. Whether you’re dealing with site migrations, URL changes, or the deletion of pages, understanding how to effectively redirect page in WordPress can significantly enhance your website’s functionality and search engine ranking.
Keeping up with best practices and using the right tools for the job will help you manage redirects more efficiently, keeping your site agile and responsive to both users’ and search engines’ needs.
Simplify WordPress with 10Web
Simplify WordPress with 10Web
Skip and automate manual work with 10Web Managed WordPress Hosting and the 10Web AI Website Builder.