Google AdSense is an important tool for website owners looking to monetize their content through ads. This is an advertising tool that facilitates earning by displaying relevant ads and mandates adherence to specific guidelines and standards. The result ensures eligibility and profitability.
This article will delve into the intricacies of Google AdSense, discuss how to add Google Adsense to WordPress, focusing on its operations, various ad types and more. Understanding these elements is crucial for anyone aiming to optimize their website’s revenue while maintaining a seamless user experience.
FAQ
Can you add Google AdSense to a WordPress website?
How do I monetize my WordPress AdSense?
How can I add Google AdSense?
Can I use AdSense on free WordPress?
Google AdSense and its requirements
Before learning how to add Google Adsense to WordPress sites, it’s crucial to understand what Google AdSense is, how it operates, and the different ad types and formats you’ll encounter. Google AdSense is not just a program to monetize your website; it comes with specific requirements and policies that you must comply with to maintain your standing in the program.
What Is Google AdSense?
Google AdSense is an advertising program that allows you to run ads on your website or blog and get paid when visitors interact with these ads. As a publisher, you can provide space for ads relevant to your content and audience. Your site must meet Google’s approval standards, and you must adhere to the AdSense program policies to participate.
How does Google AdSense work?
When you sign up for AdSense, Google uses a complex algorithm to place ads on your site that are relevant to your content and visitors. These ads are created and paid for by advertisers who want to promote their products. When a user clicks on an ad, you earn a share of the cost paid by the advertiser, known as Cost-Per-Click (CPC), or earn per thousand impressions, referred to as Cost Per Mile (CPM).
Ad types and formats
Google AdSense offers various ad types and formats to suit different kinds of content and screen sizes. Here are the types and formats of ads you can choose to place on your website.
- Display ads: Traditional banner ads that can fit in different spaces on your site.
- In-feed ads: Ads that flow naturally within a list of articles or products on your site.
- In-article ads: Ads that fit seamlessly between the paragraphs of your articles.
Selecting the right ad type and format for your site is essential for maximizing revenue while maintaining a good user experience. Each ad type has different placement rules and potential earnings, which are influenced by your site’s traffic and the advertisers’ budgets.
Adding Google AdSense: steps
Learning how to add Google AdSense to WordPress websites can be a direct way to monetize your content. You’ll integrate AdSense codes into your site, allowing Google to place relevant ads within your pages. Here is the process you should pass through. The first step is to sign up for Google AdSense.
- If you have a Gmail account or use any Google service, you already have a Google Account. If not, you’ll need to create one during the AdSense sign-up process.
- Visit the AdSense sign-up page. Enter your website URL. Provide your payment information. Comply with the AdSense policies and terms.

- Choose one of the ad types that we discussed and select the ad format, ranging from text and images to more interactive and rich media formats.
- After submitting your application, you’ll need to wait for the AdSense team to review your site and confirm that it adheres to the AdSense guidelines. Approval times can vary.
How to add Google AdSense to WordPress
When incorporating Google AdSense into your WordPress site, you have two primary options: using dedicated plugins or manual insertion of ad code. Both methods are effective but require different levels of technical comfort and control.
Adding Google AdSense via plugins
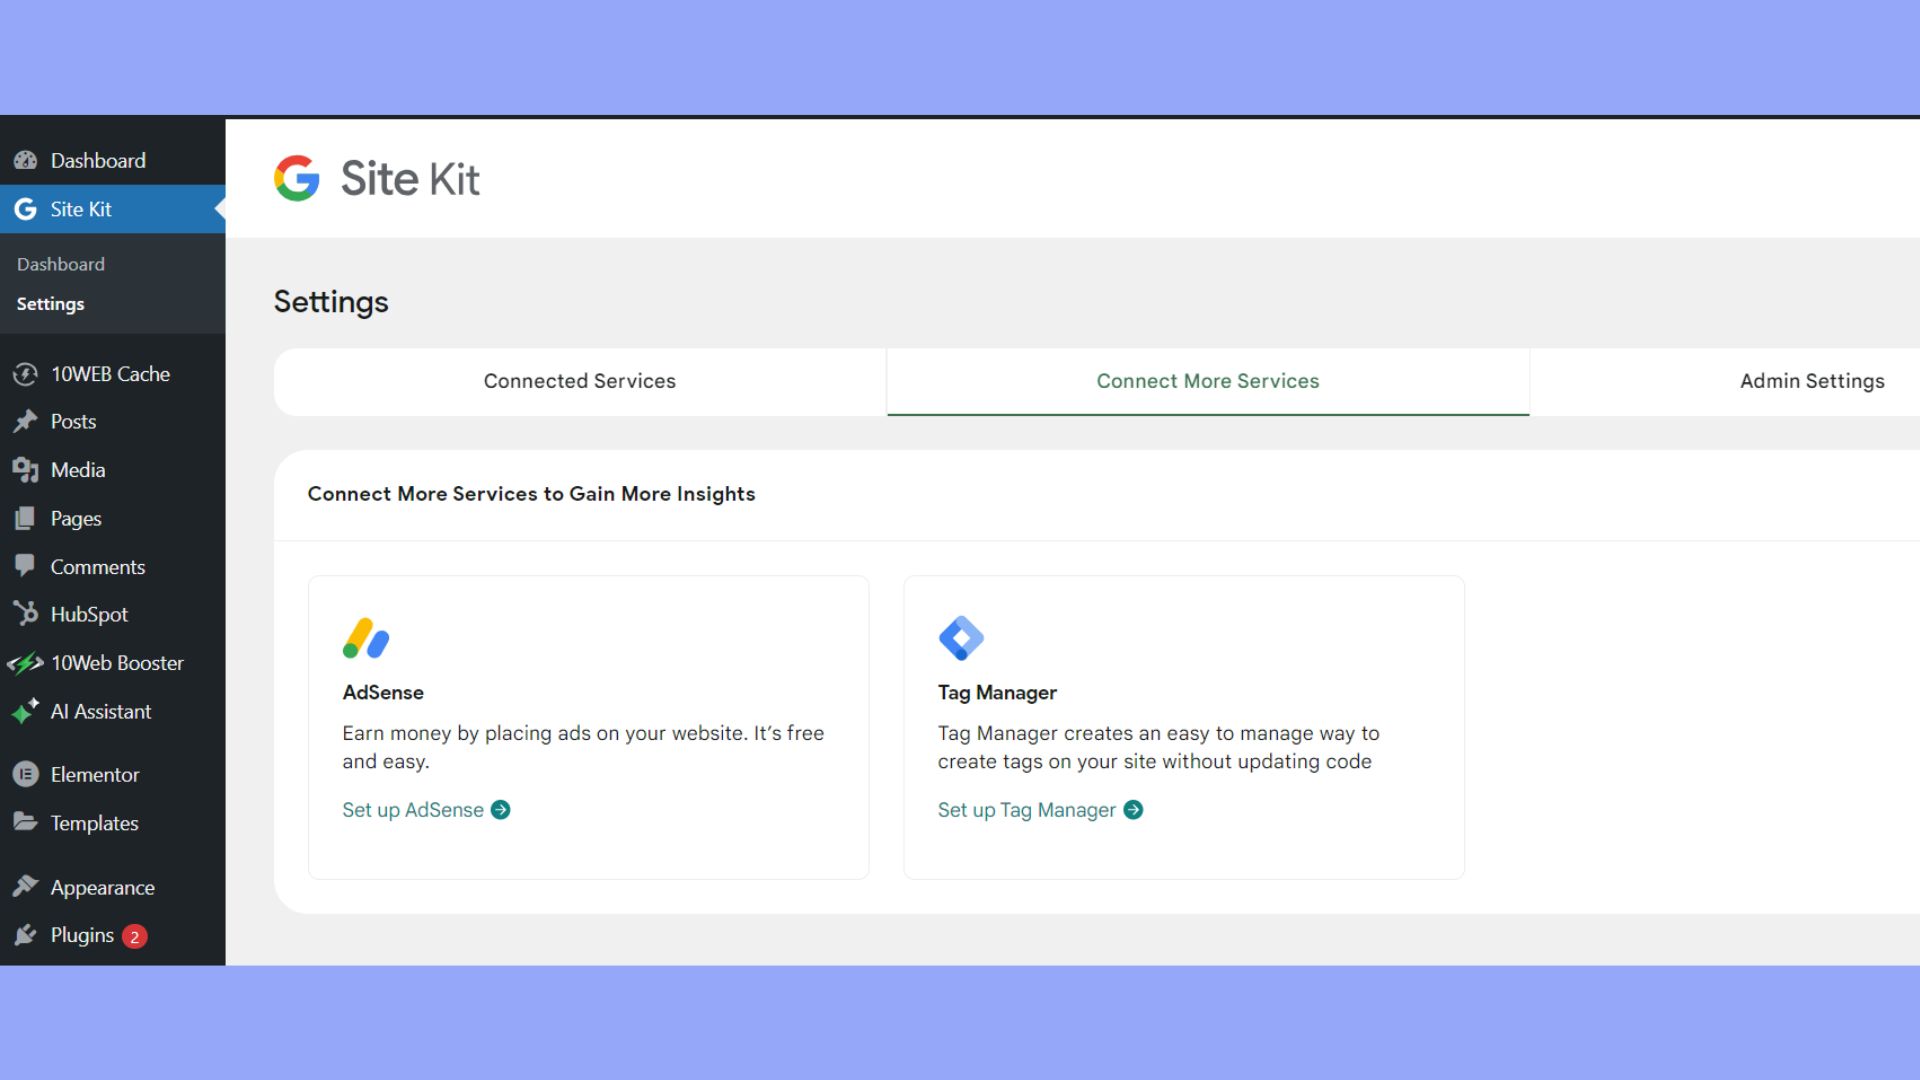
Plugins simplify the integration process by handling the technical details. For AdSense, a prominent choice is Site Kit by Google, a comprehensive plugin for WordPress that integrates multiple Google services, including AdSense.
- Navigate to
Plugins>Add Newand search for Site Kit by Google. Install and activate. - Click on
Start Setupin the Site Kit dashboard and follow the instructions to link Google AdSense to your site.
- Once connected, you can manage and place ads directly through the Site Kit interface.
Another plugin option is Advanced Ads, which offers intuitive handling of ad placements and rotation:
- Similar to Site Kit, go to
Plugins->Add New, search for Advanced Ads, and then install and activate. - Under the Advanced Ads settings, there is an
AdSensetab. Clicking onConnect To AdSensehelps you synchronize your AdSense account with your WordPress site. - You can select from the ad units you’ve set up in your Google AdSense account or create new ones.
Adding Google AdSense manually
For those who prefer a hands-on approach or a lightweight website without the use of plugins, manual integration is the way to go. Follow these steps, if you want to learn how to add Google AdSense to WordPress websites manually.
- In your Google AdSense account, create your ad unit and copy the ad code provided.
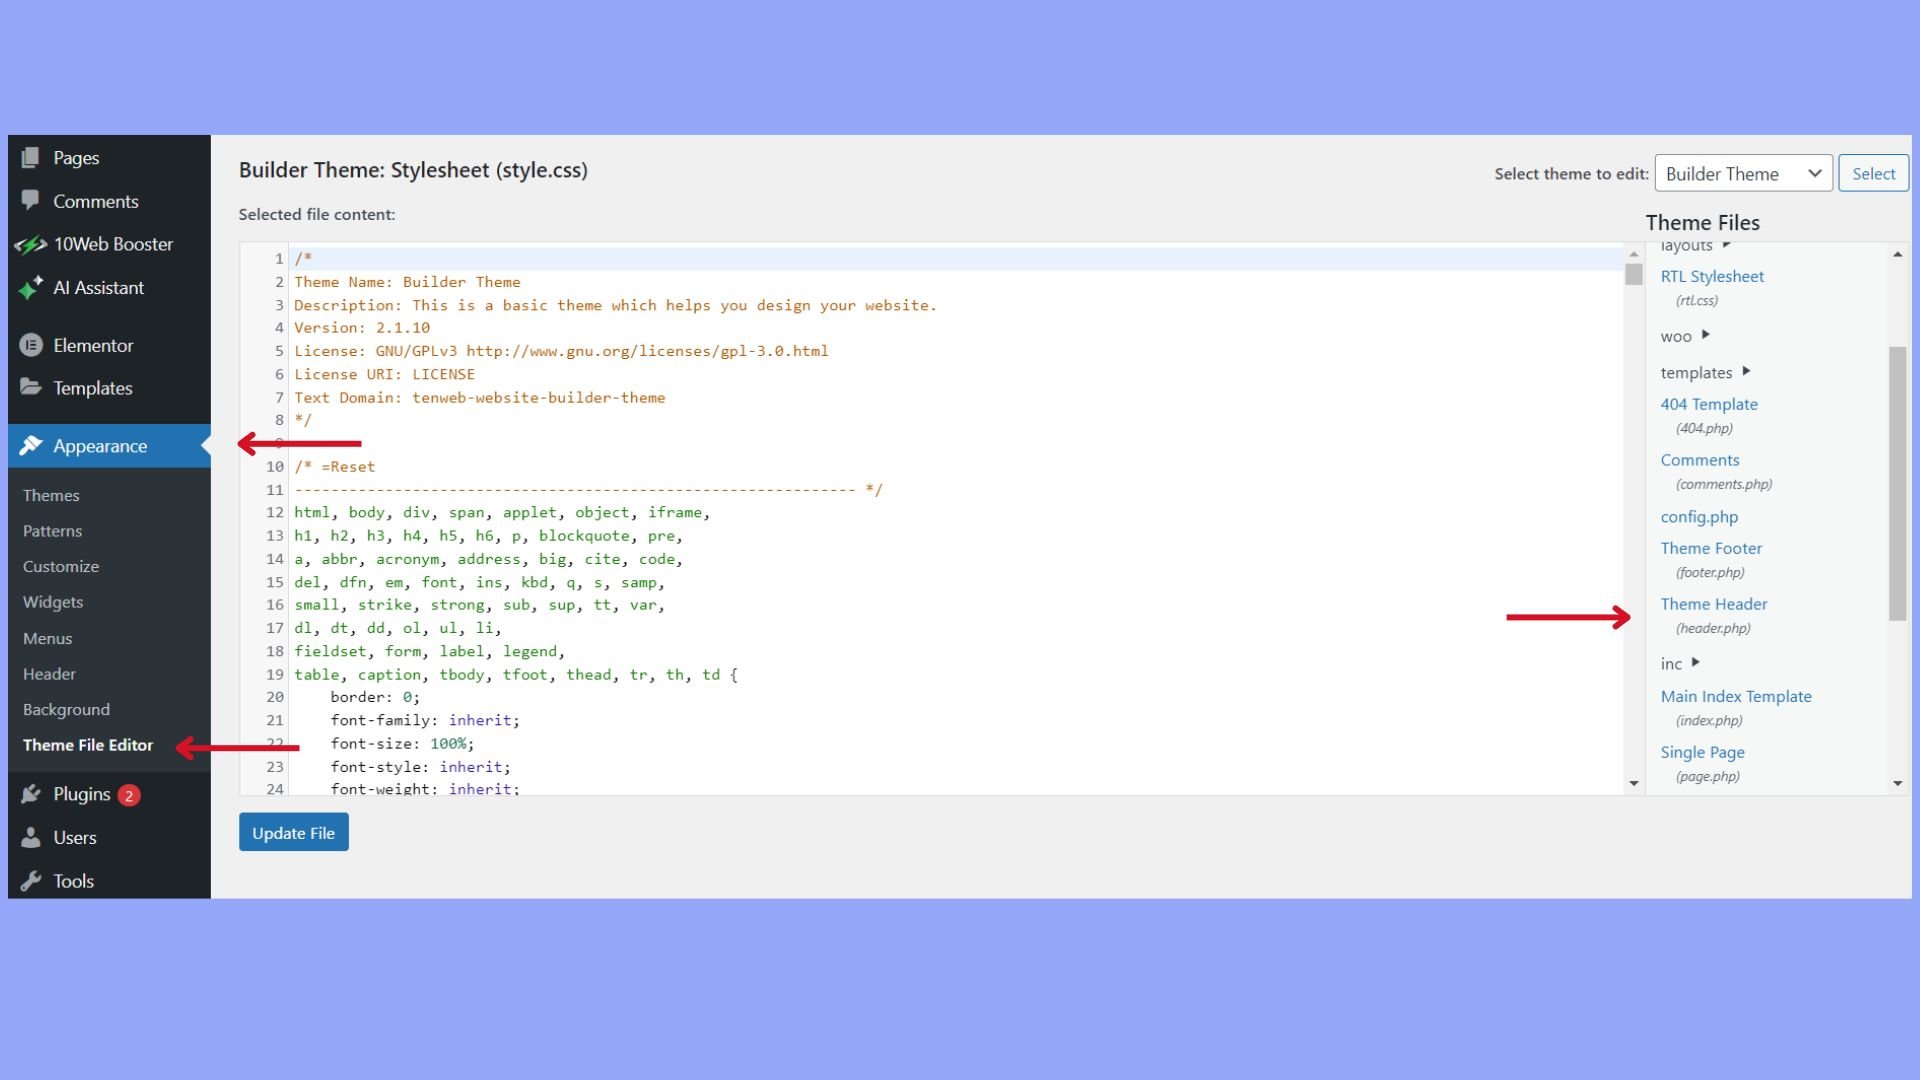
- Paste the ad code into the WordPress widgets, theme files, or by using the editor under
Appearance>Widgets, if you want the ad to appear in a sidebar or footer.
- Choose from various ad types such as display ads, in-feed, and in-article ads for placement on your pages or posts.
Clear your site cache if you are using a caching plugin or service to ensure that your new ads are displayed properly on your live site.
Placing your first ad
Before you begin, understand that ad placement and creating ad units are pivotal steps in successfully integrating Google AdSense with your WordPress site. The right placement ensures maximum visibility, while a well-crafted ad unit aligns with your site’s design and user experience.
Choose the right ad placement
When deciding where to place your first ad, consider your website’s layout and user engagement patterns. Common placement options include:
- Header: Seen immediately upon page load.
- Sidebar: Often used with a Text Widget or a Custom HTML Widget.
- Footer: Viewed as users scroll down.
- Within content: Can be at the beginning, middle, or end of an article.
Use the WordPress Customizer to add widgets for ad placement, or edit your theme’s files to insert ads directly within the content.
Creating your first ad unit
To create your first ad unit in Google AdSense:
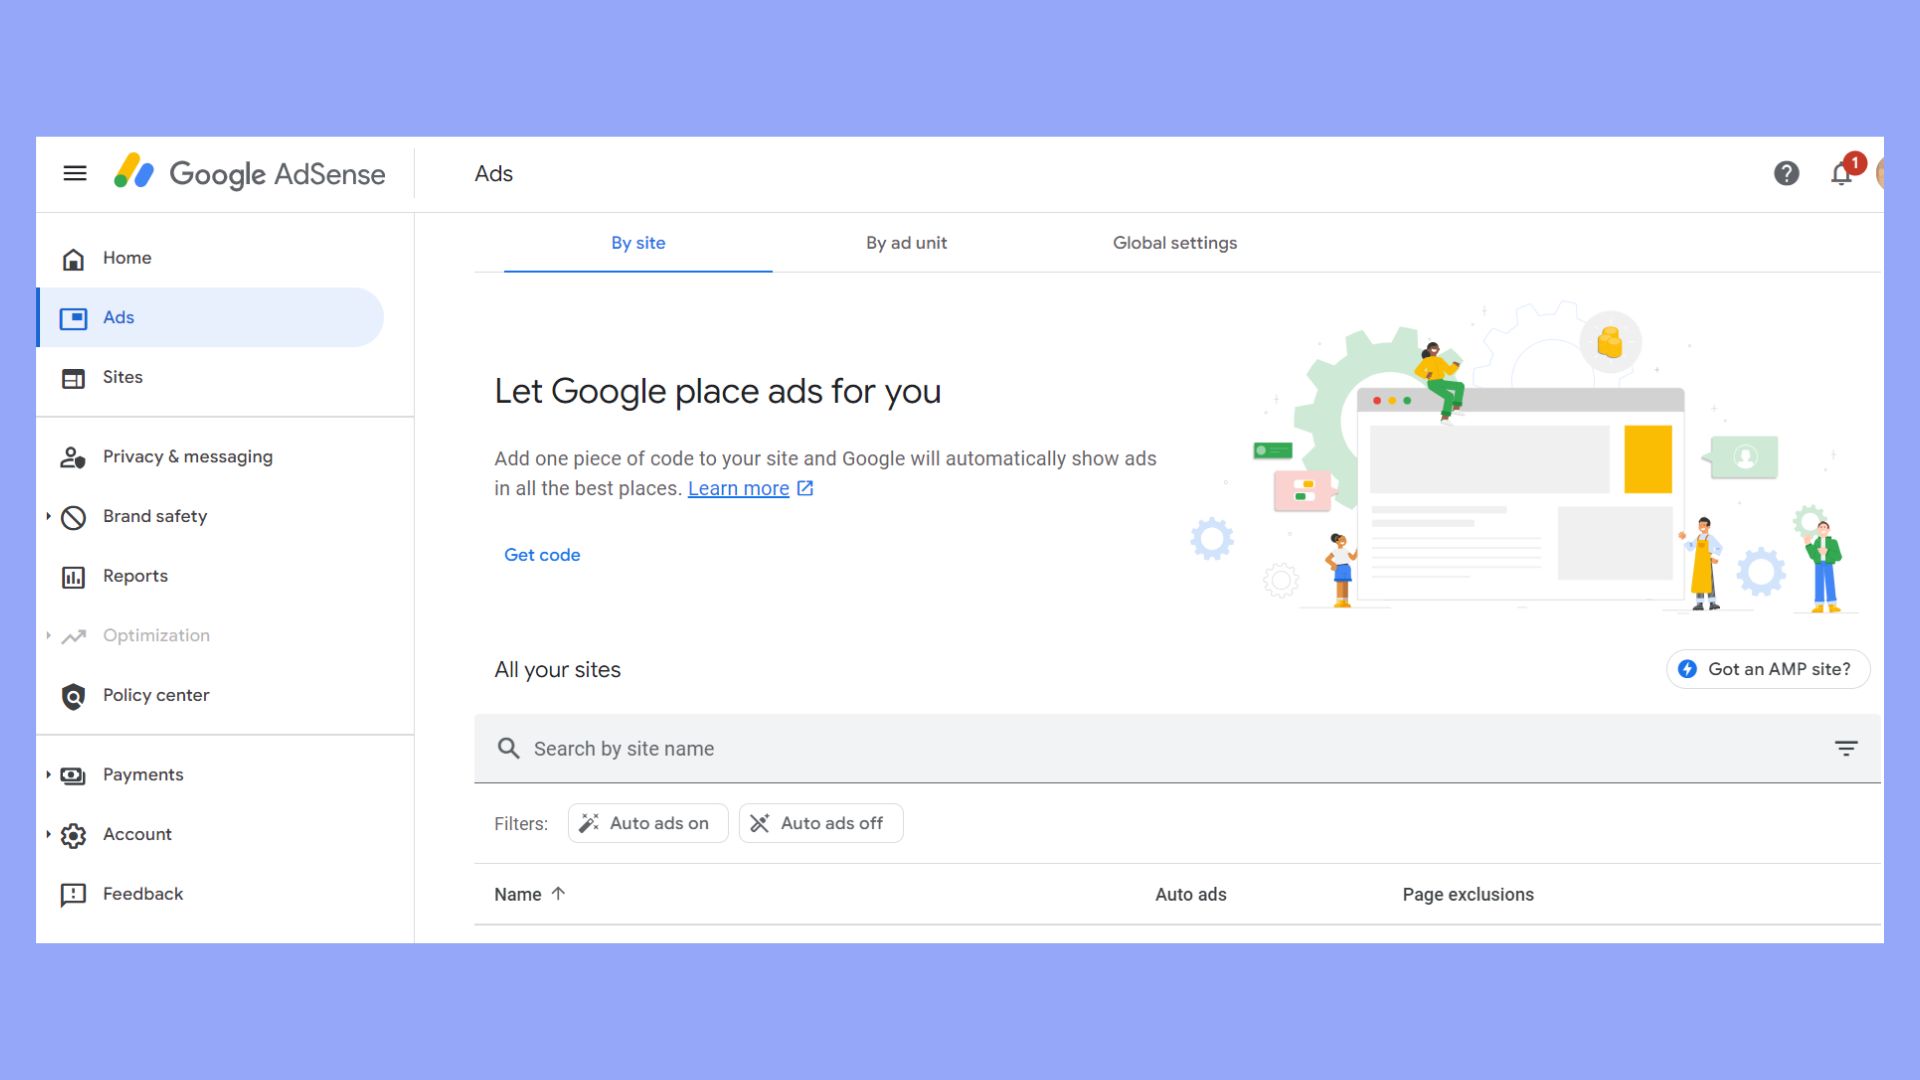
- Go to the AdSense dashboard.
- Navigate to Ads > By ad unit tab and click on Create New Ad.
- Select an ad type: Display ads, In-feed ads, or In-article ads.
- Choose a size and format that complements your site layout.
- Click Save and get the code to generate the ad code snippet.
Once you have the code snippet:
- For a widget area, navigate to Appearance > Widgets in your WordPress dashboard.
- Drag and drop a Custom HTML Widget into your chosen widget area.
- Paste the ad code into the widget and click Save.
For direct insertion into theme files, it’s recommended to use a child theme to avoid loss of customizations during theme updates. Insert the ad code where appropriate within your theme’s PHP files.
Remember to abide by Google AdSense’s ad placement policies to maintain a good standing with the service.
Maximize revenue with ad placement
To effectively increase your revenue with Google AdSense on your WordPress site, it’s important to focus on where and how your ads are placed. Strategic ad placement can significantly enhance your earnings without compromising the user experience.
In-article and in-feed ad optimization
In-article and in-feed ads need to be integrated smoothly within your content to maintain reader engagement while maximizing visibility. For in-article ads, it’s best to insert them after your first or second paragraph to catch readers’ attention early on. Keep in mind the use of mobile devices; your in-article ads should be responsive.
In-feed ads work well within your articles’ lists or feeds. Align them with your content’s format for a seamless look. Users are more likely to interact with ads that feel like part of the content flow, thus potentially improving your earnings.
Using auto-ads for optimal performance
Auto-ads take out the guesswork by using machine learning to place ads where they are likely to perform best. To get started with Auto-ads:
- Activate Auto-ads in your AdSense account settings.
- Copy the Auto-ads code and paste it into your WordPress site’s header.
Once set up, Google will automatically place ads in locations that are anticipated to generate the most revenue. You can fine-tune settings, such as the number of ads shown, to ensure user experience remains high. This dynamic approach to ad placement is designed to optimize your earnings while adapting to changes in user behavior and website layout.
Monitoring and analyzing ad performance
To successfully monetize your WordPress site, it’s essential to monitor and track how your AdSense adverts perform. The performance is generally measured by tracking clicks and impressions and by analyzing the data within AdSense Analytics.
Tracking clicks and impressions
Clicks refer to the number of times visitors have clicked on your ads. Impressions are the number of times an ad was displayed on your site. To track these:
- Log in to your AdSense account.
- Select the Performance reports tab.
- Choose the date range for the analysis.
- Look at the Clicks and Impressions columns to review the numbers.
By comparing clicks to impressions, you can calculate your click-through rate (CTR), which is a crucial metric to determine ad success.
AdSense analytics
To delve deeper into your AdSense performance:
Link AdSense to your Google Analytics account for a comprehensive overview. You’ll find this option under Settings in your AdSense account.
After linking, the Analytics report will provide insights into:
The pages that generate the most revenue. User behavior on these pages and sources of traffic that result in the highest earnings.
The key metrics to focus on are:
- Page Views: The total number of ad-containing page views by your visitors.
- Engagement: How long users stay on a page and interact with your content, influencing the potential for ad clicks.
- Earnings: Your total income from ads during a specified period.
By regularly monitoring these metrics, you can optimize your ads for better performance and, ultimately, increased earnings.
Conclusion
In summary, Google AdSense is a powerful tool for website owners looking to monetize their content through targeted advertising. By understanding AdSense requirements, choosing appropriate ad formats, and integrating these into a WordPress site, you can maximize your revenue potential.
Whether through plugins or manual code insertion, AdSense offers technical and non-technical users a manageable way to enhance site profitability. In this article, we learned how to add Google AdSense to WordPress websites. Effective ad placement and continuous performance monitoring are key to leveraging AdSense successfully, ensuring a balance between earning, optimization, and a positive user experience.
Simplify WordPress with 10Web
Automate manual work with 10Web Managed WordPress Hosting and 10Web AI Website Builder. Optimize your WordPress website effortlessly.


