
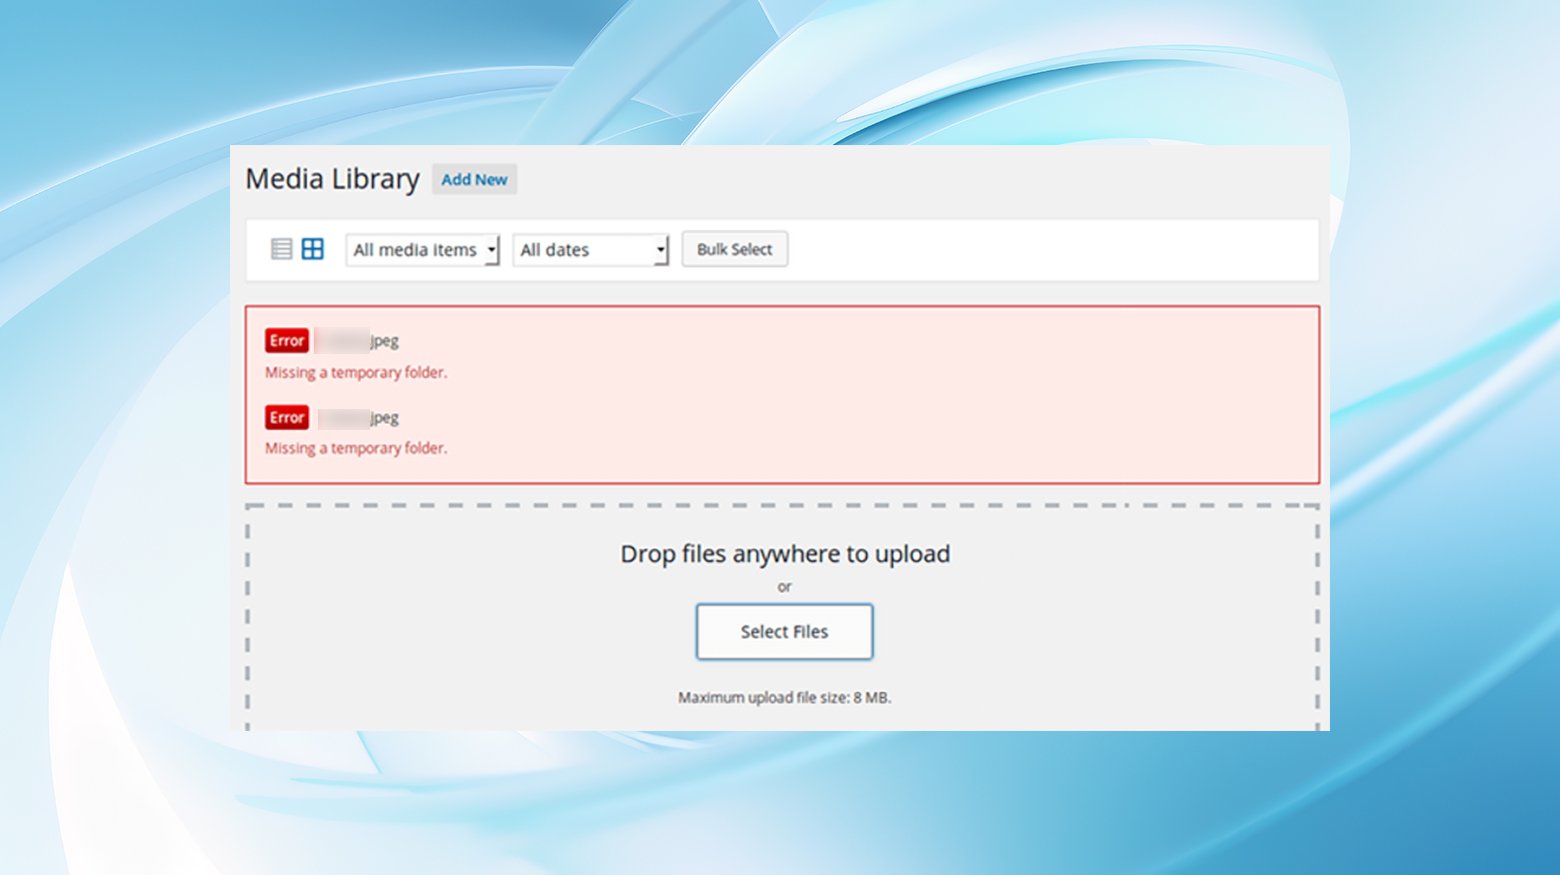
Encountering the “Missing a Temporary Folder” error in WordPress can throw a wrench in your website management routine. Suddenly, you’re stopped in your tracks from uploading images, updating themes and plugins, or refreshing the WordPress core.
Let’s go over what this error means, why it happens, and how you can resolve it to get back to smoothly running your site.
Understanding the WordPress “missing a temporary folder” error
When you bump into this error, it’s usually a sign that your WordPress site is struggling with a specific PHP setting. Specifically, this setting points to a temporary folder used by applications, including WordPress, for temporarily holding data.
This function is crucial when uploading images or updating plugins, themes, or the core WordPress software. Without access to this designated temporary space, WordPress is like a train without tracks – it simply can’t move forward with uploads and updates, presenting you with the dreaded “Missing a Temporary Folder” error.
The root of the issue lies within your server’s PHP configuration. If it hasn’t been set up to specify this temporary folder, WordPress will find itself at a standstill, unable to proceed with its usual operations.
Why this error occurs
The “Missing a Temporary Folder” error stems from an oversight in the PHP settings on your server. PHP configurations are supposed to designate a temporary folder for applications to use for data storage. When this configuration is missing or incorrect, WordPress can’t find its way to the temporary storage it relies on, triggering this error.
Fixing the “missing a temporary folder” error in WordPress
Since this error results from problems with your server’s PHP configuration, you’ll probably want to contact your hosting provider and let them know about the problem. They’ll be able to make sure the temp folder’s location is set correctly so your site can function normally.
However, if you need a quick fix, you can take the direct approach and add a line of code to your site’s wp-config.php file.
Backing up your website
Backing up your site before making changes gives you a lifeline to return to the site’s current state if things don’t work out.
If you’re using a hosting service like 10Web, it’s easy with automatic daily backups. But don’t take chances; double-check that your most recent changes are safely stored. Through your 10Web dashboard, you can verify your backups and even run a manual backup if needed.
This is a crucial step because if anything goes sideways, you can always restore your site to its previous state.
Staging site for safe testing
Consider setting up a staging site if you’re feeling adventurous with changes but want to keep risks low. This is essentially a clone of your live site, providing a sandbox to test everything from plugin updates to custom code without affecting your live site.
Configuring wp-config.php to use a new temp folder
Step 1: access your site files
You can access the wp-config.php file in two ways: using your hosting account’s file manager or via FTP.
Using FTP to access your website files:
First, locate your FTP credentials. Your hosting dashboard or cPanel has everything you need to access your website’s files with an FTP client.
For example, 10Web customers can navigate to the site’s dashboard and go to Hosting Services > Credentials to view the username, password, IP, and port number.
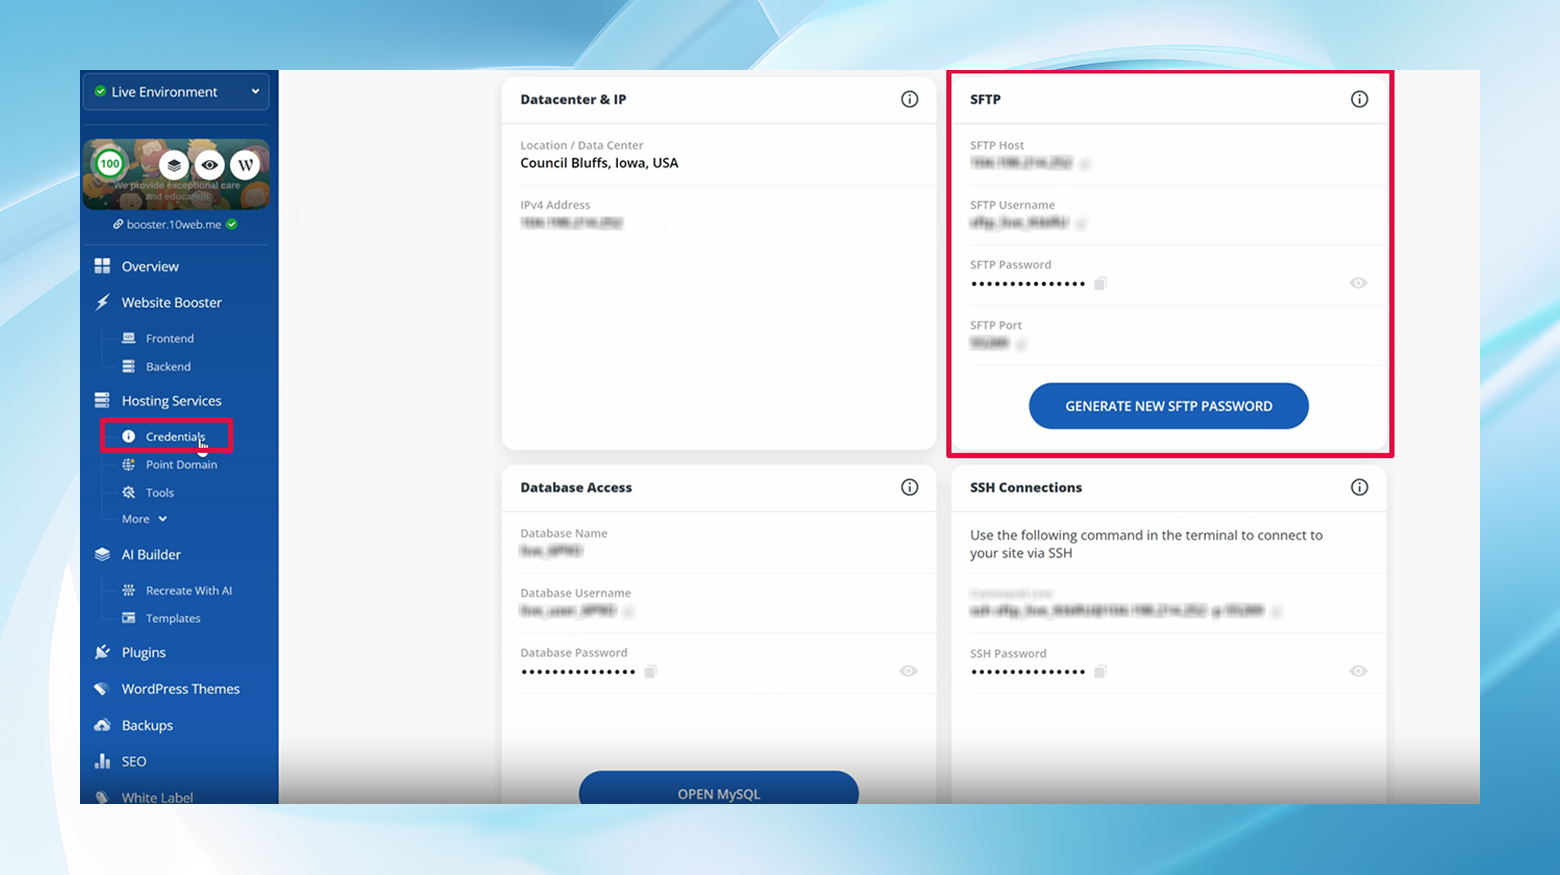
With credentials in hand, it’s time to connect to your site using an FTP client, like FileZilla, which is user-friendly and supports various protocols. Input your SFTP details to connect, ensuring you switch to an SFTP connection if you’re on a 10Web plan. This step might sound technical, but it’s just a more secure way to connect.
Using your hosting provider’s file manager:
Alternatively, you can sometimes use your web host’s file manager to access your website files.
For example, if your hosting provider uses cPanel, you can simply start typing file manager into the search bar to find the utility.
Step 2: edit wp-config
Once connected, navigate to your site’s root directory until you find the wp-config.php file.
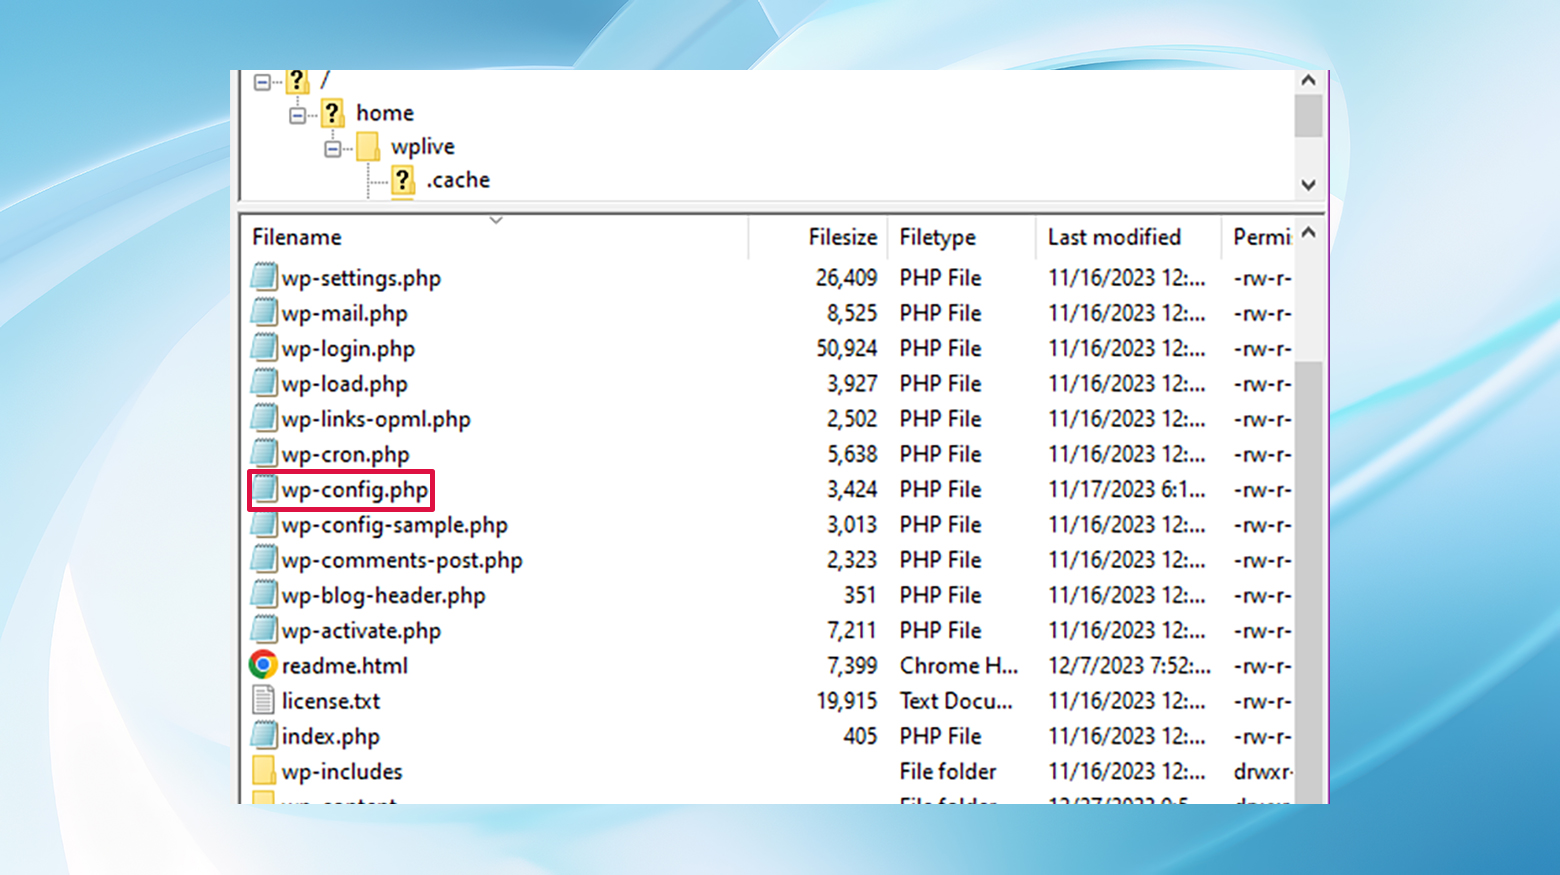
This file is the heart of your WordPress site’s configuration, and we’ll be adding a line of code to specify the location of the temporary folder WordPress uses for file uploads.
- Find the wp-config.php file in your site’s root directory
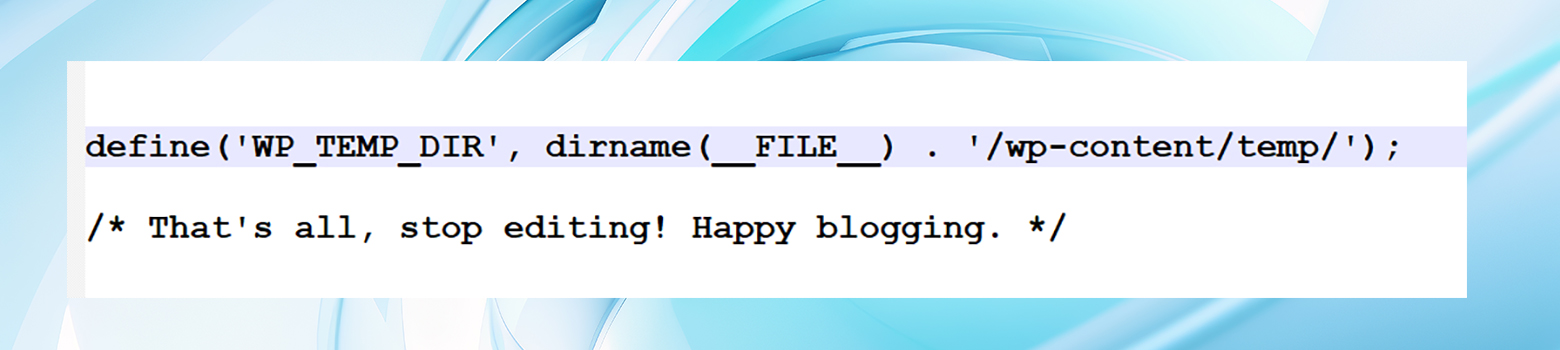
- Add the following line before the “That’s all, stop editing! Happy publishing” line:
define('WP_TEMP_DIR', dirname(__FILE__) . '/wp-content/temp/');
After adding this line, save your changes and (if using FTP or editing offline) re-upload the wp-config.php file to your server. This simple yet effective tweak informs WordPress where to store temporary files, effectively resolving the error.
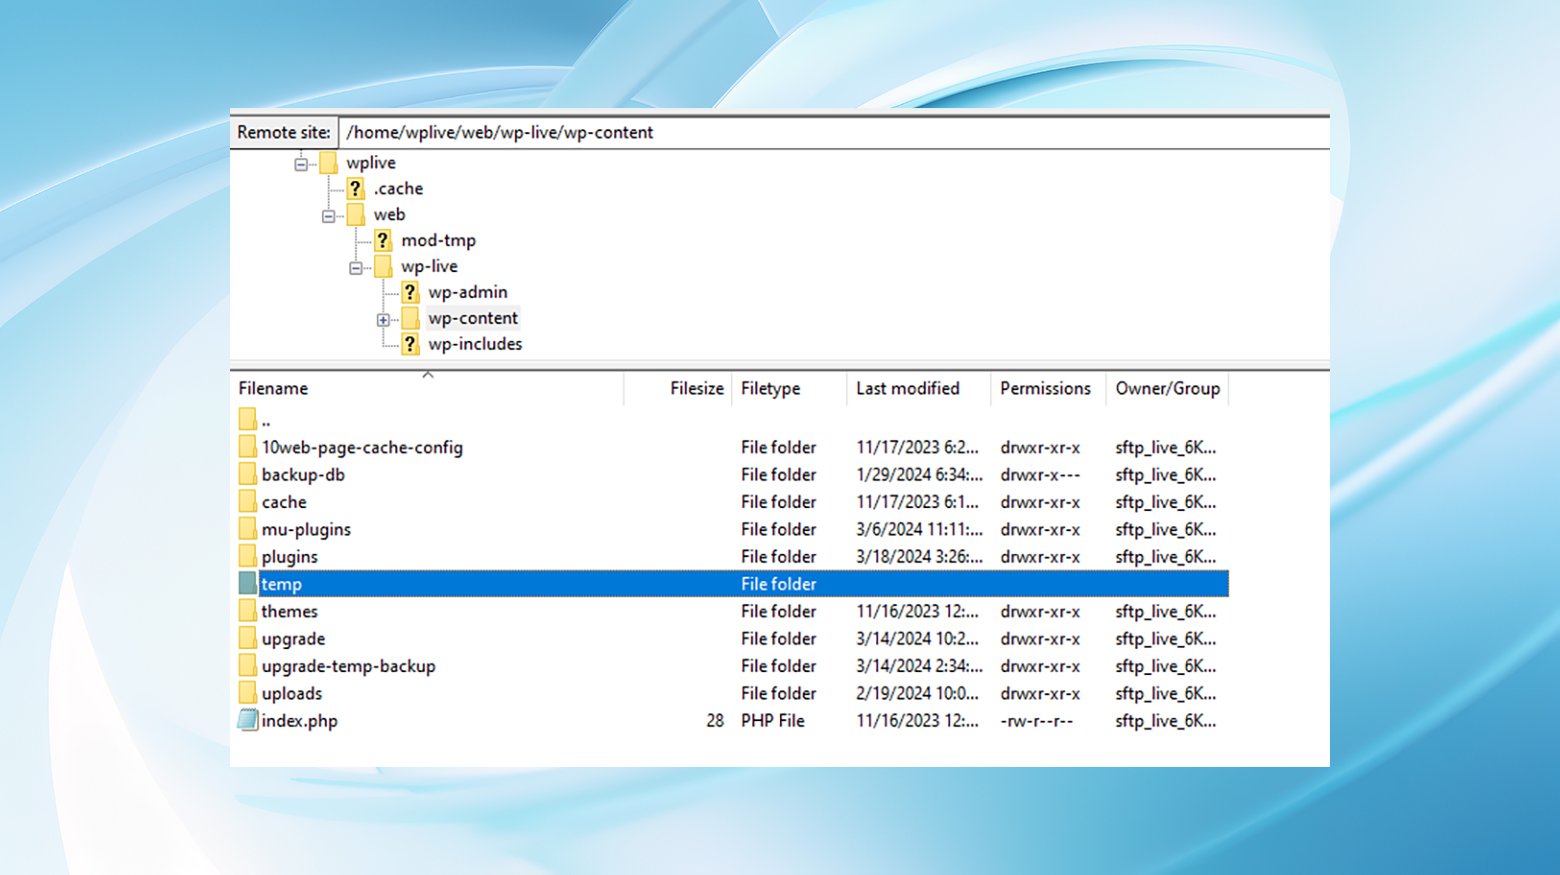
Step 3: create the temporary folder
Now, we need to create the new temporary folder we just directed WordPress to use.
Head over to the wp-content folder and create a new folder named “temp” inside.
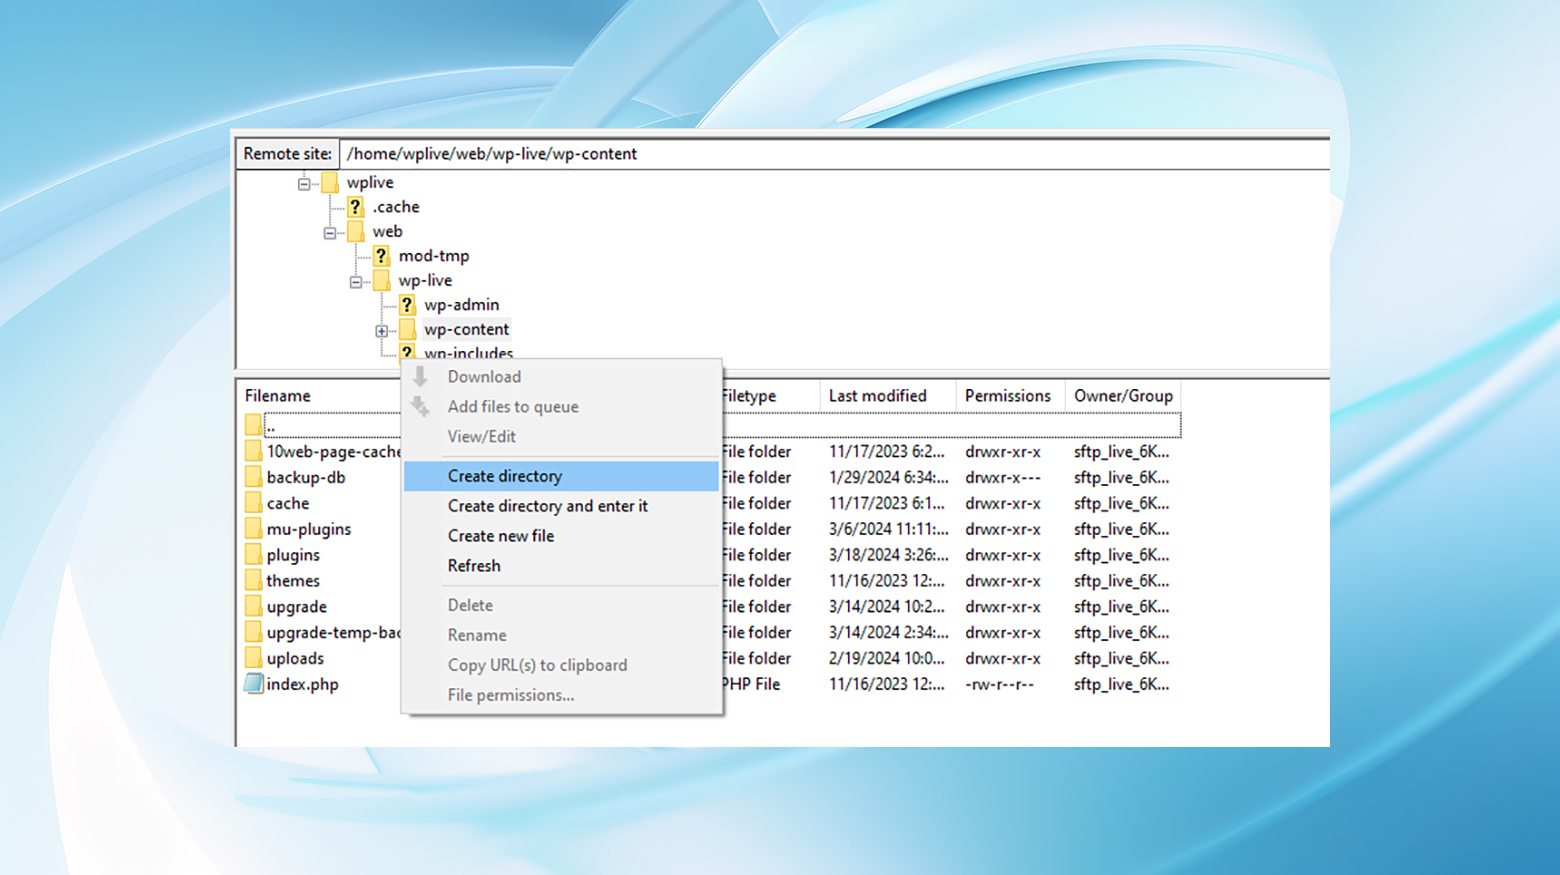
The “temp” folder’s location matches the file path set in the wp-config.php file. This is where WordPress will store its temporary files, thanks to the code snippet you just added.
Checking folder permissions
If you’ve set up the temp directory and are still facing issues, you might need to check the permissions of your wp-content folder. Ensuring it has the correct permissions (755) will allow WordPress to access and utilize the temporary folder as needed.
You can set the folder’s permissions using an FTP client or the hosting control panel’s file manager.
Using an FTP client
- Connect to your website via FTP
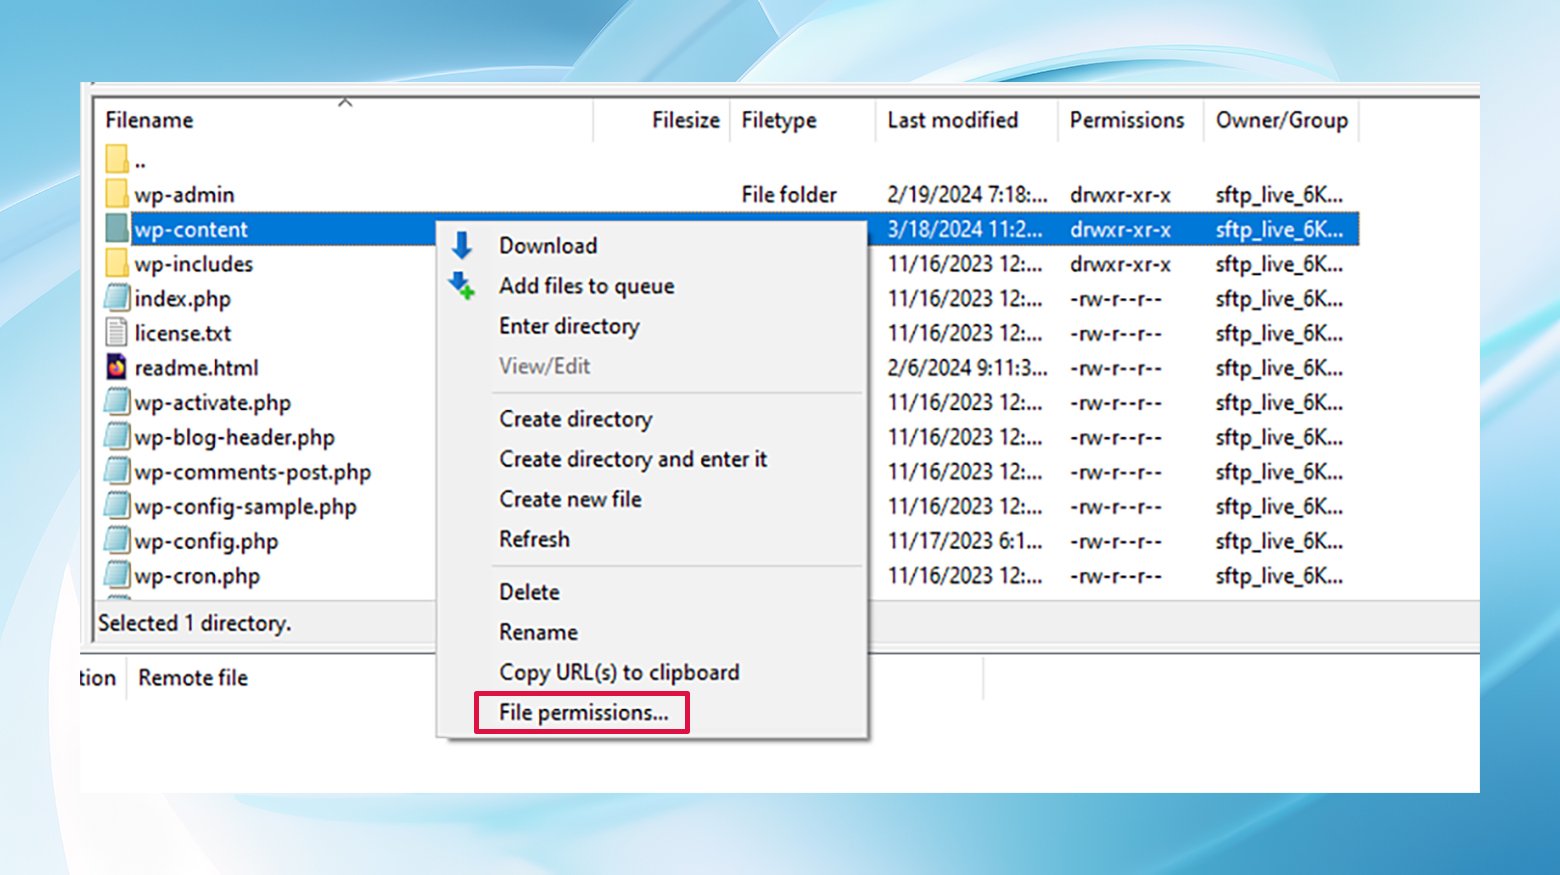
- Navigate to the wp-content folder
- Right-click on the wp-content folder and look for an option labeled “File Permissions”, “Change Permissions”, or something similar. Select it to open the permissions dialog.

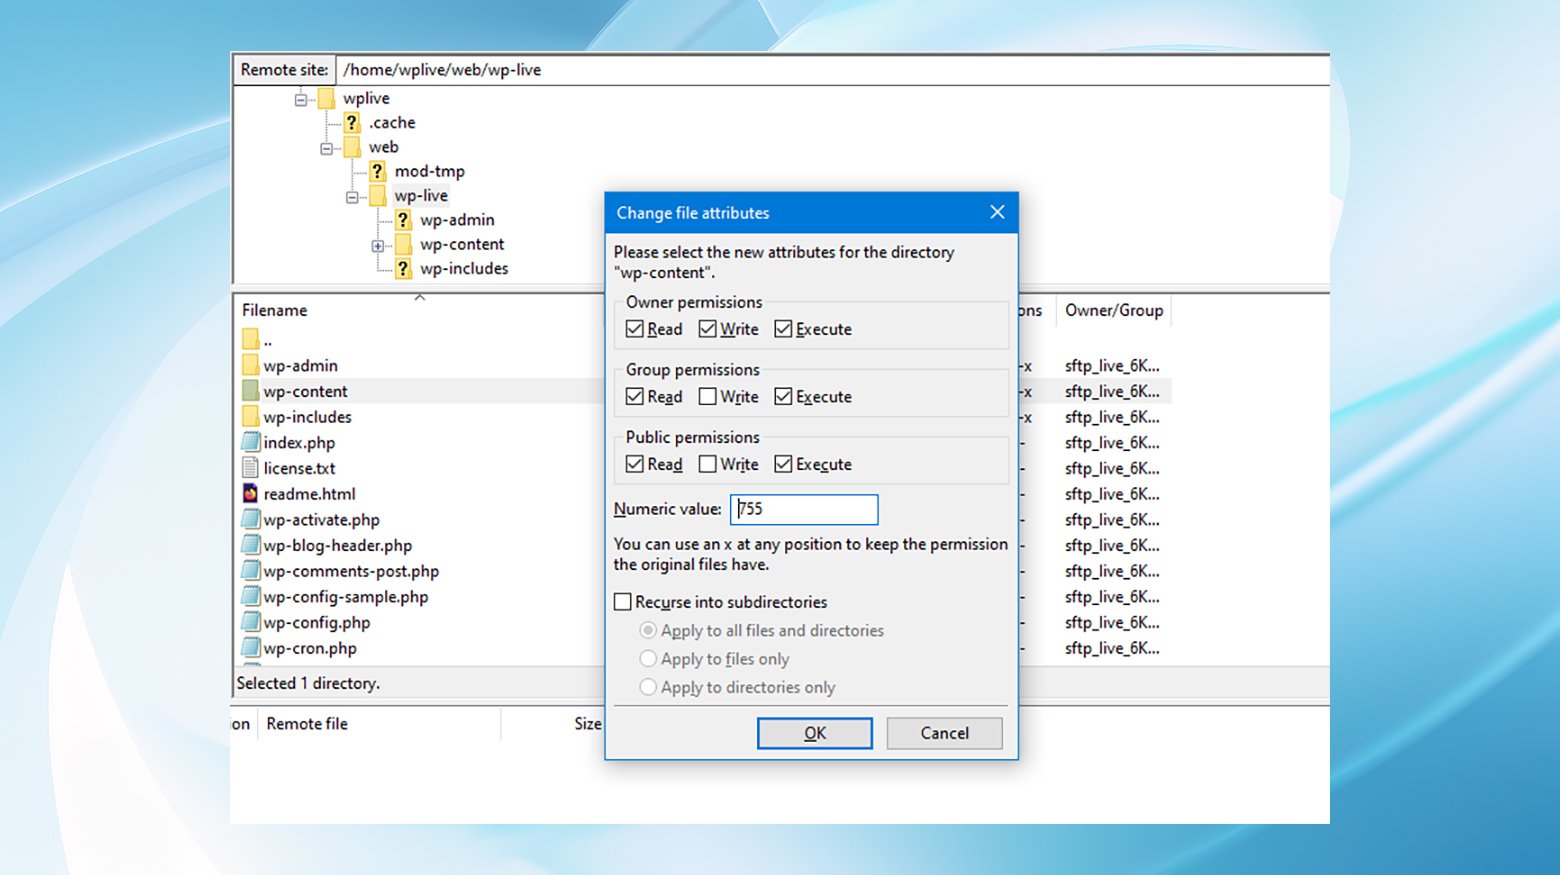
Adjust permissions to 755
In the permissions dialog, you’ll typically see numeric values or checkboxes for Read (r), Write (w), and Execute (x) permissions, divided into three groups: Owner, Group, and Public. Set the permissions as follows: – Owner: Read, Write, Execute (7) – Group: Read, Execute (5) – Public: Read, Execute (5)
This can be done by either entering the numeric value 755 in the appropriate field or checking the corresponding boxes for each group.
Apply the permissions to subdirectories
Before finalizing, you’ll usually have the option to apply these permissions to subdirectories and files within the wp-content folder. If prompted, apply to directories only, not files, since files typically require different permissions. Confirm your changes and close the dialog.
Using a hosting provider’s control panel
- Log into your hosting dashboard
- Open the File Manager
- Locate the wp-content folder
Set permissions to 755
Adjust the permissions for the wp-content folder to 755 by entering the numeric value or selecting the appropriate checkboxes for the Owner, Group, and Public permissions. Remember to apply the changes before closing.
Wrapping up
You should have successfully banished the “missing a temporary folder” error from your WordPress site by following these steps. These instructions are about fixing an error and taking preventative measures to protect your site and data.
Remember, the key to a smooth-sailing website is regular maintenance and a keen eye on security. If you ever hit a snag, don’t hesitate to reach out to your hosting provider’s support team. They’re like the tech wizards ready to help you tackle even the most perplexing WordPress conundrums.
Accelerate your WordPress website creation with AI
Create a custom WordPress website tailored to your business needs 10X faster with 10Web AI Website Builder.
Say goodbye to website errors
Fix all the website errors in one click
Migrate your website to the world's best Managed WordPress Hosting.