For WooCommerce store owners, effectively communicating product specifics is crucial not only for improving user experience but also for enhancing the decision-maaking process of potential buyers. WooCommerce, a flexible and powerful ecommerce platform, offers several functionalities to help you enrich your product pages with additional details. Here’s a step-by-step guide on how to add additional information to WooCommerce products.
FAQ
How do I add extra product information in WooCommerce?
How do I change the additional information text in WooCommerce?
How do I add a product description in WooCommerce?
What is WooCommerce additional information?
WooCommerce Additional information is a section on the product page of a WooCommerce store that displays extra product details, specifically attributes like size, color, material, or any other custom attribute that a store owner wants to include. This feature is particularly useful for providing customers with specific information that can help them make informed purchasing decisions. Here’s how it typically works:
Attributes
Attributes in WooCommerce are used to define aspects of a product. These can be general attributes that apply to multiple products (like sizes or colors for clothing) or specific to a single product type (like weight or dimensions for furniture).
Display in the Additional information tab
Once you’ve set up attributes and assigned them to products, these attributes can be displayed automatically in the Additional information tab on the product page. This tab is part of the default WooCommerce product layout and shows up next to the Description tab.
This information helps to:
- Highlight important product features: Customers can see at a glance what distinguishes a product, which is especially useful for products that come in various options or have technical specifications.
- Improve SEO: Having detailed product attributes can help in SEO as it allows your product pages to be more informative and potentially rank higher in search results.
Customization
The layout and information within the Additional information tab can be customized either through additional plugins or by editing your theme’s files if you need to add more complex or specific information than the standard attributes.
This functionality enhances the shopper’s experience by providing clear and helpful information that could affect their purchase decision, making it an essential feature for many WooCommerce stores. Create your custom online store in minutes with 10Web AI Ecommerce Website Builder and take your business online.

Looking to sell online?
How to use the Additional information tab?
The Additional information tab in WooCommerce is crucial for providing detailed product specifics that can influence purchasing decisions, such as dimensions, materials, or care instructions. This tab helps in organizing product attributes neatly, making it easier for customers to quickly find and assess the information that is important to them.
Furthermore, including comprehensive product details in this tab can improve SEO, as enriched content tends to perform better in search engine rankings, attracting more potential buyers to your site. To use this feature:
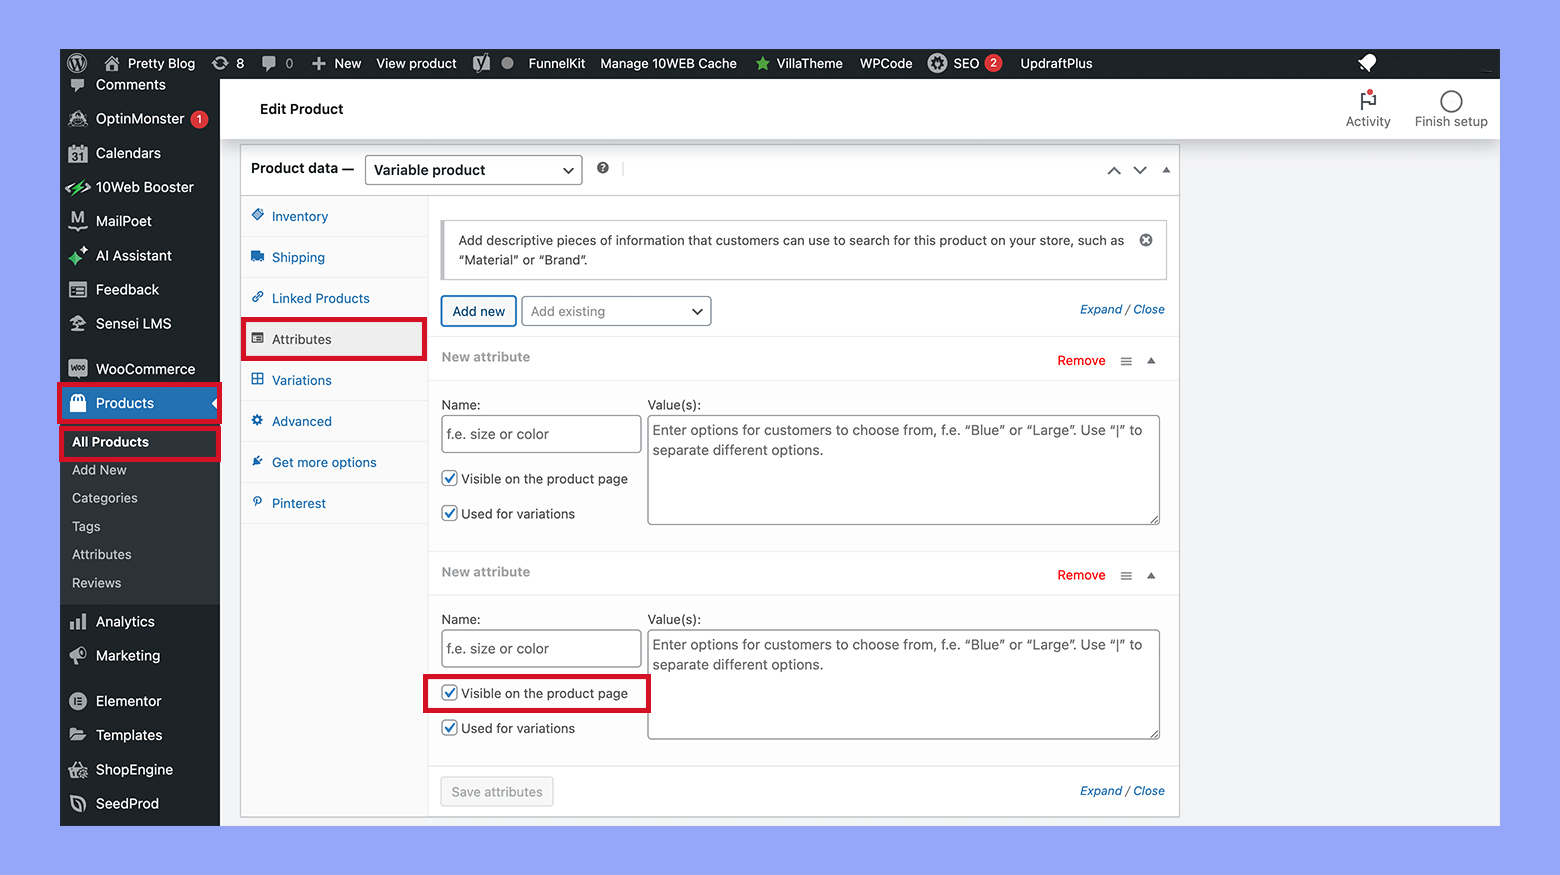
- Go to the Products section in your WordPress dashboard and select the product you want to edit.
- Below the main description, find the Product data > Attributes.
- Here you can add attributes that apply to your product. Click Add.
- Name your attribute. For example, Material, Color, or Size.
- Add attribute values separated by a vertical pipe (|), such as Cotton | Polyester.
- Check the Visible on the product page option to ensure customers will see this attribute.

- After adding all the desired attributes, click Save attributes.
How to add additional information to WooCommerce products?
Adding additional information to your WooCommerce products is a vital strategy for enhancing product listings and improving customer experience. Now, we will discuss two methods to effectively incorporate more product details using a plugin and a custom code.
Method 1: Using a plugin
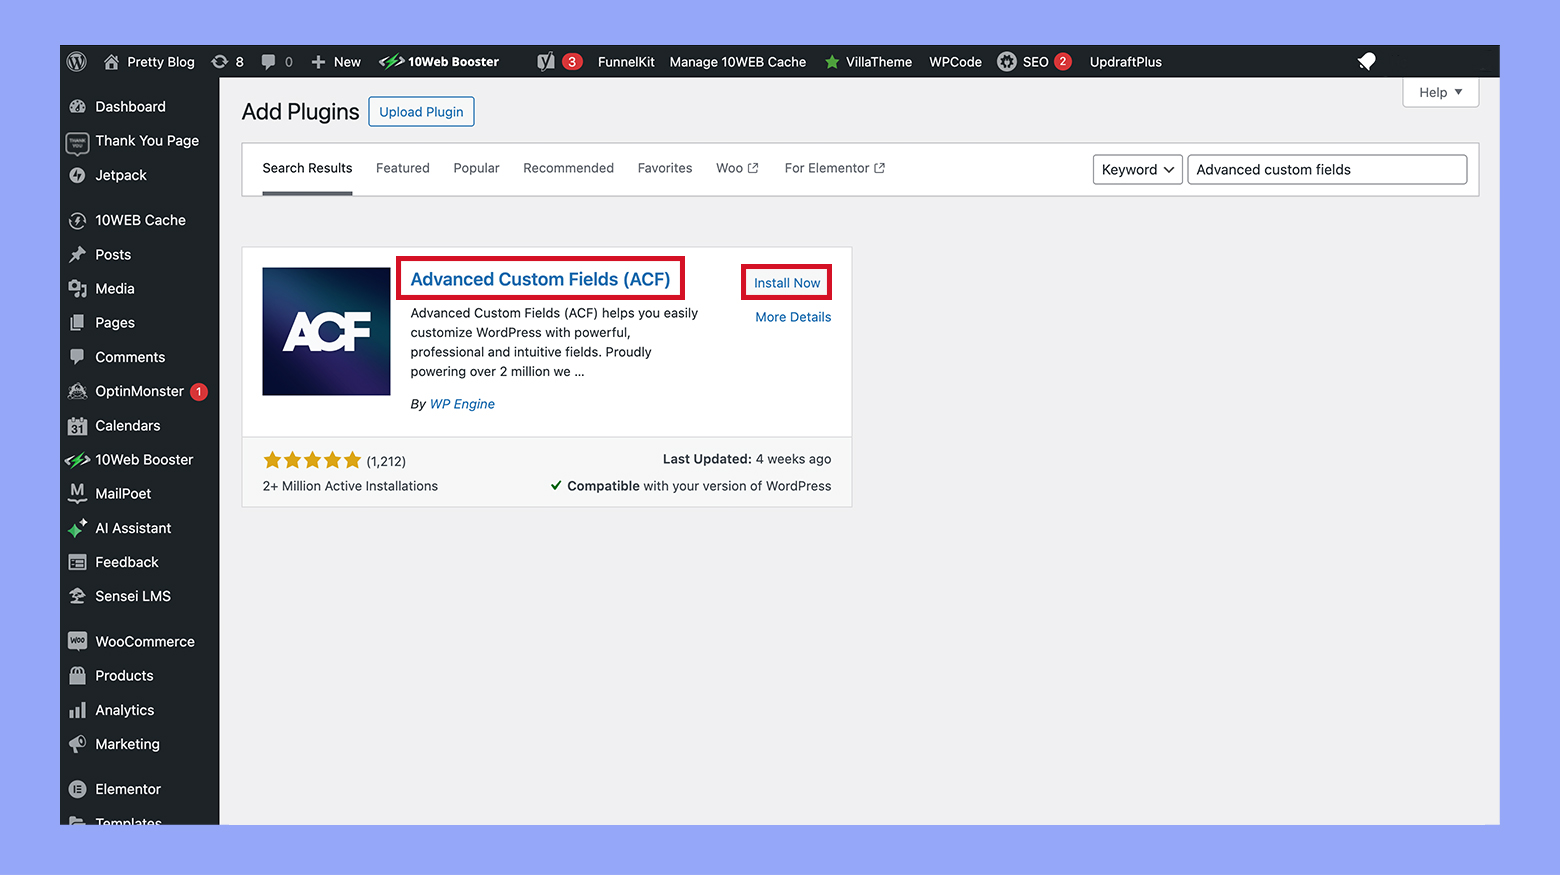
Advanced custom fields (ACF) is a popular plugin that can be used to add and display custom fields in WooCommerce. Here’s how you can use ACF to display custom fields on a product page:
- First, Install the Advanced custom fields plugin from the WordPress plugin repository and activate it.

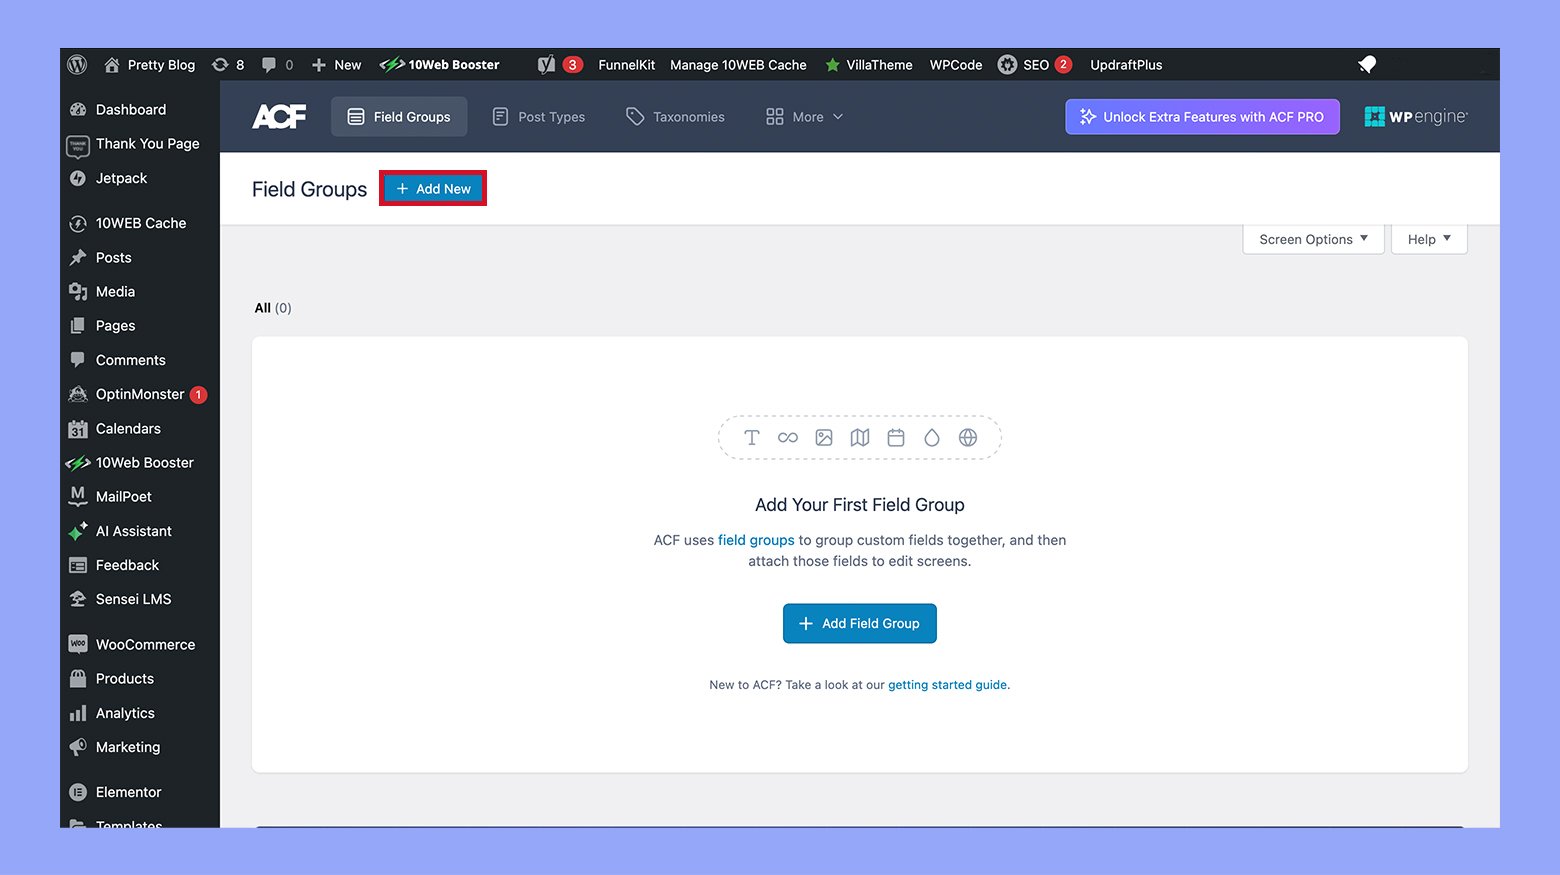
- Go to ACF in the WordPress dashboard and click Add new.

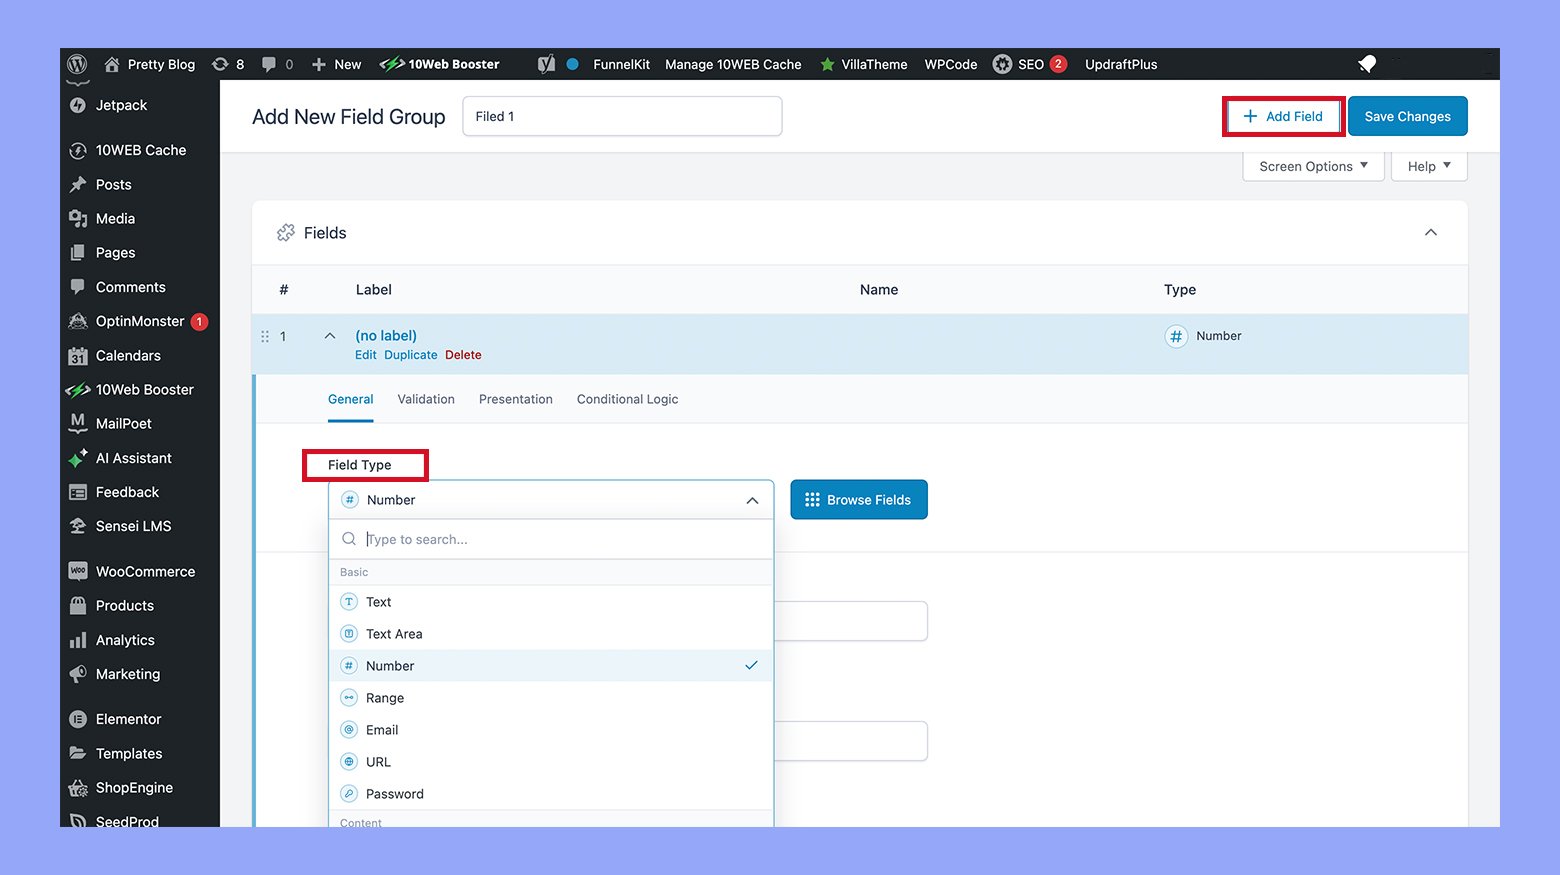
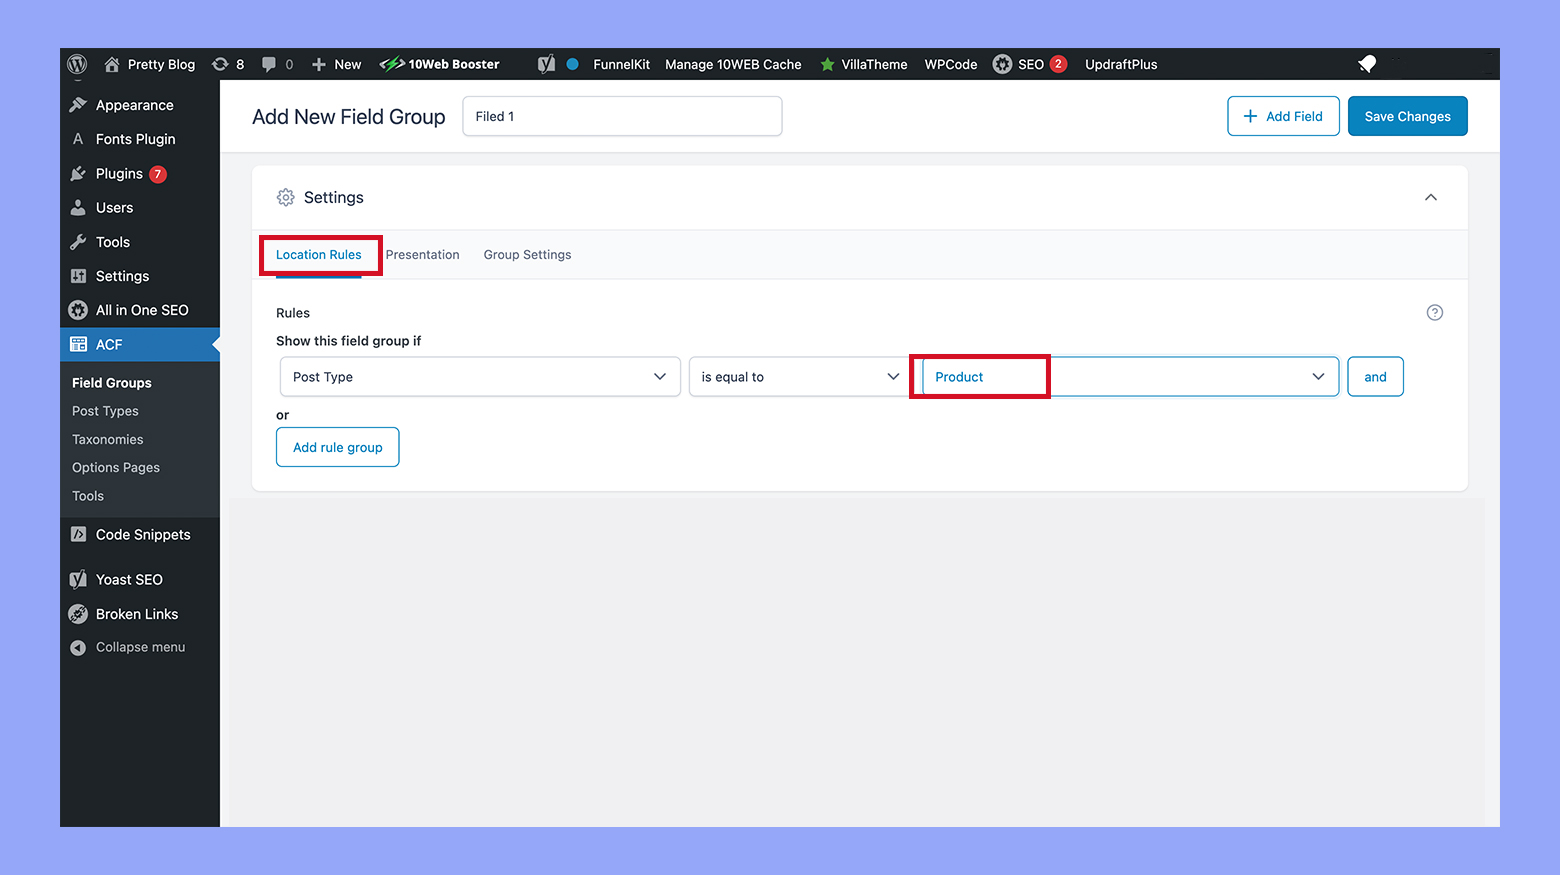
- Name your field group and use the Add field button to start adding your custom fields.
- Configure your fields by giving them labels and field names. You can choose from various types like text, textarea, image, etc.

- Set the Location rules to show these fields on the WooCommerce Product pages. You can specify that these fields appear for all products or conditionally based on categories, tags, or other product attributes.

- Go to the Products section in your dashboard, select a product to edit, and you’ll see your custom fields there. Fill them in as necessary.
- Display custom fields on the product page. Edit your theme’s product page template (usually single-product.php or a specific template part in WooCommerce) and use the ACF function the_field(‘field_name’) to display the field. Make sure to place it where you want it to appear on the page.
Method 2: Using a custom code
If you prefer not to use a plugin, you can add custom fields manually by editing your theme’s functions.php file or by creating a child theme. Here’s a basic guide:
- Add custom fields to admin:
- Use add_action to hook into WooCommerce product options to add your custom fields. You typically use woocommerce_product_options_general_product_data or similar hooks.
add_action('woocommerce_product_options_general_product_data', 'add_your_custom_general_fields');

function add_your_custom_general_fields() {

 woocommerce_wp_text_input(

 array(

 'id' => '_custom_product_text_field',

 'label' => __('Custom Product Text Field', 'woocommerce'),

 'placeholder' => 'Enter text',

 'desc_tip' => 'true',

 'description' => __('Enter a custom text for this product.', 'woocommerce')

 )

 );

}
- Save custom fields:
- Use another hook to save the data input by the user into these fields.
add_action('woocommerce_process_product_meta', 'save_your_custom_general_fields');

function save_your_custom_general_fields($post_id) {

 $custom_field_value = isset($_POST['_custom_product_text_field']) ? $_POST['_custom_product_text_field'] : '';

 update_post_meta($post_id, '_custom_product_text_field', sanitize_text_field($custom_field_value));

}
- Display custom fields on the product page:
- Edit your theme’s product page template files and use get_post_meta to retrieve and display the value of your custom fields.
echo '<div class="custom-field">';

echo '<label>Custom Field:</label> ';

echo get_post_meta(get_the_ID(), '_custom_product_text_field', true);

echo '</div>';
Managing the Additional information tab in WooCommerce
Managing the Additional information tab in WooCommerce is essential for providing a detailed shopping experience. Effective management of this tab can also boost your site’s SEO, attracting more visitors and potentially reducing product returns.
Step 1: Add custom text to the Additional information tab
To add a custom link or text to the Additional information tab, you can insert PHP code into your theme’s functions.php file.
- Open your theme’s functions.php file: This file can be accessed via the WordPress dashboard under Appearance > Theme Editor or through an FTP client.
- Insert the following PHP code at the end of the file:
add_action('woocommerce_product_additional_information', 'print_custom_html');

function print_custom_html() { ?>

 <a href="#">Click here for more information on product attributes</a>

<?php }
- This code adds a clickable link that you can customize with your desired URL and text.
- Save the changes: Update the file and visit your product page to see the new link text below or above the list of attributes.
Step 2: Hide or remove the Additional information tab
To remove the Additional information tab when it is not necessary, such as for digital products:
Using PHP code:
- Access the functions.php file of your child theme.
- Add the following code:
add_filter('woocommerce_product_tabs', 'woo_remove_product_tabs', 98);

function woo_remove_product_tabs($tabs) {

 unset($tabs['additional_information']);

 return $tabs;

}
- Save and check your product page to confirm that the Additional information tab is no longer visible.
Using CSS code:
- Navigate to Appearance > Customize > Additional CSS in your WordPress dashboard.
- Enter the following CSS code:
li.additional_information_tab {

 display: none !important;

}
- Publish the changes and verify on your product page that the tab is hidden.
Step 3: Move the Additional information to the Description tab
If you want to consolidate product information into fewer tabs:
- Edit the functions.php file in your theme.
- Paste the following PHP code to remove the Additional information tab and merge its content with the Description tab:
Remove Additional information tab
add_filter('woocommerce_product_tabs', function($tabs) {

 unset($tabs['additional_information']);

 return $tabs;

}, 98);
Insert additional information into Description tab
add_filter('woocommerce_product_tabs', function($tabs) {

 $tabs['description']['callback'] = function() {

 global $product;

 wc_get_template('single-product/tabs/description.php');

 if ($product && ($product->has_attributes() || apply_filters('wc_product_enable_dimensions_display', $product->has_weight() || $product->has_dimensions()))) {

 wc_get_template('single-product/tabs/additional-information.php');

 }

 };

 return $tabs;

}, 98);
- Save the file and view a product page to ensure that the Additional information now appears under the Description tab.
Conclusion
Adding additional information to your WooCommerce products is a powerful way to enhance the shopping experience, provide essential details, and improve the SEO of your product pages. Whether through the use of the built-in Additional information tab or by integrating custom fields with plugins, WooCommerce offers versatile options to meet the specific needs of your store. We hope that this guide helped you to configure how to add additional information to WooCommerce products and by leveraging these features, you can ensure that your products are not only well-represented but also stand out in a crowded market, ultimately leading to increased customer satisfaction and sales.


