Understanding how to change product image size in WooCommerce is crucial for maintaining a visually appealing and functional online store. This guide will explore how WooCommerce handles image settings and the impact of theme-specific configurations. We’ll cover how to adjust image sizes for catalog, thumbnail, and single product views, and provide tips for optimizing these settings for better web performance. By the end, you’ll know how to ensure your product images look their best and load efficiently, enhancing both user experience and your store’s functionality.
FAQ
Why is my product image size not changing in WooCommerce? How do I resize product images in WordPress? What size are WooCommerce product images? How do I select product size in WooCommerce?
Understanding WooCommerce image sizes
When setting up your online store, you need to ensure your product images appear clear and load quickly to enhance user experience.
WooCommerce image sizes can be influenced by the theme you are using. While WooCommerce itself provides default settings for image sizes, many themes come with their own specific image size requirements and styles, which can override or supplement the WooCommerce defaults.
Here’s how it works:
WooCommerce default settings: WooCommerce has built-in settings for Catalog Images, Thumbnail Images, and Single Product Images, which you can customize via the WooCommerce Customizer.
Theme customizations: Many WooCommerce-compatible themes come with their own custom image sizes and styling options. These themes may define their own image dimensions and apply specific styles to ensure a consistent look and feel across the store.
Theme overrides: When a theme is activated, it can override WooCommerce’s default image size settings. In some cases, themes may add additional image size options or modify the existing ones to fit the design requirements.
To ensure your images look their best, it’s important to check both the WooCommerce settings and your theme’s documentation to understand how image sizes are managed and optimized.
Difference between thumbnail, catalog, and single product image sizes
The right product image size can make a significant difference in your WooCommerce store. A balance between high-quality visuals and file size can affect your site’s load time and the shopper’s ability to view the product details.
There are three main image types in WooCommerce:
Thumbnail image: These are smaller images used in product listings, widgets, and cart items. They are often square for a uniform look.
Catalog images: They represent the product in loops, such as the shop page or category pages. A size like 370 x 370 pixels ensures a clear display without slowing down your page.
Single product image: This is the largest image and shows up on your product detail page. You want this to be large enough to allow for zooming and examining the product’s finer details.
Adjusting these image sizes to fit your theme and preferences will give your WooCommerce store a professional appearance and improve overall functionality.
How to change product image size in WooCommerce
Tailoring the size and presentation of images on your WooCommerce store is crucial as it affects the visual appeal and functionality of your site. With customization of image dimensions, you can ensure that your product images look sharp and load efficiently.
Adjusting single product image width
To change the width of the single product image:
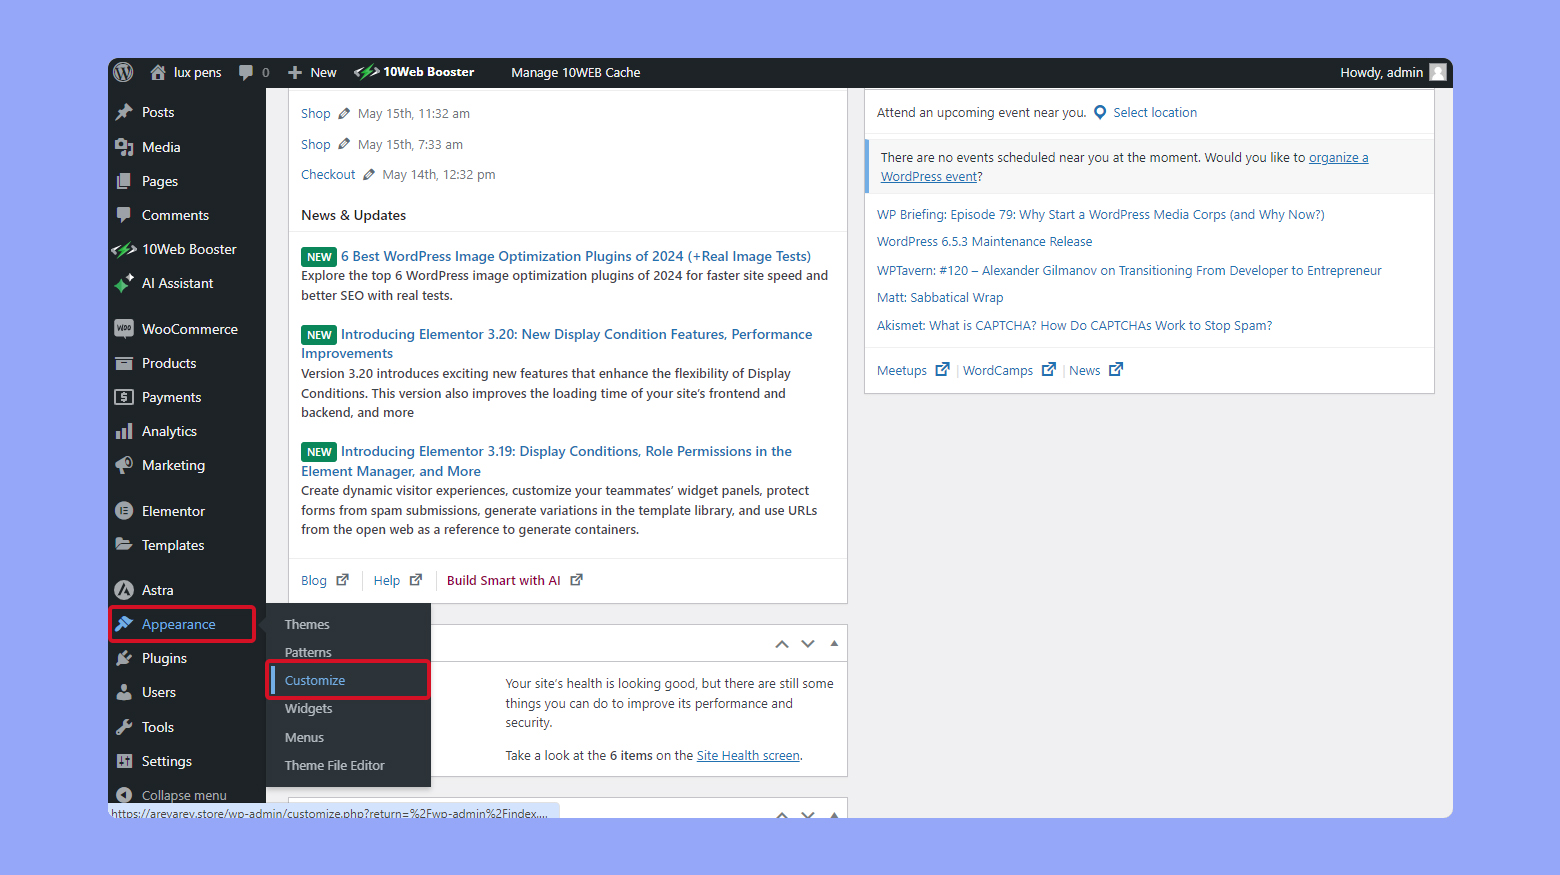
- Go to your WordPress admin dashboard.
- Hover on Appearance and click Customize.

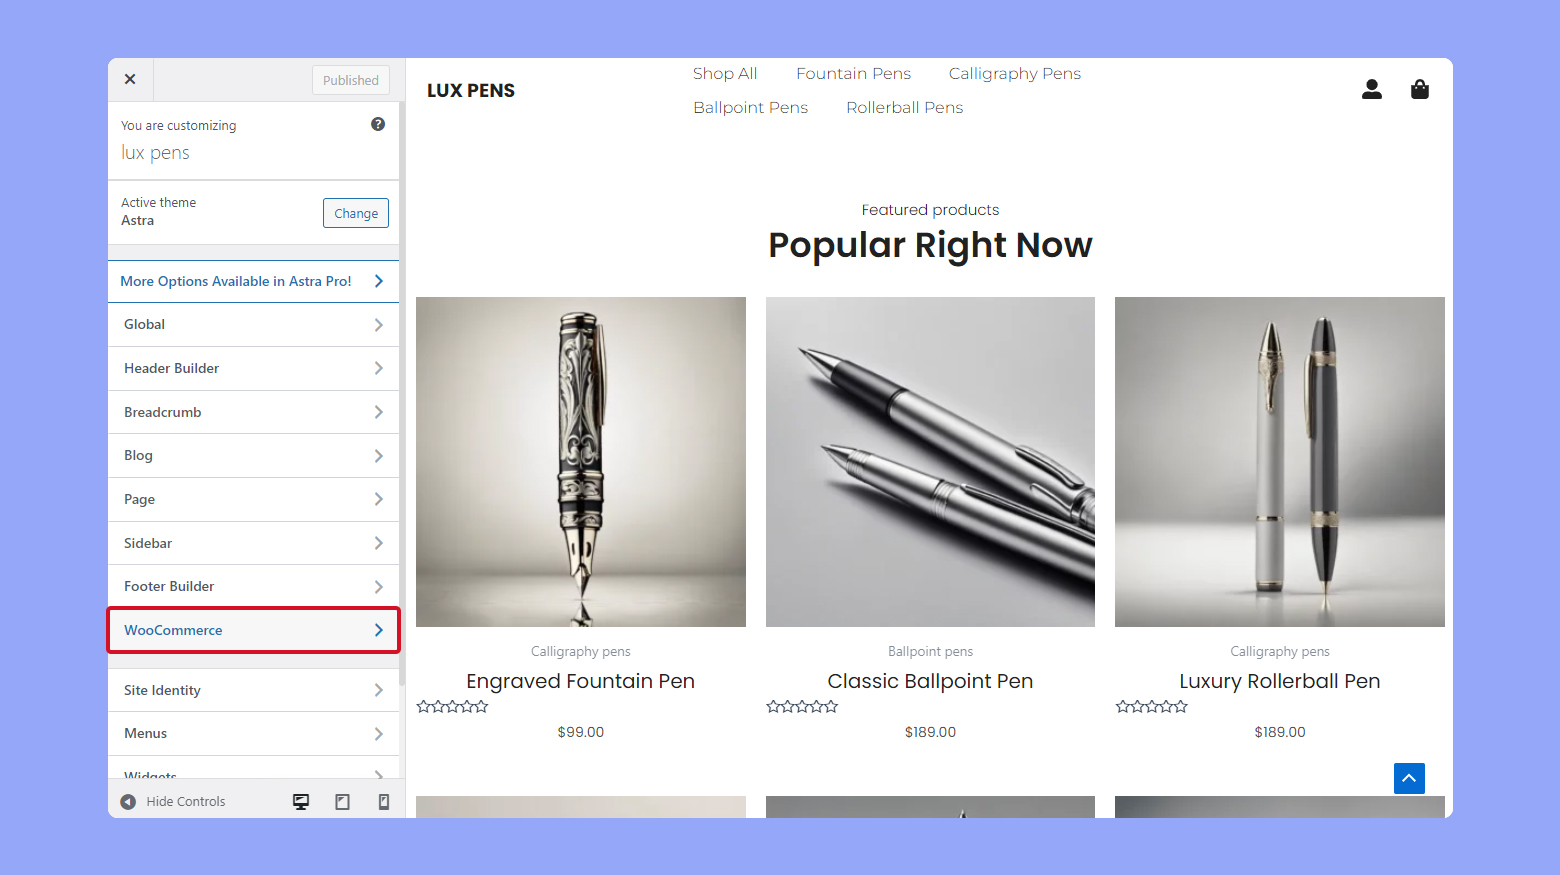
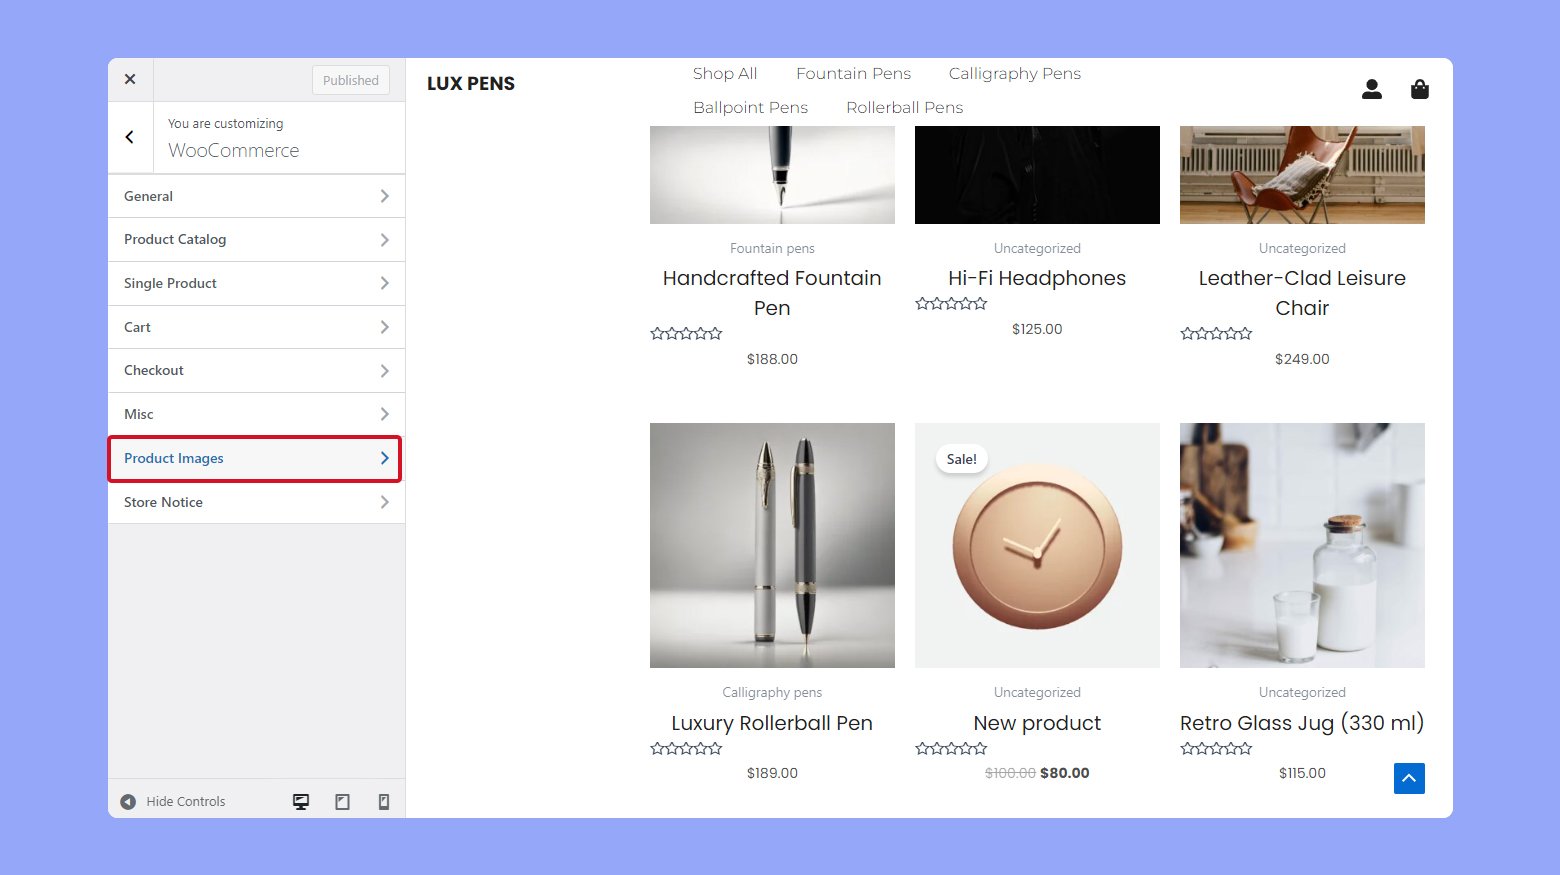
- Click on WooCommerce > Product Images. Here, you’ll find options to change the main image width and the thumbnail width.
Adjusting image width and height
For catalog images: Adjust the width to control how large your product images appear on shop pages. A typical range is between 200-300 pixels.
For single product images: Set the width according to how large you want the main image on product detail pages. Typically, a width of 600-800 pixels works well.
For thumbnails: These should generally be smaller, around 100-200 pixels, as they accompany the main product image for additional views.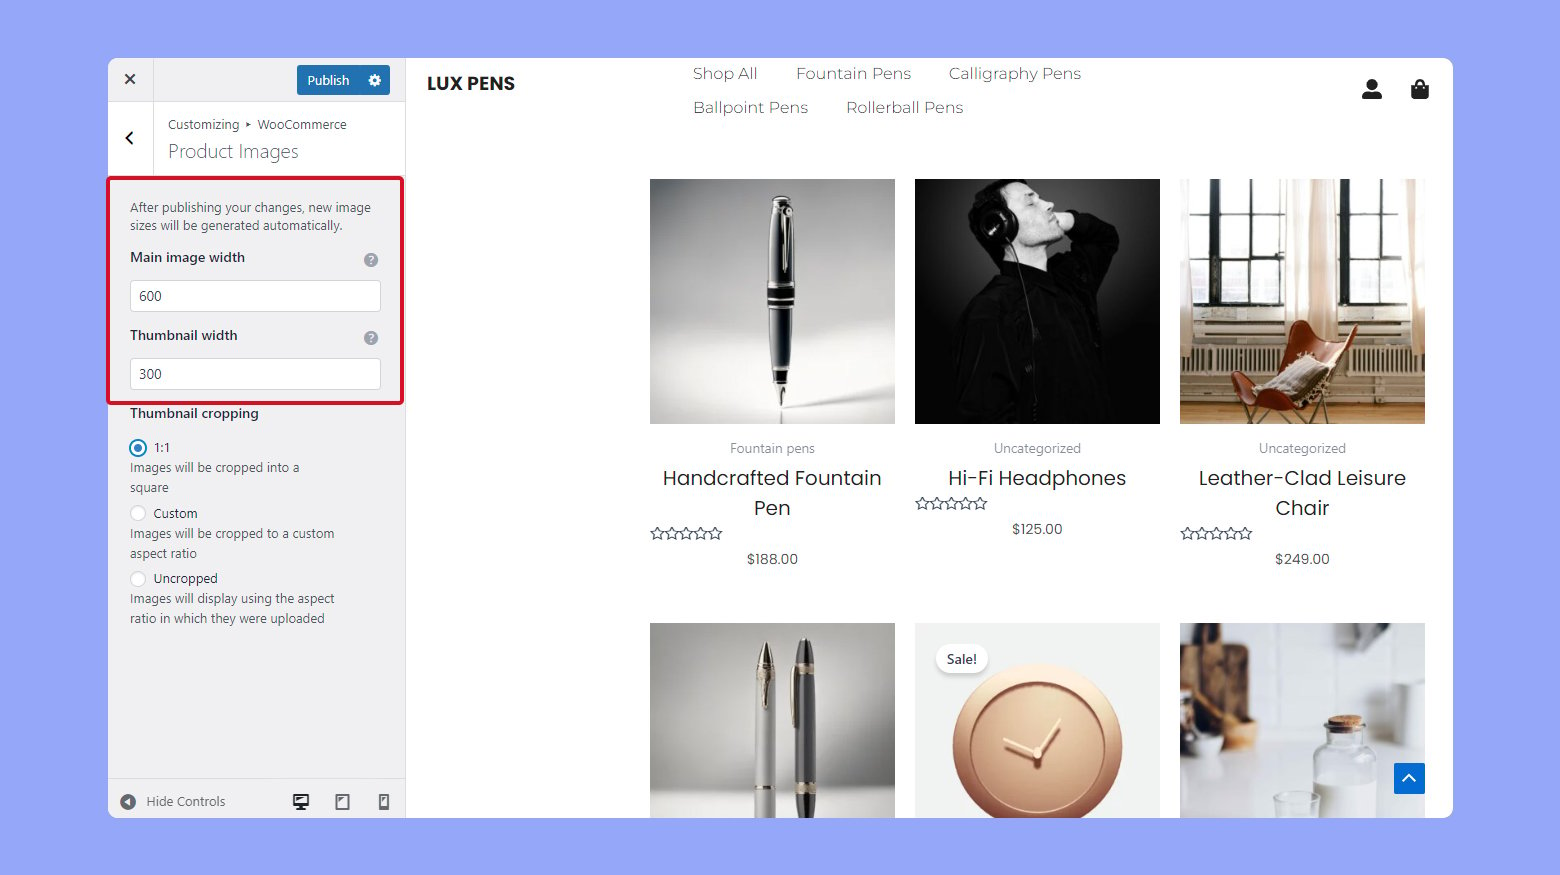
Adjust the Main image width according to your theme’s layout ensuring images are large enough to see details but optimized for load times.
When you are finished with customization, click Publish to save and publish the changes or click on the gear icon for more options.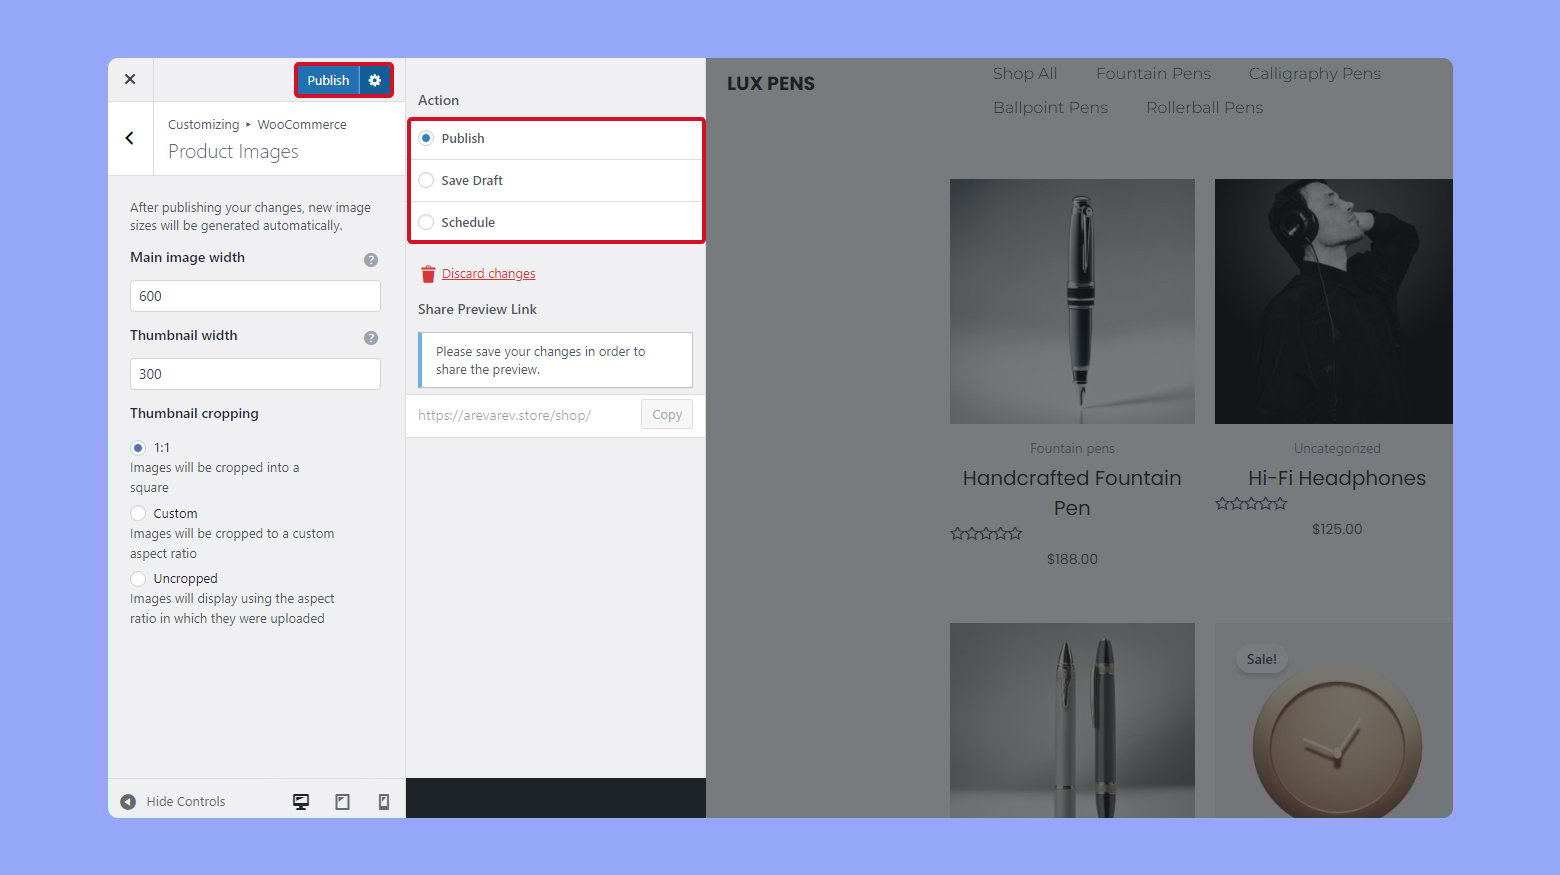
Customizing thumbnail dimensions
If you need to modify the thumbnail dimensions:
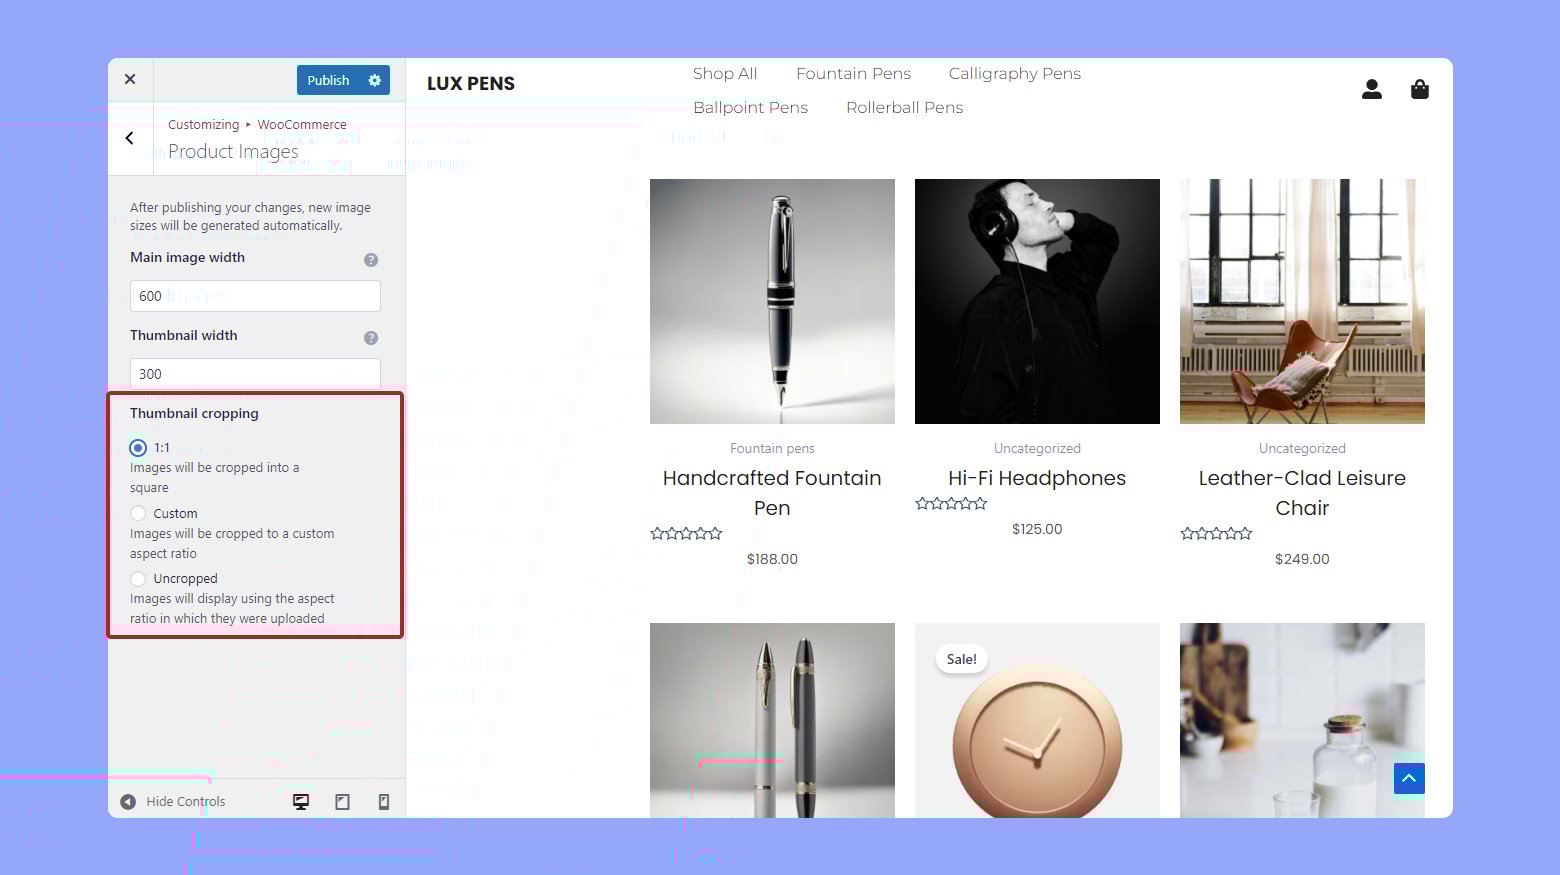
- Within the Product Images panel, find the Thumbnail width field.
- Specify your preferred width in pixels.
- Determine the Thumbnail cropping from the dropdown:
- 1:1 for square cropping.
- Custom to define a custom aspect ratio.
- Click Save changes.
By adjusting the Thumbnail width, you optimize the product grid and related product sections for a cohesive look.

Looking to sell online?
Create your custom online store in minutes with 10Web AI Ecommerce Website Builder and take your business online.
Optimizing images for web performance
When you manage a WooCommerce store, ensuring your website loads quickly is crucial. Optimized images can significantly improve loading times, enhance user experience, and contribute to SEO performance.
File size and format considerations
Choosing the right file format and size for your product images is essential for web performance. Generally, JPEG is a good choice for photographs with lots of colors, while PNG is best for images requiring transparency. More recently, formats like WebP and AVIF offer even better compression and quality but are not supported by all browsers yet. Ensure to:
- Use images with the smallest file size possible without compromising on quality.
- Prioritize formats that offer compression like WebP or AVIF if browser compatibility allows.
Using image optimization plugins
WordPress plugins can simplify the optimization process for your WooCommerce product images.
- Smush is a popular choice to optimize and compress images automatically upon upload.
- EWWW Image Optimizer can convert to optimal file formats and compress without visible loss of quality.
- 10Web Page Speed Booster uses compression, minification, lazy loading, and other methods without compromising image quality.
Regenerating thumbnails for existing images
If you’ve already uploaded product images before optimizing, you need to regenerate thumbnails to apply new image sizes and compression settings.
- Install a plugin like Regenerate Thumbnails.
- Go to Tools > Regen. Thumbnails in the WordPress admin.
- Click the Regenerate Thumbnails for All X Attachments button.
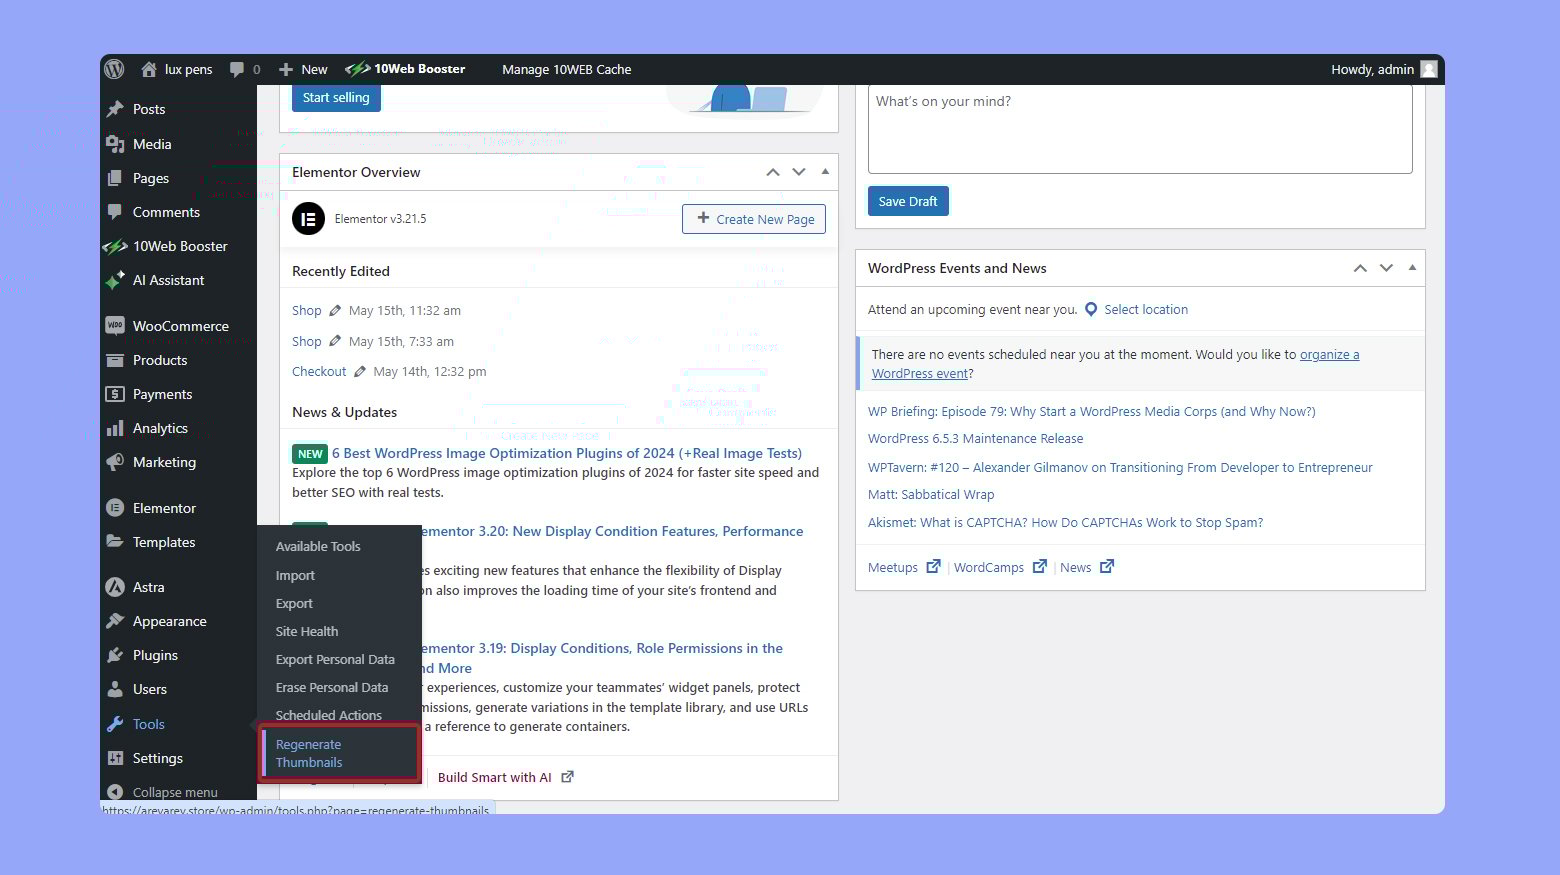
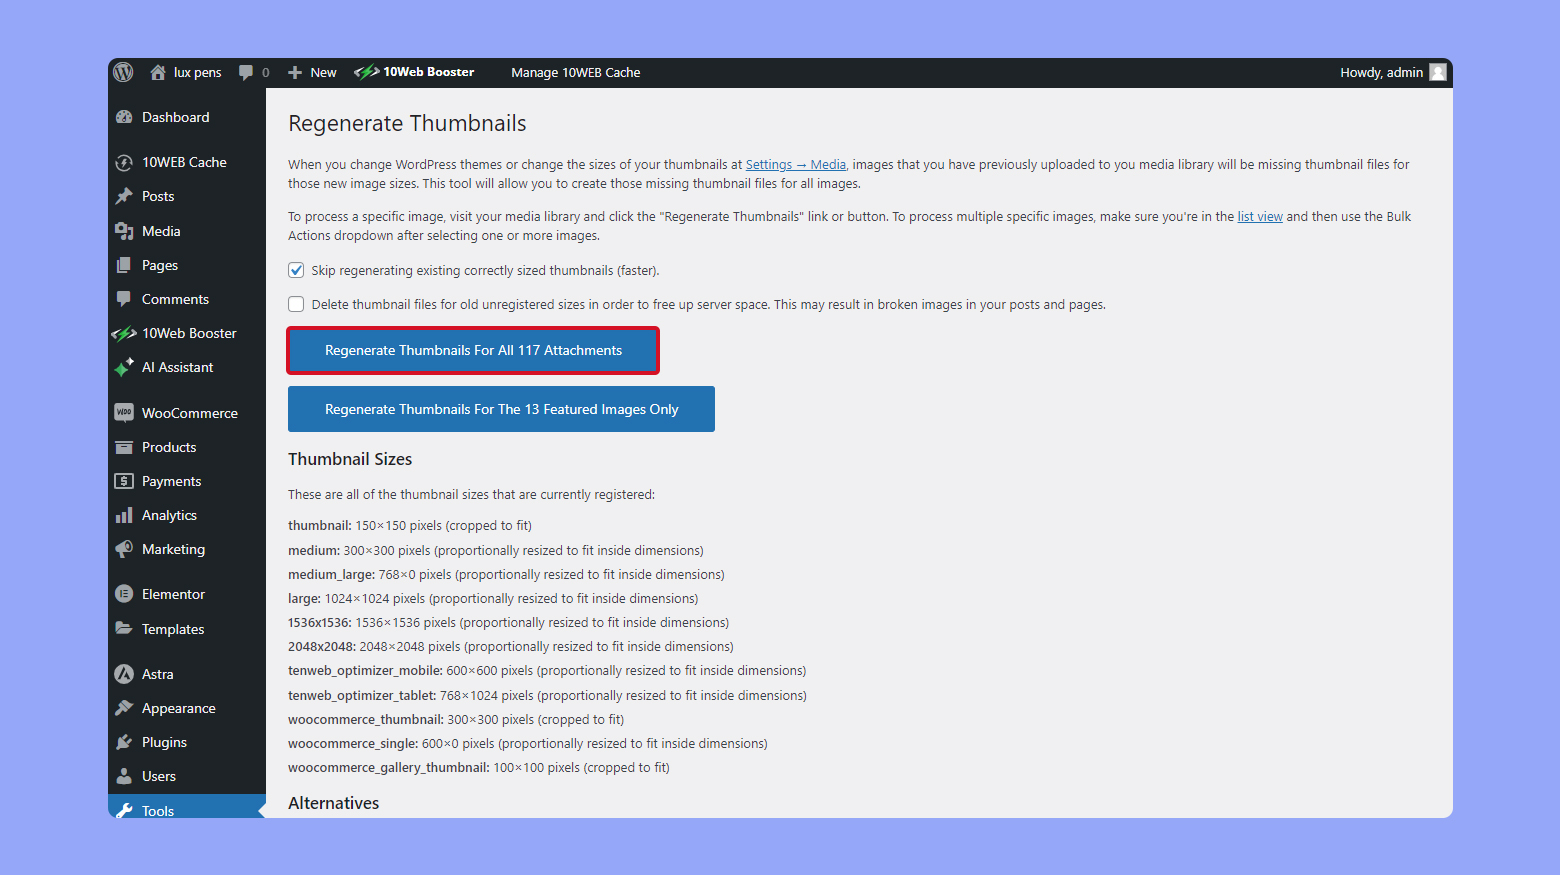
This process updates all existing images to the new settings, which can save storage space and improve loading times.
Theme customization and image sizing
When working with WooCommerce and WordPress themes, you can customize your product images to better fit your store’s design and style. These changes are typically made within your theme’s settings and can enhance the visual appeal and functionality of your store.
Modifying theme files for image size
By customizing your theme files, specifically the functions.php file, you have the ability to define and change the default image sizes used by WooCommerce. It’s essential to ensure that you’re comfortable editing PHP code because errors in the functions.php file can significantly affect your site’s functionality.
-
- Navigate to Appearance > Theme Editor from your WordPress dashboard.
- Open the functions.php file of your active theme.
Insert a snippet of code to define the image sizes. For example:
add_action( 'after_setup_theme', 'yourtheme_custom_image_sizes' );

function yourtheme_custom_image_sizes() {

 add_image_size( 'custom-size', 800, 600, true ); // Replace '800' and '600' with your desired width and height.

}
-
- Add the new image size to WooCommerce by hooking into WooCommerce’s image size array.
add_filter( 'woocommerce_get_image_size_thumbnail', 'yourtheme_override_woocommerce_image_sizes' );

function yourtheme_override_woocommerce_image_sizes( $size ) {

 return array(

 'width' => 800,

 'height' => 600,

 'crop' => 1, // 1 to crop, 0 to resize.

 );

}
- Save your changes and regenerate your thumbnails with a plugin like Regenerate Thumbnails for changes to take effect.
Using child themes and custom CSS
To avoid losing changes after theme updates, it’s recommended to use a child theme when making customizations. You can then add custom CSS to modify the appearance of your product images.
-
- Ensure you have a child theme set up for your current WordPress theme.
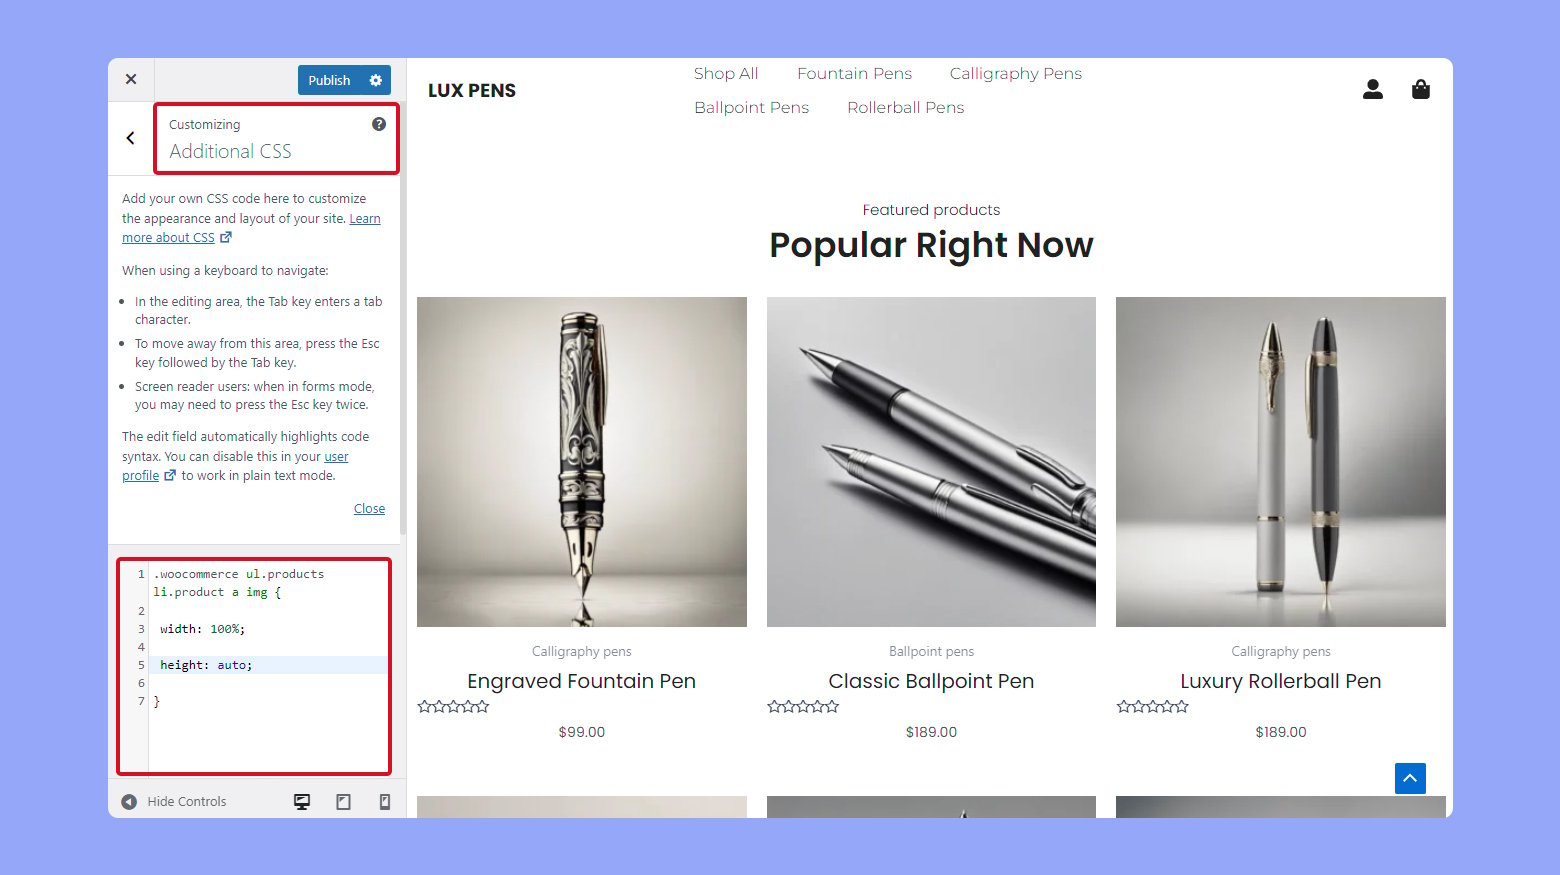
- Access Appearance > Customize > Additional CSS from the WordPress dashboard.
-
- Enter custom CSS to target WooCommerce product image elements. For instance:
.woocommerce ul.products li.product a img {

 width: 100%;

 height: auto;

}
- Click Publish to save your changes and see them reflected on your store.
By utilizing child themes and custom CSS, you can ensure your WooCommerce product images align with the overall aesthetic of your store without risking the loss of customizations during updates.
Troubleshooting common image issues
Let’s take a look at how to tackle some of the most frequent image problems in WooCommerce. Specifically, we’ll focus on resolving blurriness in images and issues related to their cropping and scaling.
Tips for resolving blurry or pixelated images
When your product images appear blurry or pixelated, it’s often a matter of incorrect image dimensions or improper scaling. Follow these steps to clear up your images:
- Check if the image dimensions match your requirements.
- If the dimensions are too small, adjust them to ensure clarity—Larger images tend to reduce blurriness when scaled down.
- To prevent pixelation, ensure your original images are high quality and upload them at the correct size.
- After adjusting the settings, you might need to regenerate thumbnails. This can be done with a plugin like Regenerate Thumbnails.
Looking to sell online?
Create your custom online store in minutes with 10Web AI Ecommerce Website Builder and take your business online.
Enhancing product presentation and SEO
To effectively enhance your product presentation and SEO, you need to focus on optimizing your product images and their display on various pages of your WooCommerce store. High-quality images tailored for both desktop and mobile users, along with SEO-friendly practices, are crucial for improving user experience and search engine visibility.
Best practices for image display on product and shop pages
Product images are integral to the shopping experience you provide in your WooCommerce store. They should represent the product effectively and be optimized for fast loading times.
- For product pages, aim to use a white background to make your product stand out. This is especially true for apparel items where details need to be clear.
- On shop pages and category pages, using a consistent image size across products helps streamline the design and improves navigation.
- The WooThumbs for WooCommerce plugin enhances the WooCommerce product gallery with additional features such as zooming and sliding capabilities.
SEO tips for image optimization
Optimizing your product images for search engines can lead to higher search engine rankings and increased traffic to your online store.
- Ensure all images are named descriptively; include relevant keywords that reflect the product, which helps search engines understand and rank the images better.
- Use alt text for images with relevant keywords. This not only improves SEO but also accessibility.
- Compress your images into .jpg format to reduce file size without sacrificing quality, decreasing page load times and enhancing user experience.
Including high-quality images and optimizing them for search engines are pivotal steps that can lead to an improved conversion rate and increased revenue for your WooCommerce store. By leveraging these tactics, you’re also ensuring your products are appealing across various marketing channels and to your target audience.
Conclusion
Effectively managing product image sizes in WooCommerce is essential for creating a visually appealing and high-performance online store. This guide has shown you how to configure and optimize image sizes for catalog, thumbnail, and single product views, addressing theme-specific settings that might override WooCommerce defaults.
By implementing these adjustments, you can enhance user experience and improve your store’s functionality. To apply this knowledge, adjust your image settings in the WooCommerce panel, use appropriate plugins for resizing and optimizing, and consult your theme’s documentation to ensure compatibility and optimal display.
Looking to sell online?
Create your online store in minutes
Create your online store in minutes with 10Web AI Ecommerce Website Builder.