You’re finally ready to sell your first product online, but the “how” is the part no one really explains. You’ve probably heard WordPress and WooCommerce are the best combo for launching an online store. It gives you full control and custom design. But when you actually sit down to build your site, it can feel like you’ve opened 37 browser tabs and still don’t know what to do first.
We will walk you through the entire process, clearly and simply, so that by the end you know how to make an ecommerce website with WordPress on your own. You’ll see how to do the setup step by step, choose a hosting theme and the plugins you actually need, and how to do everything faster with AI.
Before you start
Before discussing the setup, take a moment to clarify a few things. It’ll make the process smoother:
- What are you selling?: Define your product and audience (physical, digital, or service). Knowing your market will help you get the right design and features for the store.
- Side hustle or full business?: Are you building a side project or a full-time business? This decision will determine how much you invest in the setup and future growth.
- DIY or get help?: Do you want full control over every detail, or would you rather get occasional help with design or marketing? Keep it manageable based on your comfort level.
Why WooCommerce? The perfect fit for WordPress ecommerce
If you’re considering using or may already be using WordPress, WooCommerce is the optimal choice for building your ecommerce store. Here’s why:
- Complete control: With WooCommerce, you have full ownership of your store and its data, unlike hosted platforms like Shopify or Etsy.
- Customization: WordPress easily integrates with WooCommerce and gives you endless customization options with themes and plugins.
- Cost-effective: WooCommerce itself is free, and you can scale your store as your business grows without hefty monthly fees.
- Scalability: Whether you’re running a small shop or expanding into a full business, WooCommerce grows with you.
Insider tip: If you’re looking for flexibility, low cost, and full control, WooCommerce is the best way to go with WordPress.
Option 1: How to make an ecommerce website with WordPress manually
The first, go-to option when building an ecommerce site with WordPress is to do everything manually. It’s a little time consuming, and might seem confusing, but if you follow the clear steps below, your job will be much easier. So, if you’re wondering how to make an ecommerce website with WordPress, this is the most hands-on approach, and the one that gives you the most control.
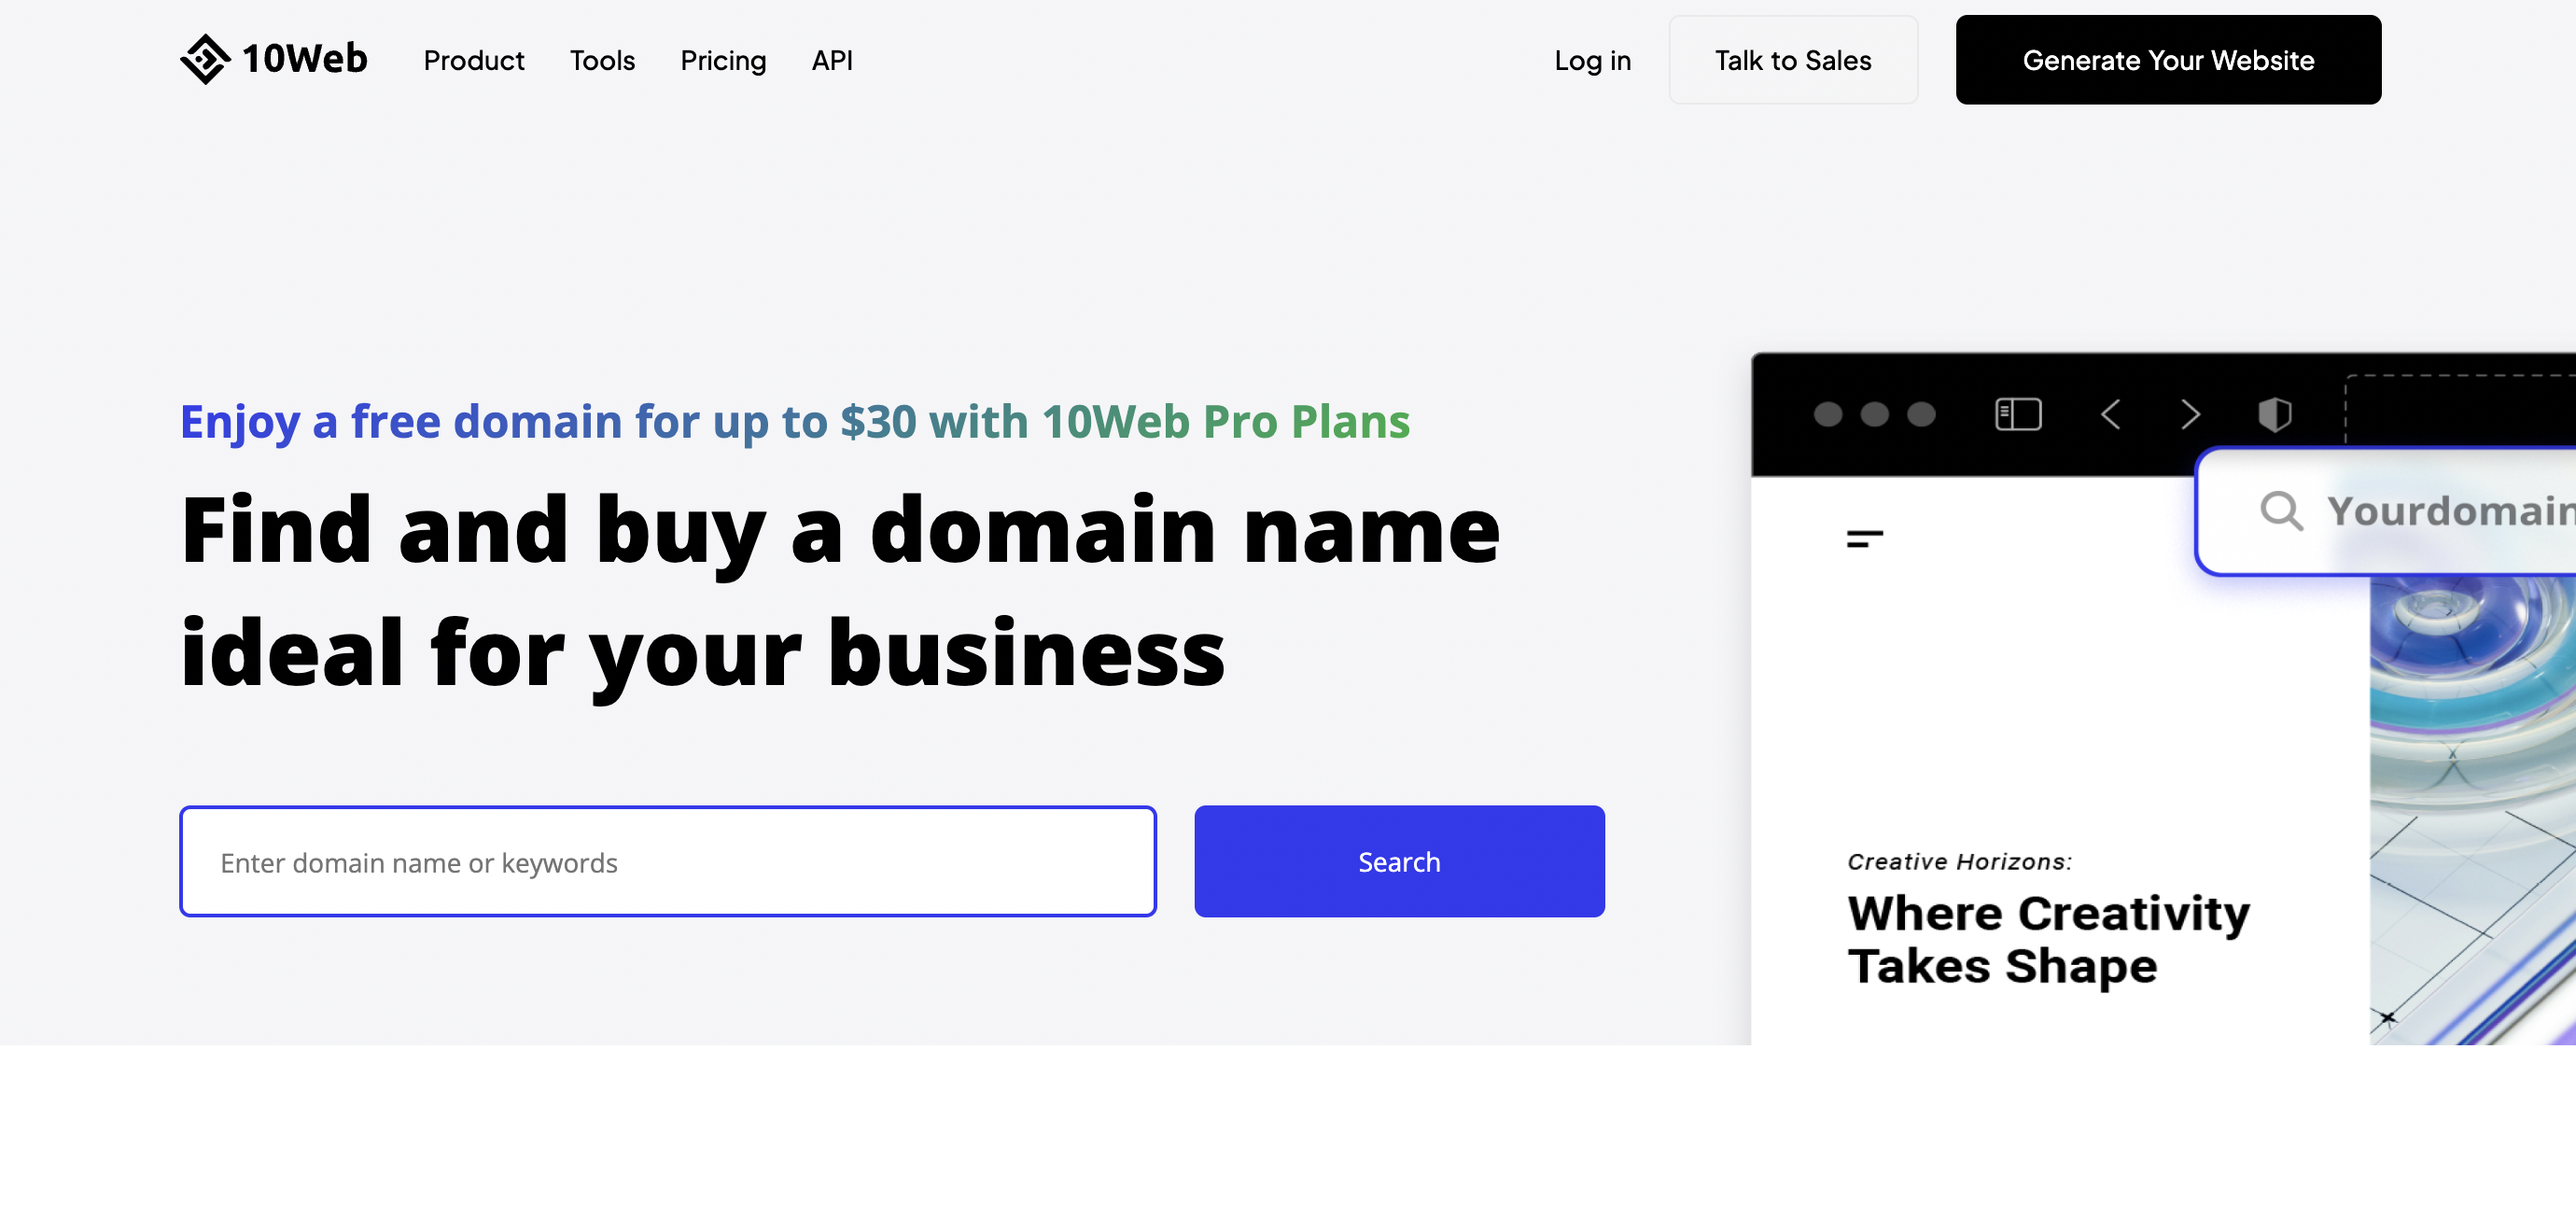
1. Choose your domain name
Your domain name is your online address, that makes finding you easier. To find and buy a domain name, you can use online domain name search tools, but when you do so, keep in mind that the name should follow a few simple rules, for you to get the best of it.
Your domain name should:
- Reflect your brand: Make it match your business name.
- Keep it simple: Short, memorable, and easy to spell.
- Use keywords: For better SEO (but keep it natural).
- Choose the right extension: .com is common, but options like .store work, too.
- Think long-term: Pick a name that grows with your business.
- Check availability: Ensure it’s free on both domains and social media.
If you already have a domain, just link it to your hosting provider by updating the DNS settings. Learn how to manage it here.
2. Choose a hosting provider
Now you need hosting for your website. When you’re figuring out how to make an ecommerce website with WordPress, choosing reliable hosting is one of the most important early steps. It affects everything related to your store performance. Look for a provider that offers:
- Reliability: 99.9% uptime.
- Fast loading speeds.
- Security: Especially for transactions.
You can review some WordPress hosting providers here, but if you want everything done for you, 10Web Managed WordPress Hosting is a great option. It combines high-performance hosting with an AI website builder to take care of the technical setup for you. We will explore this option later.
3. Install WordPress
Installing WordPress is easy. If your hosting provider offers one-click installs, just log into your account, click, and go. For more control, you can manually download and upload WordPress files, but the one-click method is great for beginners.
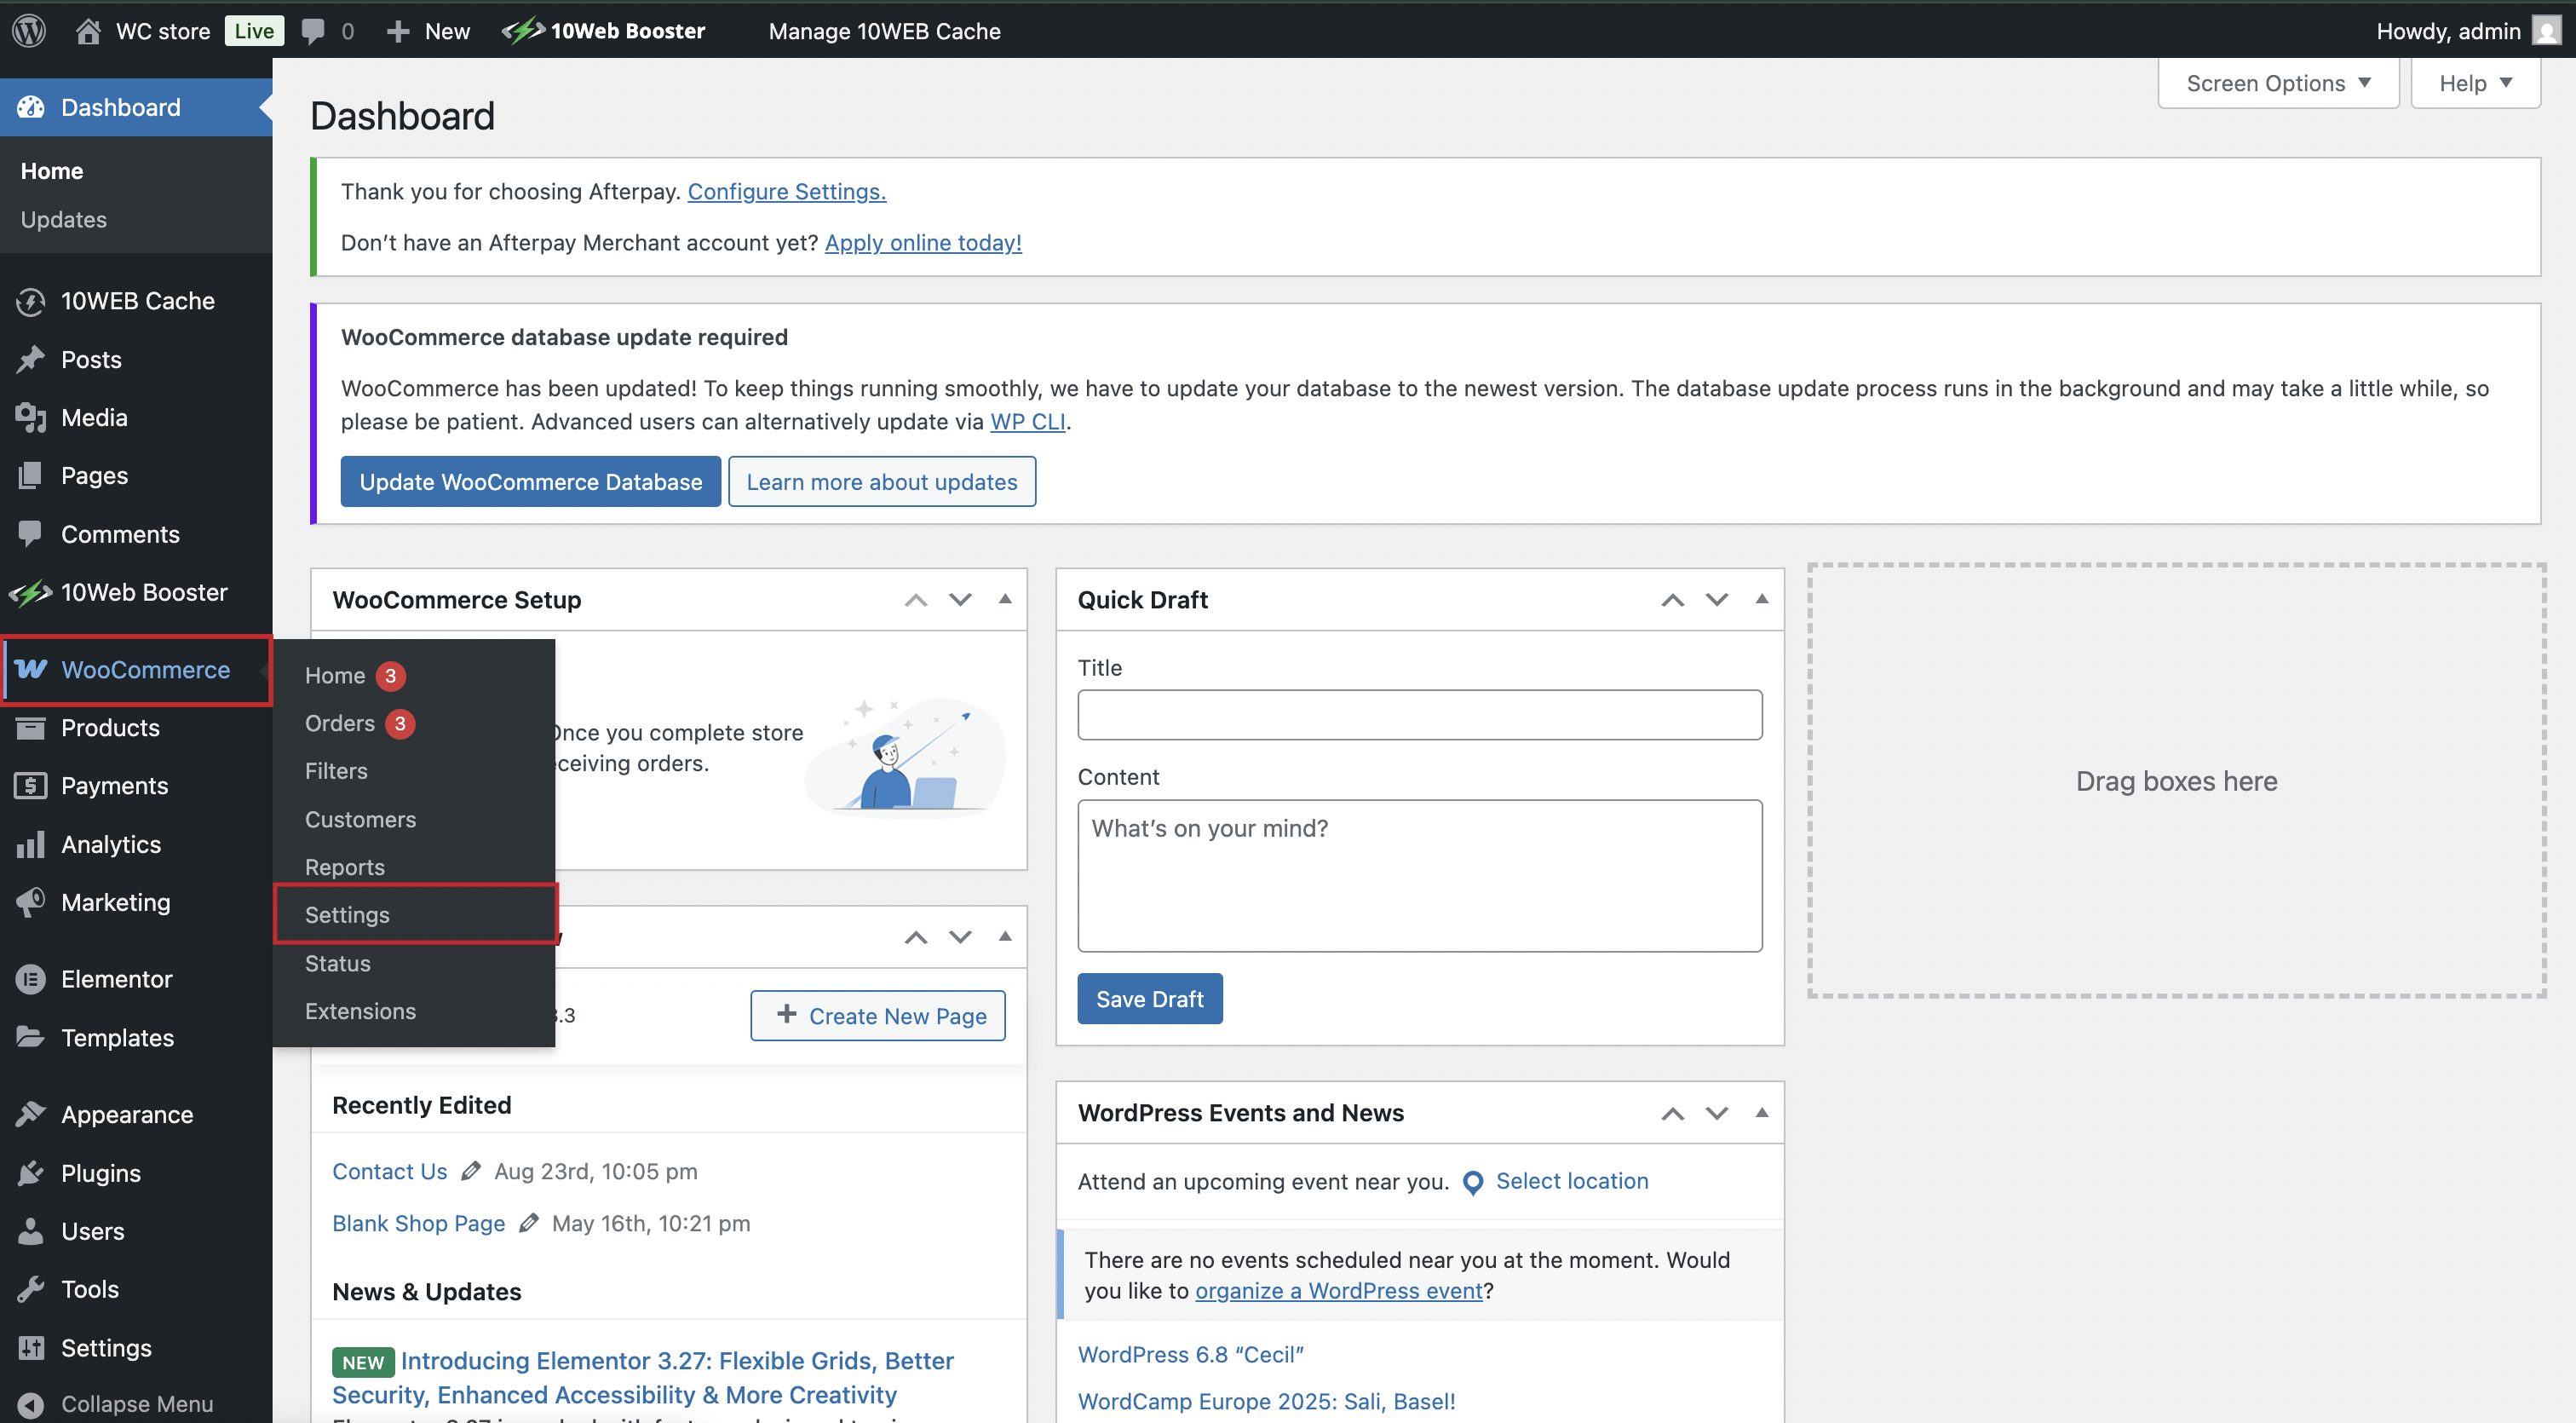
4. Install WooCommerce
WooCommerce is the plugin that turns your WordPress site into an online store. To install it:
- Go to Plugins > Add New in your dashboard.
- Search for WooCommerce and click Install Now.
- Activate the plugin and follow the setup wizard to get your store up and running.
If you need a visual guide, watch this short video from 00:25 to see how it looks like:
5. Set up your ecommerce website
To make your online store functional and user-friendly, WooCommerce automatically creates key pages like Shop, Cart, My Account, and Checkout. But you can check and customize these pages so they’re easy to navigate and more fitting for your store needs.
Shop page
The Shop page is where all your products are displayed. WooCommerce automatically creates this page, but you can easily change it:
- Go to WooCommerce > Settings.

- Navigate to Products > General. Check the Shop Page dropdown to make sure it’s set to the correct page (either the default or a custom page of your choice).

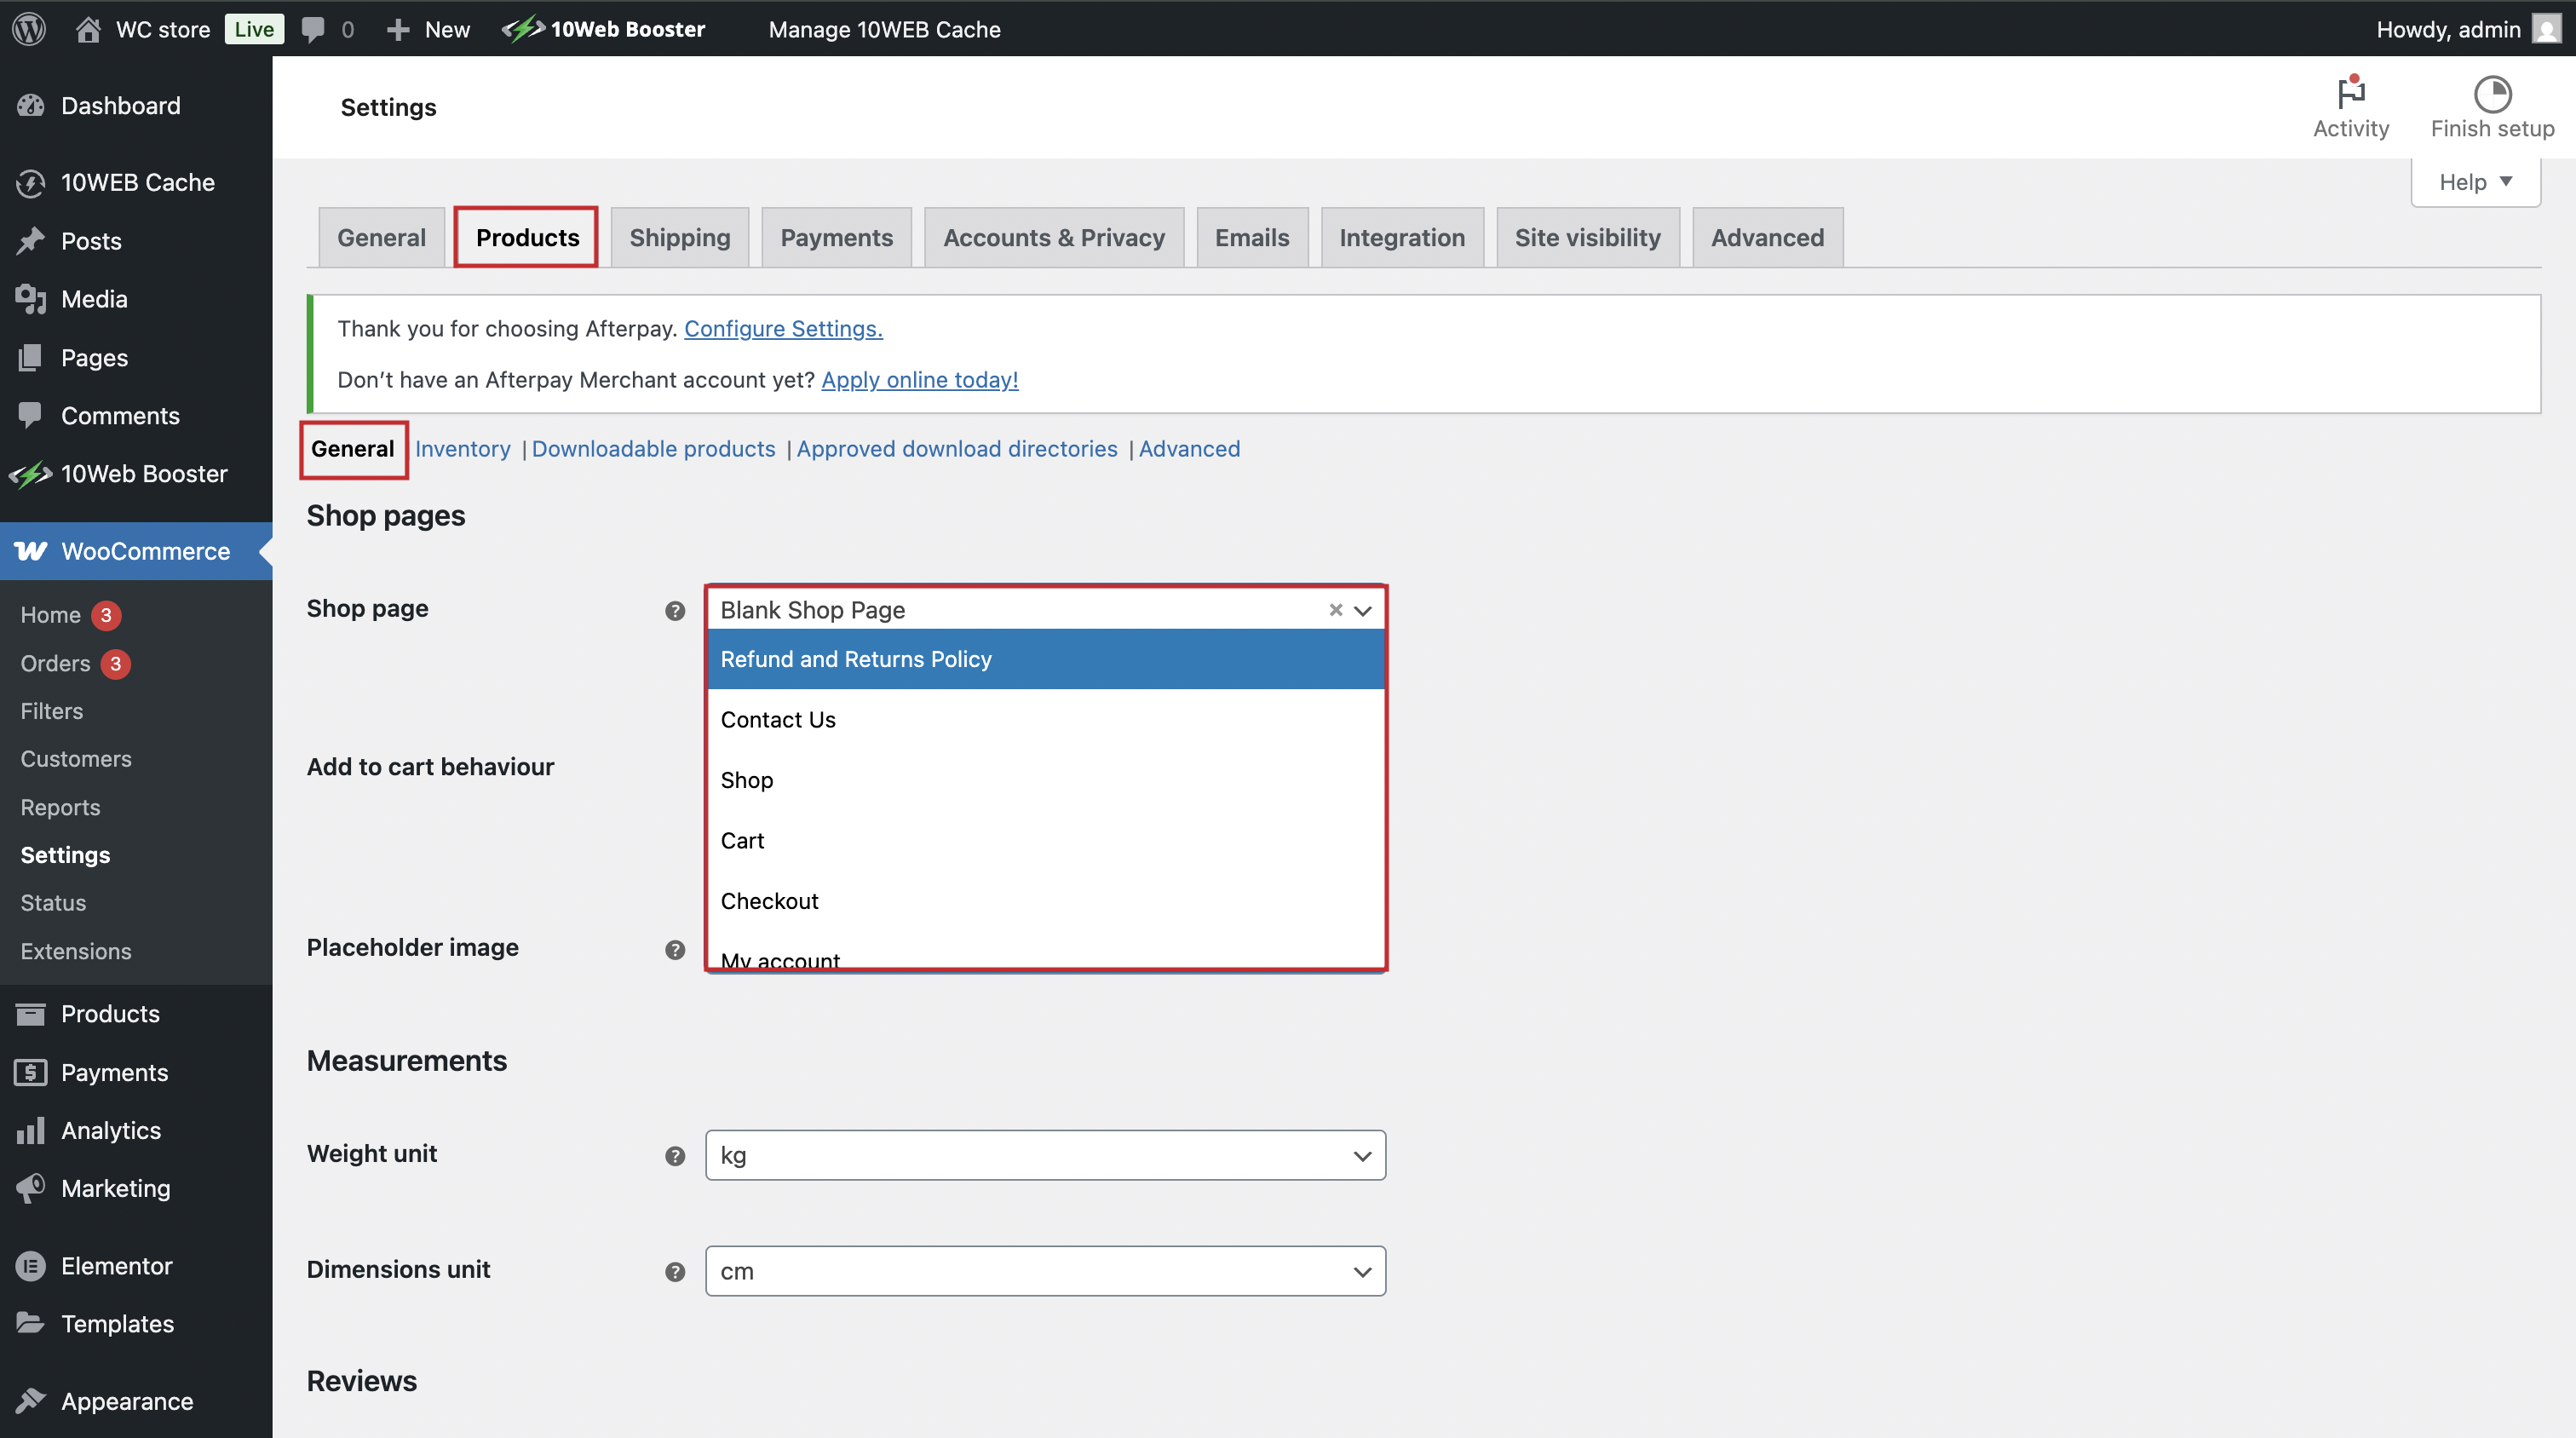
Depending on your theme, you can adjust the layout of your shop, like changing the number of products per row or per page. This can be done by just navigating to Appearance > Customize, and looking for WooCommerce-specific options or theme settings.
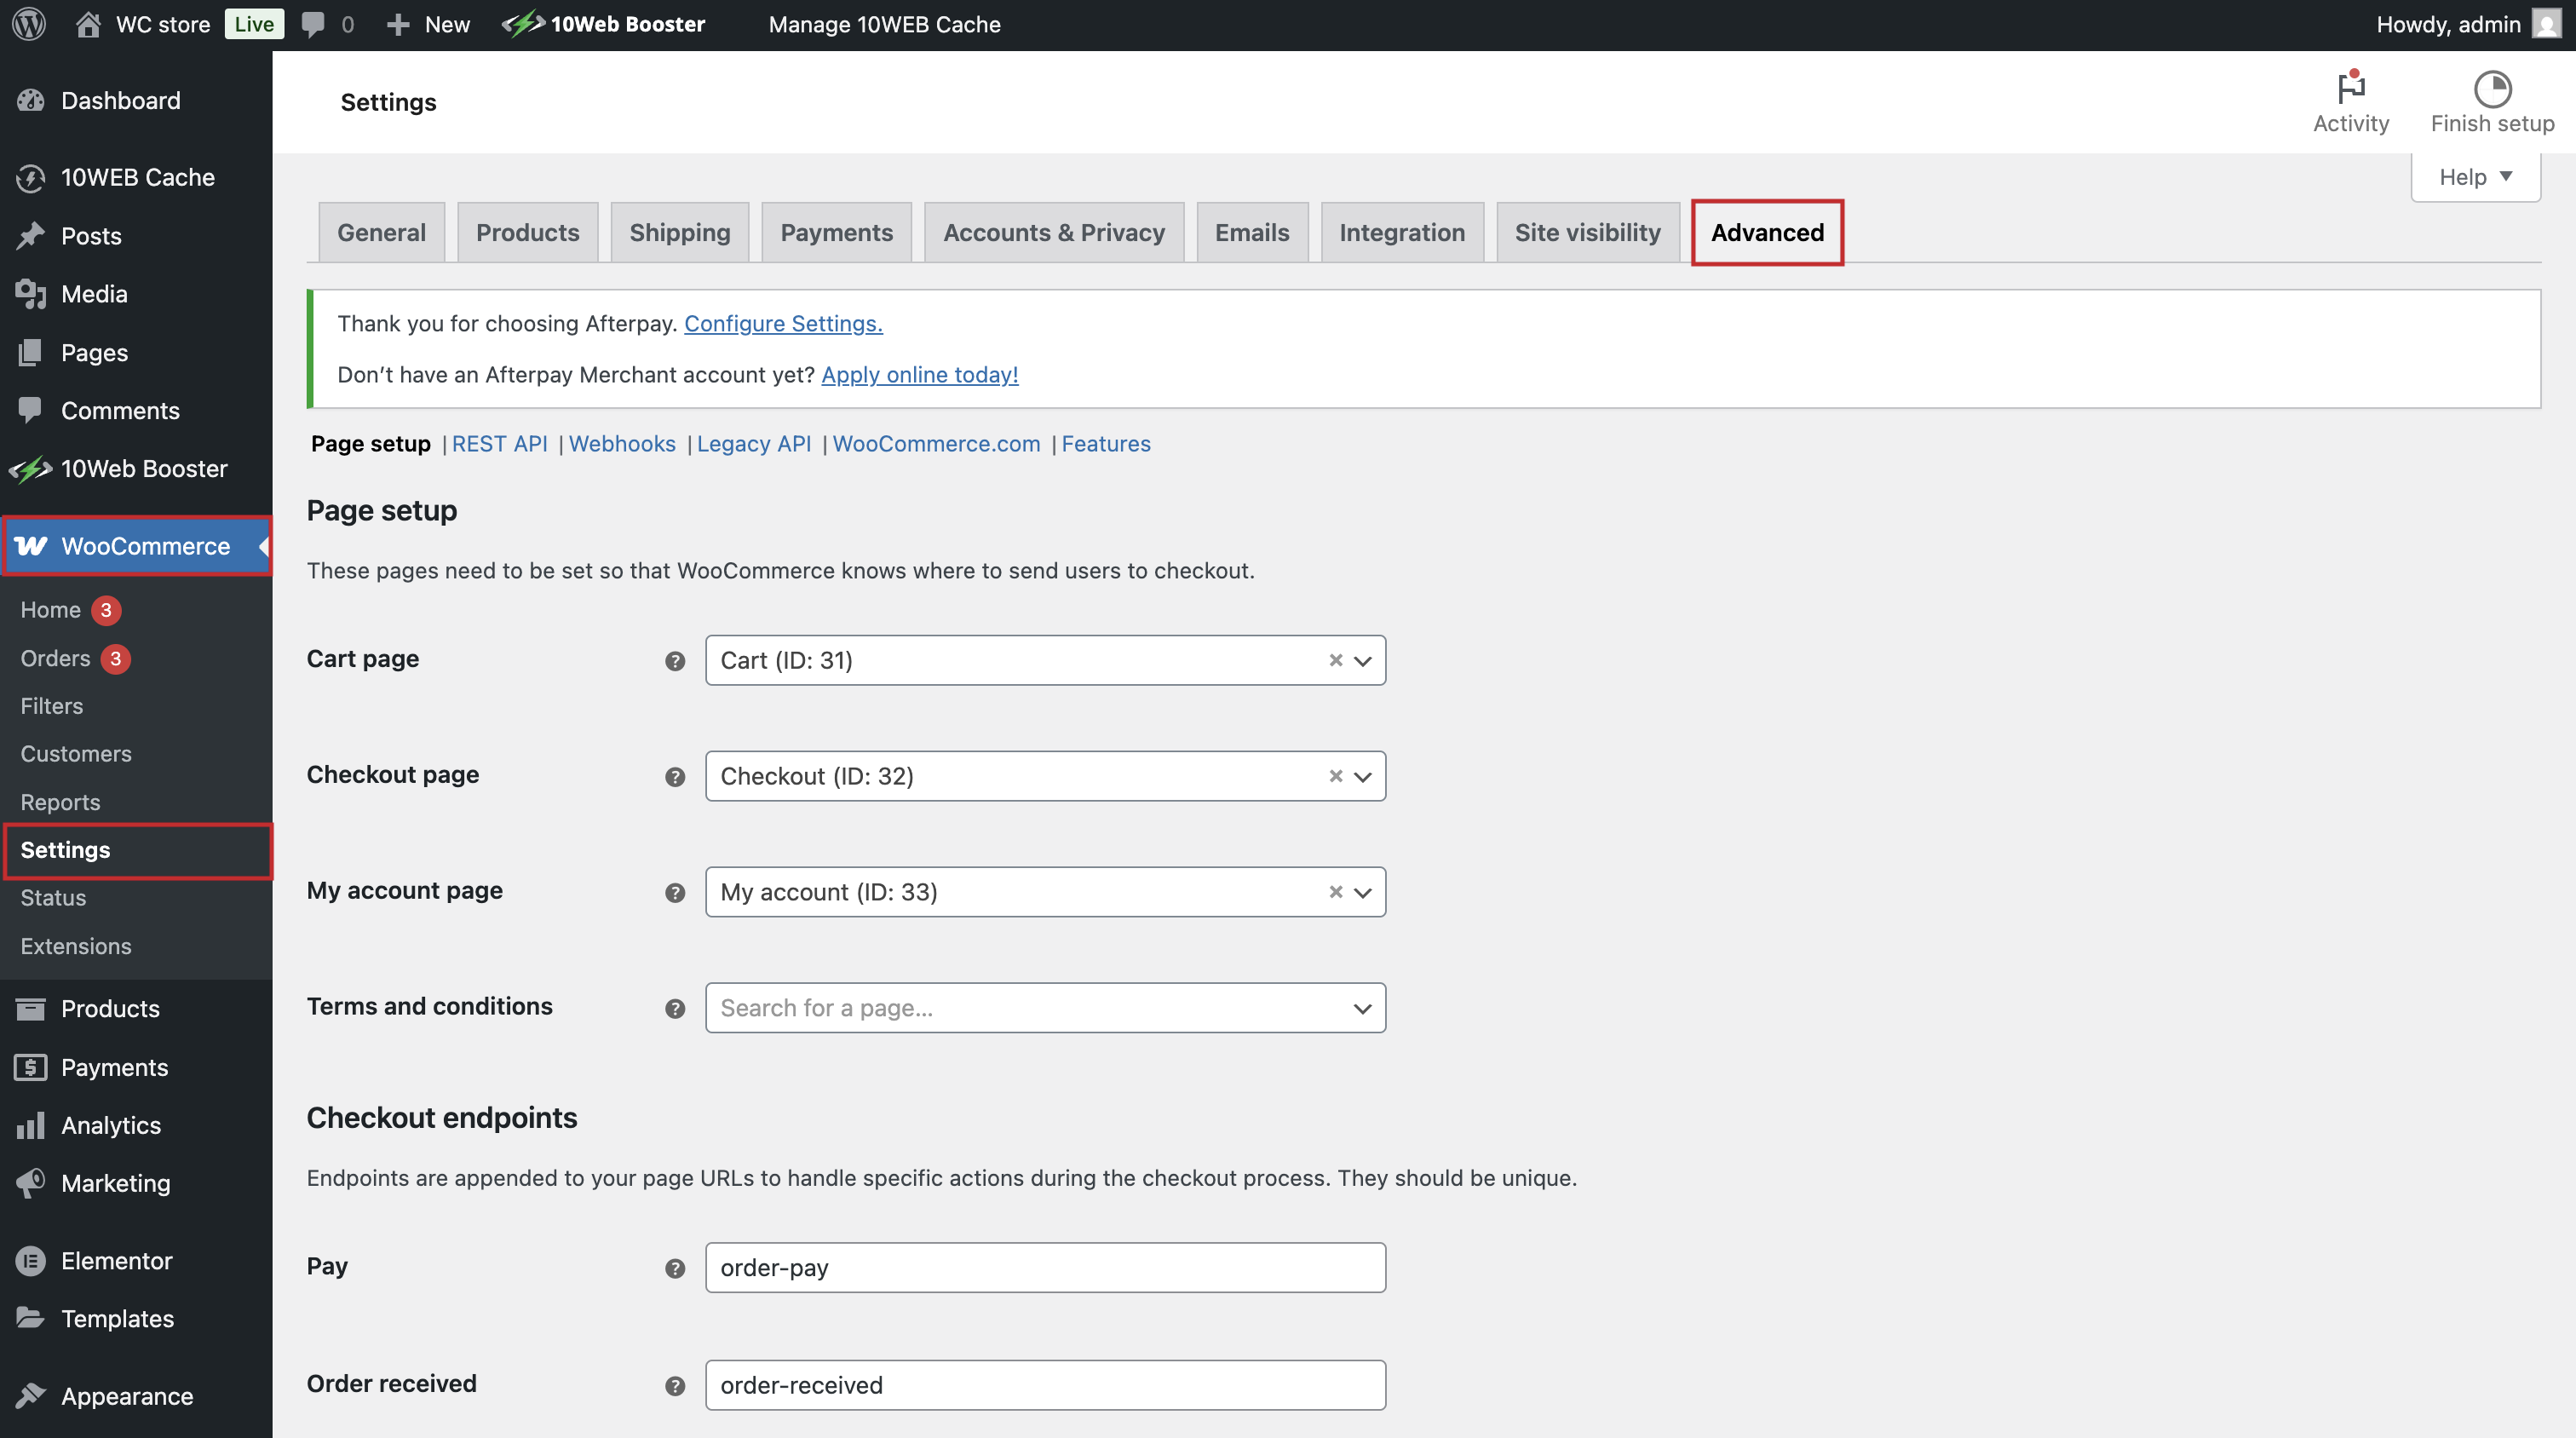
Cart page, My Account page, and Checkout page
The Cart page shows your customers the products they’ve added to their cart before they proceed to checkout. The My Account page lets customers view their past orders, update their billing/shipping info, and more. The Checkout page is where your customers finalize their purchases, entering payment and shipping details. All three are important, so let’s check if they are set correctly before you publish your site:
- Go to WooCommerce > Settings > Advanced.
- Verify that the Cart page is set properly. Check the Checkout page and My account page as well under the Cart page.
For the Cart page, consider adding features like cart suggestions (related products), return to shop button, continue shopping links to encourage additional purchases.
Insider tip: Consider reducing the number of steps or required fields in the checkout process to improve conversion rates and reduce cart abandonment. Plugins like WooCommerce Checkout Manager can help you customize the checkout experience.
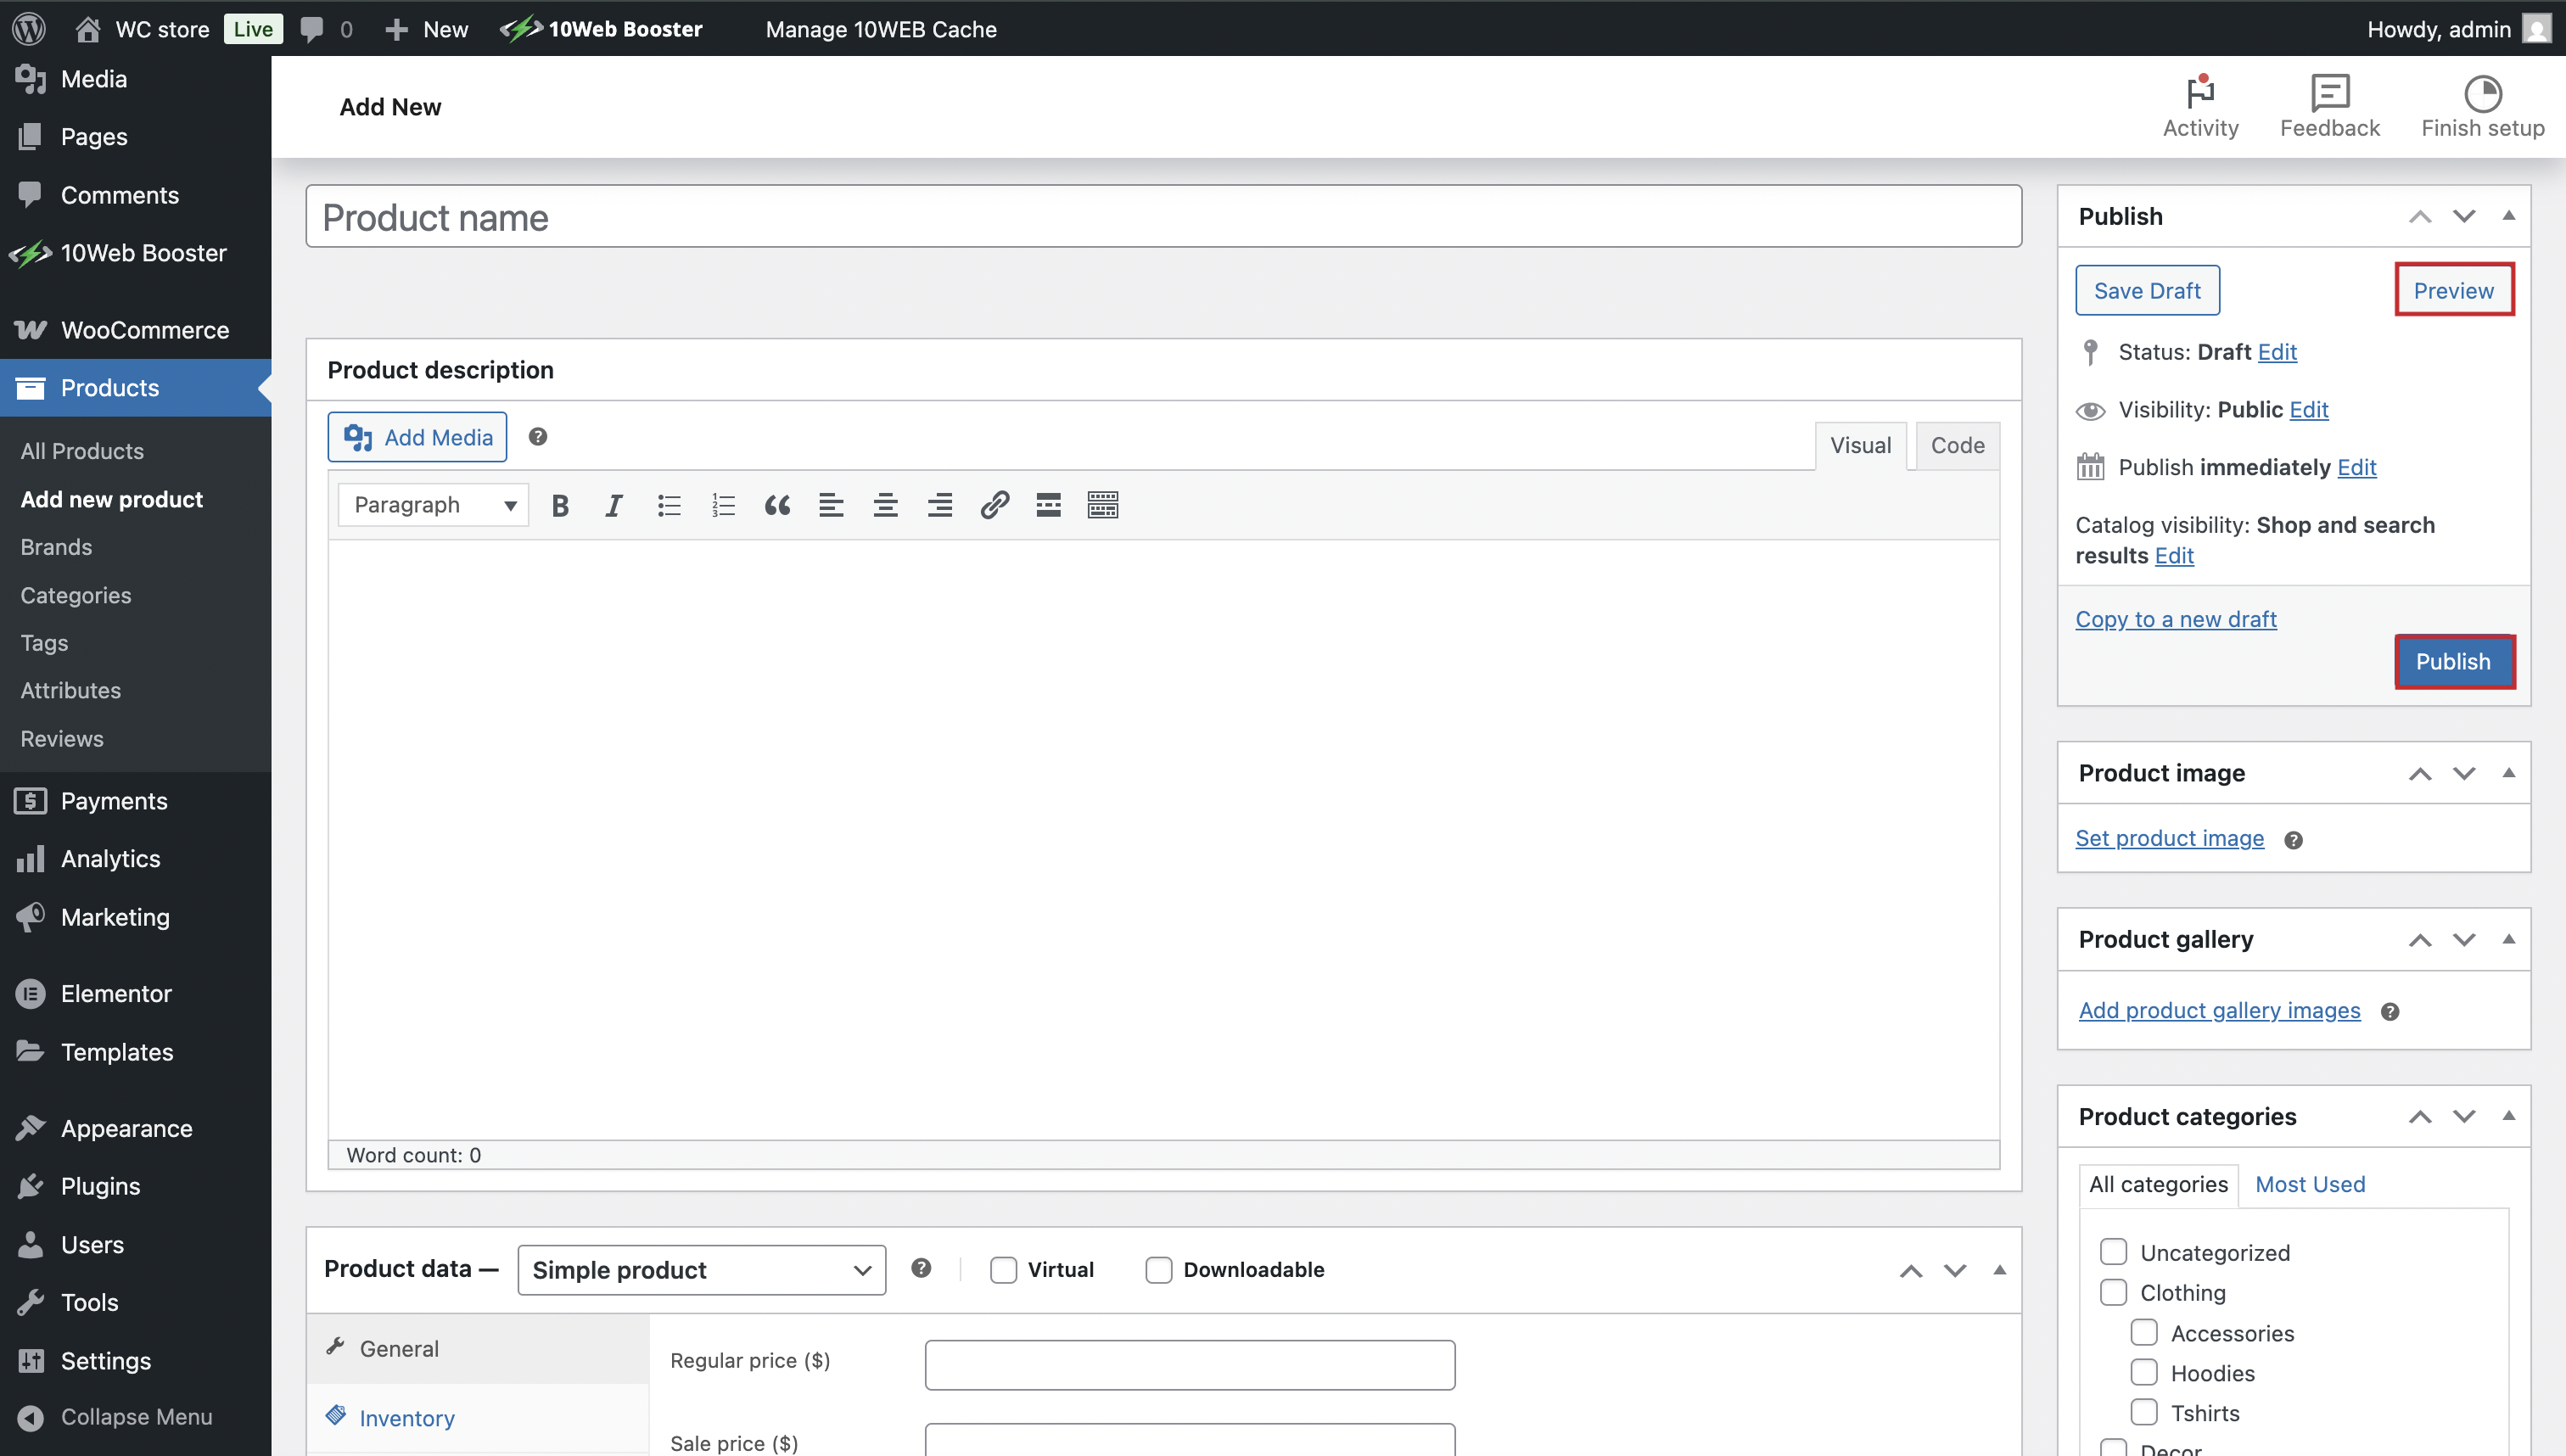
6. Add your products
Go to Products > Add New in your dashboard to add your products. You can enter details like product name, description, price, images.
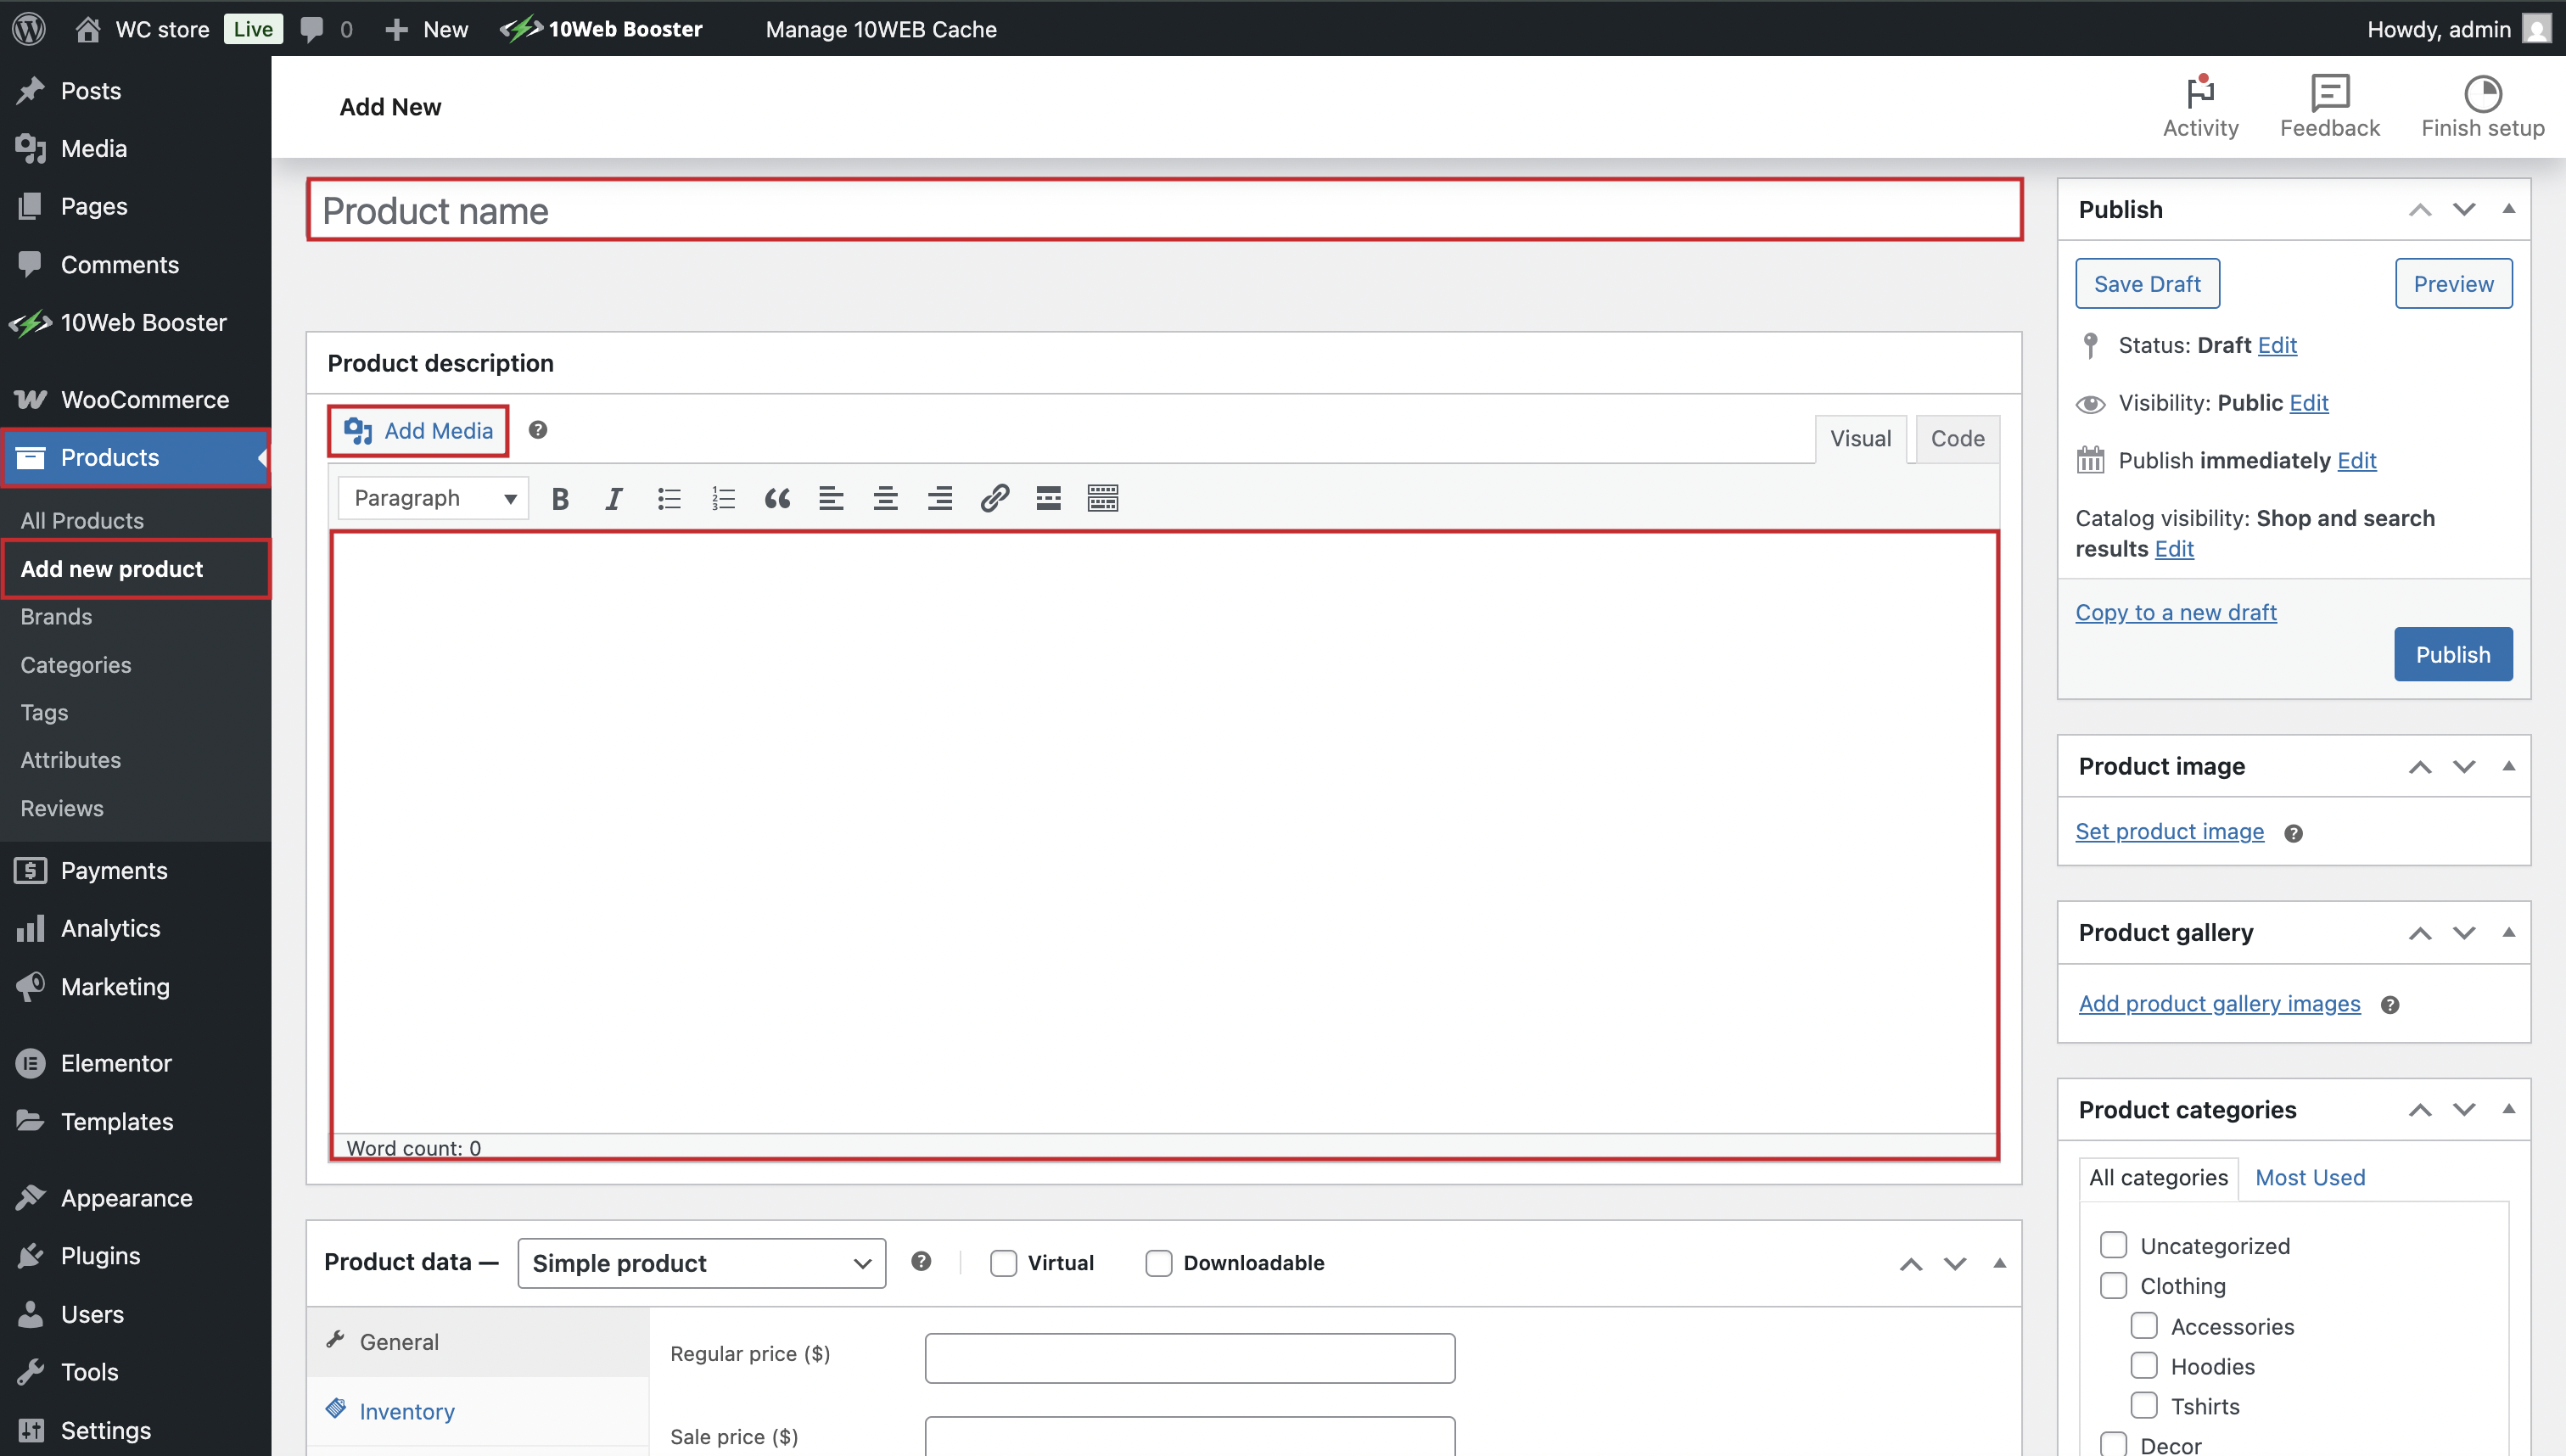
Under the main text editor, you will find the Product Data panel. Here you can adjust your Product Type from a dropdown menu.
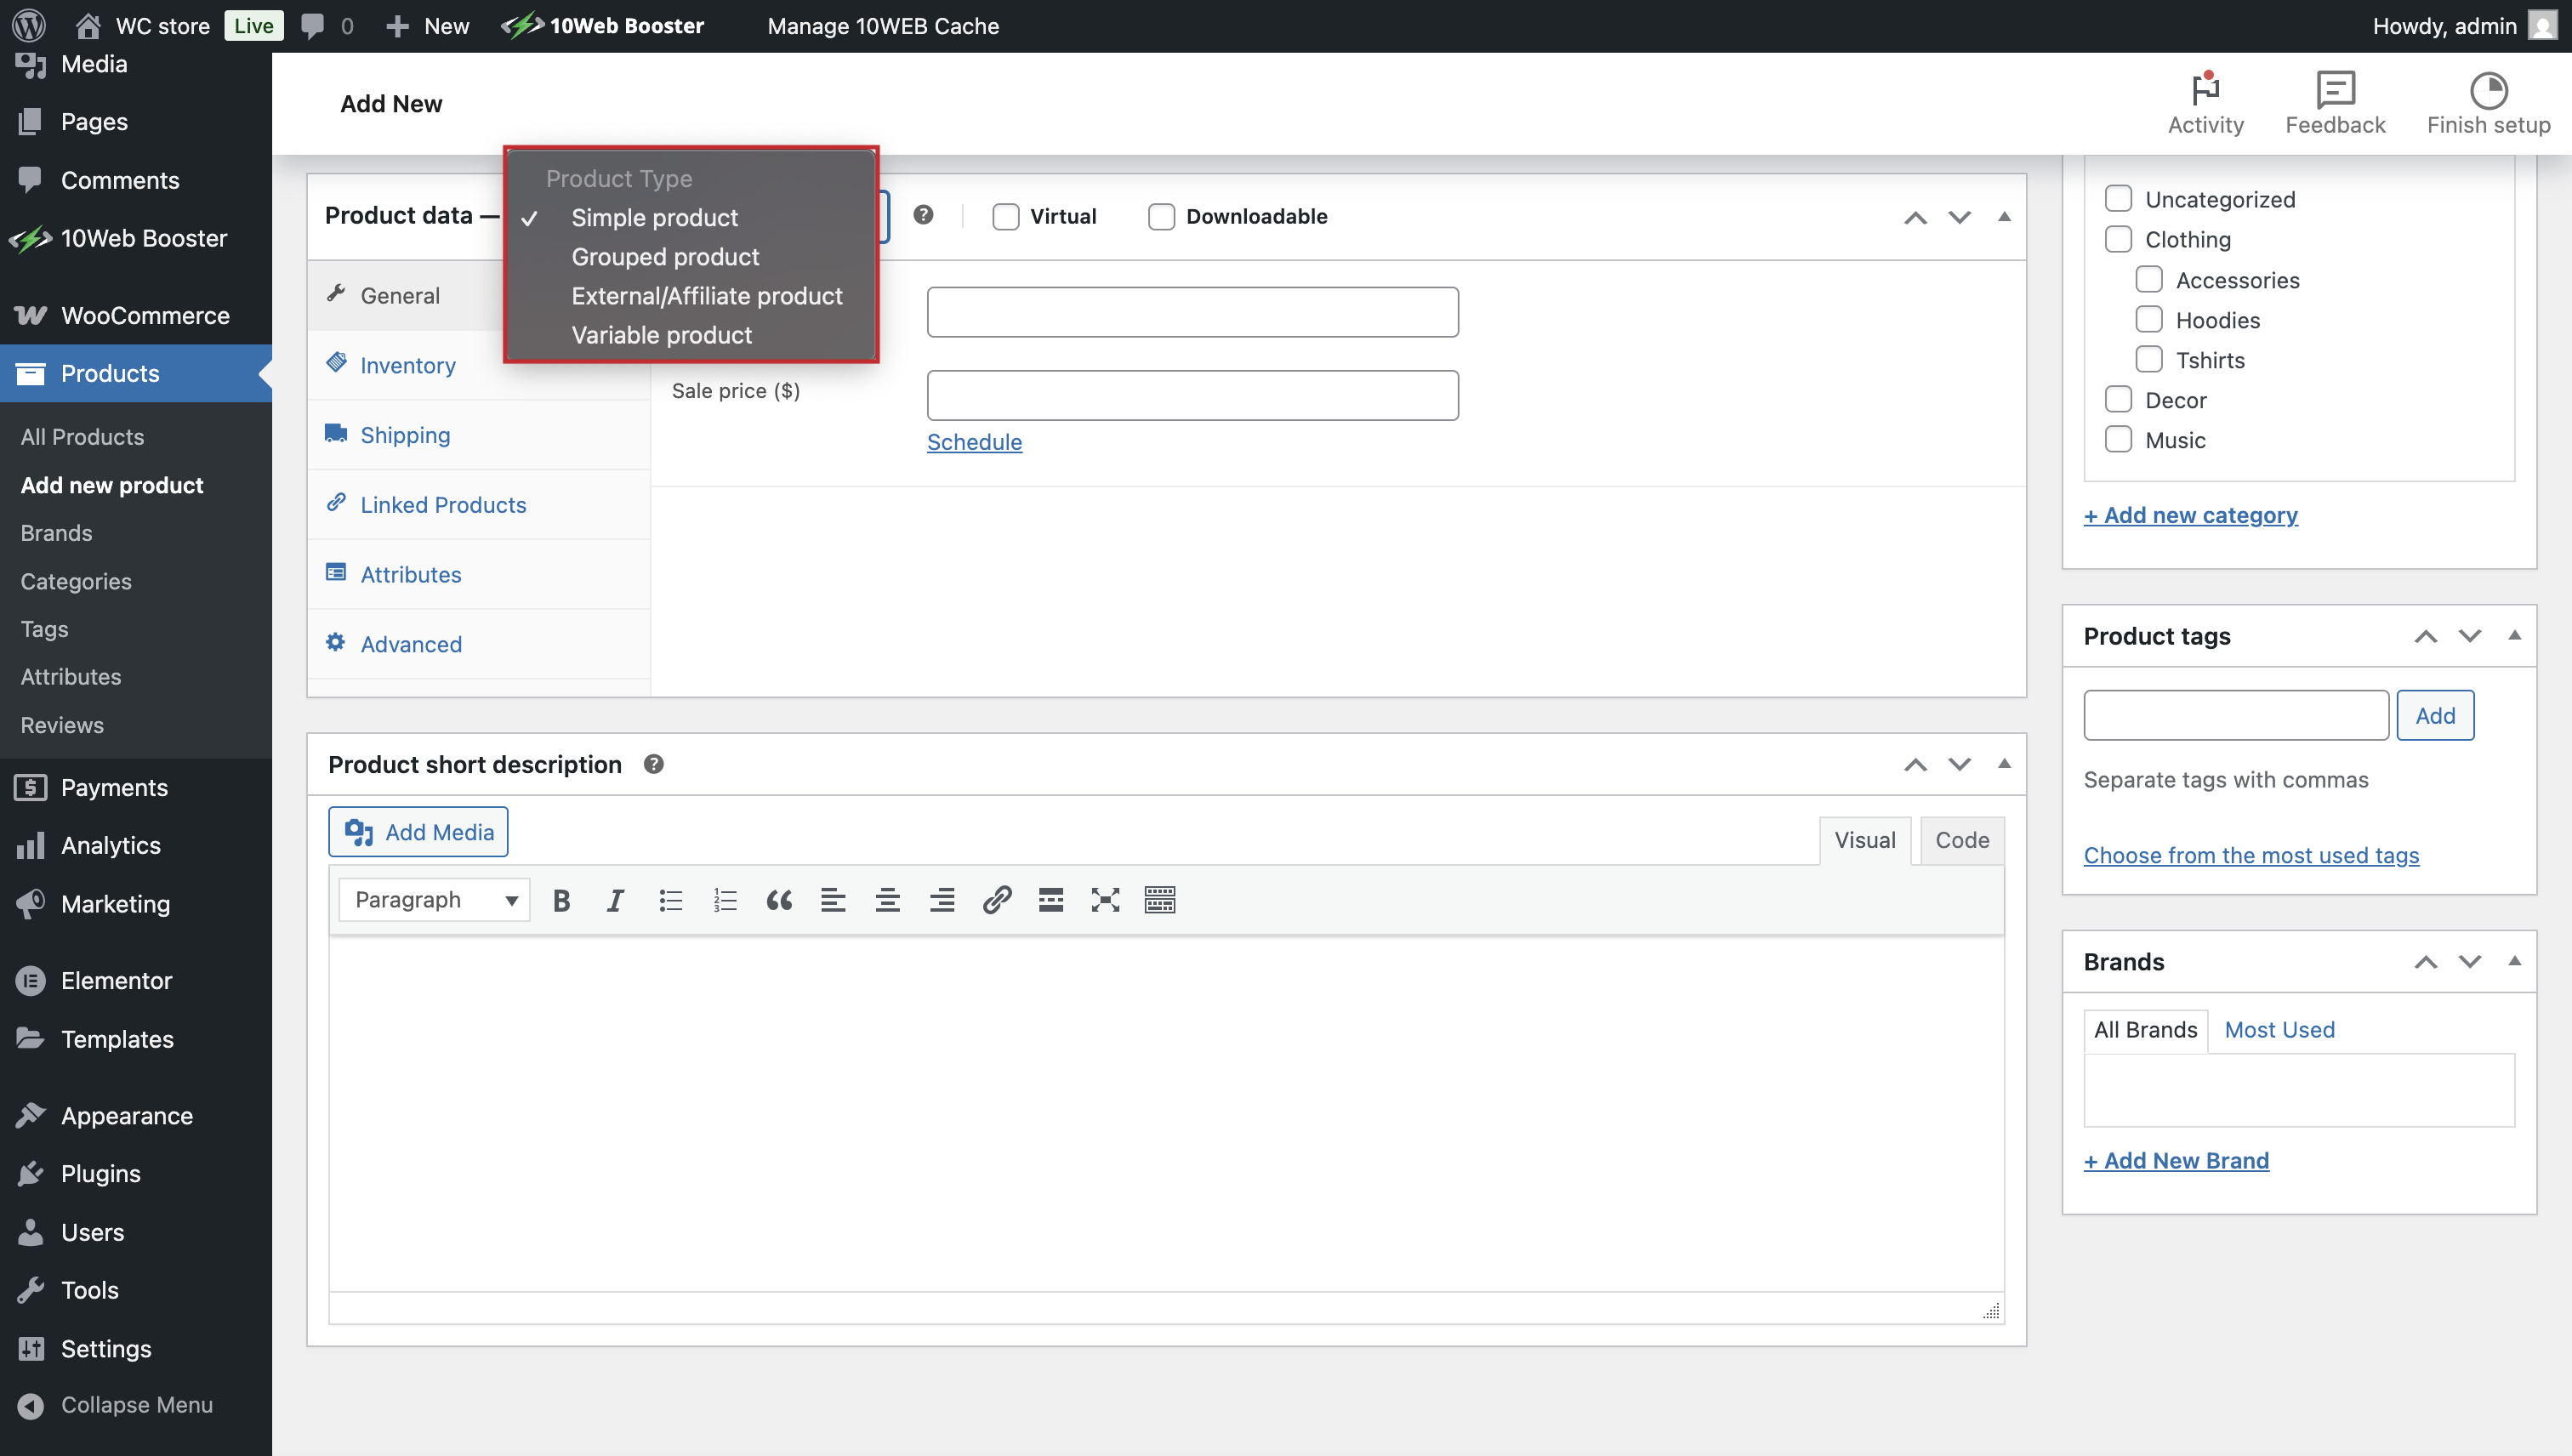
In the same panel you can specify product-related details such as General, Inventory, Shipping, Linked Products, Attributes, Advances.
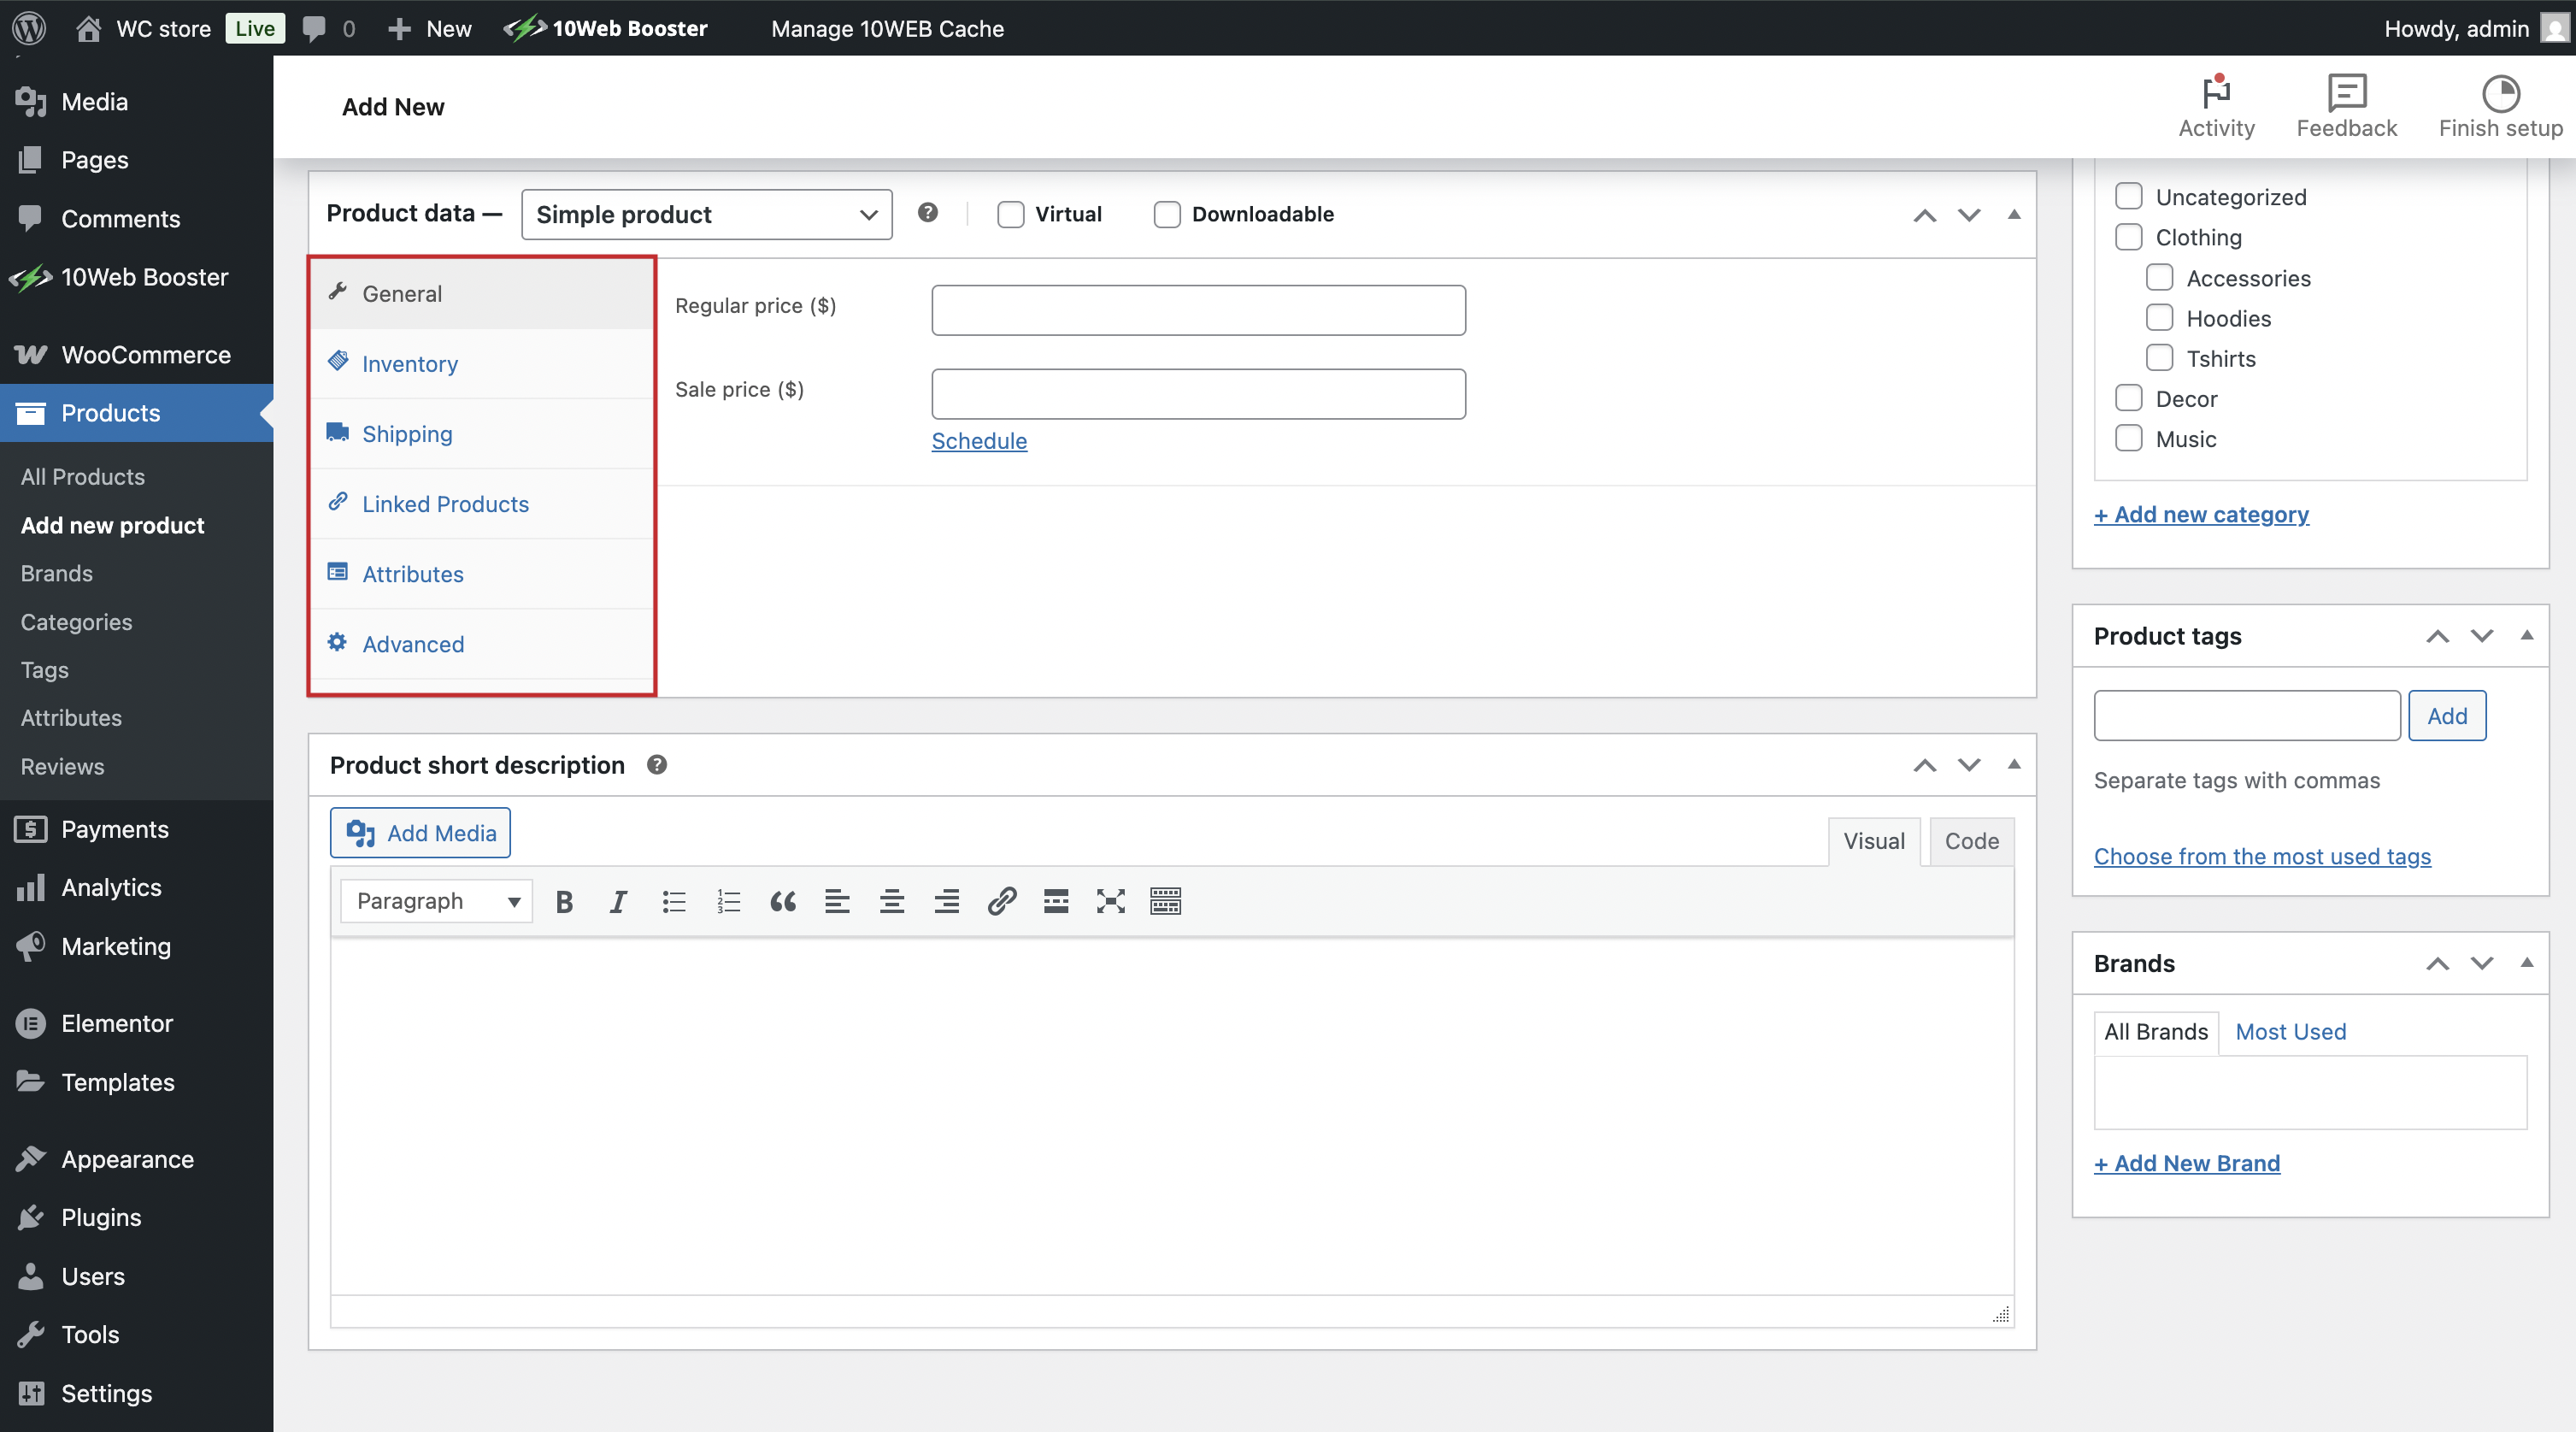
Don’t forget to set Tags, Categories, and Visuals for the product (the right-side panel). Once done, Preview and hit Publish to make them live on your site.
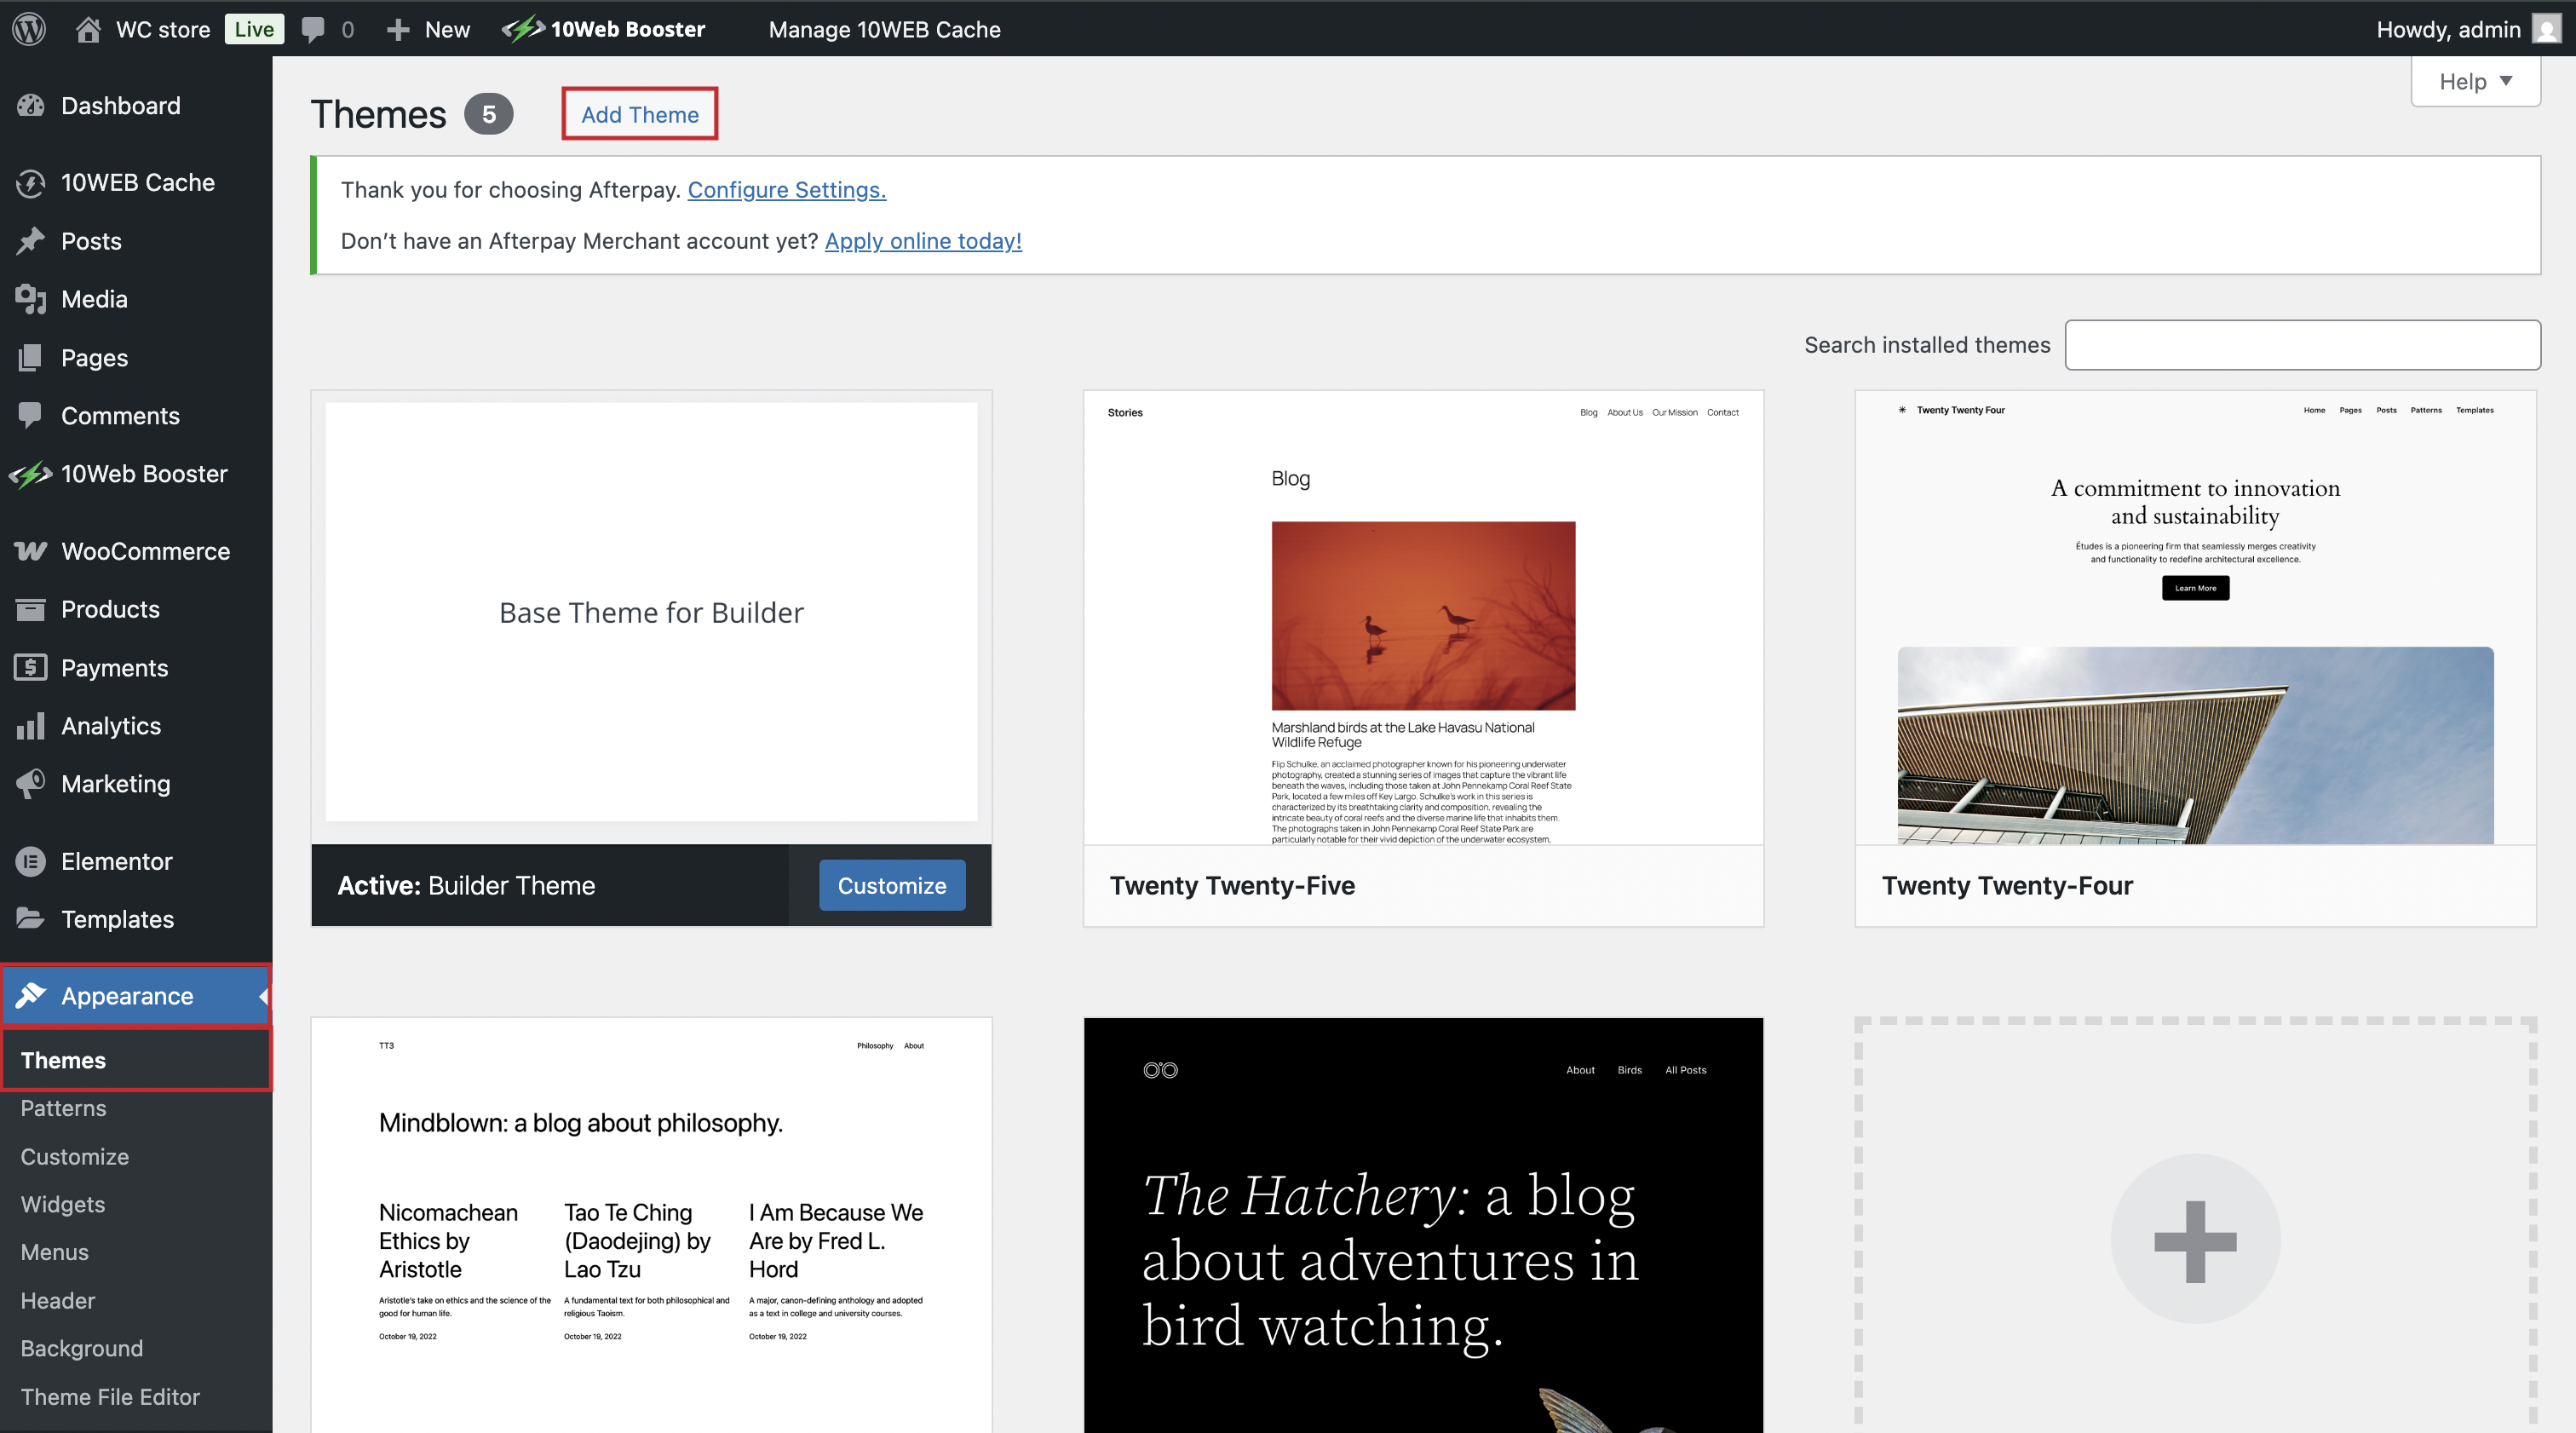
7. Choose a theme for your ecommerce website
If you’re just learning how to make an ecommerce website with WordPress, selecting the right theme is a big part of the process. For stores, it’s important to go for a theme that works well with WooCommerce. Here’s what to look for:
- Responsive: It should work across devices.
- WooCommerce-compatible: Ensure it supports your store’s functions.
- SEO-friendly: Helps your store rank higher in search results.
Once you pick a theme, install it and tweak it to match your brand. Find out how to choose WordPress themes in our blog. After you made your choice, adding is just a simple click from your dashboard: Go to Appearance > Themes > Add Theme > search and add the selected theme, and you’re done.
8. Add extensions to your ecommerce website
Extensions can improve your store’s functionality. Some popular ones are payment gateways (Stripe, PayPal), shipping extensions (real-time rates), tax plugins. You can add them by going to Plugins > Add New.
Here are a couple of guides to help you with choosing your plugins:
- 9 WooCommerce inventory management plugins for your online store
- Best WordPress security plugins for your website
- Best SEO plugins for WordPress
- 29 top AI websites you need to try
However, keep in mind that your hosting provider or website builder could already include features that support your activities. Check before you add any plugins.
Option 2: How to make an ecommerce website with WordPress using AI
Creating a WordPress-based ecommerce site is effective, but it can take time. If you’re looking to save effort and get started quickly, 10Web’s AI Ecommerce Website Builder is the tool to help you with that.
With 10Web, just answer a few simple questions, and the AI builds your WordPress website for you, including content, images (you can change those later), and WooCommerce integration. It’s like having a personal assistant build your store, with a couple of simple steps:
- Describe your store: Just type what you’re selling and who it’s for.
- Let AI build it: Instantly get a full site with products, layout, and copy.
- Customize & launch: Change colors, add your brand, and hit publish.
Once your site is set up and you want to make some changes, you can just type it in your chat with AI, and the AI Co-Pilot does it for you. The drag-and-drop editor is also a plus, if you prefer to do it manually. In any case, you don’t need any technical skills to make changes.
But the most important thing here is that with 10Web, you get all-in-one features: domain name (free for the 1st year), hosting, automatic WordPress and WooCommerce setup, AI website builder, AI Co-Pilot to make changes when you need, an optimized and secure store, an ecommerce dashboard to manage your store, and much more.
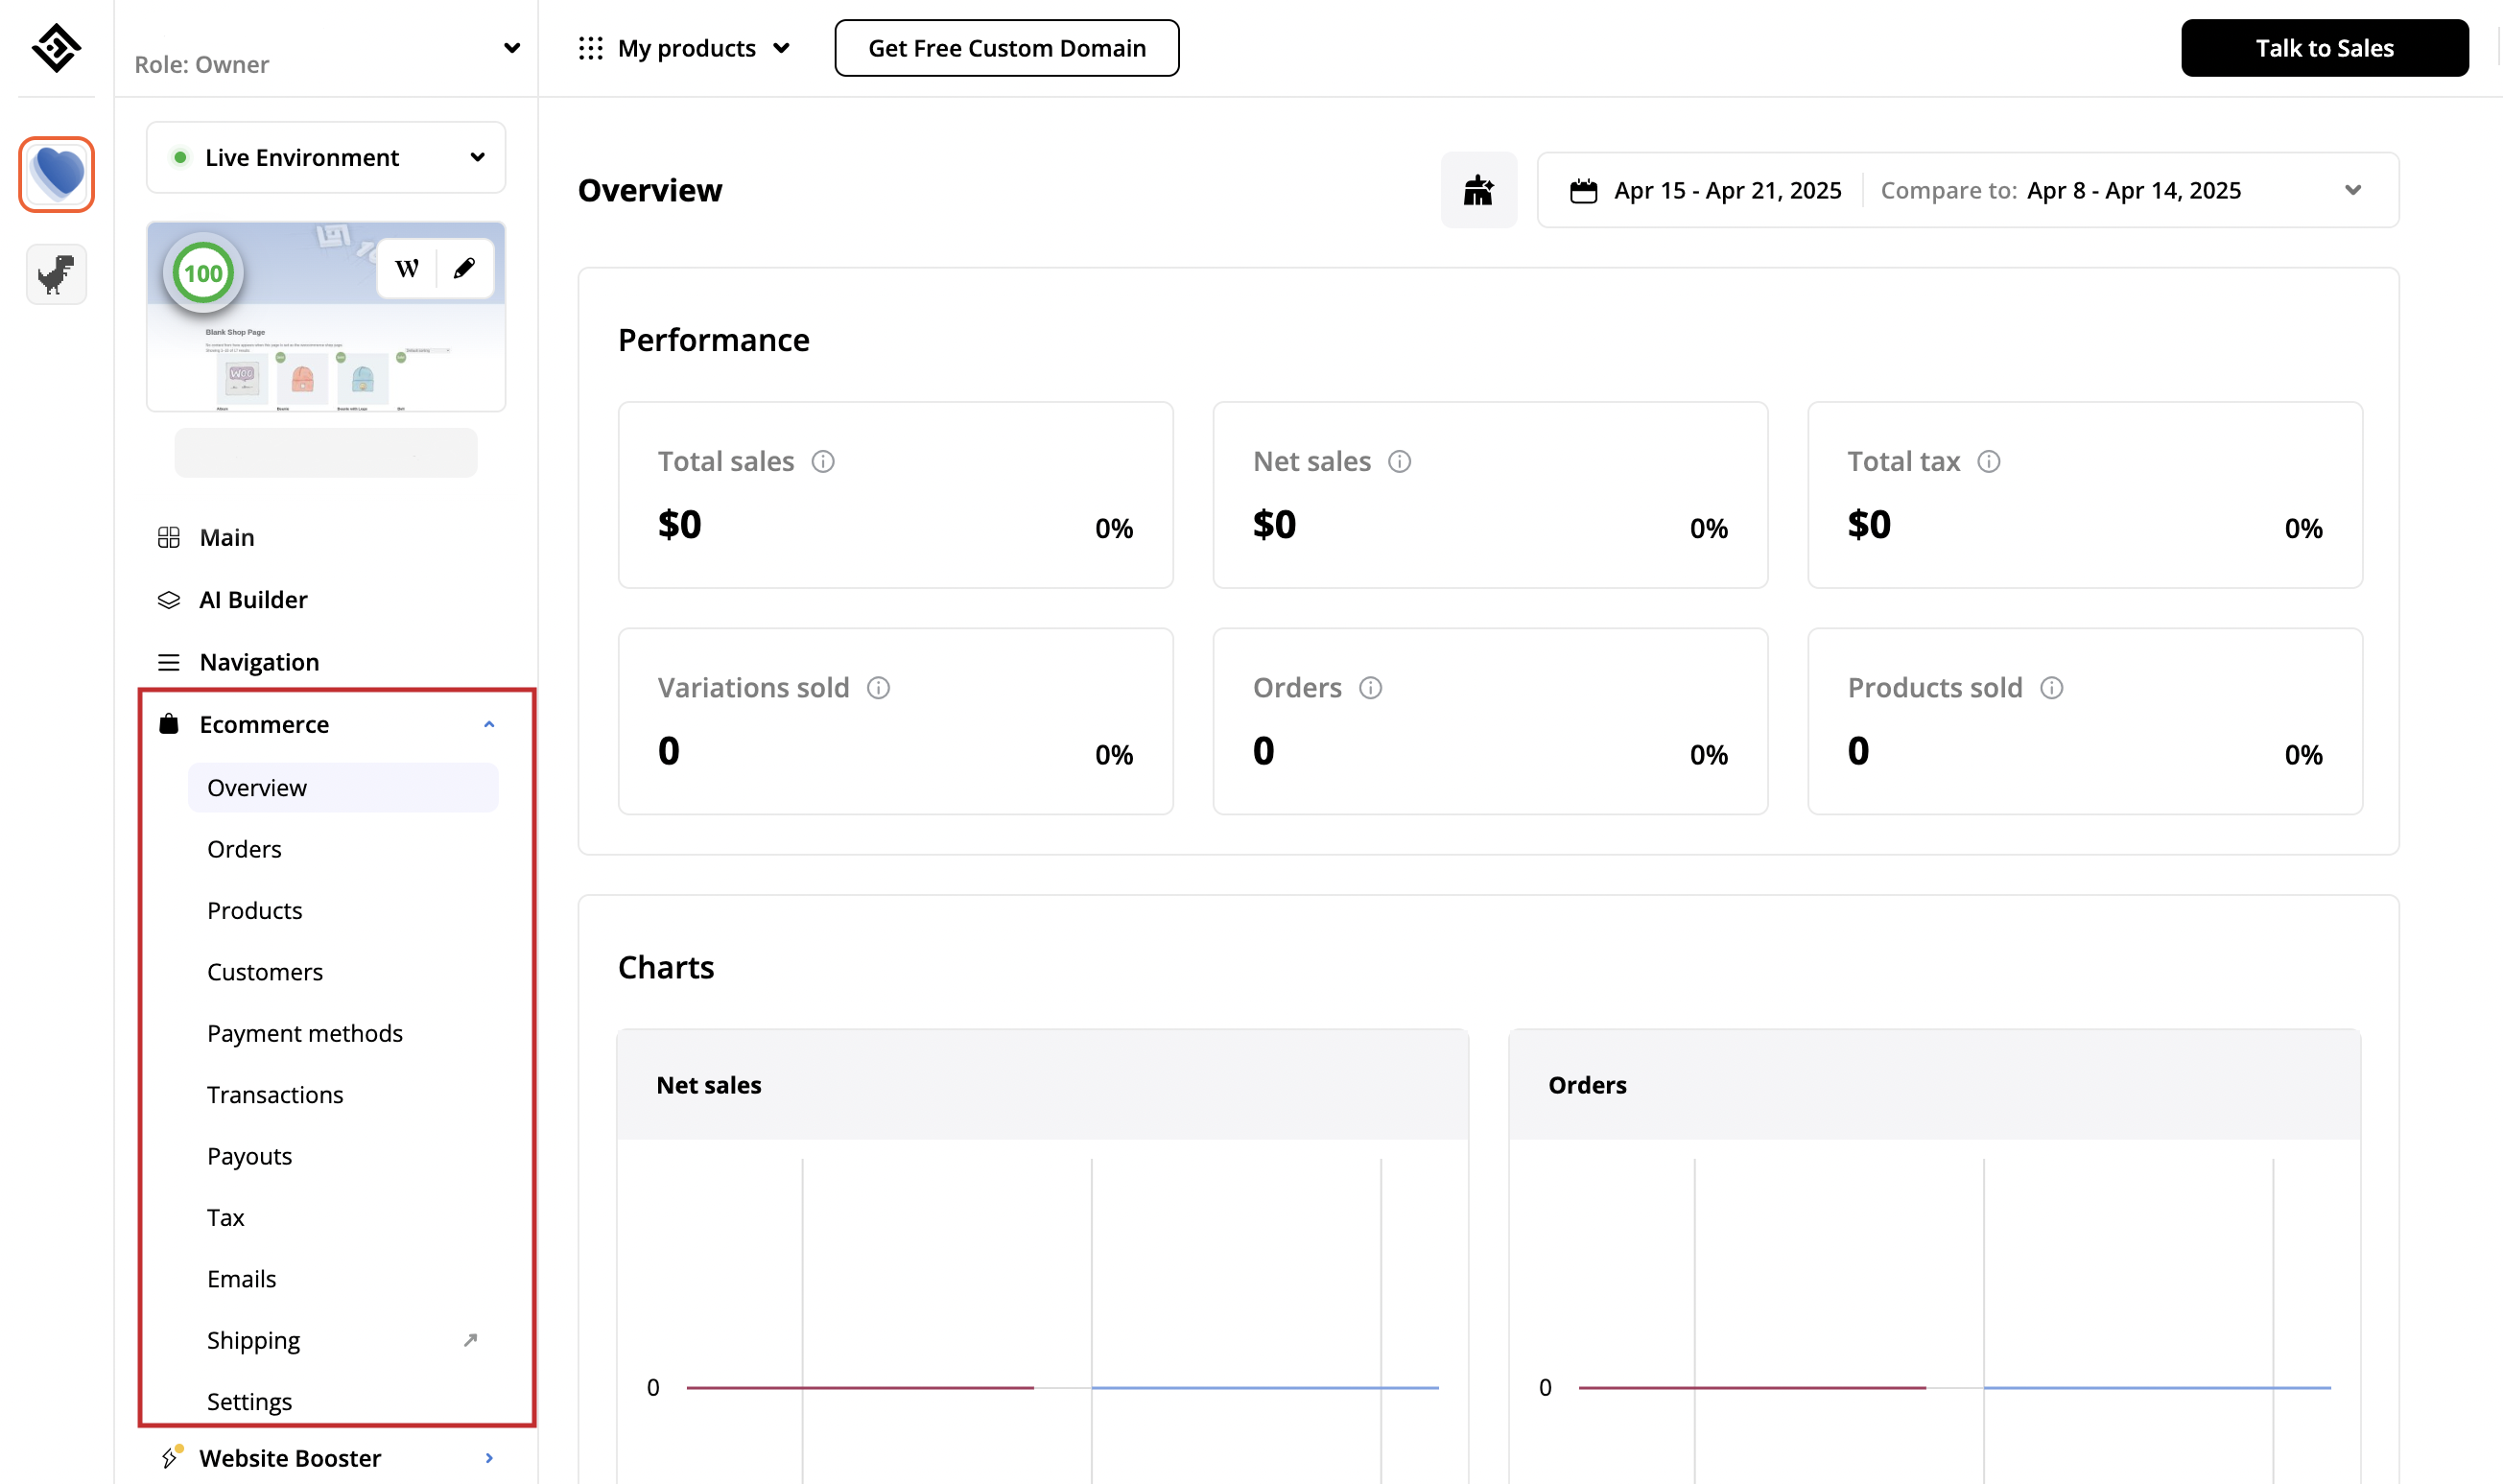
Let’s focus a bit on 10Web’s ecommerce dashboard, and see how managing your store is simple and smooth:
- See all key stats at a glance (sales, orders, products sold)
- Manage products, customers, and orders with ease
- Set up payment methods, taxes, and shipping in a few clicks
- Monitor transactions, payouts, and emails from one place
- All in one clean, faster and beginner-friendly interface
If you still prefer the WordPress dashboard, you can still switch to whenever you want with a click. But with 10Web, most users never need to.
If you want to skip the technical setup and save time, 10Web’s AI Ecommerce Website Builder is the ideal choice.
Create your dream website with 10Web AI Website Builder 
Build your website in 1 minute
and take your business online!
How much does it really cost to build a store?
It’s important to set realistic expectations about both cost and time. If you’re learning how to make an ecommerce website with WordPress, your total cost depends on how hands-on you want to be, and which tools you choose to speed things up.
What you’ll need (checklist)
- Domain: Your website’s address. Expect to pay around $10–$20/year. Free for the 1st year with 10Web.
- Hosting: This is where your website lives. Basic but good quality hosting can start at $10/month, but you may need more power as your store grows.
- Theme: The design of your site. Free themes are available, but premium themes (with more features) usually cost around $30–$60 (one-time).
- Plugins: Add extra features to your store (payment gateways, SEO tools, etc.). Some are free, but for a better experience, expect to pay $10–$100+ for premium plugins.
- Optional extras: You might want extra things like advanced security features, email marketing tools, or custom design work. These costs can add up, with some premium tools running $20–$50/month.
With 10Web’s Managed WordPress Hosting and AI Website Builder, instead of paying for individual components, you pay once for everything. That’s managed hosting, AI-powered website creation, and premium features included in simple, transparent payment of only $11/month.
Automate manual work with 10Web Managed WordPress Hosting and 10Web AI Website Builder. Optimize your WordPress website effortlessly. ![]()
Simplify WordPress with 10Web
Time estimate to launch your store
DIY route: Setting up a WordPress store manually can take anywhere from 10 to 40 hours, depending on how much customization you do. You’ll spend time installing WordPress, adding plugins, customizing the theme, and testing everything.
AI route: Using a tool like AI Website Builder, you can get your store up and running in 2 to 5 hours. The AI sets everything up for you, from WordPress installation to WooCommerce integration, saving you tons of time.
Quick reminder: Free can cost more in the long run
While starting with free tools might seem like the budget-friendly option, the time it takes to get everything right can add up. If you want to save time, going for a smart setup (premium themes, essential plugins) or even using AI can often be a better investment.
Shipping, taxes, and legal stuff (don’t skip this)
To make your online store operational and compliant, there are a few important areas you can’t skip: shipping, taxes, and legal policies. Let’s walk through the essentials.
WooCommerce shipping basics
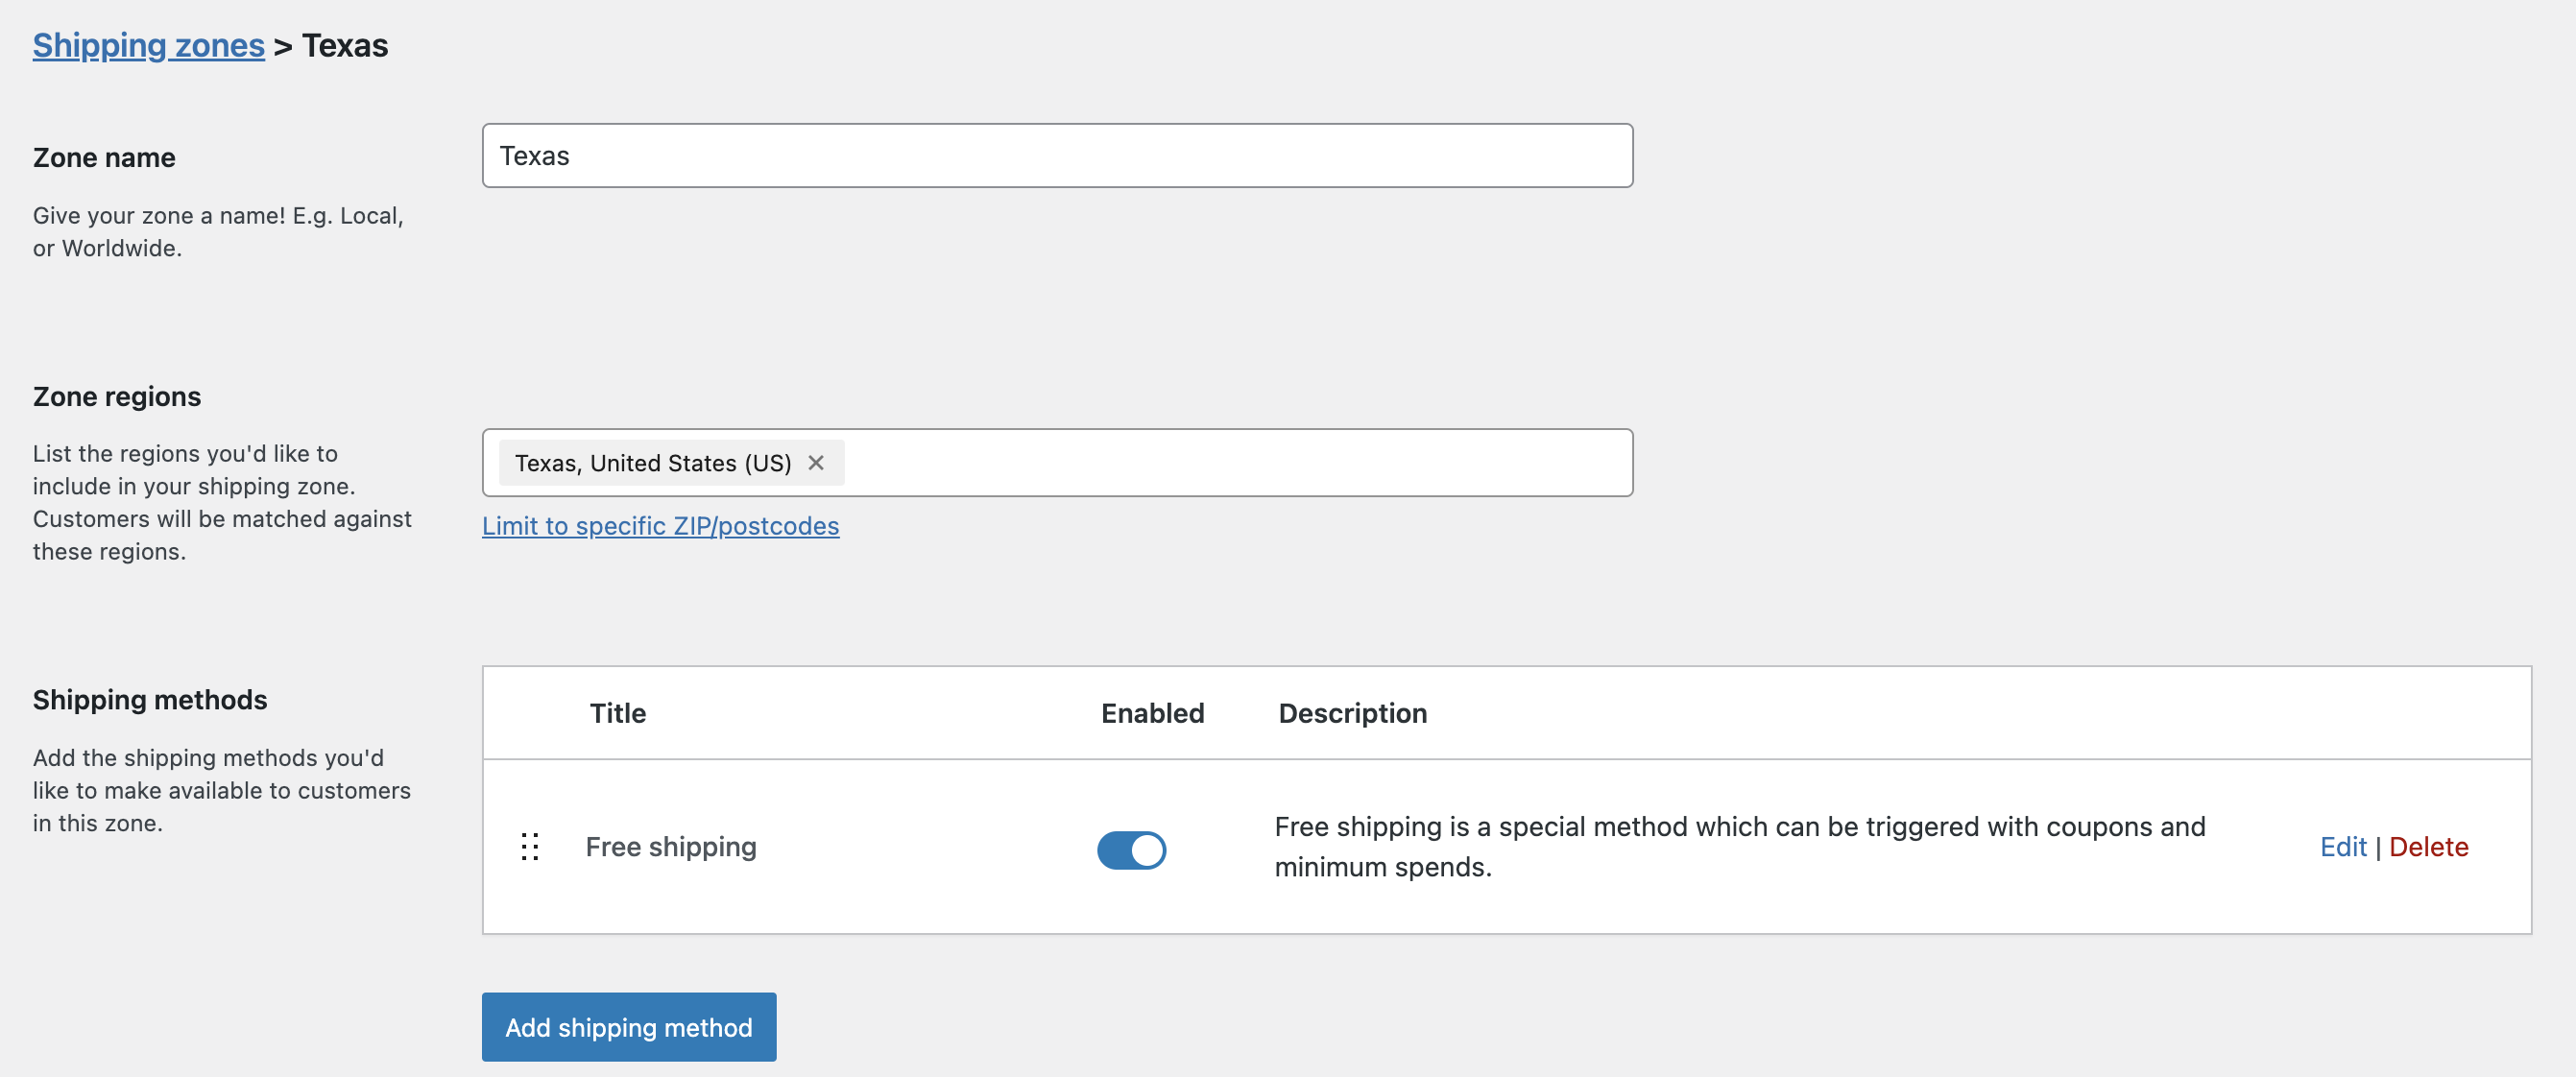
Setting up shipping zones is required to make sure your customers get accurate shipping rates. Here’s how to get started:
- Go to WooCommerce > Settings > Shipping > Shipping zones.
- Add shipping zones for different regions (local, national, international) by clicking Add Zone.
- For each zone, set a name, regions, methods, and even limitations.
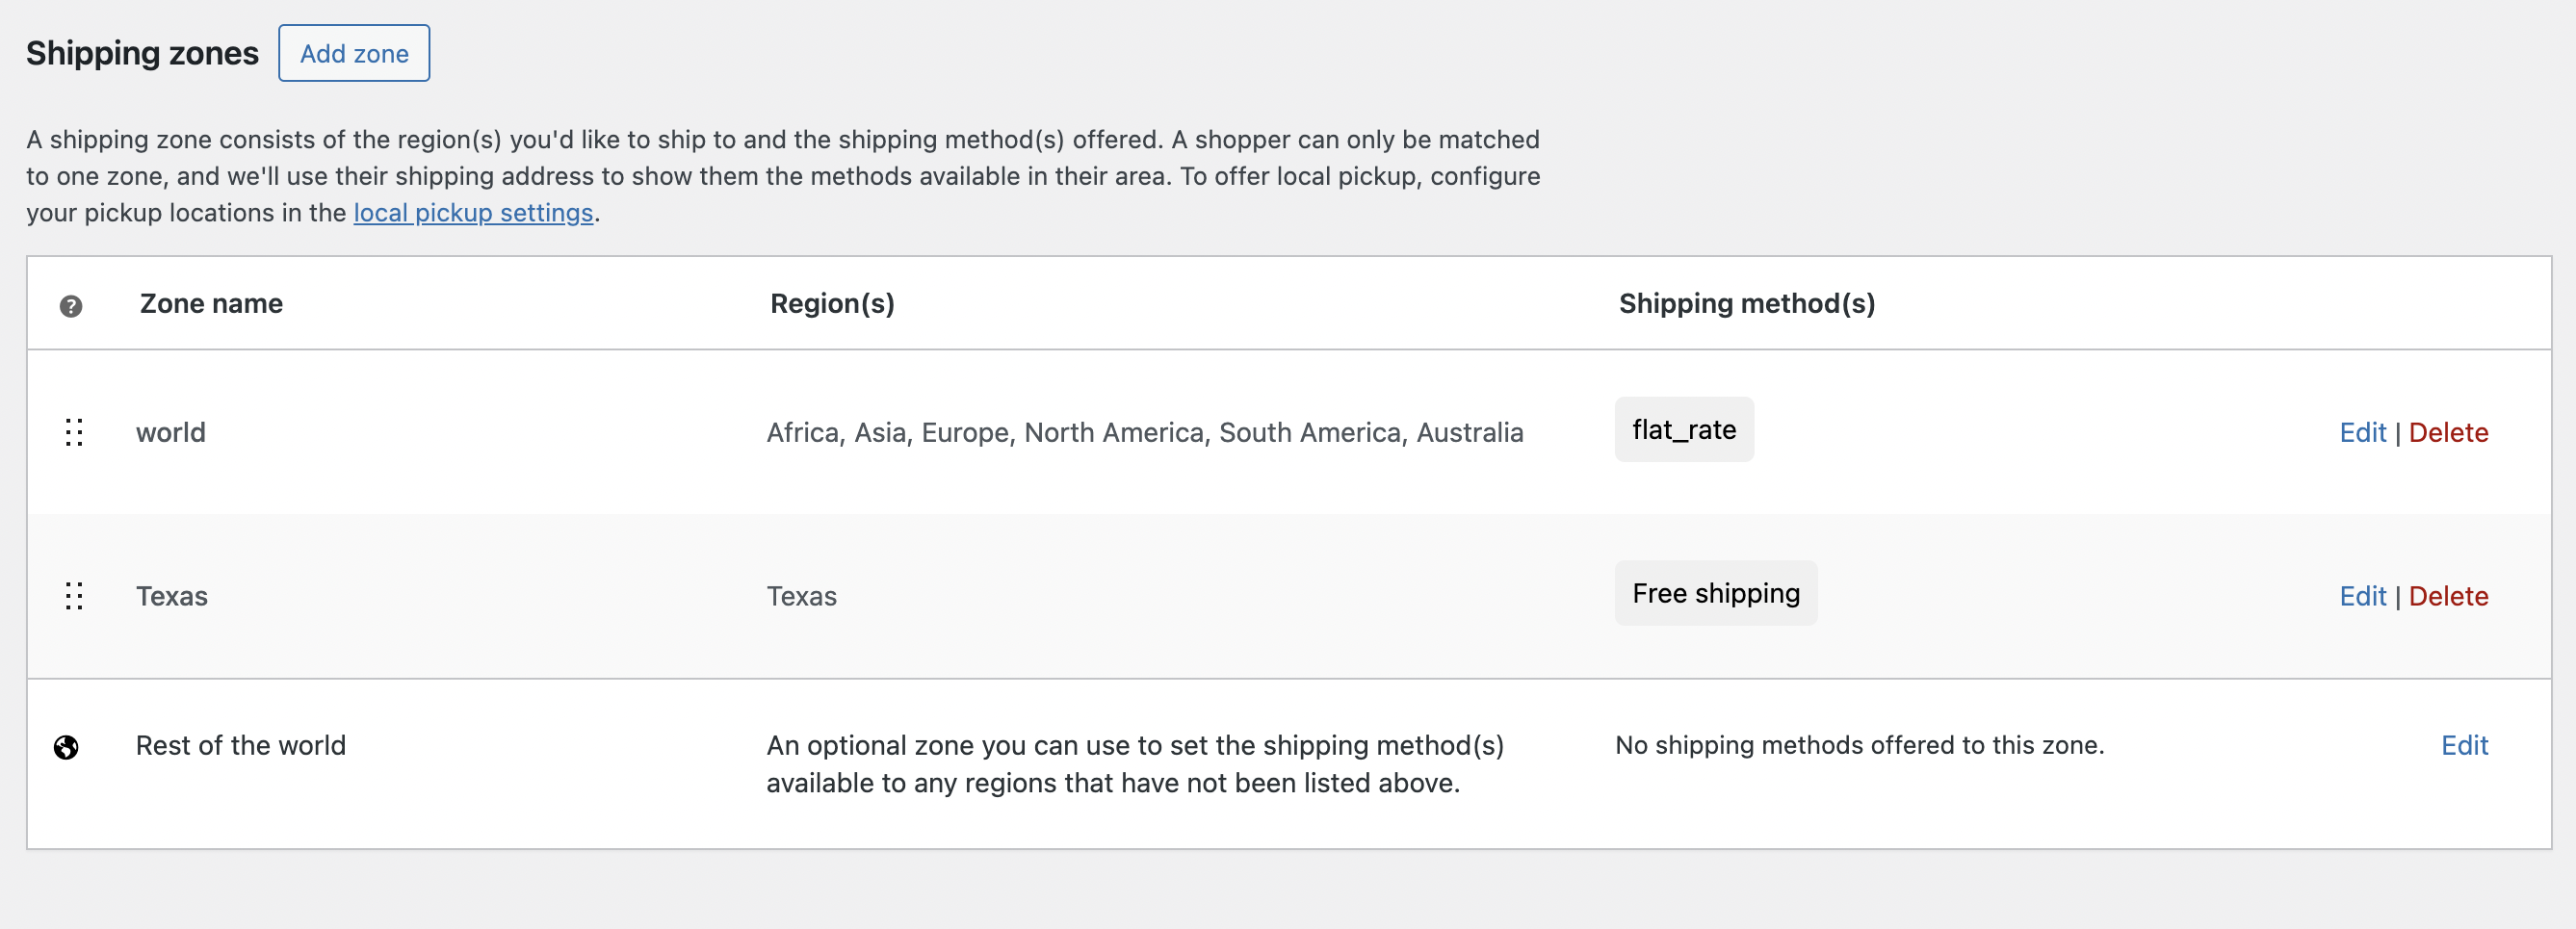
Here’s what a complete list of shipping zones should look like:
Insider tip: Always test your shipping zones with a dummy order to ensure everything works as expected before going live.
Tax plugins and manual zone setup
Taxes can be tricky, but it’s pretty easy to set up a working system with WooCommerce. You can configure tax settings based on:
- Shipping or billing address: Choose whether taxes should be calculated based on the customer’s shipping or billing address.
- Tax-inclusive pricing: Decide if your prices include taxes or if they should be added during checkout.
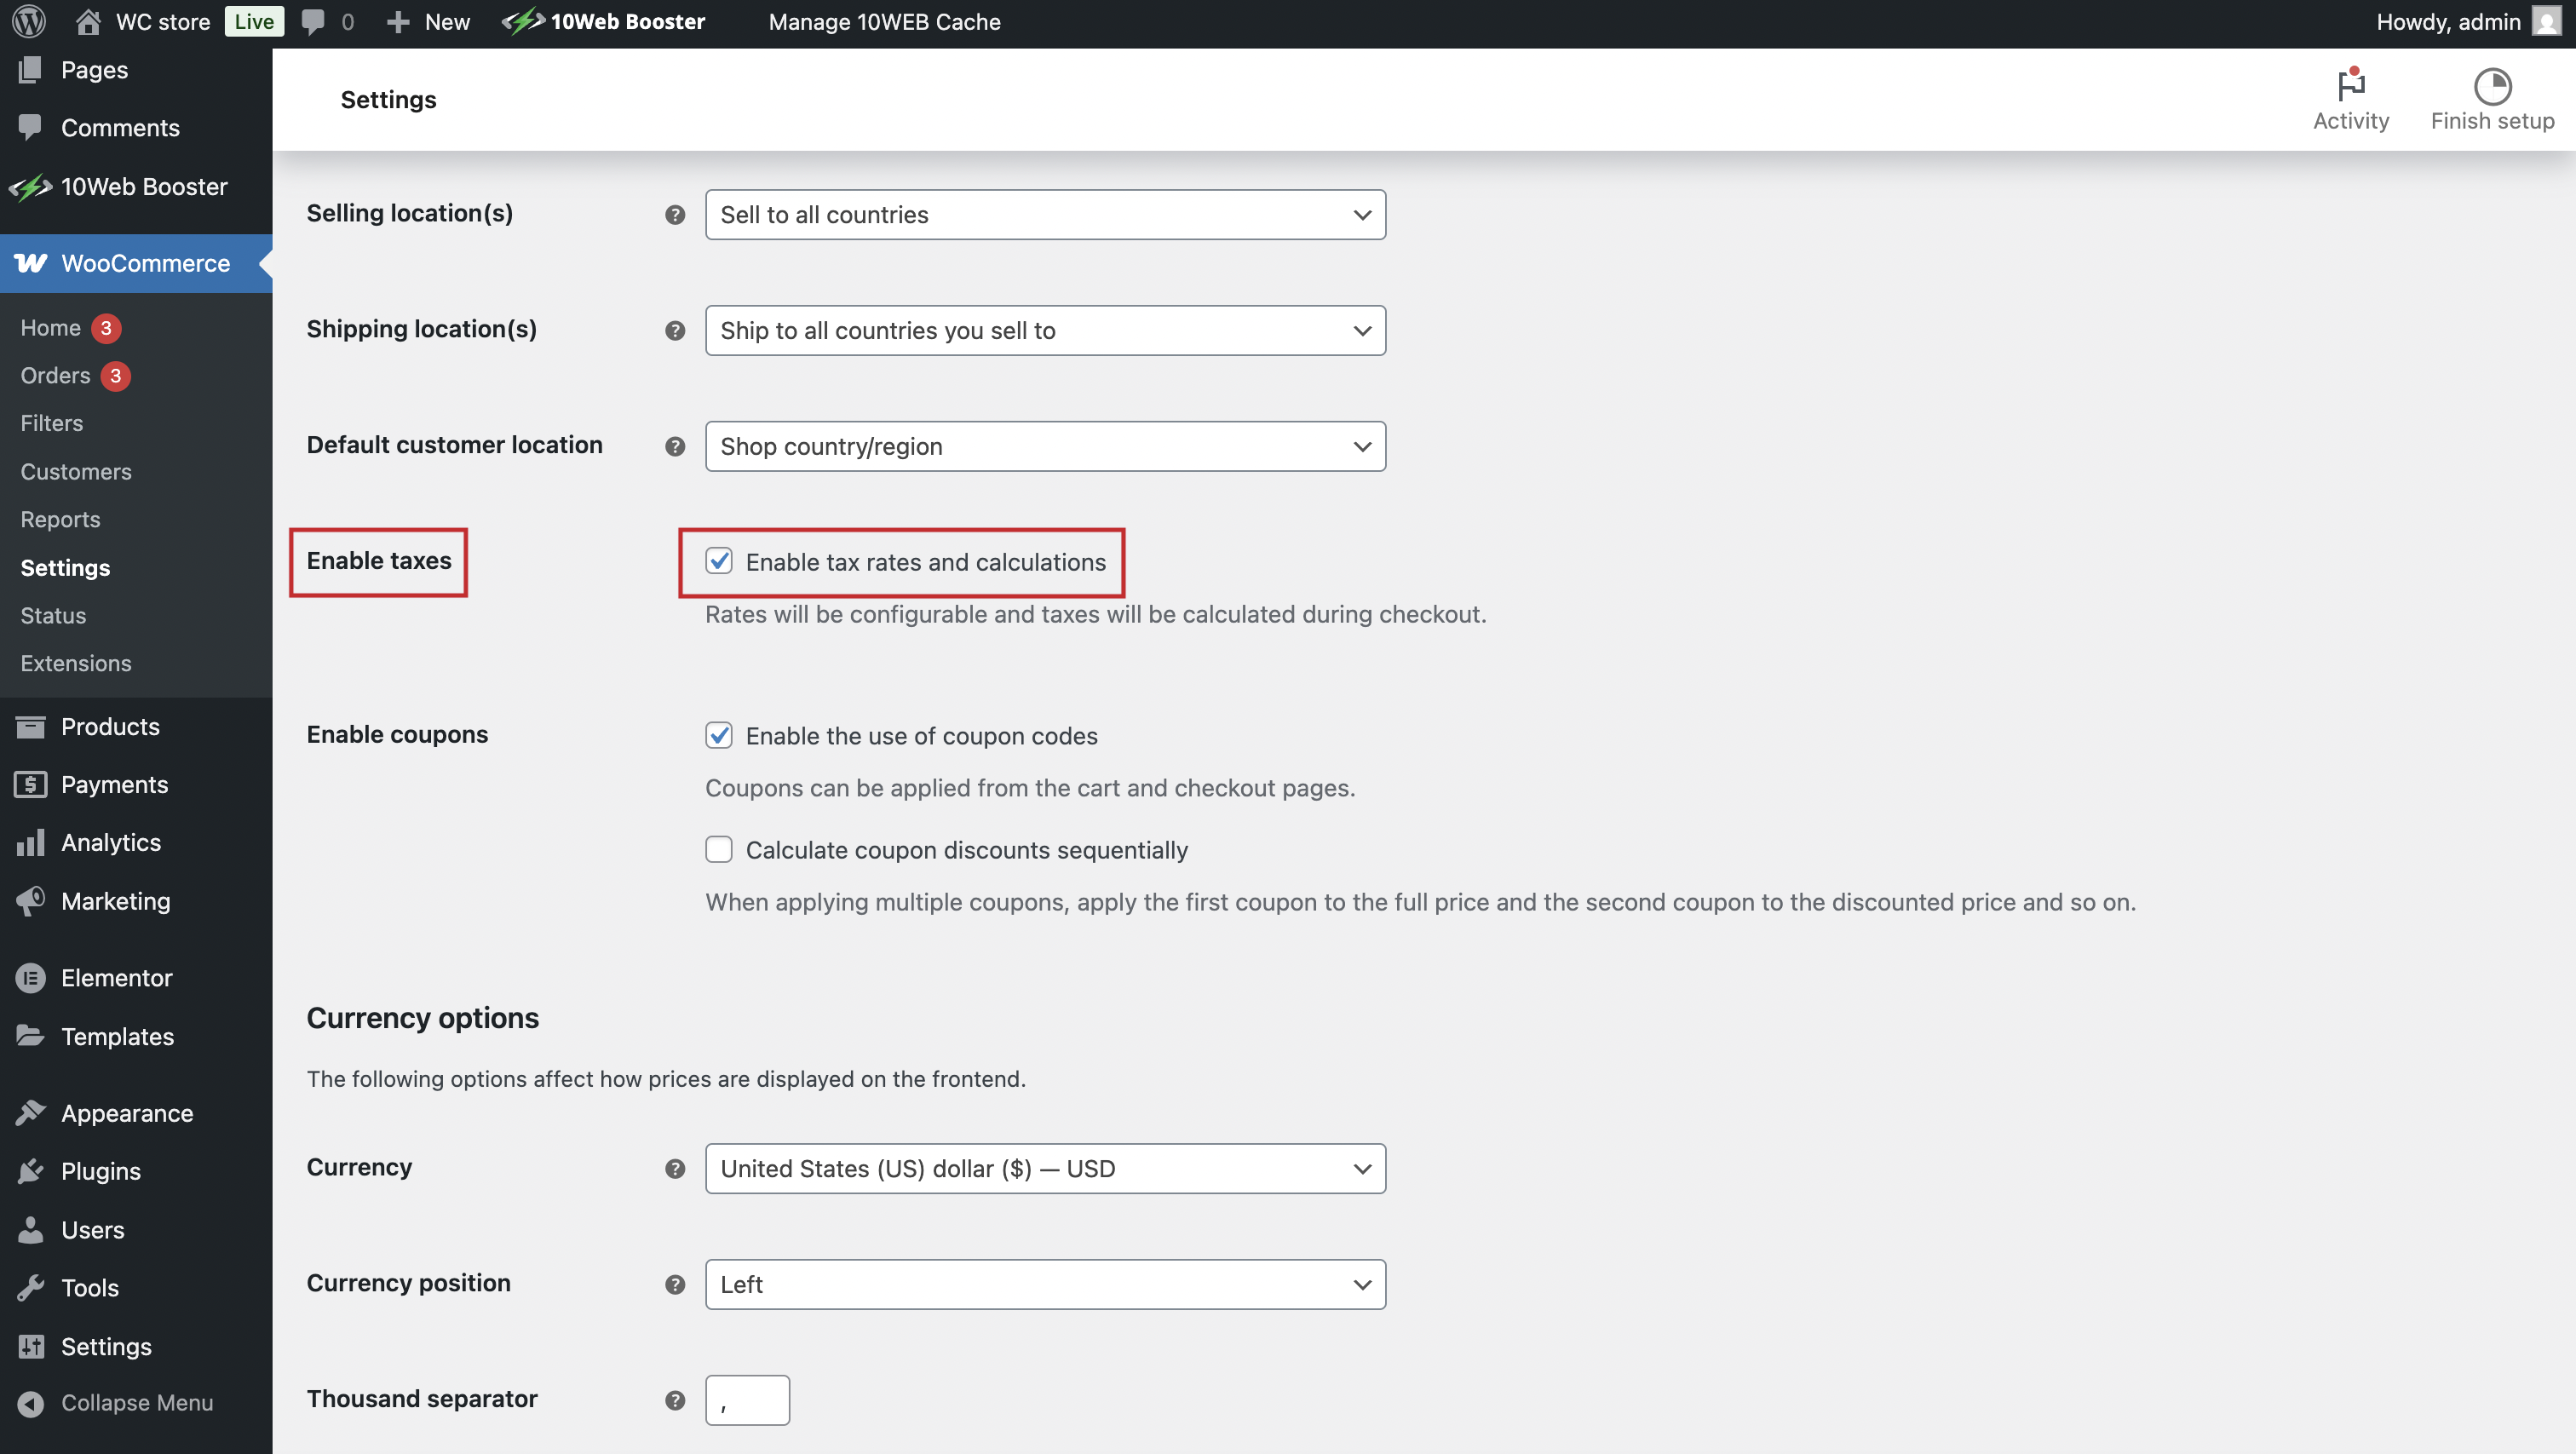
For US-based stores, use a plugin like TaxJar to automate sales tax calculations. For international stores, set up tax rates for each country or region manually under WooCommerce > Settings > Tax. If you can’t find the Tax page, you probably didn’t enable tax rates and calculations from General settings. Make sure the box is ticked:
Terms & conditions, privacy, and return policies
It’s important to have the legal pages in place for compliance and trust-building. These policies are not just there to give confidence to your customers when shopping, but also to protect your business. Let’s first get familiar with the terms:
- Terms & conditions: A page detailing your store’s terms, payment policies, and shipping terms.
- Privacy policy: A statement on how you handle customer data, including GDPR compliance if you’re in the EU.
- Return policy: Be clear about your return and refund process.
You can use free templates or generators to create these documents. There are many widely available tools for this. These legal documents should be accessible from the footer of your website.
Common beginner mistakes (and how to avoid them)
When you’re figuring out how to make an ecommerce website with WordPress, it’s easy to overlook the little stuff that causes big problems later. Let’s walk through some of the most common (but totally avoidable) mistakes.
1. Plugin overload
You might think the more plugins, the better. Wrong. Too many plugins can slow down your site and even cause conflicts between them. This affects site speed, which hurts both user experience and SEO.
Fast fix: Only install the plugins you absolutely need. Test them as you go, and remove any that aren’t necessary. Keep your plugin count lean and mean.
2. Forgetting mobile optimization
A lot of beginners spend all my time perfecting my desktop design, completely ignoring how my site looked on mobile. But most of the online shoppers use their phones, and you are losing them.
Fast fix: Use a responsive theme (like those built into 10Web’s AI Ecommerce Website Builder), which automatically adjusts your store’s layout for mobile. Always test how your site looks on mobile devices before launching.
3. No backups or updates
Another common mistake: You get so excited about your site going live that you forget to set up backups and automatic updates. A simple plugin update can cause your site to crash, and you’ll have no way to recover your data. An online store-owner’s nightmare.
Fast fix: Set up automatic backups through your hosting provider (like 10Web does for you), and enable automatic updates for your themes and plugins. You can also use plugins like UpdraftPlus for peace of mind.
4. Skipping checkout tests
You might think your checkout page’s fine and never test it. Then real customers start hitting the checkout and get stuck or abandon their cart due to errors in the process. Big oops.
Fast fix: Test your checkout flow with a dummy order before launching. Ensure that every step works, from adding items to completing payment. Don’t forget to test payment gateways and look out for unexpected charges.
5. No product validation before launch
This one’s not technical, but related to the business-side of things. You might love your products, but the customers you aim for might not care. You’ll be left with unsold inventory that wasn’t aligned with what my target audience actually wanted.
Fast fix: Before you go live (or even start anything), validate your product ideas. Start with market research or small test runs to see if people are actually interested. Tools like Google Trends or even testing a small batch can save you time and money.
Automate manual work with 10Web Managed WordPress Hosting and 10Web AI Website Builder. Optimize your WordPress website effortlessly. ![]()
Simplify WordPress with 10Web
Real advice from real store creators
The mistakes above are the most common, but not the only ones. There are a lot of blind spots, so let’s have a real talk and see what we can learn from people who’ve already made mistakes.
Before launching
Takeaway: Before diving in, take the time to learn the basics of WooCommerce and the essential setup. Use 10Web’s AI Website Builder to save time and reduce manual tasks. Even after you publish you can use 10Web’s user-friendly interface and editor, not be confused.
The Reality of SEO
Takeaway: SEO isn’t a one-time thing. Focus on long-tail keywords and content creation early on.
About customer experience
Takeaway: Focus on user experience (UX) as much as product quality. The AI Website Builder will optimize elements like simple navigation and checkout automatically.
Pre-launch checklist
Before you hit Publish, make sure everything is set for success. Use this checklist to ensure you haven’t missed any key steps:
- Domain and hosting
- WordPress and WooCommerce setup
- Theme and design
- Products, pricing, and shipping setup
- Test orders, mobile UX, and backups
- Legal pages and contacts
Note: The first three items of the checklist are crossed off automatically if you decide to use 10Web AI Ecommerce Website Builder.
You’re closer than you think
With a lot of boxes to tick, starting your ecommerce journey might feel confusing at first. But remember – you don’t need to do it all today. Mastering how to make an ecommerce website with WordPress is not a one day task. Each step you take gets you closer to your goal, and soon enough, your store will be up and running.
If you need more help along the way, there are a lot of guides online on ecommerce SEO, email marketing, and automation to keep your store growing.
If you’re looking to skip some of the setup and get straight to the customizing your store, 10Web makes it easier than ever to get started, with all-in-one hosting and AI tools to handle the technical stuff.
You’ve got this. And if you get stuck, just come back here or start building with 10Web today. The next step is yours.
Create your dream website with 10Web AI Website Builder
Build your website in 1 minute
and take your business online!
FAQ
Is WordPress & WooCommerce too hard for beginners? Can I build a store for free? What plugins do I really need? Should I use Elementor? What’s the best hosting if I’m on a budget? Can I make an ecommerce site with WordPress? Is WordPress good for ecommerce? How much does it cost to build a WordPress ecommerce website? Is Shopify better than WordPress?
Automate manual work with 10Web Managed WordPress Hosting and 10Web AI Website Builder. Optimize your WordPress website effortlessly. ![]()
Simplify WordPress with 10Web
Love the designs? Make them yours in a few clicks with 10Web AI Website Builder.Build your website in 1 minute
Create your website now for Free


![]()