Image optimization is crucial for managing a WordPress site, directly influencing page load speeds and SEO performance. This guide explains how to optimize images for WordPress in the best-accepted practices, which you can apply both through a plugin and manually with external tools. At the end of the article, you will also have the tips and tools needed for proper image optimization.
Let’s start exploring the basics.
FAQ
How do I optimize images for WordPress?
What is the best image optimizer for WordPress?
How do I improve the quality of an image in WordPress?
How do I optimize images in WordPress without plugins?
What’s image optimization in WordPress
When you’re working with WordPress, image optimization is key to maintaining fast page load times and enhancing your website’s SEO. Every image that you upload to your WordPress site is a file with properties such as file size and dimensions. The goal is to reduce the file size without compromising on the quality, which is essentially what image optimization is about.
Why optimize your images?
Before we learn how to optimize images for WordPress, let’s learn the whys of optimizing images. Optimizing images reduces the load time of your webpages, which in turn can lead to a better user experience and improve your rankings in search engine results.
Smaller image files use less bandwidth, saving hosting resources and reducing your website’s carbon footprint.
Common image formats include JPEG, PNG, GIF, WebP, SVG
- JPEG is ideal for photographs and realistic images with complex color schemes due to its efficient compression.
- PNG is great for images that require transparency or that have text, line drawings, and graphics because of its lossless compression.
- GIF is suitable for simple animations and images with a limited color palette.
- WebP is a modern format providing superior lossless and lossy compression for images on the web.
- SVG is best for logos, icons, and illustrations; it’s a scalable vector format which means it doesn’t lose quality regardless of the screen size or resolution.
Keep the formats and their uses in mind, since choosing the appropriate file format is integral in optimizing your images and ensuring that your WordPress site is visually appealing and performs well across all devices. Let’s get to learning how to optimize images for WordPress.
The impact of images on page load times
When you optimize images in WordPress, your site becomes quicker and more pleasurable to navigate, ensuring a better user experience.
Images are one of the heaviest elements on your web pages, directly influencing loading times. Heavy images take longer to load, which can be frustrating for your visitors. Optimal image sizes can reduce page load times, significantly enhancing user experience. To keep your images in check, always monitor their file sizes and compress them without sacrificing quality.
How to optimize images for WordPress
Before you upload your next image to WordPress, remember that image optimization significantly impacts how visitors view your website, thanks to speed and search engine ranking. Here’s how you can make sure your images are finely tuned for a smooth WordPress experience.
Choose the image format
Your image format affects both quality and file size. Use JPEG for photographs or images with lots of color variations. For graphics with solid colors or transparent backgrounds, PNG is ideal. WebP offers high-quality compression with smaller file sizes and ensures browser compatibility. Above we discussed which purpose each format type is suitable for.
Choose the image size
Images should be no larger than the maximum display size needed on your website. If the widest content area is 800 pixels, scale your images to that width. Use an image editor like Adobe Photoshop to adjust the dimensions before uploading.
WordPress has four size options when you upload an image or add it to a post or page, here they are:
- Thumbnail size (150 x 150 pixels)
- Medium size (maximum 300 x 300 pixels)
- Large size (maximum 1024 x 1024 pixels)
- Full size (the original size of the uploaded image)
Choose the one that’s most appropriate for your page template and website design interface.
Use image CDN
A Content Delivery Network (CDN) can serve images from servers close to your visitors, speeding up load times. Integrating a CDN can also reduce the load on your hosting server and help with image optimization processes.
How CDNs work with image delivery
A CDN consists of a network of servers distributed globally, designed to deliver your website’s content, including images, to users in the fastest possible way. When a user visits your WordPress site, the CDN redirects their image requests from the original server to a closer server in its network. This accelerates the delivery and reduces bandwidth consumption on your primary server.
There are several compelling reasons to use a CDN for image delivery on your WordPress site:
- Faster Load Times: Serving images through a CDN can decrease the time it takes for your pages to load by ensuring that users download images from a server closest to their physical location.
- Reduced Latency: Since the content is stored in multiple locations, latency is minimized, leading to quicker image loading.
- Improved Performance: Offloading images to a CDN can reduce the load on your WordPress server, allowing it to perform better especially during traffic spikes.
- Global Reach: A CDN enables your content to be rapidly accessible to a global audience, ensuring a consistent experience regardless of geographic location.
Integrate Cloudflare with WordPress
Cloudflare is a popular CDN provider known for enhancing website performance and security. To integrate Cloudflare with your WordPress site, you should:
- Sign up for a Cloudflare account and add your website.
- Change your domain’s nameservers to the ones provided by Cloudflare.
- Install and activate the Cloudflare plugin on your WordPress site.
- Enter your Cloudflare API key and configure the plugin settings.
Follow these steps to enable Cloudflare to cache and serve your images from its network, thus using the CDN benefits to enhance your website’s performance.
Compress the image
Compressing images reduces file size without a noticeable loss in quality. Tools like TinyPNG offer smart lossy compression techniques ideal for PNG and JPEG files. WordPress plugins such as reSmush.it and EWWW Image Optimizer automate the compression process for images you upload.
Use SEO attributes
Alt text, titles and captions improve accessibility for users and serve as important metadata for SEO. As you upload images to your media library, you’ll see fields where you can enter this information.
Alt text is a brief description that tells screen readers—and search engines—what the image is about. It’s essential for users who rely on assistive technology to access your WordPress website on devices.
- To add alt text, upload an image to the media library.
- Click on the image to edit its details.

- Enter a descriptive text in the Alt text field.
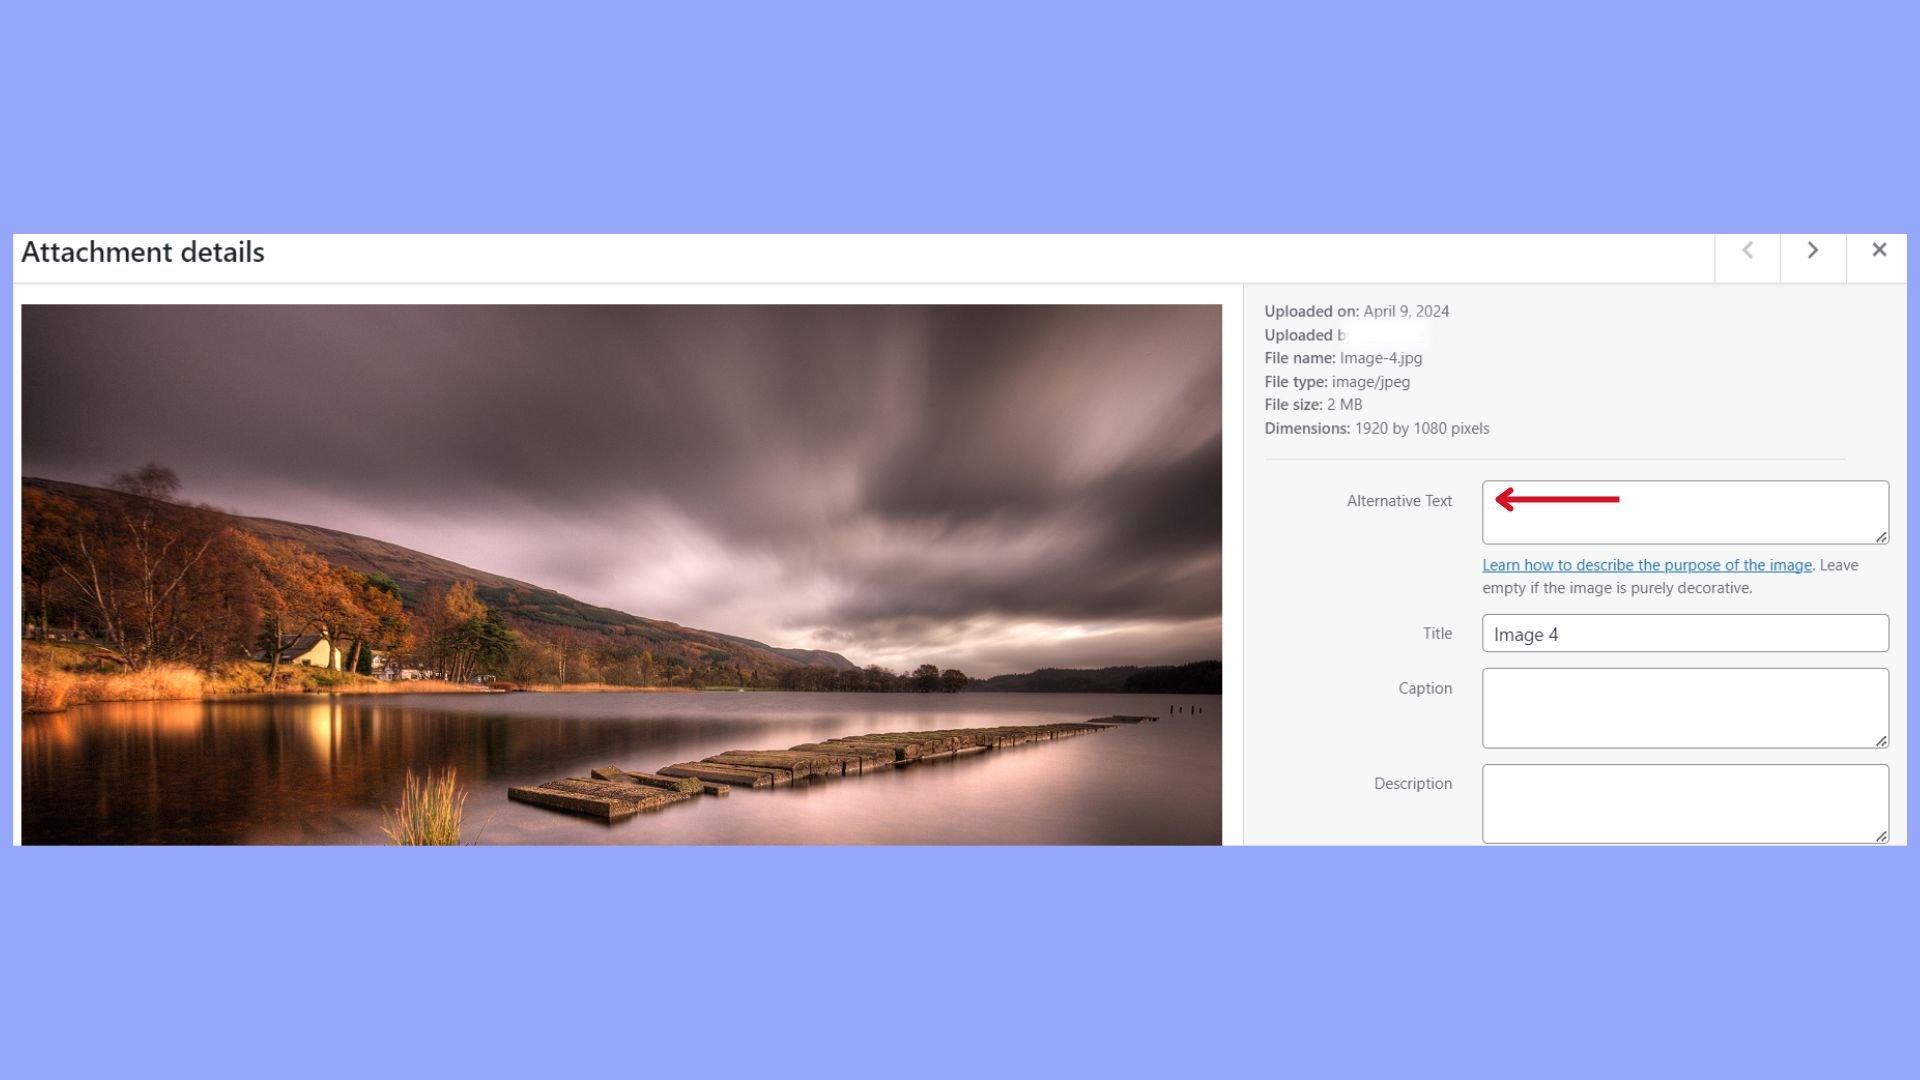
Image captions, on the other hand, might not be as critical for SEO, but they can provide additional context for all users. These are usually displayed below the image.
- Still in the image details, you can add a caption in the Caption field.
- Keep captions concise, but informative.
Using alt text and captions is a simple yet powerful way to make your WordPress website more inclusive and improve the experience for users visiting on various devices, including smartphones and mobile devices. Plus, by accurately describing your images, you’re enhancing your site’s visibility and accessibility, which is beneficial for everyone.
Effective compression and resizing
Before you upload your next image to WordPress, understanding the difference between lossy and lossless compression formats will help you balance image quality and file size. At the same time, learning the best practices for resizing will help you improve your website’s performance.
Lossy vs. lossless compression
Lossy compression reduces file size by eliminating some data, which can affect image quality. If you’re aiming for a faster website and can compromise slightly on image quality, lossy compression is a good choice. Tools such as Photoshop allow you to adjust the Quality slider under the Export options to control the degree of compression.
On the other hand, lossless compression preserves all the original data in the image, which is beneficial when you need high-quality visuals for your WordPress site. Although lossless files are larger, they’re ideal when image detail is paramount, and you can still optimize them to some extent.
Resizing images vs. scaling pixels
Resizing and scaling may seem similar, but each affects image quality in different ways. Resizing changes the pixel dimensions of your image, effectively reducing its size on disk and speeding up load times. If you reduce an image’s dimensions, it’s important to maintain the same aspect ratio to avoid distortion.
Alternatively, scaling changes the size of an image on your website without altering the image file itself — this is more about controlling how the image appears in different contexts on your site.
The role of aspect ratio
The aspect ratio, typically the relationship between an image’s width and height, is key to maintaining an image’s appearance after resizing. To preserve an image’s original look, keep the same ratio of width to height. This ensures that when you adjust either dimension, the other adjusts proportionally—a critical aspect of effective resizing techniques.
Sizing for responsive design
Responsive design calls for adaptive sizing, where images adjust to different screen sizes and resolutions seamlessly. WordPress automatically handles responsive images, but you can optimize further by providing various sizes. When you resize images, consider creating multiple versions of pixel dimensions to cater to different devices.
Using image optimization plugins
An easy way to optimize images on WordPress is by using image optimization plugins. These tools help you significantly freeing you from the manual optimization work.
Choose the optimization plugin
Before you dive into the vast pool of WordPress plugins, pinpoint what you need in an image optimization plugin. Consider factors like the size of your image library, the average traffic your site receives, and your hosting environment. Two widely recognized plugins are reSmush.it for a simple, automated approach and EWWW Image Optimizer, which offers more granular control over your optimizations.
Premium vs. freemium plugins
The battle between freemium and premium plugins is struck by the balance of features and cost. Freemium plugins like Optimole provide basic services at no cost and offer paid upgrades for advanced features. On the flip side, fully premium plugins often provide extensive support and powerful optimization capabilities. For example, WP Rocket not only optimizes images but also offers a comprehensive solution for site caching and speed improvement.
Configure plugins for maximum efficiency
To make the most out of image optimization plugins, ensure their settings are tuned to your site’s needs. Start by setting up automatic image compression and enable features like bulk optimization to process existing images.
Some plugins may offer conversion to next-generation image formats, which can be much more efficient than traditional formats like JPEG or PNG. Always check the plugin’s compatibility with your WordPress version to prevent any issues.
Using 10Web Image Optimizer
When you decide to optimize your images with the 10Web Image Optimizer for your WordPress site, you are choosing a tool that emphasizes image performance without sacrificing quality. With its smart compression techniques, you can significantly reduce the load times of your pages.
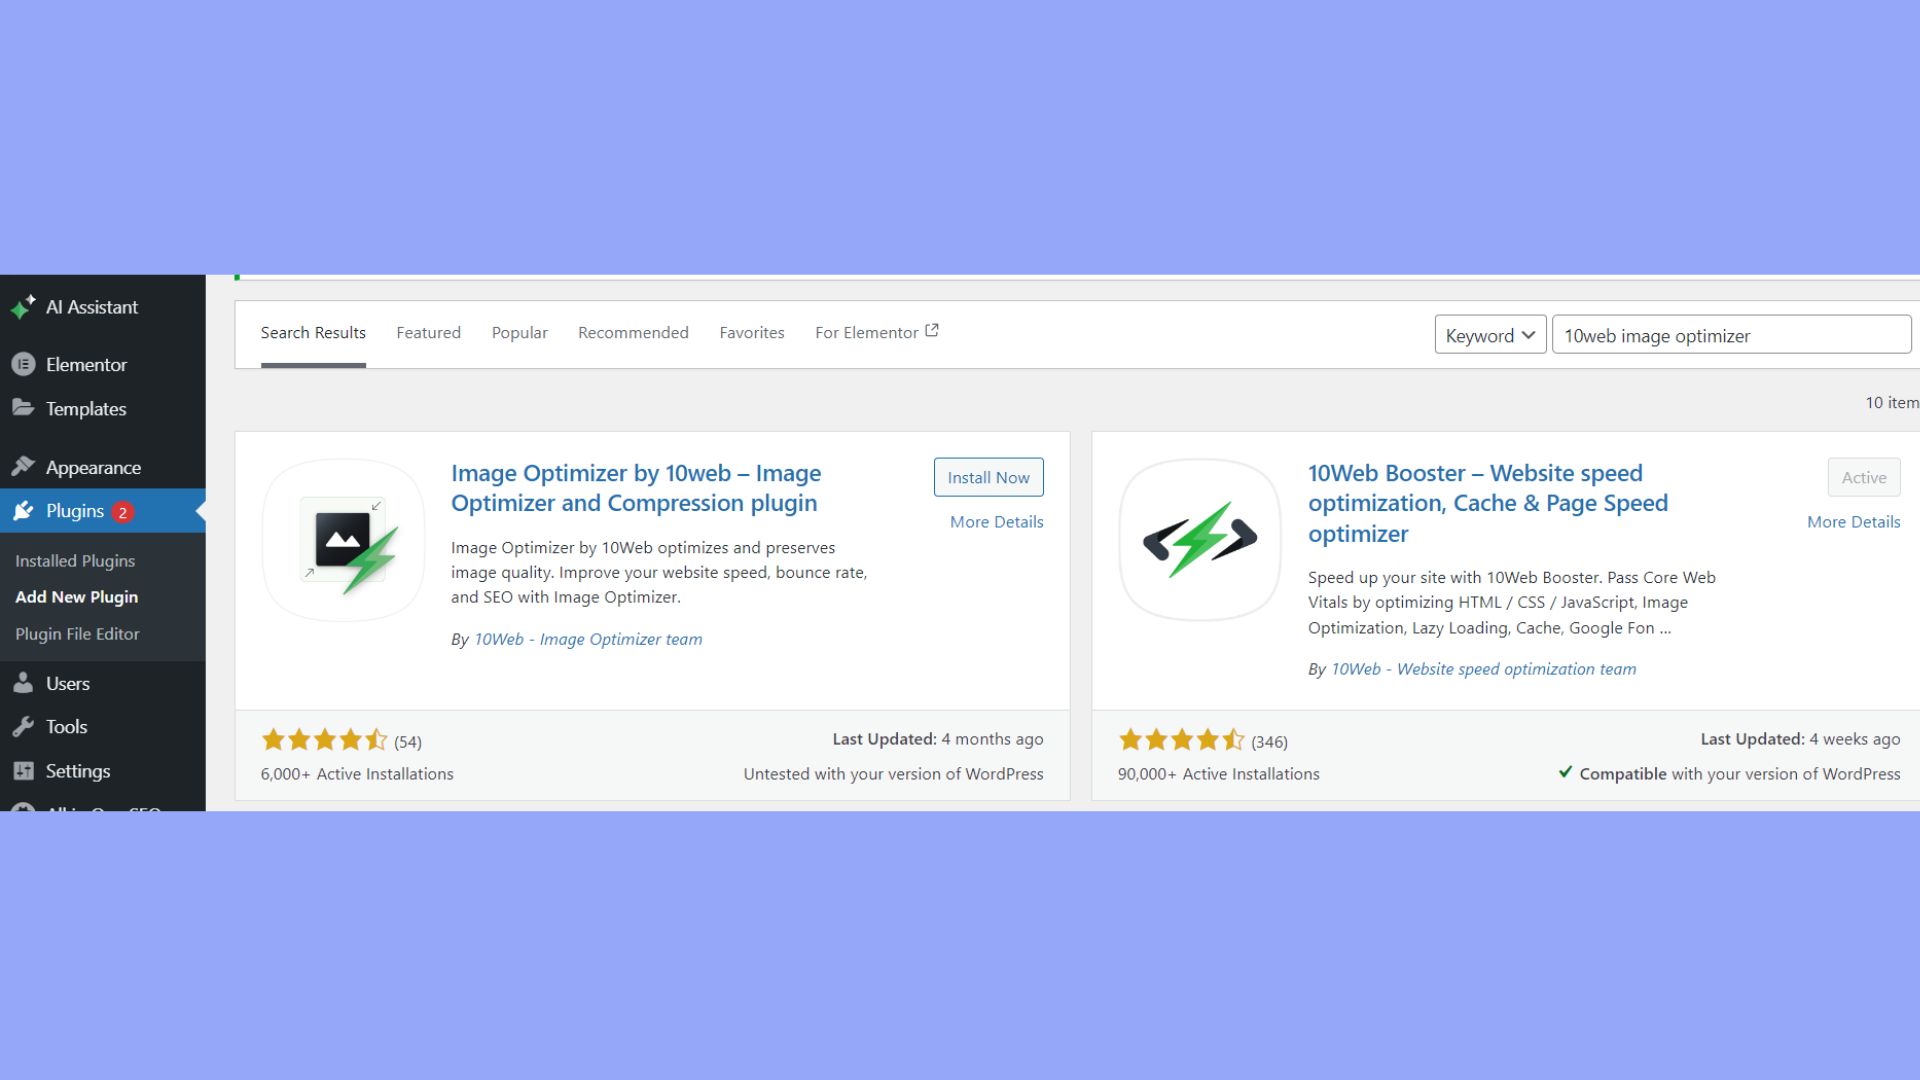
Installation and setup are straightforward. Begin by installing the plugin from the WordPress dashboard:
- Navigate to Plugins > Add New.
- Search for 10Web Image Optimizer and click Install Now.
- Once installed, click Activate plugin.
Post-activation, the plugin offers you three optimization levels to match your needs:
- Conservative: Ideal for minimal shrinkage with no quality loss.
- Balanced: Offers a middle ground, reducing file sizes more significantly.
- Extreme: Maximizes reduction in file size for the fastest possible performance.
Usage is simple. You should choose your preferred profile and hit the Optimize Now button to process your images in bulk.
For free, you can optimize up to 50,000 images monthly or perform per-page optimization on 6 pages. This means even image-heavy sites can benefit without incurring costs.
The plugin also supports various image formats, including PNG, JPG, GIF, WEBP, and PDF. It also features bulk optimization, per-page optimization, and image lazy loading to further enhance your site’s performance.
If you’re looking for more advanced features, the 10Web PageSpeed Booster package offers automatic WEBP conversion, lossy compression, and images delivered through a global CDN for lightning-fast performance. This premium package is more than an image optimizer; it’s an all-encompassing performance solution for WordPress websites.
Simplify WordPress with 10Web
Automate manual work with 10Web Managed WordPress Hosting and 10Web AI Website Builder. Optimize your WordPress website effortlessly.
WordPress media settings and accessibility
In this section, you’ll learn how to tweak your WordPress media settings for better site management and how to improve accessibility for all users with alt text and captions.
Customizing media settings in WordPress
Your WordPress media settings are a set of options that regulate how the media content, such as images and videos, is handled on your website. You can find these settings by navigating to Settings > Media in your WordPress admin dashboard.
Here, you can specify the default sizes for your thumbnails, medium, and large images. It’s important to adjust these settings to match the content layout of your site, which can also help images load faster on mobile devices. For example, for a tighter content area, you might choose smaller default dimensions to prevent oversized images from loading.
- Go to Settings > Media.
- Set the sizes for Thumbnail size, Medium size, and Large size.
- Click Save Changes.

Remember, these settings apply globally to new images you upload, so it’s a good idea to decide on these dimensions as you’re setting up your WordPress website to ensure consistency.
Conclusion
Optimizing images for WordPress is not merely a technical necessity but a fundamental aspect of managing a successful website. As we’ve explored, the right approach involves more than compressing images—it requires a comprehensive understanding of the formats, sizes, and tools available to improve page load speeds without sacrificing image quality. In this guide, we learned how to optimize images for WordPress, ensure that your WordPress site both looks appealing and performs optimally.
Simplify WordPress with 10Web
Simplify WordPress with 10Web
Skip and automate manual work with 10Web Managed WordPress Hosting and the 10Web AI Website Builder.