Editing the header of your WordPress site can significantly influence the look and feel, making your site more attractive and functional.
Whether you’re aiming to adjust the logo, modify navigation menus, or insert custom code for SEO purposes, WordPress offers several methods to customize your header. Let’s understand how to edit header in WordPress to better align with your site’s design and purpose.
Understanding the WordPress header
The WordPress header is more than just the top part of your website; it’s a key element that can define the entire user experience. It usually contains your site’s title or logo, navigation menu, and other essential items like contact information or social media icons. The header is loaded by a PHP function in your theme files, typically called header.php. But don’t worry; you don’t necessarily need to dive into the code to make changes.
Why edit the header: key reasons
The header of your WordPress site can dramatically influence both the aesthetic appeal and the functionality of your site. Before understanding how to edit header in WordPress, let’s explore some key reasons it can be a game-changer for your website.
Enhancing first impressions
The header is often the first thing visitors notice when they land on your site. It sets the tone and gives a sneak peek into what your website is all about. A well-designed header can make a powerful first impression, encouraging visitors to explore your site further. Whether it’s through a captivating header image, a neatly organized navigation menu, or an instantly recognizable logo, editing your header allows you to make that all-important good first impression.
Improving navigation
A user-friendly navigation menu in the header can significantly enhance the user experience on your site. By editing your header, you can ensure that visitors find what they’re looking for quickly and easily. This might involve reorganizing your menu items for better logic and flow, adding dropdown menus to categorize content neatly, or even incorporating a search bar. Better navigation directly contributes to lower bounce rates and more time spent on your site.
Simplify WordPress with 10Web
Automate manual work with 10Web Managed WordPress Hosting and 10Web AI Website Builder. Optimize your WordPress website effortlessly.
Strengthening brand identity
Your header is a prime location to reinforce your brand identity. Editing your header to include your logo, brand colors, and tagline can help solidify your brand’s presence in the minds of your visitors. This consistent visual branding helps build trust and recognition, making your site more memorable to your audience.
Optimizing for mobile users
With an increasing number of users browsing the web on mobile devices, optimizing your header for mobile is crucial. Editing your header to be responsive ensures that it looks and functions well on screens of all sizes. This might include adjusting the size of your logo, ensuring the navigation menu is accessible on touch screens, or optimizing the header’s layout for mobile viewing. A mobile-friendly header is essential for providing a good user experience across all devices.
Enhancing website functionality
Editing your header isn’t just about aesthetics; it’s also an opportunity to add new functionalities to your site. This could involve incorporating social media icons, a shopping cart for e-commerce sites, or a call-to-action button that directs visitors to a crucial page. Adding these elements to your header makes it easier for users to interact with your site and take desired actions.
Boosting SEO
While it’s not the first thing that comes to mind, optimizing your header can also benefit SEO. Editing your header to include keyword-rich headings and ensuring proper hierarchy with H1 tags can help improve your site’s SEO. A clean, well-coded header can also speed up loading times, boosting your site’s search engine rankings.
Simplify WordPress with 10Web
Automate manual work with 10Web Managed WordPress Hosting and 10Web AI Website Builder. Optimize your WordPress website effortlessly.
How to edit header in WordPress
We’ll cover three ways to edit your header, suited for easy to advanced levels.
Method 1: Using WordPress Customizer
The WordPress Customizer is the most straightforward way to make changes to your header, as it offers a live preview of your adjustments. Let’s see how to edit header in WordPress with Customizer.
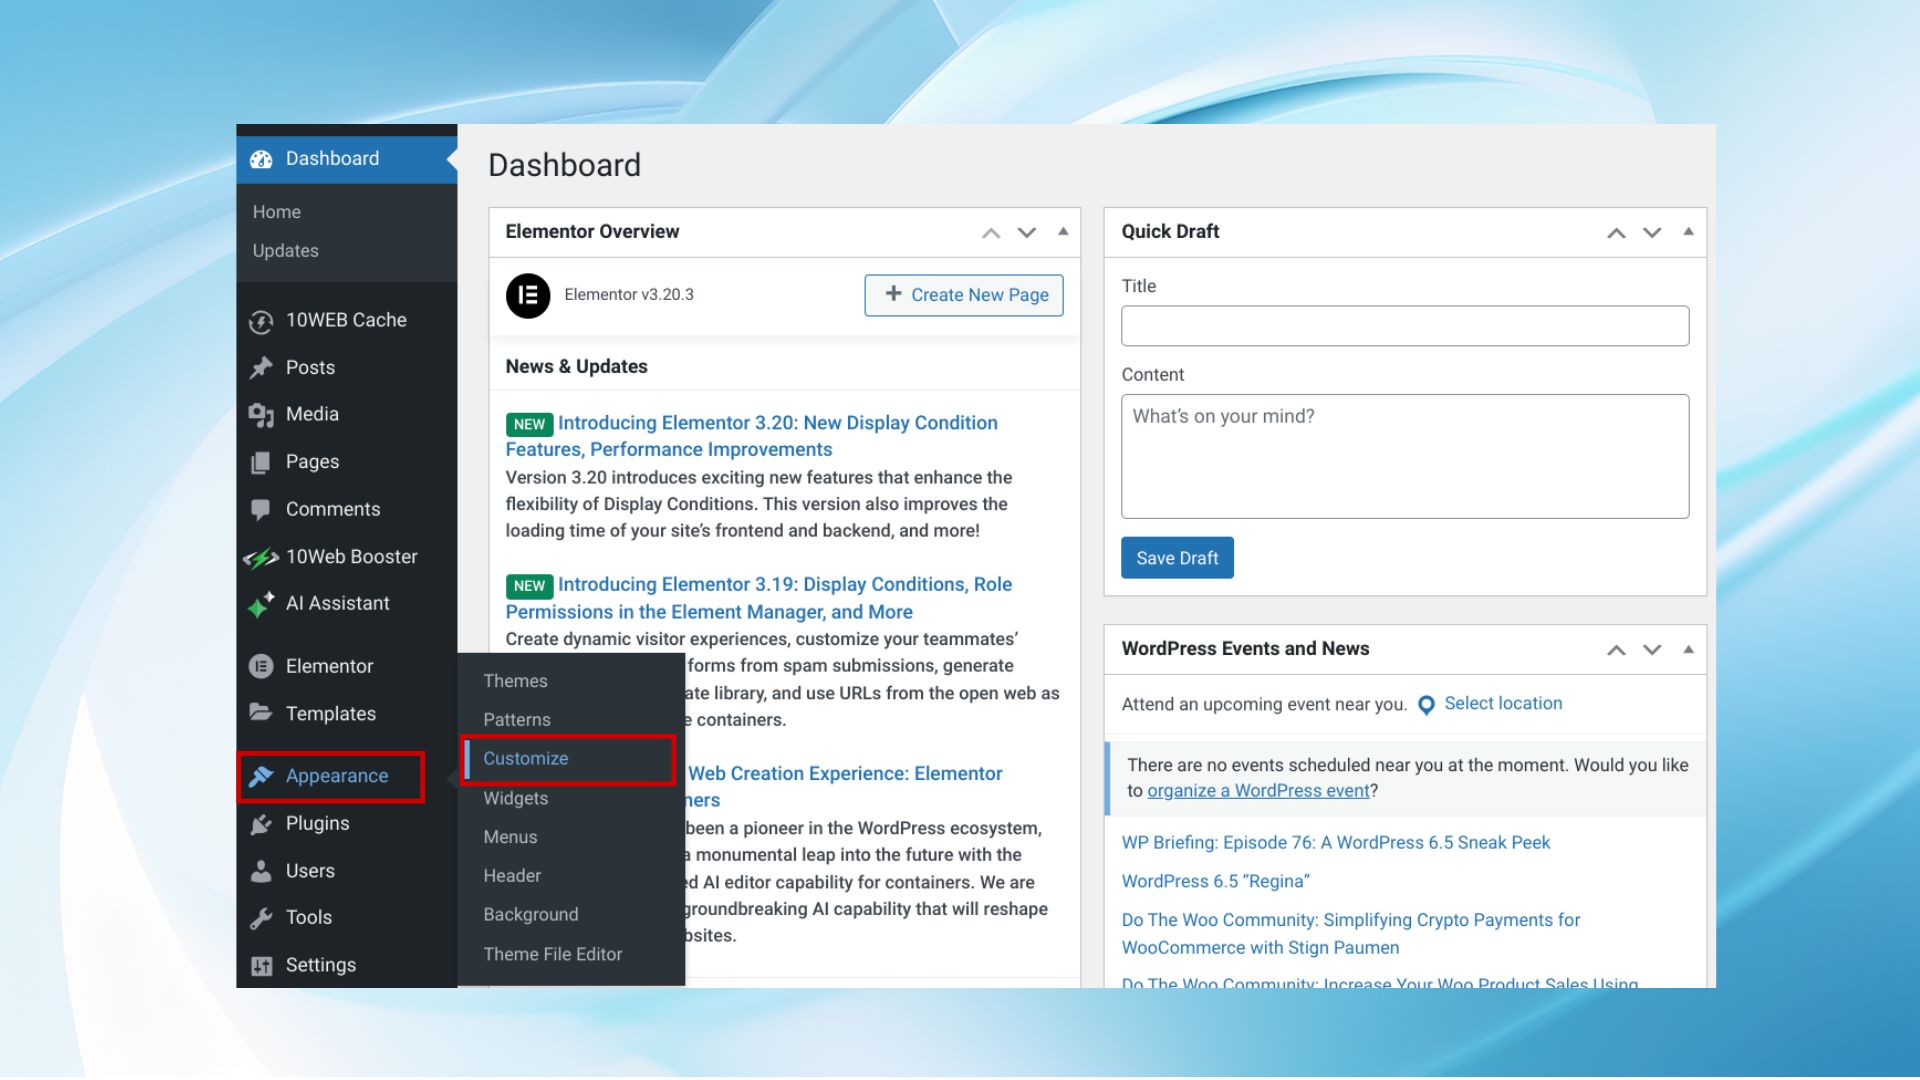
Step 1. Access the WordPress Customizer
The first step involves getting into the WordPress Customizer from your WordPress dashboard. Here’s how:
- Log into your WordPress Dashboard.
- Find the Appearance option in the left sidebar of your Dashboard and click on it.
- Click on Customize within the Appearance submenu.
Clicking this will open the WordPress Customizer, showing a live preview of your current theme.
Step 2. Locate header options
Once inside the Customizer, the next step is to find the header options. This can vary depending on the theme you’re using, but generally, they’re not hard to find:
- Look for sections labeled Header, Site Identity, or Theme Options. These are the most common places where you might find header settings. The exact naming can differ, so check under related terms or sections if it’s not immediately apparent.
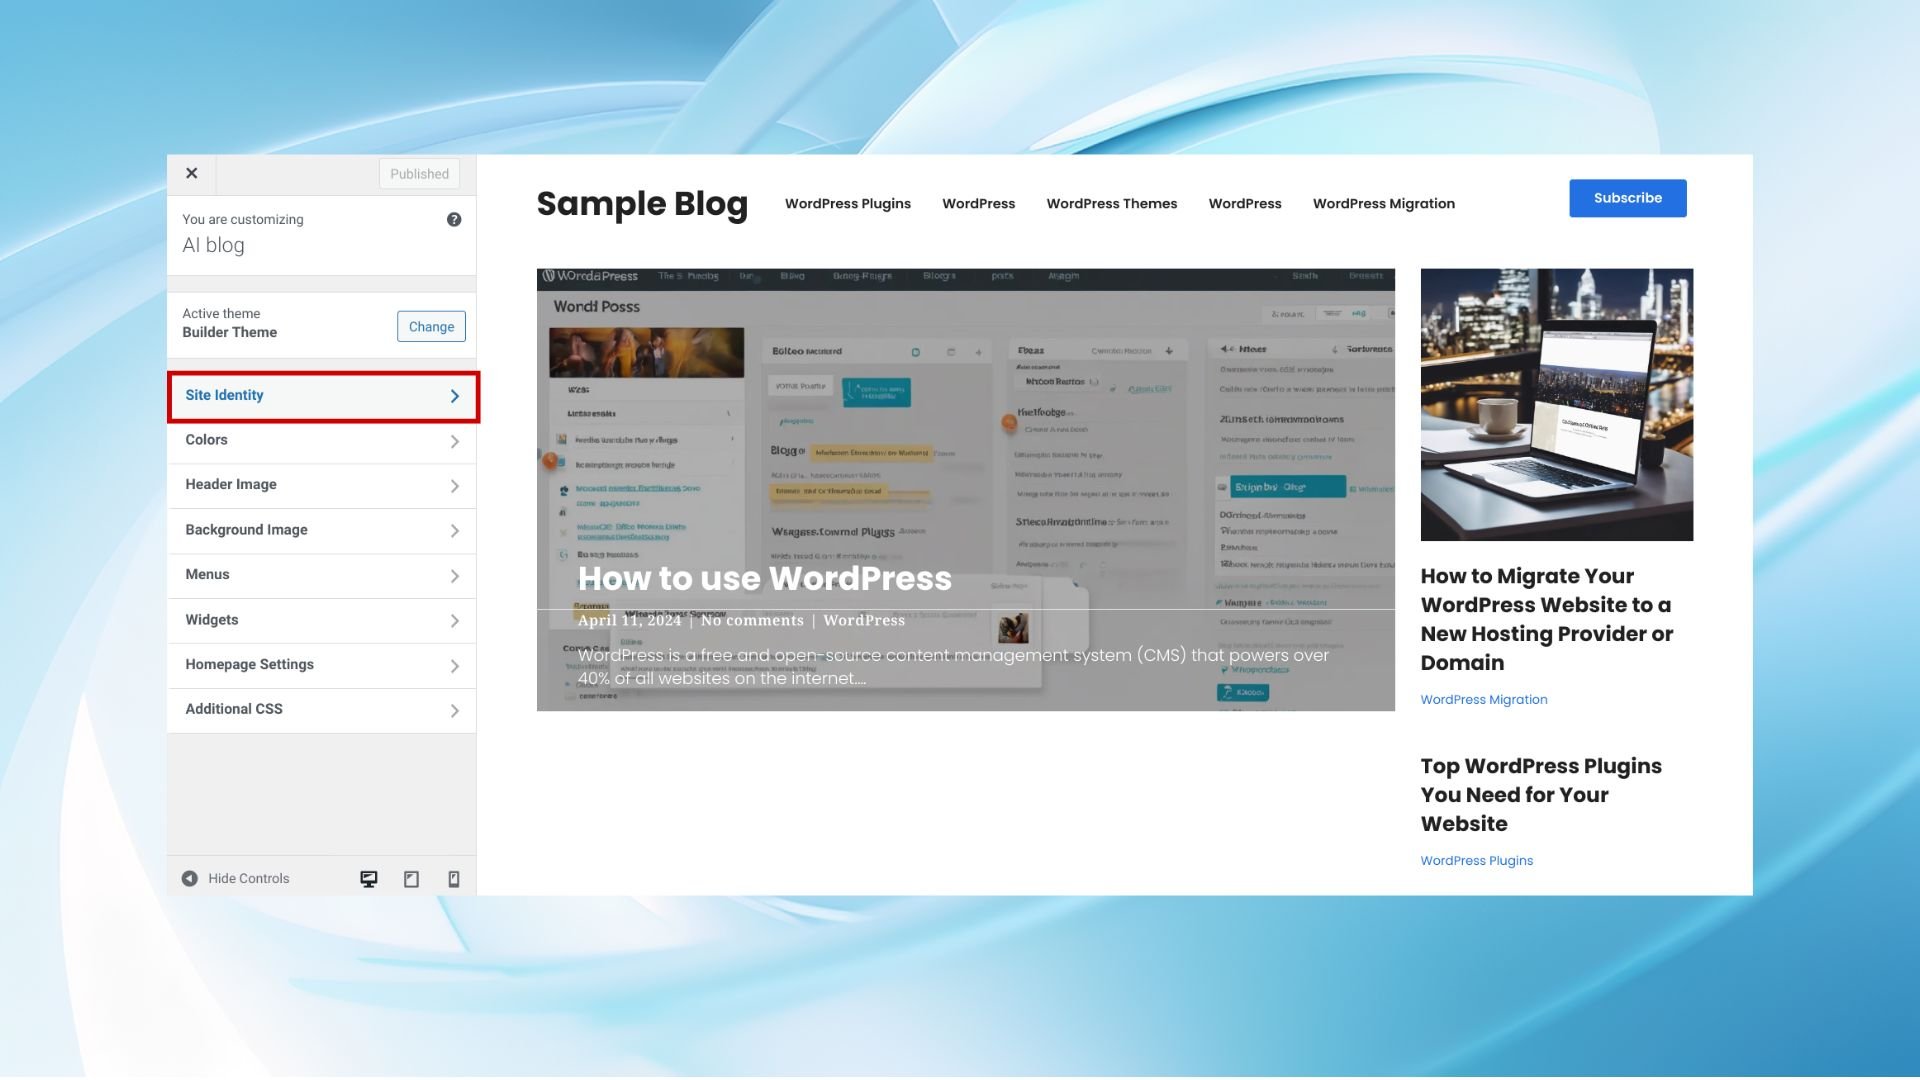
- Once you’ve found the section containing the header options (Logo, Site Title, Tagline, Site Icon), click on it to expand and view the available settings.
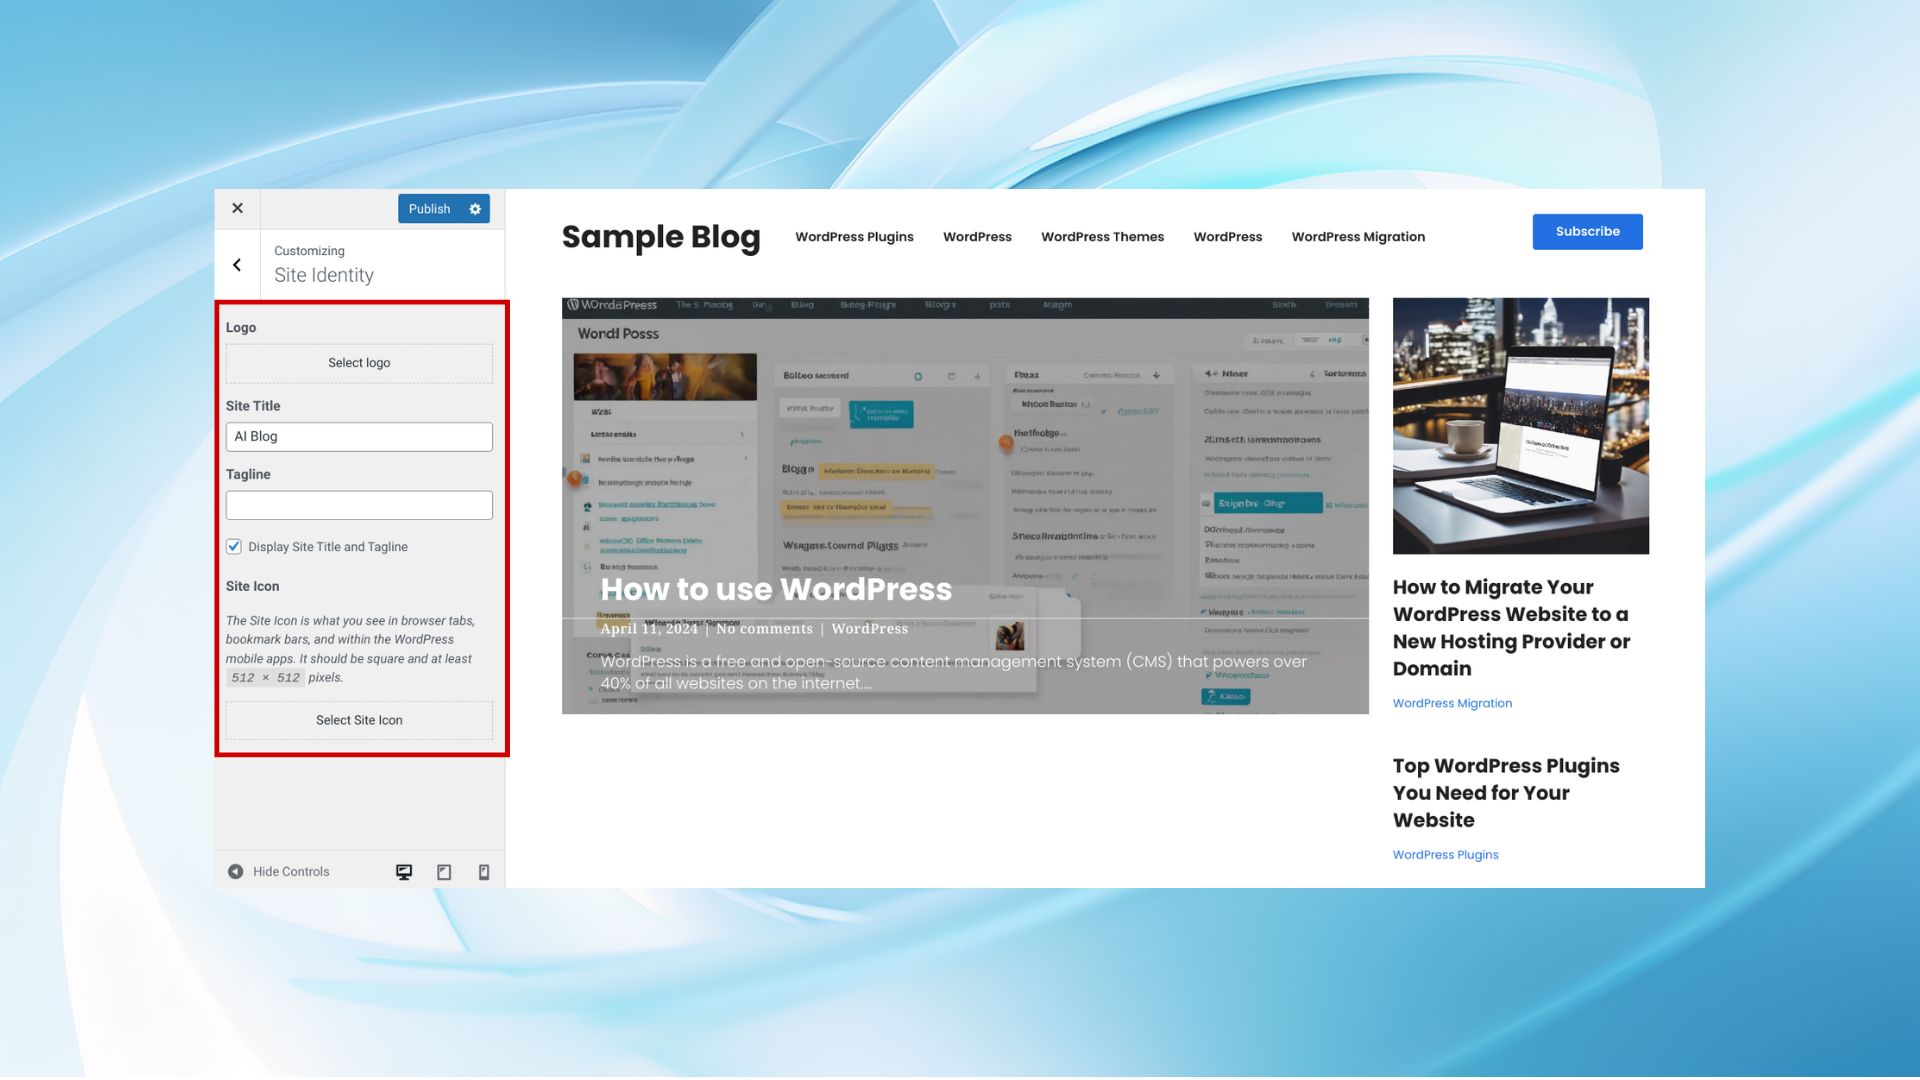
Step 3. Edit other header component
With the Customizer options open, you’re ready to start making changes. The real-time preview feature of the Customizer is particularly useful here.
Whether it’s updating the site logo, changing the header image, or modifying the navigation menu, you can make these changes directly within the Customizer. Each theme might offer different customization options, so explore what’s available. Learn more about editing the navigation menu and header image at the end of the post.
As you make adjustments, keep an eye on the live preview pane to the right of the Customizer. This shows exactly how your changes will appear on the live site, allowing you to tweak settings until you’re satisfied with how the header looks.
Step 4. Publish your changes
Look for the Publish button at the top of the Customizer. Clicking this will apply your changes to the live site.

Method 2: Using the theme’s built-in options
Some themes offer their own set of options for customizing the header, separate from or in addition to the Customizer. Let’s explore how to change header in WordPress with the theme’s built-in options.
Step 1. Check your theme’s documentation
Before diving into customization, it’s crucial to understand the specific features and options your theme offers:
- Find your theme’s documentation. This can typically be found on the website of the theme’s developer or in a help section within the theme itself. If you purchased a premium theme, documentation is often included in the download package or accessible through the purchase site.
- Review header customization options. Look for sections in the documentation that cover header customization. This could include information on changing the header layout, updating logos, modifying the navigation menu, and more. Documentation is invaluable for understanding the full capabilities of your theme and how to access them.
Step 2. Navigate to your theme’s editor
Once you have a good understanding of what’s possible with your theme, it’s time to start customizing:
- Access your WordPress Dashboard.
- Locate the theme options panel or theme’s editor. This might be directly under Appearance or might be nested within a theme-specific settings page.
- Open the Theme Options, Theme Editor or Editor.
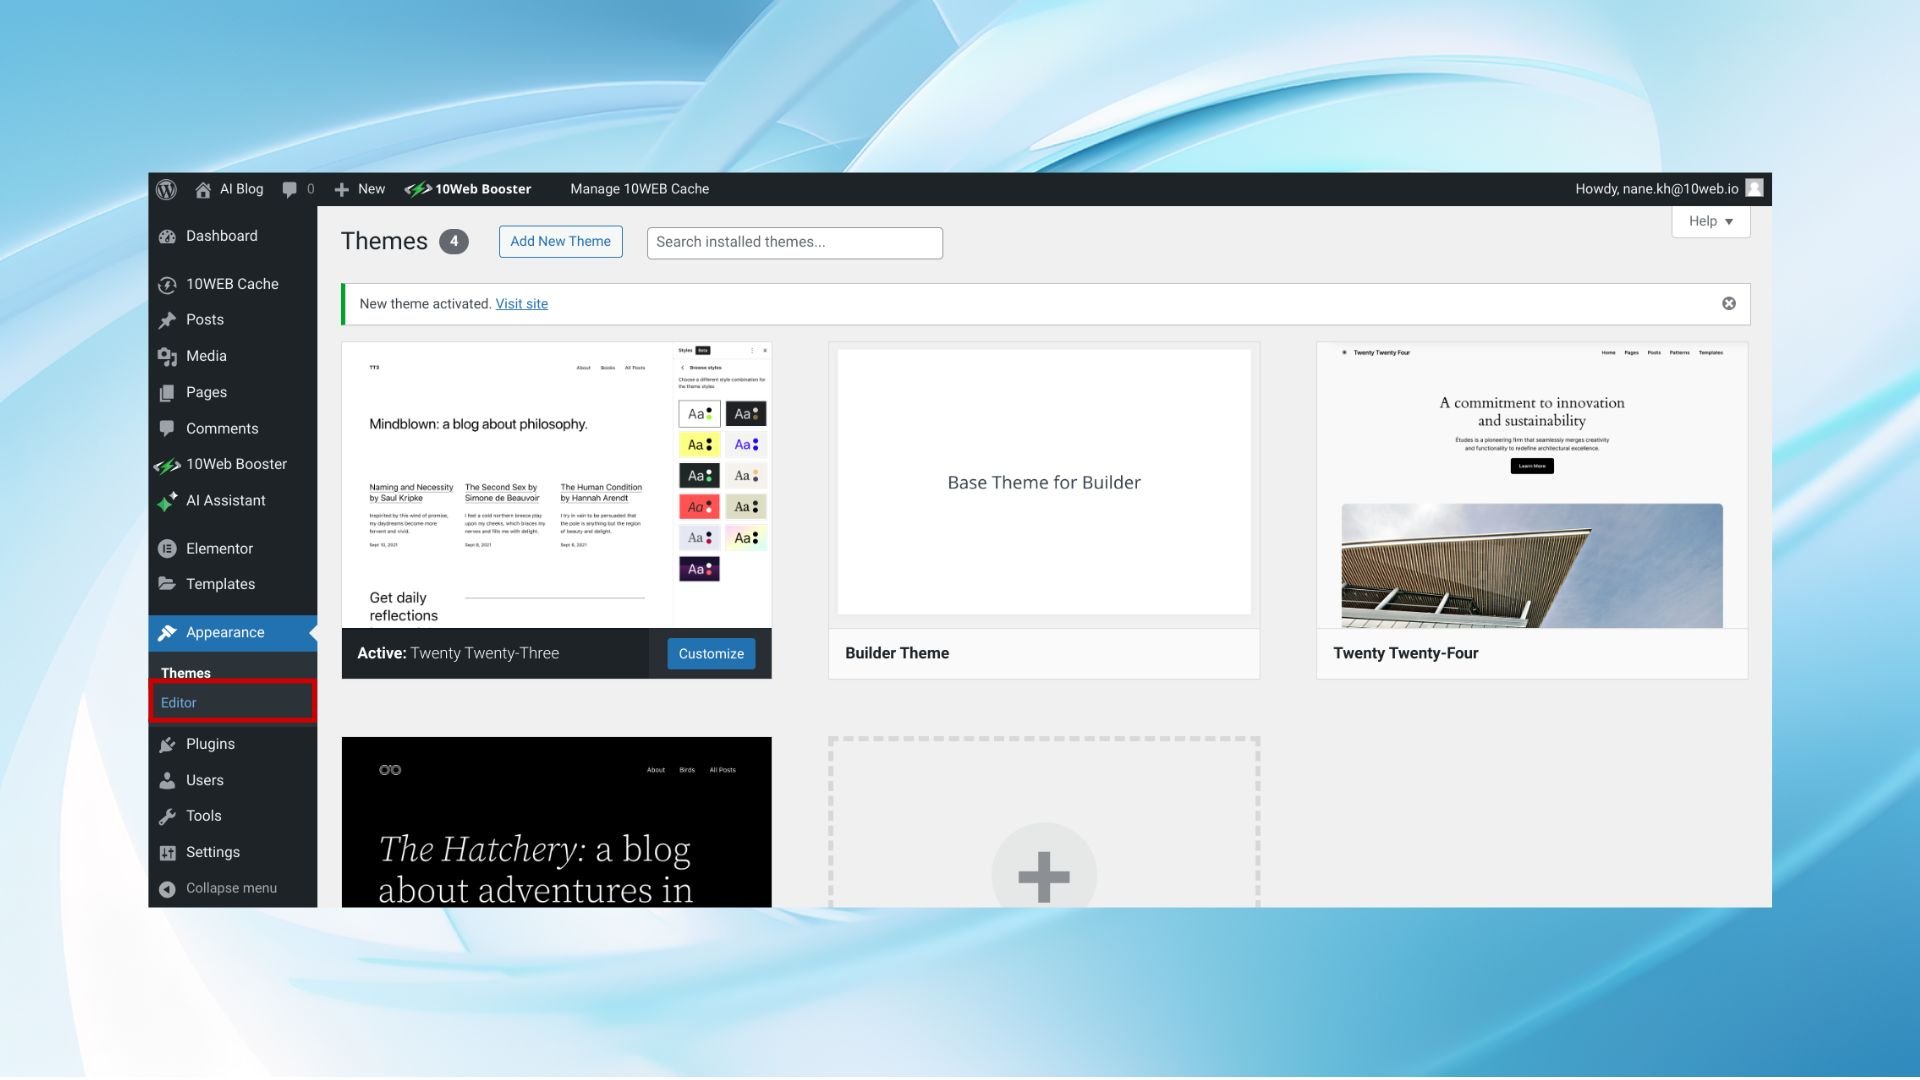
- Navigate to Patterns > Header.
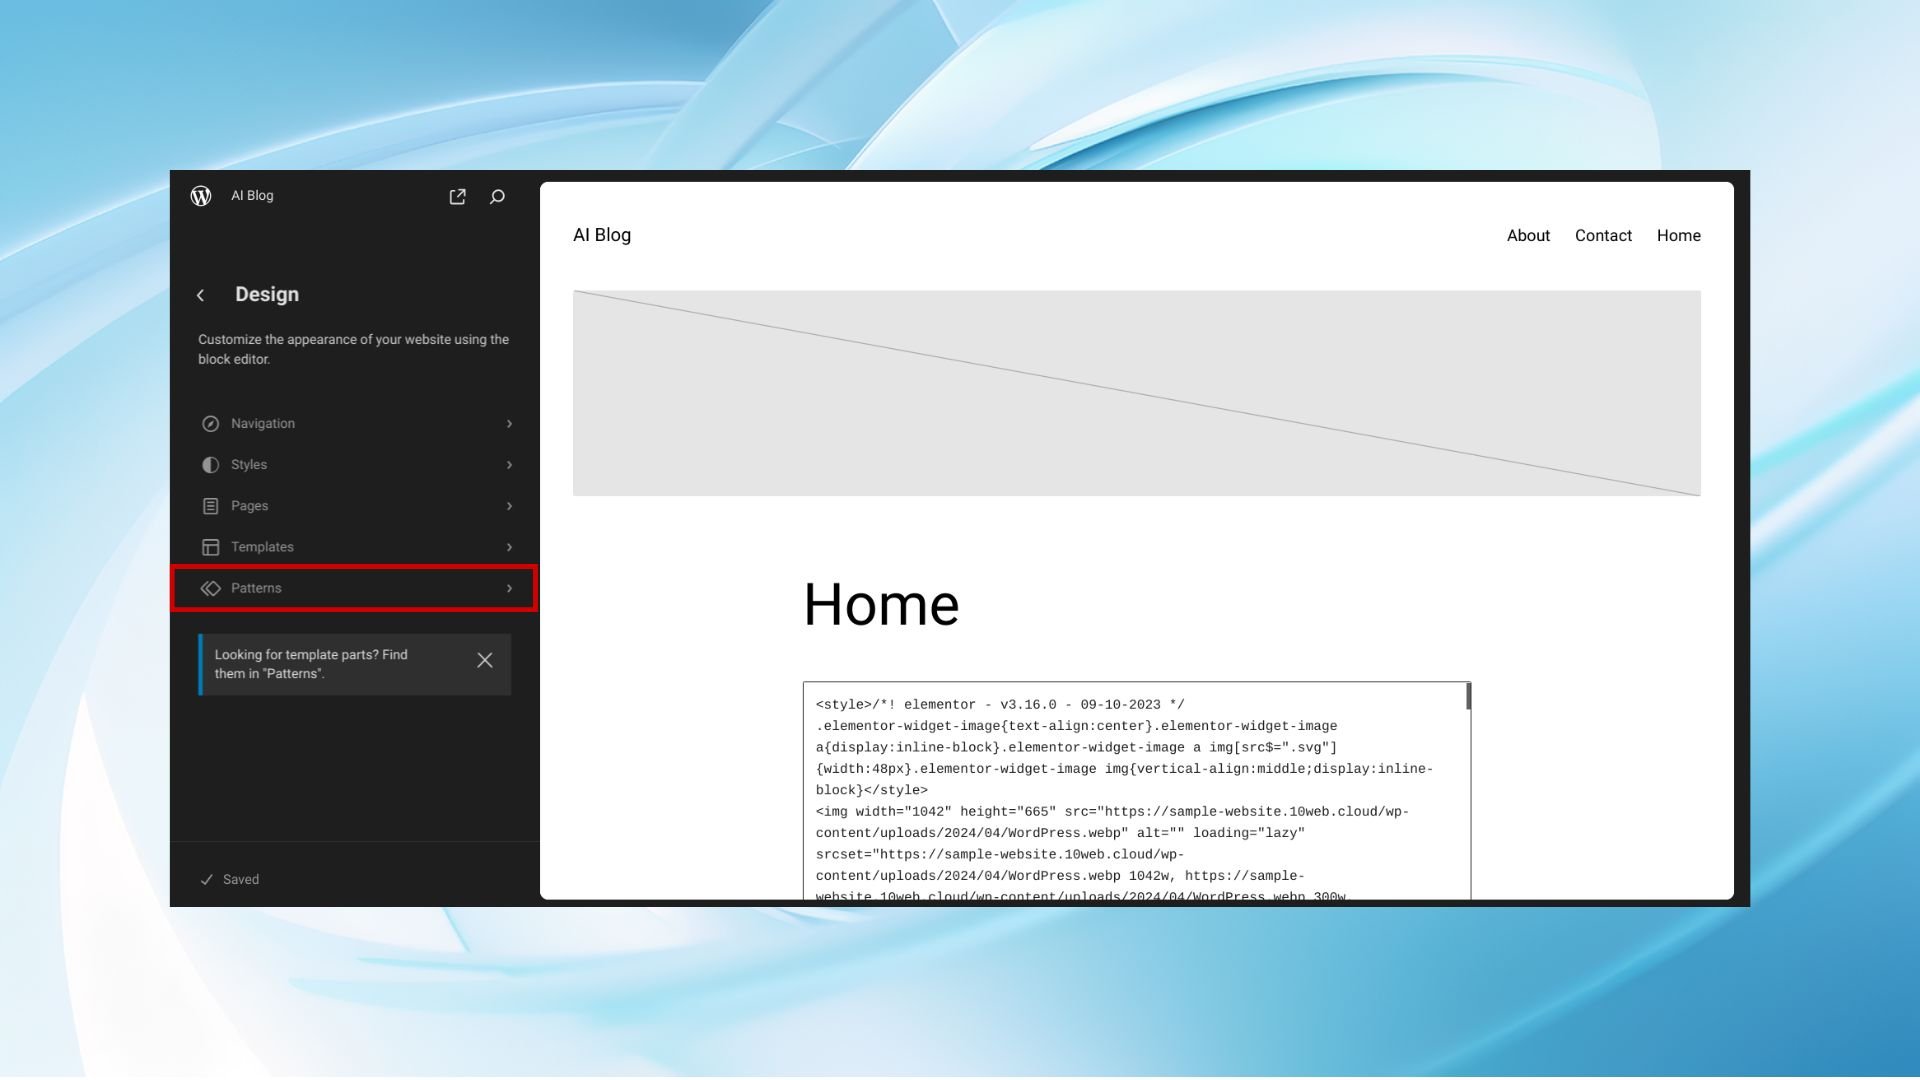
Step 3. Customize your header
With the theme’s editor open, you can now begin making changes to your header. The available options and their range will depend on the theme you’re using:
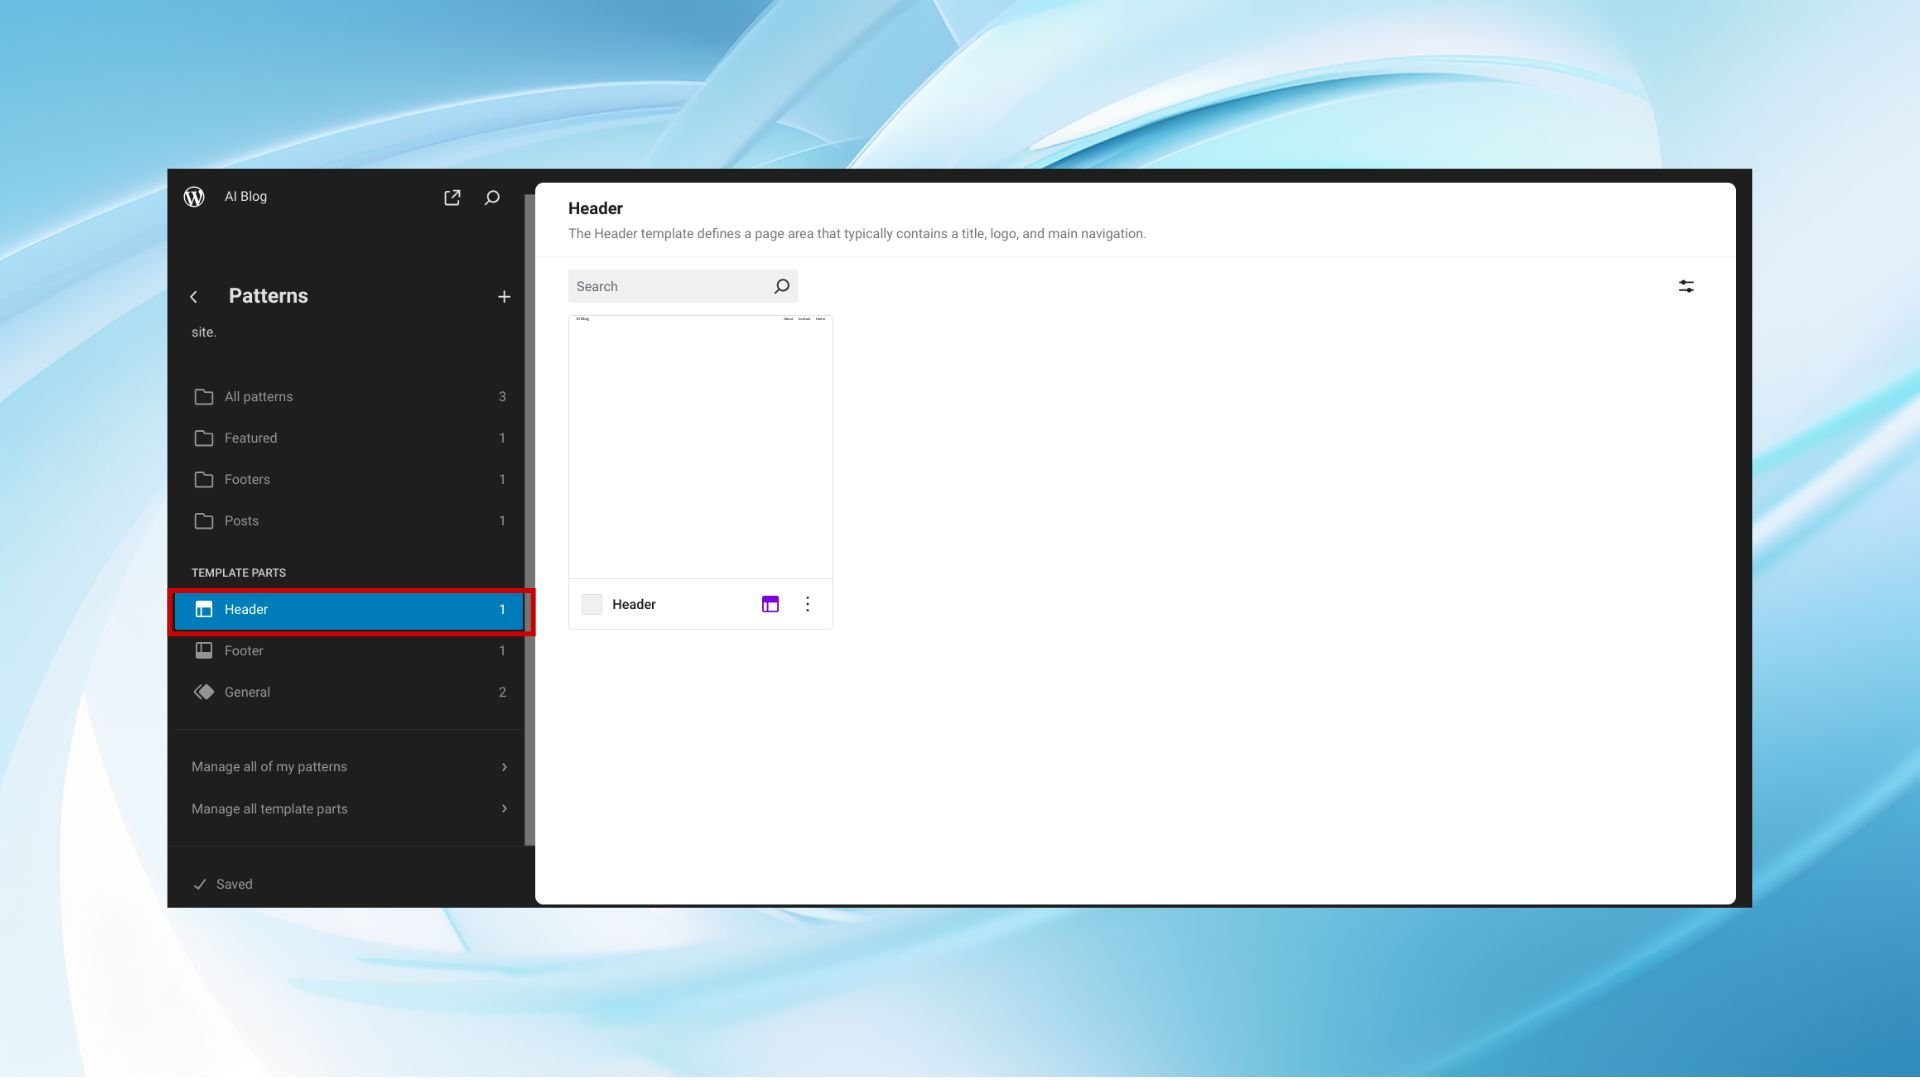
- In the opened header window, click the List View button (three parallel lines) located in the upper left corner. This action will display the List View, outlining all blocks currently in use within the header.
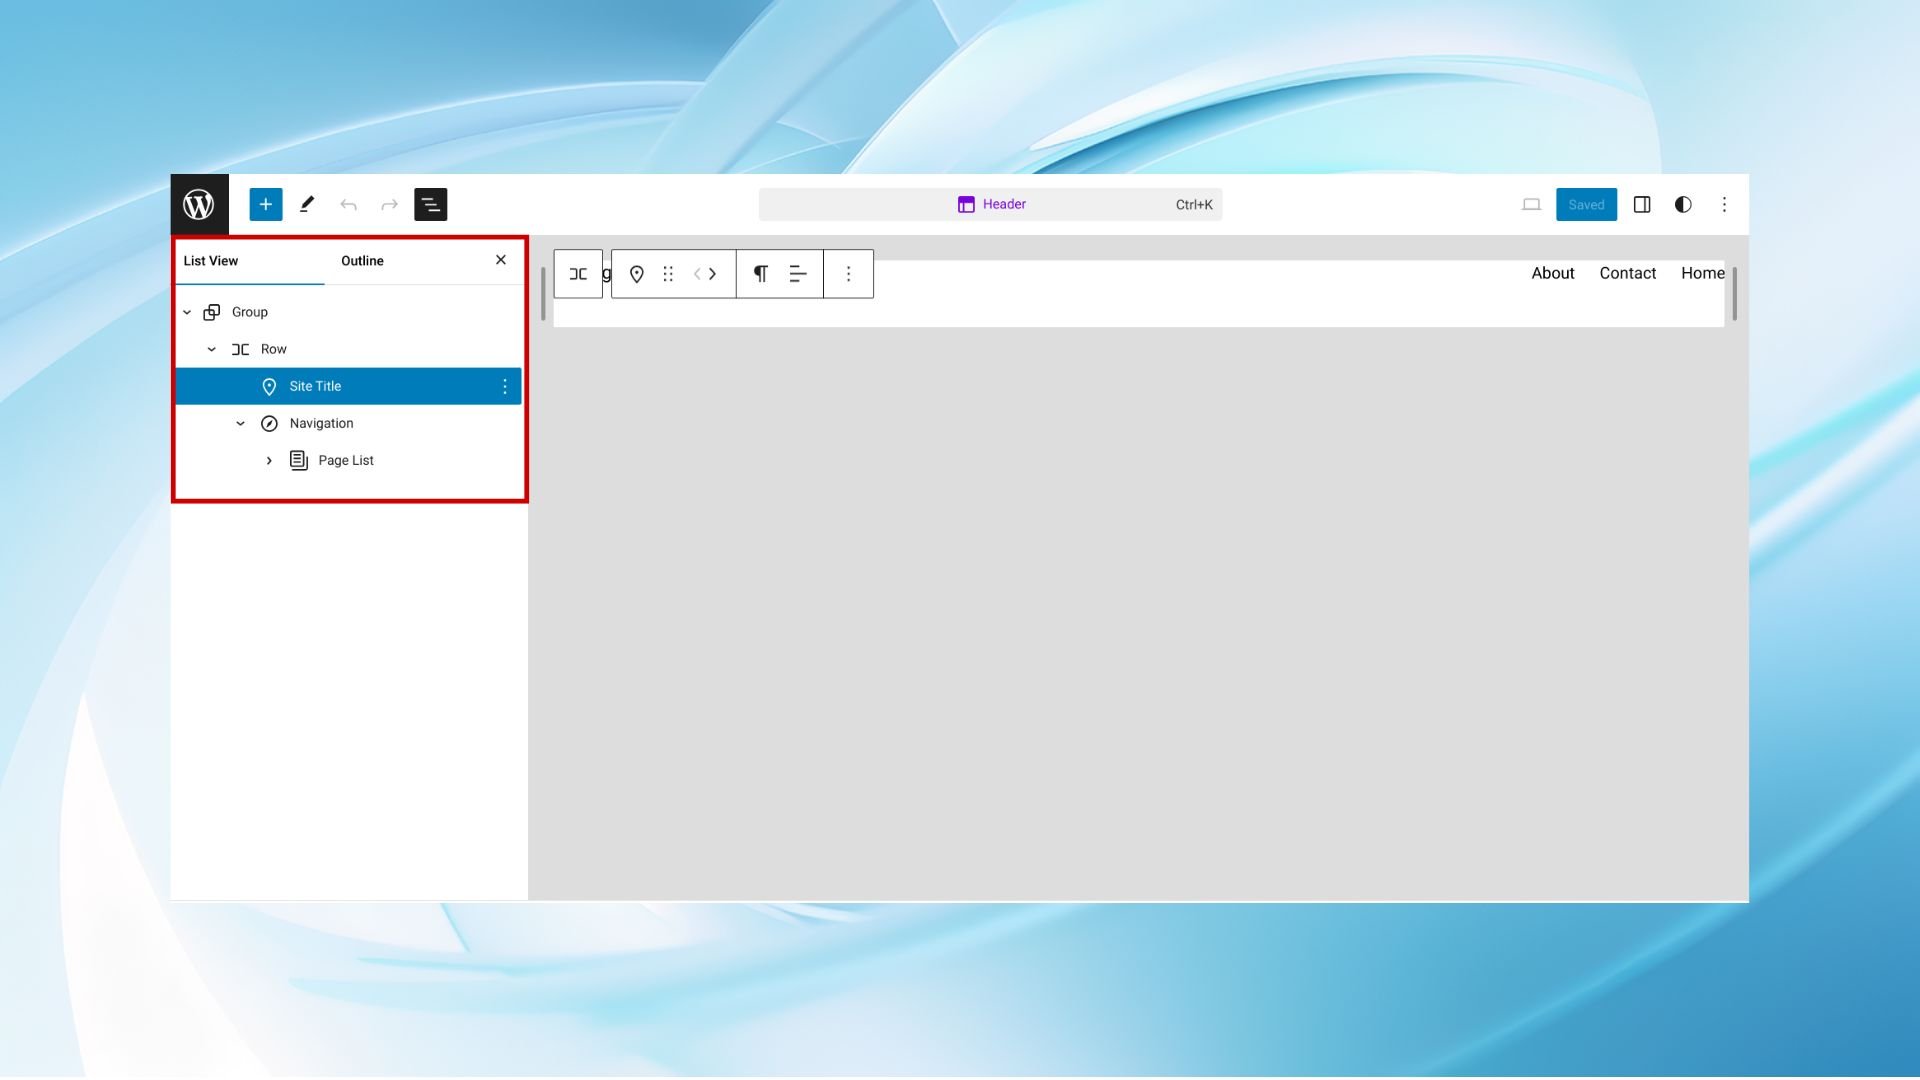
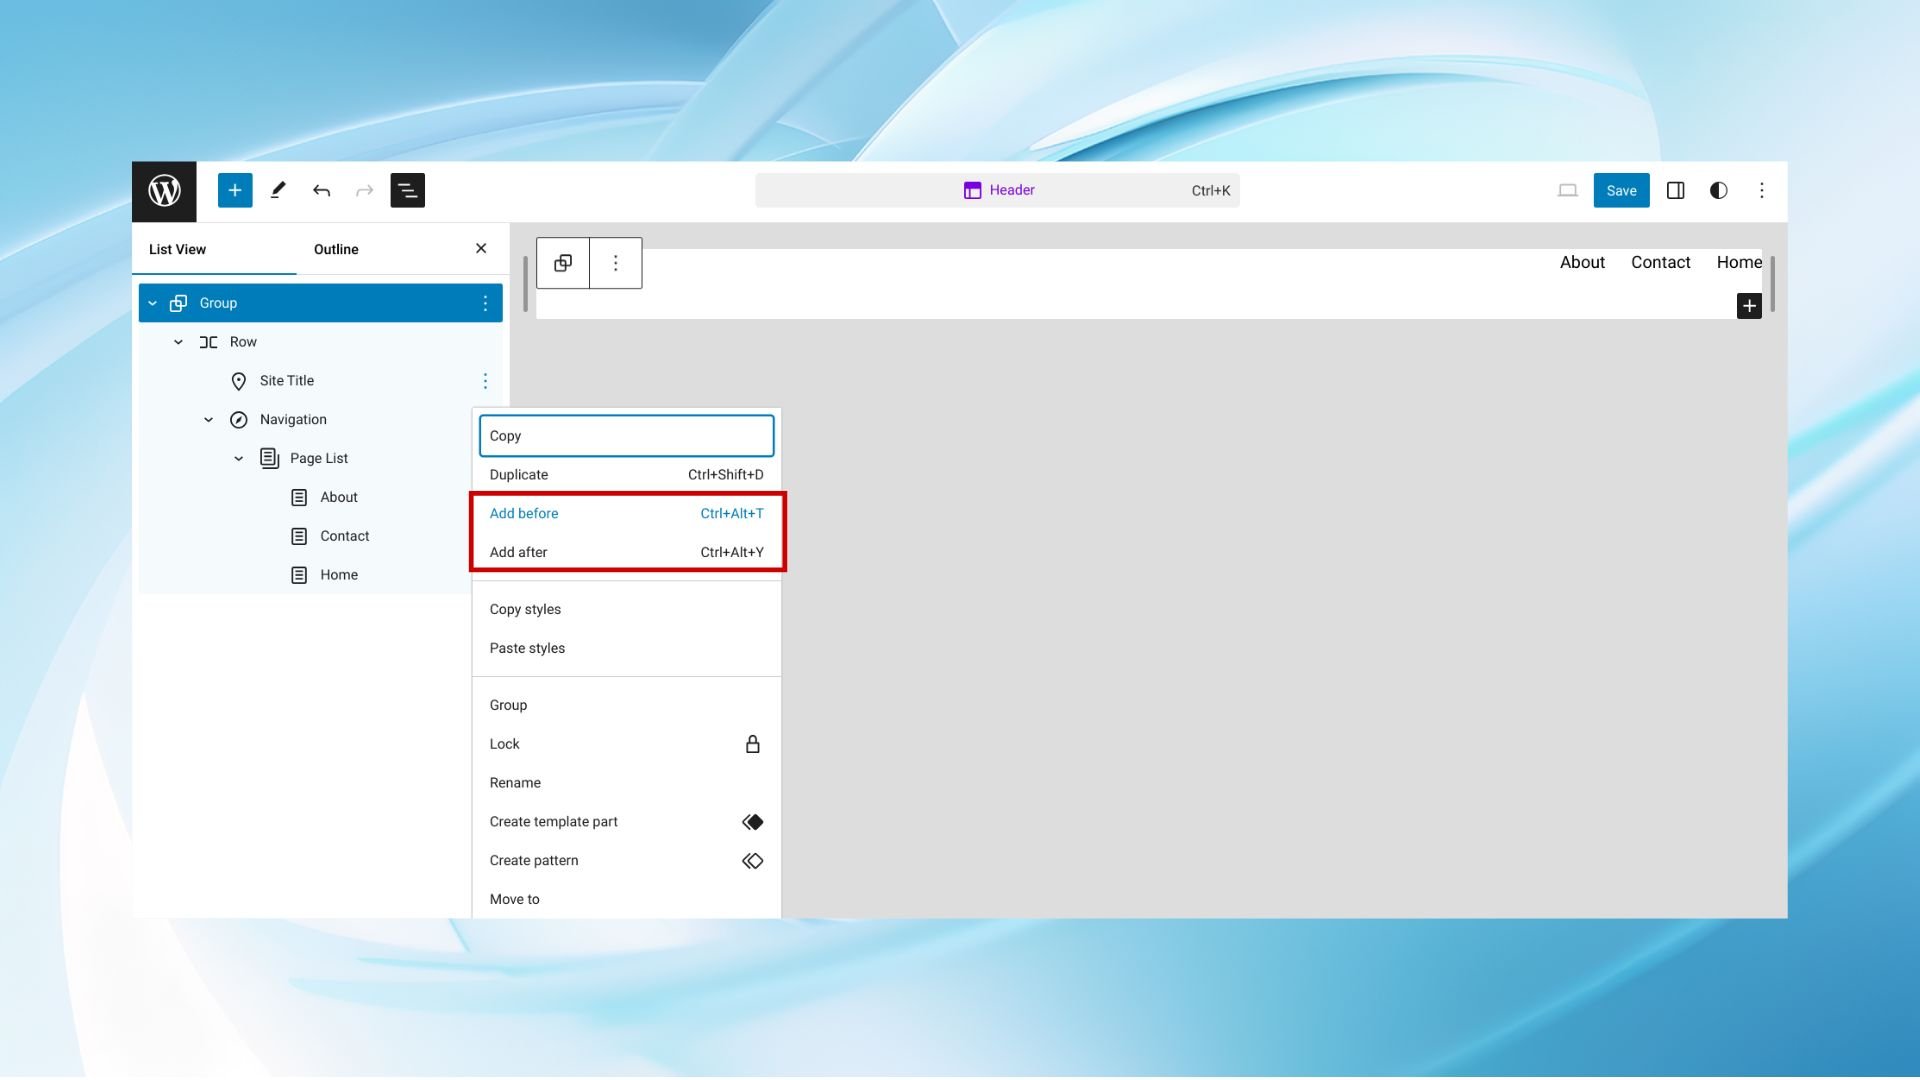
- To modify a block, click the Options button (three dots) next to the desired block. This provides options to edit the existing block or to add a new one.
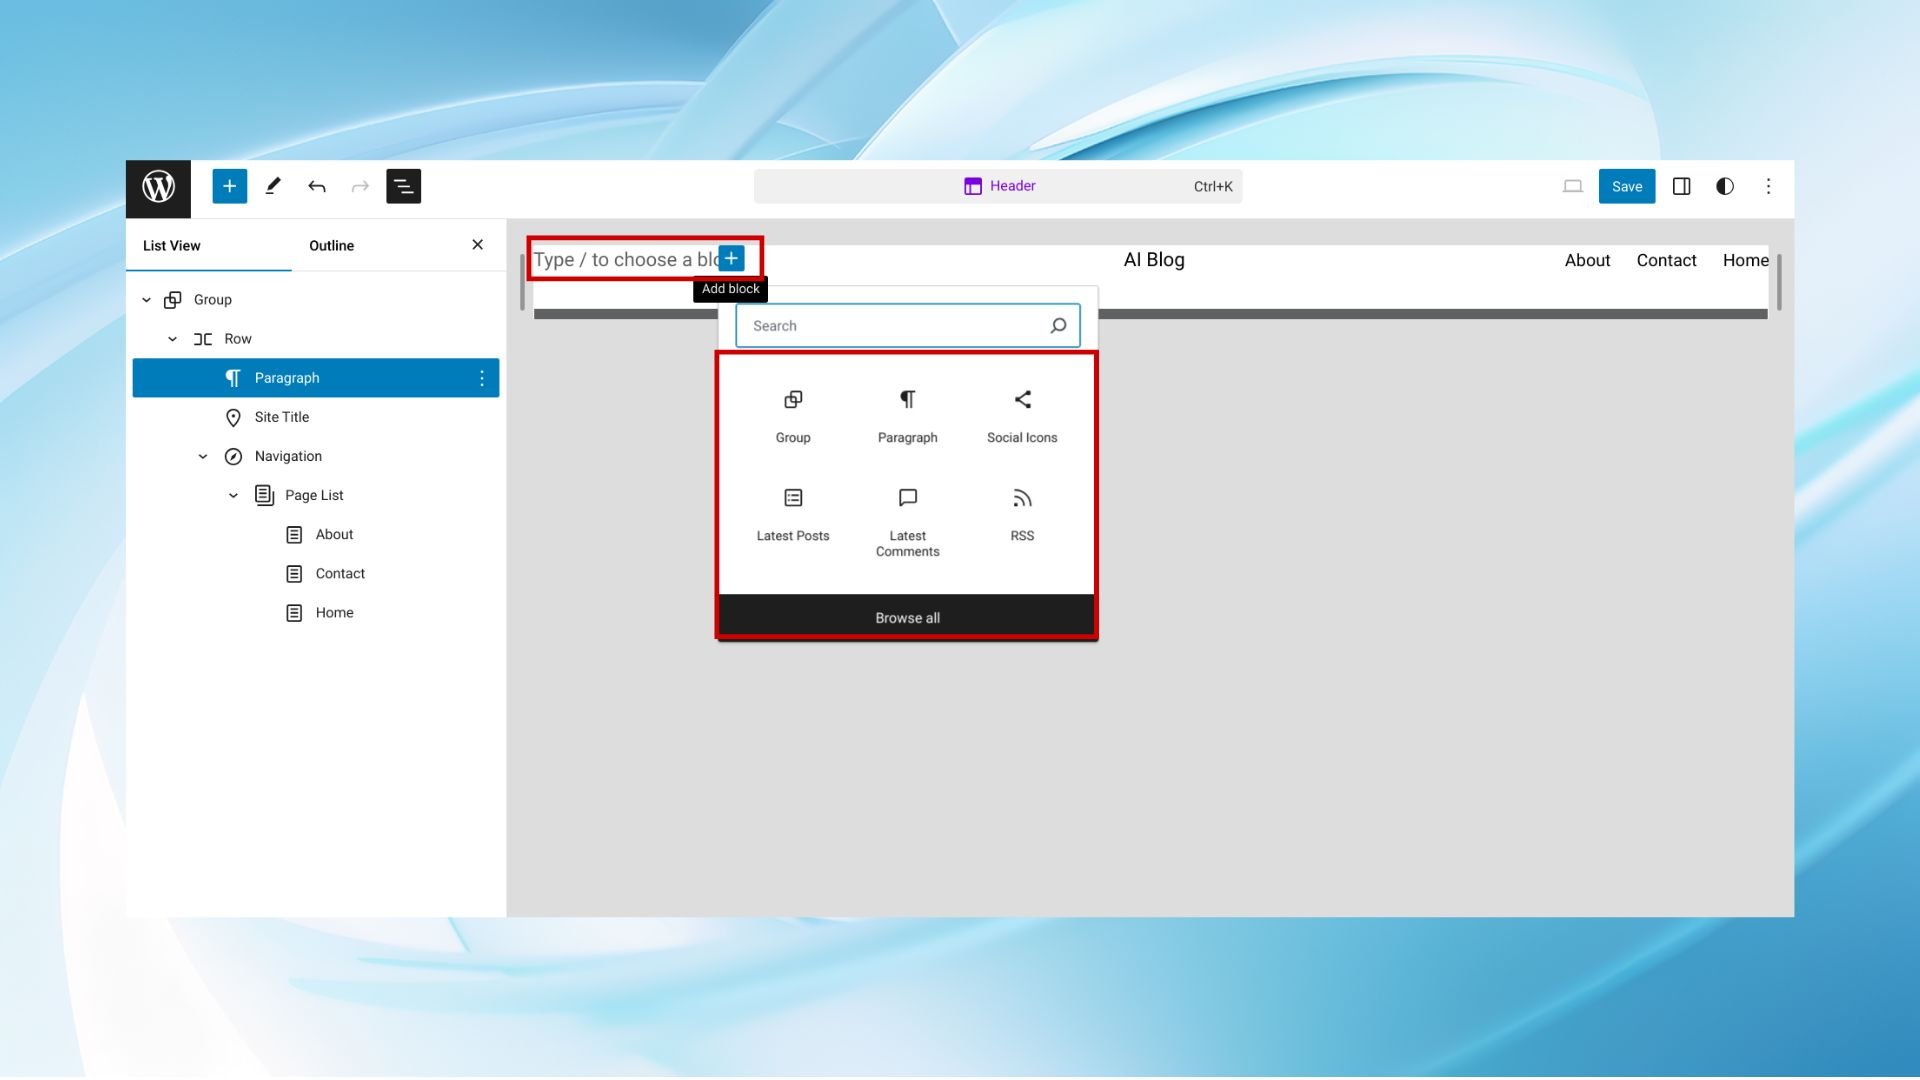
- Once the new block appears in the header area, click the + button to select the type of block you need. If necessary, click Browse all to view all available block options. Continue adding blocks as needed.
- After selecting the block type, proceed to edit it. For example, to add social icons, click the + button adjacent to the block and select the required icon.
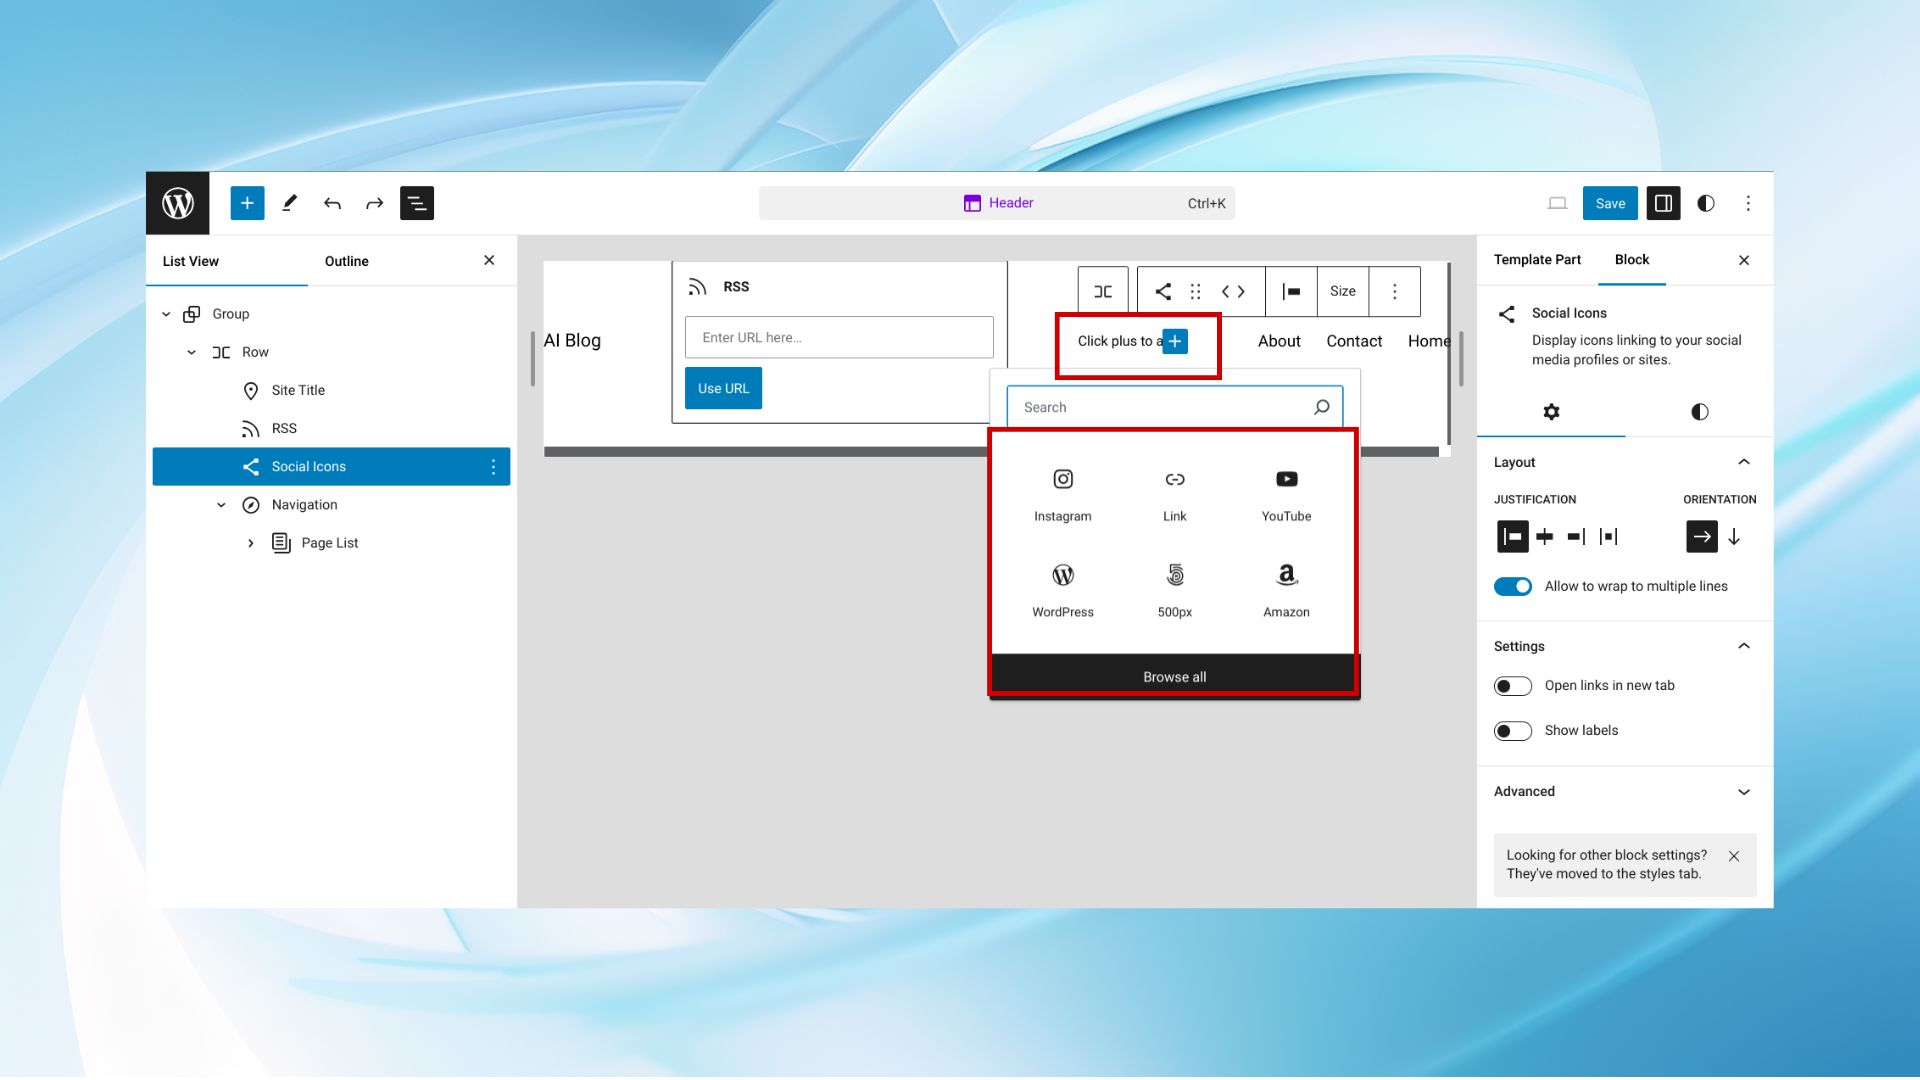
- For further customization of the block, click the Settings button in the upper right corner.
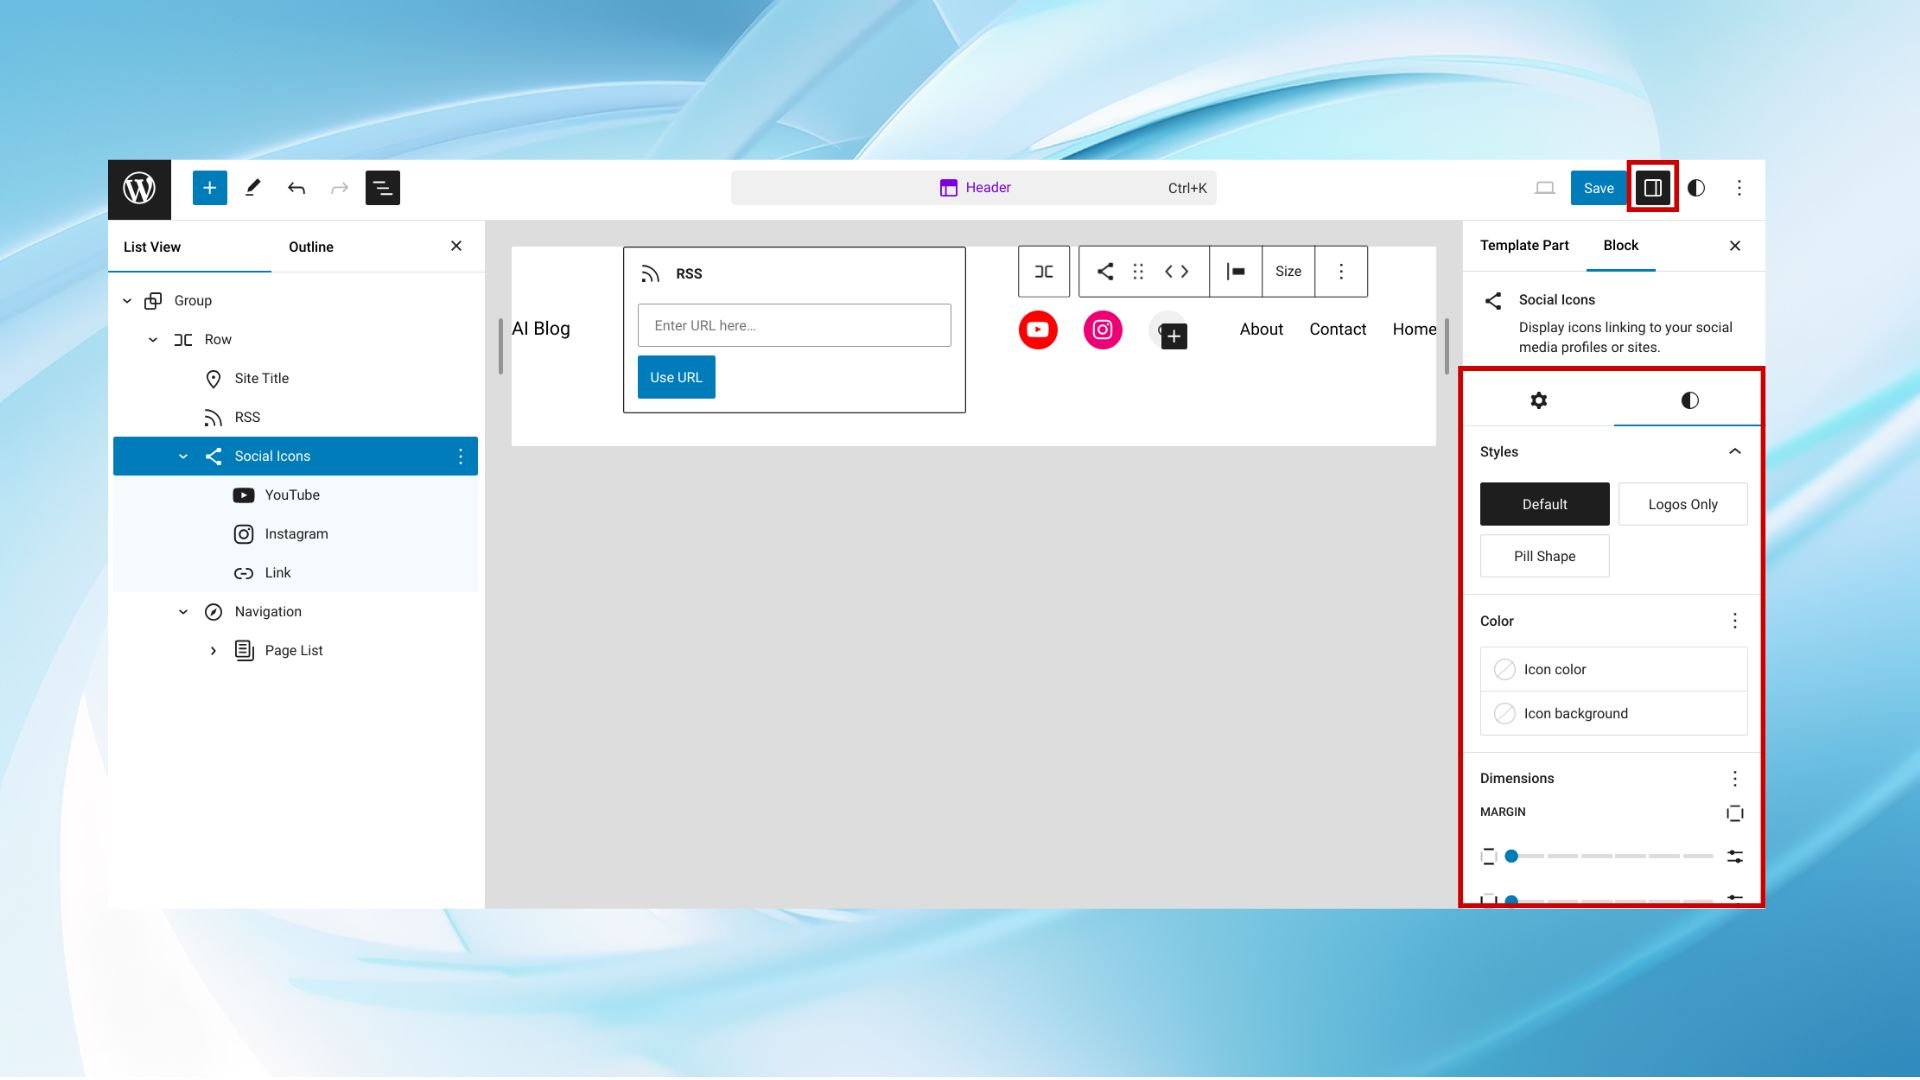
- To customize the overall header, click the Styles button also located in the upper right corner. This allows you to adjust the header’s general settings and aesthetics.
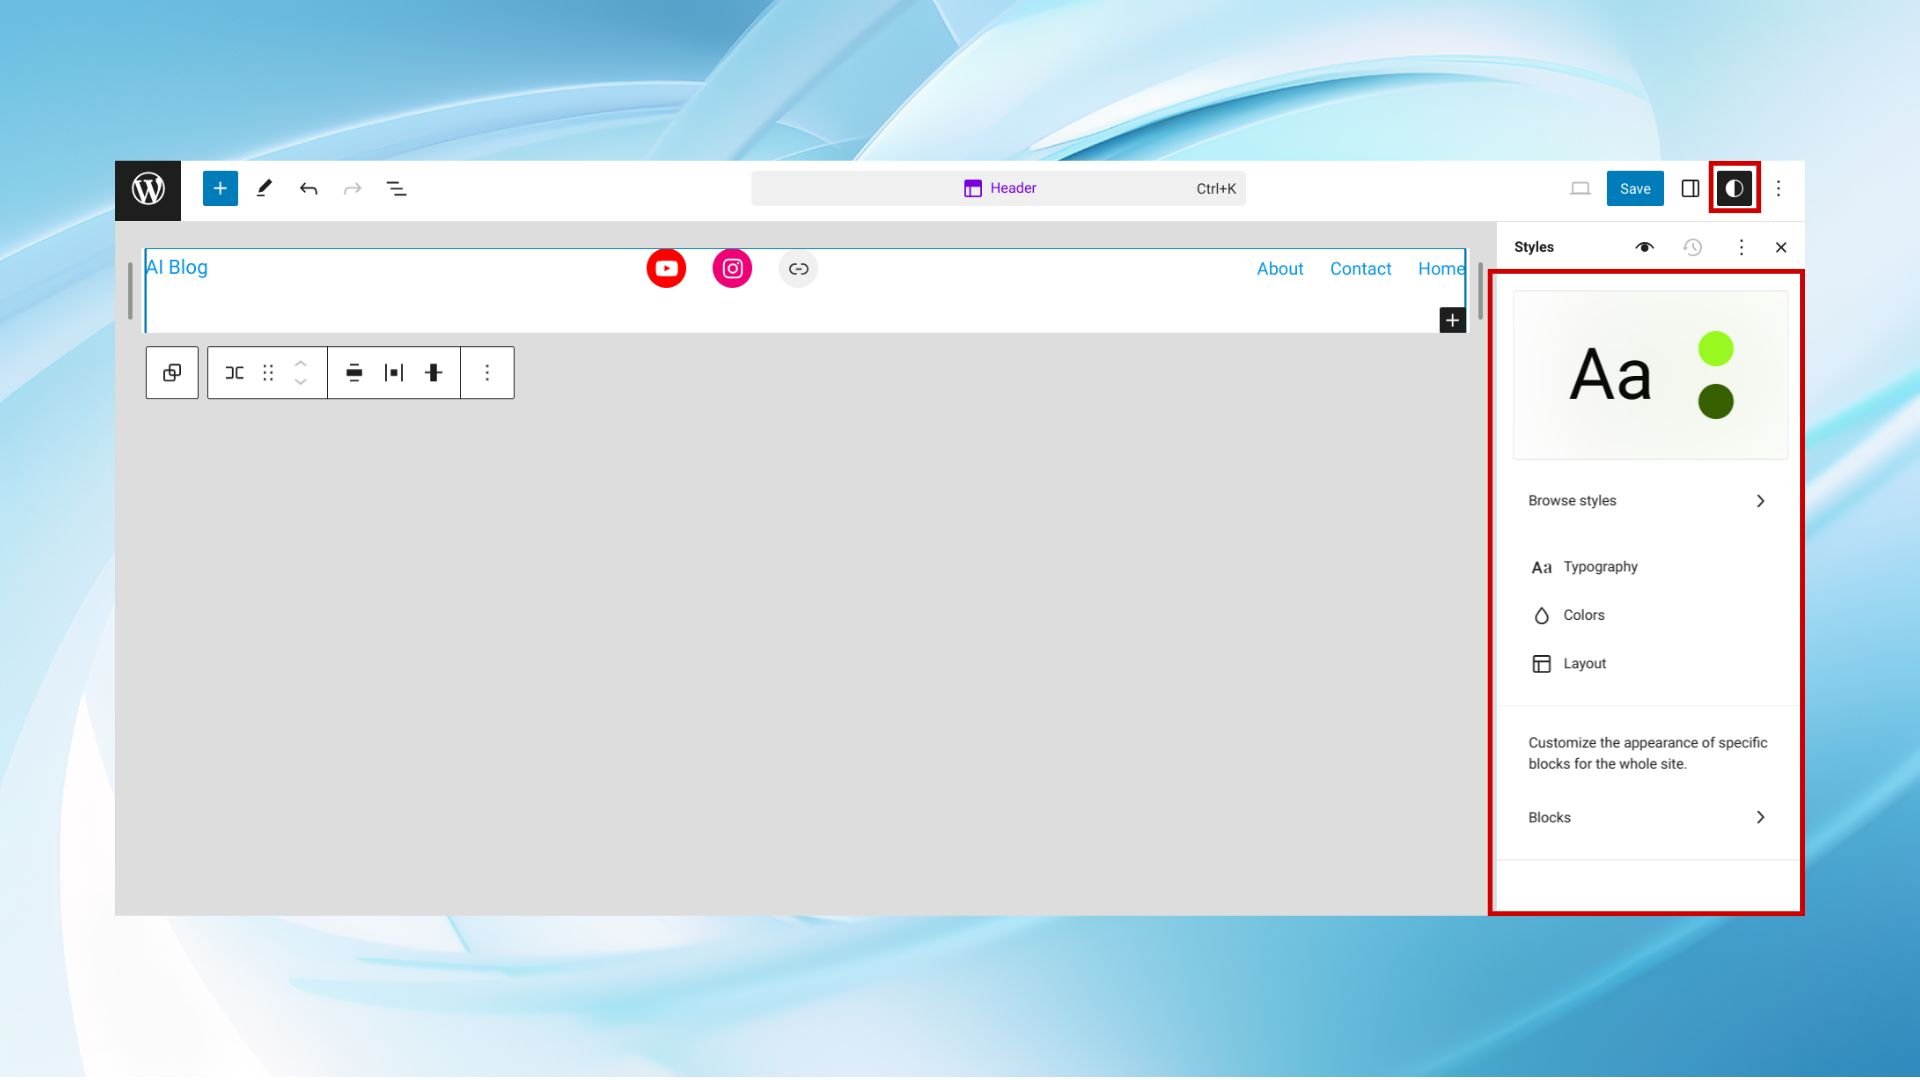
With the given tools you can adjust header layout, change colors and fonts, update the logo, customize the navigation menu and more.
Simplify WordPress with 10Web
Automate manual work with 10Web Managed WordPress Hosting and 10Web AI Website Builder. Optimize your WordPress website effortlessly.
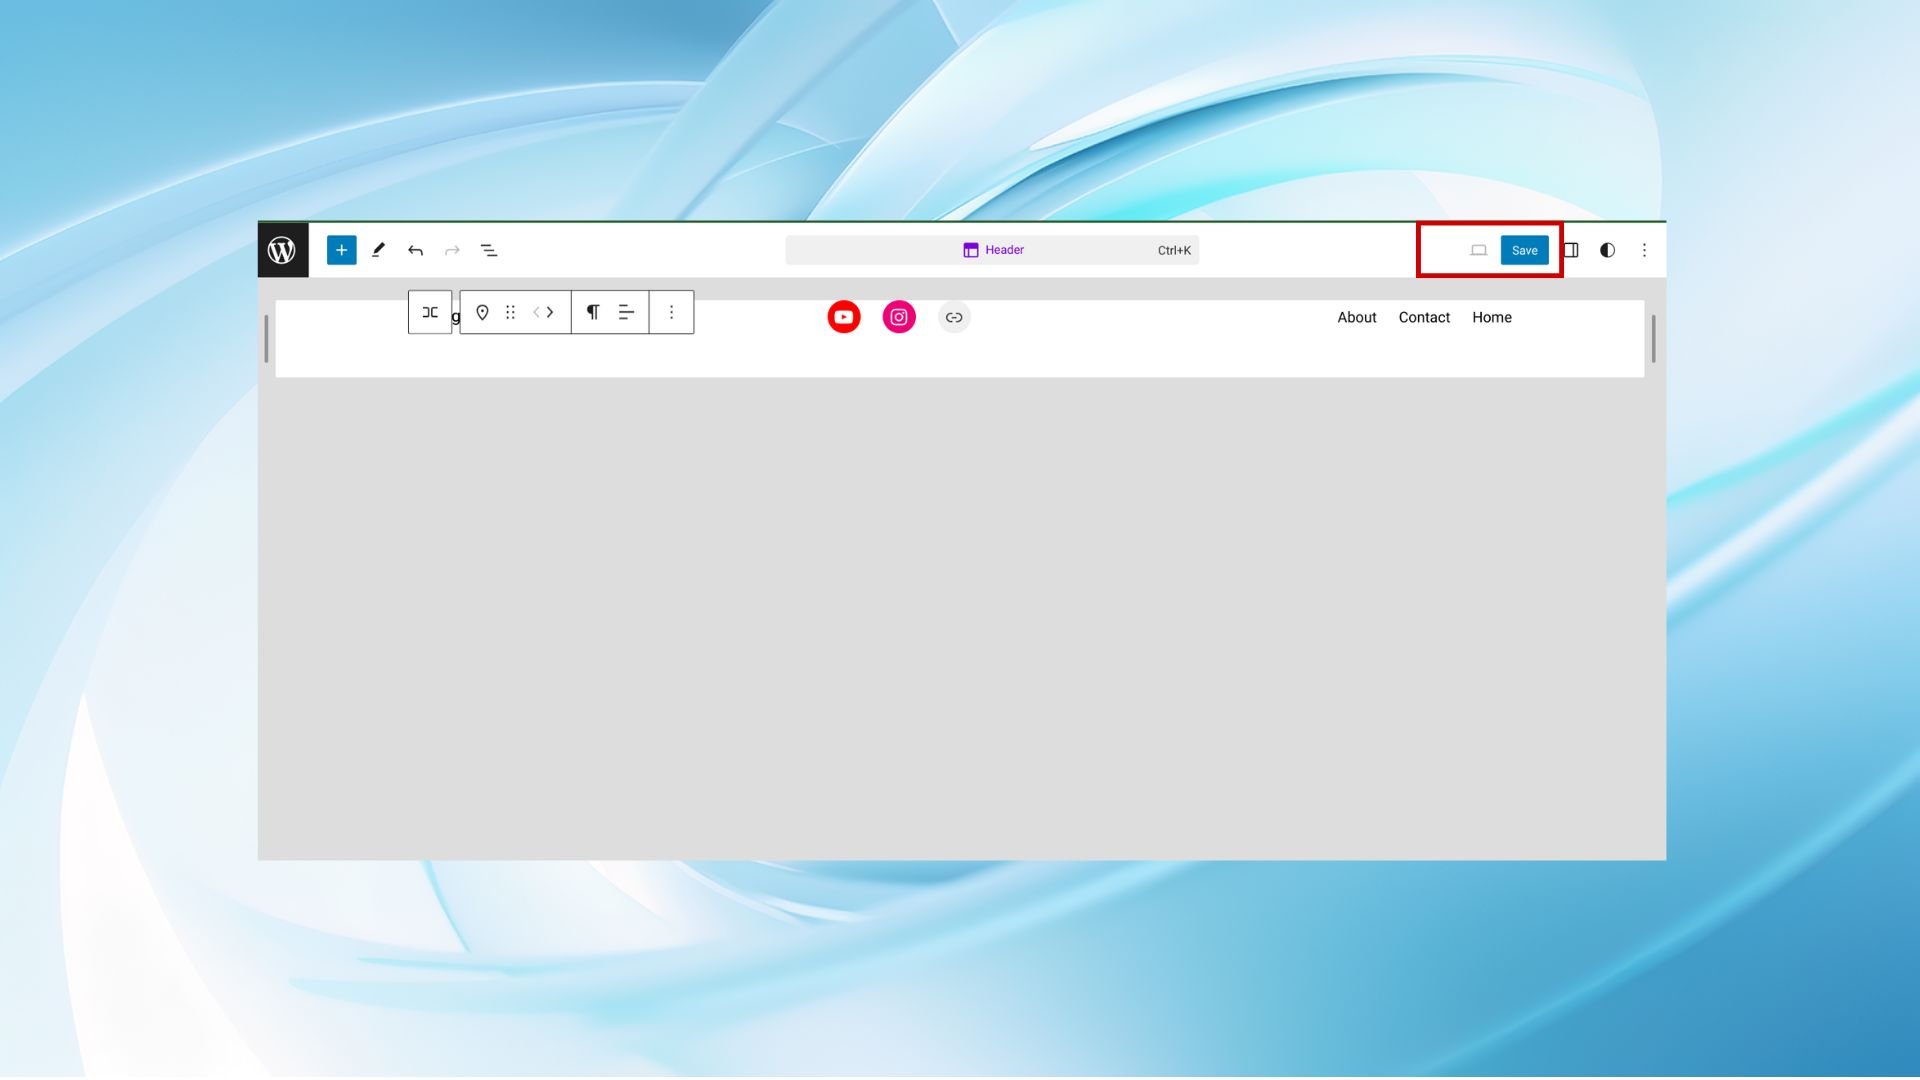
Step 4. Save your changes
After making the desired adjustments to your header look for a save option. This might be a button or link, often located at the top or bottom of the theme options panel. It might say Save, Save Changes, Update, or something similar.
Method 3: Editing header PHP and CSS files
You might need to edit the theme files directly for more advanced customization. This approach is recommended for users who are comfortable with coding. Always backup your site before making changes. Now, let’s break down how to edit header in WordPress using its PHP and adding custom CSS for more in-depth customization.
Step 1. Backup your site
Before making any changes, use a backup plugin. Install and activate a backup plugin from the WordPress plugin repository to create a full backup of your site.
Alternatively, you can manually back up your site by downloading a copy of your WordPress files via FTP and exporting your WordPress database from your hosting control panel.
Step 2. Access the theme editor
To start modifying your theme’s PHP:
- Log into your WordPress Dashboard
- Go to Appearance > Theme File Editor to open the WordPress theme editor. This tool allows you to modify the files that make up your current theme directly from the Dashboard.
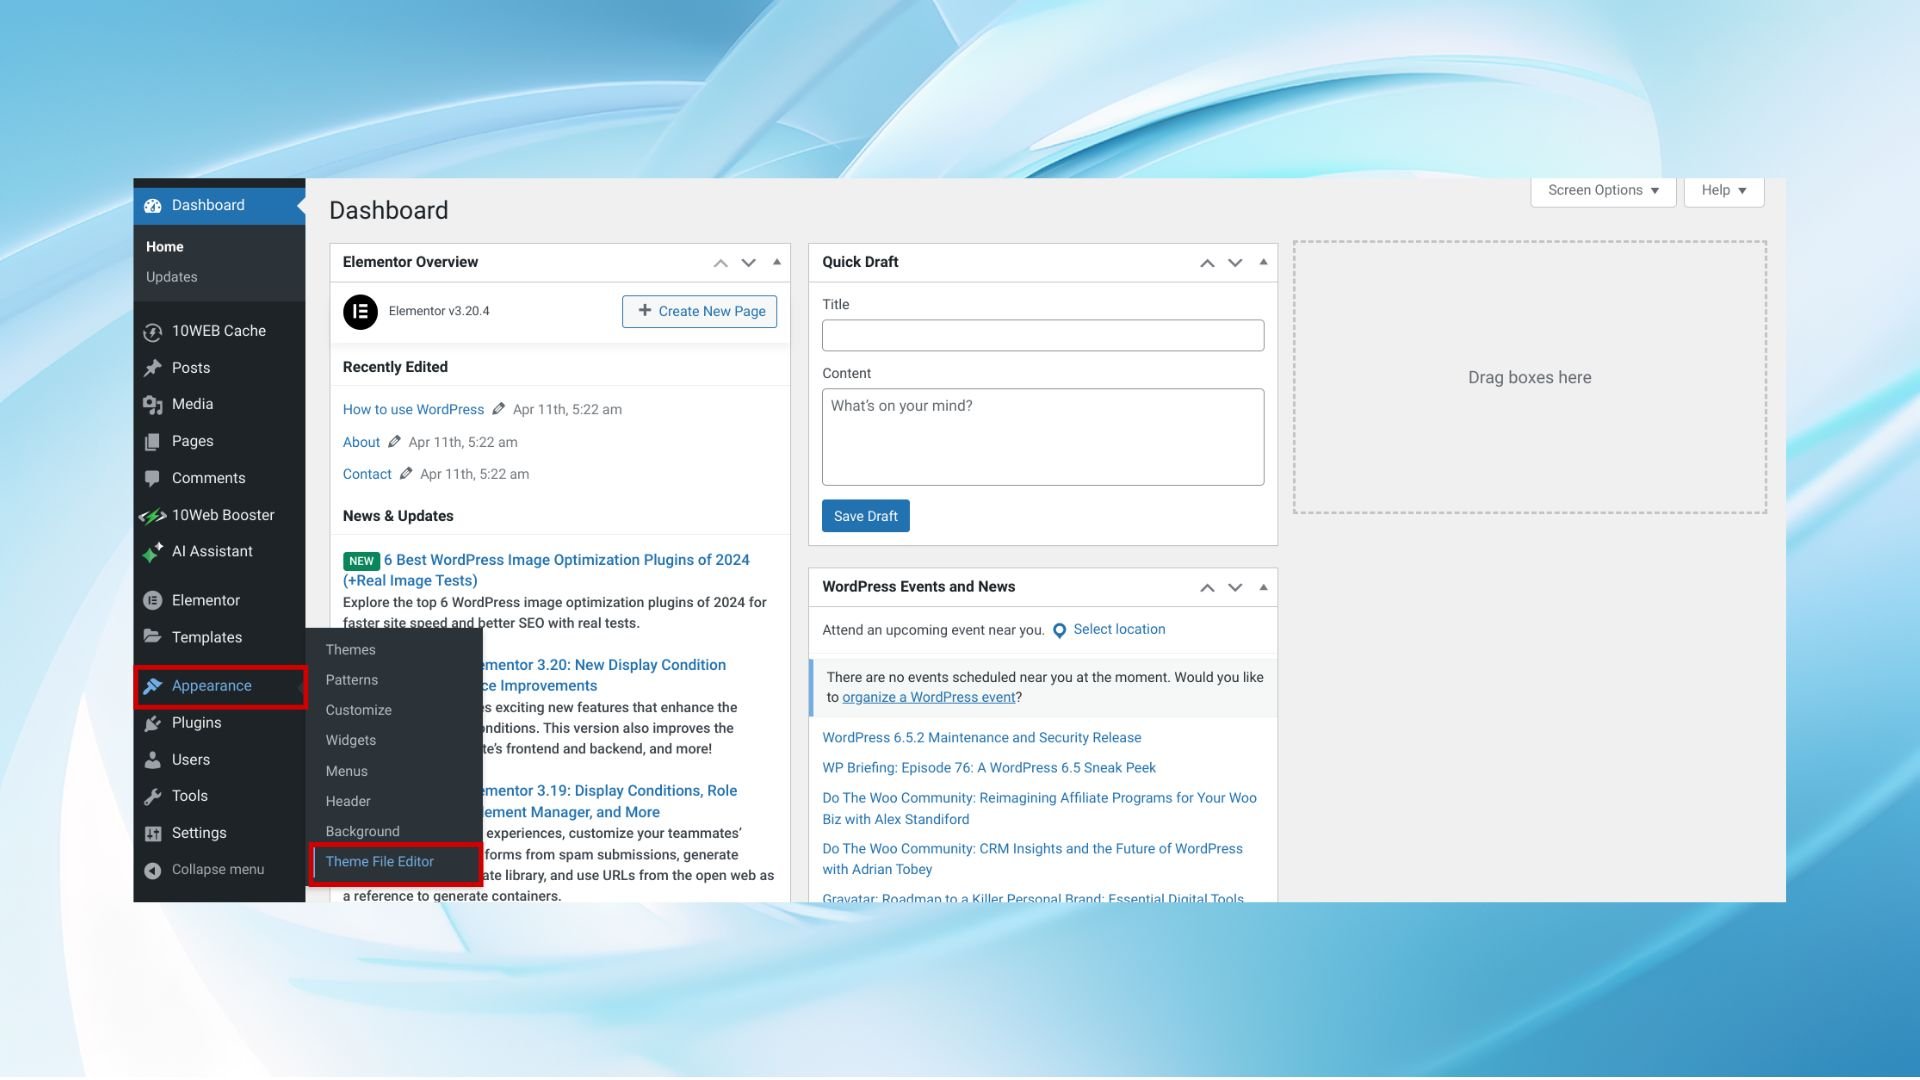
- If your active theme isn’t already selected, choose it from the drop-down menu or list provided. This ensures you’re editing the correct set of files.
Step 3. Edit the `header.php` file and save
The `header.php` file controls much of what appears in the header of your WordPress site:
- In the list of theme files, find and select the `header.php` file. This will open the file in the editor.
- Carefully edit the PHP structure of the header. For example, to insert custom code snippets like Google Analytics code, you would place them before the closing `</head>` tag. Ensure your changes are precise and syntactically correct to avoid breaking your site.
- In the theme editor, click the Update File button to save your PHP changes.

Step 4. Add custom CSS
For style-related adjustments, like changing fonts, colors, or the overall layout of your header, use the Additional CSS feature:
- From the WordPress Dashboard
- Navigate to Appearance > Customize.
- Within the Customizer, find and select the Additional CSS section. This area allows you to write or paste custom CSS that will directly affect your site’s appearance.
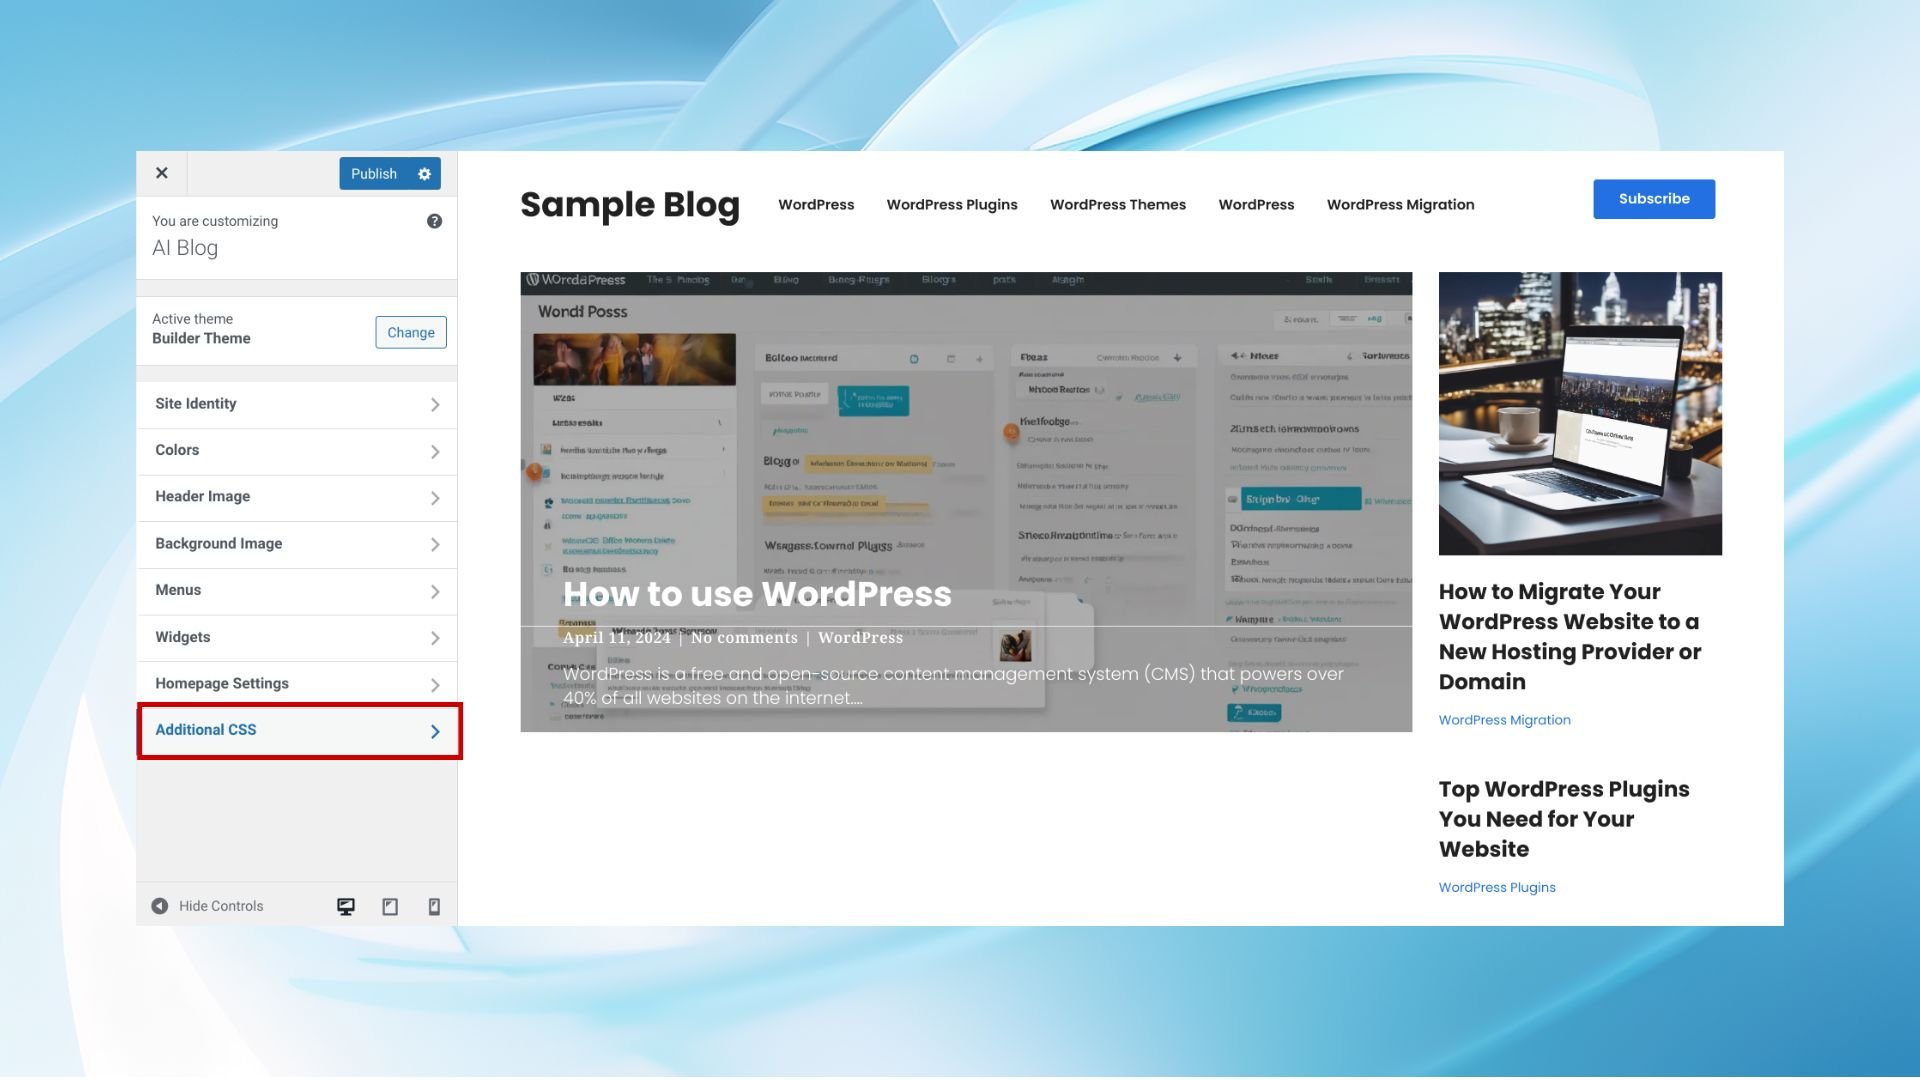
- Enter your custom CSS code here. Each entry should be designed to override the existing styles defined by your theme. For instance, to change the header’s background color, you would specify the CSS selector for the header and apply a new color value.
- In the Customizer’s Additional CSS section, click Publish to apply your CSS modifications.

Simplify WordPress with 10Web
Automate manual work with 10Web Managed WordPress Hosting and 10Web AI Website Builder. Optimize your WordPress website effortlessly.
Method 4: Using page builder plugins
Page builders like Elementor offer drag-and-drop interfaces to design headers. Let’s explore how to change header in WordPress using page builder plugins.
1. Install a page builder plugin
To begin with, you need to select and install a page builder plugin that suits your needs. For this guide, we’ll assume you’re choosing between popular options like Elementor, Beaver Builder, or Divi. Here’s how to install one:
- Log into your WordPress site’s admin area.
- Go to Plugins > Add New Plugin. You’ll find this option in the left sidebar of your dashboard.
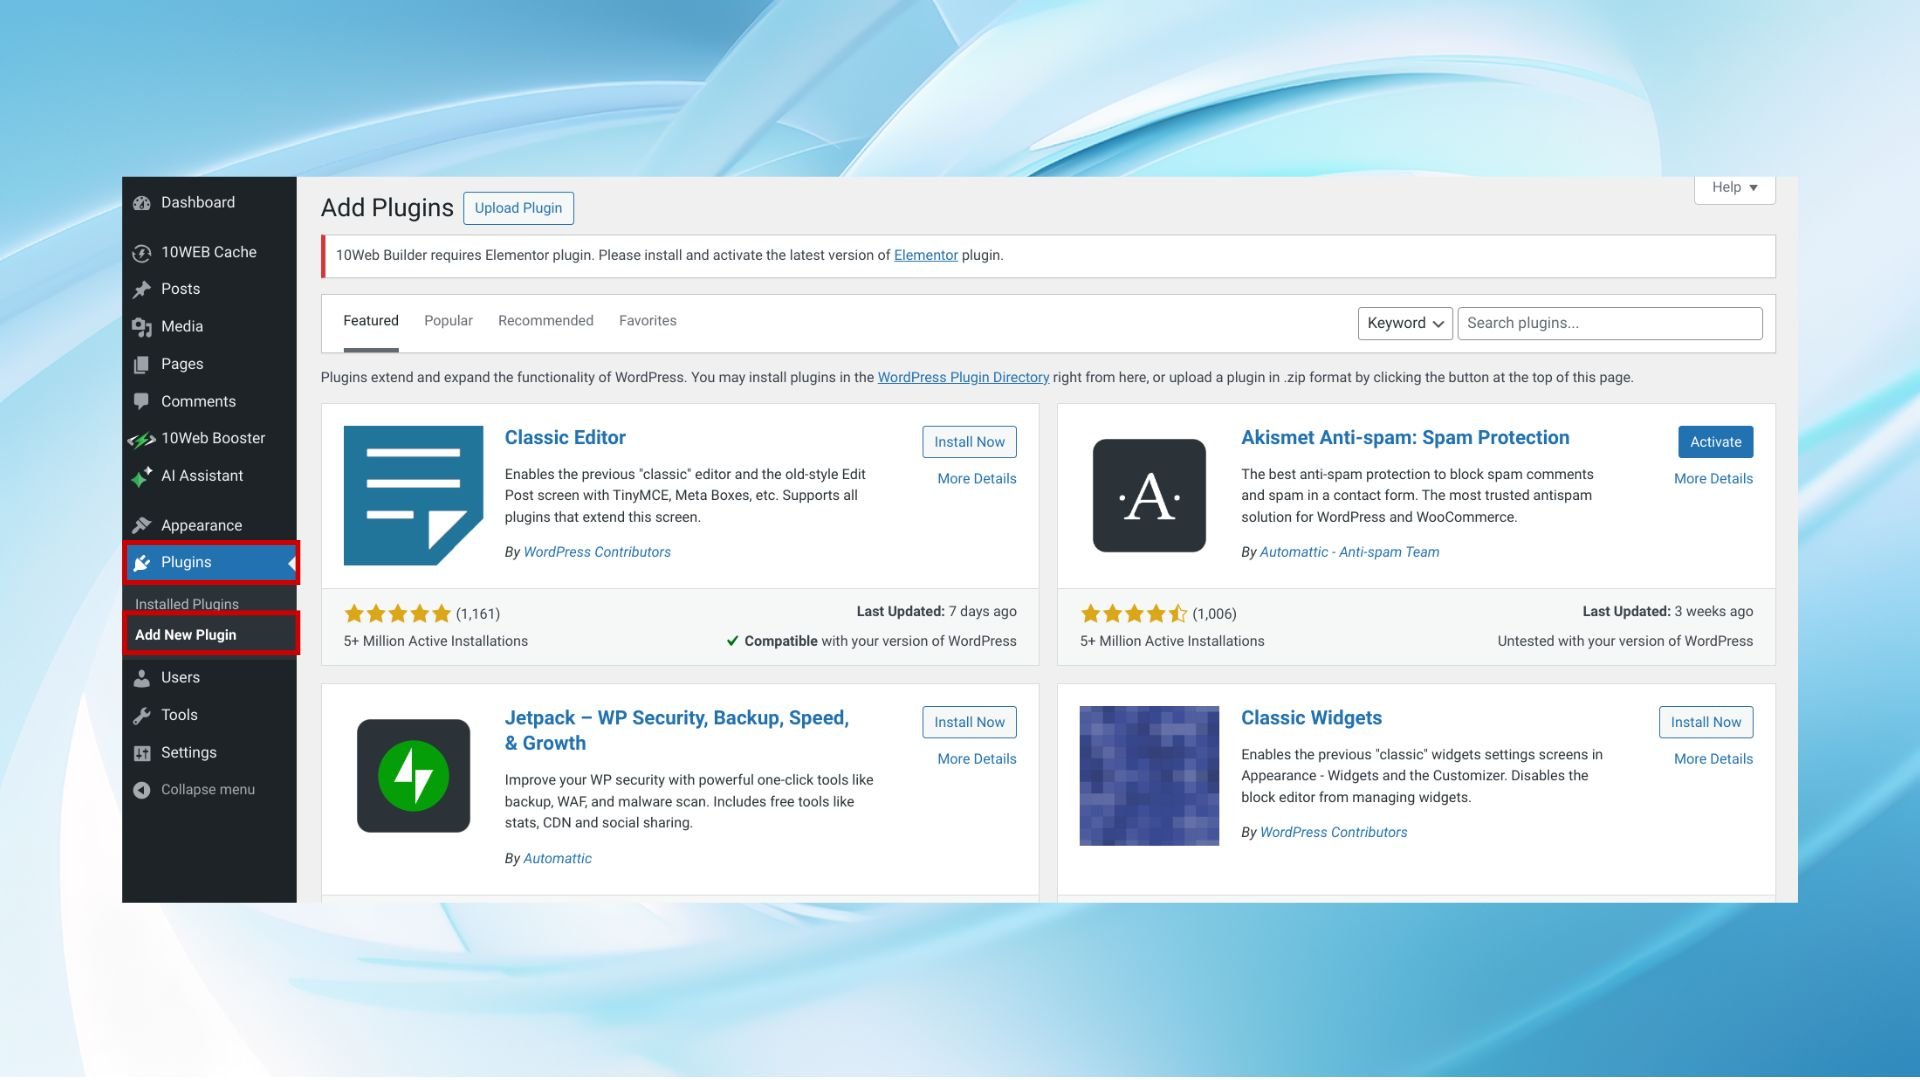
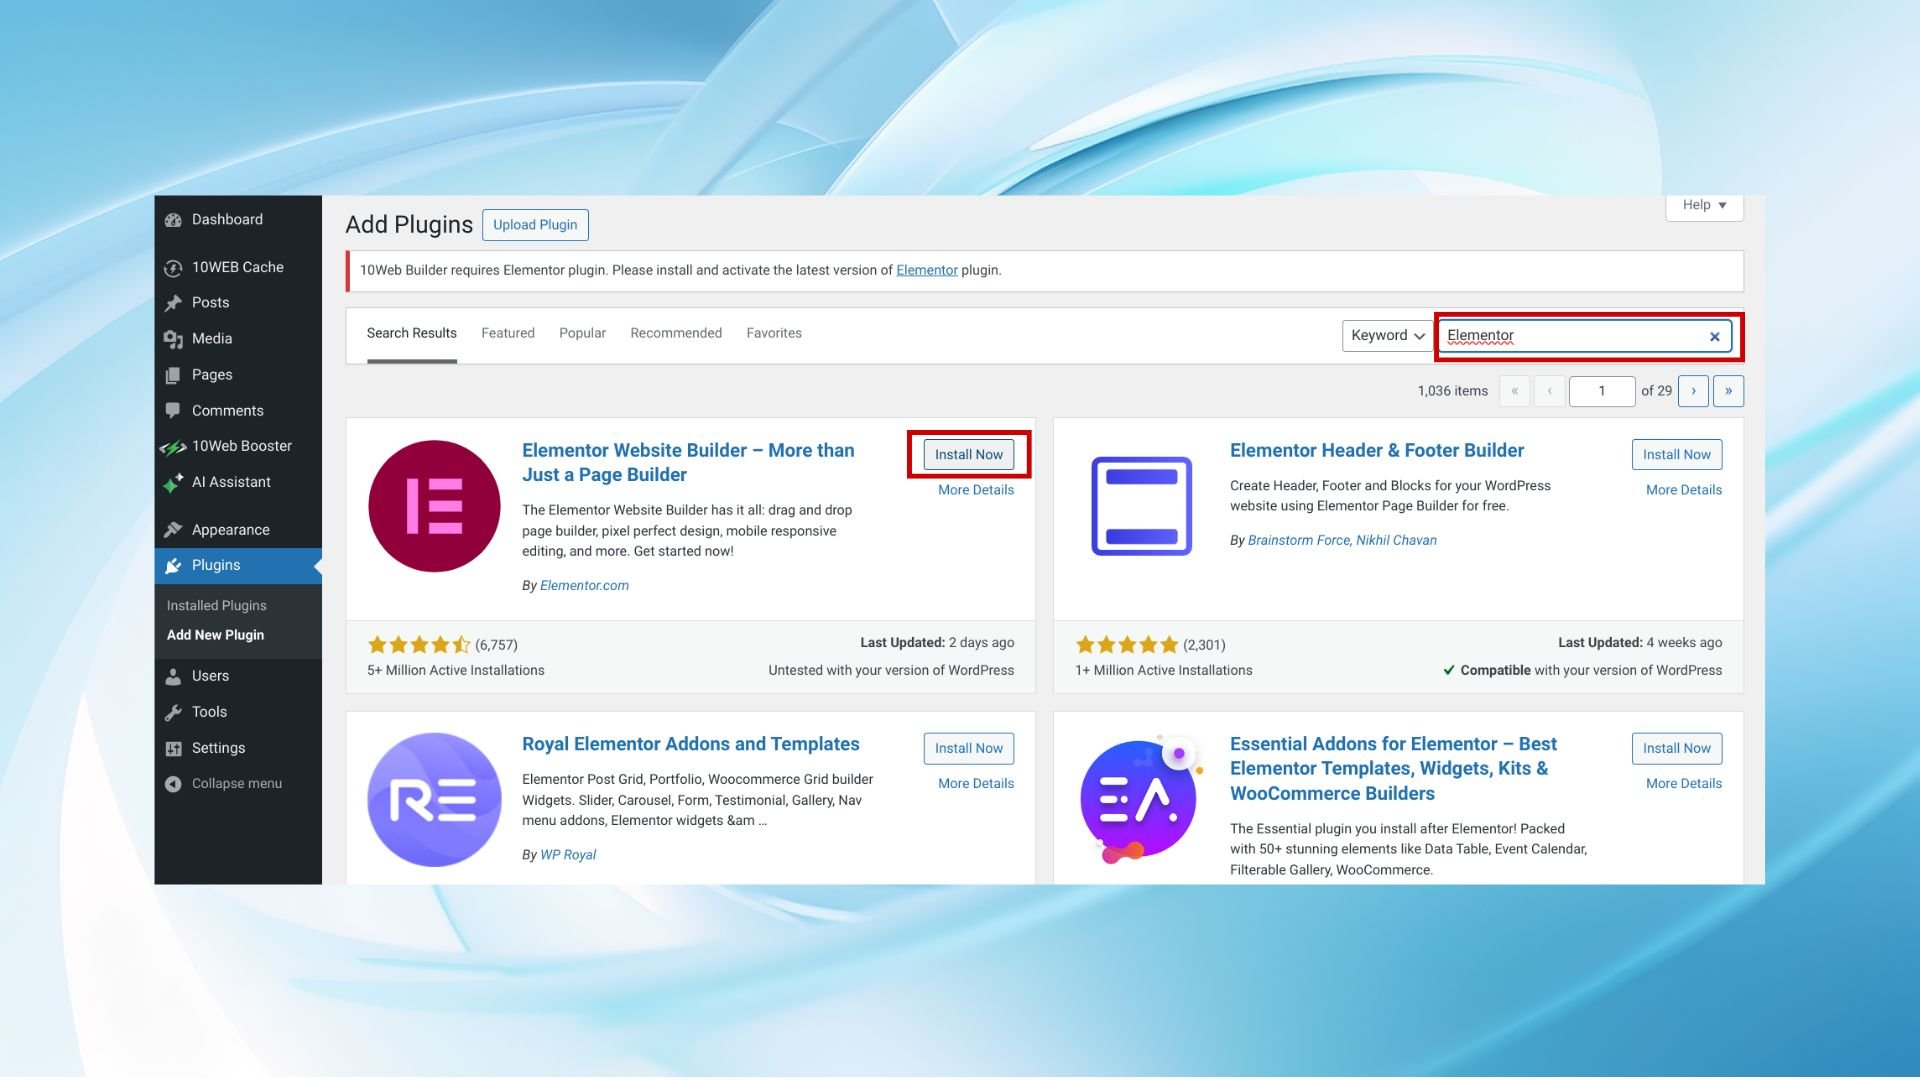
- Use the search bar in the top right corner of the Add New Plugins page to find the page builder of your choice. Type in “Elementor,” “Beaver Builder,” or “Divi.”
- Once you’ve located your preferred page builder in the search results, click the Install Now button next to the plugin’s name.
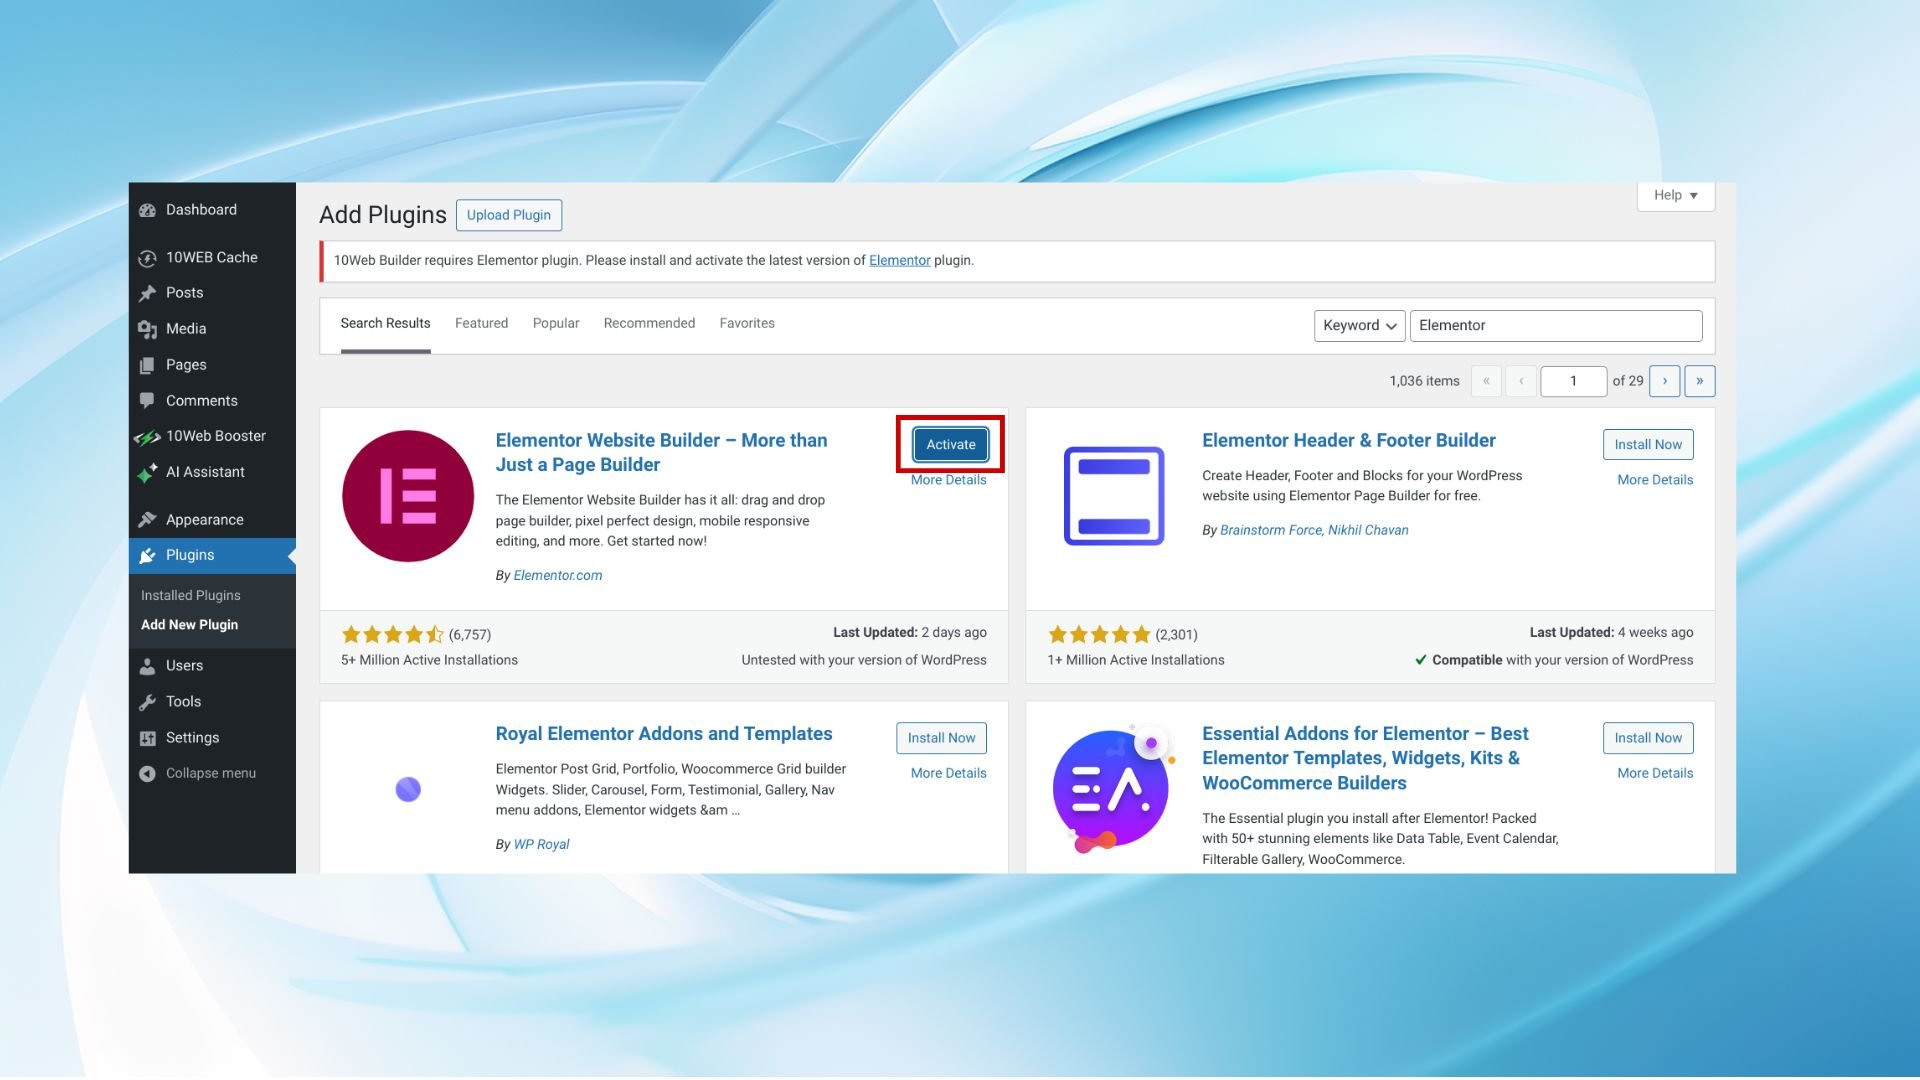
- After the installation is complete, the Install Now button will change to an Activate button. Click it to activate the plugin on your site.
2. Create a custom header
With your page builder installed, the next step is to design a custom header. This process may vary slightly depending on the page builder you’re using, but the general steps are similar:
- Most page builders come with a theme builder function. You can typically find this by visiting the page builder’s section in your WordPress Dashboard. For example, in Elementor, you would navigate to Templates > Add New.
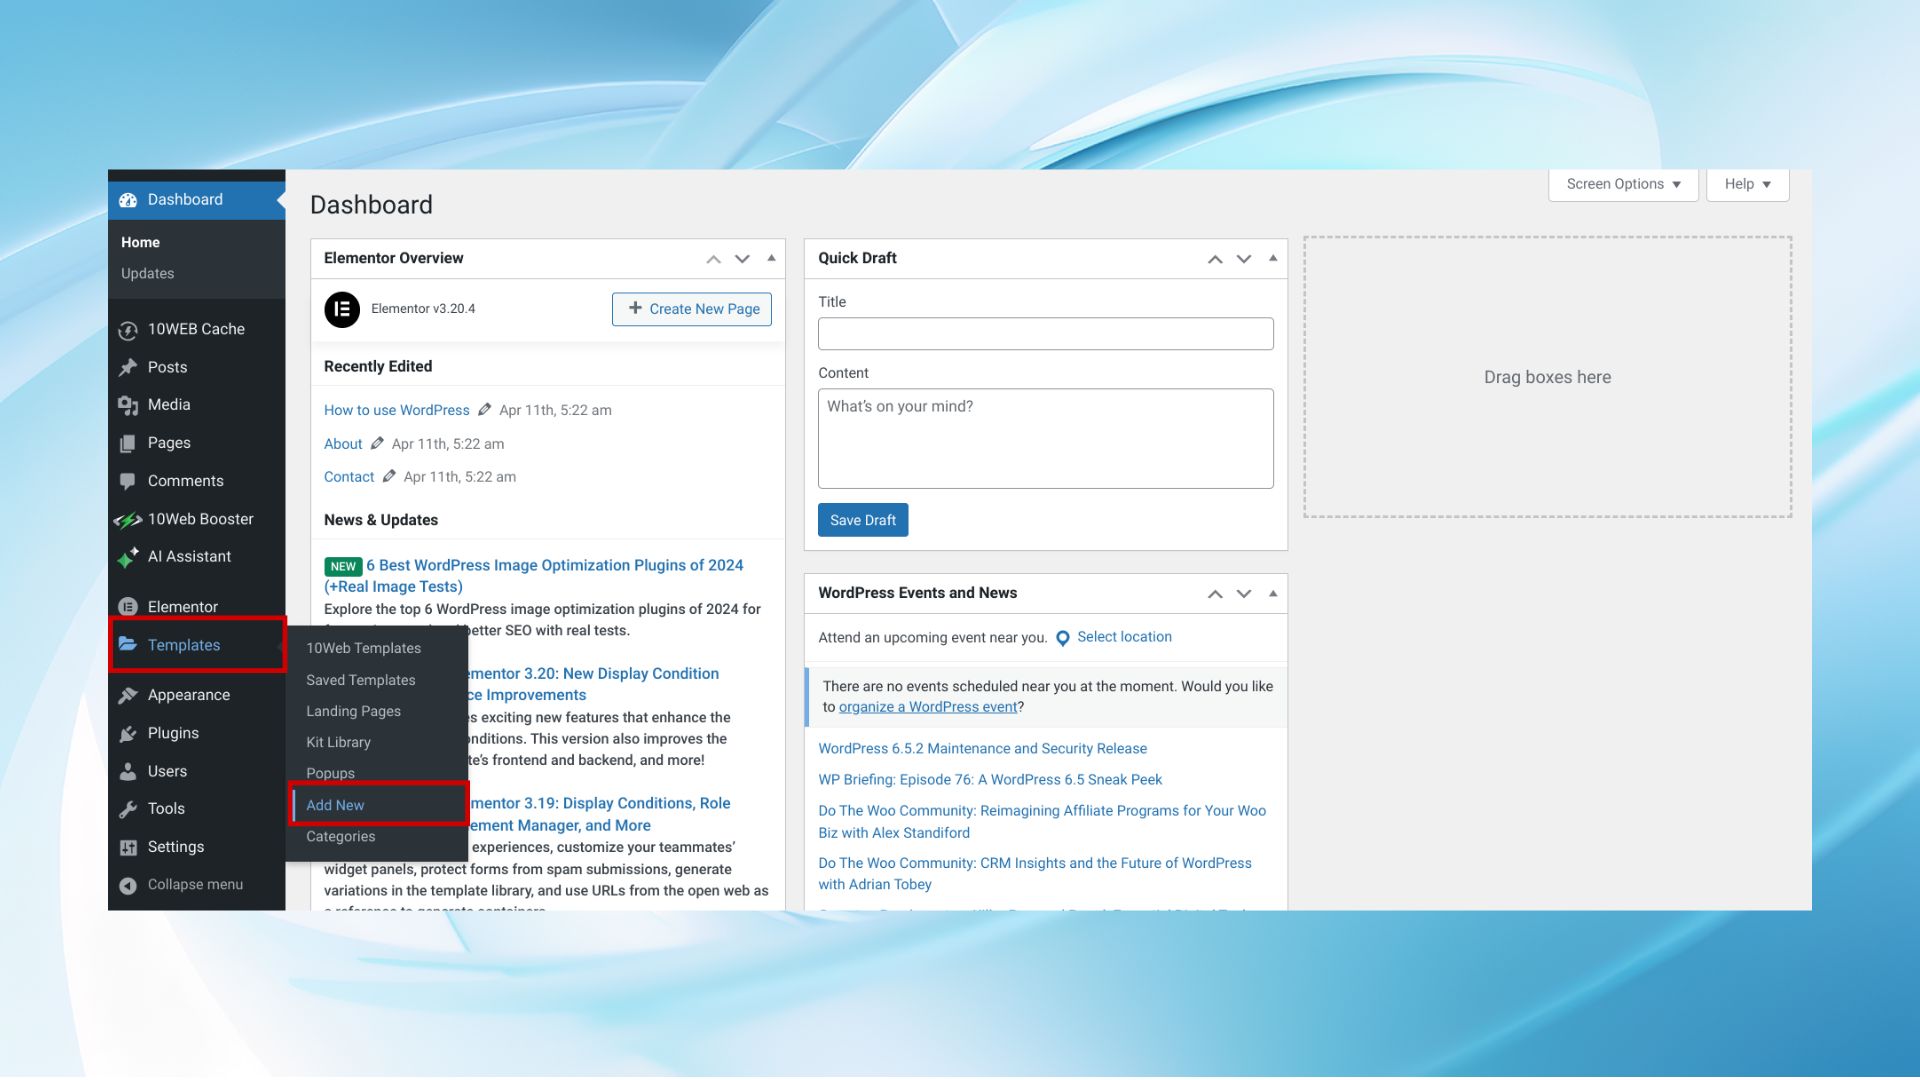
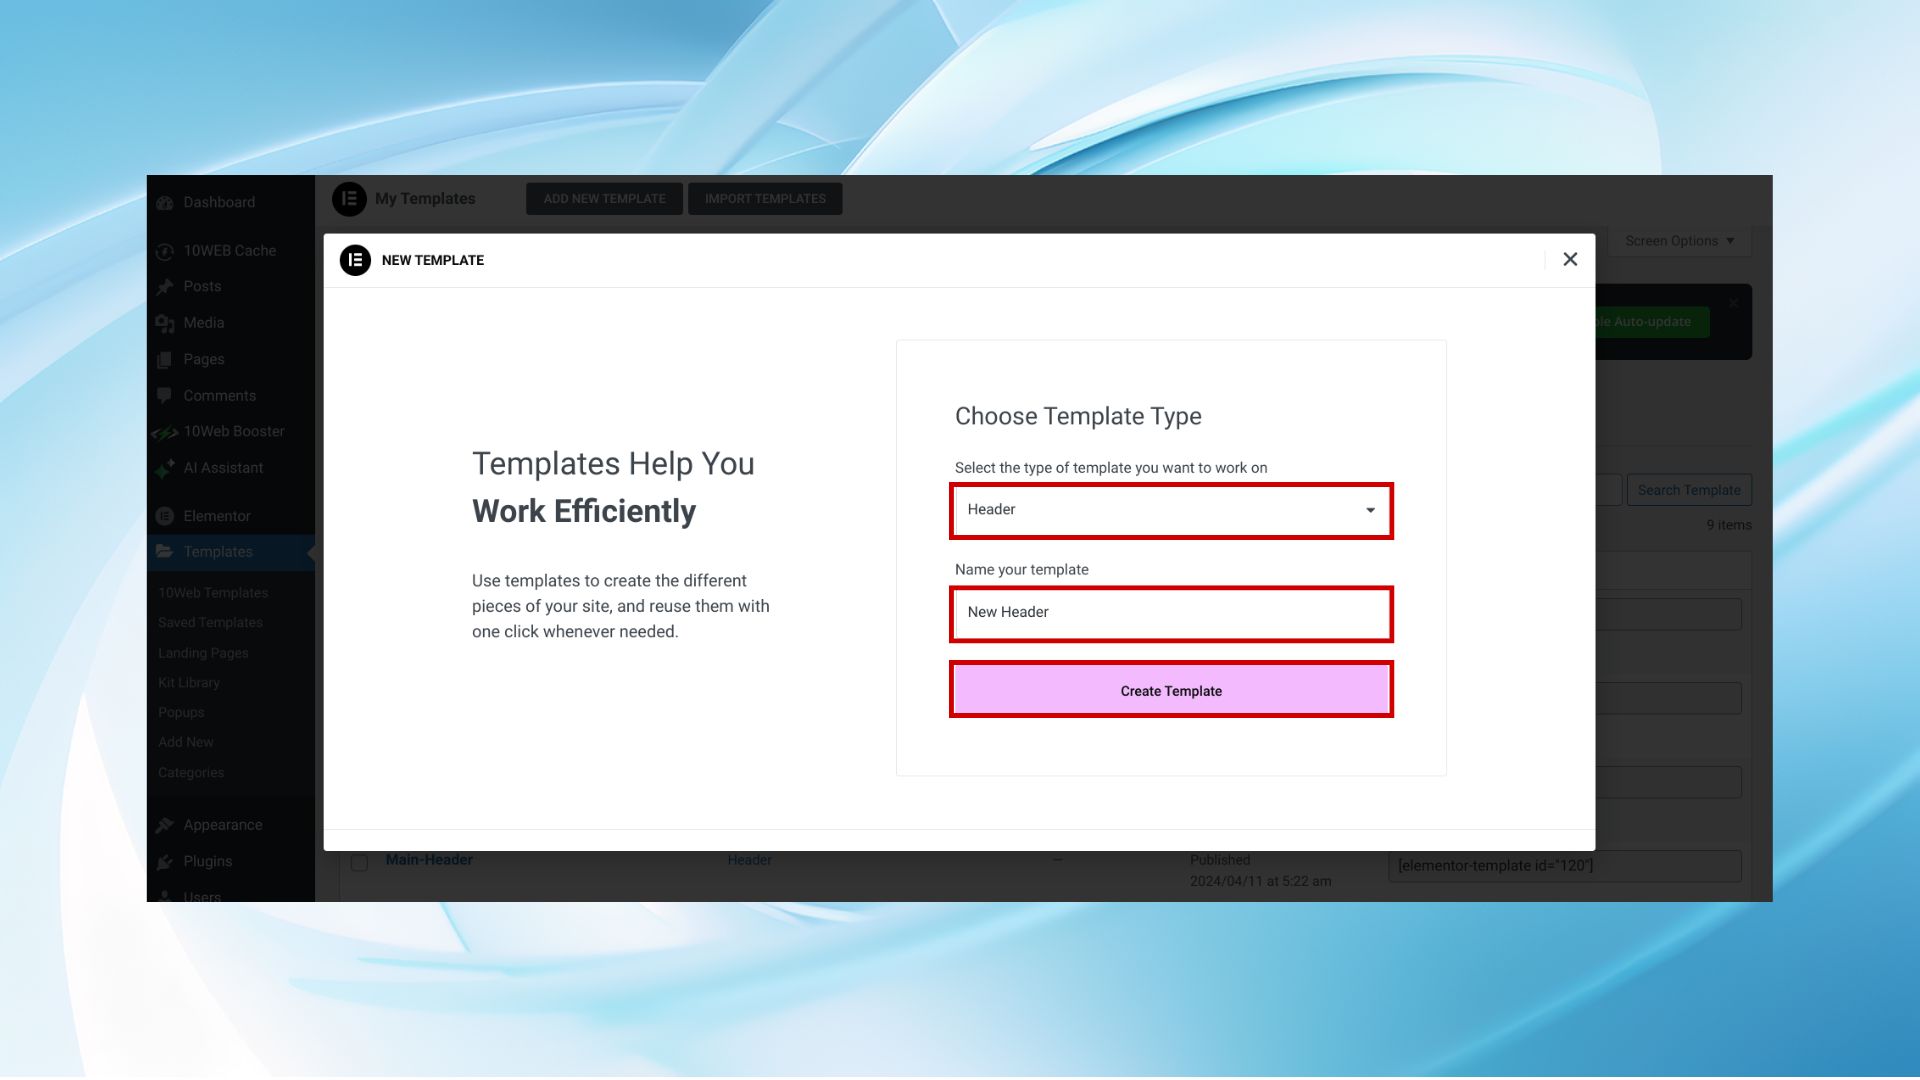
- In the pop-up select Header as the type, name the template and click on the Create Template button.
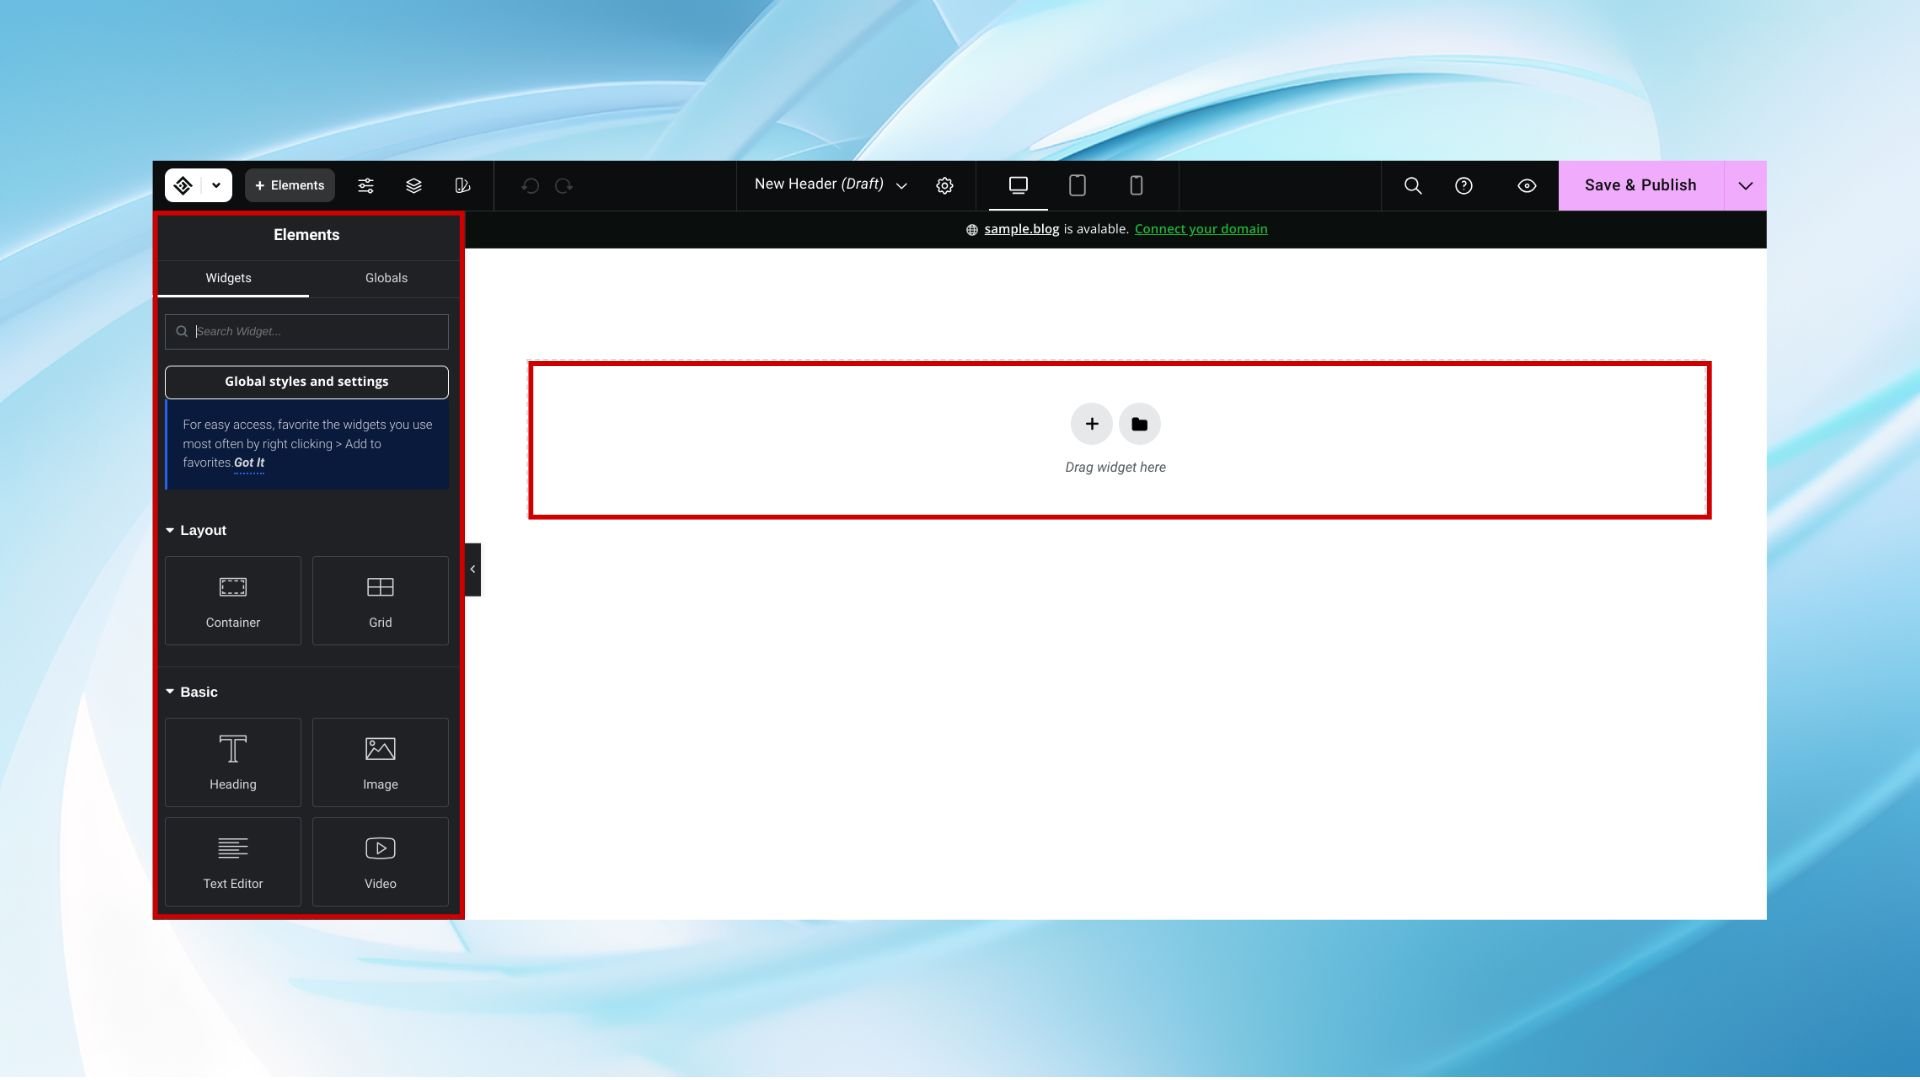
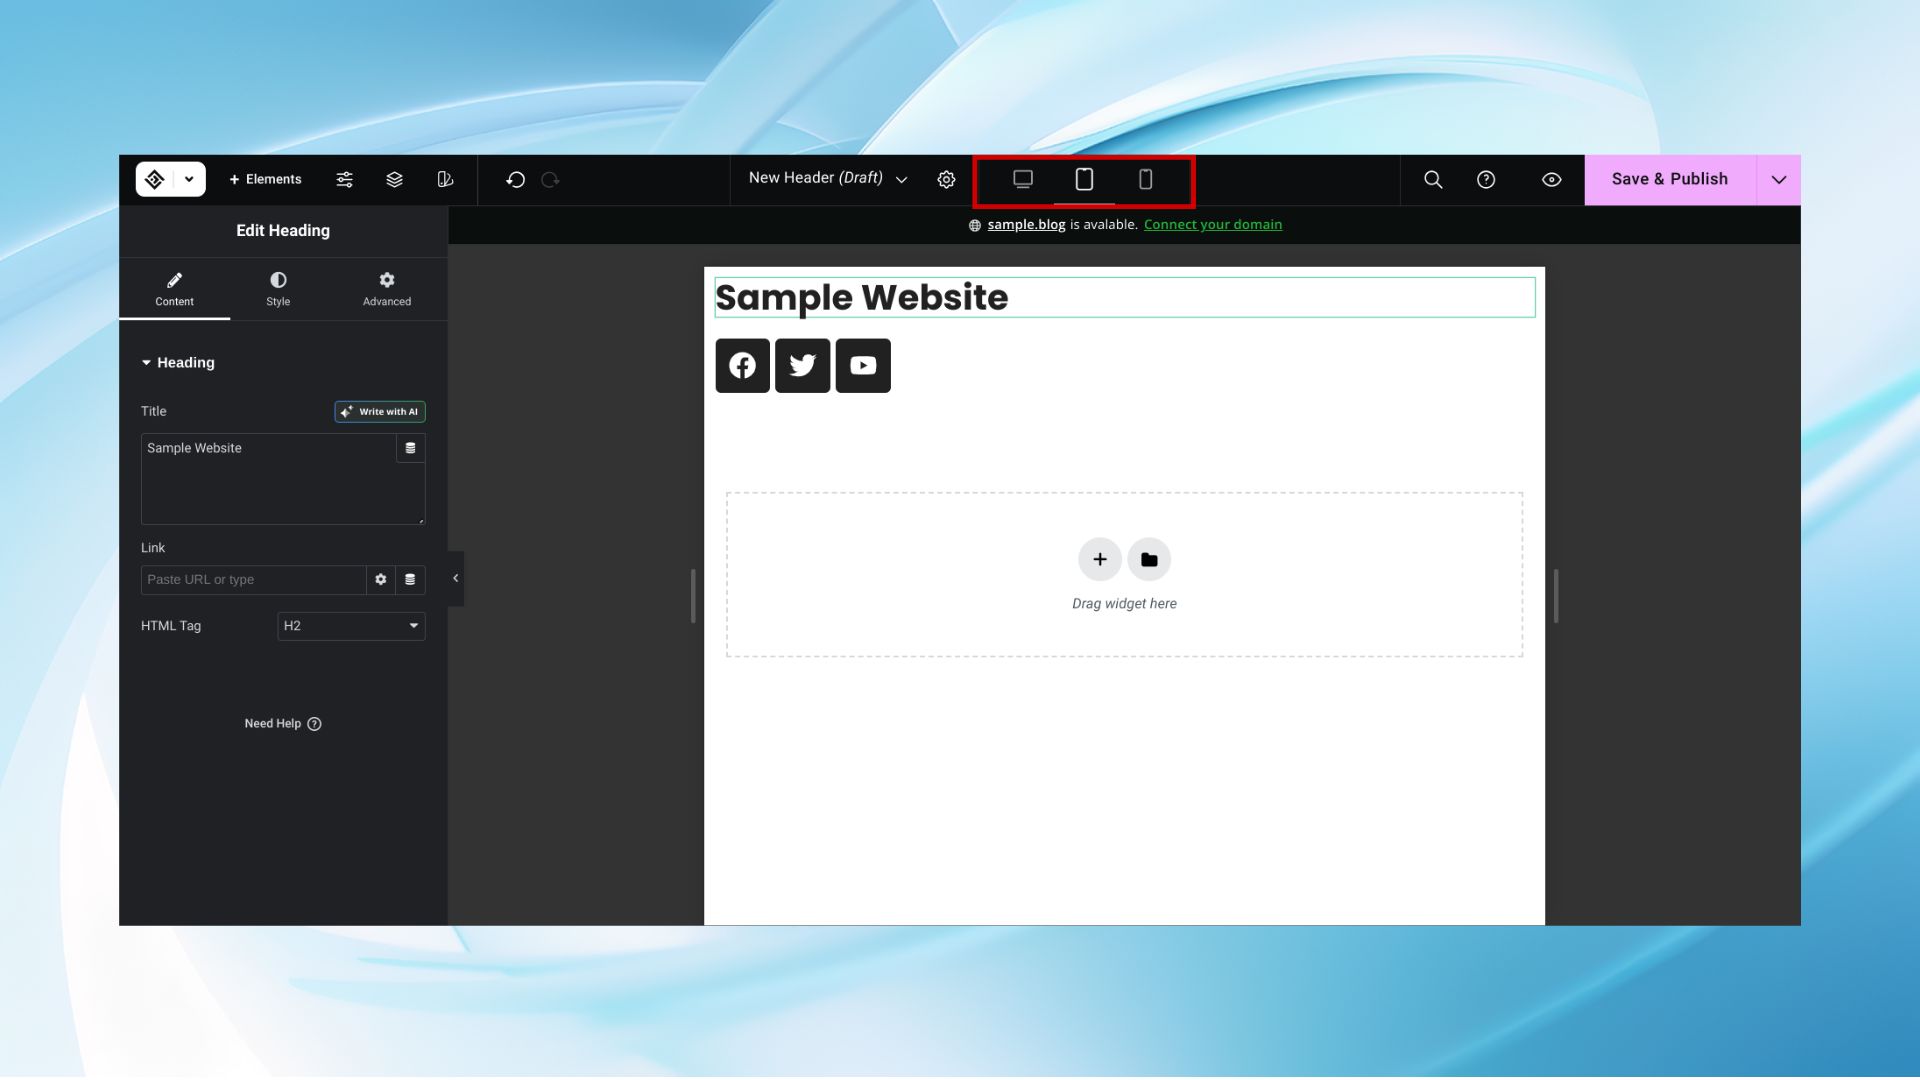
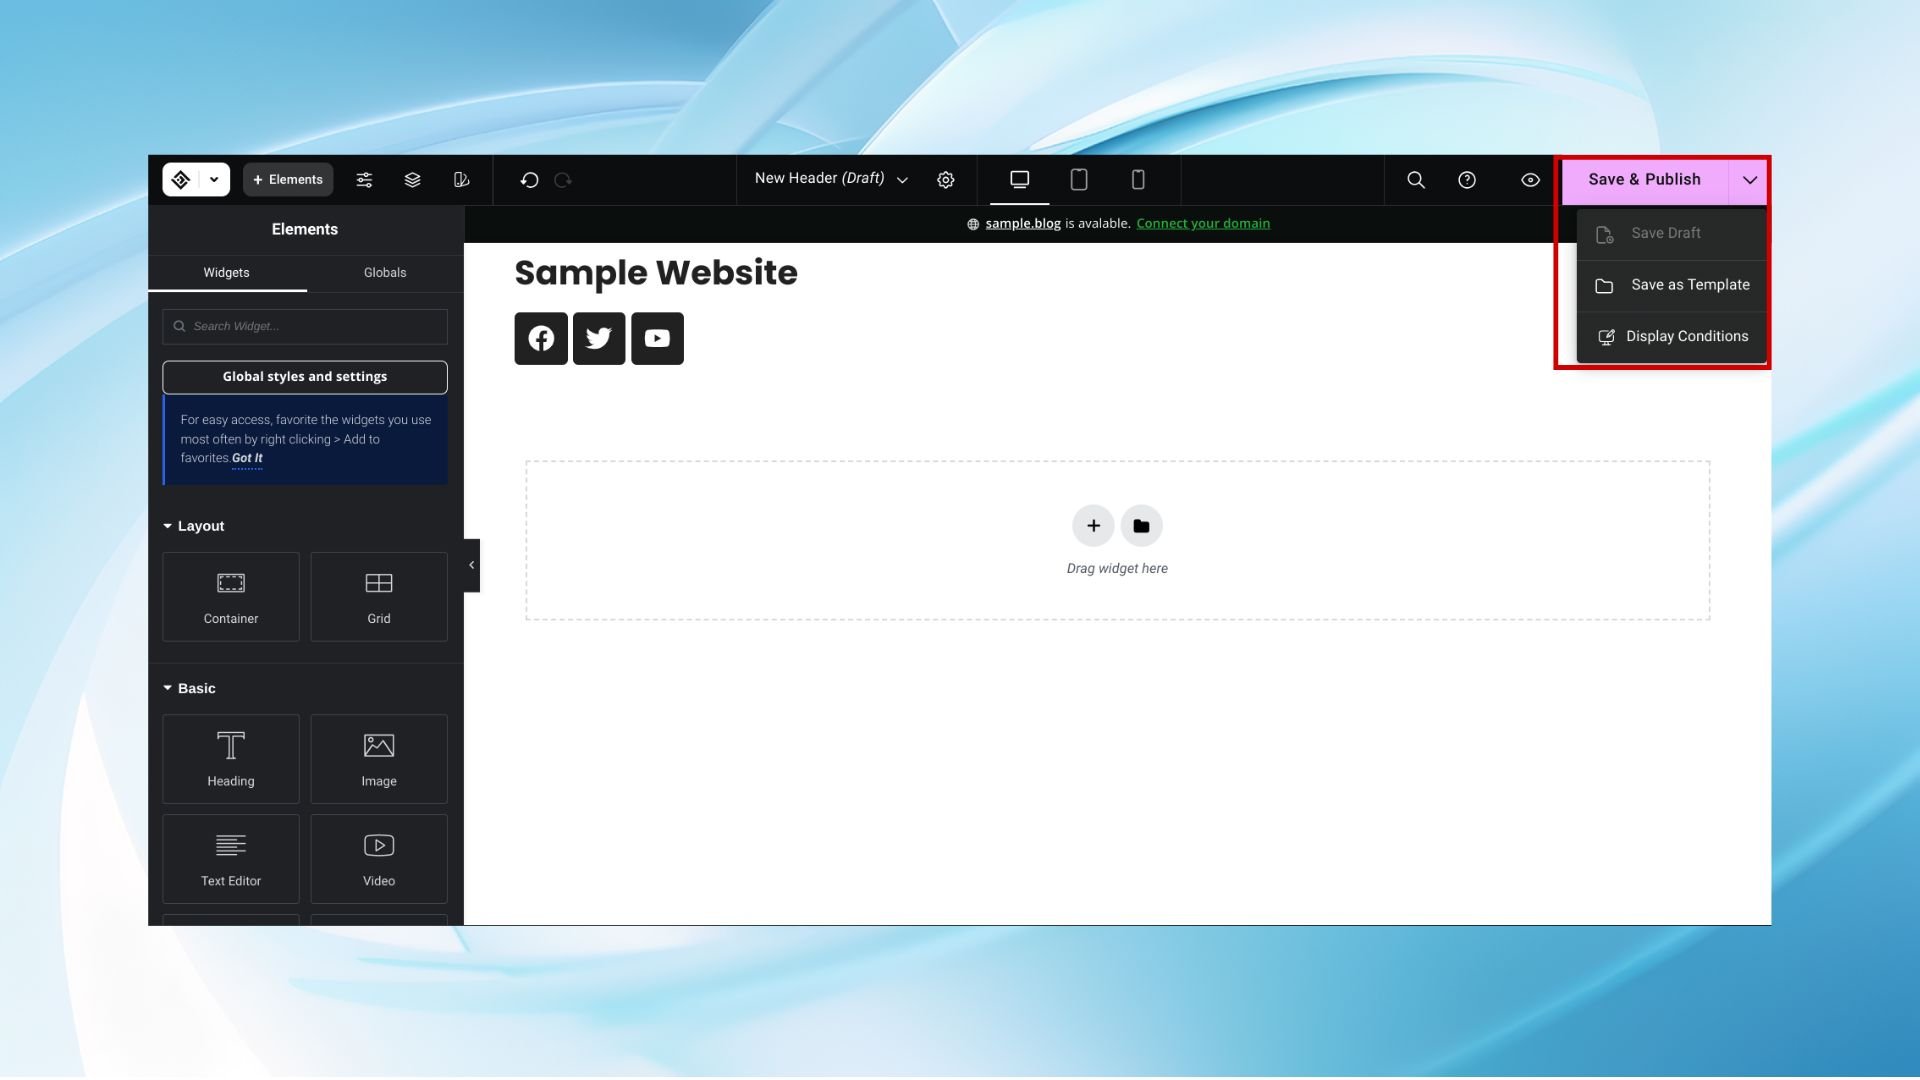
- Design your header. Use the drag-and-drop interface to add elements to your header. Common elements include logos, navigation menus, search bars, ans social media icons.
- You can also apply custom styling to match your site’s branding.

- You can preview how the header will look for different devices.
- Once you’re satisfied with the design, save your header template by clicking on Save & Publish.
3. Assign the header
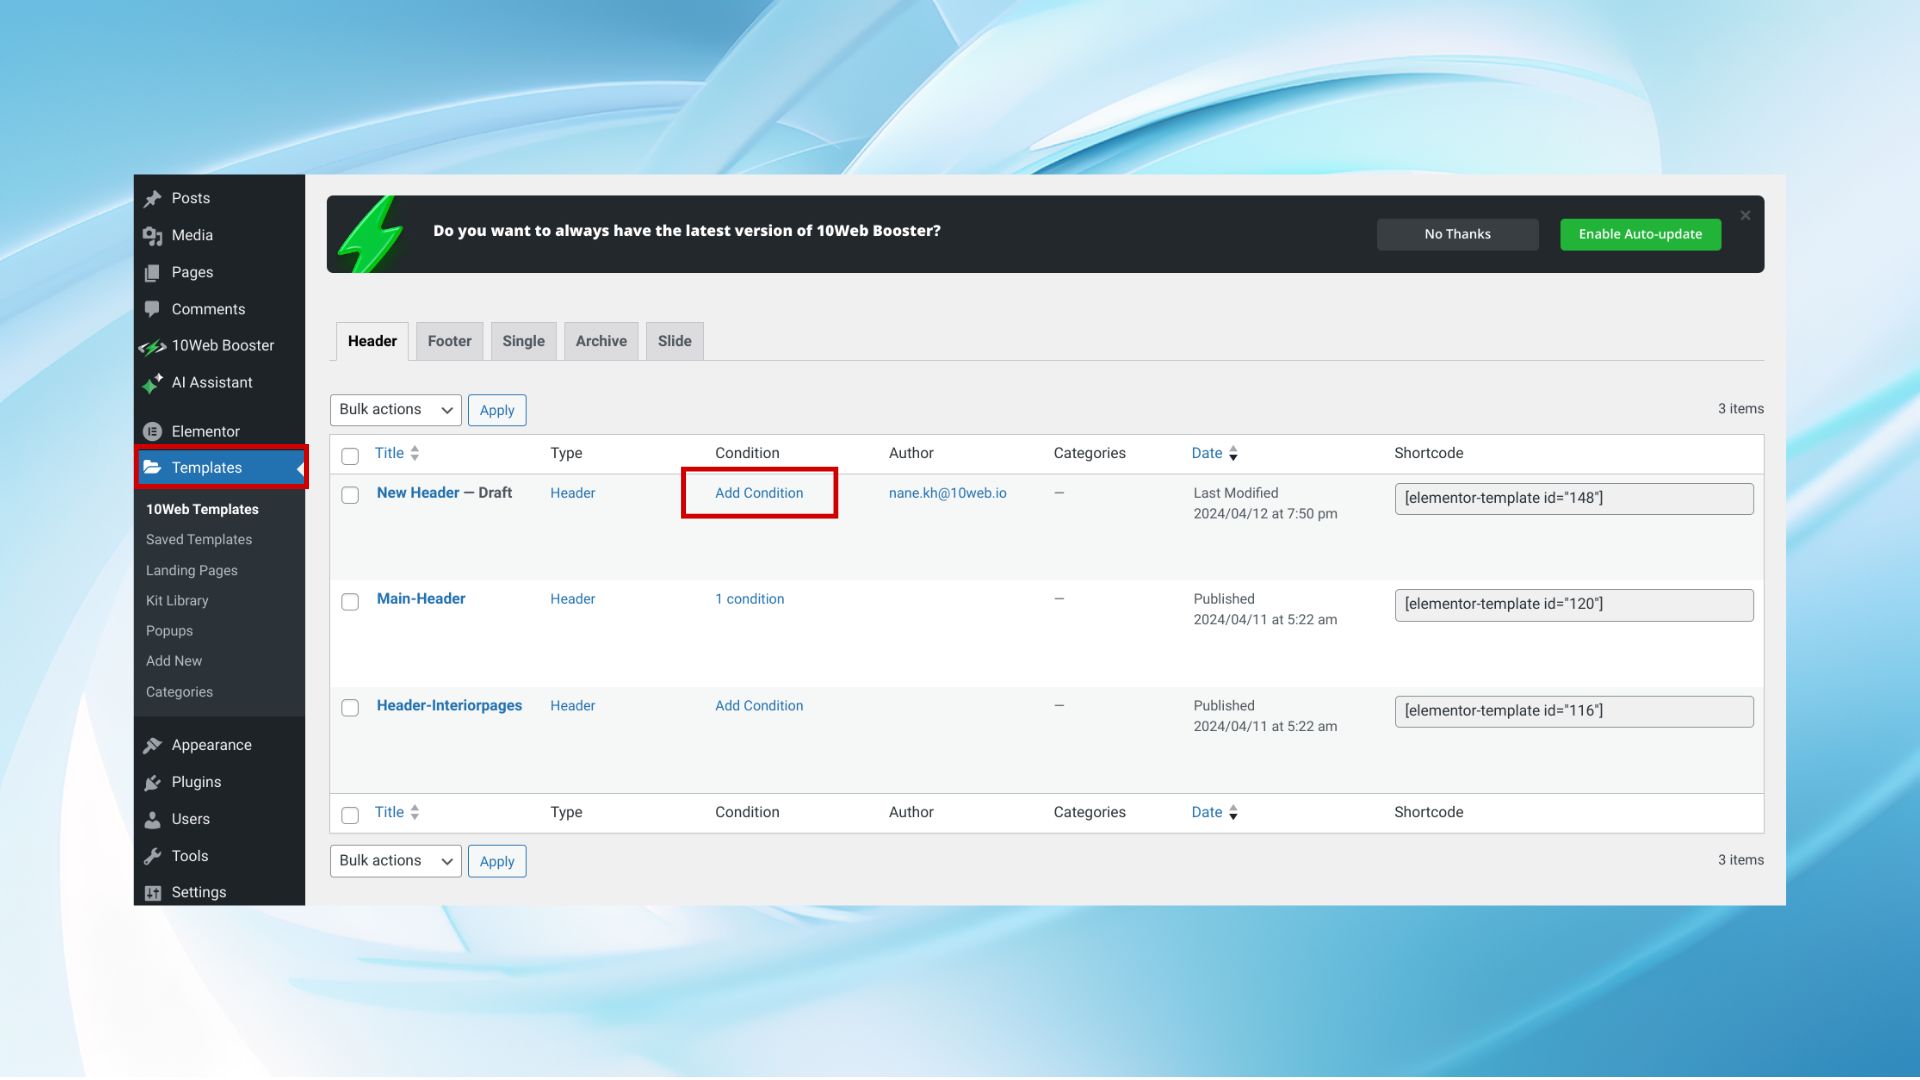
After designing your custom header, the final step is to assign it so it appears on your site. Within the theme builder, you should find options to assign your newly created header. You can typically choose to display it across your entire site or only on specific pages. This step is crucial for tailoring the user experience on different parts of your site.
- Go to Templates and find your newly designed header template.
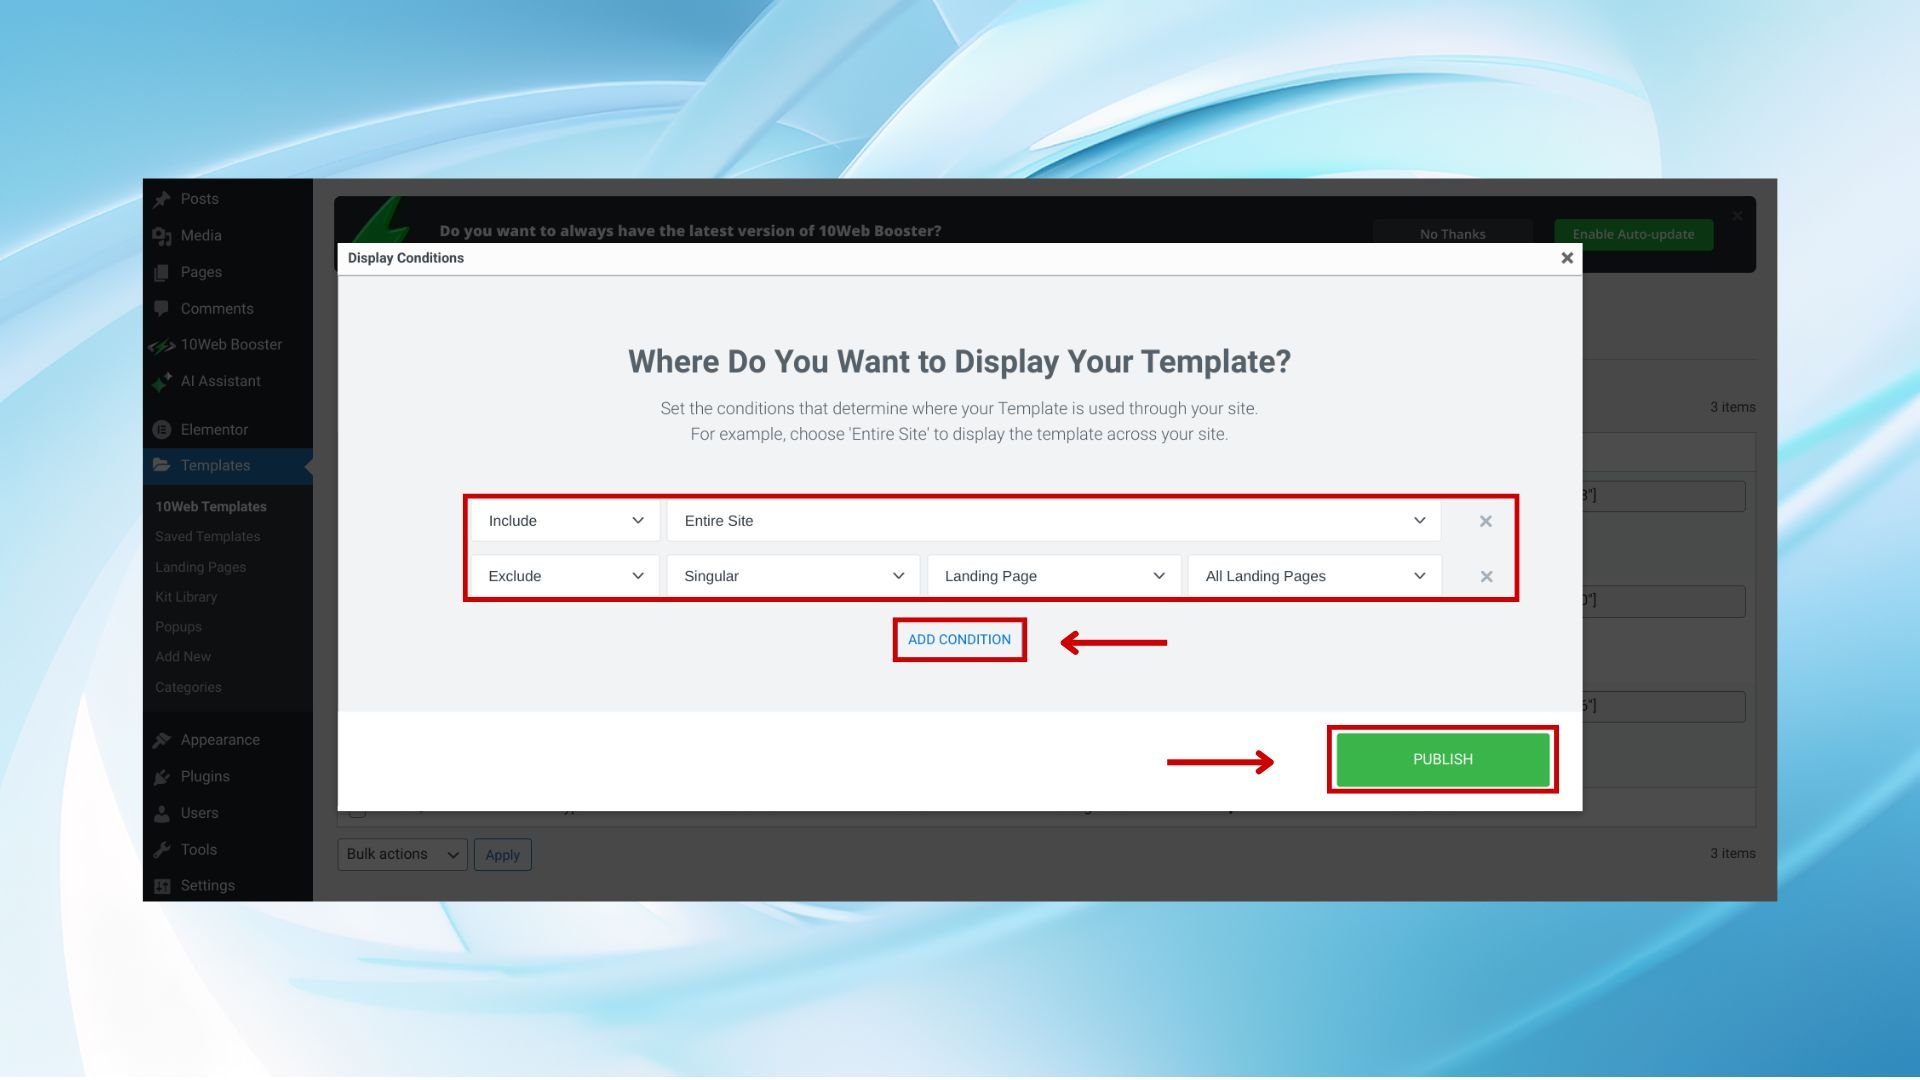
- Click on Add Condition to set display conditions.
- In the pop-up, choose the appropriate conditions, and click on the Publish button. This action will replace the default header provided by your theme with the custom header you’ve designed.
Simplify WordPress with 10Web
Automate manual work with 10Web Managed WordPress Hosting and 10Web AI Website Builder. Optimize your WordPress website effortlessly.
How to edit header in WordPress: navigation menu and images
You can add different elements and blocks to your header using each of the methods above. Let’s see how to add images and navigation menu to the header using the Customizer.
How to add custom header images to WordPress
Custom header images are a great way to add a personal touch to your WordPress site. Here’s how to add one using the Customizer:
- From your WordPress Dashboard, go to Appearance > Customize.
- Navigate to the Header Image or similar section. This is where you can manage header images.
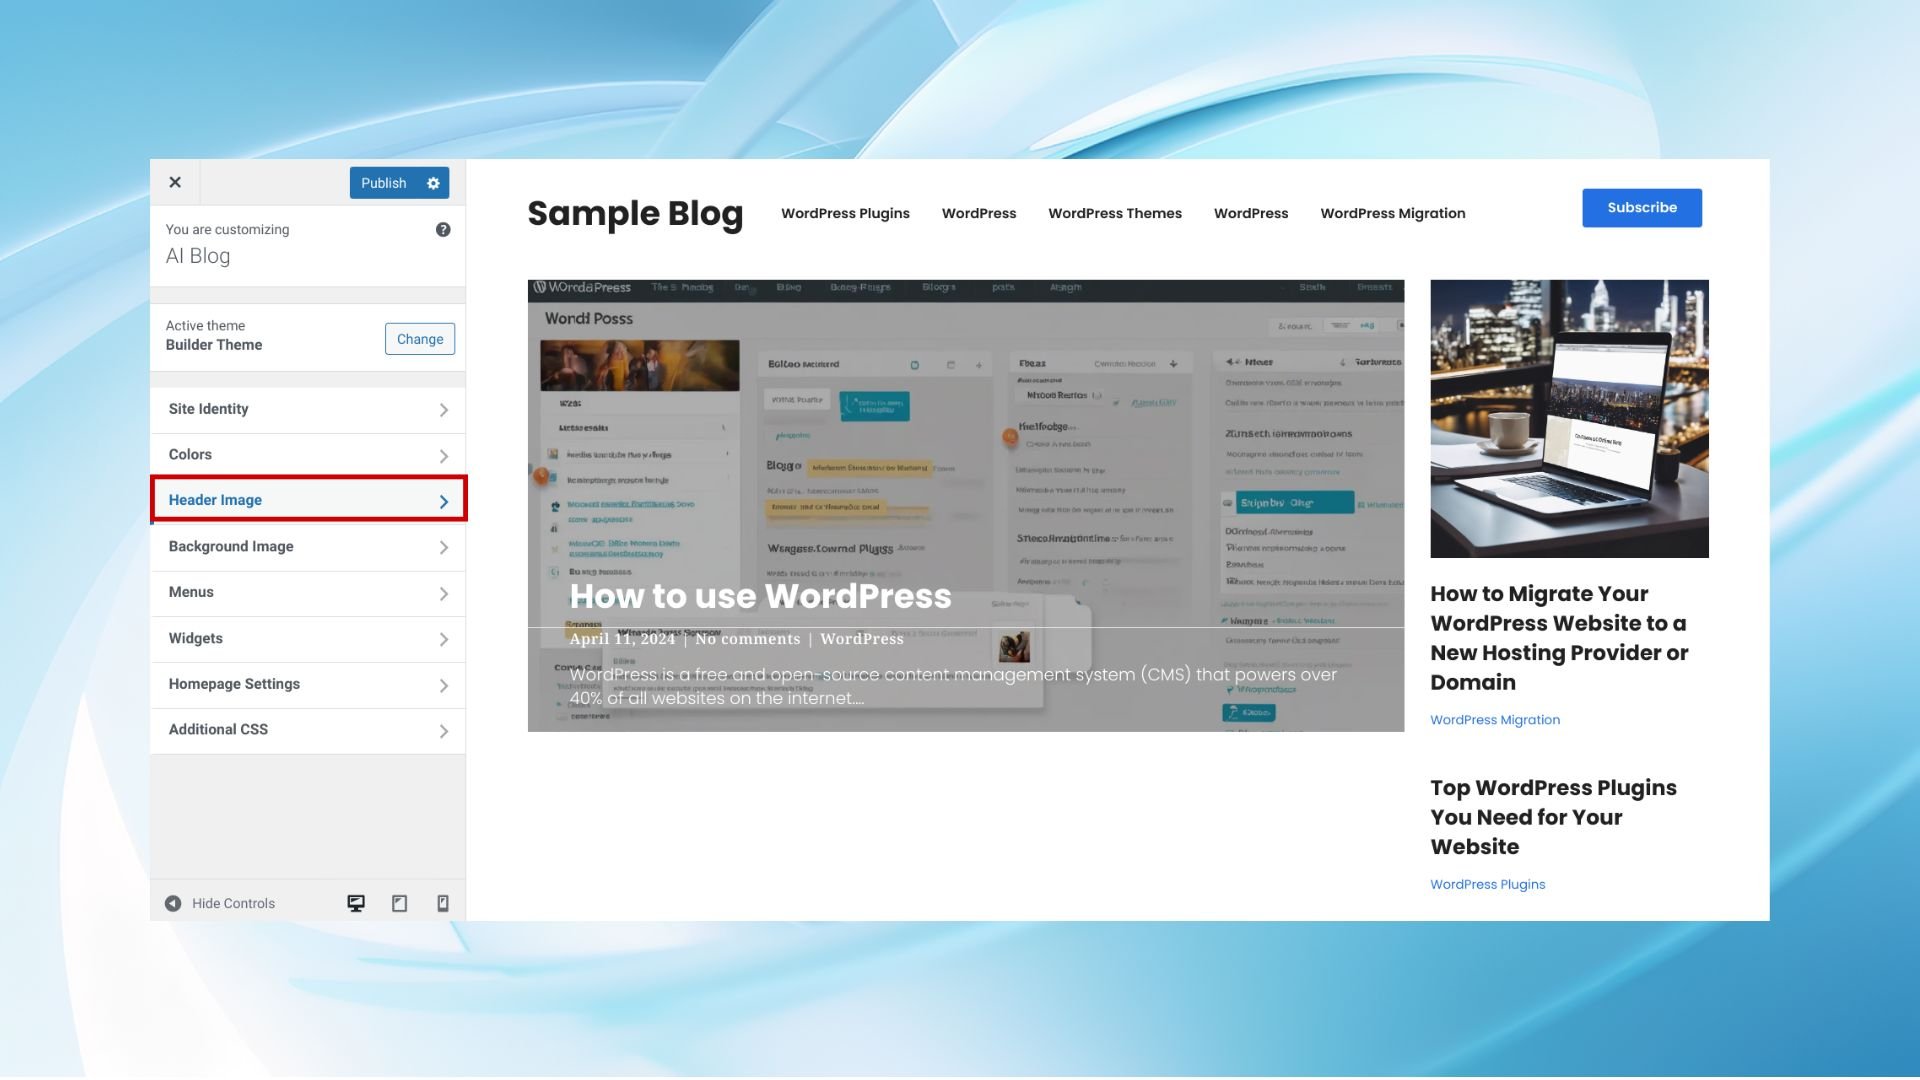
- Click on Add new image or Change image to upload a new header image. You can select an image from your media library or upload a new one.
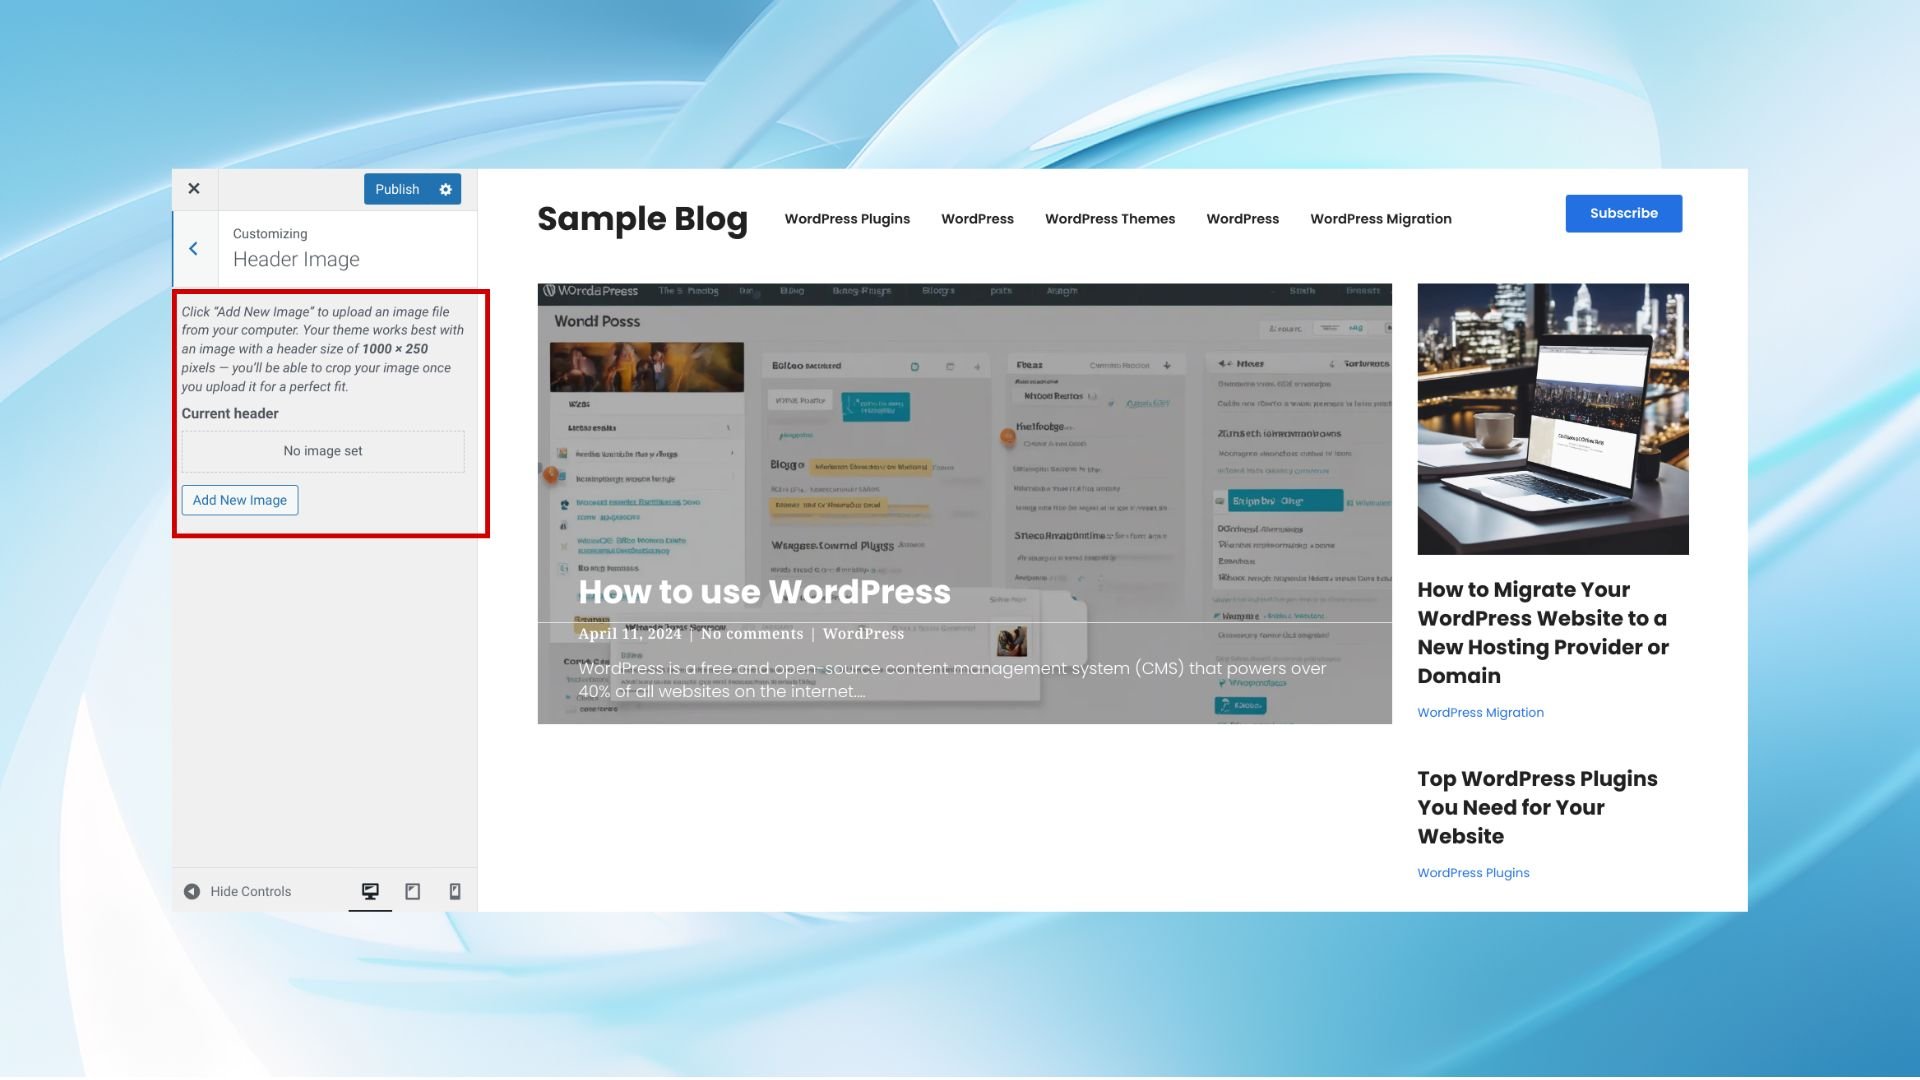
- After uploading, you might have options to crop or adjust the image. Once you’re happy with how it looks in the preview, click Publish.
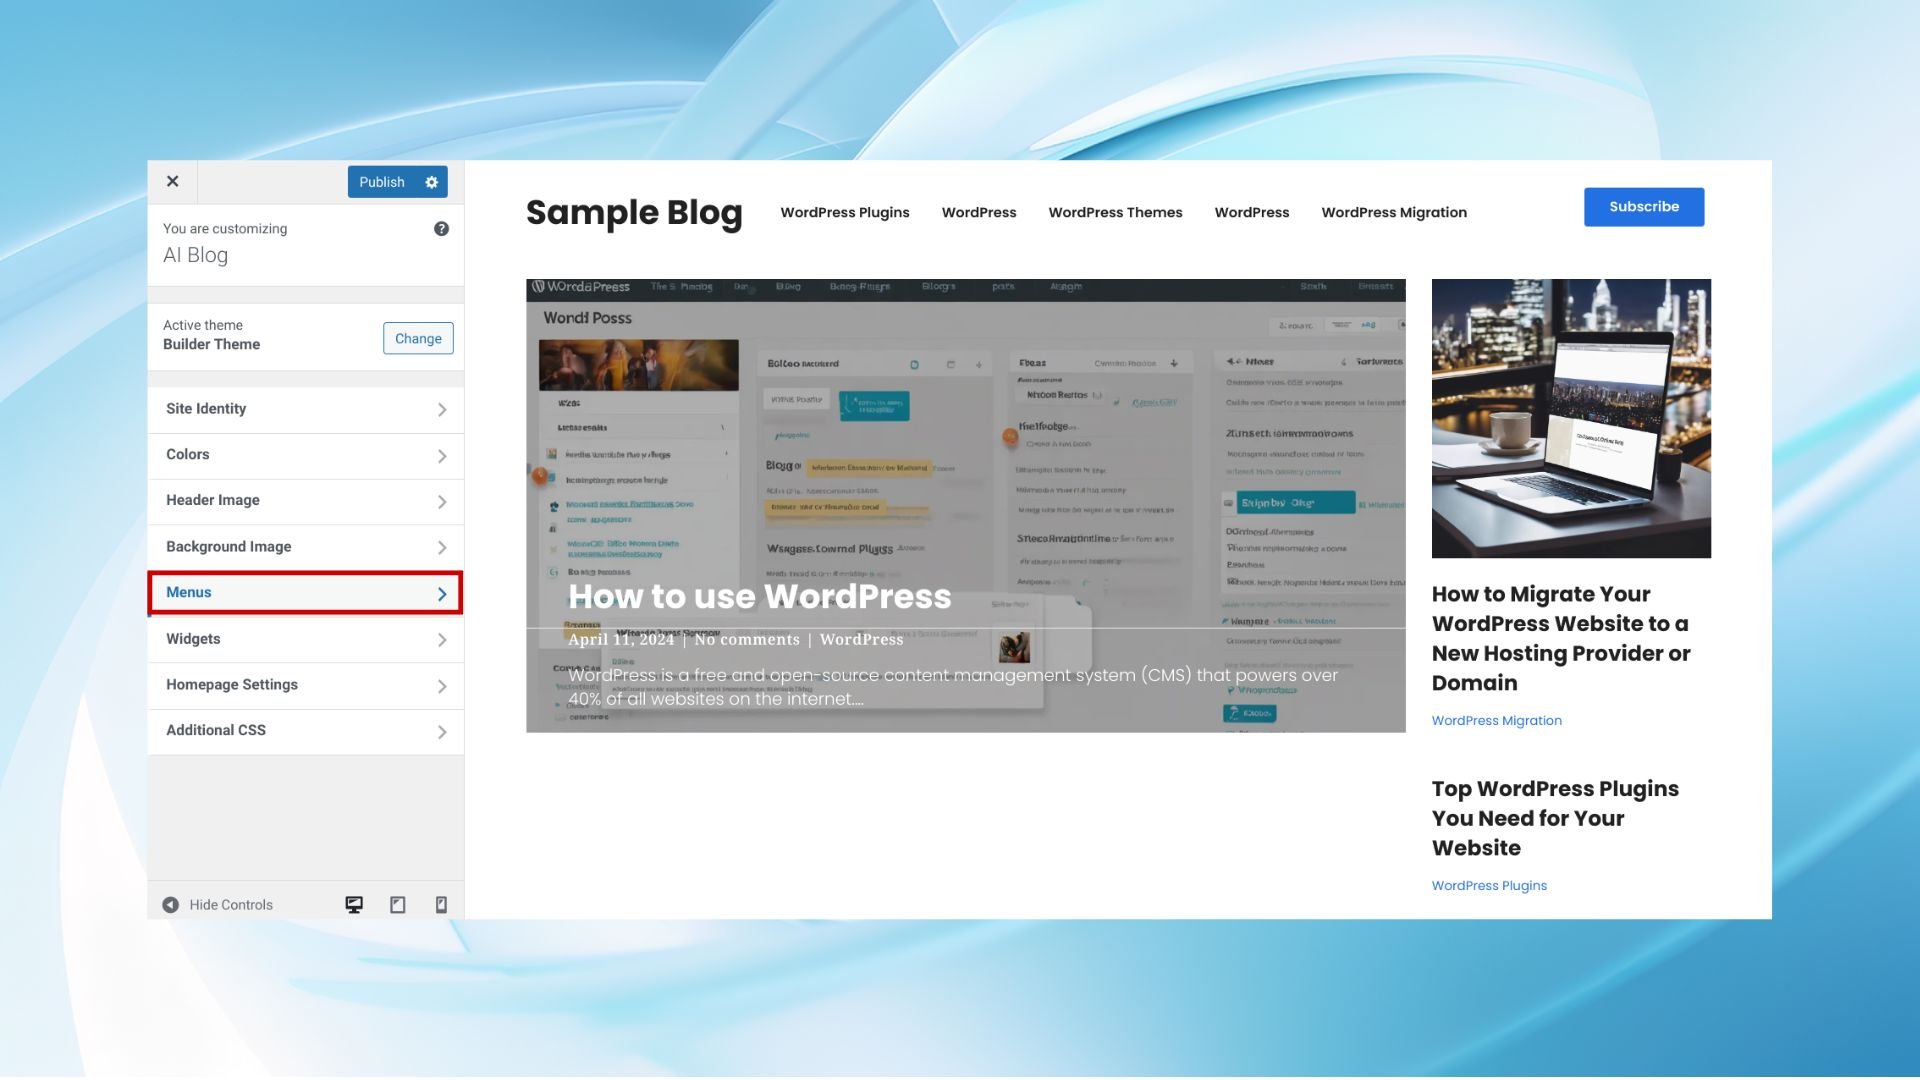
How to add navigation menu to WordPress header
A well-placed navigation menu is key to a user-friendly site:
- Go to Appearance > Customize in your WordPress Dashboard.
- Look for a section labeled Menus. Here, you can manage your site’s menus.
- Choose an existing menu to add to your header or create a new one by selecting Create New Menu.
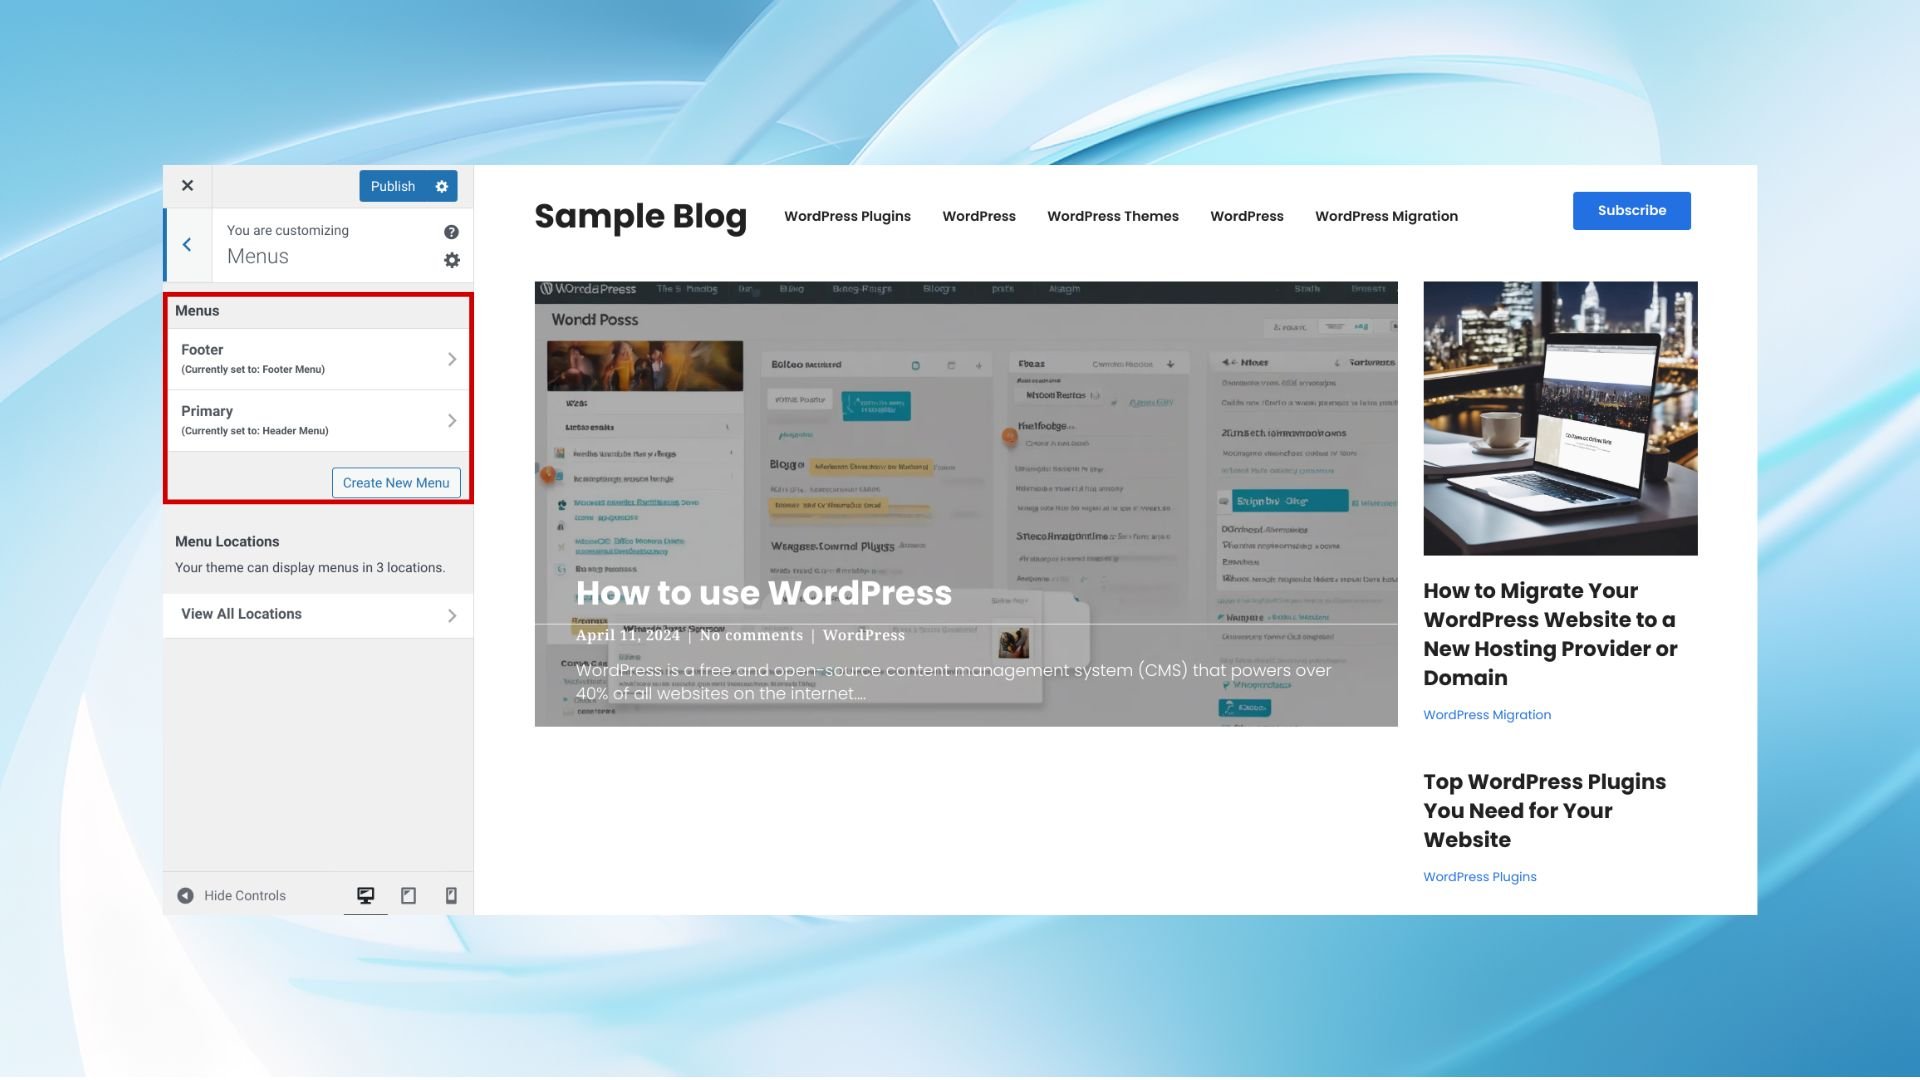
- After creating or selecting a menu, edit it by adding items or changing their sequence.
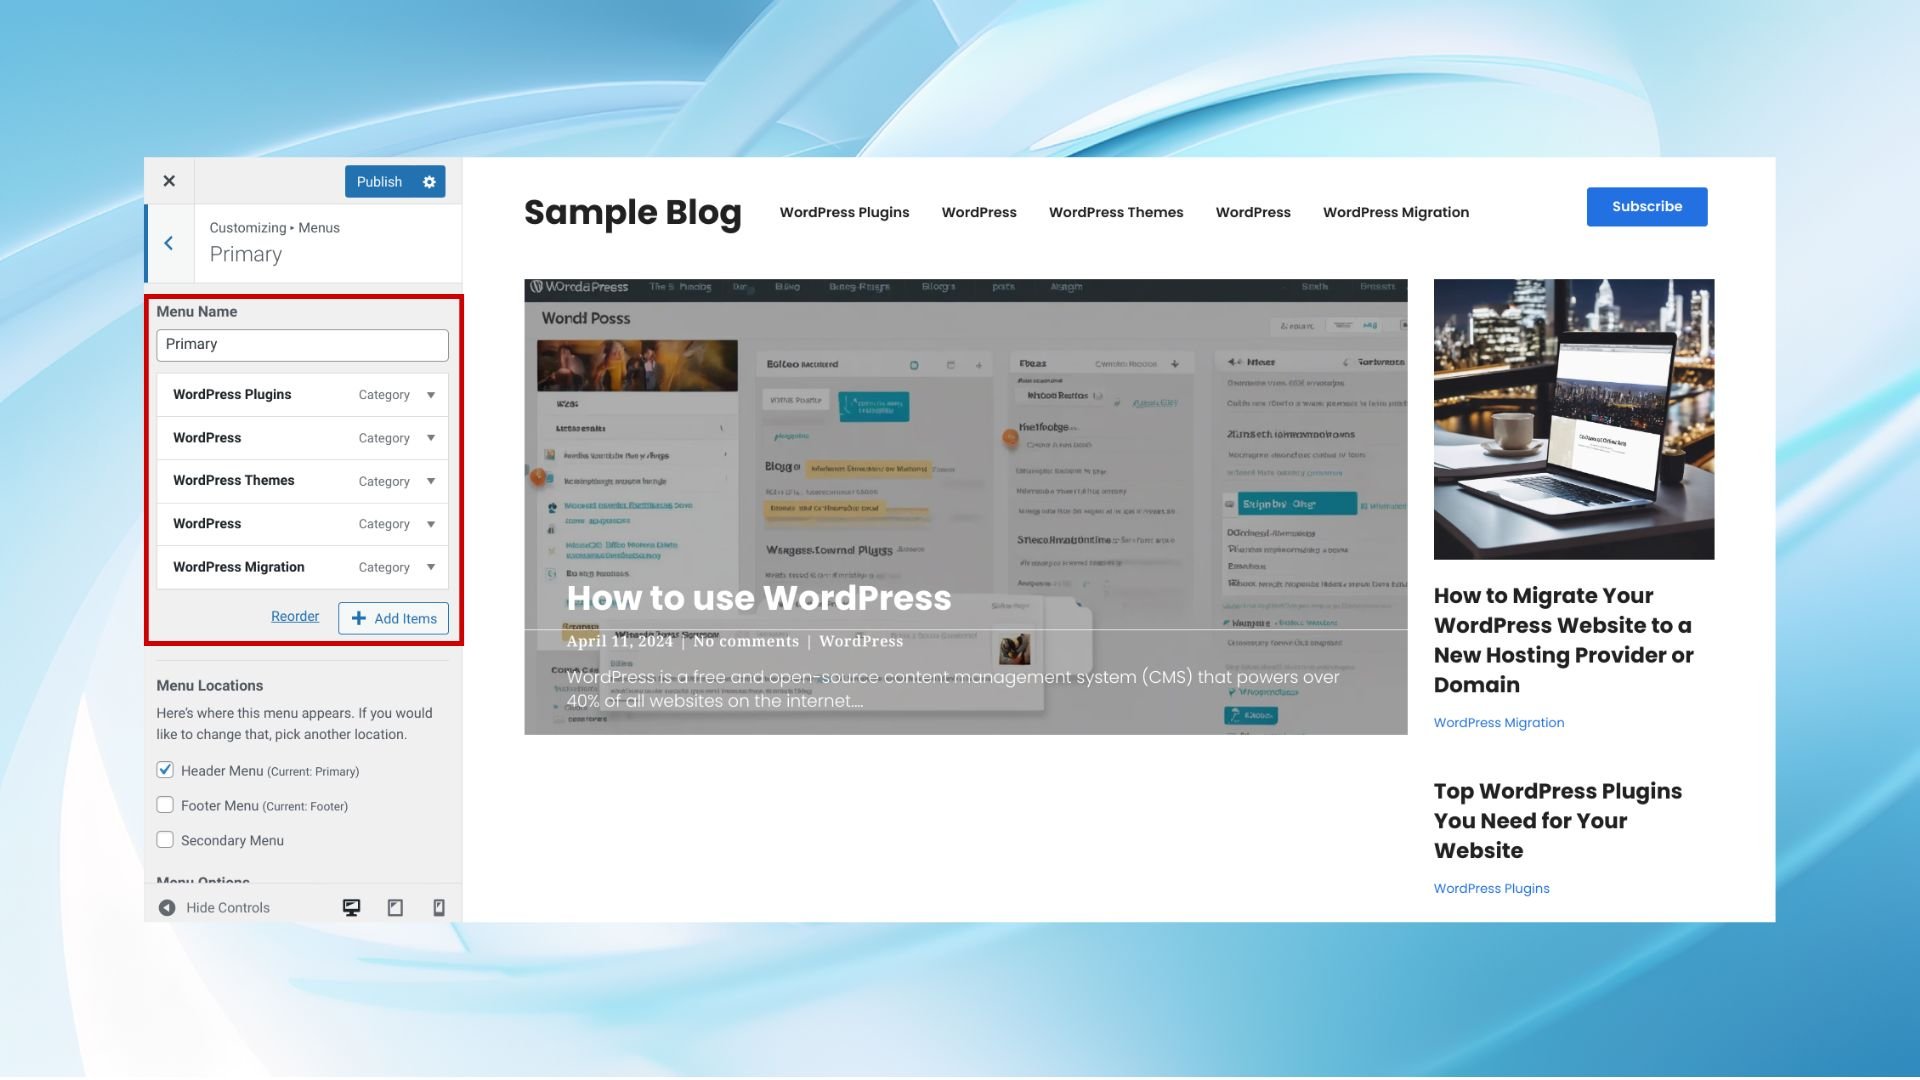
- Set its location to Header or a similarly named option, depending on your theme.
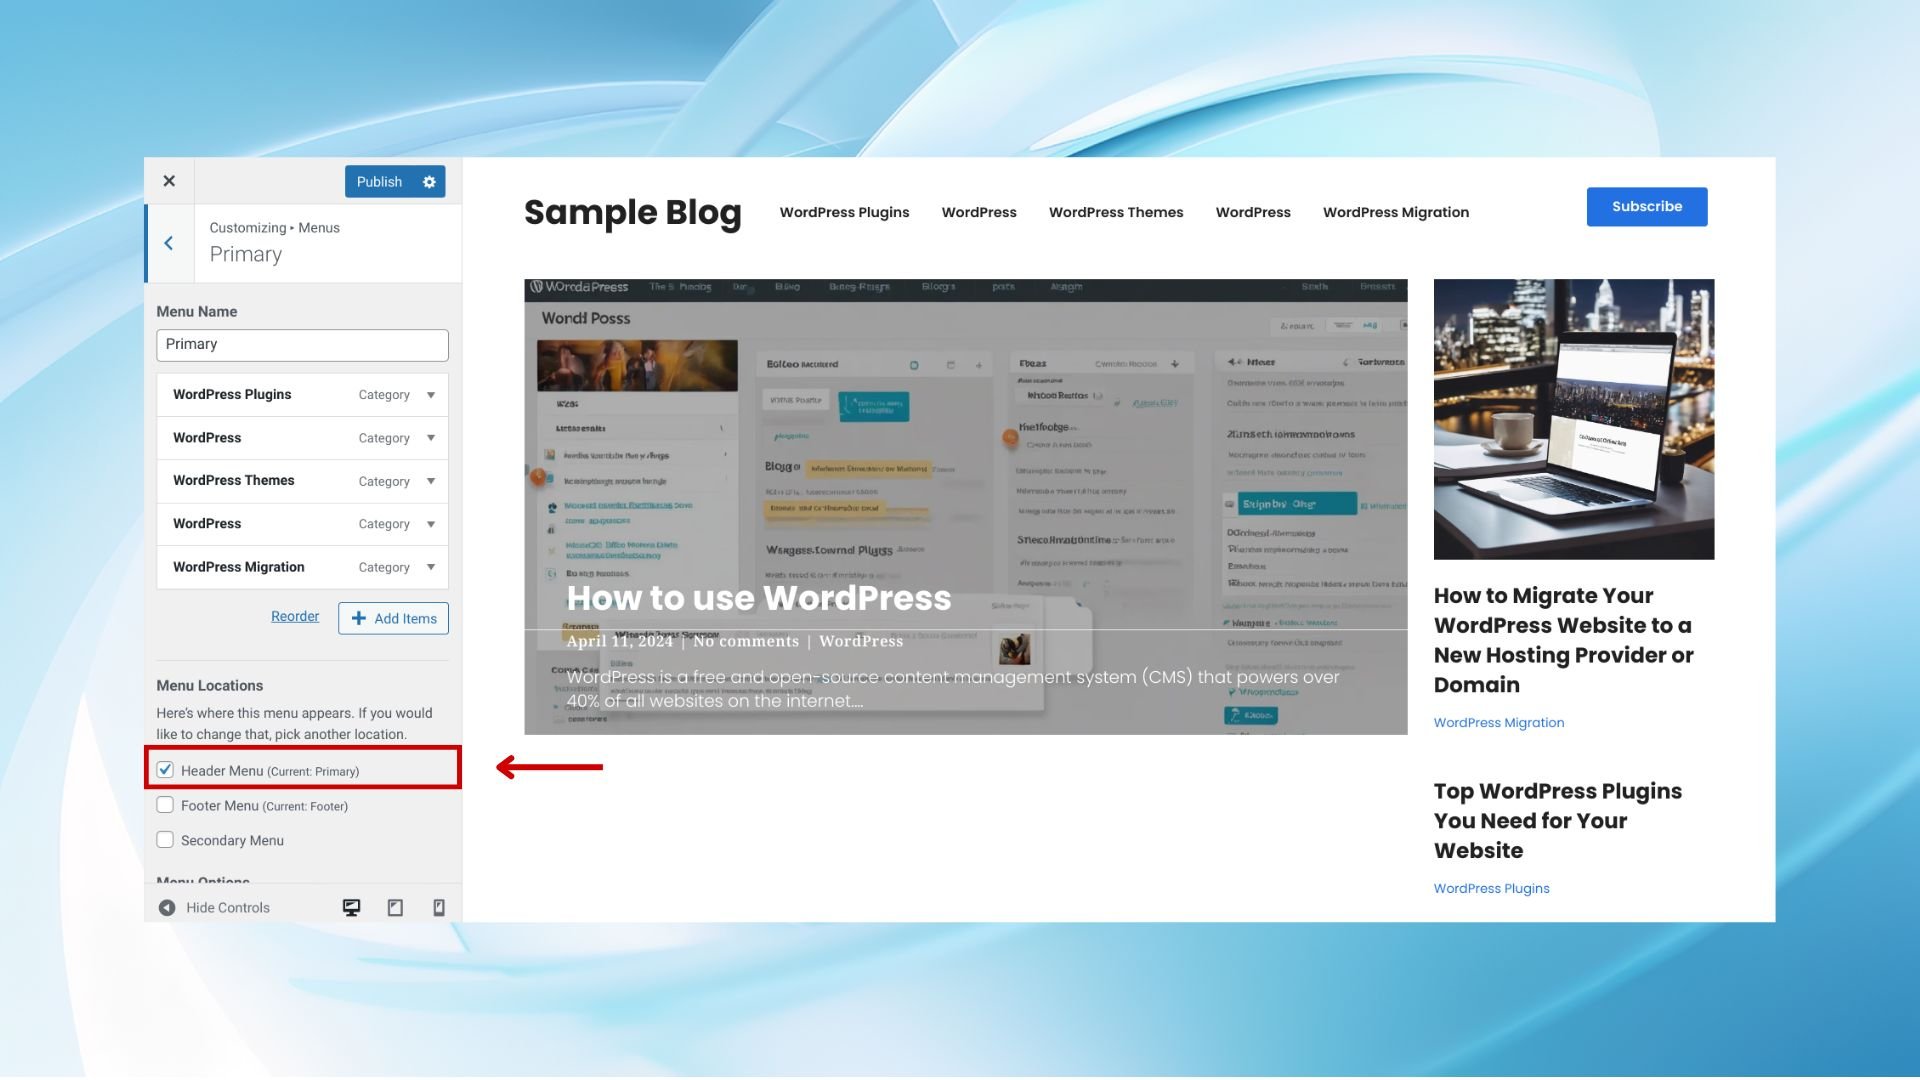
- Review your menu in the live preview. If it appears as desired, click Publish to update your site.
Conclusion
Enhancing your WordPress header can significantly elevate your site’s aesthetic appeal and functionality. Through various methods detailed in this guide, from utilizing the Customizer for real-time edits to leveraging page builders for drag-and-drop design or diving into code for precise adjustments, there’s a way for everyone to customize their site’s header.
Remember, a well-crafted header not only captivates visitors but also streamlines navigation, reinforcing your brand identity and optimizing for mobile users. By following these steps, you’ll ensure your WordPress header aligns perfectly with your site’s design and purpose, providing a stellar user experience.
Simplify WordPress with 10Web
Simplify WordPress with 10Web
Skip and automate manual work with 10Web Managed WordPress Hosting and the 10Web AI Website Builder.