SEO is critical for the success of any website. Whether blogging, selling a product, and everything in between, your website needs to be SEO-friendly.
Achieving a good SEO rating for your website is not easy, but, with the correct tools and know-how it isn’t really that difficult either.
Optimizing your entire website structure for SEO is one thing, but there is one specific component that requires its own separate checklist of SEO preparation.
No matter your website, including images in your content is a must. Not only do they make your content that much more presentable, but they can also be jam-packed with information.
Sprinkling an image or two on every page or post on your website is not that difficult. But, doing so may lead to quite a hit to your website’s SEO ranking, especially if you do not take care of all the necessary SEO precautions.
There’s a reason why preparing your images for SEO is important. Putting it simply, when Google’s search engine goes over your website scanning its content and discovers the images on your website, it doesn’t just register them as “images” but it also looks at all the text/data “behind” the image. All the additional metadata also gets taken into consideration.
Which is why it’s very important to have all that information/data prepared and set properly when uploading new images to secure your website’s SEO without having to constantly worry about it.
Image Preparation Steps:
1. Choosing unique images
One surefire way to hamper your image’s SEO potential before even reaching any of the coming steps is to choose random or stock photos to post on your website.
You need to make sure that the image is relevant to the content it’s posted for. We cover your images’ titles, descriptions, and alt-text and their effects on your SEO ranking down below, but in order to have those metadata make any sense, your image also needs to make sense in relation to the content around it.
On top of that, you need to make sure to avoid stock and random photos off Google and other places. You need to upload photos that belong to you or use outside sources that provide unique images for you to use. This way you can make sure that your content both looks good for visitors and doesn’t negatively impact your website’s SEO ranking.
2. Image format
When it comes to image formats, there’s no single optimal choice from an SEO point of view. But rather, you should look at which format works best for the type of image you’re uploading to your website.

There are both positives and negatives when it comes to different image formats. Here’s a small overview of each:
JPEG is one of the most common formats and mostly you’re better off sticking to this format for website optimization purposes. And that’s because JPEG comes in much smaller file sizes.
The downside for that is it could lose too much of its quality based on your settings, and it doesn’t support transparent backgrounds.
PNG has its own special place in all this. It supports very high resolutions; meaning overall much higher quality photos that don’t degrade after resaving them multiple times. They also support transparent backgrounds, which can be crucial depending on your content.
The downside when it comes to optimization is that PNG images could get very large if not saved or handled properly. Which leads to major issues when it comes to website speed optimization.
WebP is a relatively new format that uses lossy and lossless compression to achieve high-quality images that are also small in size.
Finding what works best for you is completely up to you and your content needs. You can convert your images to and from these formats (incl. GIFs) by using the 10Web Image Optimizer․
3. Optimizing image sizes
Your website’s load speed has a huge impact on your website’s SEO ranking and large images are one of if not the biggest factor in slowing down your website.
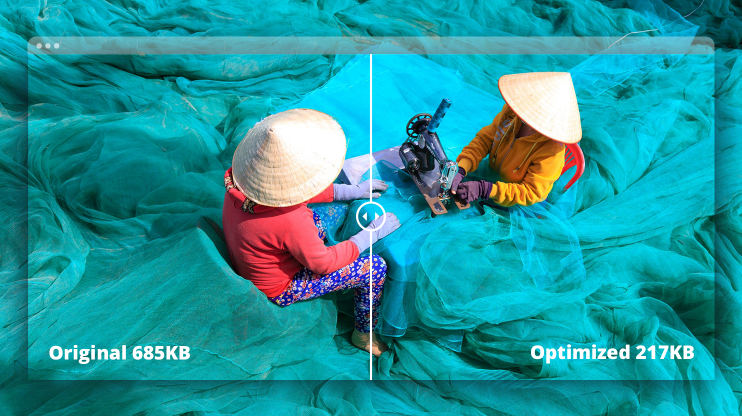
When it comes to providing good content to your users, it’s very important to upload high quality images to your site, but this will inevitably negatively impact your SEO ranking.
To solve this issue, you need to find the right balance between hosting high-quality images and keeping said image sizes small. And this is where optimization comes in.
There are many ways of optimizing your website’s speed but in this particular case, we only need to take care of optimizing our images for a better SEO ranking. You can optimize your images very easily by using the 10Web Image Optimizer.
You can just set your preferred compression mode, and the optimizer will automatically compress every image you upload to your website.
4. Naming images correctly
Now we’ve arrived at the actual textual matters, the stuff that the SEO bots directly interact with. It all starts with the file name of your image. You’d be surprised how many people skip renaming their images even though it only takes seconds.
This process is crucial for image SEO since it’s the first thing the search engine bots recognize when going through your content. Which is why after uploading an image that’s relevant to the content around it, it now requires a relevant name to go with it.
Concerning this subject, PHLEARN CEO Seth Kravitz said, “The #1 tip for image SEO is getting your naming conventions right for each image. You never want to upload an image with something like stockimage_34847574.jpg. You always want to match the image name to the keywords you are targeting for the page where the image will be posted. If the page is about Sony cameras, then the featured image would ideally be named: sony-cameras.jpg.”
As we can see naming images is very important. Echoed also by Bryan Pattman from 9Sail, who said, “Optimizing for images is extremely important when it comes to posting blogs and building service pages for your website. To optimize for images you need to include the keyword of the page in the image file name. Next, you need to upload the image into your media folder of your WordPress site and make the name of the image the keyword that you are targeting and any other description of the image.”
Setting an image name that contains the main keyword of the content around it is a huge step in helping the SEO bots understand what the image and the content around it are all about.
5. Alt-text
Similar to naming your images, alt-text really helps the SEO crawlers make sense of what your images are supposed to present. As Bernard May, CEO of National Positions says, “It is easy to overlook alt tagging your site images…but web crawlers still need to be told what they are looking at. So tagging images could include other aspects that the image relates to: your products, services, locations, etc. Each of these adds to a search engine’s ability to properly read and serve up your content during a search.”
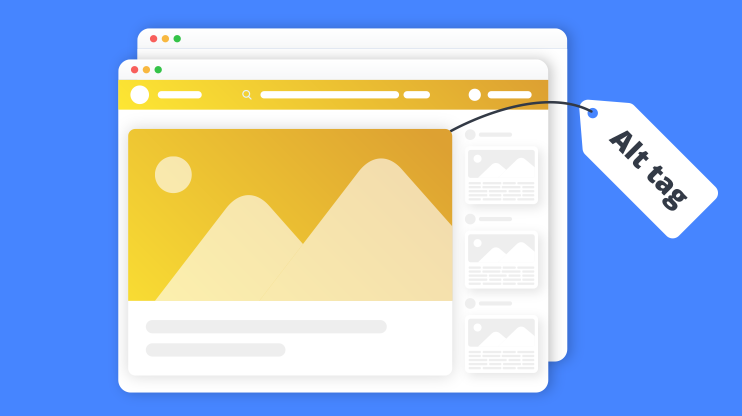
The purpose of adding alt-texts from user’s perspective is that whenever a user visits your page and for whatever reason is unable to load the images in it, he or she will see your specified alt-text instead. So even if the image does not load, the user can still make sense of what’s supposed to be there.
In terms of SEO though, having a proper, short, and precise alt-text that includes the specified keyword of the content around it would highly increase the chances of your image being properly “discoverable” by the SEO bots.
You shouldn’t overlook the importance of both inserting a proper name and an alt-text to your images. “The alternative text box should explain what the image is and also include the keyword that you are targetting. This will help you rank in Google image search and will also help with ranking. We get about 15% of our traffic from our images showing up on Google images and people use them on their own websites and we have gained a few backlinks from it,” says Bryan Pattman from 9Sail.
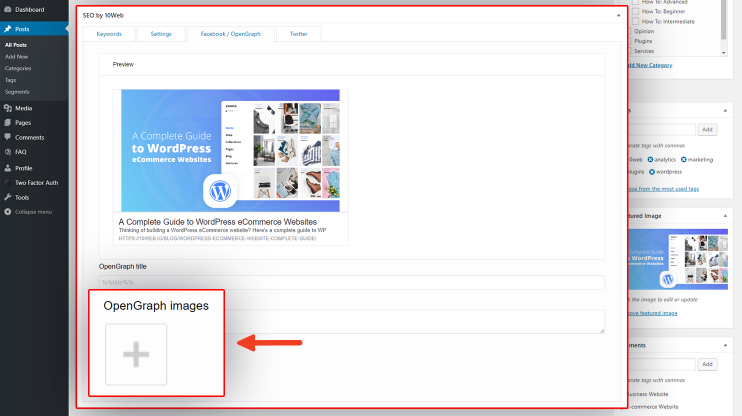
6. OpenGraph images
Social media shares are critical to your website’s SEO as they massively bump the amount of interaction that your website gets, which is critical for its SEO ranking.
To make sure your images are ready for social media sharing for better SEO visibility you need to manually set its OpenGraph setting. You should make sure that whenever a post or a page from your website is shared on a social media website, it displays the proper image for it and not a randomly selected thumbnail.
One of the easiest ways of doing this is to use 10Web’s SEO service; You’ll have a separate OpenGraph tab at the bottom of your posts where you can easily choose the title, description, and the image whenever that post is shared on a social media website.
This is without a doubt the definitive way of securing fast and easy SEO management not just for your images, but for your whole website as well.
Conclusion
There’s only so much you can do apart from these easy-to-follow steps in regards to your website’s image SEO. You could add captions or add images to your XML sitemap, which you can automatically generate using 10Web’s SEO service.
But these aren’t as critical as setting clearly written and self-explanatory keywords when naming your images and setting its alt-text, while also making sure that the images are not too large to avoid your website slowing down as a result.
That’s all there’s to it! Achieving good SEO for your website’s images is not difficult, especially when you turn these 6 easy steps into habitual practice.
Simplify WordPress with 10Web
Simplify WordPress with 10Web
Skip manual work with 10Web Managed WordPress Hosting.

Simplify WordPress with 10Web
Simplify WordPress with 10Web
-
 Experience automated website management
 -
Keep your site up-to-date with automatic updates
-
Forget about security threats and malware
 Experience automated website management