Starting a sticker business is an exciting venture that requires minimal investment and can be highly profitable. If you’re wondering how to start a sticker business, this guide will walk you through each step, from designing your stickers to marketing and selling them effectively. With the right approach, you can turn your creative passion into a thriving business.
FAQ
How much does it cost to start a sticker business?
Is a sticker business profitable?
What do I need to start a sticker business?
How much do homemade stickers sell for?
Stage 1: Understanding the sticker market and setting up the fundamentals
To succeed in the sticker business, you need to understand your target market, analyze your competition, and predict market trends. Here are the key points to get you started.
Step 1: Identifying your focus area
Finding the right focus area can set your sticker business apart. The focus can be based on themes like animals, motivational quotes, or custom designs. Think about who your target audience is. Are they students, office workers, or hobbyists? Knowing your audience helps you create designs that appeal specifically to them.
Conduct market research to see what types of stickers are popular, and where there might be gaps. Tools like Google Trends and social media can provide insights.
Step 2: Analyzing competitors
Analyzing your competitors is essential. Identify the top players in the sticker market. Look at their products, pricing, and marketing strategies. Make a list of their strengths and weaknesses.
Use SWOT analysis (Strengths, Weaknesses, Opportunities, Threats) to see where you stand. This analysis can highlight what you can do better. For example, you might offer higher quality materials or faster shipping times.
Step 3: Predicting market trends
To keep your sticker business thriving, keep an eye on market trends. Stickers with unique and trendy designs often sell well. Use tools like Pinterest and Instagram to see what designs are capturing attention. Pay attention to seasonal trends too.
Attend trade shows or craft fairs to see new trends in person. Subscribe to industry publications and blogs. Being proactive helps you stay ahead of the competition and keep your designs fresh.
Following these steps can give you a strong foundation in how to start a sticker business and keep it growing. Pay attention to your focus area, understand your competitors, and stay updated with market trends.
Step 4: Finding inspiration
Start by looking at different types of art and designs for inspiration. Pinterest and Instagram are great platforms for discovering trends and styles in custom stickers.
Visit local art galleries or craft shops to see what catches your eye. Keeping a sketchbook of your ideas helps you turn thoughts into physical drawings.
Talk with friends or potential customers to understand what they like. Getting feedback early on will guide your creativity in the right direction.
Step 5: Selecting design software
There are many design software options available to help you create digital stickers. Adobe Illustrator is a popular choice for its powerful vector graphics tools. It allows you to create scalable designs that look great on any size sticker.
Canva is user-friendly and offers a variety of templates perfect for beginners. For more advanced users, Procreate on the iPad offers flexibility with a range of brushes and tools.
Consider what features you need and how comfortable you are with learning new software. Free trials can help you decide which one works best for your sticker business.
Step 6: Hiring graphic designers
If you’re not confident in your design skills, hiring a graphic designer can be a good investment. Look for artists who have a portfolio of work that aligns with your vision. Websites like Upwork and Fiverr are good places to find freelance designers.
Set clear expectations about what you want. Communication is crucial to get the results you’re looking for. Establish deadlines and a budget to keep the project on track.
Pay attention to their previous work to ensure they can deliver unique designs. Hiring a professional can save time and result in higher-quality custom stickers, making your business stand out.
Step 7: Choosing a business name
Your business name should be unique and easy to remember. It represents your brand and what your stickers are about. Brainstorm several ideas, then check if the name is available.
You can search online or use a business name generator. Tools like 10Web’s AI business name generator can help to come up with a cool name. Ensure the name isn’t already taken by checking the U.S. Patent and Trademark Office database. Registering your name is crucial to protect your brand and prevent others from using it.
Step 8: Deciding on a legal structure
Decide on a legal structure for your business. Sole proprietorships are simple and common but offer no personal liability protection. Partnerships are for businesses owned by two or more people. Corporations and limited liability companies (LLC) offer more protection but involve more paperwork.
An LLC is a popular choice for small businesses because it offers liability protection and flexibility. Consult with a legal professional to choose the best structure for your needs.
Step 9: Understanding taxes and finances
Understanding taxes and finances is vital. You’ll need an Employer Identification Number (EIN) from the IRS if you plan to have employees. Open a business bank account to keep personal and business finances separate.
Keep track of all expenses and earnings, and consider hiring an accountant to help manage finances and ensure you comply with tax laws. Familiarize yourself with the tax obligations for your chosen business structure to avoid any future issues.
Step 10: Designing a logo
Your logo is the face of your brand. It’s what people will remember first, so it needs to be unique and recognizable.
- Start with sketches: Draw multiple rough ideas. Play with shapes and symbols that resonate with your brand values.
- Choose colors wisely: Colors evoke emotions. Choose a color scheme that aligns with your brand’s message.
- Keep it simple: A simple design is often more memorable. Avoid clutter and focus on a clean, distinct design.
Use digital design tools like Adobe Illustrator or Canva to refine your sketches into a polished logo. Test your logo in various sizes and formats to ensure it always looks great.
Step 11: Developing your brand’s voice
Your brand’s voice is how you communicate with your audience. It should reflect your brand’s personality and values.
- Know your audience: Understand who you are speaking to. Are they young and trendy or professional and serious?
- Choose a tone: Decide whether your communication will be casual, formal, friendly, or authoritative.
- Be consistent: Use the same tone across all platforms and materials. Consistency helps build trust and makes your messages more recognizable.
Draft a style guide outlining your brand’s voice. This guide should include phrases you like to use, words to avoid, and examples of how you’d like to communicate.
Step 12: Building a brand story
A compelling brand story connects you with your customers on an emotional level. It explains why your brand exists and what it stands for.
- Start with your origin: Share how your sticker business began. Was it a hobby that grew, or did you spot a gap in the market?
- Highlight challenges: Talk about any obstacles you overcame. This adds a human element to your story.
- Focus on values: Make clear what you stand for. Whether it’s creativity, quality, or sustainability, let your values shine through.
Write your brand story in a way that’s engaging and authentic. Use it on your website, social media, and marketing materials to build a deeper connection with your audience.
Stage 2: Producing your stickers
Creating quality stickers involves choosing the right equipment, finding quality materials, and deciding between outsourcing or in-house production. Each step is crucial for delivering high-quality products while keeping costs manageable.
Step 1: Choosing the right equipment
To start, you’ll need a good printer. An inkjet printer is often preferred for its versatility and cost-effectiveness. Laser printers are also an option but tend to be more expensive. Ensure your printer supports high-resolution output to produce clear and sharp stickers.
Next, consider a cutting machine. Popular choices include Cricut and Silhouette machines. These machines precisely cut your stickers into the desired shapes. They are user-friendly, making them ideal for beginners.
Step 2: Finding quality materials
The next step is sourcing sticker paper. Your choice of paper impacts the quality of the final product. Matte and glossy finishes are common, each giving a different look and feel. Make sure to choose a paper compatible with your printer.
You will also need adhesive. Ensure the adhesive is strong enough to stick to various surfaces but easy to remove without leaving residue. Vinyl material is a popular choice for its durability and water resistance.
Ink quality is another crucial factor. Use high-quality, pigment-based inks for vibrant prints. Low-quality inks can fade quickly and might not be waterproof, affecting the sticker’s lifespan.
Step 3: Outsourcing vs in-house production
Deciding between outsourcing your production or keeping it in-house is a significant choice. If you outsource, you rely on a third-party vendor to print and cut your stickers. This can be convenient and save time but may be costlier per unit.
In-house production gives you more control over quality and allows you to experiment with new designs immediately. It requires an initial investment in equipment and materials but can be more profitable in the long run.
Evaluate your inventory needs and order volume. If you have high sales, in-house production might be more practical. For smaller operations, outsourcing could be a better fit.
With these steps, you can confidently produce high-quality stickers and make your sticker business a success.
Step 4: Determining cost of production
Starting a sticker business requires a good approach to pricing and understanding profitability. You need to figure out production costs, set your prices, and calculate profit margins to ensure you make money.
To determine the cost of production, consider all expenses involved. Key costs include materials, labor, and overhead. Materials cover vinyl, paper, ink, and lamination. Labor involves your time or the cost of hiring someone. Overhead includes electricity and software.
Start-up costs can range from $5,000 to $27,000. At the lower end, you might work from home and outsource printing. On the higher end, budget for setting up a storefront and buying equipment.
Create a simple table to keep track of costs:
| Item | Cost |
| Materials | $1,000 |
| Equipment | $10,000 |
| Labor | $3,000 |
| Overhead | $2,000 |
Total these costs to find out your initial investment.
Step 5: Setting retail prices
Setting retail prices involves more than just covering costs. You need to consider market demand, competition, and perceived value. Research what other sticker businesses charge and adjust your prices accordingly.
A good rule of thumb is to multiply your production cost by 2 to 3 times. This ensures you cover expenses and make a profit. For example, if one sticker costs you $1 to make, consider charging $2-$3.
Use tiered pricing for different product types, such as:
- Basic stickers: $2 each
- Premium stickers: $5 each
- Custom bulk orders: Discounted rates
This will help attract a range of customers and boost your revenue.
Step 6: Calculating profit margins
Profit margins show how much money you make after covering all expenses. To calculate profit margins, subtract the cost of production from your retail price, then divide by the retail price and multiply by 100.
For example:
Retail Price: $3
Cost of Production: $1
Profit: $3 – $1 = $2
Profit Margin: ($2 / $3) * 100 = 66.67%
A strong profit margin for a sticker business is around 50-70%.
Keep track of all sales and adjust prices if needed to maintain healthy margins. By carefully managing costs and setting appropriate prices, you can make your sticker business profitable.
Step 7: Handling orders and shipping
Getting your stickers to your customers is crucial for your business. You will need to handle orders and shipping, set up a dropshipping system if you prefer not to manage inventory, and find ways to expand your distribution channels.
Handling orders efficiently ensures that your customers receive their stickers promptly. 10Web’s Ecommerce Hosting to manage orders. It can simplify your sales process and integrate shipping options.
Invest in quality packaging materials. Good packaging not only protects your stickers but also enhances the unboxing experience. Consider using branded packaging to leave a lasting impression on your customers.
Here’s a step-by-step approach to handling orders and shipping:
- Receive the order: Use your ecommerce platform to keep track of new orders.
- Prepare the stickers: Ensure you have the correct designs and quantities.
- Package the stickers: Use protective materials and include a thank you note or business card.
- Ship the orders: Use services like USPS, UPS, or FedEx. Compare shipping rates to find the most cost-effective options.
Step 8: Setting up dropshipping
Dropshipping can be an excellent way to manage your sticker business without holding inventory yourself. Partner with a reliable dropshipping supplier who will print, package, and ship the stickers directly to your customers.
Follow these steps to set up dropshipping for your sticker business:
- Choose a dropshipping supplier: Research and select a reputable supplier specializing in stickers.
- Integrate with your ecommerce platform: Ensure your supplier can seamlessly connect with your online store.
- Manage your listings: Keep your product listings updated and accurate on your platform.
- Monitor sales and quality: Regularly check in with your supplier to ensure timely fulfilments and maintain quality standards.
Step 9: Expanding distribution channels
Reaching a wider audience can help grow your sticker business. Here are ways to expand your distribution channels:
- Online marketplaces: Sell on platforms like Amazon, Etsy, and eBay to reach more customers.
- Social media: Use Instagram, Facebook, and TikTok to promote your stickers and drive traffic to your ecommerce store.
- Physical stores: Approach local gift shops or craft stores to stock your stickers. Offer them consignment deals or wholesale pricing.
- Participate in events: Attend craft fairs, markets, and conventions to showcase your stickers and connect with your target audience directly.
By effectively managing sales and distribution, you can ensure a smooth operation and satisfied customers.
Stage 3: Developing your online store and your marketing strategy
Creating an online store for your sticker business is an exciting step. This helps you reach customers worldwide and manage your business with ease. You’ll need to build a website and optimize for ecommerce success.
Step 1: Building a website
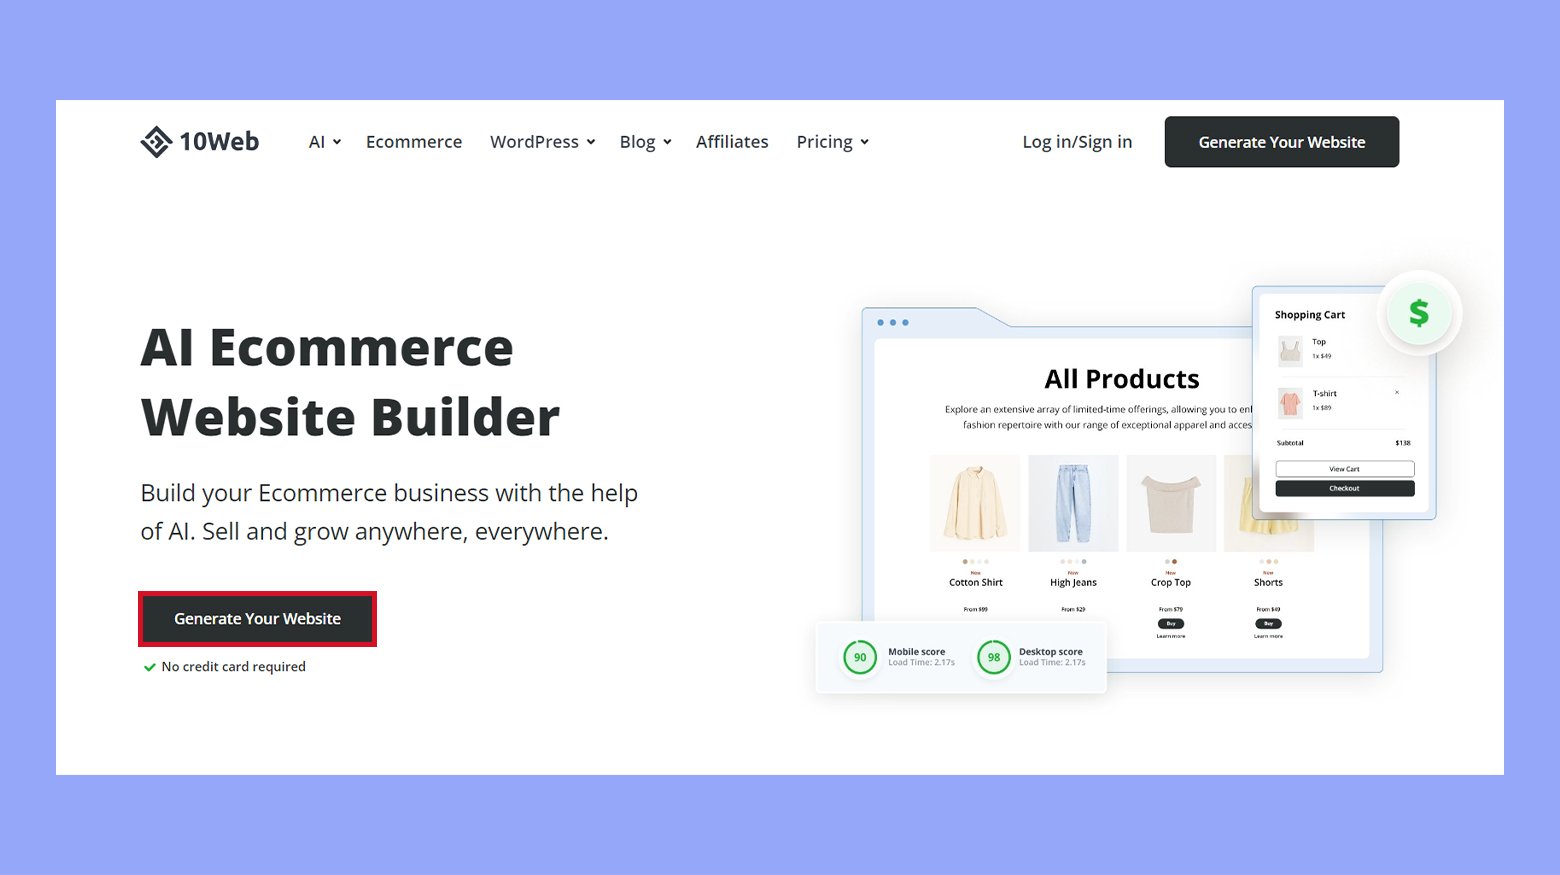
To start, you’ll need a website to showcase your stickers. Using a platform like 10Web and its ecommerce plans makes this easy with templates and user-friendly tools.
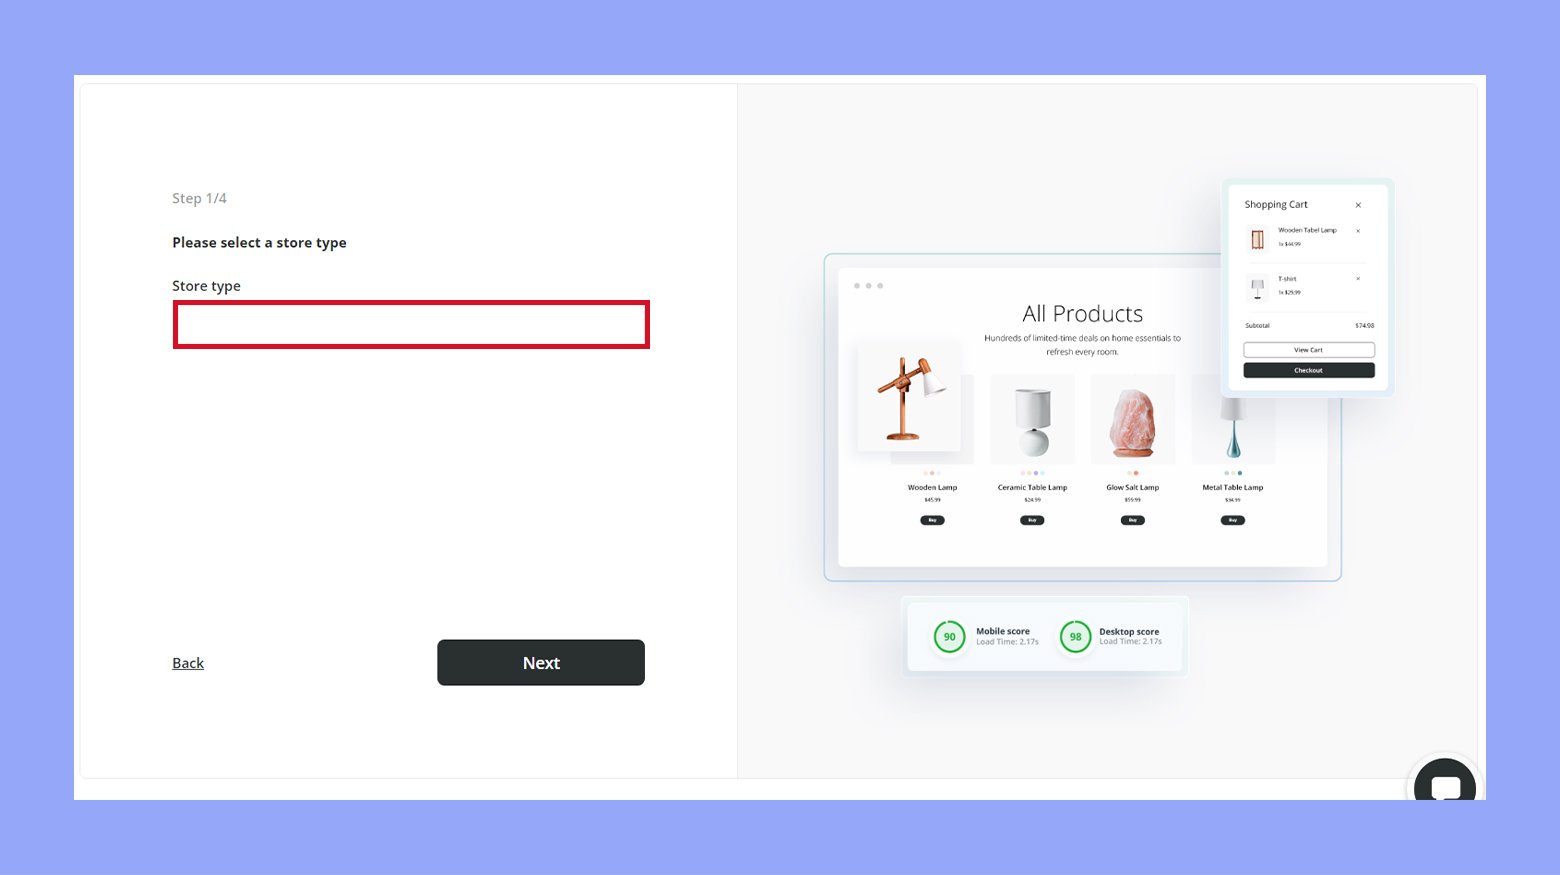
- Visit the 10Web Ecommerce Website Builder page and select Generate Your Website.

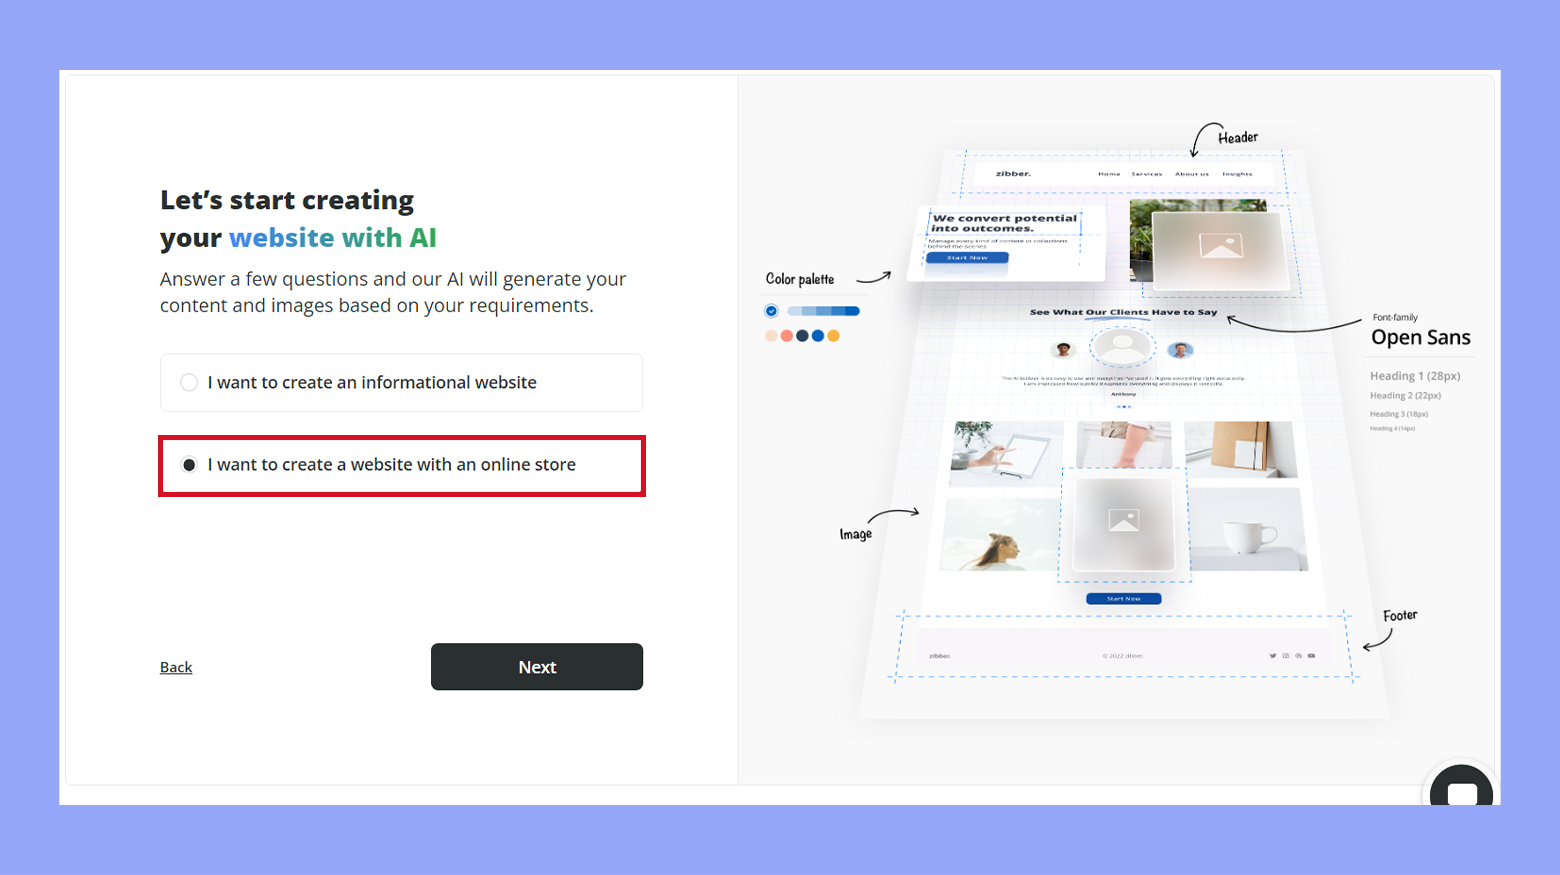
- Opt to create an online store.
- Specify your store’s type.
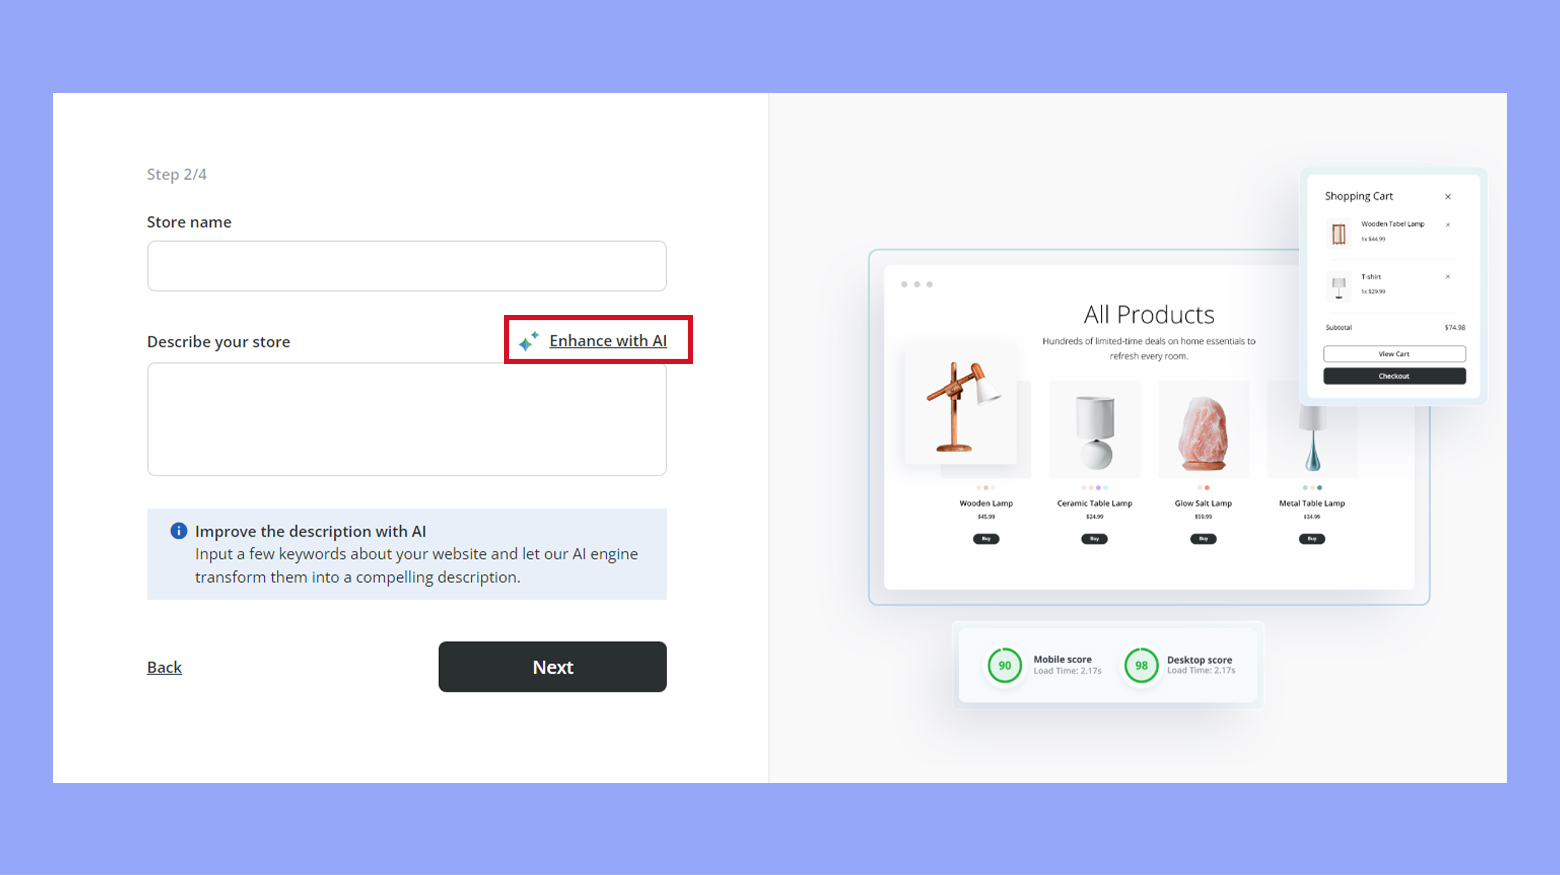
- Provide a name and description for your store, using the Enhance with AI tool if needed.
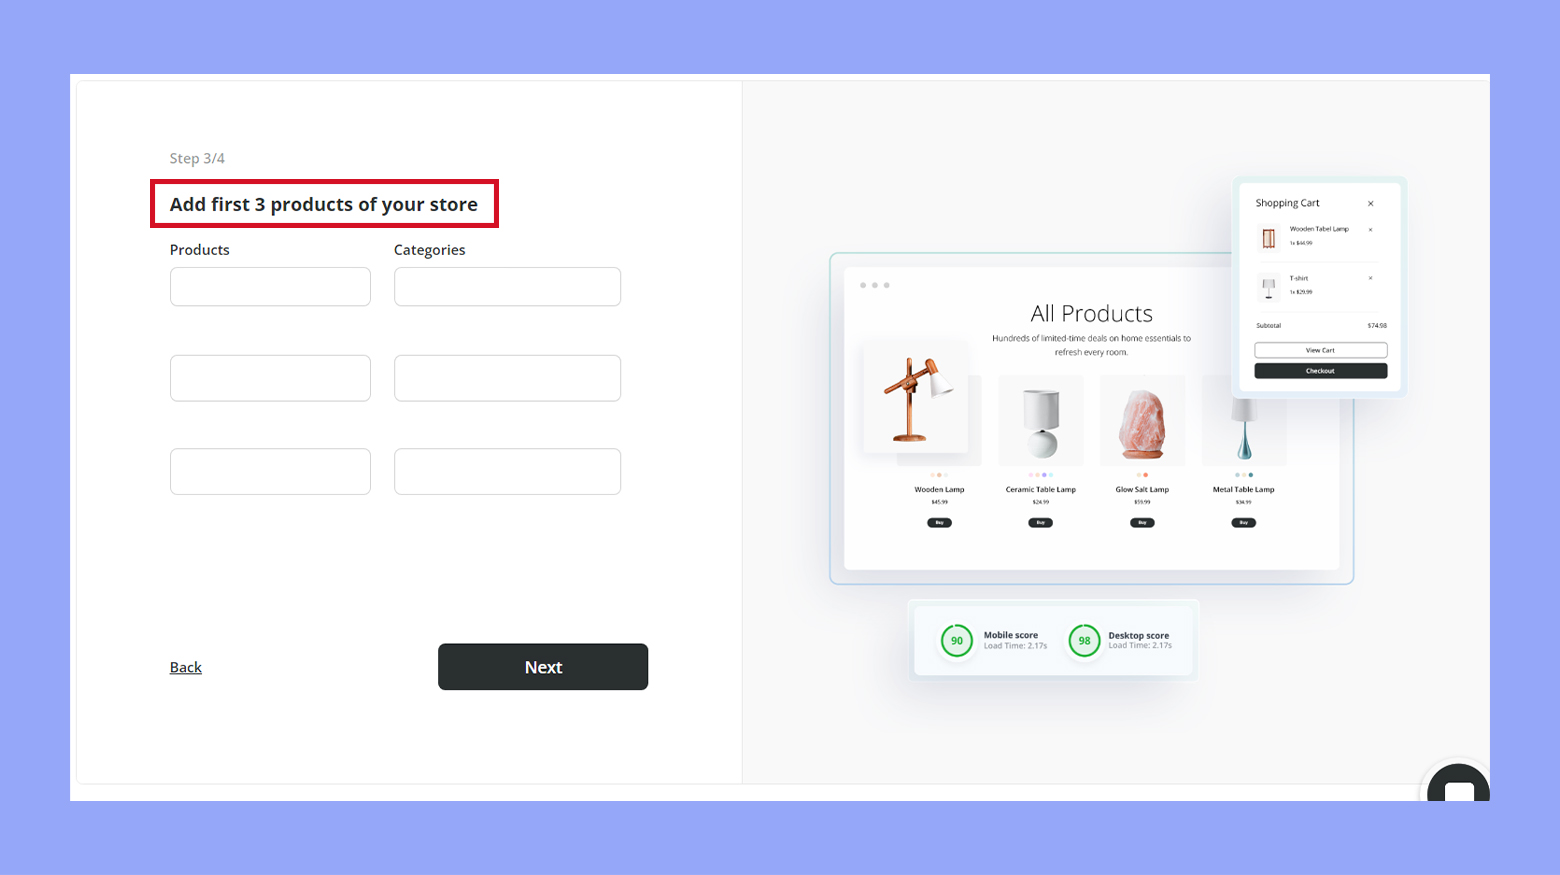
- Add details for your first three products and categories.
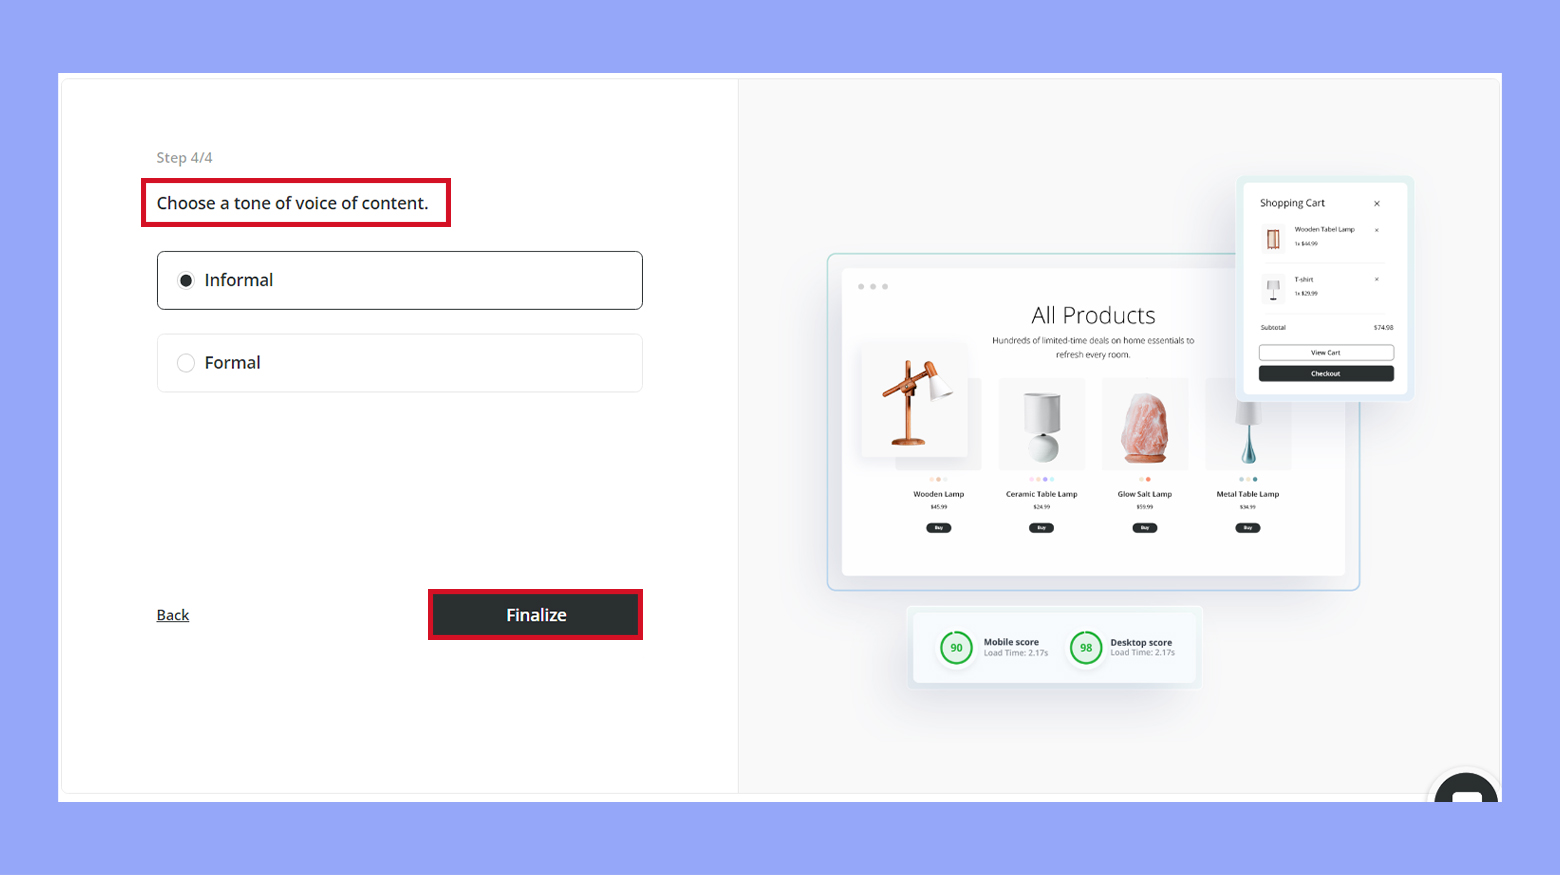
- Select the tone of voice for your website, click Finalize, and wait for 10Web to create your site.
- Review your site and make any necessary adjustments using the user-friendly tools.
Remember to make your site mobile-friendly and easy to navigate. Adding a blog can also help with SEO and bringing in visitors.
Step 2: Optimizing for ecommerce
To make your online store a success, you must optimize it for ecommerce. This includes SEO (search engine optimization), user experience, and online payment systems.
- SEO: Use keywords in your product titles and descriptions. For example, include “how to start a sticker business” in relevant sections.
- User experience: Ensure your website is fast, easy to navigate, and mobile-friendly. Clear categories and a search bar help users find what they need.
- Payment systems: Integrate secure payment options like PayPal, credit cards, and even local payment methods.
Also, consider adding customer reviews and ratings to build trust. Keeping inventory updated and offering excellent customer service will keep buyers coming back.
By covering these key points, you can build a strong foundation for your online sticker business.
Step 3: Leveraging social media
Social media can be a powerful tool for getting the word out about your stickers. Start by creating accounts on platforms like Instagram, TikTok, and Facebook where you can share photos and videos of your designs.
Posting regularly helps keep your audience engaged. Use high-quality images to show off your stickers in different settings. Encourage your followers to share your posts and offer discounts or giveaways to grow your audience faster.
Collaborating with influencers can also be effective. Find popular users in your niche and ask if they’d be interested in featuring your stickers. Their endorsement can bring new customers to your business.
Step 4: Utilizing SEO and content marketing
Having an online presence is vital. Start by building a visually appealing website optimized for SEO. This helps your website rank higher in search results, making it easier for people to find you.
Add a blog section to your site and write articles related to your stickers, such as DIY craft ideas or tips for using stickers in planners. Include relevant keywords like how to start a sticker business in your content to boost visibility.
Utilize tools like Google Analytics to track your website traffic and see what content is performing well. Adjust your strategies based on these insights to continually improve your site’s performance.
Step 5: Exploring advertising and promotions
Investing in paid advertising can accelerate your growth. Platforms like Google Ads allow you to target specific keywords related to your stickers. Set a budget and track your ads’ performance to ensure you’re getting a good return on investment.
Social media ads are another option. These allow you to show ads to users based on their interests and demographics. Running promotions such as discounts or bundle deals can encourage more sales.
Don’t forget about offline marketing tools. Hand out flyers at local events, set up booths at craft fairs, and network with local businesses that might be interested in selling your stickers.
Conclusion
Starting a sticker business is a rewarding venture that combines creativity and entrepreneurship. By following this comprehensive guide on how to start a sticker business, you’ll be well-equipped to design, market, and sell your unique stickers effectively. Remember to leverage free design tools, understand your market, and develop a strong brand identity to set your business up for success. With the help of 10Web’s tools and resources, you can easily build and manage your online store. With dedication and the right strategies, you can turn your passion for stickers into a profitable and thriving enterprise.