Getting started with video uploads on WordPress involves more than just selecting files; it demands an understanding of compatible video formats and the platform’s specific capabilities. This article will guide you through how to upload video on WordPress, discussing optimal formats, and covering essential practices for video optimization and embedding techniques.
FAQ
Can you upload a video to a WordPress website?
Why can't I upload a video on WordPress?
How do I upload a large video to WordPress?
What video format can you upload to WordPress?
Understanding WordPress videos
Before diving into how to upload video on WordPress, it’s essential to understand WordPress’s video capabilities and ensure your files are in a compatible format.
WordPress allows you to upload and embed video content directly into your pages and posts. You have two primary methods to do this: you can either upload the files to your WordPress media library or embed them through various video hosting services. We will cover both in this guide.
Video formats for WordPress
Choosing the right format for WordPress videos is essential for compatibility and performance. The most widely supported video formats for web use are MP4, WebM, and OGG. These formats ensure that your visitors can watch your videos regardless of their browser type.
- MP4: This is the most recommended format due to its high compatibility with different browsers and devices.
- WebM: Offers high-quality video with smaller file sizes, but it’s not as widely supported as MP4.
- OGG: An alternative format that’s free of patents, but with less compatibility than MP4.
How to upload video on WordPress
Before you upload your video to WordPress, it’s crucial to ensure that it’s optimized for the web and has the proper metadata, which will help performance and SEO.
Optimizing videos for web performance
Optimized video content positively affects fast page load times and provides a good viewing experience. Here are some specific steps to optimize your videos:
- Resolution and quality: Aim for a resolution that balances clarity and file size, such as 720p or 1080p.
- Compression: Use tools to compress your video files without losing significant quality.
- Format: Choose web-friendly video formats such as MP4 (with H.264 compression), which are widely supported and typically have smaller file sizes.
- Loading performance: Implement techniques like lazy loading, where the video only loads when it’s visible on the screen, to enhance your website’s performance.
Adding metadata to videos
Metadata is the information that you add to your videos to make them more searchable and accessible. It has a significant impact on SEO and user experience. Here’s how to add metadata:
- Titles and descriptions: Write clear and descriptive titles and descriptions containing relevant keywords to improve SEO.
- Subtitles and captions: Include subtitles or captions to make your content accessible to a wider audience and boost SEO as they provide additional text that search engines can index.
- SEO tags: Utilize SEO plugin tools in WordPress to tag your videos effectively, which can help them rank better in search results.
- Thumbnails: Select a compelling thumbnail that accurately represents the video content, as it can influence click-through rates.
We already learned that uploading videos to your WordPress site enhances your blog’s visual appeal and helps engage your audience more effectively. Let’s learn how to upload video on WordPress in two primary methods.
Use the media library
Firstly, you can upload your video files directly to the WordPress Media Library. To do this:
- Go to your dashboard and select Media
- Click Add New.
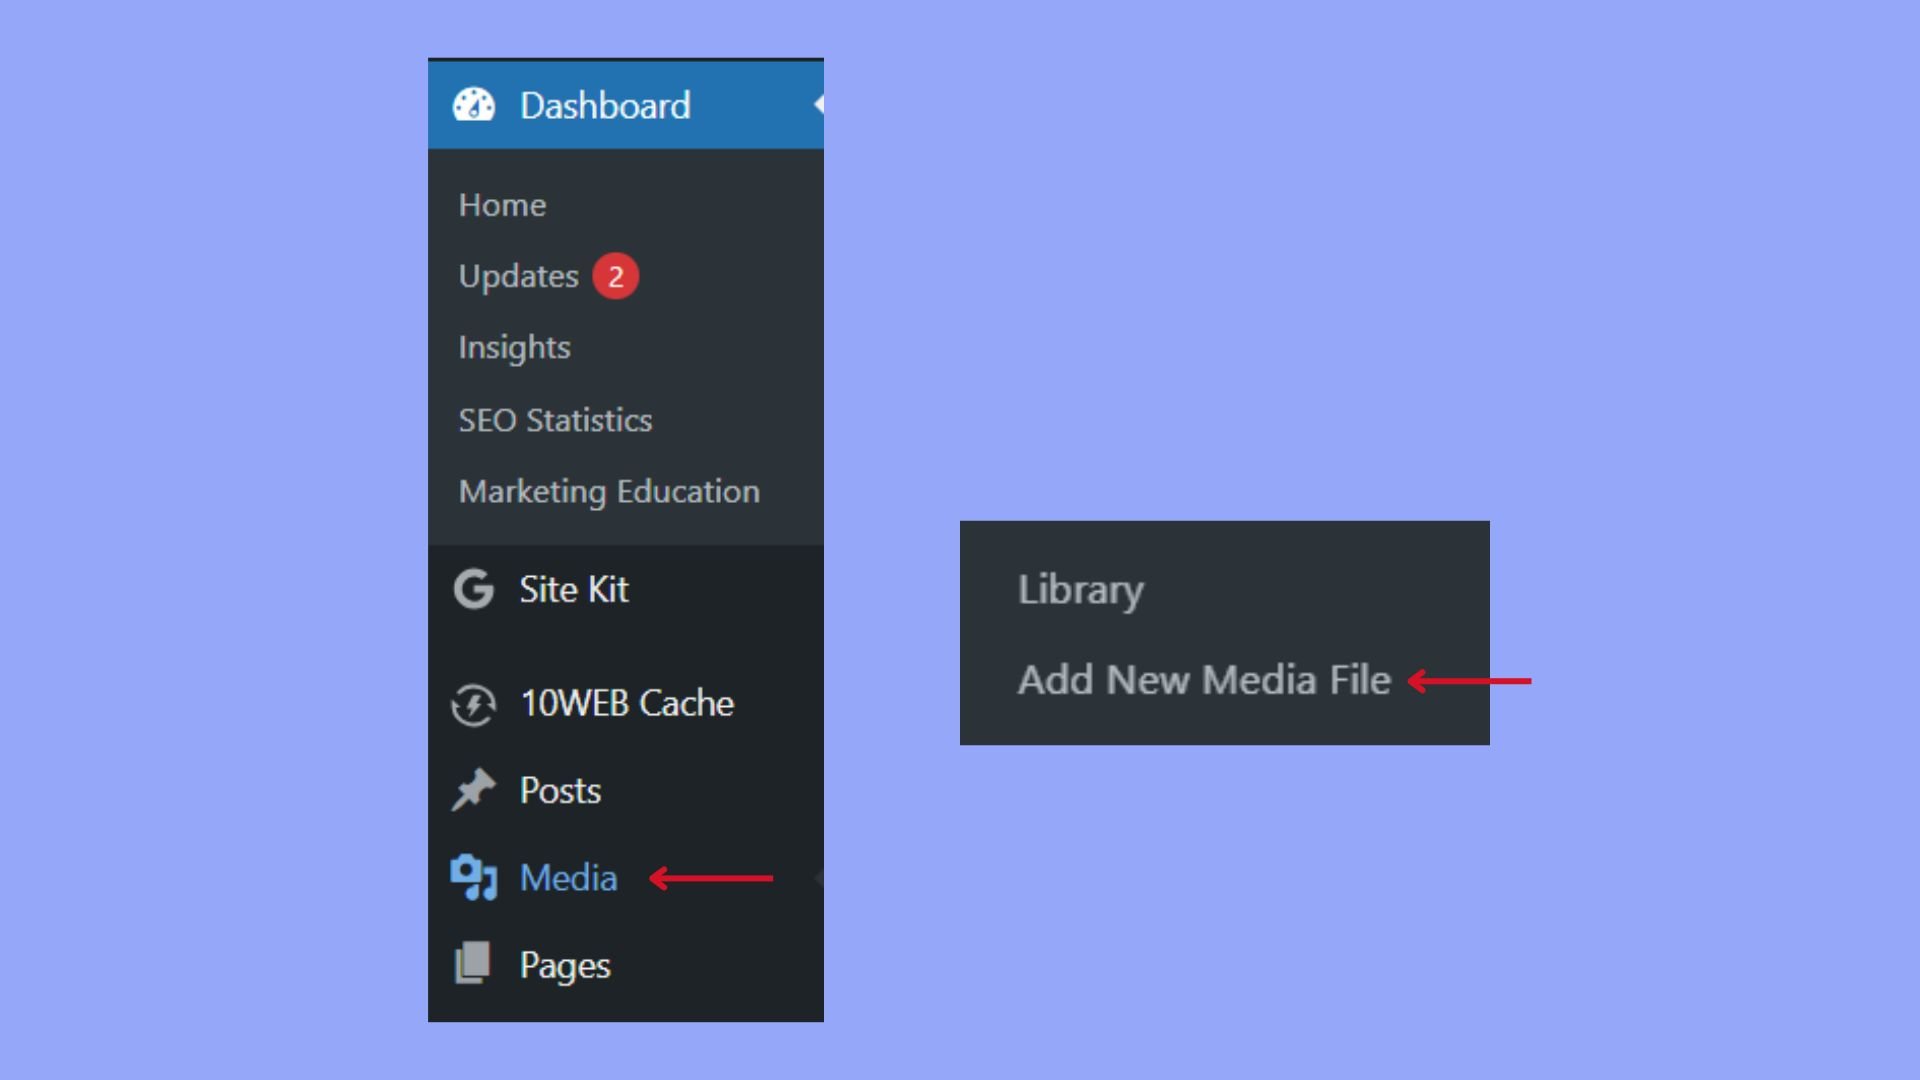
- Either drag and drop your video file into the window or click the button to select a file from your computer.
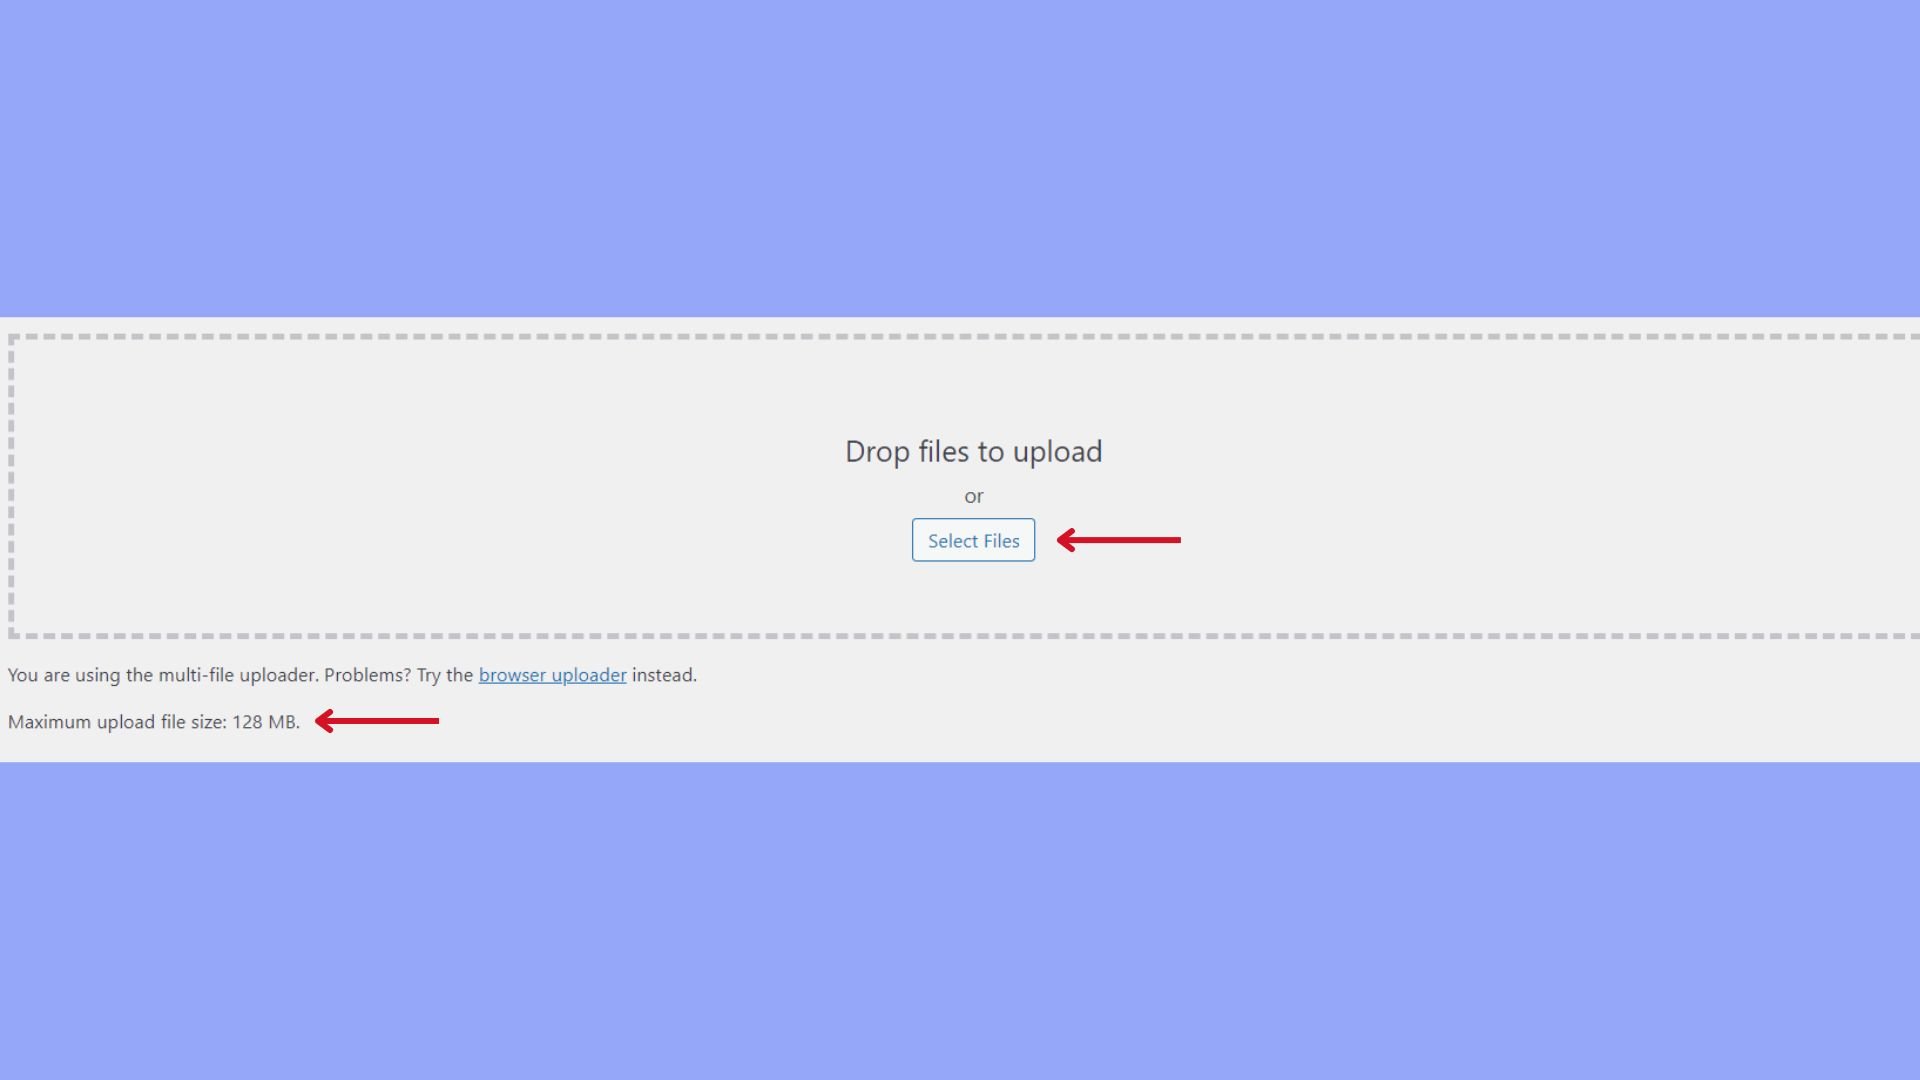
Keep in mind that WordPress has a default upload limit, which may vary depending on your hosting provider. If your video exceeds this limit, you may need to upload it through an FTP client or consult your hosting provider to increase the limit.
Inserting videos into posts and pages
To add a video to a post or page:
- Open the Block Editor for the post or page you want to edit.
- Click the Add block button (represented by a plus icon).
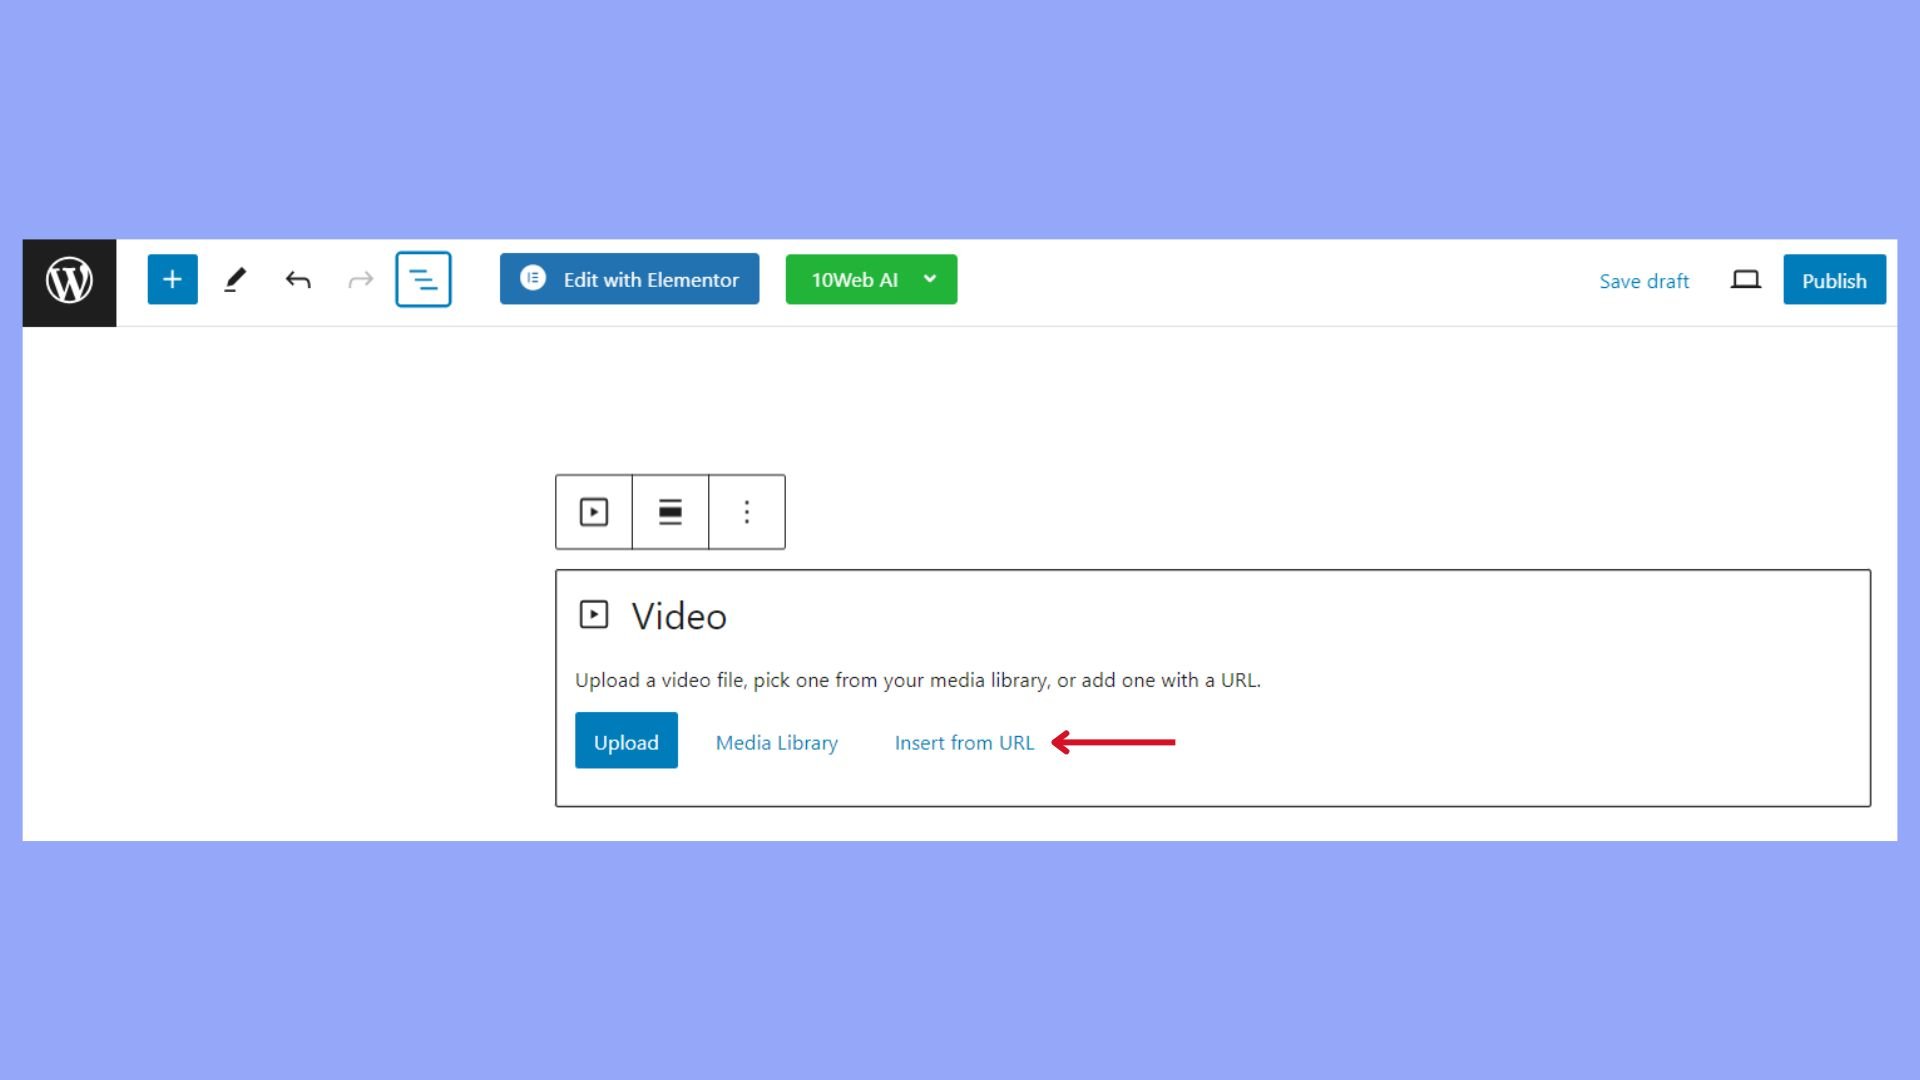
- Search for and select the Video block.
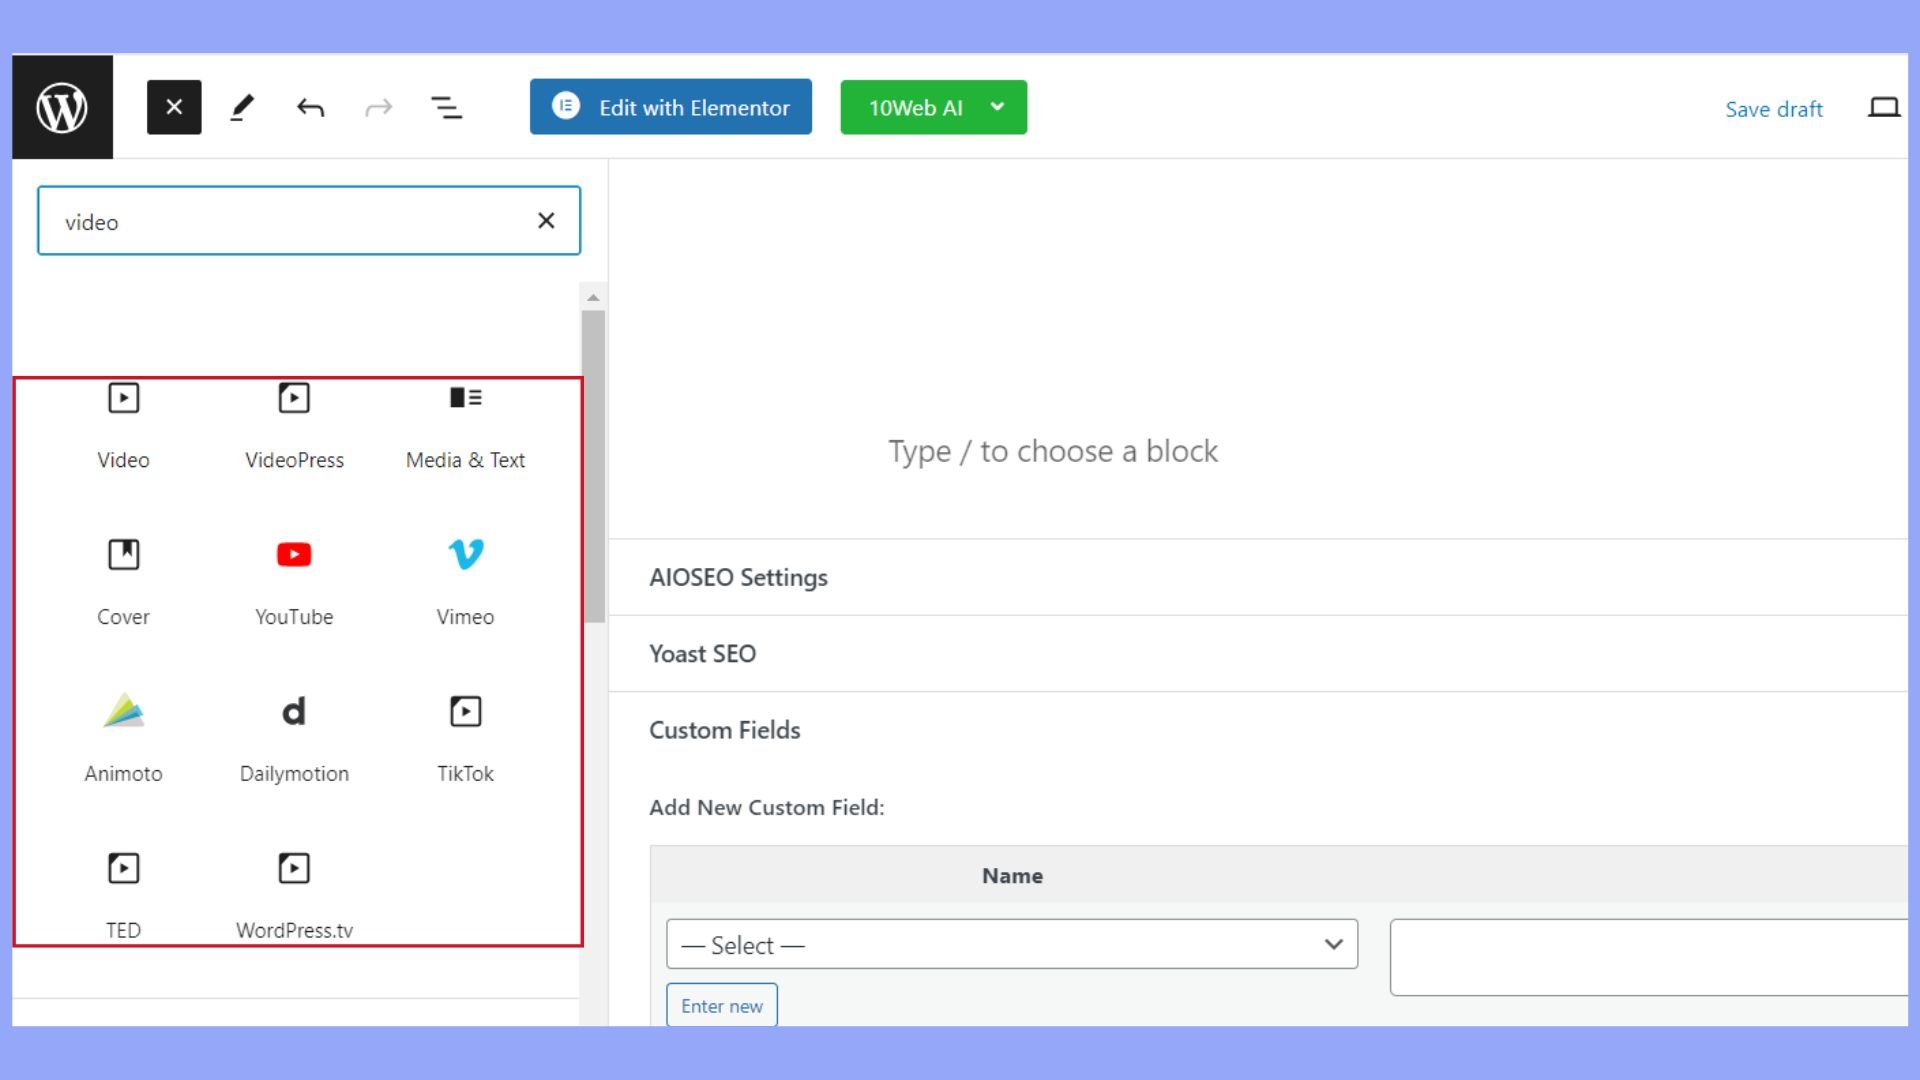
- You now have options to Upload a video from your computer, select a file from the Media Library, or insert from a URL.
For embedding videos hosted externally, like on YouTube, simply copy the video URL and paste it into a Video block; WordPress will automatically handle the embedding process. Alternatively, use the Embed block for more control and paste the embed code directly.
Embedding external videos in WordPress
When you want to include a video in your WordPress site, embedding it from popular platforms like YouTube or Vimeo is an efficient way to do so. By using embed codes or WordPress’s video blocks, you can easily showcase external videos within your content.
Embedding from the platforms
To embed videos from platforms such as YouTube or Vimeo, follow these steps:
- Find the Share button below the video you want to use.
- Click on this and then select Embed to reveal the embed code.
- In the WordPress editor, select the plus icon (+) to add a new block and choose the Video block option.
- Paste the URL of the video in the field that says Insert from URL and watch as the video seamlessly integrates into your page or post.
Embedding via the codes and video blocks
If you possess the embed code for a video, embedding it into WordPress can be done with a Custom HTML block:
- Click the plus icon (+) in the WordPress editor to add a new block.
- Select Custom HTML.
- Paste your embed code in the input area.
An alternative approach involves using a dedicated Video block:
- Click the plus icon (+) to add a new block.
- Type video in the search bar.
Select the Video block and use the Insert from URL option to add the video’s address. With these steps, you can enrich your WordPress content by embedding a variety of videos.
Improving visitor engagement with video
Videos are a powerful tool to keep your visitors engaged and interested in your content. By customizing your video player settings and thoughtfully placing your videos, you can enhance the user experience and promote your brand effectively.
Customizing video player settings
The video player settings are crucial for ensuring that your visitors have a positive viewing experience. When you upload a video to your WordPress site, take the time to adjust the Video settings. For example:
- Autoplay: Decide whether you want your video to start playing automatically when a visitor lands on your page. While autoplay can immediately engage users, be aware that it can also be intrusive, so use it judiciously.
- Volume: Set a default volume level that is noticeable but not overwhelming, to avoid startling your visitors.
- Controls: Enable visitors to have control over playback, including pausing, volume, and full-screen options, to improve engagement.
Video placement and design tips
Where and how you place your videos can significantly impact visitor engagement. Here are some tips to ensure your videos catch the eye without being overwhelming:
- Above the fold: Try to position your video above the fold so that it’s visible without scrolling.
- Responsive design: Ensure your video player is responsive, meaning it adjusts to different screen sizes and devices for a seamless viewing experience.
- Branding: Incorporate your logo or brand colors in the video player to maintain consistent marketing.
- Quality: Always opt for the highest quality video that’s reasonable for your site’s loading times.
Videos are not just for entertainment; they’re a part of your content marketing strategy. Used wisely, they can be an effective tool for improving visitor engagement and strengthening your branding.
Enhancing video functionality
Once you’ve uploaded your video to WordPress, enhancing its functionality can greatly improve your audience’s viewing experience. Advanced features and plugin configurations are key to making your video content more engaging and accessible.
Advanced video features
With the right tools, you can offer your audience more than just the basic play and pause options. Captions are essential for accessibility and can help with viewer comprehension and SEO. Consider adding loop options to keep your message going or take advantage of responsive design features to ensure your video looks great on all devices.
If you want to stay ahead of video trends, it’s worth exploring the advanced responsive video embedder. This allows for an optimal viewing experience by automatically adjusting video size and aspect ratio across different screen sizes.
Using video plugins
Selecting the right plugin will enhance your video’s functionality on WordPress. Look for a video player plugin that supports a wide range of video resolutions and formats and offers extensive customization options.
Jetpack VideoPress: Offers a seamless integration with WordPress, includes performance optimization, and supports high-resolution videos.
Presto Player: A plugin choice that focuses on a customizable viewing experience and advanced features like picture-in-picture mode and private video options.
To configure these plugins, navigate to your WordPress dashboard and look for the plugin settings. There, you can tailor the settings to match your needs, such as enabling autoplay or choosing a default video quality. The goal is to make your video content impressive and user-friendly, so take your time to test different settings and find what works best for your site and audience.
Video SEO and performance
Enhancing your video content for search engine optimization (SEO) and improving load times are crucial to your website’s success. Here, you’ll learn some best practices for video SEO and how to optimize your videos for both performance and reduced bandwidth use.
Best practices for video SEO
For better search engine rankings, ensure your videos are as accessible to Google as they are to your audience:
- Choose the right video format: MP4 is widely supported and recommended for its balance of quality and file size.
- Apply video schema markup: Adding structured data to your video helps search engines index and display them more effectively. In the WordPress post or page, navigate to AIOSEO Settings and click on the Schema tab to generate schema.
Optimizing loading speed and bandwidth use
Optimizing your videos not only enhances the user experience but can also improve SEO:
- Enable video sitemap: A video sitemap helps Google discover and index your videos more effectively. Turn on sitemaps by selecting the Enable Sitemap slider, then Activate Video Sitemap under the Video Sitemap menu.
- Compress your videos: Large files slow down loading times. Compress your video files to reduce their size without significantly impacting quality.
By sticking to these practices, you’re not just ensuring that your videos are more likely to rank on search engines like Google, but you’re also making sure they perform well on your site without excessive bandwidth consumption.
Conclusion
Uploading and effectively integrating video content on WordPress is an invaluable strategy for enhancing your site’s visual appeal and engagement. This guide has equipped you with a thorough understanding of the essential aspects of video handling within WordPress, from selecting the right formats and optimizing videos for web performance to embedding them seamlessly into your pages and posts. You have already learned how to upload video on WordPress. By employing the best practices outlined you can dramatically improve the user experience on your website.
Simplify WordPress with 10Web
Automate manual work with 10Web Managed WordPress Hosting and 10Web AI Website Builder. Optimize your WordPress website effortlessly.
Simplify WordPress with 10Web
Simplify WordPress with 10Web
Skip and automate manual work with 10Web Managed WordPress Hosting and the 10Web AI Website Builder.