Adding Google Analytics to your WordPress website is an important decision. Google Analytics gives you access to comprehensive data about your website traffic and user behavior. By integrating Google Analytics, you gain valuable insights that can help you make informed decisions to improve your site’s performance, enhance user experiences, and further your business or blogging goals.
There are several methods for adding Google Analytics to your WordPress site. In this guide, we will learn how to add Google Analytics to WordPress website. Let’s get the Google Analytics discussion started.
FAQ
How can I integrate Google Analytics with my WordPress site using a plugin?
How to add Google Analytics code in WordPress without a plugin?
Can I connect Google Analytics to my WordPress website through the Yoast SEO plugin?
How do I add Google Analytics to my WordPress footer?
How do I set up Google Analytics 4 on my WordPress website?
Google Analytics and its importance
As we learned, Google Analytics is a powerful web analytics service that gives insights about the traffic to your website, making it easier to track various aspects of user interaction and engagement on your site.
Before learning how to add Google Analytics to WordPress websites, let’s find out some key features and components of Google Analytics:
Real-time data: See who is on your site and what they are doing in real-time.
Audience demographics: Understand your visitors’ age, gender, interests, devices, and location.
Acquisition reports: Discover how users find your website, whether it’s through search engines, social media, or referrals from other sites.
Behavior reports: Observe what visitors are doing on your site, which pages they visit, and what content captures their attention.
Conversions: Set up goals to track if visitors complete specific actions like signing up for a newsletter or making a purchase.
This information helps you make informed decisions for user experience and your business objectives. Thus, Google Analytics is not just about collecting data; it’s about understanding that data to improve your website’s effectiveness and reach your goals. It’s an integration you cannot afford to miss.
How to add Google Analytics to WordPress websites: Steps
Let’s go step-by-step and find out how to add Google Analytics to WordPress websites making them controls on real-time data.
Step 1: Create your Google Analytics account
Before diving into setting up your Google Analytics account, ensure that you have a Google account ready. This account will be the cornerstone of all subsequent steps, from registering for Google Analytics to configuring your property and choosing the right settings for data gathering.
Sign up for Google Analytics
- Visit the Google Analytics website.
- Click on the Start measuring button.

- Create an account using your business details.
- Log in using your Google account credentials.
- Set Up Analytics by providing essential details.

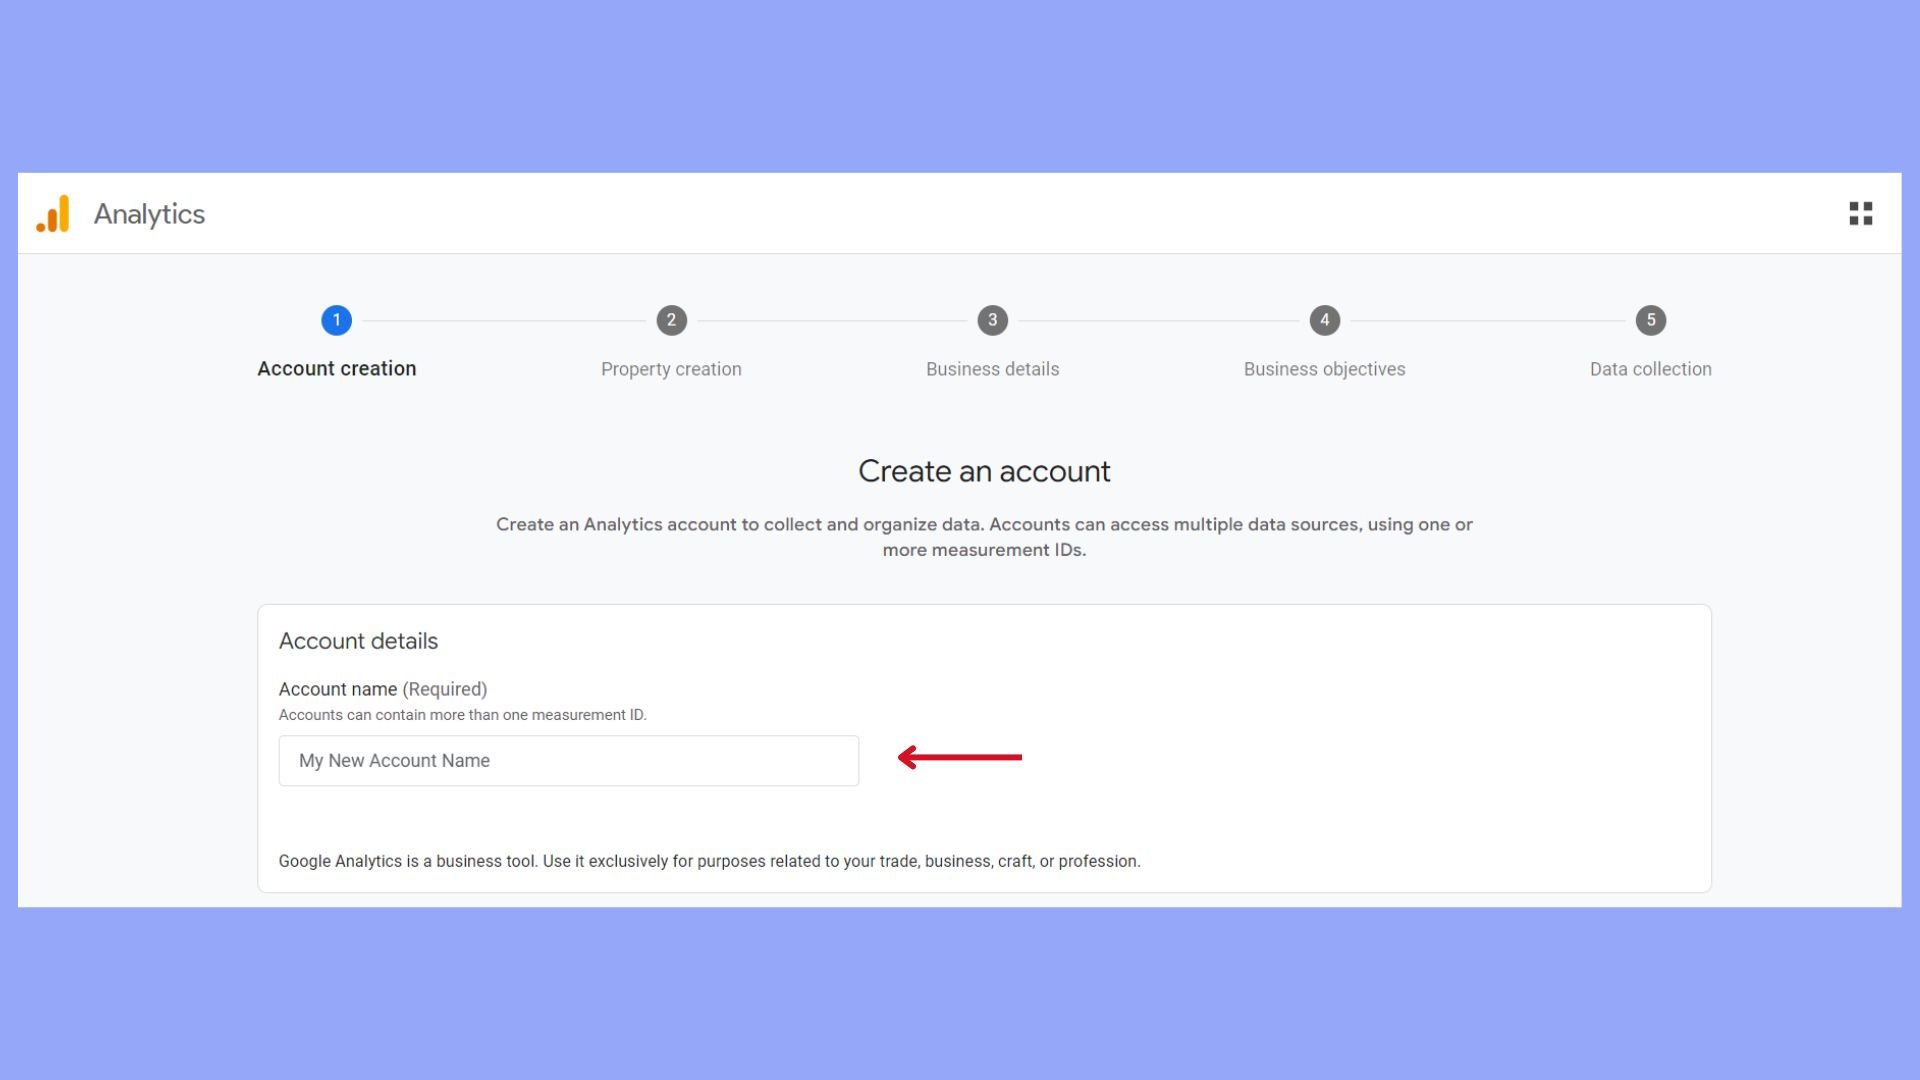
Account name: Choose a name that makes it easy for you to identify.
Data-sharing settings: Decide which data you wish to share with Google and other services.
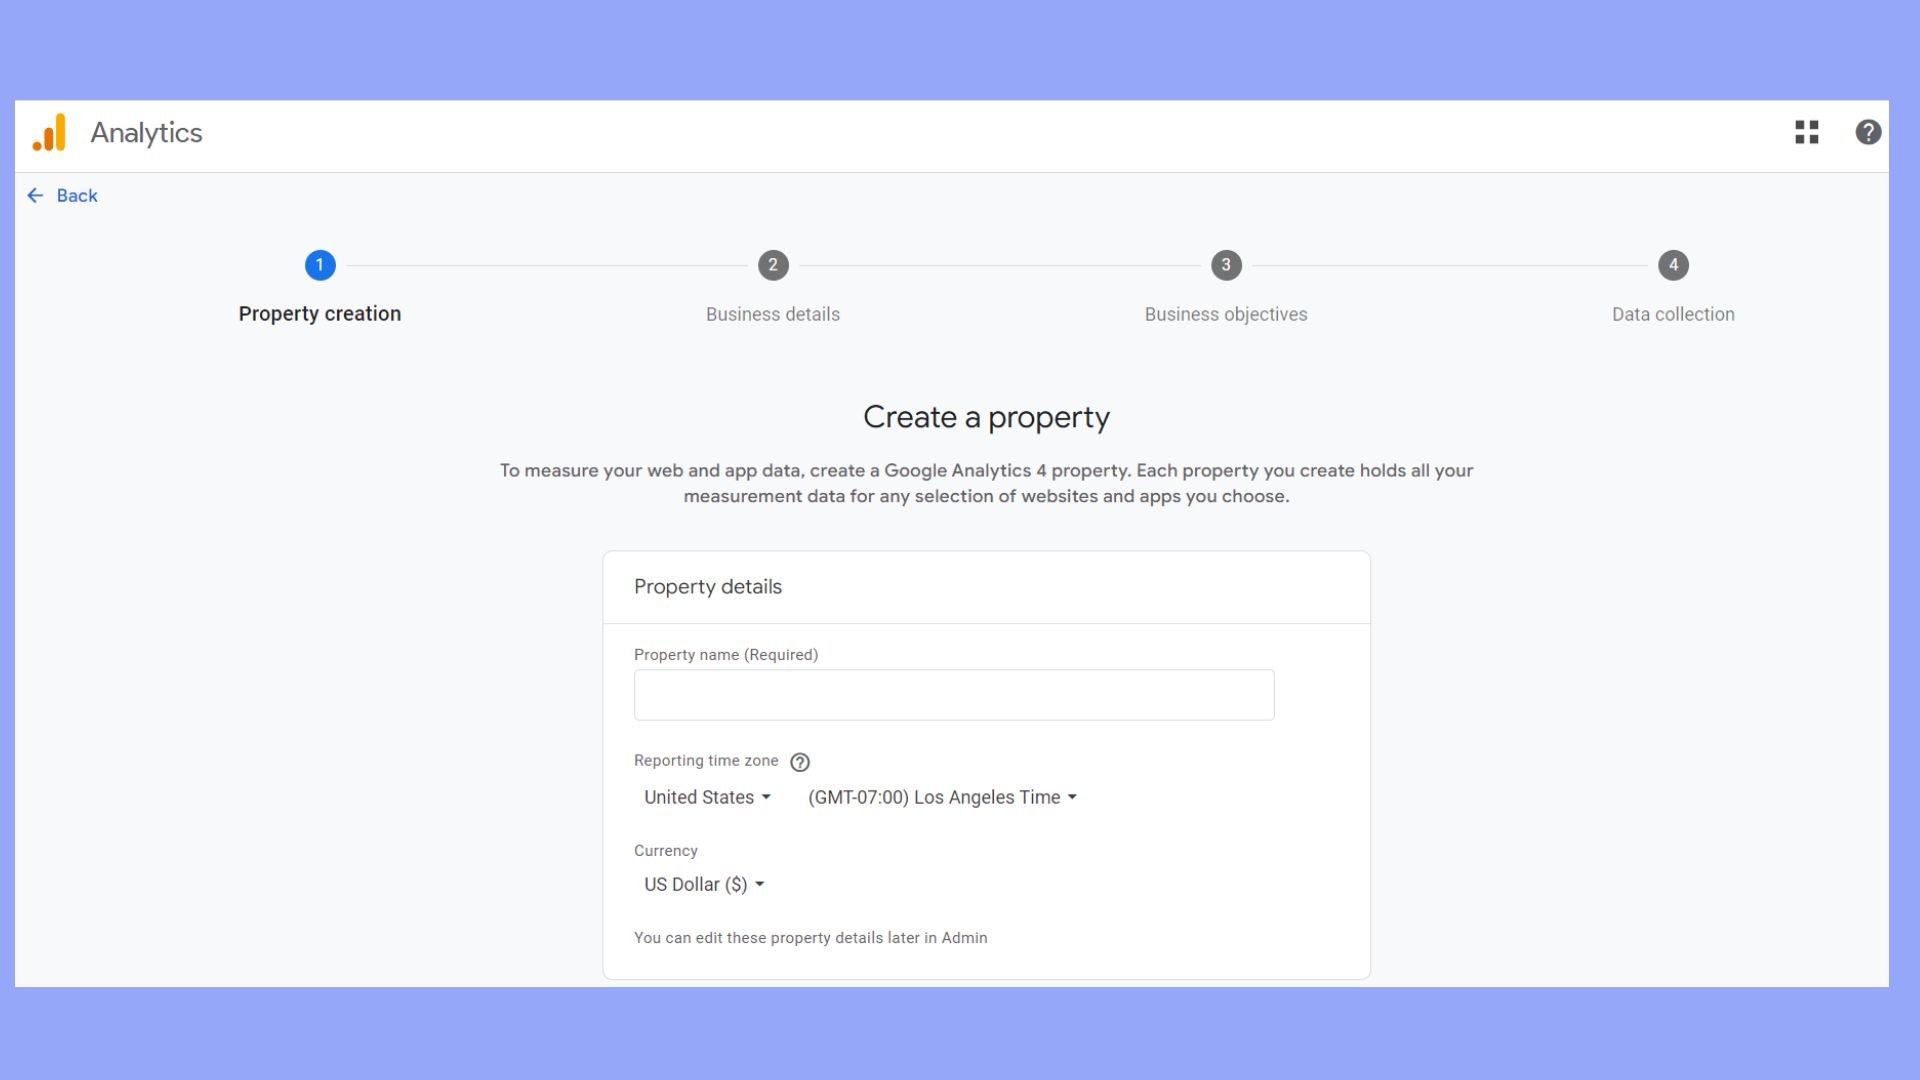
Step 2: Set up a property
The next step involves setting up a property which is essentially your website in Google Analytics:
- Go to the Admin section and select Create Property.
- Enter your website name and URL.
- Choose your website’s industry, category, and reporting time zone.
- Specify the currency to use for financial data reporting.
- Follow the instructions to get your tracking code to insert into your WordPress website.

Simplify WordPress with 10Web
Automate manual work with 10Web Managed WordPress Hosting and 10Web AI Website Builder. Optimize your WordPress website effortlessly.
Get WordPress ready for Google Analytics
Before integrating Google Analytics with your WordPress site, make sure that the platform is ready for the setup. This involves selecting a suitable plugin and verifying that your WordPress theme supports JavaScript.
Choose the plugin
To integrate Google Analytics with WordPress, you need a plugin that makes the process straightforward. Identify reputable WordPress Google Analytics plugins. Popular choices include MonsterInsights and ExactMetrics. Here are some steps to select and install a plugin:
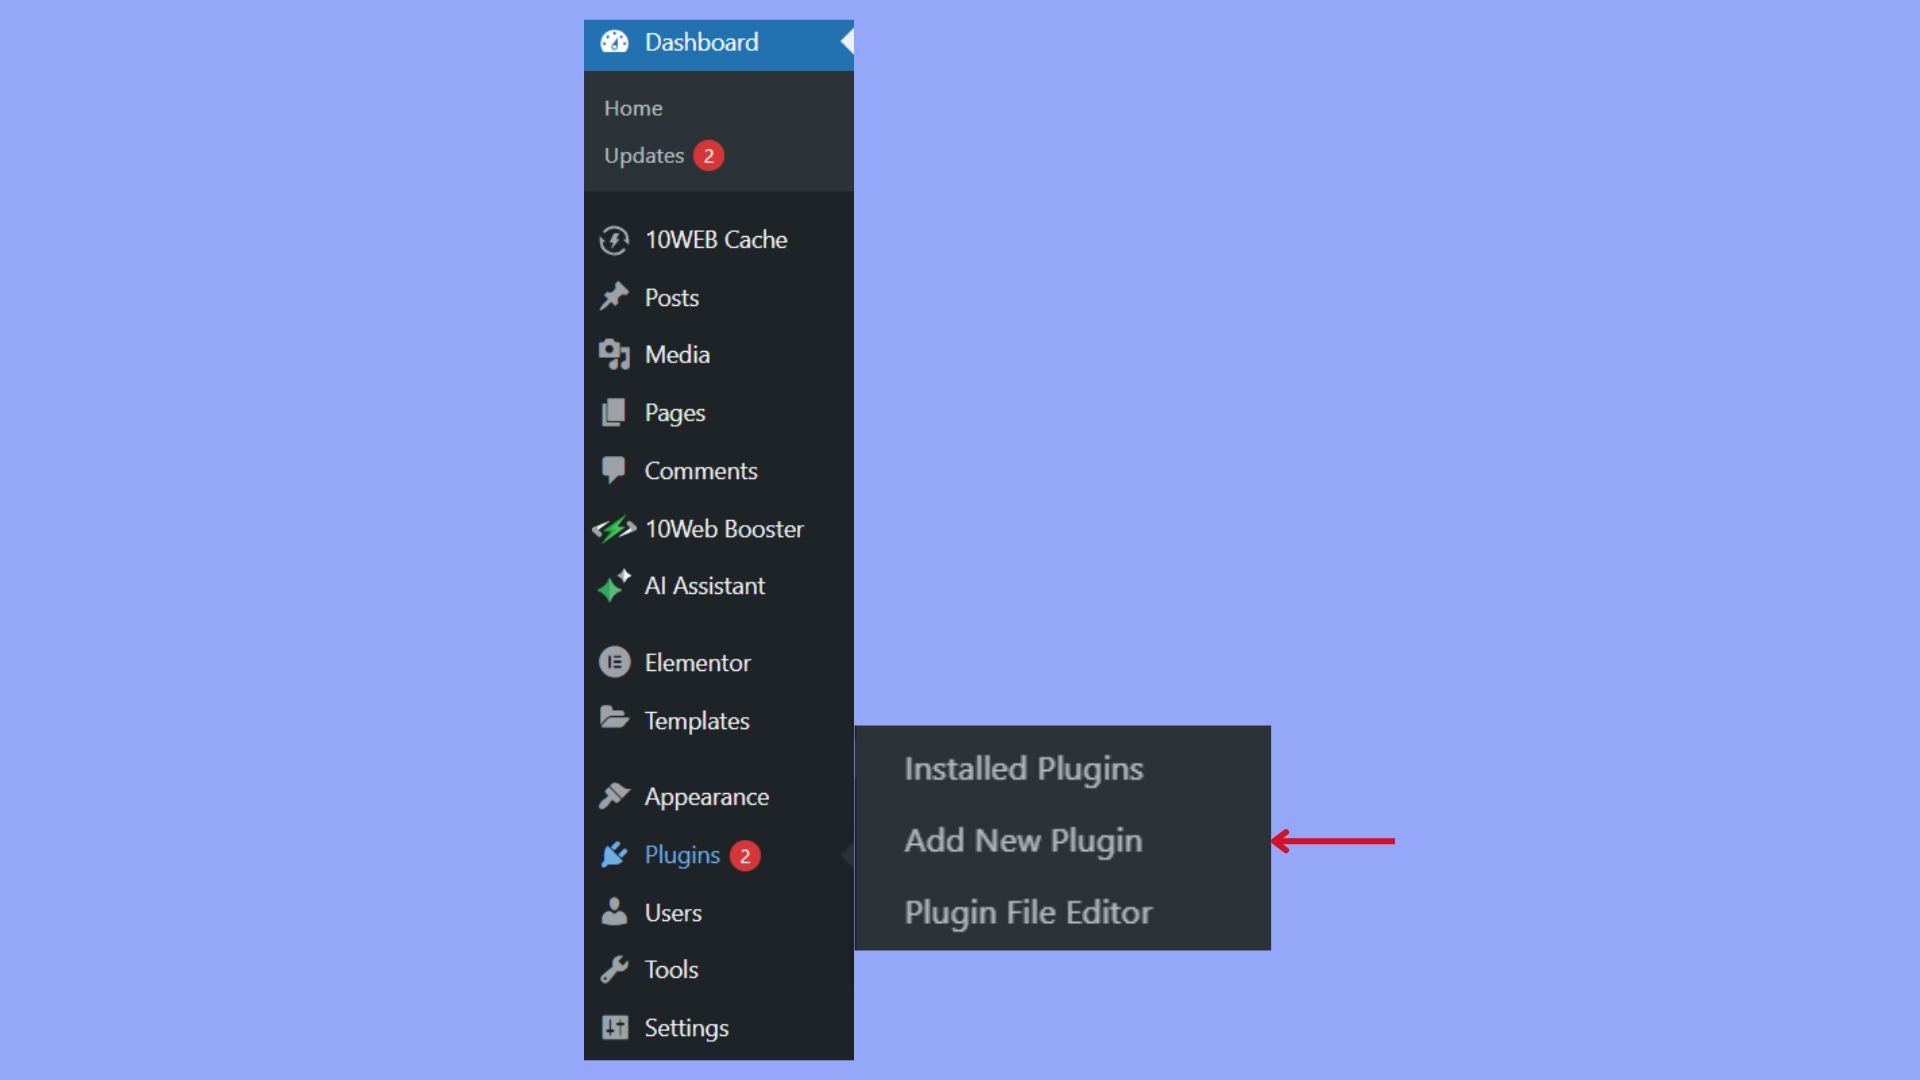
- Access your WordPress dashboard, navigate to Plugins > Add New.
- In the search bar, type the name of the plugin you’ve chosen.
- Click Install Now and then Activate for the plugin you wish to use.
- Check JavaScript support since Google Analytics relies on JavaScript to track user interactions on your website.
To check JavaScript support:
- Make sure that the WordPress theme you are using doesn’t restrict JavaScript. Most themes allow JavaScript by default.
- Verify in your WordPress theme settings or by viewing the page source code that the necessary JavaScript code for Google Analytics can be inserted or is present.
Installing Google Analytics in WordPress
Before you begin, ensure you have access to your WordPress dashboard as an administrator. It’s required for both plugin installation and configuration.
Method 1: Install the plugin via the WordPress dashboard
- Log in to your WordPress dashboard and go to the Plugins section on the left-hand sidebar.
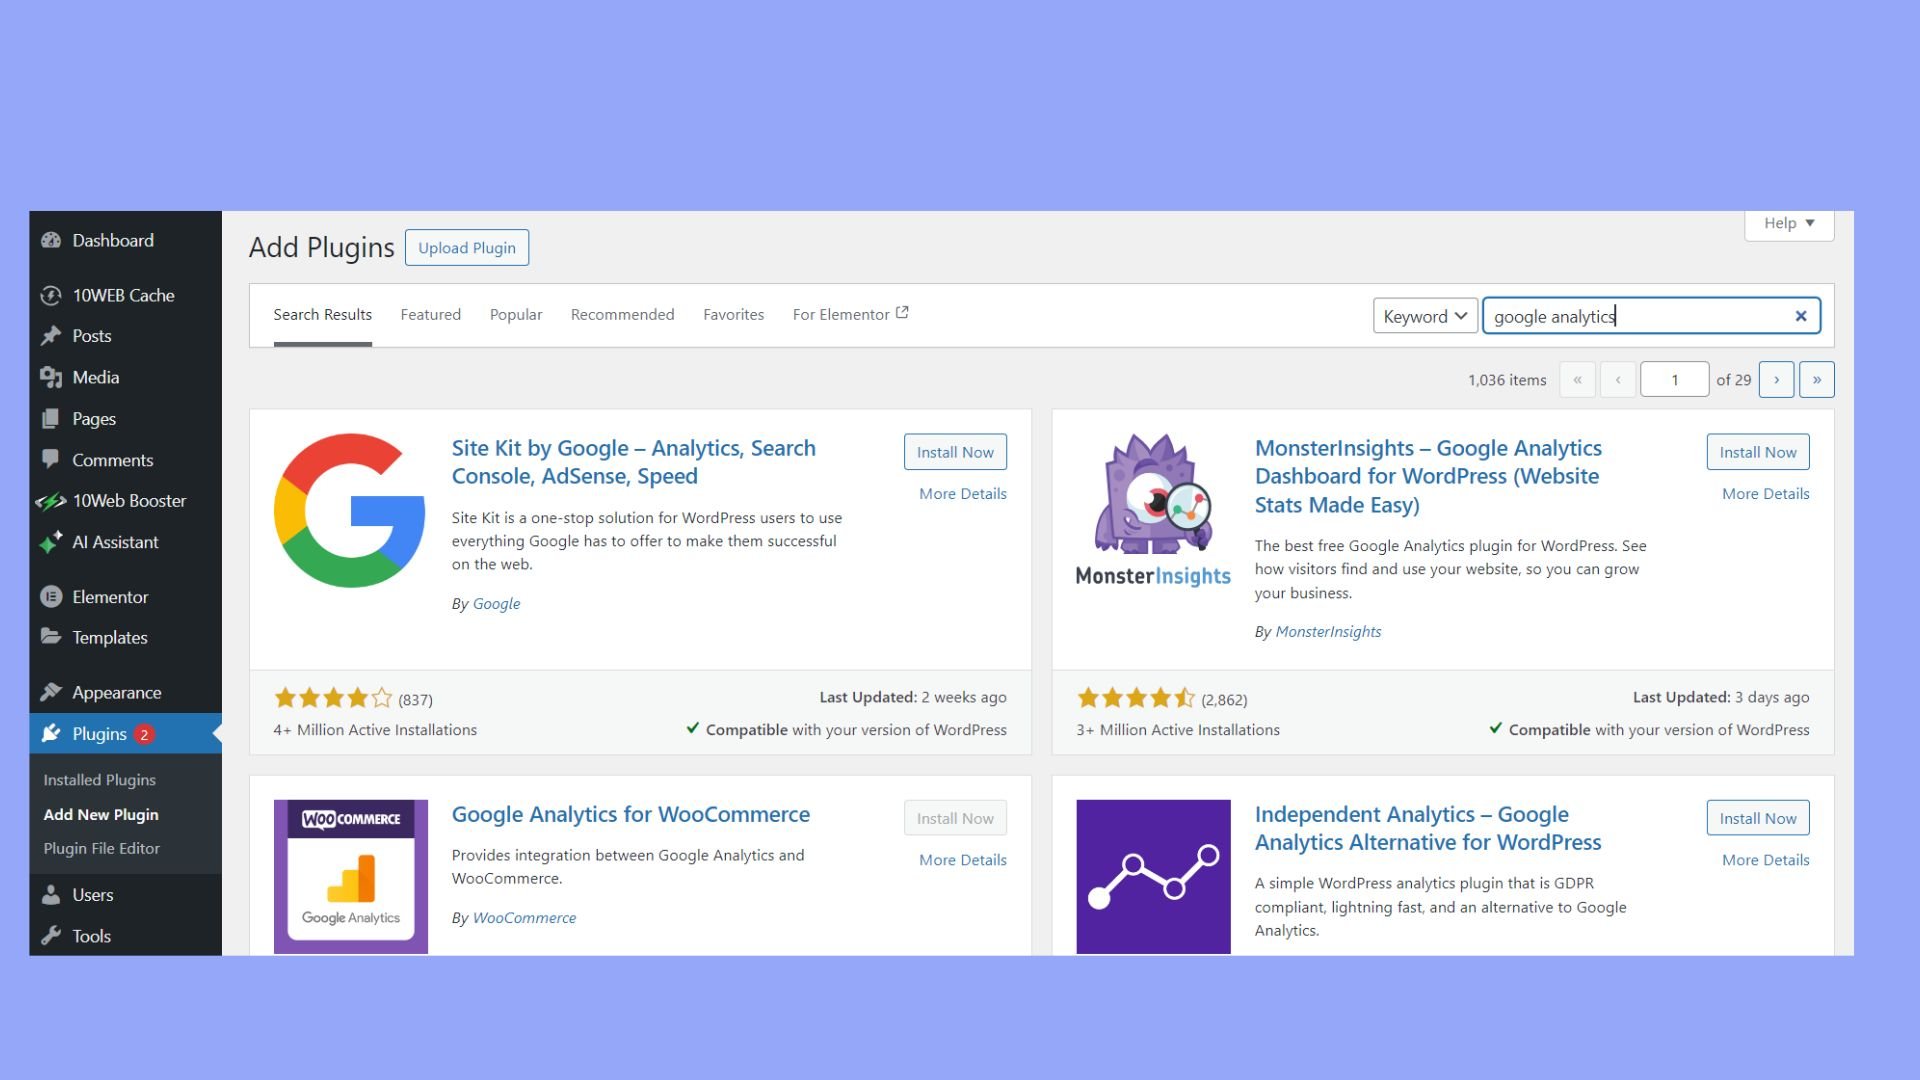
- Click Add New at the top of the page.
- In the search field, type Google Analytics for WordPress to find the respective plugin such as MonsterInsights, which is widely used.
- Once you’ve located the plugin, click Install Now next to its name.
Activate the plugin and access the settings
- After installation, a button will appear in the same location labeled Activate. Click this button to activate the plugin.
- Once activated, most plugins will add a new menu item to your WordPress dashboard, often labeled with the plugin’s name.
- Locate and click on the menu item to access the plugin’s settings.
Here, you will usually need to enter your Google Analytics Tracking ID or connect your Google Analytics account following the on-screen instructions.
Method 2: Integrating Google Analytics and WordPress manually
Incorporating Google Analytics into your WordPress site manually involves inserting the tracking code into your theme files. You’ll need to access your site’s files and be cautious to insert the code correctly. Let’s see how to add Google Analytics to WordPress manually.
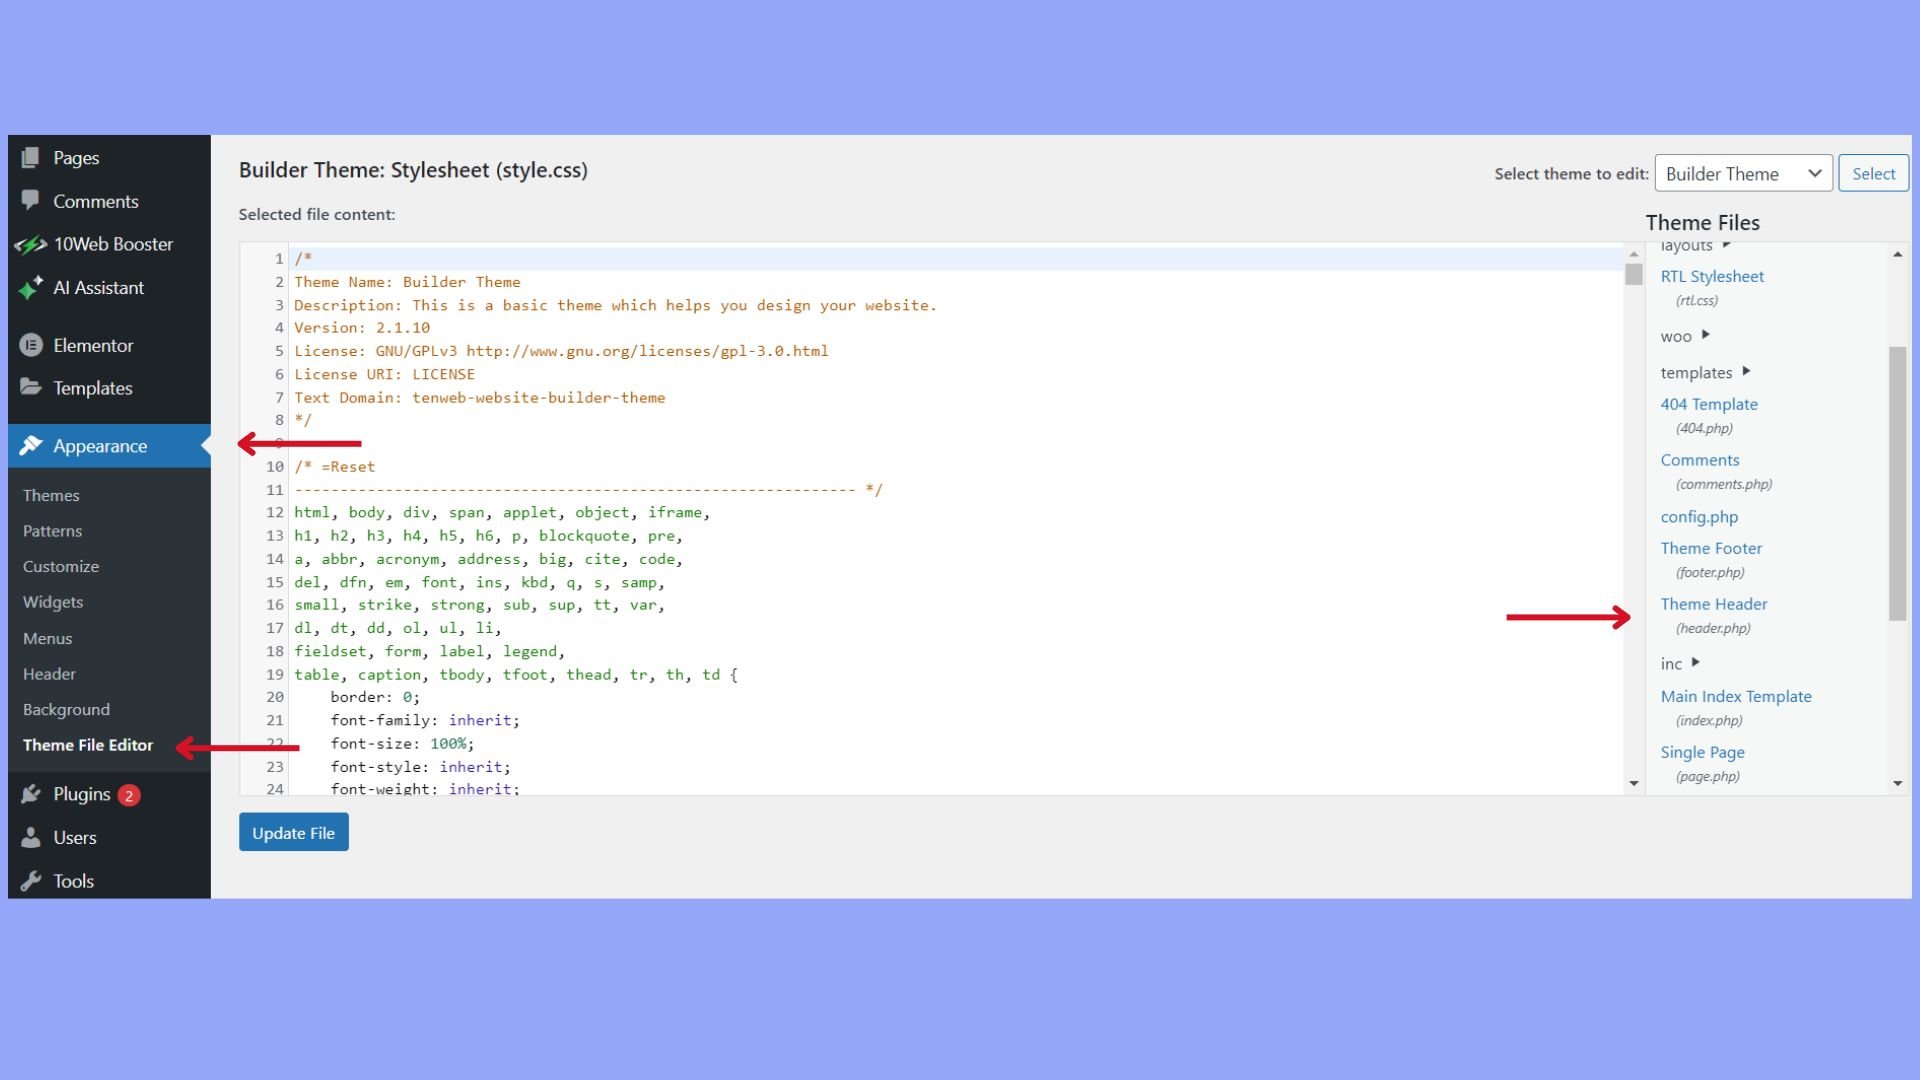
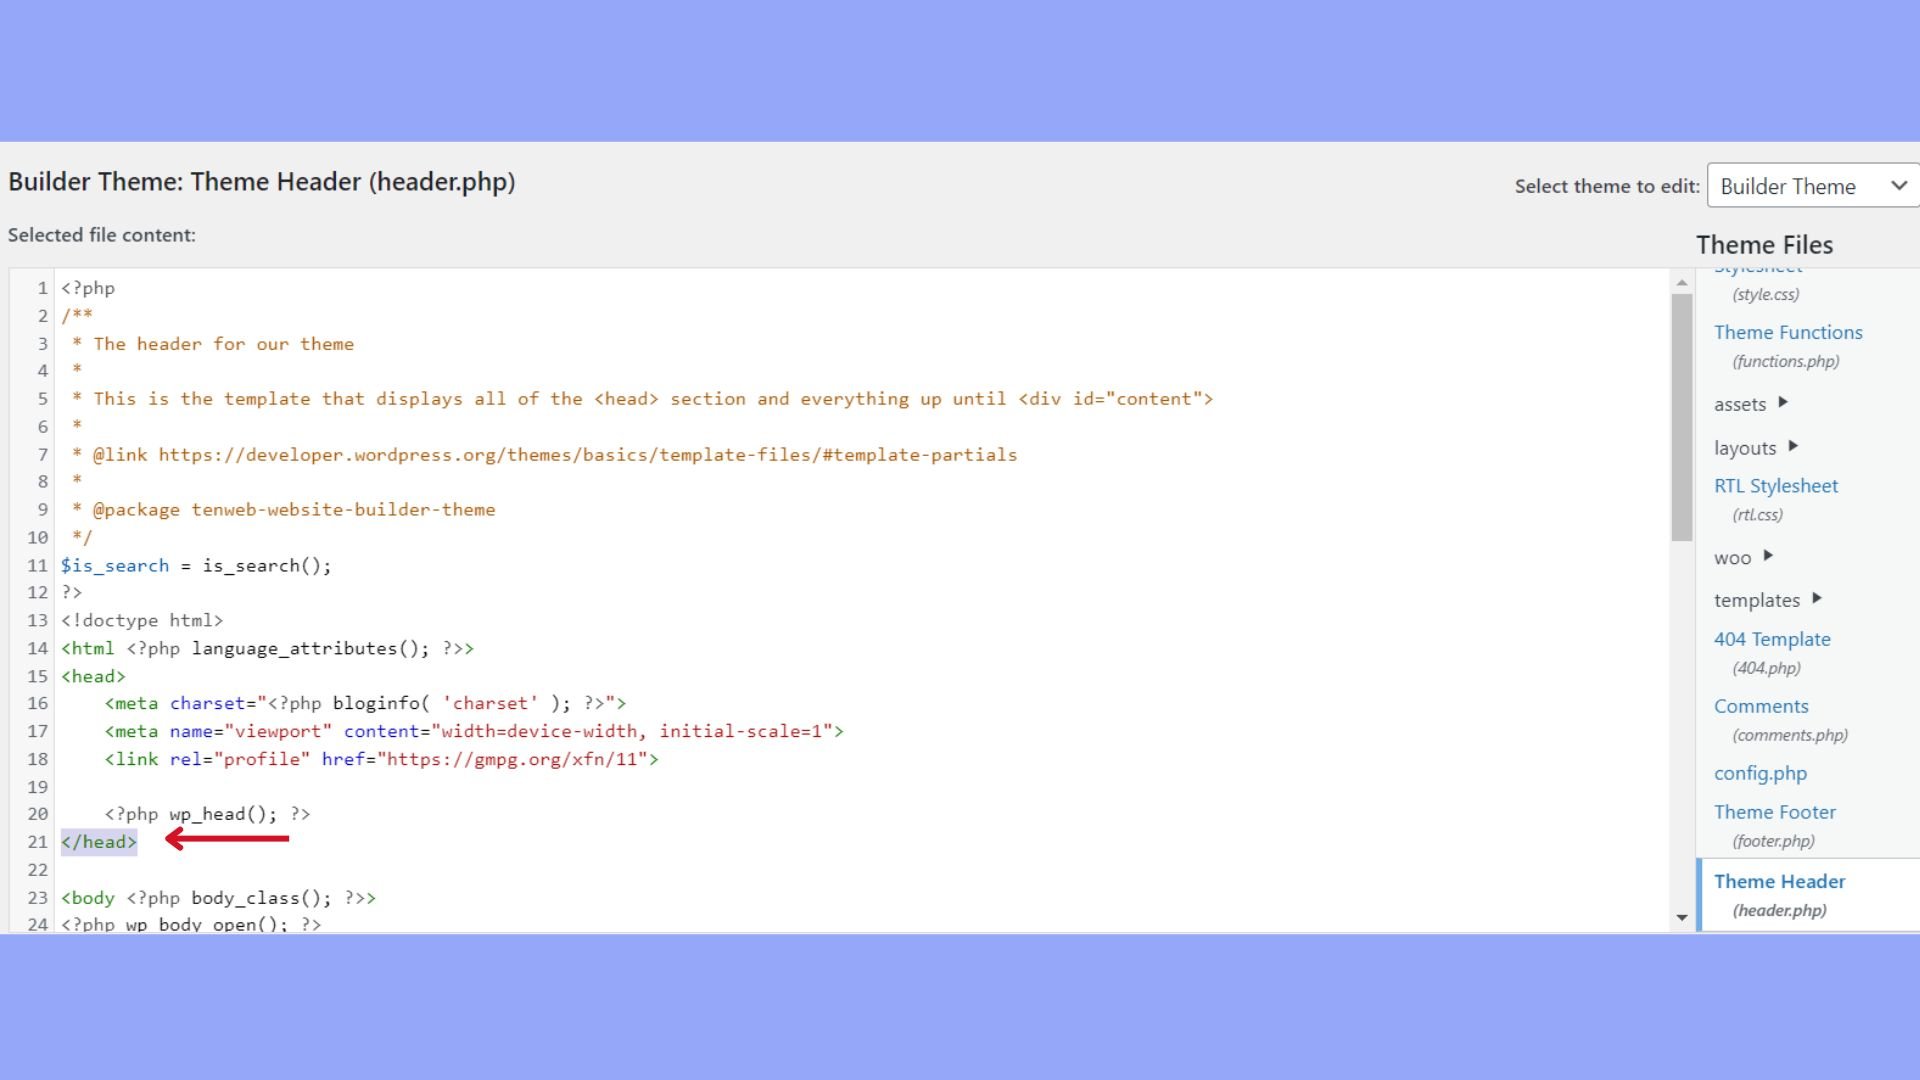
Edit the header.php file
To integrate Google Analytics manually, you must insert the tracking code provided by Google Analytics into the header.php file of your WordPress theme. Follow these steps:
- Go to Appearance > Theme Editor in your WordPress dashboard.
- Find the header.php file on the right-hand side and click to edit it.
- Paste your Google Analytics tracking code just before the </head> tag.
- Save your changes by clicking the Update File button.
If you update or change your theme, you need to re-add the code since it’s specific to the theme files.
Use Functions.php File
Alternatively, you can also add the tracking code to your theme’s functions.php file. This method ensures that the tracking code remains active even if you change your theme’s header.php file:
- Find your theme’s functions.php file in the Theme Editor.
- Add the following snippet to the file and save the changes:
function add_googleanalytics() { ?>

 <!-- Google Analytics tracking code -->

 <script>

 // Your Google Analytics tracking code here

 </script>

<?php }

add_action('wp_head', 'add_googleanalytics');
Replace // Your Google Analytics tracking code here with the actual Google Analytics tracking code.
Enhance data collection with Google Analytics
Integrating Google Analytics with your WordPress site allows for a comprehensive understanding of user metrics vital for data-driven decisions. You can unlock advanced features to target your audience more effectively and optimize your e-commerce performance. Now that you have learned how to add Google Analytics to WordPress and added it successfully, you have the freedom to enhance what you see through the analytics tools.
Track demographics and interests
By enabling demographic and interests reporting in Google Analytics, you can collect data that includes age, gender, and interest categories. To activate this feature:
- Go to your Google Analytics account and view your reports.
- Select Audience > Demographics or Interests.
- Follow the prompt to Enable if it’s not already active.

This data helps you tailor your content and marketing strategies to the segments that are most engaged or represent valuable leads for your business.
Simplify WordPress with 10Web
Automate manual work with 10Web Managed WordPress Hosting and 10Web AI Website Builder. Optimize your WordPress website effortlessly.
Enable ecommerce tracking
If you are running an eccomerce account, Google Analytics ecommerce tracking is essential for understanding the buying behavior of your visitors. To set this up:
- Go to your Google Analytics account.
- Click on Admin, and in the view column, go to ecommerce settings.
- Enable ecommerce and Enhanced Ecommerce Reporting.
Configure analytics for advanced tracking
When setting up advanced tracking in Google Analytics, you will be dealing with the specifics of conversions and how they relate to your business objectives. Properly configured goals and integration with Google Tag Manager can arm you with the insights necessary to evaluate your site’s performance.
Setting up goals and conversions
To track your website’s objectives, such as form submissions or product purchases, you need to set up goals in your Google Analytics (GA) account. Begin by identifying the key actions that count as conversions for your site.
- To find your Tracking ID, go to Admin in your GA account.
- Under the Property column, click on Tracking Info > Tracking Code.
To create new goals, still under Admin:
- Access Goals under the View column.
- Click on + New Goal to start configuring custom goals.
- Choose from templates or create custom ones, then specify the destination URL, duration, or event you’re tracking as conversions.
After setting up a goal, use the Verify this Goal option to test it.
GA will simulate the conversion rate based on past data, allowing you to confirm the goal is set up correctly.
Integration with Google Tag Manager
For more granular tracking and easier management of your Google tags, you can use Google Tag Manager (GTM):
- Sign up for GTM and create a container for your WordPress site.
- In GTM, create a new Tag for GA with your Tracking ID.
- Configure triggers to specify when the tag should fire, such as on-page views, form submissions, or clicks.
With GTM, you can deploy and update tags across your site without altering the code directly.
This can include tags for Google Analytics and other marketing or analytics services.
Simplify WordPress with 10Web
Automate manual work with 10Web Managed WordPress Hosting and 10Web AI Website Builder. Optimize your WordPress website effortlessly.
Understanding reports and data insights
When you integrate Google Analytics with your WordPress site, you unlock a wealth of data. These reports allow you to see how audiences interact with your site and how they find you in the first place. You’ve already learned how to add Google Analytics to WordPress website, unlock advanced features, and enable tracking, now you should learn how to deal with reports and data insights.
Audience and behavior reports
Audience reports provide demographic data such as age, gender, and location, which help you understand who your visitors are. By analyzing this data, you can tailor your content and design to better match your audience’s preferences. Meanwhile, behavior reports help you see how users navigate through your site, what content they spend the most time on, and where you might be losing their interest. This might include:
- Pageviews: The total number of pages viewed.
- Sessions: Periods a user is actively engaged with your site.
- Bounce rate: The percentage of single-page visits.User flow: The path users take through your site.
Acquisition and real-time reporting
Acquisition reports show you where your visitors come from, be it search engines, social networks, or direct visits. This section is critical for understanding the channels driving traffic to your site, helping you refine your marketing strategies.
On the other hand, real-time reporting gives you a live snapshot of your site’s activity. This allows you to monitor immediate responses to new content or promotions. Real-time data includes:
- Active users: How many are on your site right now.
- Top referrals: Sites currently sending traffic to yours.
- Top active pages: Most viewed pages in real-time.
- Locations: Geographic data of current visitors.
Optimizing your site with Google Analytics data
By integrating Google Analytics into your WordPress site, you gain valuable insights to optimize your website traffic. Through careful analysis and strategic adjustments, you can improve your SEO and site performance.
Using insights for SEO
To enhance your presence on search engines:
- Identify low-performing pages: Sort your pages by bounce rate and average time on page. Pages with high bounce rates and low engagement may require content improvements.
- Understand keywords: Look at organic traffic to understand how visitors find your site. Focus on these keywords to improve your SEO strategy.
Improving site performance
To improve website performance based on analytics data:
Analyze page load times: Slow-loading pages can be identified in the Site Speed section, allowing you to take corrective action, like optimizing images or leveraging caching.
Improve conversion rate: Set up goals in Google Analytics to track conversions. Analyze conversion paths and optimize the user journey to increase conversion rates.
Simplify WordPress with 10Web
Automate manual work with 10Web Managed WordPress Hosting and 10Web AI Website Builder. Optimize your WordPress website effortlessly.
Troubleshoot common issues
After you’ve added Google Analytics to WordPress, you might encounter several common issues. Here’s how you can address them.
Issue 1: Google Analytics not tracking data
- Check that the tracking code is correctly installed in the header section of your theme’s files. This can typically be accessed through the Appearance > Theme Editor in WordPress.
- Verify that your website’s URL in your Google Analytics account matches your actual site URL, particularly if your site uses www or a HTTPS protocol.
Issue 2: Real-time data not showing
- Clear your browser cache and cookies, then try accessing your site again.
- Ensure your browser is not running any extensions that may block scripts, such as ad blockers.
Issue 3: Inaccurate data reporting
- If you have access to your site’s footer, check to ensure the tracking code is not duplicated there, as it should only be present in the header.
- Exclude visits from your IP address to prevent skewing data with your own interactions.
Stay updated with Google Analytics versions
As Google Analytics evolves, understanding the distinctions between Universal Analytics and Google Analytics 4 is crucial for maintaining accurate data tracking on your WordPress site. So, learning how to add Google Analytics to WordPress is not wholly enough, you should keep up with it.
Transition to Google Analytics 4
Google Analytics 4 (GA4) is the next generation of Google Analytics, building on the foundation of Universal Analytics but with a different data model that emphasizes user privacy and cross-platform measurement. GA4 introduces a more flexible approach to data collection, which can be extremely beneficial in adapting to new privacy regulations and changes in user behavior.
To stay current with Google Analytics:
- Create a GA4 property: Access your Google Analytics account and click on “Start measuring” to begin the setup.
- Configure data streams: In GA4, data collection is organized around data streams that represent different sources of data, such as your WordPress website.
- Use the measurement ID: This unique identifier is crucial for tagging and tracking across your site.
From Universal Analytics to GA4
Switching to GA4 will ensure that you don’t lose valuable insights:
- Migrate to Google Analytics 4 sooner rather than later to start accumulating historical data in your new property.
- Run Universal Analytics and GA4 concurrently on your WordPress site to compare data and adjust to the new version.
GA4 focuses on event-based data, which may require a shift in how you interpret user interactions on your site.
Conclusion
In conclusion, integrating Google Analytics into your WordPress website is a strategic move that empowers you with data to refine and optimize your digital presence.
By following the outlined steps, you’d learn everything you need for the question of how to add Google Analytics to WordPress website– from setting up an account to selecting the right plugin or inserting the tracking code manually–you equip yourself with the tools necessary to capture and analyze user interactions and site performance.
Simplify WordPress with 10Web
Simplify WordPress with 10Web
Skip and automate manual work with 10Web Managed WordPress Hosting and the 10Web AI Website Builder.