Adding size charts to your WooCommerce store can greatly enhance the shopping experience by providing customers with essential sizing information, thereby reducing uncertainty and returns. We’ll walk you through step-by-step instructions on how to add a size chart in WooCommerce, how to show product sizes, and how to implement a size dropdown. By the end, you’ll be equipped to provide your customers with accurate and helpful sizing details, ensuring a more satisfying shopping experience.
FAQ
How to create a size chart in WooCommerce?
How do I add sizes to WooCommerce?
How do I add a size dropdown in WooCommerce?
How to add a size chart in WooCommerce
Step 1: Getting started with size charts
When it comes to providing a great shopping experience in your WooCommerce store, offering size charts can significantly reduce customer uncertainty and returns. This section guides you through the basics of understanding size charts and choosing the right plugin to implement them.
Size charts are essential tools for online apparel shops, ensuring that your customers can easily find the perfect fit without trying on the products. In WooCommerce, size charts can be added to product pages to give detailed measurements, typically through a plugin integrated with your WordPress site.
Choosing the right size chart plugin
To introduce size charts to your WooCommerce store, you’ll need a plugin that is both reliable and compatible with your current setup. Begin by selecting a size chart plugin tailored to your needs—whether it’s for simple tabular charts or something more complex.
Step 1: Browse the WooCommerce extension store or other marketplaces to find a size chart plugin that fits your requirements.
Step 2: Once you’ve chosen a plugin, click Install and then Activate it within your WordPress dashboard. In this example, we will be using the Product Size Charts Plugin for WooCommerce.
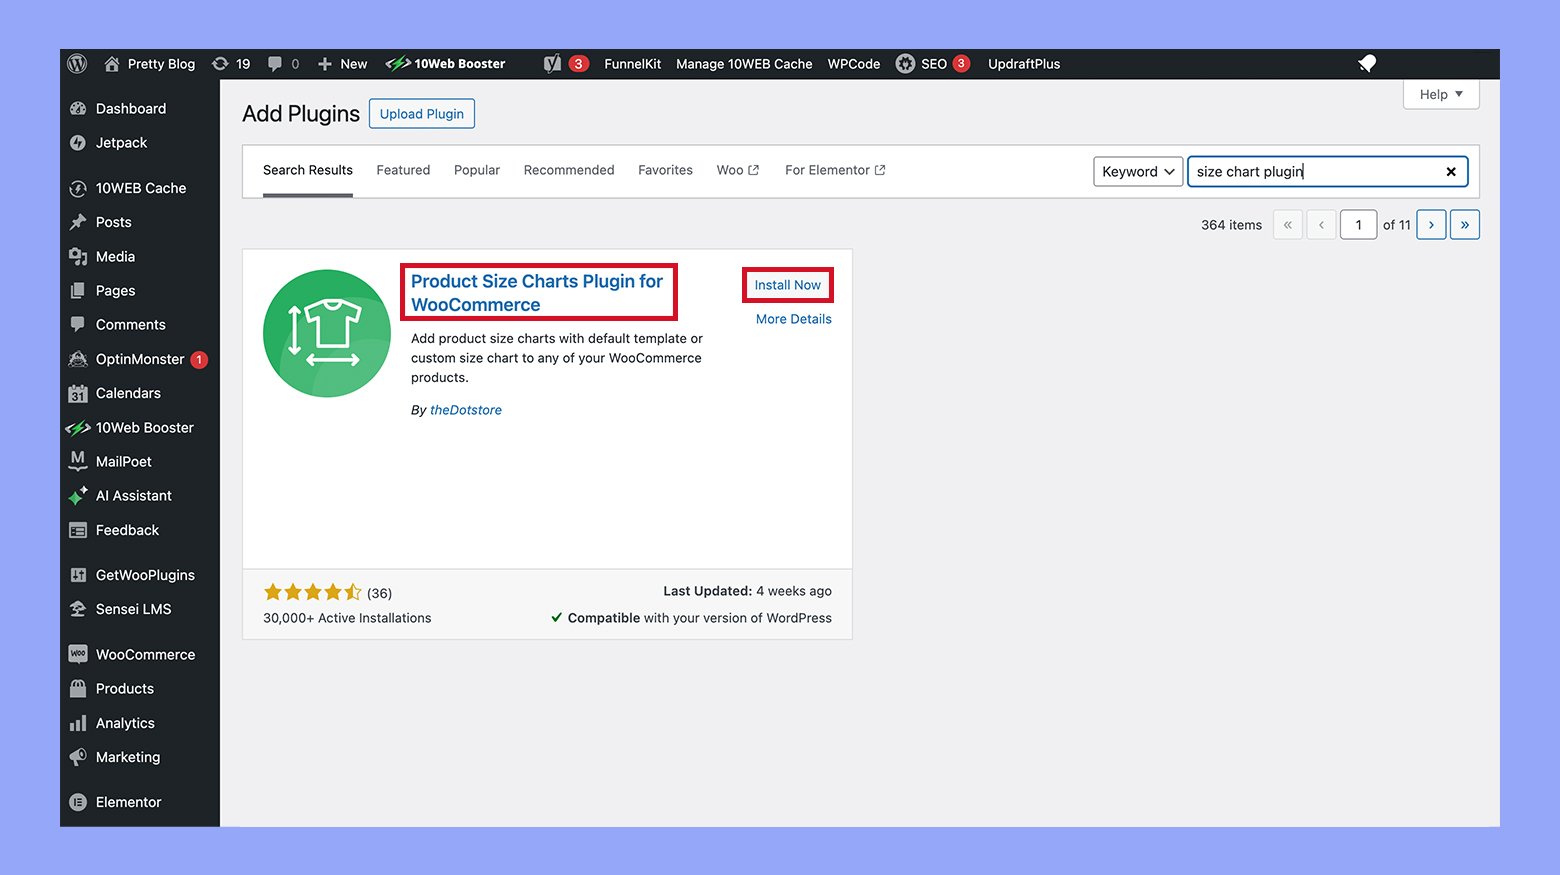
You should now see the plugin listed in your Active plugins list and can begin configuring your size charts for products. Remember to check if there are any additional setup requirements after activation to ensure the plugin functions correctly.
Step 2: Configuring size chart settings
When setting up size charts in WooCommerce, you need to configure your settings to ensure that the size charts meet the needs of your store and products. This involves accessing the settings menu and exploring customization options to tailor the design and functionality.
Accessing the settings menu
- To begin, navigate to your WooCommerce dashboard.
- Next, locate and click on the Products tab to expand your options.
- Within that drop-down menu, select Size Charts to enter the size chart section.
- If you have a specific plugin installed, look for its tab, like WooLentor or DotStore Plugins, and then click on Advanced Product Size Charts for WooCommerce to proceed.
Customization options
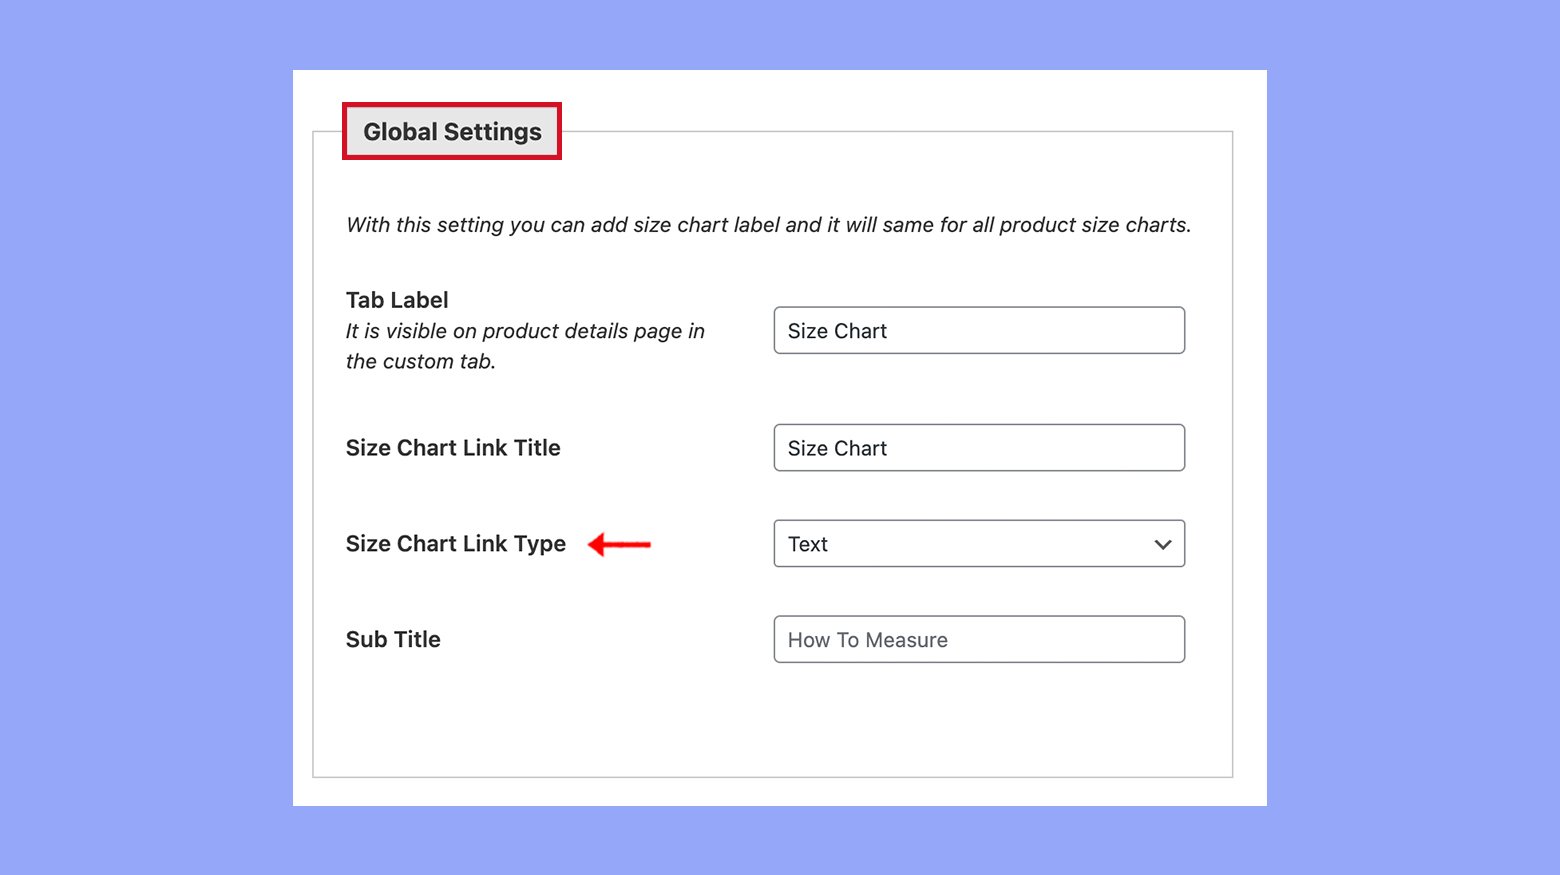
The Settings area allows you to modify the design and presentation of your size charts. Here’s how you can personalize these charts:
- Within the settings, find the section where you can choose between several templates and styles that fit your brand’s aesthetic.
- The Customization options typically allow you to configure aspects such as font sizes, colors, and border styles to create a coherent look with your website.
- Utilize the provided configuration options to decide how the size chart will appear on the product page—whether as a tab, a button, or embedded within the product information.

By accessing the settings menu and utilizing the customization options, you can align the size chart’s appearance and behavior with your online store’s design and user experience.

Looking to sell online?
Create your custom online store in minutes with 10Web AI Ecommerce Website Builder and take your business online.
Step 3: Creating and managing size charts
Before we get started, it’s important to understand that adding a size chart in WooCommerce will not only enhance the shopping experience for your customers by providing them with valuable sizing information, but it also reduces the likelihood of returns due to poor fit.
Designing your size chart
Begin by deciding on what sizes your chart will display and the measurements that correspond to each size. This visual representation can be as simple or detailed as you desire.
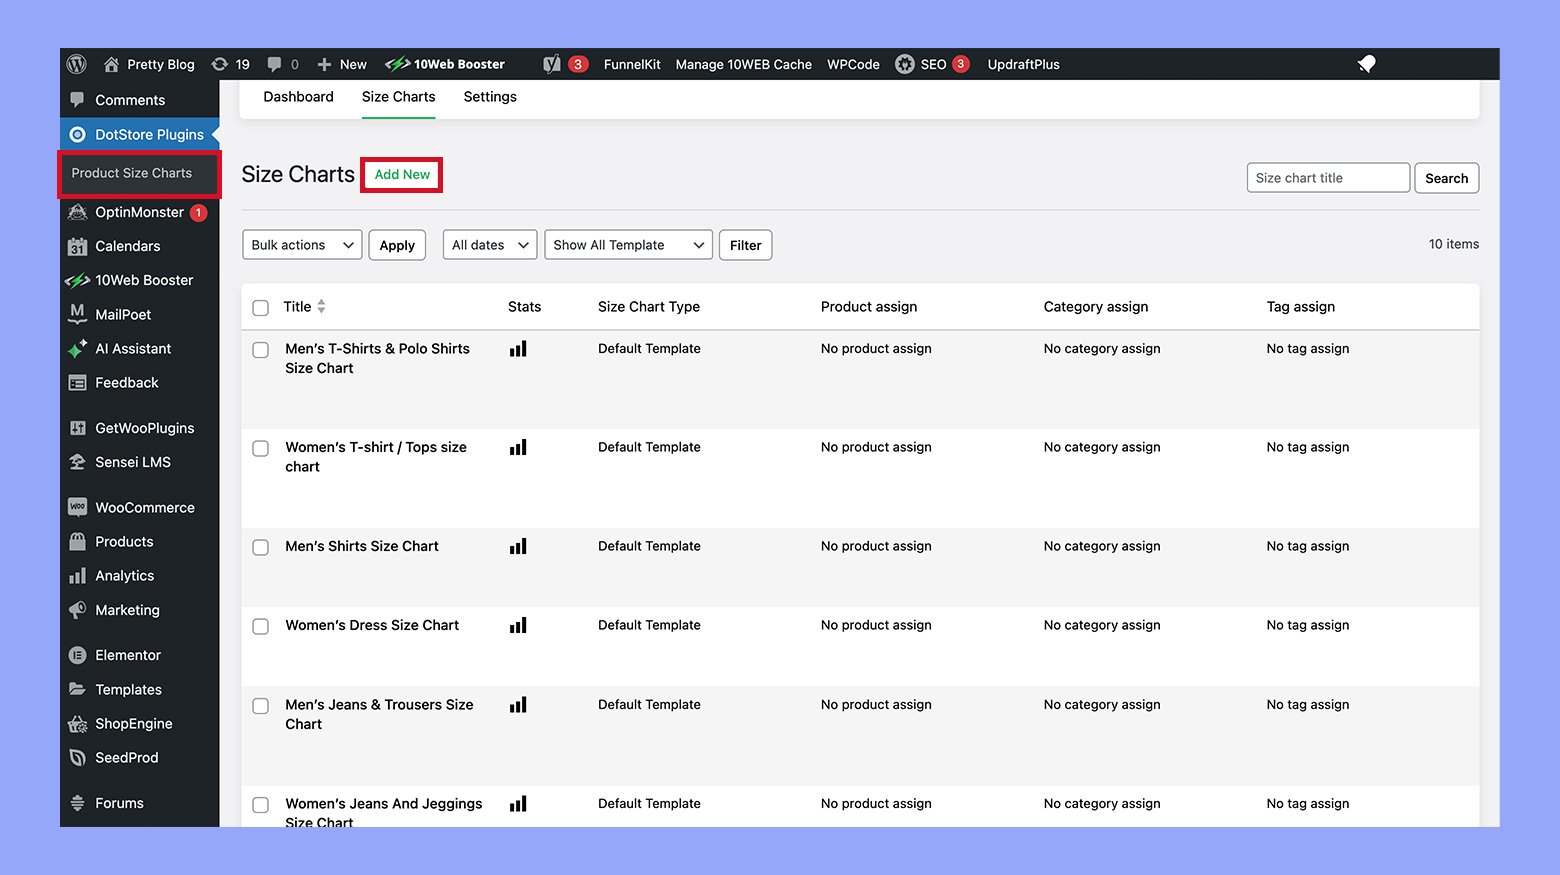
- Navigate to Size Chart in your admin panel and click on Add New.
- Enter a title for easy reference, and if you wish, customize the sizing guide by adding measurement details relevant to your products.
- Preview your size chart to ensure all the information is correct.
Applying good design principles to your size chart makes it user-friendly. Include clear labels and organize measurements in a way that’s easy to read, such as using a chart table.
Custom size charts for different categories
If your store sells different types of products, you’ll want to customize size charts specific to each category of item.
- Within the Size Chart section of your admin panel, first, add new size charts tailored to different product types like “T-shirts” or “Shoes”.
- Specify which categories each size chart applies to, ensuring that customers view the correct chart for each product.
- Use conditional logic to show the appropriate size chart based on the product being viewed.

Creating custom size charts for different product categories can offer a more personalized shopping experience and ensure that customers are viewing the most relevant sizing information.
Step 4: Product page integration
When you integrate a size chart on your product pages, you enhance the shopping experience by providing essential sizing information directly where it’s needed. Let’s explore how to neatly include this feature via a dedicated tab and by using shortcodes.
Embedding size charts with shortcodes
Shortcodes allow you to embed size charts within your product descriptions or additional information sections efficiently:
- Create your size chart by going to the Size Charts tab.
- After saving your size chart, copy the provided shortcode.
- Edit the product where you want to display the size chart.
- Paste the shortcode into the desired area of the product description.
Shortcodes provide a flexible option to embed product size guides anywhere on the product page, ensuring customers have all the details at their fingertips.
Step 5: Enhancing the shopping experience
Your customers’ shopping experience can greatly benefit from an intuitive presentation of size charts. A well-designed size chart helps avoid confusion and increases customer satisfaction.
Previewing size charts in popups
When you Add new post for your product, consider offering a size chart within a popup. Here’s a simple way to achieve this:
- Ensure your Size Charts setting is configured.
- Use a popup plugin to create a trigger within your product page.
- Link your size chart to this trigger, so that when customers click the popup button, the size chart appears seamlessly.
Popups provide customers with immediate access to sizing information without navigating away from the product page, keeping their shopping experience uninterrupted.
Customizing color and style
Having a consistent look and feel on your website enhances brand recognition and trust. Customize your size chart to match your site’s theme:
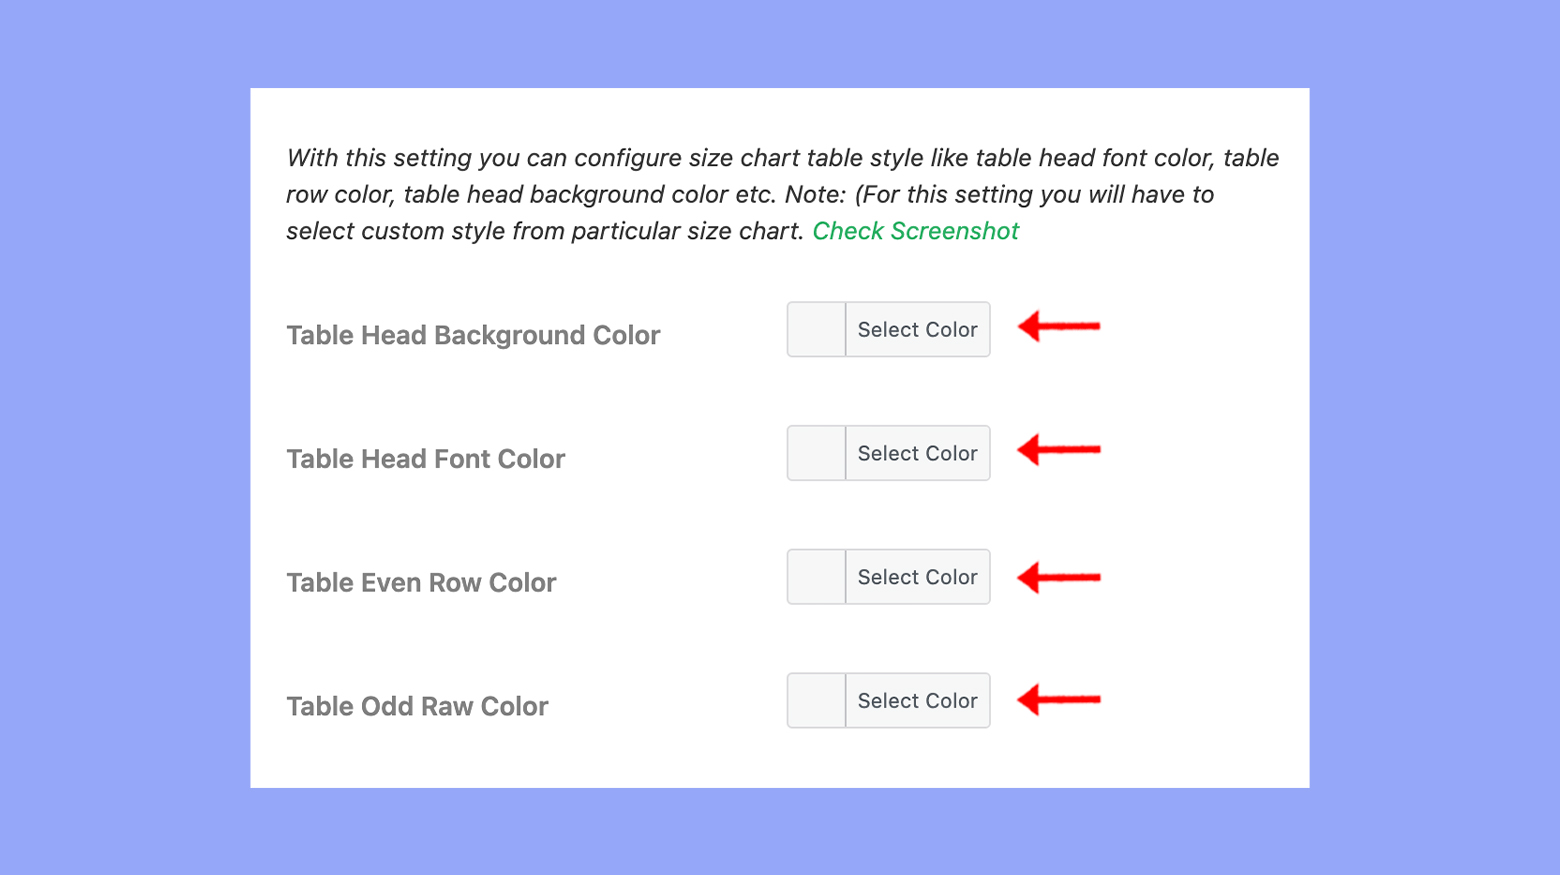
- Access the size chart settings.
- Modify the colors and text color to align with your website’s palette.
- Ensure that your popup’s text color and button color are also in harmony with your site’s design.
By customizing the visual aspects such as color and style, you create a cohesive and appealing shopping experience for your customers.
Additional tips
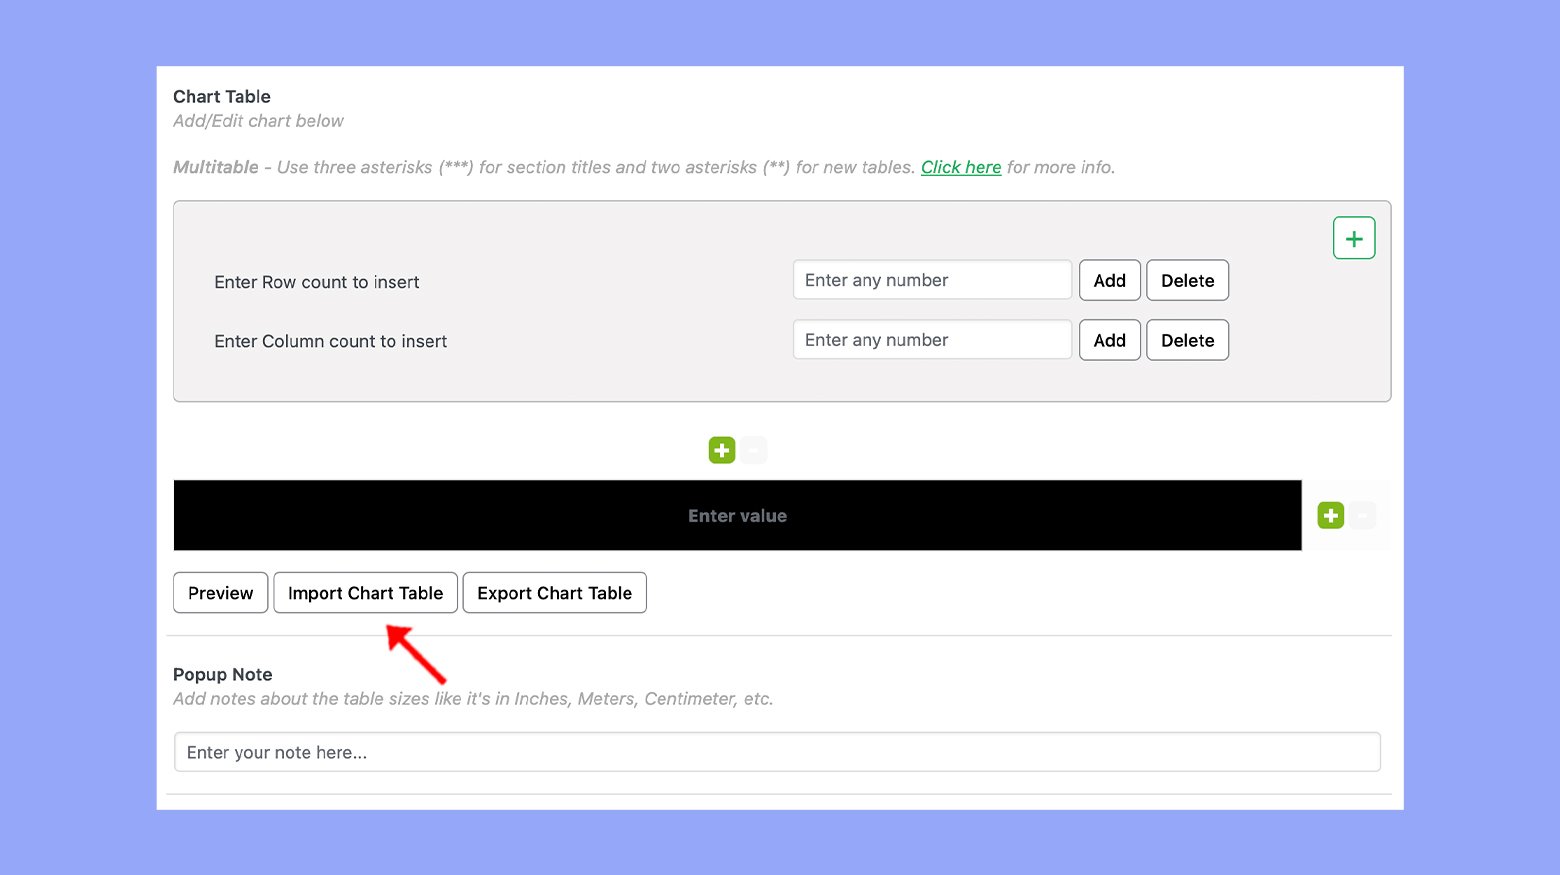
Importing and exporting size charts
If you’re managing an online store with a variety of products, keeping your size charts updated is key. When expanding your product line or transitioning between ecommerce platforms, it becomes essential to efficiently export size charts from your current store and import them into another. This process is streamlined by using CSV files, allowing for a smooth transfer of size chart data between stores.
Using CSV files
CSV files are a versatile format for organizing and transferring data. They make it easy to import and export size charts in your WooCommerce store. To begin with this process:
- Navigate to the Size charts section within your WooCommerce dashboard.
- Select the size charts you wish to export and find the option to Download as CSV.
- Save the CSV file on your computer.
When you’re ready to import size charts to a new or existing WooCommerce store:
- Go to the Size charts section once more.
- Click on the Import button.
- Choose the CSV file from your computer and confirm the upload.
- Once the import is successful, you should see your size charts listed in the backend of your store.
Transferring charts between stores
Transferring size charts between different stores can be straightforward if both use WooCommerce and facilitate data import/export via CSV files.
To move size charts from one store to another:
- Export the size chart data to a CSV file from your current store as shown above.
- Log in to the WooCommerce dashboard of the store you want to transfer the charts to.
- Navigate to Size charts and select the Import option.
- Upload the CSV file and ensure the fields match the store’s existing product data structure.
- Confirm the import and verify that the size charts now appear correctly in the new store.
By using this method, you can keep your product sizes consistent across different ecommerce platforms, maintaining a seamless shopping experience for your customers.
Maintaining the plugin and addressing issues
Maintaining the WooCommerce size chart plugin and addressing issues when they arise is essential for providing an optimal shopping experience for your customers. Here are some solutions to common problems and tips on keeping the plugin updated.
Addressing common size chart issues
If you encounter a sizing issue with your size chart, such as incorrect dimensions being displayed, it’s crucial to troubleshoot effectively to ensure accurate sizing information for your customers:
- Verify whether you have the latest version of the size chart plugin installed. Outdated versions might not function properly with your current WooCommerce setup.
- Check if there is a conflict with another plugin by deactivating other plugins and then reactivating them one by one.
- Look through recent reviews of the plugin to see if other users are experiencing similar problems and how they managed to solve them.
- If you’re using the pro version of a size chart plugin, access premium support for assistance with more complex issues that might need technical expertise.
Updating and upgrading the plugin
Keeping your plugin up to date is important for both functionality and security. Follow these steps to manage updates:
- Go to your WordPress dashboard and select Plugins.
- Find the size chart plugin and check if there’s an Update available notification next to it.
- Click on Update now to install the latest version of the plugin. If it’s a pro version, you might need to manually download updates from the provider’s website.
By keeping the size chart plugin current, you’re ensuring the best performance and minimizing conflicts and issues.
Conclusion
Implementing size charts in your WooCommerce store is a straightforward yet powerful way to improve customer satisfaction and reduce returns. By following this guide, you will understand how to add a size chart in WooCommerce effectively, making it easier for customers to find the perfect fit. This not only enhances the user experience but also builds trust in your brand, encouraging repeat business and positive reviews.
Looking to sell online?
Create your online store in minutes
Create your online store in minutes with 10Web AI Ecommerce Website Builder.