If you’re looking to enhance your online store’s performance and aesthetic, understanding how to change WooCommerce product page layout is key. Tailoring your product pages not only improves user experience but also aligns with your brand’s style and enhances functionality, setting your store apart from the competition.
This guide will walk you through various methods to revamp your product pages, from using custom CSS for more detailed changes to simple plugins like Elementor for visual edits. Whether you’re a beginner or an experienced developer, this article provides the tools and knowledge you need to make impactful modifications.

Looking to sell online?
Create your custom online store in minutes with 10Web AI Ecommerce Website Builder and take your business online.
FAQ
How do I change my WooCommerce product page?
How to customize your WooCommerce product page template visually?
How do I change the CSS in WooCommerce product page?
Understanding WooCommerce product page layout
Before you start altering your WooCommerce product page layout, it’s important to grasp the fundamentals of what you’re working with. WooCommerce templates define the structure of your product pages, and by default, they provide a standardized layout that includes the product image, title, price, description, and an Add to Cart button.
Step 1: Identify the default template
Your journey to customize the WooCommerce product page begins with the default template. This template is a pre-set file that determines how product information is displayed on your site.
Step 2: Understand the sections
A typical WooCommerce product page is divided into several sections:
- Product title: Showcases the name of your item.
- Product images: The visual representation of your product.
- Price: Displays how much the product costs.
- Add to cart: A button for customers to purchase the product.
- Description: Detailed information about the product.
Step 3: Learn about available hooks
WooCommerce uses hooks, which allow you to insert content or change the layout without altering the original template files. Hooks provide a way to integrate your custom code into WooCommerce’s operations, allowing you to modify processes while preserving the ability to update the core software without losing your changes.
Types of Hooks
There are two main types of hooks in WooCommerce (and WordPress): actions and filters.
- Action hooks: These allow you to execute custom code at specific points during the execution of WordPress or WooCommerce. For instance, you might want to display a custom banner or message above the product listing on a category page. An action hook lets you inject this feature at precisely the right moment in the page load process.
- Filter hooks: These allow you to modify data before it is sent to the database or before it is displayed to the user. If you want to alter how product titles are displayed globally, for example, you can use a filter to modify the title before it gets output on the screen.
Step 4: Get to know the customization options
Learning how to change WooCommerce product page layout can be straightforward with the help of custom CSS or a plugin. These tools give you the power to tweak everything from font sizes to color schemes without needing to code.
Step 5: Decide on edits or a new template
You might only want to modify a few aspects of the layout, or you may opt for creating a completely new product page template tailored to your brand.
Remember, when making changes, it’s always best to use a child theme or a custom plugin so updates to WooCommerce won’t overwrite your customizations.
Customizing product page elements
When you want to know how to change WooCommerce product page layout, it’s crucial to focus on the key sections that make up your product page. By customizing these elements, you’ll create a more attractive and unique shopping experience for your customers.
Modifying the product title
Your product title is the first thing customers see, so make sure it’s eye-catching. To change its appearance:
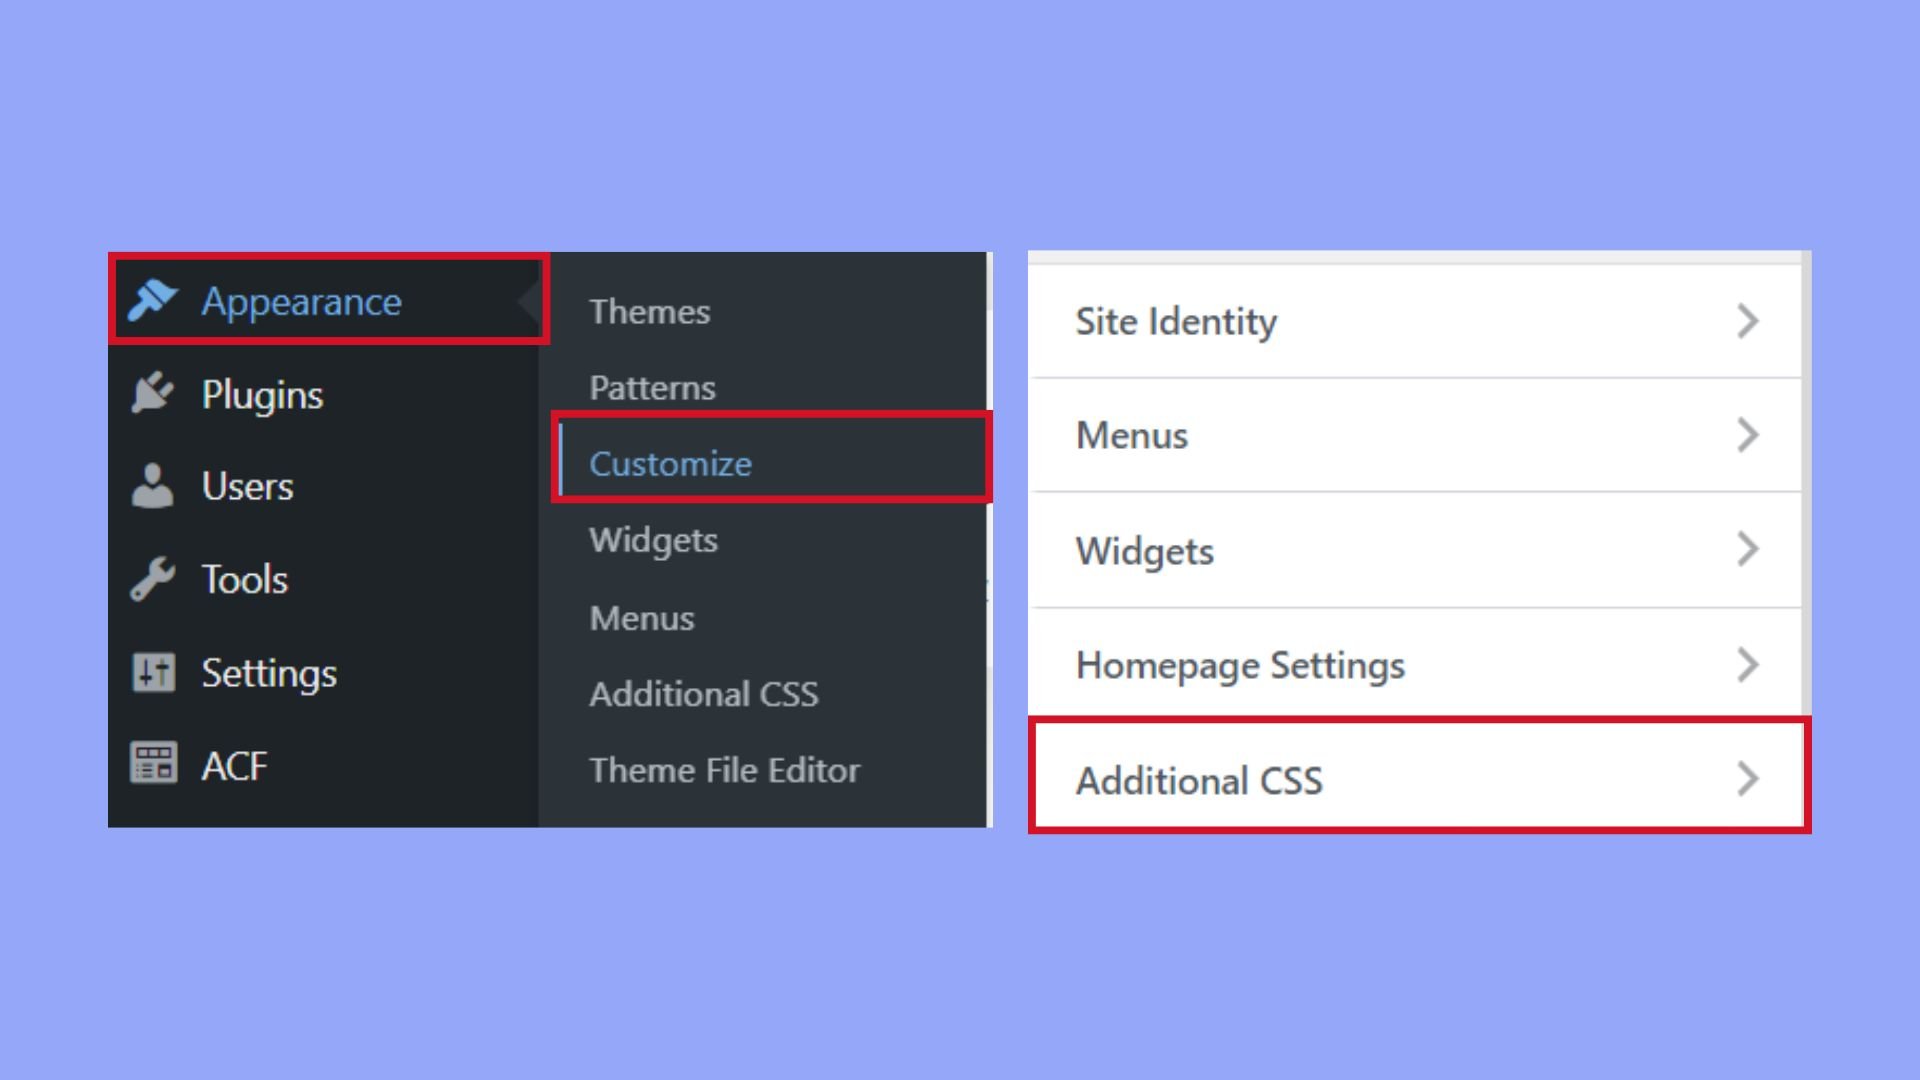
- Find your theme’s CSS section by navigating to Appearance and then Customize.

- Enter the following CSS code to adjust the font size to your preference:
.woocommerce div.product .product_title { font-size: 36px; }Replace “36” with the font size you desire.
- To change the font color, add a line for the
colorattribute with your chosen hex code:.woocommerce div.product .product_title { color: #000000; /* Replace with your desired hex code */ }
Adjusting the product image display
Product images can make or break a sale, so positioning them effectively is key:
- Go to WooCommerce and then Settings within your dashboard.
- Click on Products and find the section for product images like Match images and change the setting to fit your design needs.

Styling product descriptions
The product description needs to be as clear and appealing as possible. For styling:
- Again, navigate to Appearance > Customize.
- Insert the following CSS to change typography settings, like font size or style:
.woocommerce div.product .woocommerce-product-details__short-description {
   font-size: 16px;
   font-style: italic;
}
Adjust the values according to your design preferences.
Custom product tabs enhancement
Product tabs hold important information, so they should be easy to navigate:
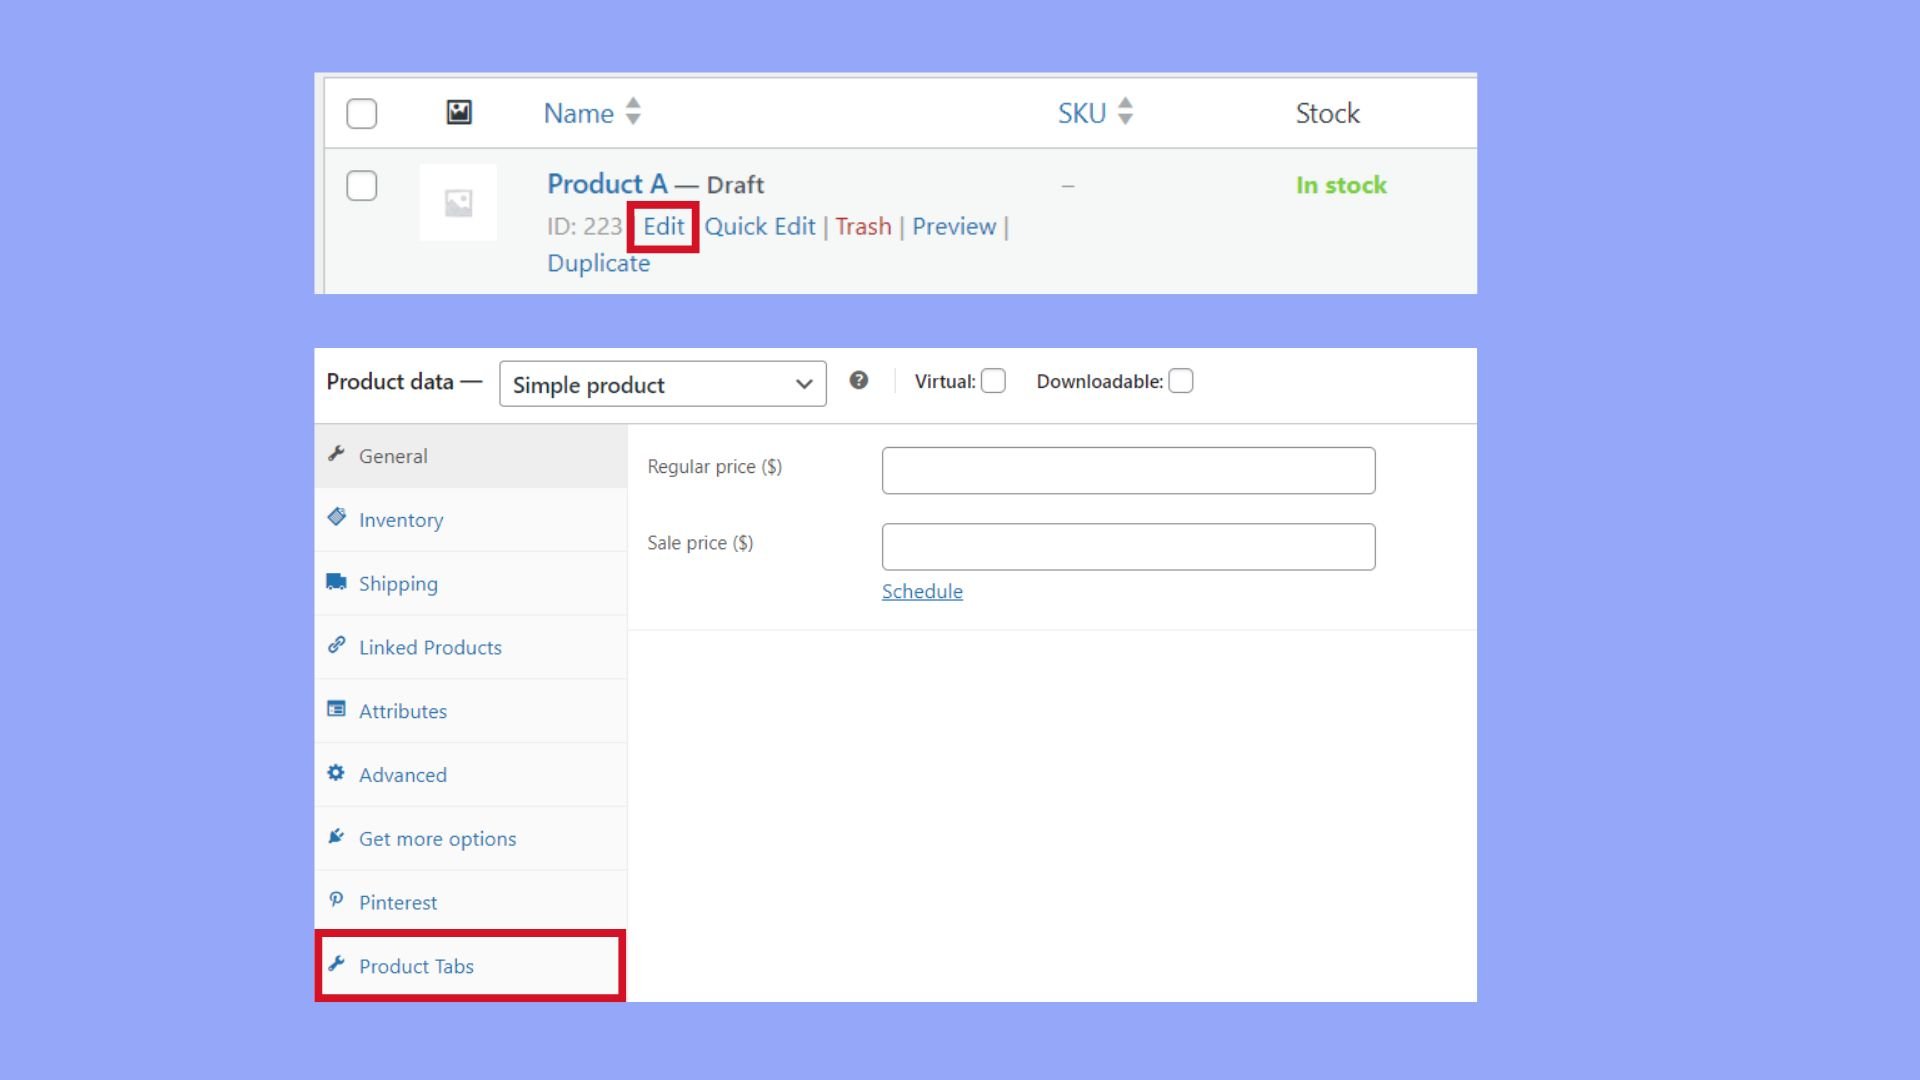
- Access the Edit Product page by going to Products in your dashboard.
- Scroll to the Product data section and click on Custom tabs to add or edit tabs.
- Customize the tab content and ensure the colors and typography align with your site’s theme for consistency.
By following these steps, you’ll enhance your WooCommerce product pages and provide customers with a seamless and enjoyable shopping experience.
Looking to sell online?
Create your custom online store in minutes with 10Web AI Ecommerce Website Builder and take your business online.
Advanced customization techniques
For those who wish to take their WooCommerce product page layout to the next level, in-depth customization can be achieved through various methods. Let’s look at how you can harness the power of hooks, CSS, and theme customizers to truly make your shop stand out.
Using hooks for deeper customization
Hooks are a powerful feature in WordPress that allow you to tap into the core code of WooCommerce and make changes without altering the source files. Follow the steps below to customize your WooCommerce product page using hooks:
- Identify the hook that corresponds to the area you want to customize. WooCommerce provides a plethora of action hooks for adding or moving content and filter hooks for modifying data.
- Add the relevant hook to your theme’s functions.php file. For example,
add_action('woocommerce_before_single_product', 'your_custom_function');. - Define the function that you wish to execute with the hook. This function could customize elements such as the product description or additional information tabs.
Remember to use child themes when adding custom code which ensures your changes aren’t lost during theme updates.
Applying custom CSS and additional CSS
To modify the visual elements of your product pages, CSS is your best friend. You can add your own styles for a more personalized look:
- Navigate to Appearance > Customize > Additional CSS from your WordPress dashboard.
- Enter your CSS code into the provided field. For instance, to change your product title font size:
.woocommerce div.product .product_title { font-size: 36px; }. - Click Publish to save the changes.
This manual customization allows for precise control over the presentation of your products, enabling changes to colors, spacing, and more.
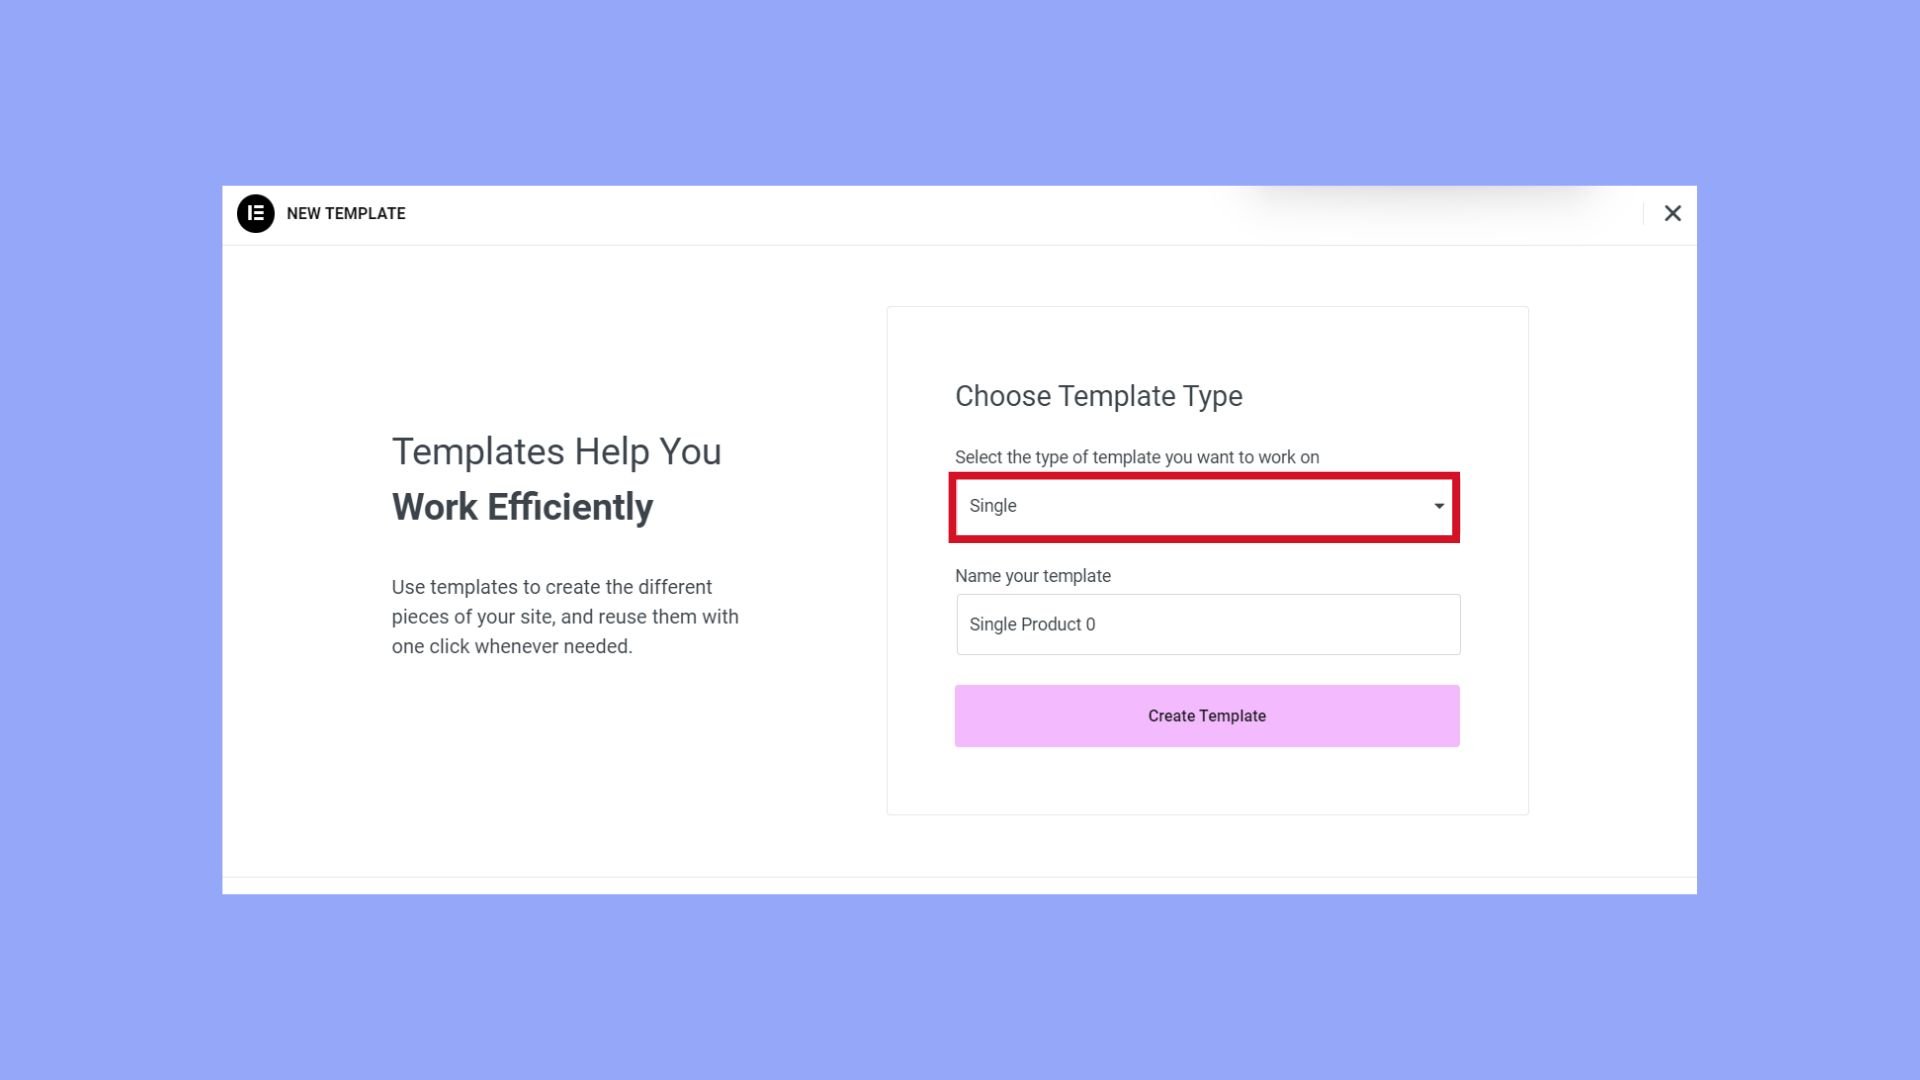
Theme customizer and page builders utilization
To customize without direct coding, page builders like Elementor and Divi offer a user-friendly interface with drag-and-drop functionality:
- Install your chosen page builder plugin and activate it.
- Go to the Templates area and select Theme Builder or equivalent.
- Choose the Single or Single Product template to start designing your page layout.
Using these tools, you can add or rearrange elements such as image galleries, product descriptions, and related products. This how to change WooCommerce product page layout option provides a balance between the power of manual customization and ease of use.
Learn more on how to edit WooCommerce product page with Elementor by following this guide.
Extending product page features
When enhancing your WooCommerce product page, you can extend its capabilities beyond basic information to engage customers and offer a wider range of options.
Adding product videos or galleries
You can enrich the shopping experience by including product videos or a more dynamic gallery layout, showcasing your products in action.
- Go to your product edit screen in WooCommerce.
- Scroll down to the Product data section.
- Click on the Product gallery box to add additional images or a video.
- To add a gallery layout plugin, you can search for “gallery layout” in the Add New plugin section and select one that fits your needs.
Leveraging widgets and extensions
Widgets and extensions can be strategically placed to provide additional information and enhance the shopping experience on your product page.
- Access the Widgets section under Appearance in your dashboard.
- Look for widgets or extensions that serve your product page needs such as product add-ons, related products, or customer reviews.
- Select the desired widget and drag it to the appropriate widget area of your product page layout.
Creating custom product add-ons
Custom product add-ons allow customers to personalize their purchase, leading to greater satisfaction and potentially higher sales.
- Find a suitable product add-ons plugin and install it.
- Configure the plugin settings according to the types of add-ons you want to offer, such as gift wrapping or a personalized message.
- Make sure to update and preview your product page to see how the add-ons appear to customers.
Incorporating these elements can be a game-changer in how to change WooCommerce product page layout, creating a more appealing and functional shopping environment.
Looking to sell online?
Create your custom online store in minutes with 10Web AI Ecommerce Website Builder and take your business online.
Improving shop functionality
When customizing your WooCommerce product page layout, enhancing the functionality of your shop can lead directly to increased sales and better user experiences. Focus on streamlining the shopping process, leveraging customer feedback, and displaying product relationships strategically.
Streamline the add to cart process
Step 1: Shorten the path to purchase by simplifying the Add to cart process. Ensure your Add to cart button is prominently displayed and easy to find.
Step 2: Reduce load times by optimizing product images and limiting on-page elements that can cause delays.
Step 3: Provide clear feedback to users once an item has been added to the cart, such as changing the color of the Add to cart button or a confirmation message.
Incorporate social proof through reviews
Step 1: Activate and display the reviews and ratings section on your product pages to build trust and assist in the buying decision process.
Step 2: Encourage customers to leave product ratings and reviews by following up via email after a purchase.
Step 3: Highlight top reviews to emphasize the positive feedback, and don’t shy away from responding to negative reviews with solutions.
Enhancing related products visibility
Step 1: Use the built-in WooCommerce features to link related products, upsells, and cross-sells to your main product, increasing the visibility of additional items.
Step 2: Curate the related products carefully to ensure they are contextually relevant, which can boost the perceived value and relevance for your shoppers.
Step 3: Use clear, concise labels for sections such as “Customers also bought” or “You may also like” to draw attention.
By implementing these changes, you’ll be well on your way to knowing how to change WooCommerce product page layout to improve not just aesthetics but practical functionality, making your online store a place where customers want to keep coming back.
Conclusion
Mastering how to change WooCommerce product page layout allows you to elevate your online store by creating a more personalized and efficient shopping experience for your customers. Whether you choose to implement minor tweaks or undertake a complete redesign, these modifications can significantly impact your site’s aesthetics, usability, and ultimately, sales performance. Use this guide as a stepping stone to experiment with different layouts and features, ensuring your WooCommerce store remains dynamic and appealing to your target audience.
Looking to sell online?
Create your online store in minutes
Create your online store in minutes with 10Web AI Ecommerce Website Builder.