Do you want to edit WooCommerce product page with Elementor? You’re in the right place to learn how to edit WooCommerce product page with Elementor. Setting up WooCommerce and Elementor on your WordPress site streamlines the process of creating compelling, customized product pages.
This introduction outlines the essential steps to install both WooCommerce and Elementor, followed by enhancing your site with Elementor Pro for advanced design capabilities. You’ll have a step-by-step approach to configuring your first products, choosing compatible themes, and utilizing Elementor’s powerful templates and widgets for ultimate customization.
Let’s start exploring.
FAQ
How do I edit WooCommerce products page with Elementor?
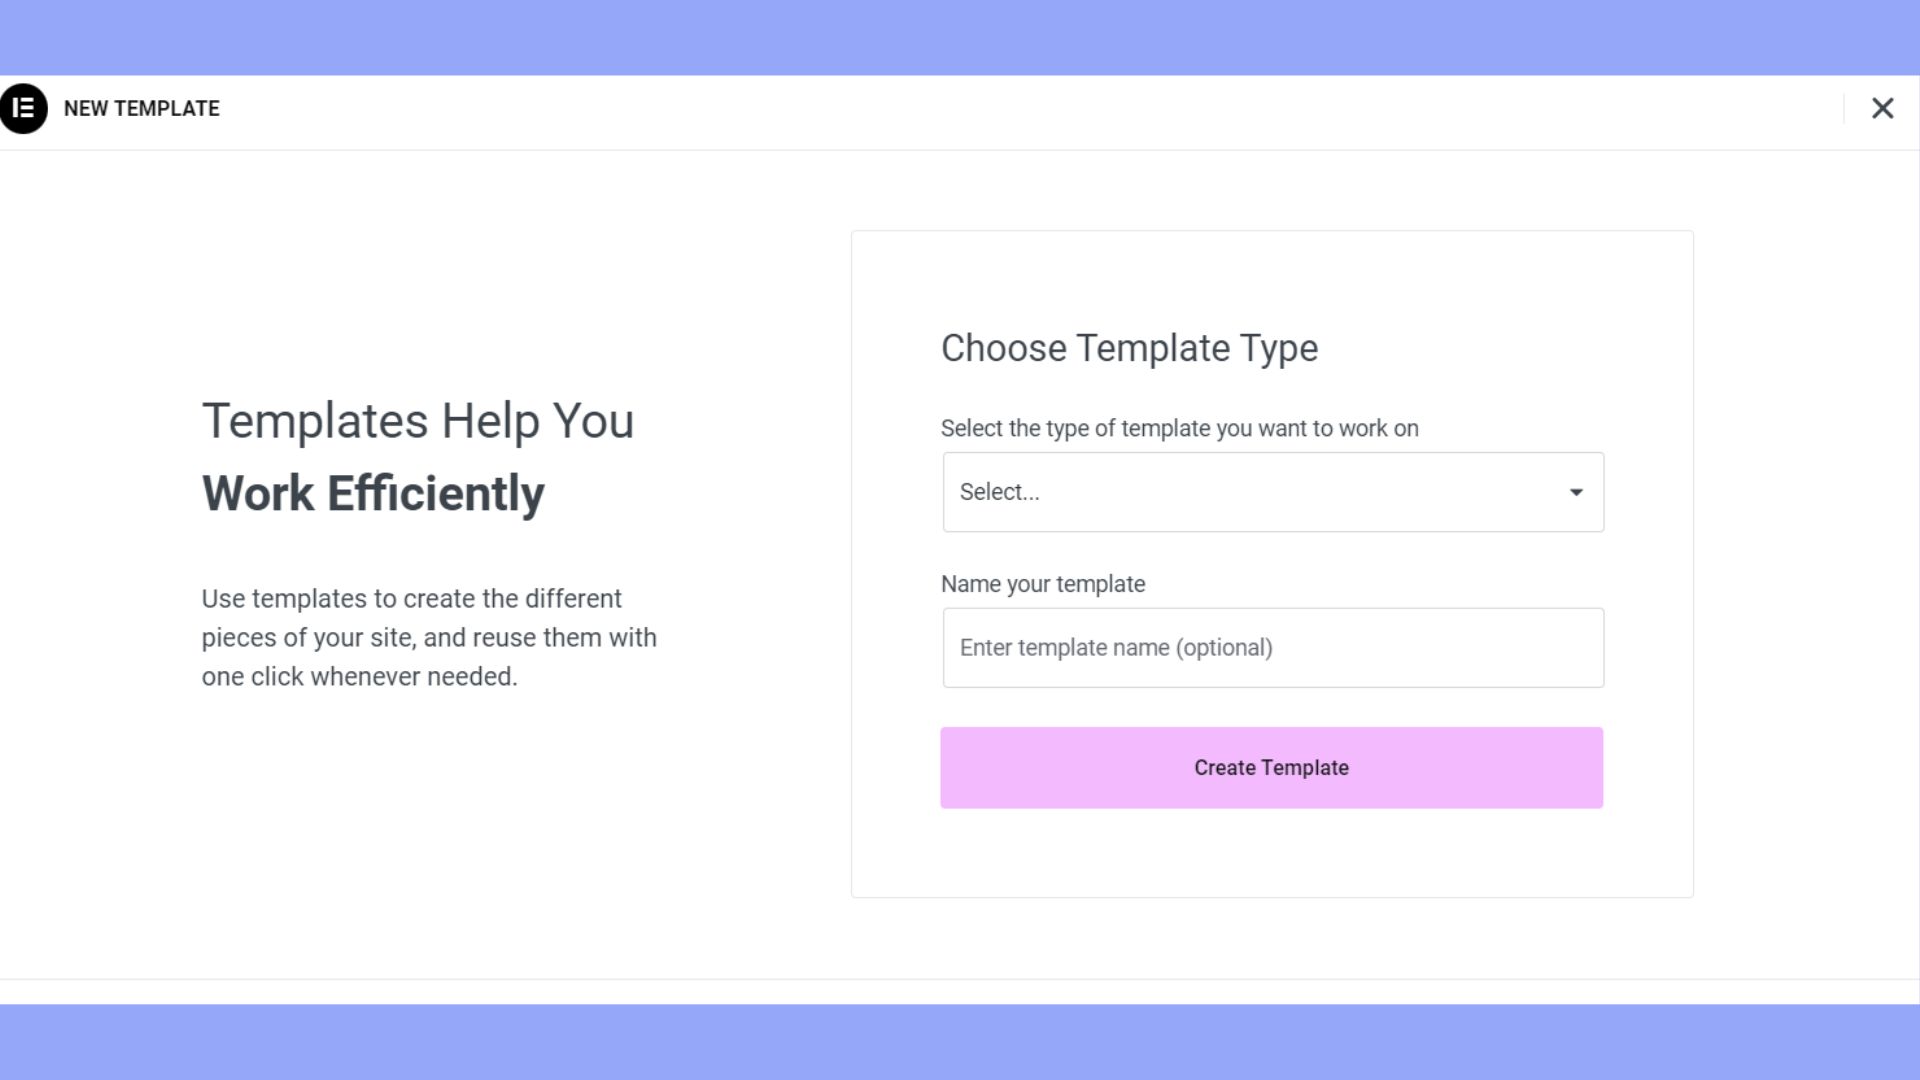
Name your template and click Create Template. Choose a pre-designed product archive template or build one from scratch. Customize your layout using Elementor’s widgets and design options. Save and publish your template, then set the conditions to apply it to all product archive pages.
Why can't I edit my WooCommerce shop page with Elementor?
How do I edit WooCommerce product page in WordPress?
Go to Elementor > Templates > Theme Builder > Add New > Single Product from the template type. Create and customize your product page template using Elementor’s WooCommerce widgets and design tools. Save and apply the template to all single product pages or specify conditions for certain products or categories.
How do I customize WooCommerce checkout page using Elementor?
Go to Elementor > Templates > Theme Builder. Create a new template, select “Single Product” or “Product Archive” depending on where you want your changes to appear. Design your checkout page by dragging and dropping the WooCommerce checkout widgets and customize them as needed. Publish your template and set it to apply to the checkout page under display conditions. Ensure no styling conflicts by reviewing and testing the checkout process.
Using these steps, you can effectively customize and manage WooCommerce pages within your WordPress site using Elementor.
How to edit WooCommerce product page with Elementor
There are two methods you can apply for editing WooCommerce product pages with Elementor:
Setting up a single product page template or creating a single product page from scratch. But first, you should set up the plugins for seamless page edits.
Set up WooCommerce and Elementor
Before you dive into editing your WooCommerce product page with Elementor, make sure you have both WooCommerce and Elementor installed on your WordPress site.
Step 1: Install WooCommerce Plugin
- Go to your WordPress admin dashboard.
- Go to Plugins and select Add New.
- Search for WooCommerce in the search bar.
- Click Install Now and activate it.
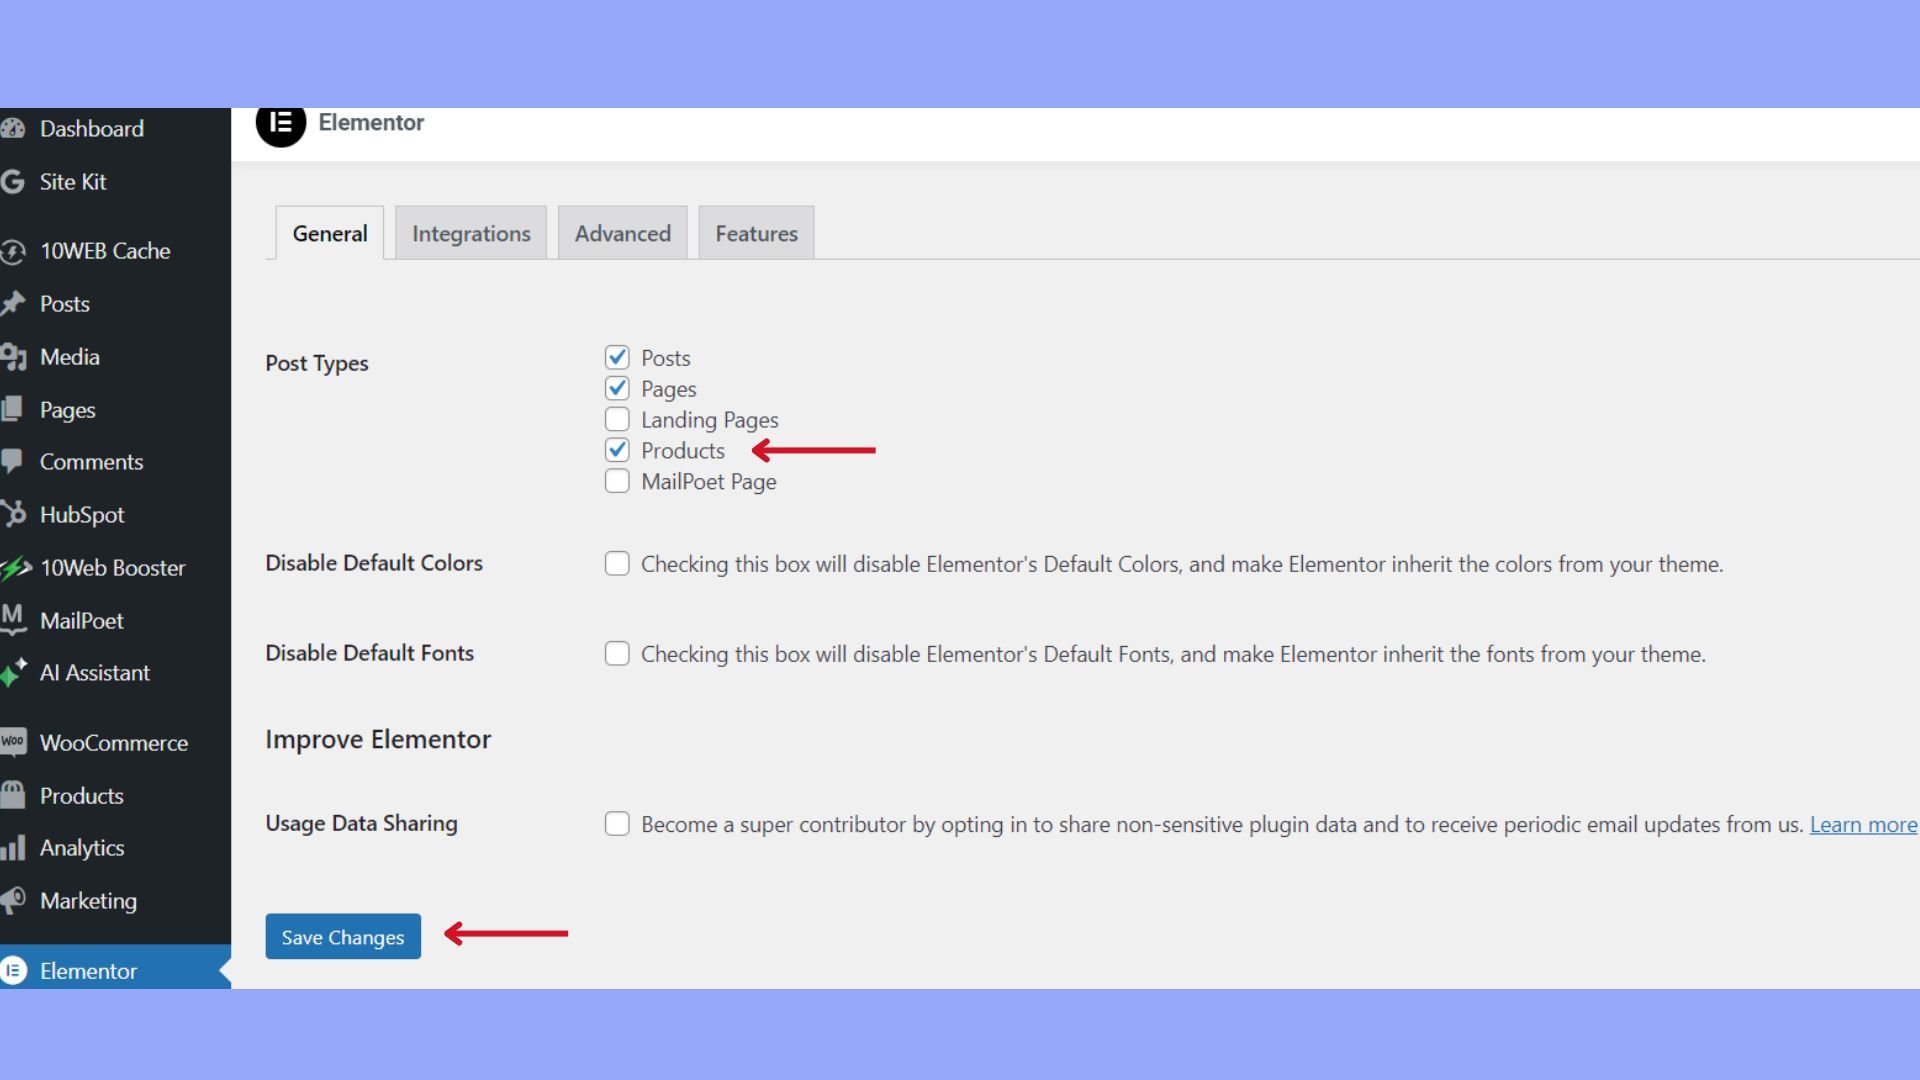
Step 2: Install Elementor
- While still in the Add New plugins screen, search for Elementor.
- Click Install Now next to Elementor Page Builder, then activate it.
- When setting up Elementor, check Products as a post type, that you will be able to edit.

Step 3: Get Elementor Pro (Optional)
- Elementor’s free version is powerful, but to access the full WooCommerce builder and theme builder, you’ll need Elementor Pro.
- You can purchase Elementor Pro from their official website.
- Download the Elementor Pro plugin and upload it to your WordPress via Plugins > Add New > Upload Plugin.
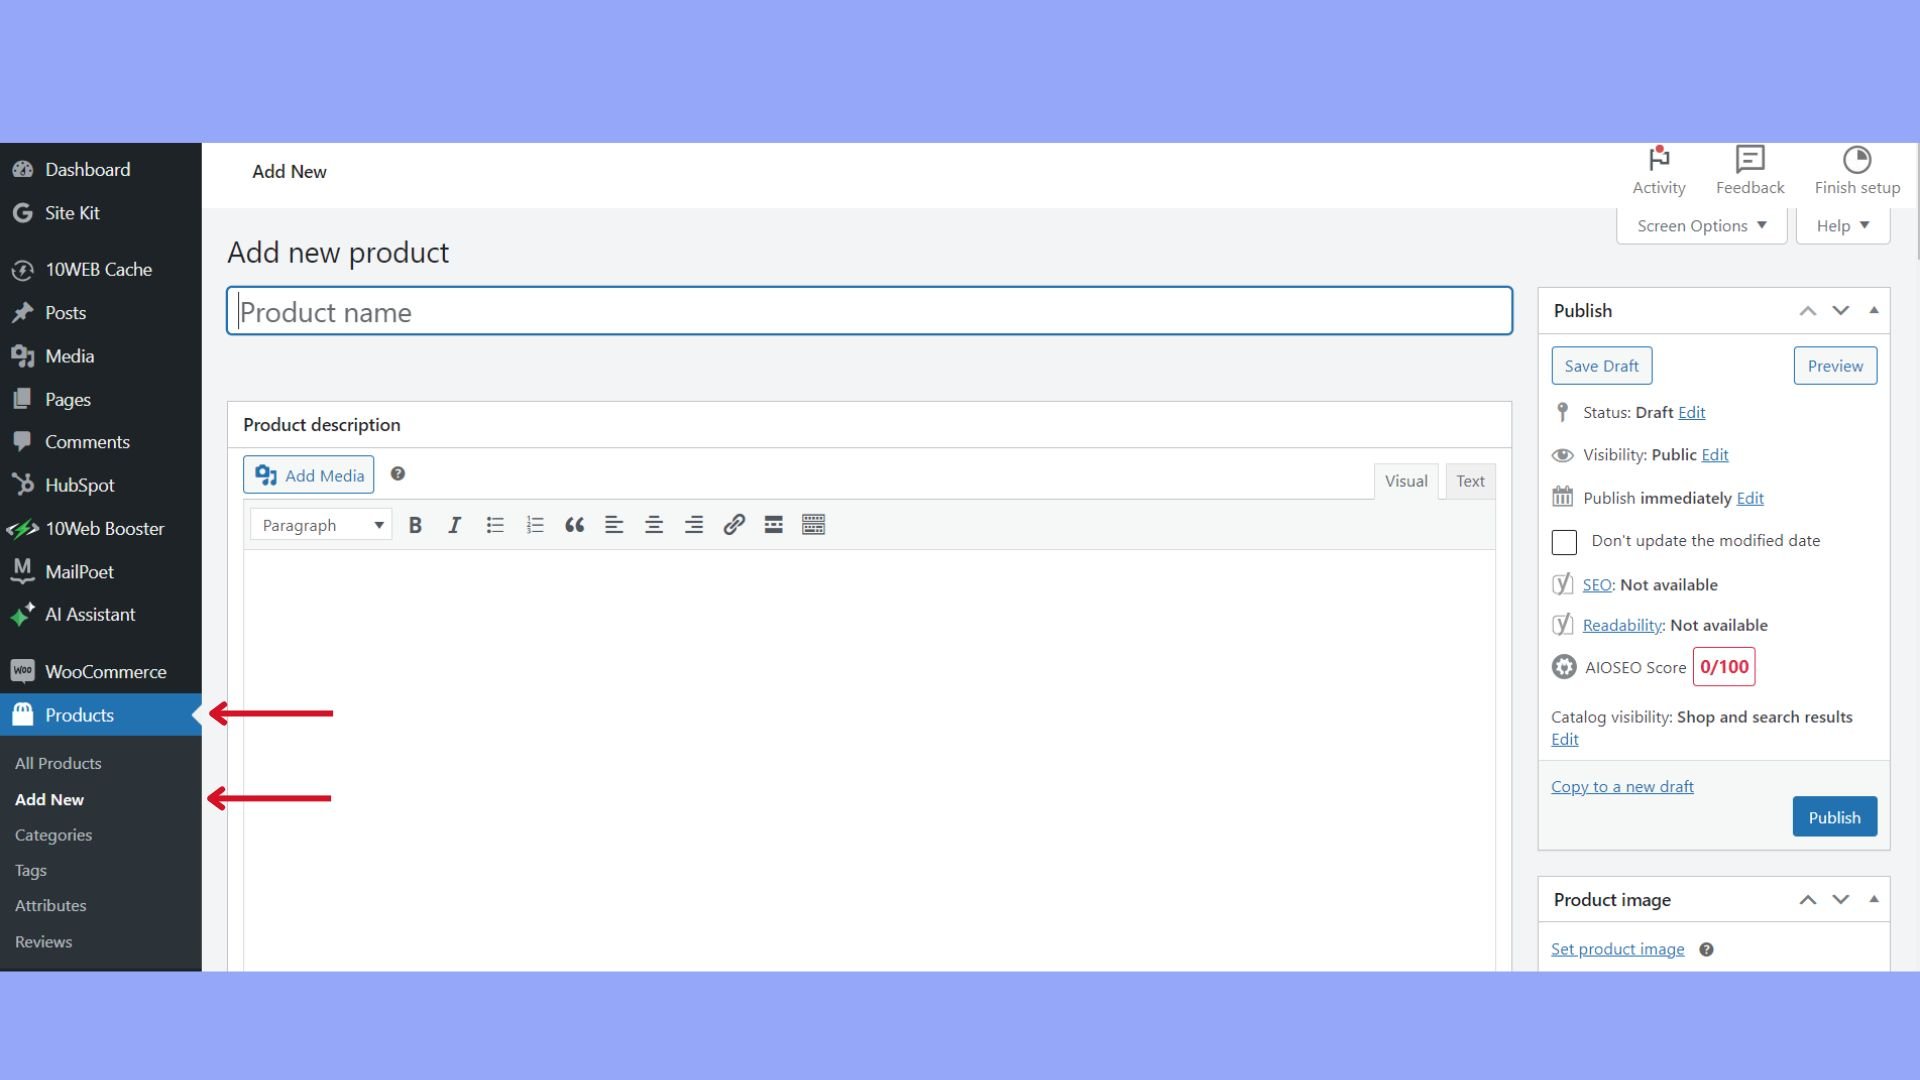
Step 4: Create your first product with WooCommerce
- Go to Products and click Add New.
- Enter your product details here.
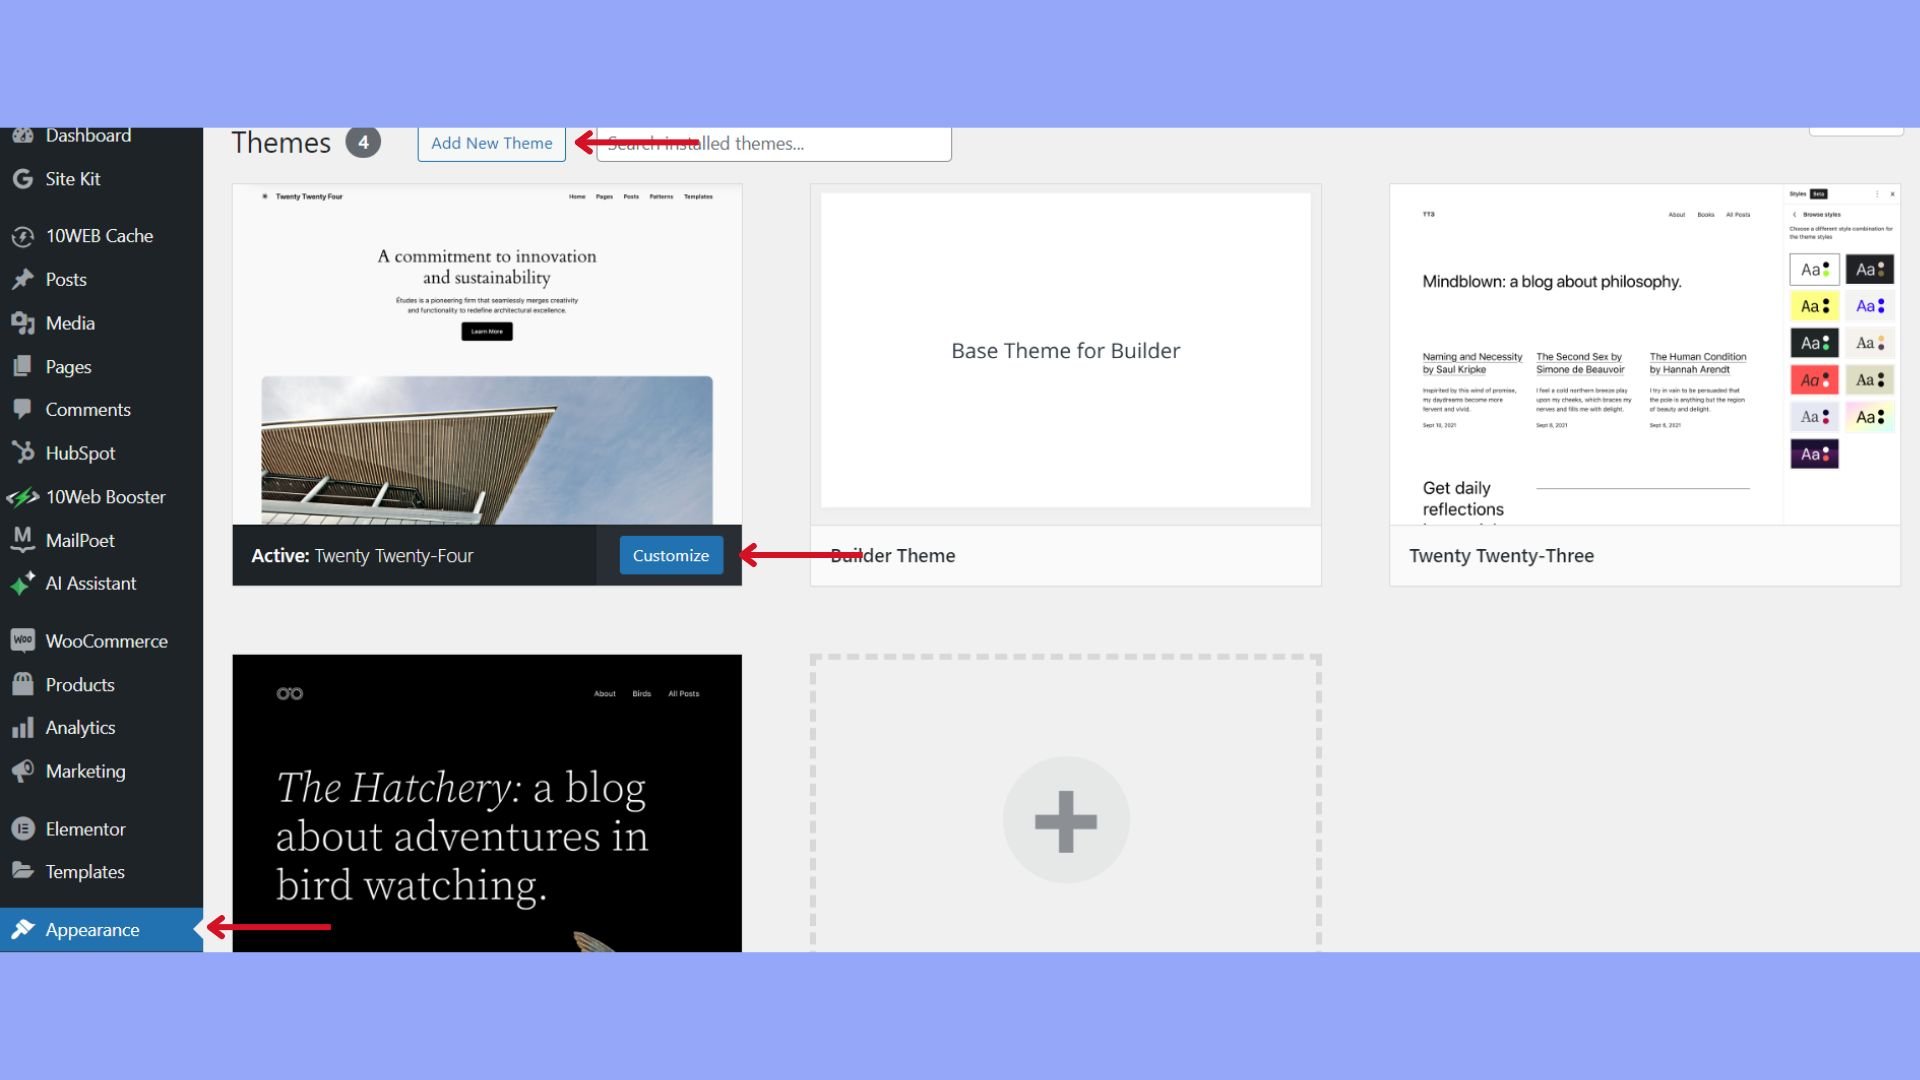
Step 5: Choose a WooCommerce-compatible theme
- While Elementor Pro works with most themes, for best results, choose an Elementor-compatible WooCommerce theme.
- You can browse and install themes under Appearance > Themes > Add New.
Now that you have everything set up, you’re ready to use Elementor’s drag-and-drop editor and templates to design your WooCommerce product pages. Elementor templates provide a great starting point; simply go to Templates > Add New, and select Single Product to begin customizing your product pages with ease.
Create the single product page template
To start designing a single product page on your WooCommerce site with Elementor, follow this step-by-step process:
- Go to Templates > Theme Builder.
- Click Add New and select Single Product from the dropdown menu.
- Enter a name for your template and click Create Template.
Now you’re ready to design your layout. Elementor provides blocks and widgets to help structure the single product page:
- Choose a single product block: You can insert pre-designed blocks for immediate use or opt to build your custom design from scratch.
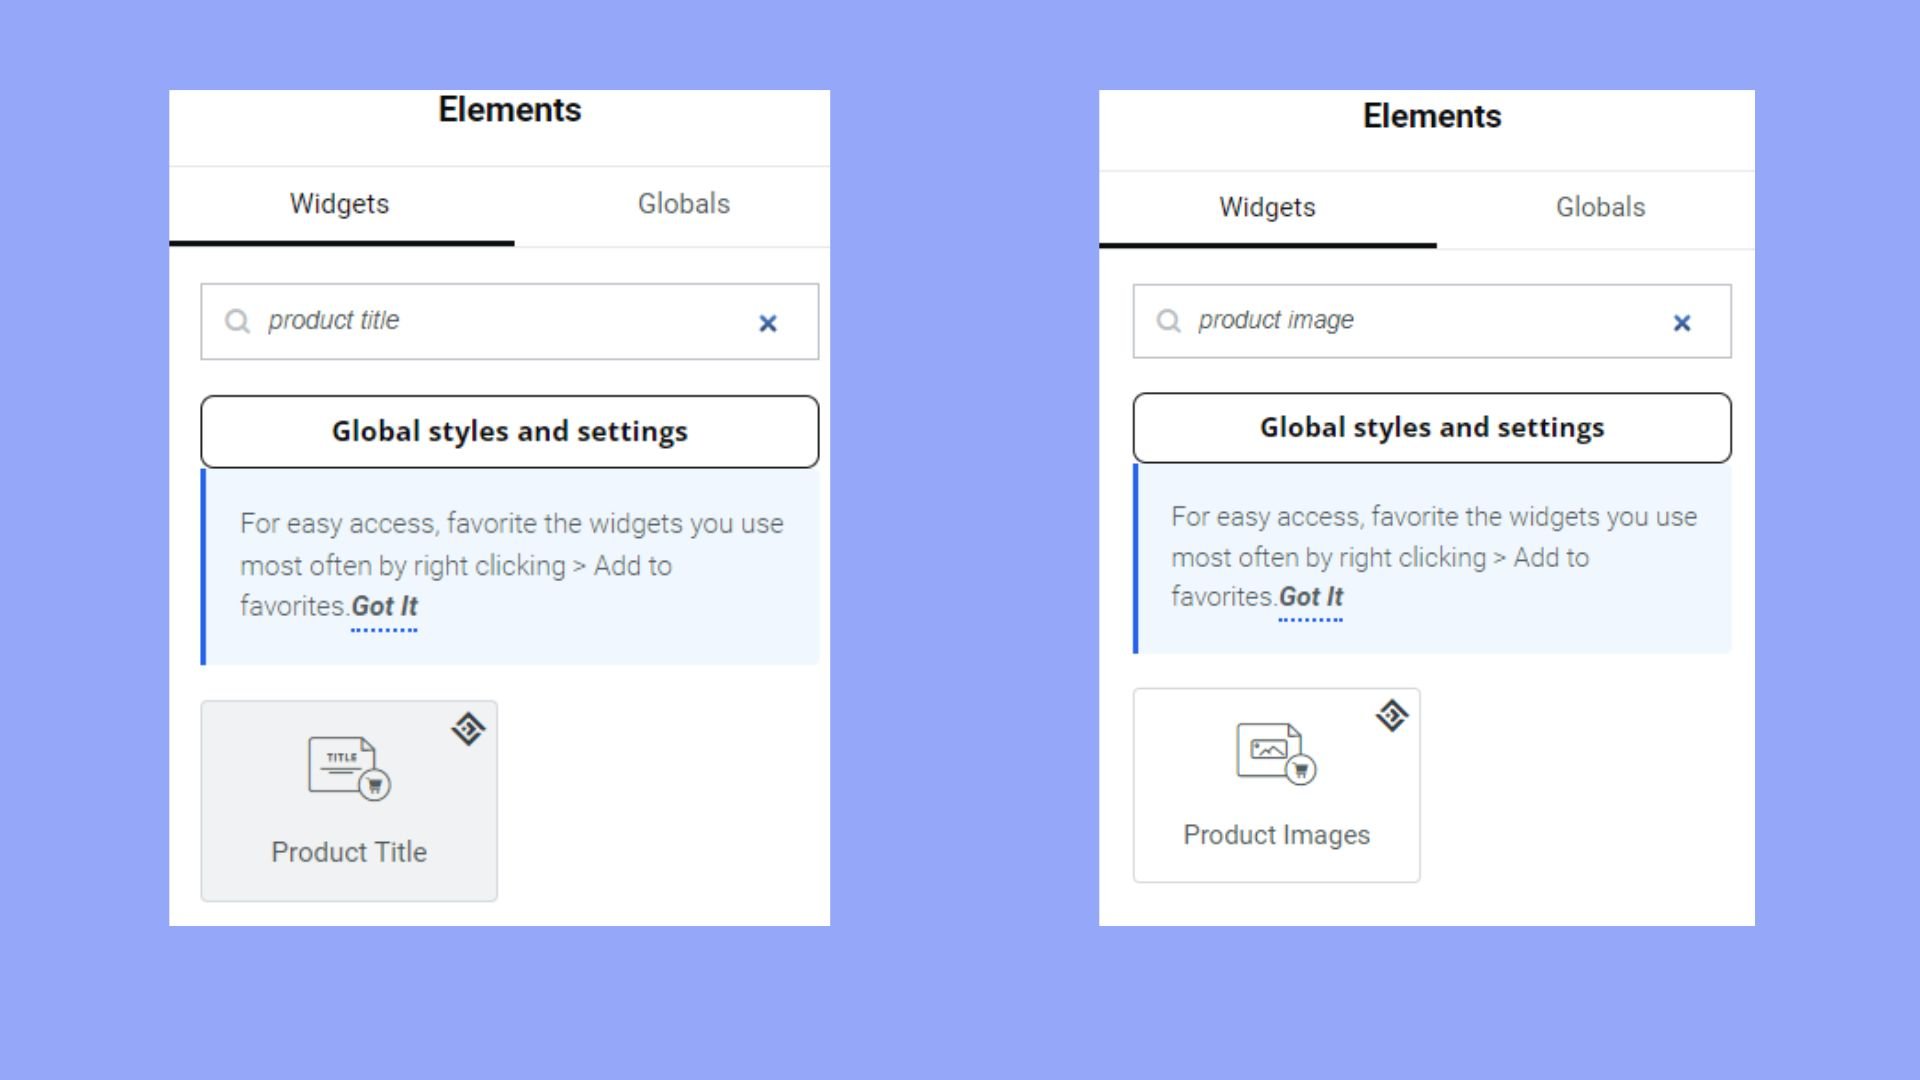
- Customize with widgets: Add a variety of widgets such as Product Title, Product Images, Product Price, Product Description, and more to your page.
For fine-tuning:
- Change the size and display options for product images to fit your layout.
- Adjust the typography for the product description to enhance readability and align with your brand’s style.
- Modify the color scheme of elements like the price and add-to-cart button to match your site’s palette.
Once your design is in place click Publish to take the design live. Set the Conditions to determine where your template will be applied. Ensure to preview your product page and ensure the layout, images, and text components appear as intended on different devices. Take the time to review every detail, such as the clarity of colors and the legibility of your product descriptions to ensure a user-friendly experience.
Create a new single product page
Creating a new single product page for your WooCommerce store using Elementor is a simple process. We will talk it through step by step.
Firstly, ensure you have Elementor Pro installed since you’ll need it to access the theme building functionality. Once installed, navigate to Templates in your WordPress dashboard.
Now, follow these simple steps:
- Click on Add New to start creating a new template.
- In the template type dropdown, select Single Product to specify the type of template you’re creating.
- Enter a name for your template and then click Create Template.
At this point, you have two options:
Choose a pre-designed product page template: Elementor provides several well-designed templates to jumpstart your design. Hover over a template you like and insert it into your workspace.
Build from scratch: If you prefer to create a custom design, start with a blank template. Use Elementor’s drag-and-drop feature to add widgets and design elements, crafting your single product page to match your unique style.
Remember to drag widgets such as the Product Title, Product Images, Product Price, Add to Cart Button, and others from the Elementor panel to your product page. Simply hover over the widget you want to use, then click and drag it onto your page.
Once your design is complete, preview it by clicking on the eye icon. Then click Publish when you’re satisfied with how your product page looks. Lastly, set the conditions to specify where your single product template will be applied.
That’s it! You’ve created a new single product page for your WooCommerce store with Elementor from scratch.
Using templates and pre-designs
When editing your WooCommerce product page with Elementor, you have two primary options to begin with: The Single Product page template or pre-designed product page template each provides a different starting point for customization, depending on your needs.
- The Single Product page template is a blank canvas that allows you to build your product page from the ground up.
- The pre-designed product page template is one of the various templates that Elementor offers. You can select one that aligns with your store’s aesthetic and branding.
Once you’ve chosen your template, it’s time to make it yours:
- Add WooCommerce widgets: These are the building blocks of your product page. Drag and drop elements like product title, images, and add to cart buttons.
- Adjust design details: Change colors, fonts, and layout to match your brand.
- Customize for different products: Use Elementor’s preview feature to see how the template looks with various products.
To ensure your template is used for all products, set the conditions in Elementor to apply it:
- Navigate to Settings > Conditions.
- Choose where and when your product page template will appear, such as across all products or in specific product categories.
Templates are just the starting point. With Elementor’s intuitive interface, you can easily transform a template into a unique product showcase that enhances your online store’s shopping experience.
Using 10Web’s AI Ecommerce Website Builder
When configuring your WooCommerce product pages using Elementor, consider leveraging the advanced capabilities of 10Web’s AI Ecommerce Website Builder. This tool not only supports seamless integration with WooCommerce but also enhances the customization process through AI-driven design options.
The platform can automatically adjust layouts, optimize images, and tailor content to your specific ecommerce needs, streamlining the creation and management of professional, responsive online stores. This integration can significantly boost the efficiency and aesthetics of your product pages.

Looking to sell online?
Create your custom online store in minutes with 10Web AI Ecommerce Website Builder and take your business online.
Add and customize widgets
When you’re ready to edit your WooCommerce product page with Elementor, widgets are your building blocks. With these, you can add various elements like the product title, product images, and the add to cart button, to name a few.
To get started, you’ll create a Single Product template under Elementor > Templates > Theme Builder. Hit the Add New button and select Single Product. Here’s a quick guide to adding and customizing some key WooCommerce widgets:
Product title widget: Drag and drop the product title widget where you want your product’s name displayed. You can adjust the typography, color, and size to make it stand out.
Product images widget: To add visual appeal, use the product images widget. You can set the size and choose how to display the images.
Short description widget: Include essential details using the short description widget, where you can edit text and style as necessary.
Product price widget: Show your product’s price with this widget. Customize the format and appearance to match your site’s design.
Add to cart widget: Essential for sales, this widget includes the add to cart button along with quantity selectors. Adjust the button’s design to make it prominent.
Product rating widget: Display customer ratings with the product rating widget. It can influence buying decisions, so make sure it’s visible.
Product meta widget: The product meta widget offers additional product information like categories and tags. Customize its look to fit into your page layout.
Always preview changes with the Preview button. Customize these widgets to reflect your brand and enhance the shopping experience on your WooCommerce store.
Optimizing product page elements
In WooCommerce, customized product pages can be pivotal in enhancing the buyer’s journey and boosting your store’s performance. Elementor facilitates this through robust widgets and design options that align just right with your vision for an ideal eCommerce storefront.
Include product data tabs and related products
When configuring your WooCommerce product pages, it’s essential to Include Related Products and Product Data Tabs to provide customers with additional options and valuable information. Display upsells and complementary items to increase the chance of additional sales. Tailor the tabs to showcase reviews, specifications, and any other product-related detail that aids in purchasing decisions.
Adjust the shop and cart pages
Revise the Shop and Cart Pages to streamline the shopping process. Ensure your menu cart is easily accessible, and the Add to Cart button is prominent on the shop page. This encourages more interactions leading to the checkout process. Customizing the cart page can involve adding quick links back to the shop or incorporating an option to adjust product quantities.
Enhance the customer shopping experience
Incorporate simple design elements and straightforward navigational tools like breadcrumbs to enrich the overall customer experience. You can also add customer testimonials and real-time product stock levels which build trust and transparency, urging customers to make a purchase.
Personalize the checkout process
To personalize the checkout experience, focus on the Checkout Page design. Include options for guest checkout, a streamlined form, and clear instructions. Simplifying the checkout process can reduce cart abandonment rates and increase conversions.
Improve page responsiveness and interactivity
A responsive design ensures your product pages look great and function properly across devices. Implement buttons and interactive elements that work smoothly in the front end, adjusting them for different screen sizes to maintain page responsiveness.
Ensure effective product depiction
High-quality product images and Product Descriptions are crucial for convincing shoppers. Consider integrating zoom effects and video demonstrations to provide a comprehensive visual understanding. Always aim for clarity and detail so customers can virtually ‘experience’ the product.
Leverage sales and conversion tools
Implementing tools to highlight ongoing sales and potential savings can positively affect your conversion rates. Incorporate dynamic pricing options, discount pop-ups, and limited-time offer banners to urge customers to take immediate action.
Utilize SEO and WooCommerce add-ons
SEO boosts your product page rankings, drawing more traffic to your store. Moreover, employing WooCommerce Add-ons for analytics can enlighten you on customer behavior patterns, helping you make data-driven decisions.
Implement design and theme customizations
Explore the wide array of design customizations available with Elementor to reflect your brand’s uniqueness. Adjust the product archive template and leverage WooCommerce Themes’ flexibility to create a cohesive look for your online store.
Provide support and post-publishing updates
Once your pages are live, it’s necessary to publish updates regularly. Keep your Theme Updates and Plugin Updates current to ensure optimal performance and security. Offer prompt support to address any customer issues or questions.
Refine product discovery and navigation
Lastly, streamline how your customers discover and navigate products. Optimize the product discovery with clear categories, and ensure your WooCommerce Shop Page and breadcrumbs enhance the user journey within your online store.
Conclusion
Editing your WooCommerce product page with Elementor provides a robust and flexible solution. Through the detailed steps outlined, you are equipped to craft compelling, personalized product pages that captivate and engage your customers.
Additionally, by integrating widgets, templates, and design customizations you will provide a tailored shopping experience. In this comprehensive guide, you have learned how to edit WooCommerce product page with Elementor. The guide also suggested an alternative AI solution with 10Web to boost your site’s usability and conversion rates. Now you have all the tools and tips you need for building and editing great WooCommerce pages. Good luck.
Looking to sell online?
Create your online store in minutes
Create your online store in minutes with 10Web AI Ecommerce Website Builder.