Exporting your customer list from WooCommerce is an essential task for any online store owner looking to leverage customer data for business growth. Whether you’re planning targeted marketing campaigns, managing customer relationships, or simply keeping track of your store’s performance, having access to detailed customer information is crucial. By following this guide, you will learn how to export customer list from WooCommerce efficiently and utilize your customer data to drive your business forward.
FAQ
How do I export a customer list from WooCommerce?
How do I export WooCommerce orders to Excel?
Understanding WooCommerce customer export
When you’re running an online store, having access to your customer data is vital for various operational and marketing strategies. WooCommerce allows you to export this information into a commonly used format known as a CSV file. A CSV – Comma-Separated Values – is a type of data file that is widely supported by spreadsheet and database software, making it an ideal format for exporting customer data.
Before you begin to export customers from WooCommerce, it’s important to know what kind of data you can export:
- Personal information: Names, emails, addresses, and phone numbers.
- Order history: Details about past purchases and customer orders.
- Customer metadata: Custom fields and additional information that may be relevant for your store’s operations.
How to export customer list from WooCommerce
Step 1: Preparing to export customers
Method 1: Exporting user(s) from users page
Before you begin the process of exporting your WooCommerce customer data, it’s important to define what specific information you need and understand how user roles affect the data you can access.
Selecting export criteria
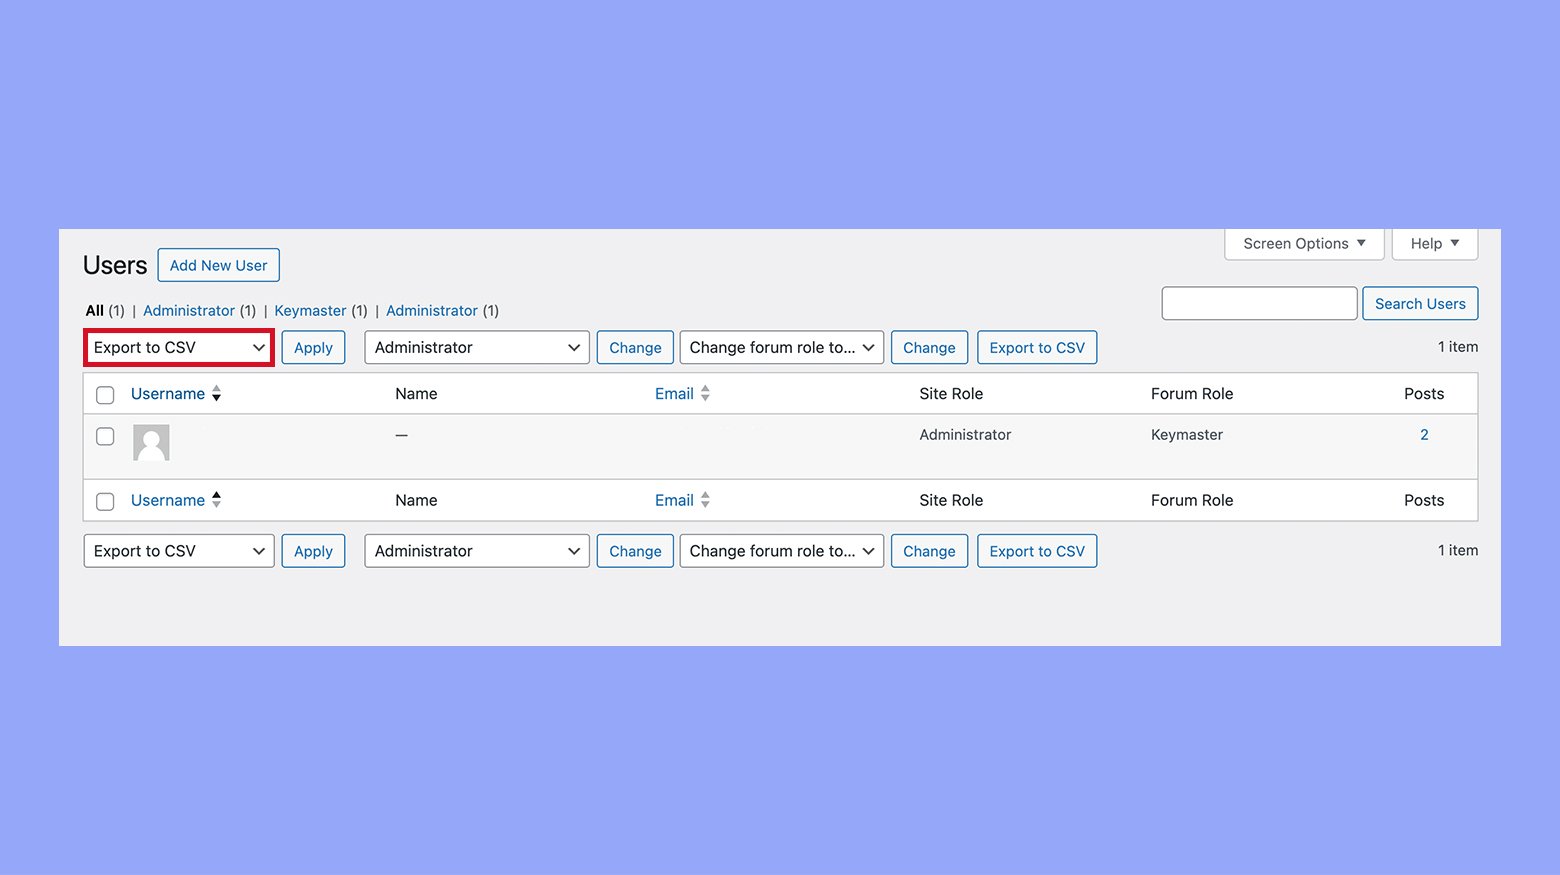
- Log in to your WooCommerce dashboard and navigate to the Users section.
- From Bulk actions identify and click the Export to CSV button to initiate the process.

- Review the selected information to ensure you’re exporting the right data set. The more precise your filters, the more targeted your exported list will be.
Managing user roles
- Under the Users menu, select Roles to see the different roles provided by WooCommerce.
- Determine the roles relevant to the data you wish to export. By default, WooCommerce includes roles like Customer and Shop Manager.
- Ensure you have the necessary permissions to access user data associated with each role.
- If needed, apply additional filters to include or exclude specific roles from your export.
By carefully selecting your export criteria and understanding how different user roles interact with the data, you can efficiently extract a list of your WooCommerce customers tailored to your business needs.
Method 2: Using WooCommerce export tools
WooCommerce provides you with the necessary tools to export your customer data directly from your WordPress dashboard. This seamless integration allows for efficient management of your customer information.
Accessing export features via WordPress dashboard
To get started with exporting your WooCommerce customer data, first log in to your WordPress dashboard. Here’s how you can quickly reach the export tools:
- Navigate to Tools and select Export from your dashboard menu.
- You will see options for different kinds of data you can export.
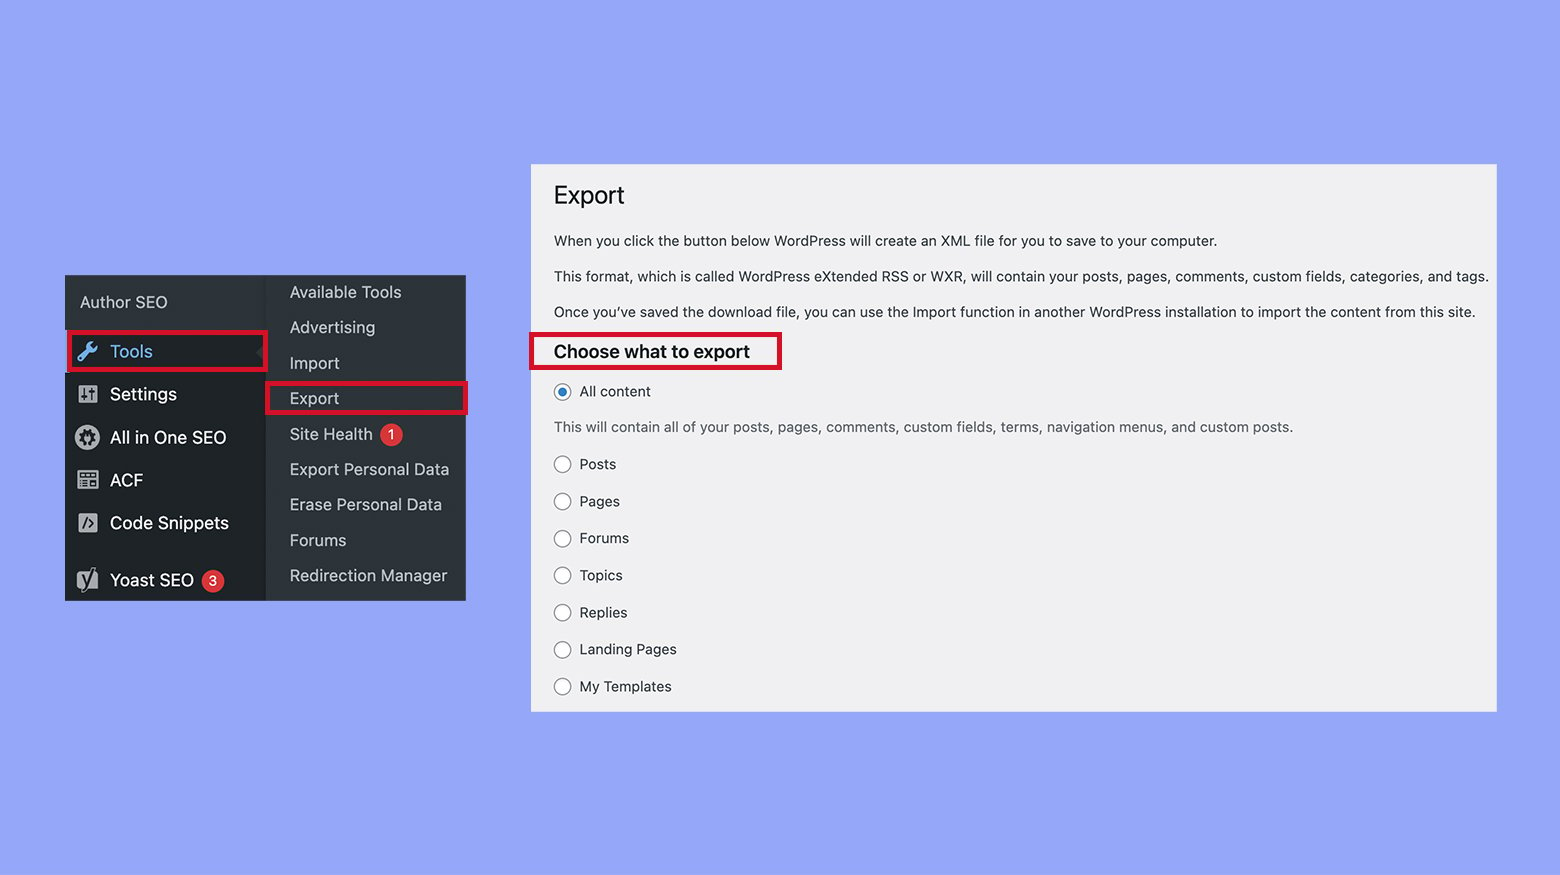
This dashboard access simplifies your workflow by placing these tools just a few clicks away.
Choosing the right export type
When you’ve reached the export section, it’s essential to choose the correct export type that matches your needs:
- Orders: To export transactions and related customer data.
- Emails: For a list of customer email addresses.
- Coupons: If you need to handle promotional details.
Each export type is tailored to provide specific data subsets from your WooCommerce store. Selecting the correct type is crucial for acquiring the precise data you need. Remember, the right export choice contributes significantly to your data management efficiency.
Method 3: Working with plugins for enhanced export
When you need to export your WooCommerce customer list, using dedicated plugins can significantly simplify the process. These tools offer you advanced features and customizations that go beyond the basic export capabilities.
Webtoffee integration
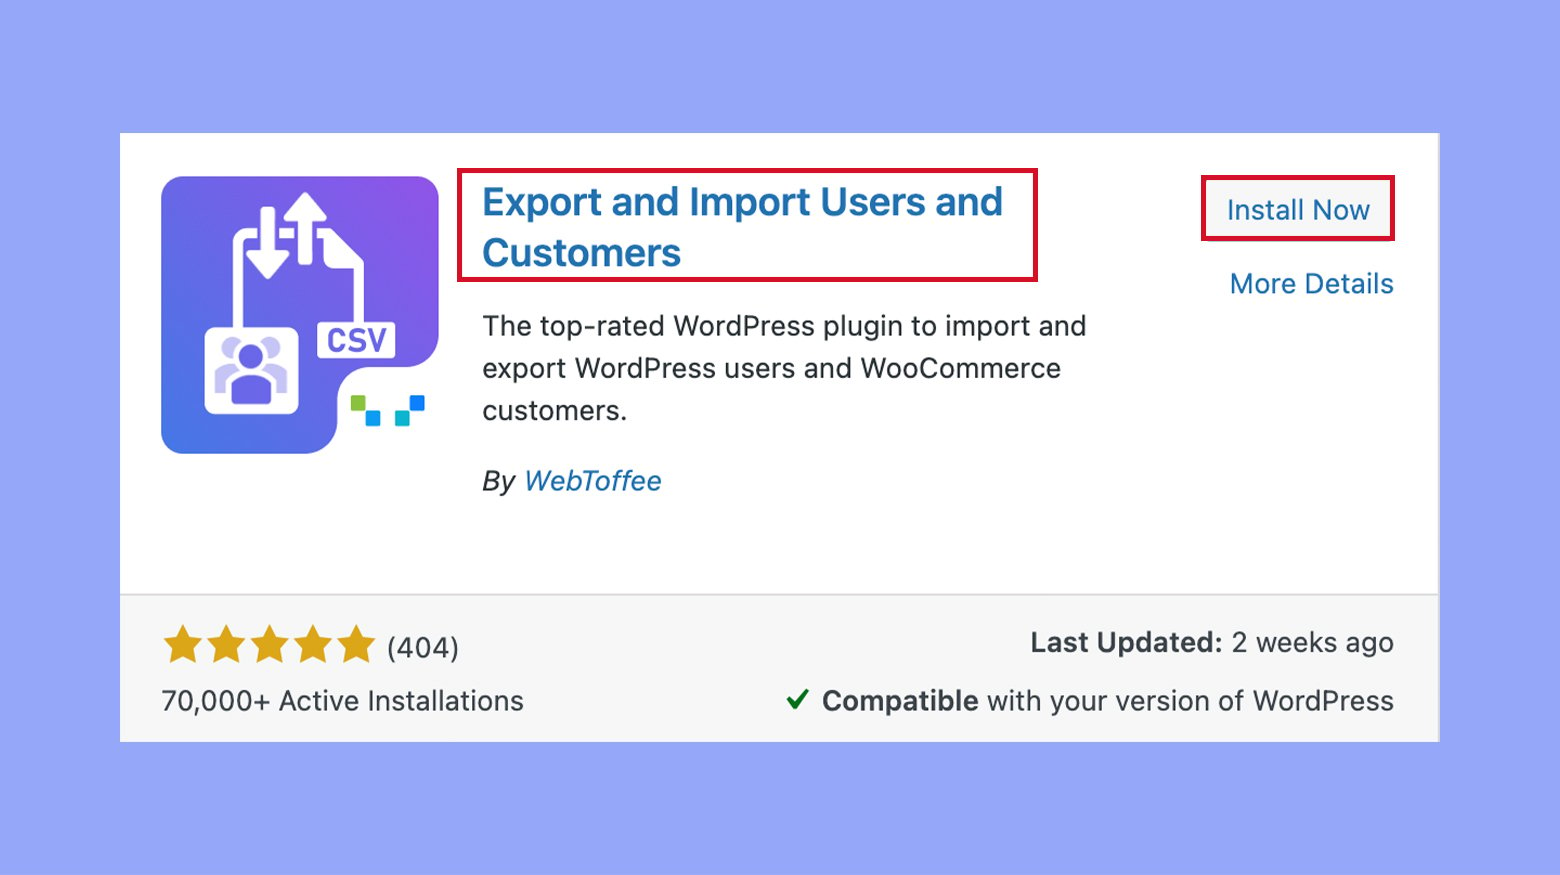
Export and import users and customers by Webtoffee offers a straightforward solution for exporting your customer data. Start by installing the plugin on your WordPress site and activate it.
Here’s how you go about it:
- After activation, navigate to the WebToffee Import Export option on your dashboard.
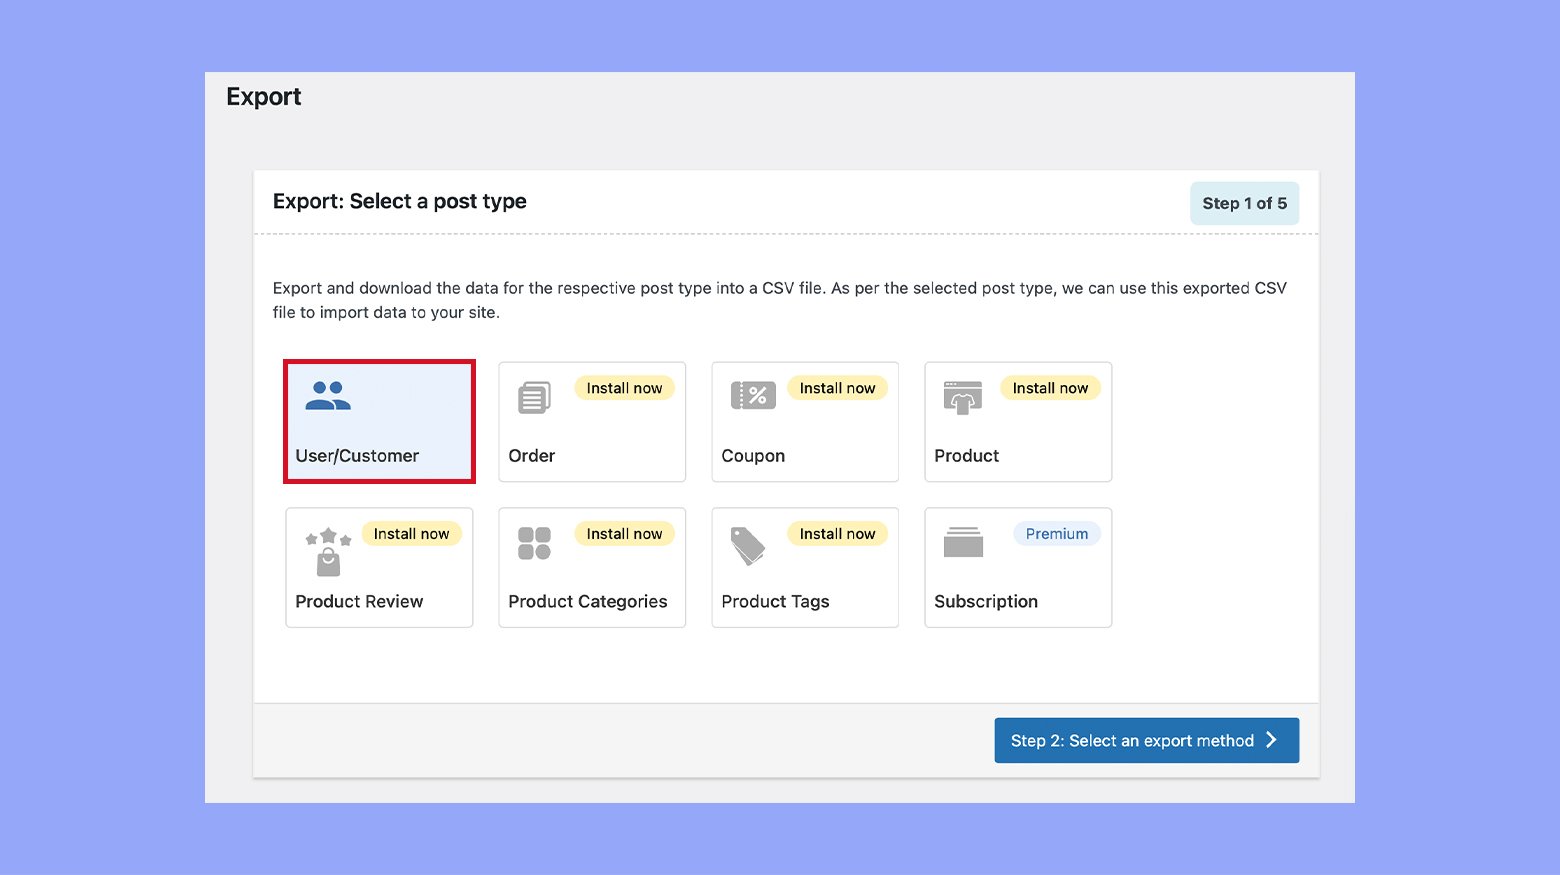
- Select Export Type as ‘user/customer’.
- Choose ‘Customer’ from the user roles selection to specify which data you want to export.
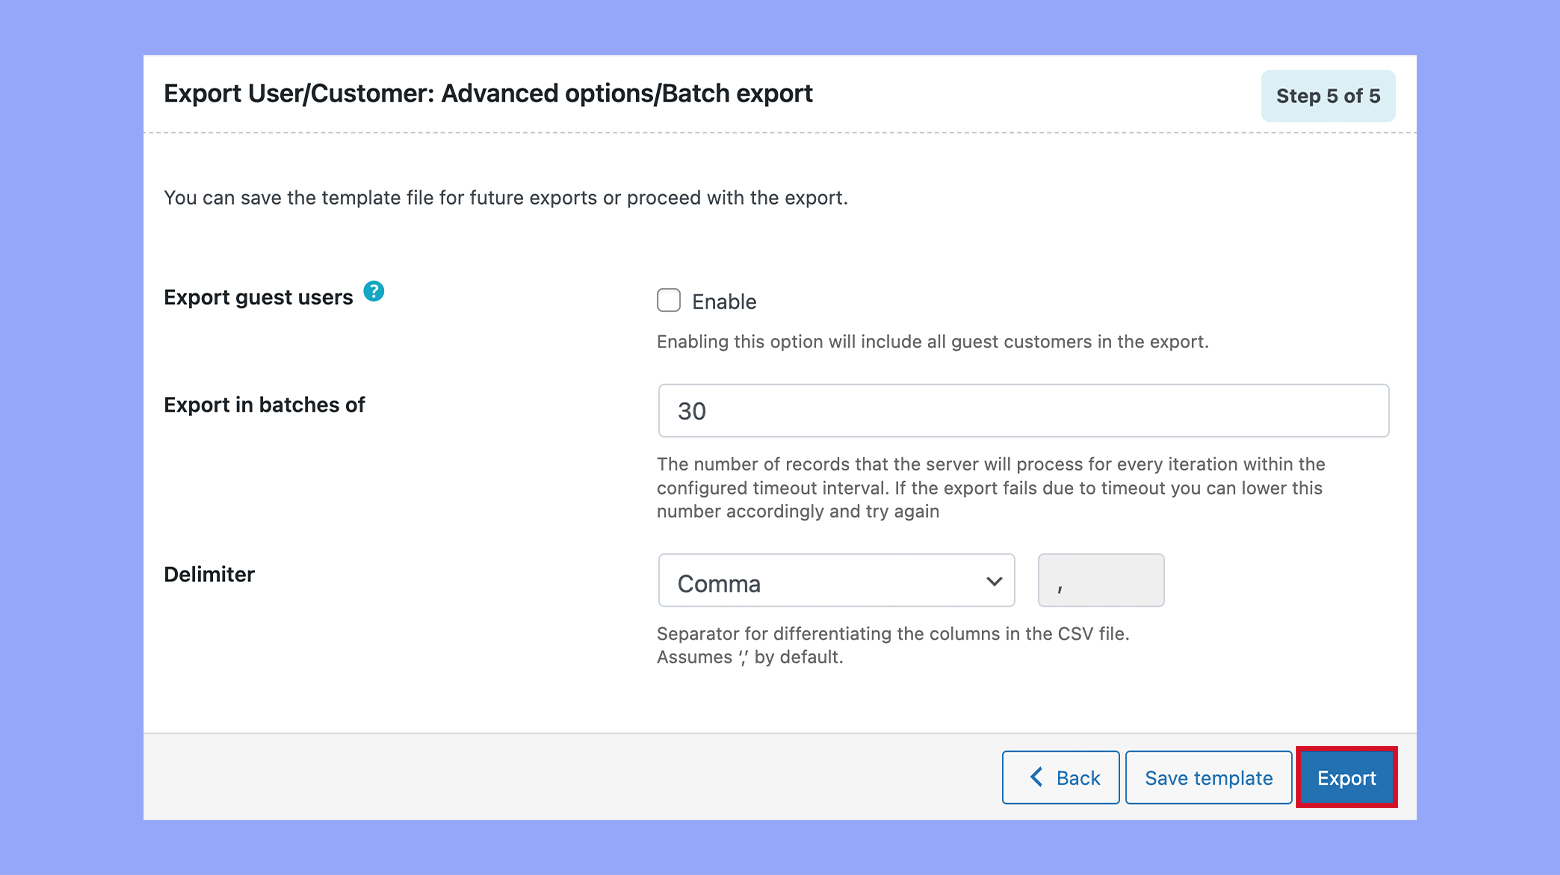
- Proceed with all the steps and click Export to export the data.

Looking to sell online?
Create your custom online store in minutes with 10Web AI Ecommerce Website Builder and take your business online.
Step 2: Customizing export fields
Before diving into the details of customizing your export, it’s important to understand that focusing on the data you need leads to more efficient management and analysis. By customizing fields and applying filters, you ensure that your CSV file is not cluttered with irrelevant data.
Setting up custom fields
When exporting your WooCommerce customer list, you may want to include specific information that’s not available by default. This is where Custom Fields come into play. Let’s get them set up:
- In your WooCommerce dashboard, navigate to the Users tab.
- If your desired fields are not listed, you will need to add them by selecting Add field.
- In the field options, enter the Field name and select the Field type.
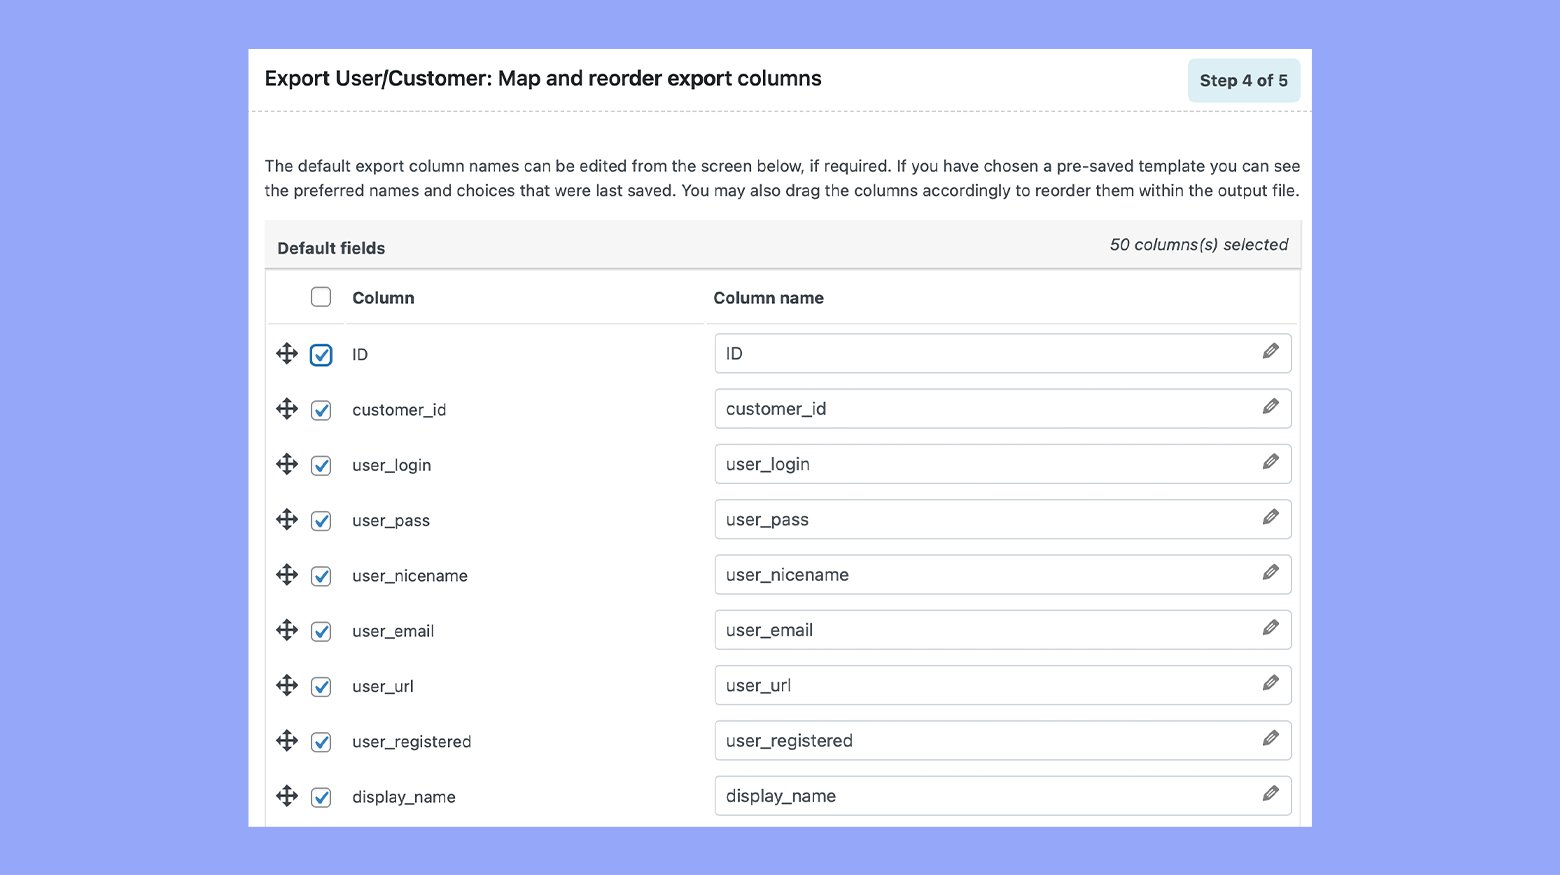
- Once your custom fields are set up, they will appear in the column mapping area, where you can choose them for your export.
Filtering customer orders
Sometimes, you need to export a list of customers based on certain order criteria such as order status or products purchased. Let’s apply some filters to do that:
- In the column mapping area, you’ll find the Filters button—click it to see your filtering options.
- You can filter by various order properties, like Order status, Products ordered, or date ranges.
- After you’ve applied the necessary filters, proceed to export. Only the customer orders that match your filters will be included in the CSV file.
Step 3: Exporting customer data to different formats
Having the ability to export your WooCommerce customer data is useful for analysis, reporting, or integration with other systems. The primary formats for export are CSV and XML, which are widely used and compatible with many tools. For added convenience, you can also convert these files to Excel or Google Sheets for further manipulation and review.
CSV and XML formats
Before you start exporting your customer data to CSV or XML, it’s important to know that these are text-based formats that are excellent for data interchange:
- Navigate to WooCommerce > Export if you’re doing this manually or use an export plugin.
- For manual export, update the output type to either CSV or XML depending on your needs.
- Choose Customers as the export type.
- Select the data fields you wish to export. You might not need all available data, so choose accordingly.
- Click the Export data button to generate your file.
The CSV format is compatible with a wide range of software, including text editors and spreadsheet programs like Excel and Google Sheets. XML files, while also versatile, are specially designed to carry data with support for nested structures, making them ideal for more complex data hierarchies.
Converting to Excel and Google Sheets
Converting your CSV or XML file to Excel or Google Sheets can make data analysis easier due to the robust features of these applications:
- For Excel:
- Open Excel and select File > Open. Then, navigate to the location of your CSV or XML file.
- Excel will prompt you with the Text Import Wizard if you’re opening a CSV file, allowing you to specify how your data is delimited.
- Once imported, you can save it as an Excel file (.xls or .xlsx) for further use.
- For Google Sheets:
- In Google Drive, click on New > File upload and select your exported CSV or XML file.
- Once uploaded, right-click the file and choose to open with Google Sheets.
- With the data in Google Sheets, you’re free to use its collaboration and data manipulation tools. You can also save this sheet in an .xlsx format directly from Google Sheets.
Remember to choose the correct file format during the initial export from WooCommerce to ensure a smooth conversion process to either Excel or Google Sheets.
Post-export actions and best practices
After you’ve successfully exported your customer list from WooCommerce, it’s essential to take the right steps to secure and utilize your data effectively for better customer relationship management and targeted marketing efforts.
Securing exported customer data
The security of your customer’s information is critical. When handling exported data:
- Ensure that your files are saved in a secure location with limited access.
- Use strong passwords to protect the files, and consider encryption for an additional layer of security.
- Regularly update your security software to guard against any potential cyber threats.
Keeping your customer’s data safe helps maintain trust and compliance with data protection regulations.
Using exported data for CRM and marketing
Now that you have your WooCommerce customer data, here’s how you can leverage it:
- Import your customer list into your preferred CRM to track interactions, sales, and support tickets.
- Create segmented marketing campaigns based on purchase history or product interest, utilizing the customer data to personalize the outreach.
- Monitor the effectiveness of your campaigns in driving additional sales or subscriptions and refine your strategy accordingly.
By thoughtfully using your exported customer information, you can enhance the customer experience, foster loyalty, and increase sales opportunities.
Conclusion
Exporting your WooCommerce customer list is a powerful way to manage and utilize your customer data. This process helps improve marketing strategies, streamline customer management, and enhance business operations. We hope this guide helped you to understand how to export customer list from WooCommerce effortlessly. With the right approach, exporting your customer data can significantly contribute to your store’s success and growth.
Looking to sell online?
Create your online store in minutes
Create your online store in minutes with 10Web AI Ecommerce Website Builder.