Changing your WordPress username might seem simple, but the platform does not allow users to simply edit their usernames from the profile area. Whether you want to update your username for security reasons, branding purposes, or just as a change, understanding how to tackle this process is essential for effective website maintenance.
There are a few different methods to change your WordPress username; from technical to non-technical approaches. In this guide, we will explore all the ways there are to change WordPress username.
Reasons to Change WordPress Username
Your WordPress username is an important part of your site’s identity and security. Selecting a unique username can help protect your site against unauthorized access attempts. Whichever method you choose, ensure that you back up your website before making any changes; this way, you can restore your site if any unexpected issue pops up.
Before discussing the steps of how to change WordPress username, let’s understand the reasons that may require a username update.
- To increase security: Your default admin username is a prime target for hackers. By changing it, you reduce the risk of attacks, as attackers must guess both the username and password.
- To reflect a rebrand: If your website undergoes a branding or rebranding process, updating your username ensures consistency across all platforms.
- As a personal preference: Maybe the current username no longer represents you or your business, or it’s simply time for a change.
- For professionalism: A custom username presents a more polished, professional image than a generic, autogenerated one.
- To transfer ownership: If a different individual is taking over the site, updating the username is a necessary step in the handover process.
- For error correction: In the event of a typo or other mistake in the original username, you would need to change it for accuracy.
Simplify WordPress with 10Web
Automate manual work with 10Web Managed WordPress Hosting and 10Web AI Website Builder. Optimize your WordPress website effortlessly.
Before changing WordPress username
Before you start the daunting process of changing your WordPress username, it’s crucial to address all safety measures. This involves creating a secure backup of your site and verifying that you have the necessary user roles and permissions.
Backup your website: It’s of utmost importance to back up your WordPress site before making any changes. A backup ensures that you can restore your site to its previous state if something goes wrong during the username change process. To backup, navigate to your WordPress admin area, then to the backup plugin of your choice and follow the steps to create a full site backup. If you are a 10Web user, you can back up your website right from the 10Web Dashboard.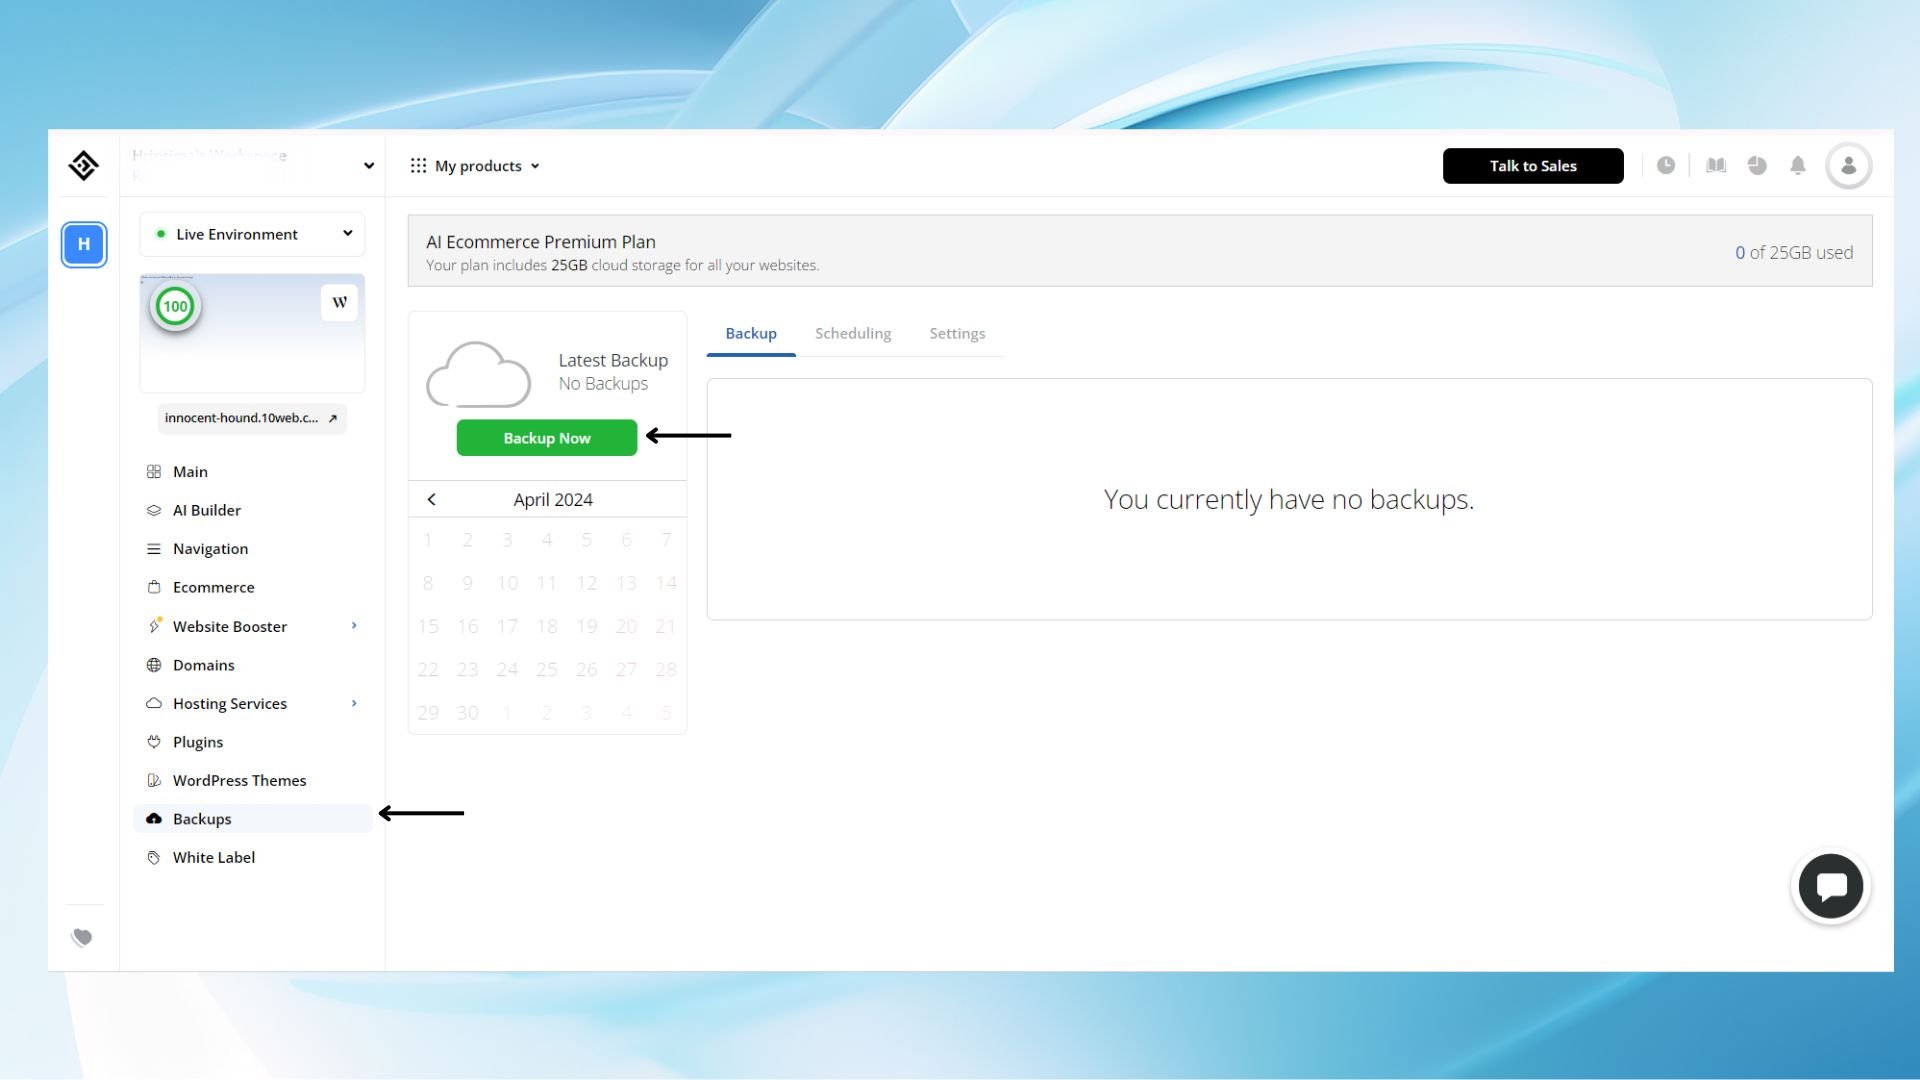
Check user role: Ensure that the account whose username you are changing has an Administrator role. Being an admin gives you the permissions required to change user details. If you’re not an admin, you’ll need someone with admin privileges to make the changes for you or to elevate your account to admin status.
Confirm email address: Confirm that the email address associated with your account is active and accessible. WordPress will often send notifications to this email during the username change process, especially if you employ methods that impact your login credentials. It’s a security measure as well that helps prevent unauthorized changes to user accounts.
How to change WordPress username via the dashboard
In this section, you’ll learn the specific steps to change your WordPress username directly from the dashboard without the use of plugins or code. Keep reading if you prefer a non-technical for changing WordPress username or skip to the section where we discuss how to change WordPress username in a technical method.
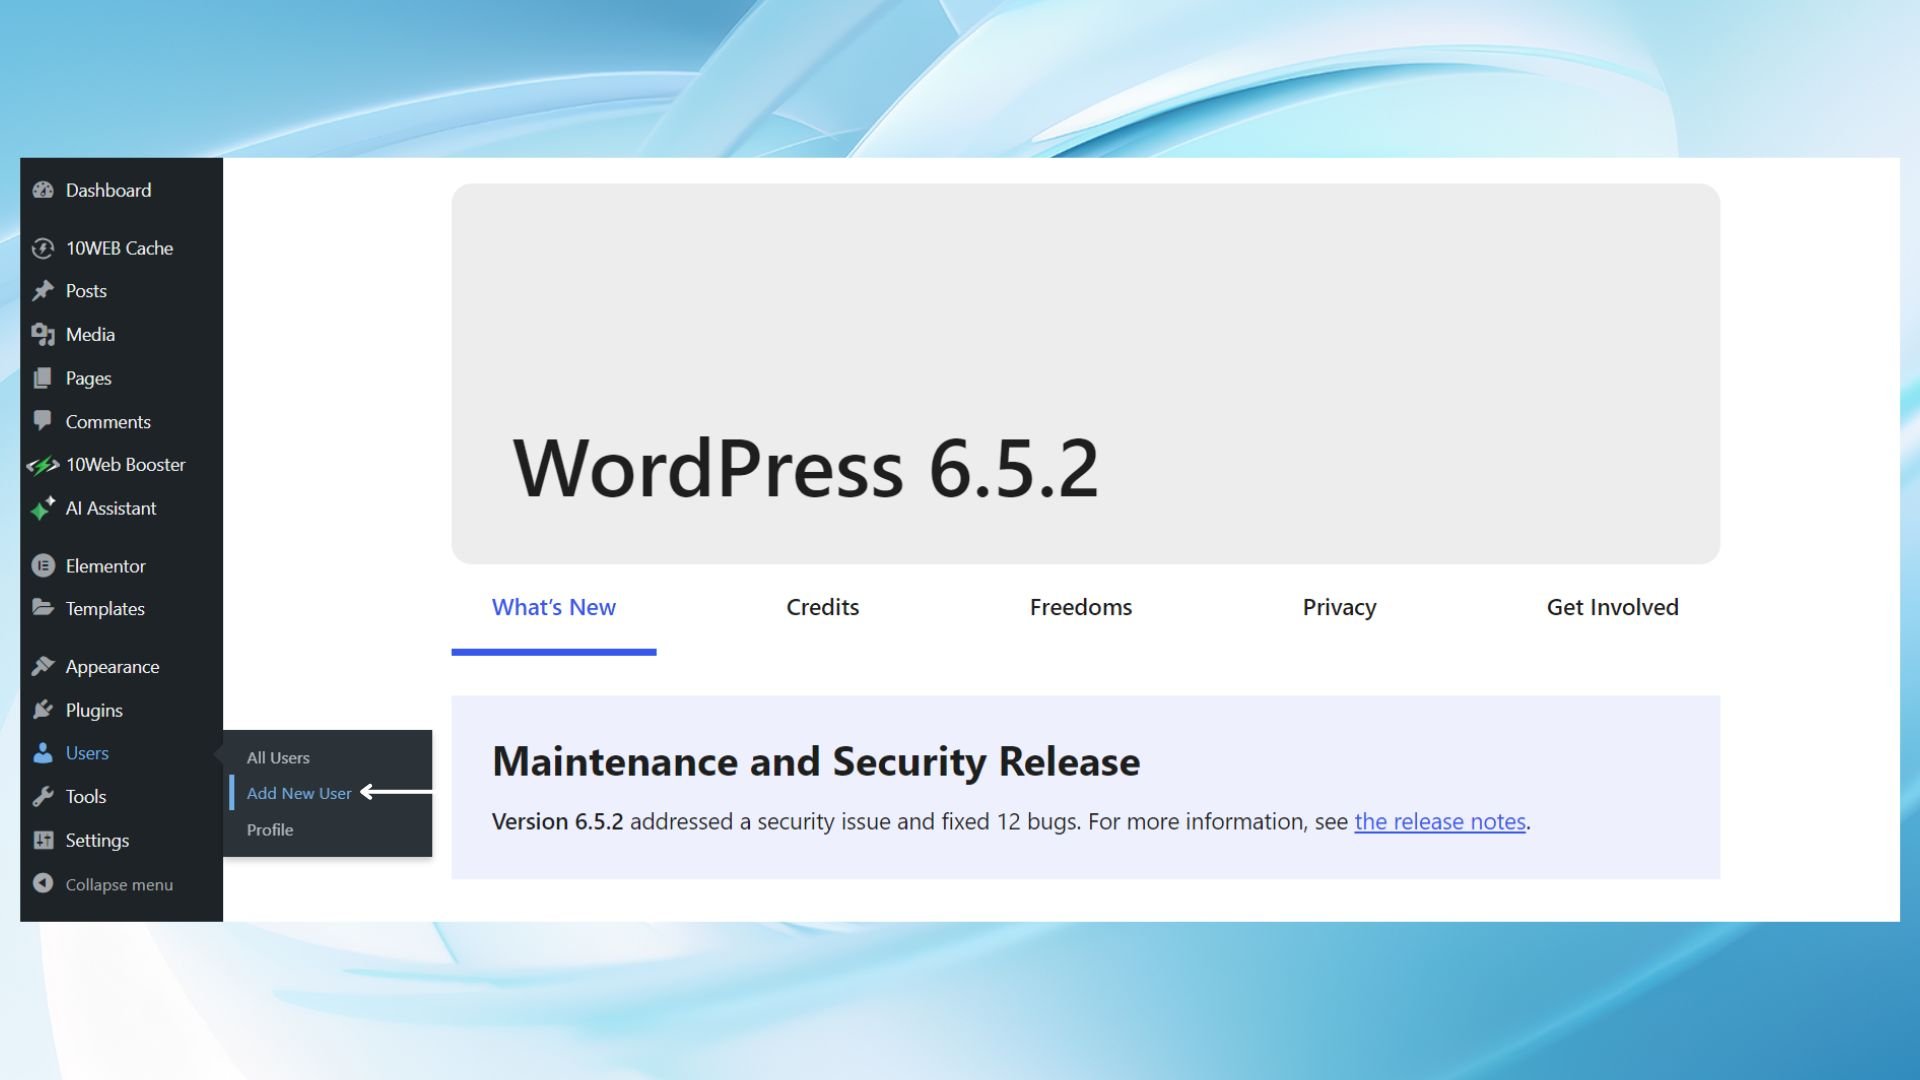
- Create a new user account: go to the WordPress Dashboard. Click on Users > select Add New User.

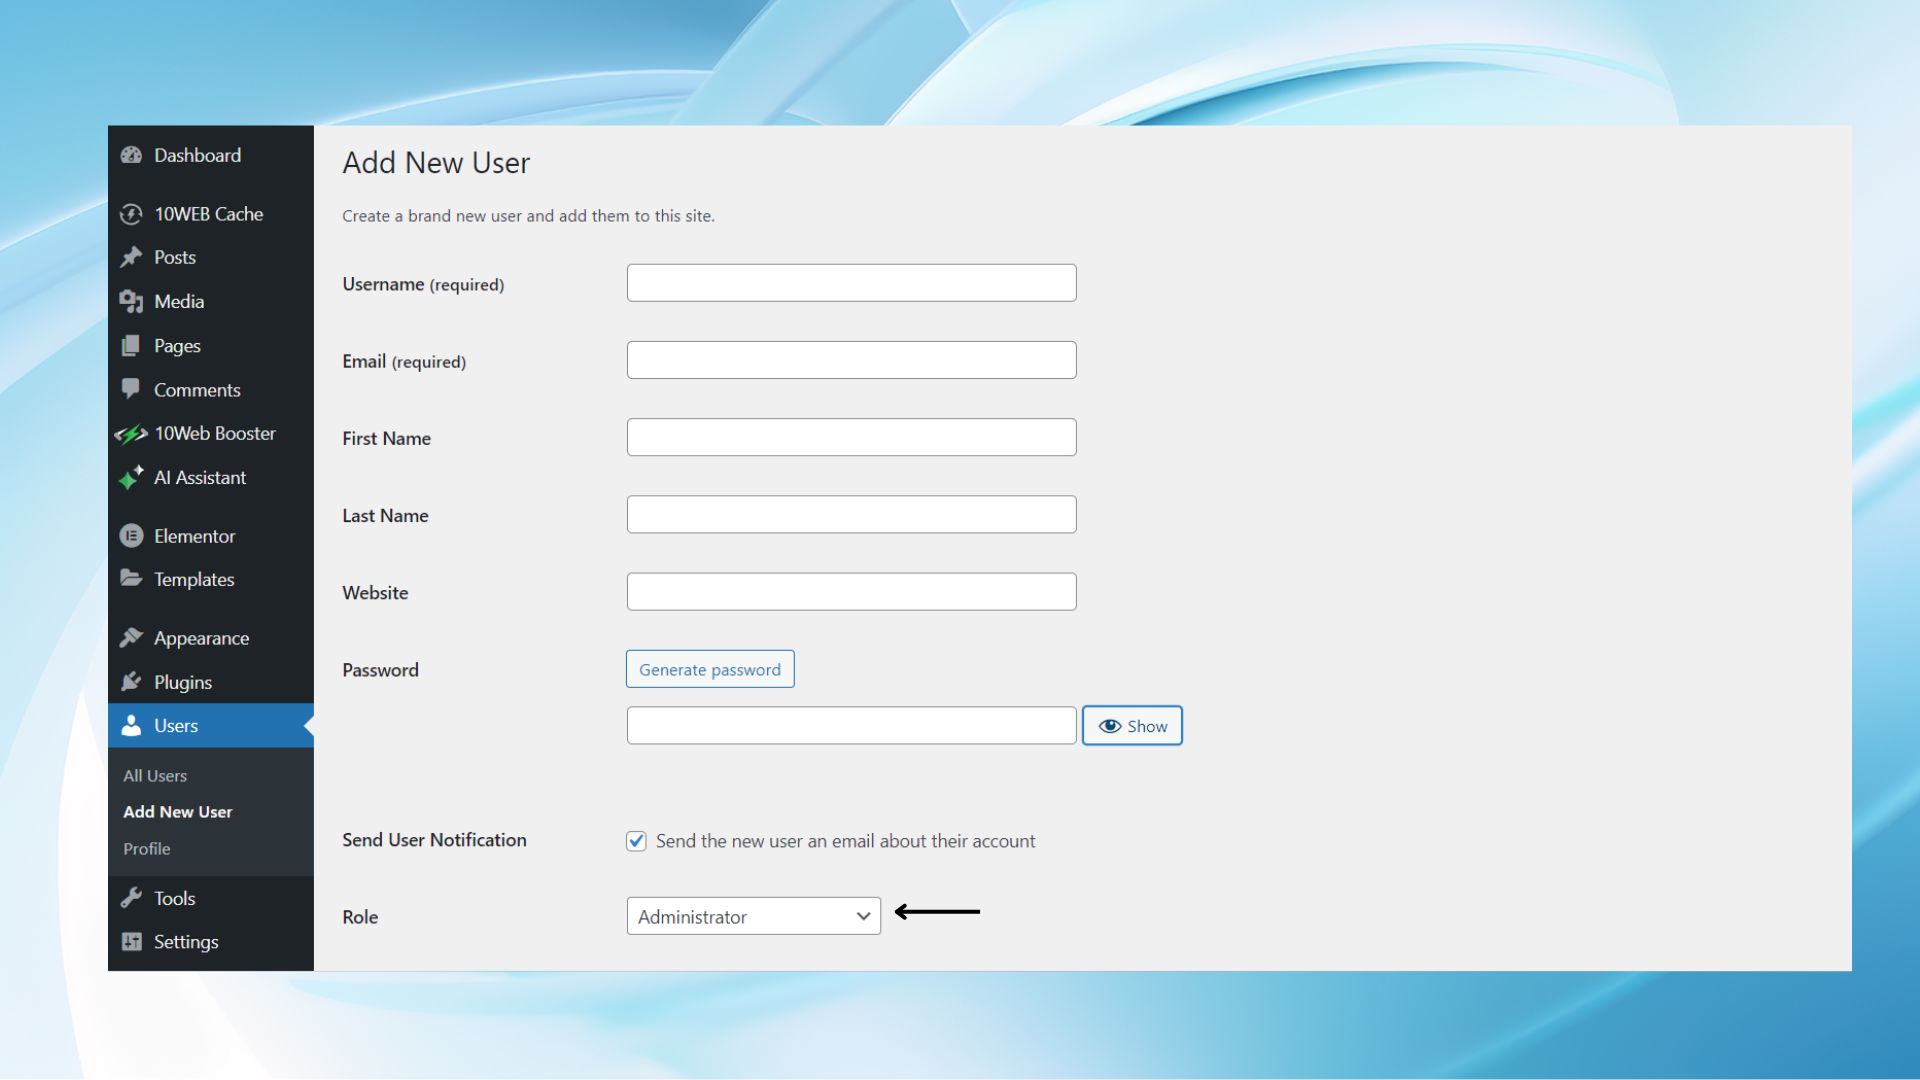
- Fill in the required fields to create a new user with an Administrator role. (Use a different email address than the one associated with your old account.)
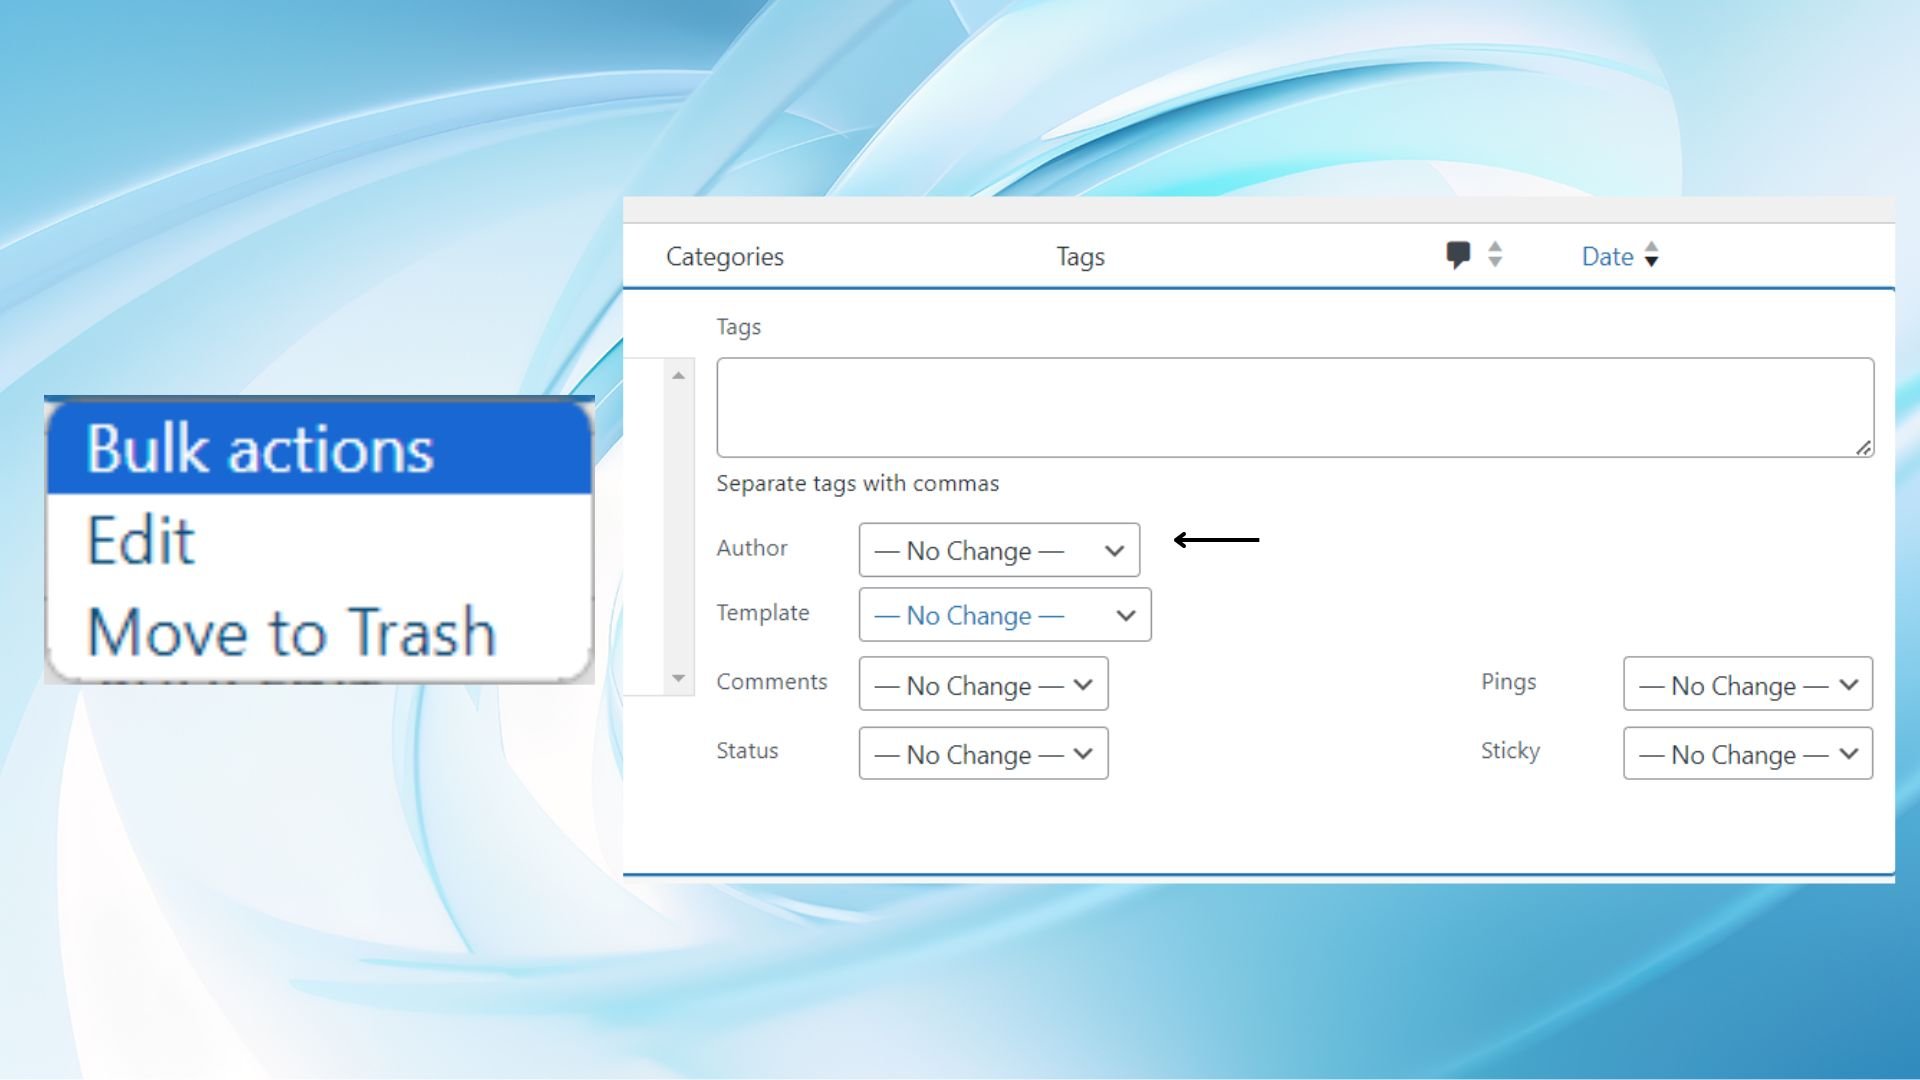
- Transfer content to the new user: go to the Posts section in the dashboard > use the Bulk Actions feature to select all posts created by your old account. Then, Edit > Apply the change to set the new user as the author.
- Delete the old user account: return to the Users section > find your old user account. Hover over the username and click the Delete link. You will be asked what to do with the content for this user; choose to attribute all content to another user and select your new user account. Confirm deletion to finalize the username change.
Simplify WordPress with 10Web
Automate manual work with 10Web Managed WordPress Hosting and 10Web AI Website Builder. Optimize your WordPress website effortlessly.
How to change WordPress username using phpMyAdmin
Changing your WordPress username via phpMyAdmin is a direct approach that involves interacting with the database used by your WordPress site. This can be done when access through the WordPress dashboard is not possible or when you prefer a more technical solution.
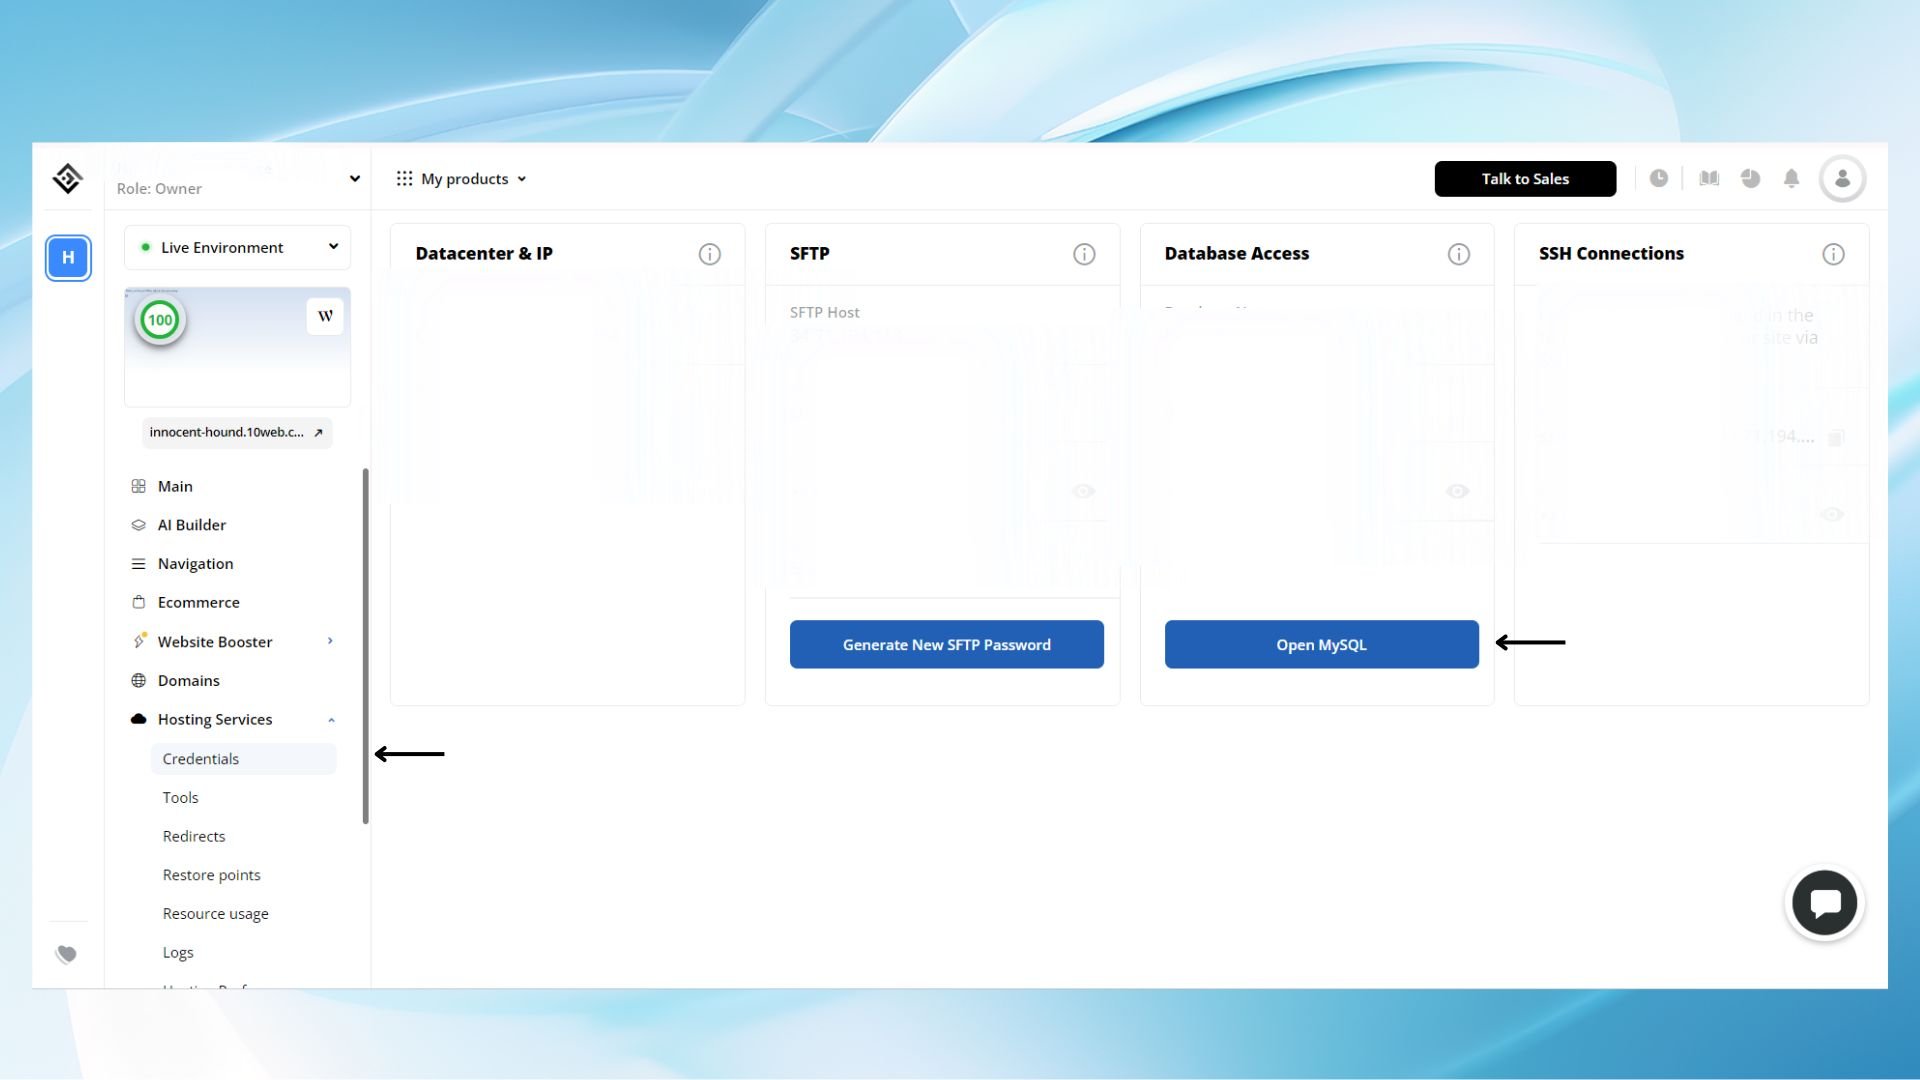
- Access phpMyAdmin from the dashboard: log into your 10Web Dashboard > click Open MySQL under the Databases section.
- Modify the wp_users table: from inside phpMyAdmin, select the database that corresponds to your WordPress site from the left sidebar. Find and click on the wp_users table; this is where all user information is stored.
- Click on the Browse tab to view all users. Find the user_login entry for the username you wish to change, click the Edit link corresponding to their row.
- Change the username in the user_login column.
When changing your username, ensure all content created by the old username is attributed to the new one. Double-check the wp_users table for consistency. Save the changes, and all content should automatically be reassigned to your new username within WordPress.
How to change WordPress username using a plugin
When managing your WordPress site, updating your username directly can be complicated, but with the right plugin, the process becomes simple and secure. Plugins usually provide an easy-to-use interface to make changes without dealing with the database.
Choose the right plugin
Identify a reputable username changer plugin that is compatible with your version of WordPress. Check for plugins that have high ratings and are regularly updated. Read reviews and see what features they offer to ensure it meets your needs.
Install and configure
To install the plugin, go to your WordPress dashboard, click on Plugins > Add New, and search for the plugin, such as ‘Username Changer plugin’. Once you find it, click on Install Now, then Activate. Some plugins may have additional settings to configure; if so, follow the provided instructions to set up correctly.
Change username with the plugin
Go to the plugin’s settings, often found under Users or a similarly labeled tab in your dashboard. Select the user whose username you wish to change and enter your new preferred username. Confirm the change—most plugins will have an Update Username button or similar. Remember to log out and back in with your new username to ensure the change has taken effect.
How to change WordPress username with advanced methods
If you need to change your WordPress username and have a good grasp of technical details, advanced methods allow you more control and direct access to where user information is stored. While these methods are powerful, you should approach them with caution to stay away from potential issues with your WordPress site.
Use MySQL command line
To change your WordPress username via the MySQL Command Line, you’ll need to have access to your web hosting control panel or SSH access to your server. First, log into your MySQL database, for which phpMyAdmin can often provide access. However, when working directly with MySQL, you can use the command line.
Here’s a rough sequence of steps:
- Access your database: mysql -u username -p
- Select your WordPress database: USE your_database_name;
- Locate the wp_users table: SELECT * FROM wp_users;
- Change the username with an UPDATE query:
UPDATE wp_users SET user_login='YourNewUsername' WHERE user_login='YourCurrentUsername';
Remember to replace YourCurrentUsername and YourNewUsername with the actual usernames.
Simplify WordPress with 10Web
Automate manual work with 10Web Managed WordPress Hosting and 10Web AI Website Builder. Optimize your WordPress website effortlessly.
Use functions.php file
Another method involves adding a snippet of code to your site’s functions.php file, Method 2 in technical circles. This is a WordPress theme file that influences the behavior of your site.
Proceed with the following steps:
- Connect to your site via FTP/SFTP or access the file manager in your hosting control panel.
- Navigate to your current theme’s folder and locate the functions.php file.
- Carefully add the following code at the end of the file:
function change_username() {

 $user = get_user_by('login', 'OldUsername');

 if (!empty($user)) {

 $user_id = $user->ID;

 wp_update_user(array('ID' => $user_id, 'user_login' => 'NewUsername'));

 }

}

add_action('init','change_username');
4. Replace OldUsername and NewUsername with the desired usernames.
5. Save the changes and upload the file back to the server if necessary.
After adding this code and loading any page on your WordPress site once, the username change takes effect. Remember to remove the code afterward, as it is a one-time operation, and leaving it there could have unintended effects if someone else loads your site.
Steps to take after changing WordPress username
After you have successfully changed your WordPress username, it’s important to ensure that your email and other linked accounts reflect this update. This will maintain consistency across your user management systems and prevent any confusion when you or others are accessing the site.
Update email and other accounts
Ensure that your WordPress login credentials are consistent across all platforms by updating your email address associated with WordPress. To do so:
- Go to Users > Your Profile in the WordPress dashboard.
- Scroll down to the Email (required) field.
- Replace your old email with your new one and save the changes.
If you have linked your WordPress account with external services or have configurations that use your old username, update those as well. This could include FTP accounts, email marketing services, and other databases.
Inform users of the change
If you manage a multi-user WordPress platform, it’s essential to inform your users about the change in your username. Draft a brief, clear email noting the update to your username and the reason for the change. Send this notification to all users if the change affects their interaction with you or the website’s management.
Simplify WordPress with 10Web
Automate manual work with 10Web Managed WordPress Hosting and 10Web AI Website Builder. Optimize your WordPress website effortlessly.
Final thoughts
Changing your WordPress username becomes a simple process once you understand the methods available to you. Regardless of the method you choose, the goal is always the same: to keep your site secure and customize your WordPress experience.
Remember to log out and log back in with your new username after you’ve made the change. It’s also important to consider the impact on other integrated services or connections that rely on your WordPress username. Ensure to update those systems accordingly to avoid any access issues.
Successfully changing your WordPress username can contribute to a safer and more personalized website management experience. Refer back to this guide if you need to change WordPress username again. By now you should have learned the proper method of how to change WordPress username.
Simplify WordPress with 10Web
Simplify WordPress with 10Web
Skip and automate manual work with 10Web Managed WordPress Hosting and the 10Web AI Website Builder.