When you’re surfing the web and suddenly hit a “401 Unauthorized Error,” it’s like running into a digital roadblock. This error is a standard response in the internet world, indicating that access to the requested resource is denied due to lack of proper authentication.
Same error different message
The message of the 401 Unauthorized Error can vary:
- 401 Authorization Required
- HTTP 401 Error – Unauthorized
- Access Denied
- 401 Unauthorized
In browsers typically, you’ll see a message stating “401 Unauthorized” or “Access Denied.”
Why does the 401 error occur?
This error usually pops up for a handful of reasons:
Incorrect credentials – The most common cause is entering the wrong username or password.
Expired session – If you were logged in but your session has expired, you’ll need to log in again.
Misconfigured permissions – On the website’s side, incorrectly set permissions can lead to unauthorized access errors.
URL errors – Mistyping the URL or attempting to access a URL that requires different credentials can trigger this error.
Server configuration issues – If the server hosting the website is not set up correctly, it might deny access even when it shouldn’t.
Say goodbye to website errors
Achieve peace of mind with 99.99% uptime on 10Web Managed
WordPress Hosting, powered by Google Cloud.
Resolving the 401 Unauthorized Error
Verify your credentials
The most common and simplest cause of a 401 error is incorrect input of username and password. This could be due to typographical errors, forgetting a recent password change, or not being aware of case sensitivity in passwords. Each time a user submits credentials, the server compares them with stored data. If there’s a mismatch, the server denies access, resulting in an error. Ensuring accuracy in this step is crucial as it’s a primary gatekeeper for user identification and security.
- Ensure Caps Lock is off.
- Re-enter your username and password carefully.
- If you have recently changed your password, ensure you are using the new one.
Refresh and retry
A 401 error may sometimes be a temporary glitch caused by issues like network latency or server overload. Refreshing the page can be an effective solution as it reinitiates the request to the server. When you hit refresh, the browser discards the previous request and starts a new session. This can bypass transient issues that might have caused the error initially, such as momentary server downtime or network interruptions.
- Click the refresh button in your browser or press F5 (Windows) or Command+R (Mac).
- Try logging in again after the page reloads.
Ensure correct URL
Accessing the wrong URL might lead to a restricted area of a website, where specific credentials are required, thus triggering a 401 error. This can happen due to typing errors, outdated bookmarks, or incorrect links. By verifying you’re attempting to access the right URL, you ensure you’re not unintentionally trying to enter a secure or restricted area that requires special authentication.
- Double-check the URL in the address bar for typos.
- If you clicked a link, verify it’s correct and up-to-date.
- Try accessing the site from a trusted homepage or bookmark.
Clear browser cache
Caching is a mechanism where browsers store copies of web pages, so they load faster upon subsequent visits. However, if the cache becomes too large or outdated, it can cause issues, including erroneous 401 errors. This happens because the browser might be trying to use stored credentials or session data that’s no longer valid. Clearing the cache removes this old data, forcing the browser to retrieve the latest version of the webpage, along with new and valid session data.
Windows (Chrome)
- Open Chrome.
- Click the three dots in the top right corner to open the menu.
- Select ‘More tools’ > ‘Clear browsing data’.
- In the new window, check the boxes for ‘Cookies and other site data’ and ‘Cached images and files’.
- Choose a time range, or select ‘All time’ to clear everything.
- Click ‘Clear data’.

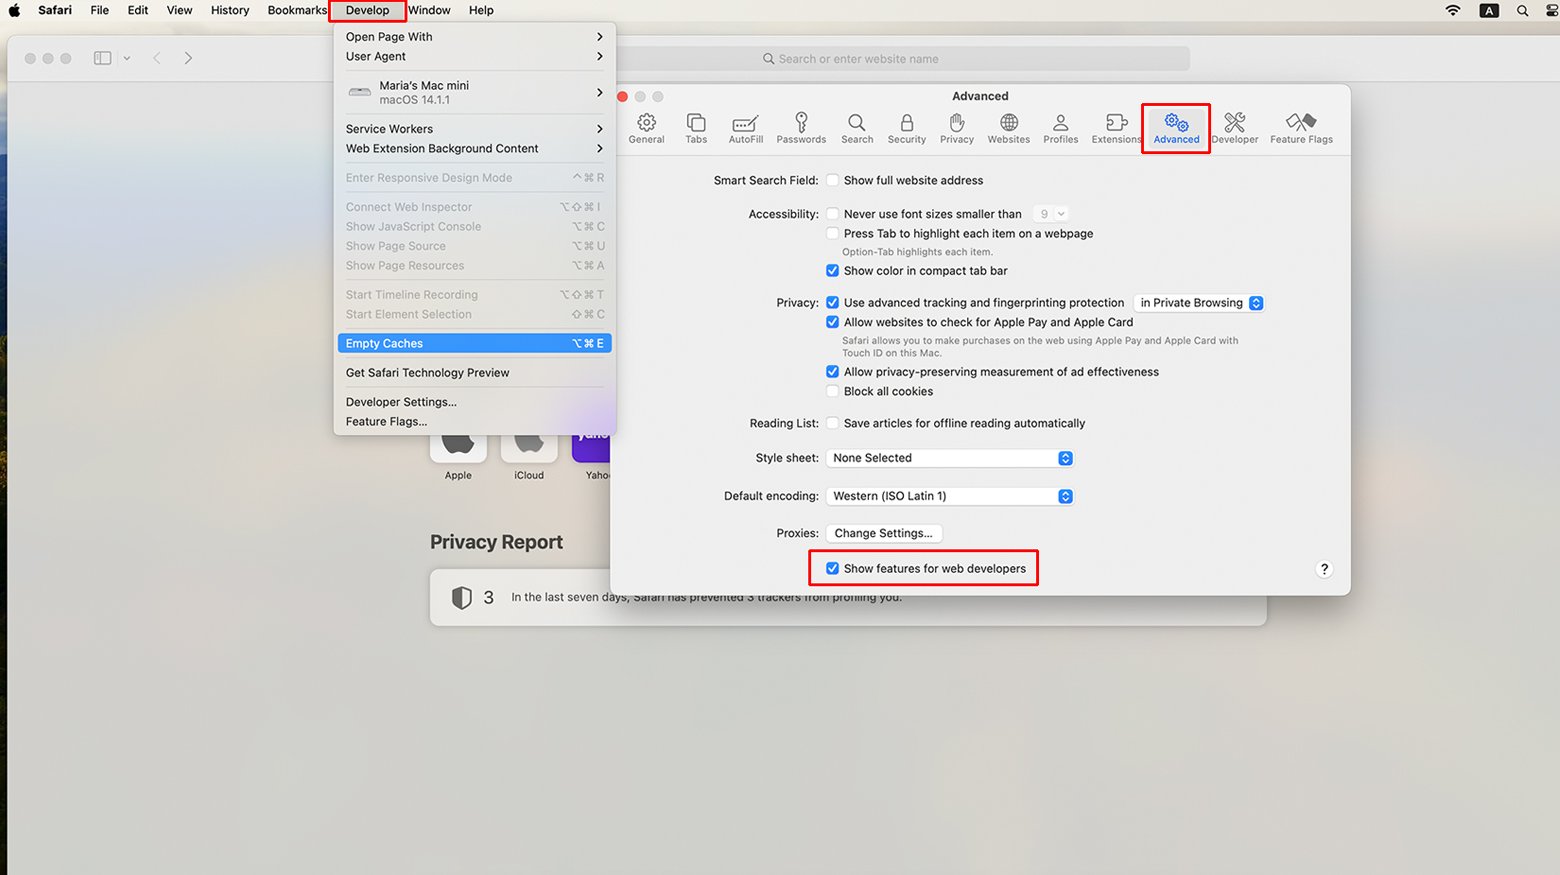
Mac (Safari)
- Open Safari.
- Click on ‘Safari’ in the menu bar, then choose ‘Preferences’.
- Go to the ‘Advanced’ tab and check the box at the bottom that says ‘Show Develop menu in menu bar’.
- From the menu bar, select ‘Develop’, then choose ‘Empty Caches’.
- You might also want to clear history, which can be done by clicking ‘Safari’ > ‘Clear History’.
Audit the WWW-authenticate header response
The WWW-Authenticate response header defines the authentication method that should be used to gain access to a resource. This header is sent along with 401 Unauthorized responses and helps identify what kind of authentication is required. By inspecting this header, administrators can understand whether the correct authentication challenge is being sent to the client. This can be particularly useful in diagnosing issues where the authentication method is not matching the client’s expectations, leading to repeated unauthorized requests.
Using browser developer tools
-
- Open the website that is causing the 401 error in your browser.
- Right-click on the page and select ‘Inspect’ or ‘Inspect Element’ to open the developer tools.
- Go to the ‘Network’ tab.
- Reload the webpage to capture the network traffic.
- Click on the first request to your website (usually at the top of the list) which should have a 401 status.

- Look for the ‘Headers’ tab in the detailed view for this request.
- In the headers section, find the ‘WWW-Authenticate’ header to see the authentication method being requested.
Using cURL (Command Line)
- Open a command line interface.
- Use the cURL command to access your website, e.g., curl -I http://yourwebsite.com.
- Look for the WWW-Authenticate header in the output.
- Analyze the value of this header to understand the required authentication method.
Interpreting the header
The WWW-Authenticate header might indicate a Basic, Digest, Bearer, or other types of authentication challenge. Confirm that your client is set up to respond to this challenge correctly. For instance, if the header indicates Basic authentication, ensure that your client is sending the appropriate Base64-encoded username and password.
Permission settings validation
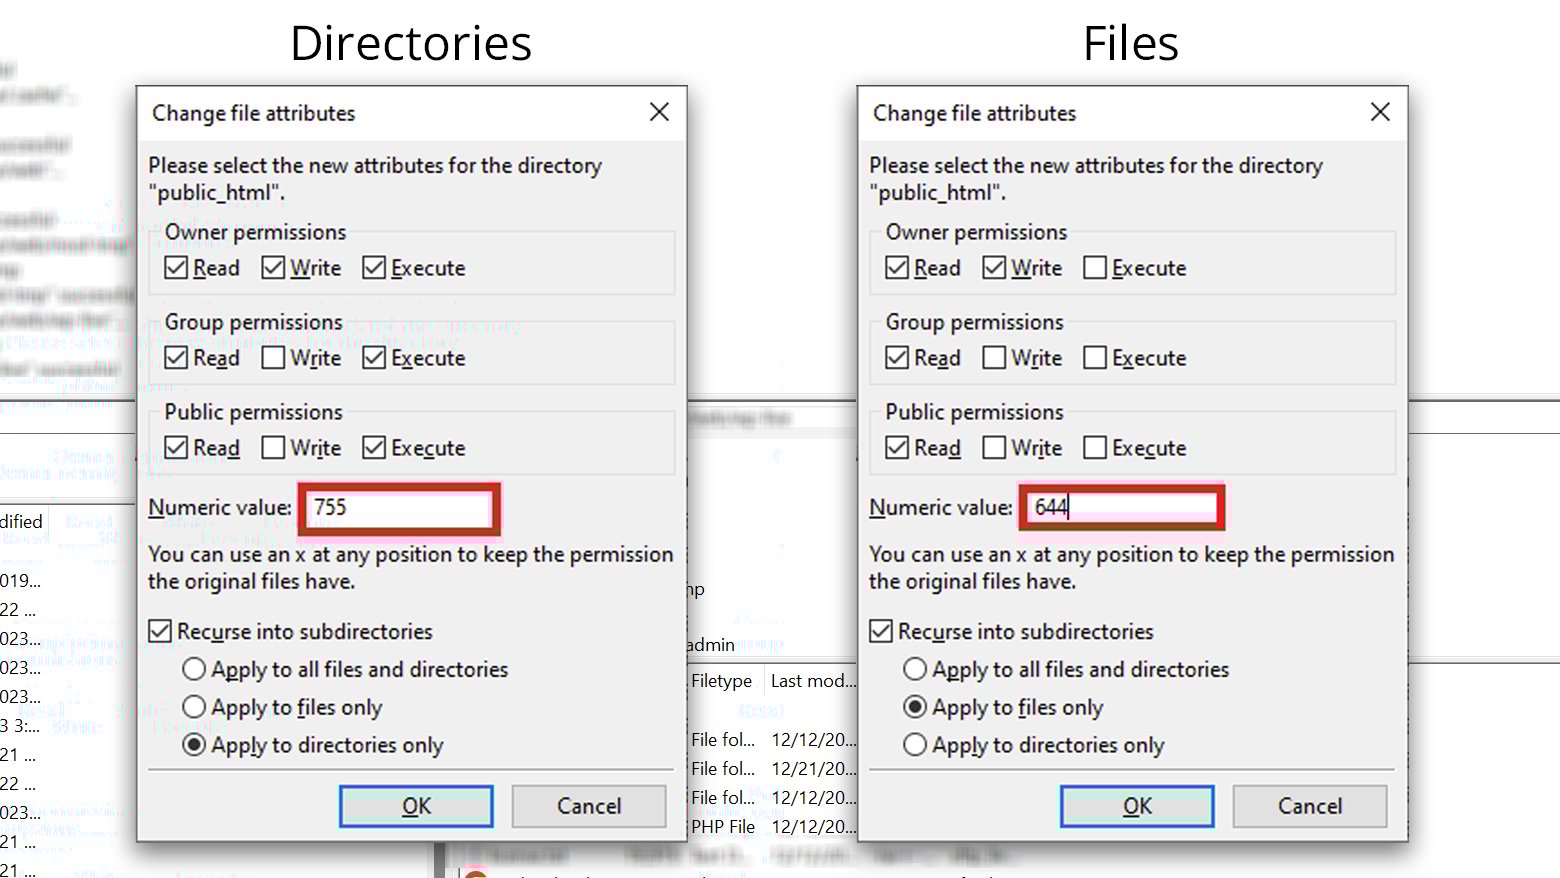
In web servers, file and directory permissions dictate who can read, write, or execute files. Incorrect permissions might lead to unauthorized access errors if the server blocks access to essential files needed during the authentication process. For example, if an .htaccess file or a critical script lacks proper read permissions, the server can’t process it, leading to access issues. Regular checks and adjustments of these permissions are vital for both security and functionality. To alter the permission settings:
- Connect to your server using an FTP client.
- Navigate to your website’s root directory.
- Right-click on files or directories to view their properties or permissions.
- FTP clients typically show permissions in a series of checkboxes for read, write, and execute.
- Adjust permissions as necessary. For instance, setting permissions to 755 for directories and 644 for files is a common practice.
 Be cautious with permissions. Overly permissive settings (like 777) can be a security risk. After making changes, verify your website’s functionality to ensure that the permissions are set correctly.
Authentication method review
Modern web applications often use advanced authentication methods like OAuth or token-based authentication. Misconfigurations or failures in these systems can lead to widespread access issues. For example, if an OAuth token expires or is invalidated without proper renewal processes in place, users will encounter 401 errors. Regular testing and monitoring of these authentication mechanisms ensure they function correctly and securely. To check your authentication method:
- Review the authentication configurations in your server or application settings.
- Test the authentication process to ensure it’s working as intended.
- Check for recent changes or updates that might affect authentication.
Server log analysis
Server logs are a treasure trove of information, recording every request made to the server and its response. When a 401 error occurs, these logs can provide detailed insights, such as the specific URL requested, the time of the request, and any accompanying error messages. Analyzing these logs can help pinpoint the exact cause of the problem, whether it’s a misconfiguration, an unauthorized access To check server logs:
-
- Access your server logs. This could be through a command line or a logging tool.
If your website is hosted at 10Web, you can access your server logs via the 10Web dashboard.
- Look for entries around the time the 401 error occurred
- Identify any unusual patterns or error messages that correlate with the unauthorized access issue.
Use this information to diagnose and address the specific cause of the error.
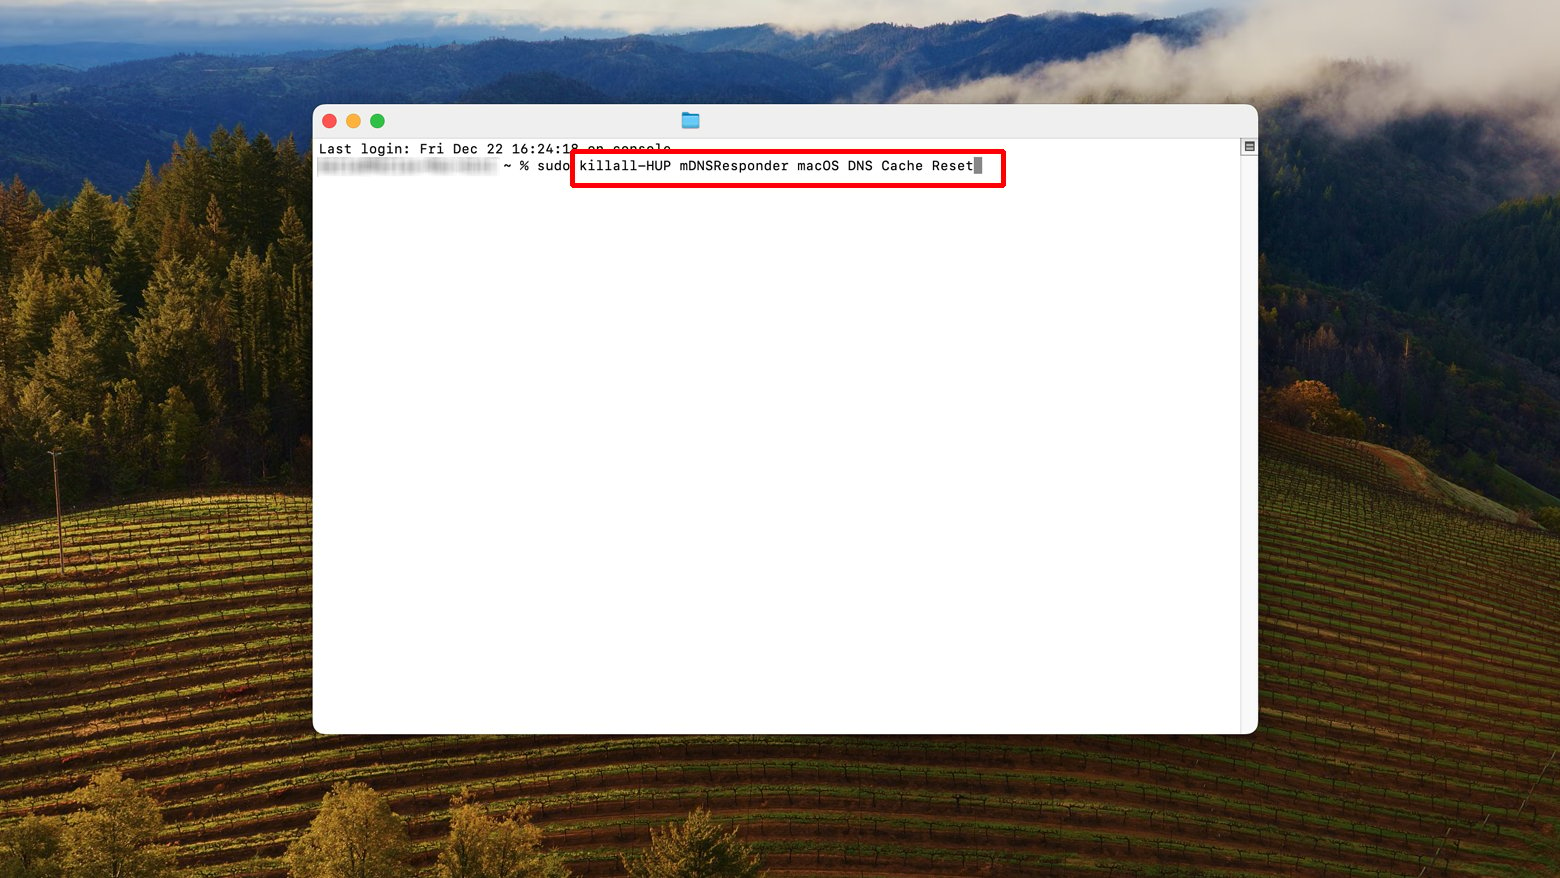
Flush your DNS
DNS (Domain Name System) is like the internet’s phonebook, translating domain names into IP addresses. Sometimes, your system’s DNS cache can become outdated or corrupted, leading to errors like 401 when trying to access websites. Flushing the DNS clears this cache, allowing your computer to freshly retrieve updated DNS information. This process can resolve access issues stemming from old or incorrect DNS data that your system is holding onto.
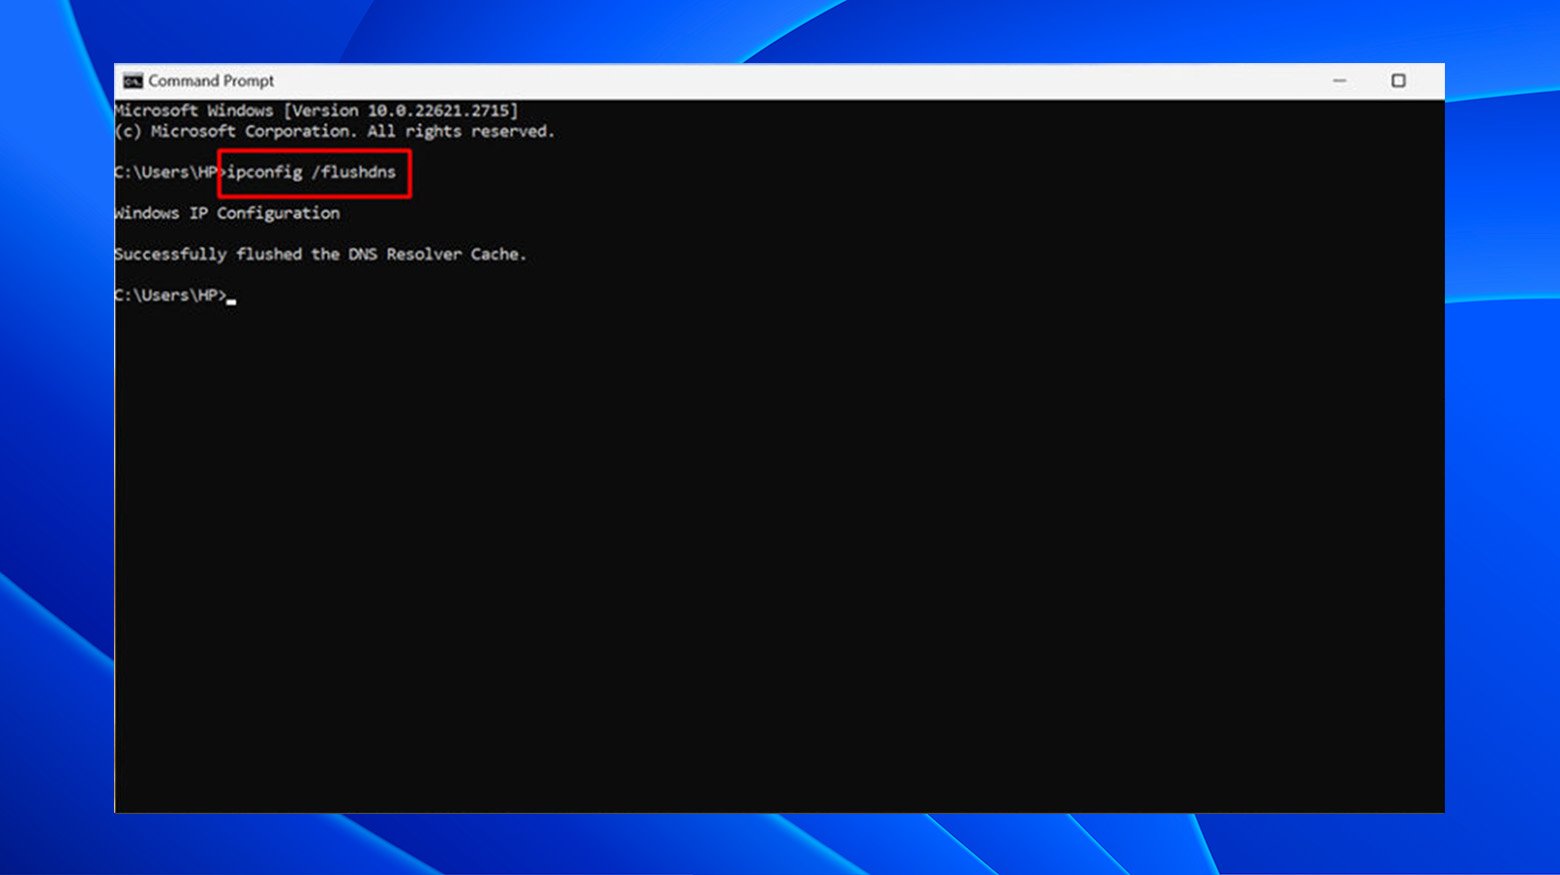
Windows
- Open Command Prompt as an administrator.
- Type `ipconfig /flushdns` and press Enter.
- You’ll see a confirmation message upon successful completion.
Mac
- Open Terminal.
- Depending on your macOS version, type the appropriate command (e.g., `sudo killall -HUP mDNSResponder` for macOS 10.12 or later) and press Enter.
- Enter your password if prompted.
Deactivate your plugins
Plugins enhance functionality in WordPress but can sometimes conflict with each other or with the WordPress core, leading to errors like 401. This issue is especially common after updates. Deactivating plugins can help identify if a plugin is the cause of the problem. Once identified, you can either update the problematic plugin, replace it, or keep it deactivated until a fix is available. To deactivate your plugins:
-
- Log in to your WordPress admin dashboard.
- Go to the ‘Plugins’ section.
- Deactivate plugins one by one or select the option to deactivate all plugins at once.
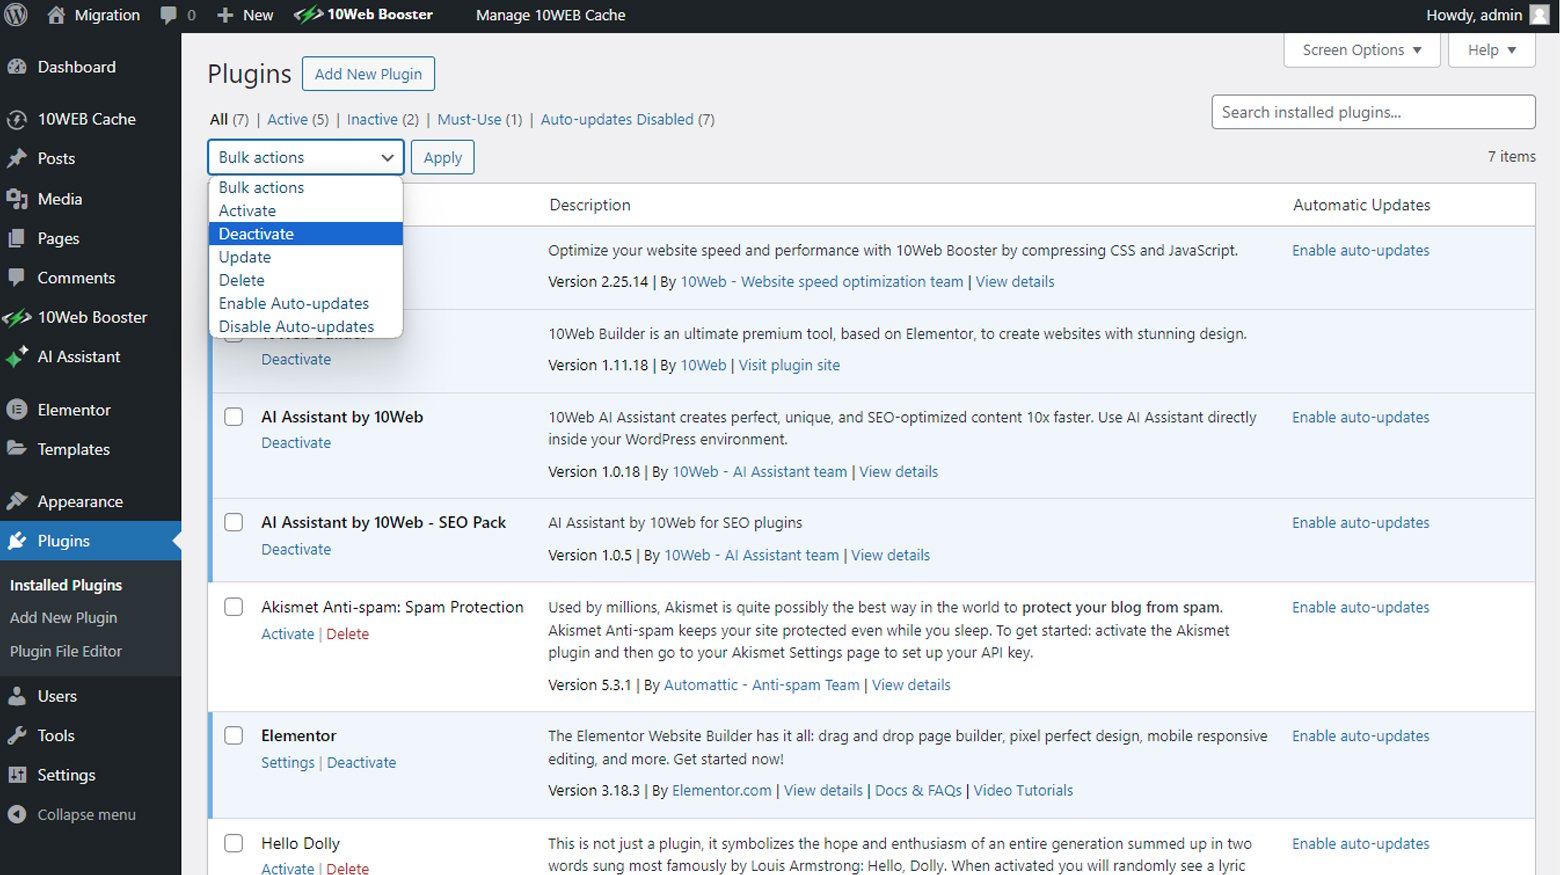
- After each deactivation, check to see if the issue persists.
- If the error resolves after deactivating a specific plugin, that plugin is likely the cause.
Closing thoughts
Resolving a “401: Unauthorized Access” error involves careful diagnosis and appropriate actions, whether you’re a regular user or a website administrator. For users, most solutions revolve around ensuring correct credentials, refreshing the page, clearing the browser cache, and verifying the URL. Administrators, on the other hand, need to delve deeper into server configurations, permission settings, authentication methods, and server logs to identify and rectify the root cause of the problem. By following these structured steps, both users and administrators can effectively address and resolve access issues, improving the overall web experience and maintaining secure, functional access to web resources.
Say goodbye to website errors
Achieve peace of mind with 99.99% uptime on 10Web Managed
WordPress Hosting, powered by Google Cloud.
Say goodbye to website errors
Fix all the website errors in one click
Migrate your website to the world's best Managed WordPress Hosting.