Running into the “509 Bandwidth Limit Exceeded” error can be a real headache for WordPress website owners. It’s like hitting a roadblock that prevents your visitors from accessing your site, often leaving both you and them frustrated. This error is a sign that the website you’re trying to access is facing some serious traffic management issues. Let’s dive deeper into what this error means, where it comes from, and how it can be resolved, ensuring you have all the knowledge needed to understand this technical hiccup.
Say goodbye to website errors
Achieve peace of mind with 99.99% uptime on 10Web Managed
WordPress Hosting, powered by Google Cloud.
Understanding the 509 Bandwidth Limit Exceeded error
The “509 Bandwidth Limit Exceeded” error is a message from the server hosting the website you’re trying to visit. It tells you that the website has surpassed its allocated bandwidth limit. Bandwidth, in simple terms, is the amount of data that can be transferred from the website to its visitors over a certain period, usually measured monthly and in gigabytes (GB). When a website exceeds this limit, it essentially runs out of the resources needed to serve its content to users, leading to the appearance of the 509 error.
This issue primarily stems from the website’s hosting plan. Hosting providers allocate a certain amount of bandwidth to each website based on the plan that the site owner has chosen. When a site receives more traffic than anticipated or hosts large files for download, it can quickly use up this allocated bandwidth. Additionally, the issue could arise from the website’s code or setup, especially if there are elements that unnecessarily consume bandwidth.
Understanding this error requires knowing a bit about how web hosting works and the concept of bandwidth. It also helps to recognize that this isn’t an issue with your computer or internet connection but rather a limitation the website is facing.
Variations of the 509 error
The “509 Bandwidth Limit Exceeded” error can manifest in various ways, depending on the web server, the website’s custom error messages, and the browser. Here are some of the forms it might take:
- 509 Bandwidth Limit Exceeded
- Error 509
- Bandwidth Limit Exceeded
- The site is temporarily unable to service your request due to the site owner reaching his/her bandwidth limit. Please try again later.
- Website Bandwidth Limit Exceeded
Why does the 509 error occur?
Several factors can lead a website to exceed its bandwidth limit, including:
High traffic: An influx of visitors can quickly use up your bandwidth, especially if you have a popular site or receive a sudden spike in traffic due to referrals or viral content.
Large files: Websites with large files, such as high-resolution images or videos, consume more bandwidth as these files are transferred to each visitor. Optimizing these files can help reduce their size and the bandwidth they consume.
Shared hosting resources: If you’re on a shared hosting plan, you’re sharing server resources with other websites. If another site on the same server experiences a surge in traffic or uses excessive resources, it can affect your site’s bandwidth usage.
Inefficient code: Websites with inefficient code or too many plugins can load slowly and use more bandwidth than necessary.
Hotlinking: If other sites link directly to the images or content on your site, it can lead to increased bandwidth consumption without any direct traffic to show for it.
Resolving the 509 error
First things first, reaching out to your hosting provider can be a crucial step. If you’re encountering a 509 error, it’s a clear sign that your website’s traffic or data transfer has outgrown your current bandwidth allocation. Hosting services often have different plans with varying bandwidth limits, and upgrading your plan could be a straightforward solution.
If you are a 10Web customer, you can contact support from your 10Web dashboard. 10Web has elastic scalability, which means that if your website has surges in resource usage, your website will still be up and running. The 10Web support team will guide you through the options available to you. Each hosting plan has it’s own specific allocations for bandwidth and resources. You can also track your website resource usage in the 10Web dashboard.
Calculate your bandwidth usage
Understanding your website’s bandwidth needs is essential for preventing future 509 errors. Calculating your bandwidth involves knowing the average page size of your site and the daily visitor count.
To calculate your bandwidth:
- Use a tool like Sitechecker’s Web Page Size Checker.
- Enter your website’s URL to find out the average page size in megabytes (MB).
- Utilize Google Analytics or a similar platform to get an estimate of your daily visitors.
- Multiply your average page size by the number of daily visitors to get your daily bandwidth usage. For a monthly estimate, multiply this figure by 30.
For example, If your site’s average page size is 20 MB and you receive 500 visitors daily, your monthly bandwidth usage equates to 100 GB (20 MB * 500 visitors * 30 days).
Leveraging CDN
When it comes to enhancing your website’s speed and efficiency, CDN caching emerges as a game-changer. By storing static files on CDN servers and delivering them directly to your audience, you not only slash page load times but also significantly reduce the strain on your original server. This is particularly advantageous for websites with heavy traffic or for those serving a global audience from a single location.
Enable Cloudflare CDN through 10Web
For websites hosted on 10Web, enabling CDN caching is a breeze, thanks to the integration of Cloudflare CDN. This integration offers a straightforward way to distribute your static content across the globe efficiently.
To enable CDN:
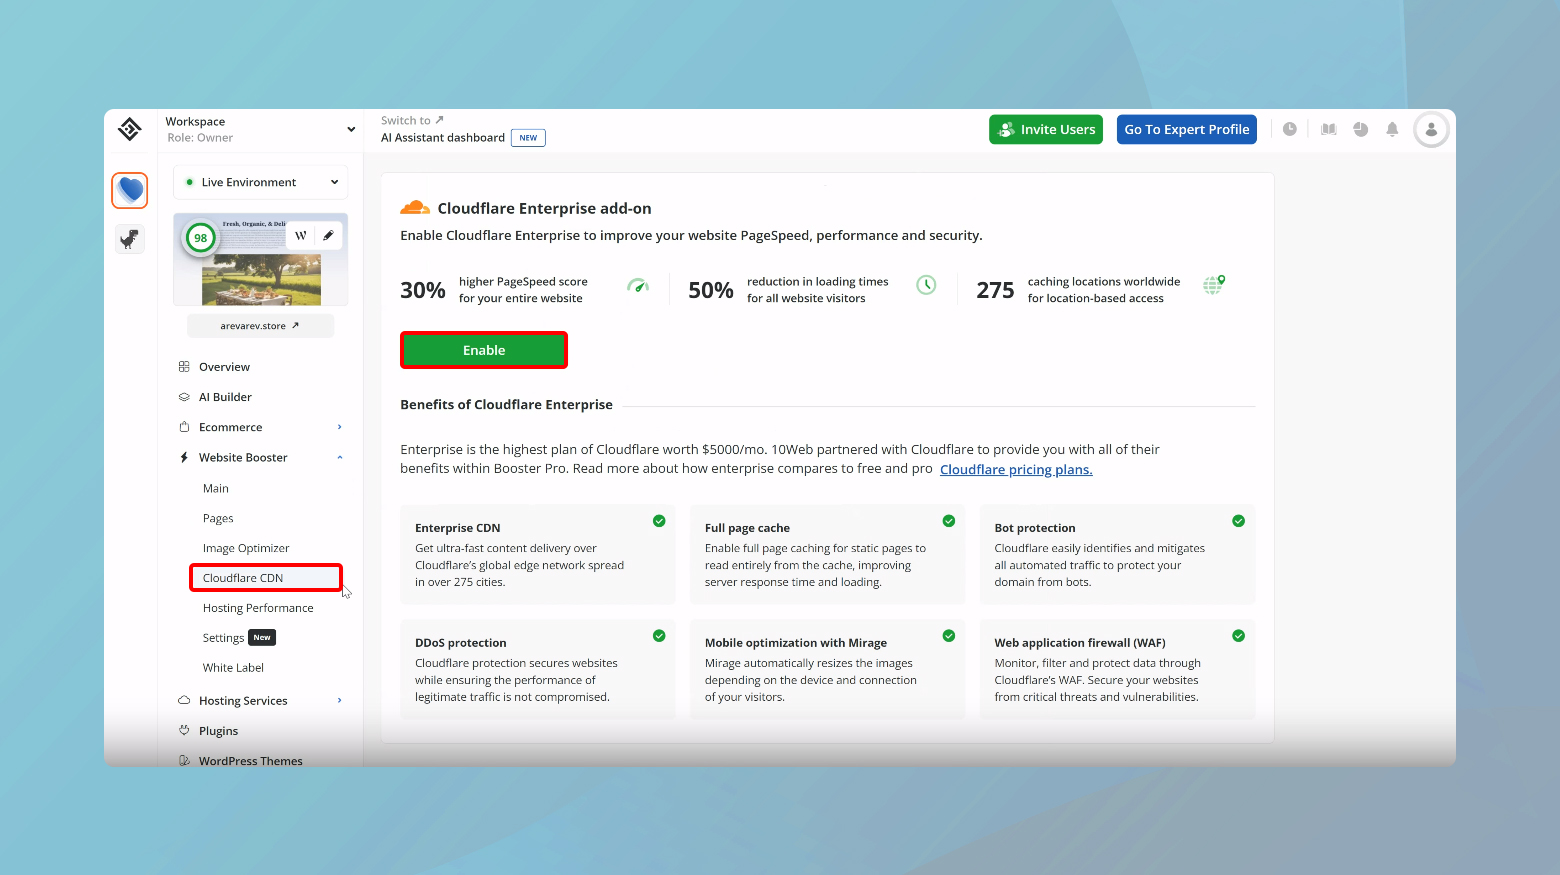
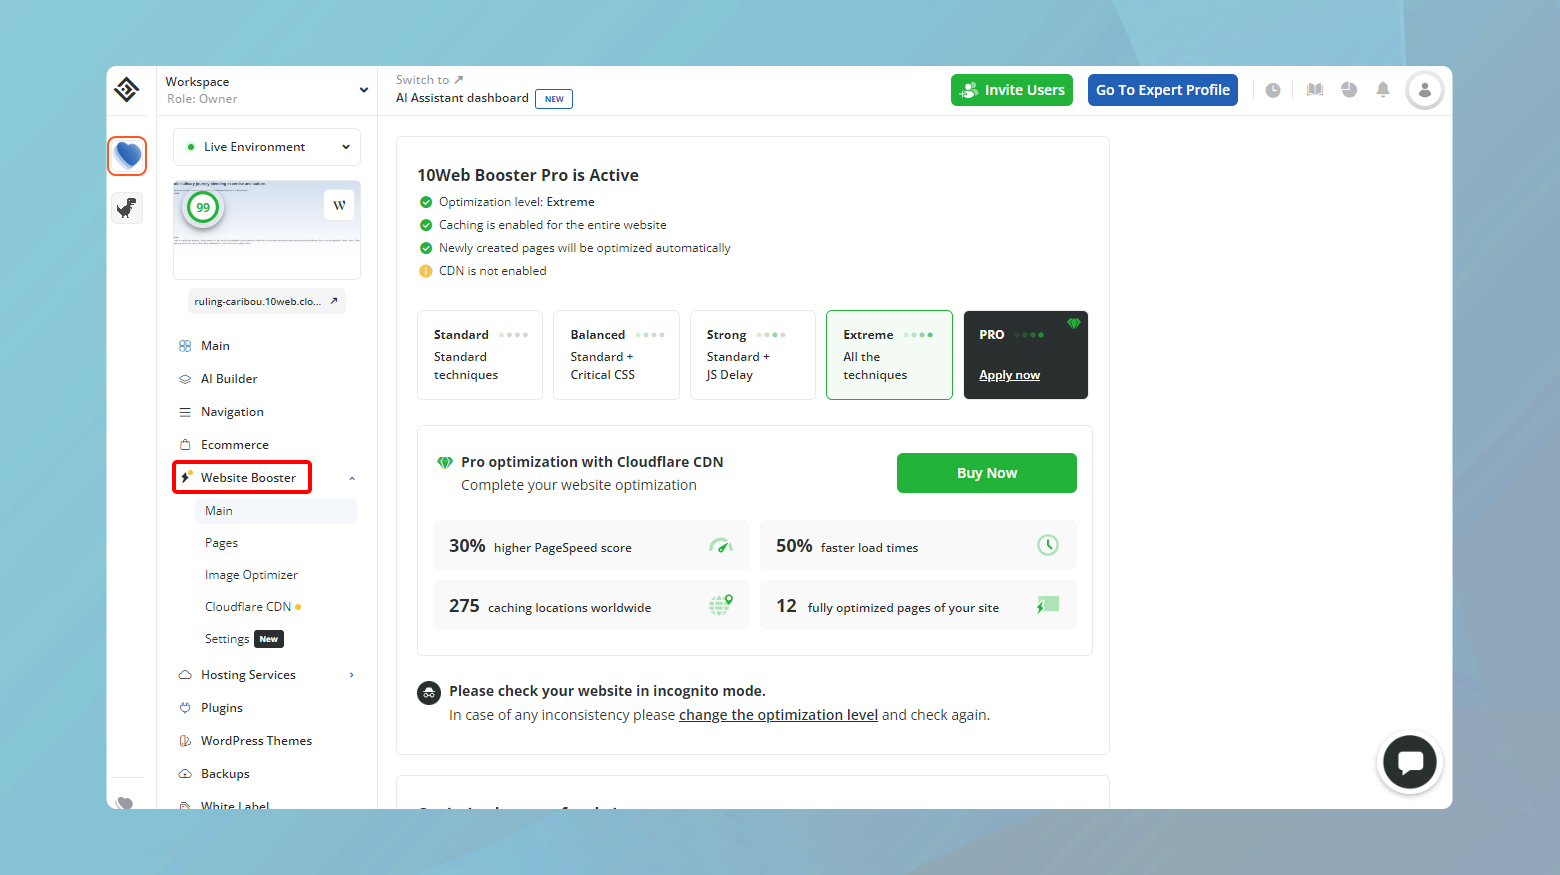
- Log into your10Web dashboard.
- Navigate to Website Booster > Cloudflare CDN.
- Click Enable
For a comprehensive guide on how to enable Cloudflare Enterprise CDN take a look at this guide.
Setting up CDN caching manually
If your hosting provider doesn’t offer a built-in CDN solution, no need to worry. Setting up CDN caching manually might require a bit more legwork, but it’s well within reach. This typically involves modifying your website’s .htaccess file and configuring your chosen CDN provider to specify which files should be cached.
For manual CDN setup:
- Add the necessary lines of code to your website’s .htaccess file to redirect static file requests to your CDN. This step is crucial for telling your server how to handle these files differently.
- Sign into your CDN provider’s dashboard and set up your website. You’ll need to specify which files to cache (e.g., images, CSS, JavaScript) and set rules for cache duration and invalidation.
After configuration, it’s important to test your website to ensure static files are being correctly served from the CDN. Tools like GTmetrix or Google PageSpeed Insights can help you verify that your content is delivered efficiently from the CDN servers.
Important considerations for CDN caching
While CDN caching offers significant advantages, there are a couple of key points to keep in mind to ensure optimal performance:
Static vs. dynamic content: Only cache static content (e.g., images, CSS, JavaScript files). Dynamic content, such as pages generated by a CMS, should not be cached, as this can prevent updates from appearing on your site.
CDN capacity: Ensure your CDN provider can handle your website’s traffic volume. Inadequate capacity could lead to delays or downtime, undermining the very benefits CDN caching is supposed to provide.
Refrain from hotlinking
Hotlinking might seem harmless at first glance, but it’s a digital faux pas that can have serious implications for your website. Essentially, it occurs when other sites link directly to the files on your server, such as images, causing unnecessary strain on your resources. This not only slows down your site but can also lead to unexpected bandwidth charges. Fortunately, there are several ways to combat hotlinking, depending on your server type and the tools at your disposal. Let’s dive into how you can protect your site, focusing on solutions for Apache and Nginx servers, as well as utilizing plugins.
Apache
Apache server users can deter hotlinkers by modifying the `.htaccess` file. This method enables hotlink prevention, ensuring only authorized sites can reference your files.
-
- Using an FTP client or file manager in your hosting control panel, locate your site’s .htaccess file.
- Add the following lines of code, replacing yourwebsite.com with your actual domain name. This script allows images to be displayed only when the request comes from allowed domains such as your own or major search engines:
RewriteEngine on

RewriteCond %{HTTP_REFERER} !^$

RewriteCond %{HTTP_REFERER} !^http(s)?://(www.)?yourwebsite.com [NC]

RewriteCond %{HTTP_REFERER} !^http(s)?://(www.)?google.com [NC]

RewriteCond %{HTTP_REFERER} !^http(s)?://(www.)?bing.com [NC]

RewriteCond %{HTTP_REFERER} !^http(s)?://(www.)?yahoo.com [NC]

RewriteRule .(jpg|jpeg|png|gif|svg)$ http://dropbox.com/hotlink-placeholder.jpg [NC,R,L]
- After adding the code, save your .htaccess file. This should immediately activate hotlink protection on your Apache server.
Nginx
Nginx server users will need to adjust their configuration file to prevent hotlinking effectively.
-
- Find your site’s Nginx config file, typically located within the /etc/nginx/sites-available/ directory.
- Insert the following configuration, adjusting the domain name accordingly:
location ~ .(gif|png|jpeg|jpg|svg)$ {

 valid_referers none blocked ~.google. ~.bing. ~.yahoo. yourwebsite.com *.yourwebsite.com;

 if ($invalid_referer) {

 return 403;

 }

}
- After saving your changes, reload Nginx to apply the new settings.
Plugins
For WordPress users, plugins like All In One WP Security & Firewall offer a user-friendly way to block hotlinking. After installing and activating the plugin, look for the hotlink protection feature and enable it following the plugin’s instructions.
Optimize your WordPress database and file storage
Maintaining a fast and efficient WordPress site isn’t just about fine-tuning the front end; it requires diligent care of your database and file storage as well. Over time, databases can become bloated with unnecessary data, and file storage can get cluttered with oversized or redundant files. Both scenarios can drag down your site’s performance, affecting load times and, ultimately, user experience. Fortunately, optimizing your database and managing file storage effectively can significantly improve your site’s speed. Here’s how to tackle these critical tasks.
Compressing and managing files
File compression is a powerful tool in speeding up your website. By reducing file sizes, you minimize the bandwidth needed to load your pages, thereby improving load times.
Compress images: Before uploading images to your site, use tools like Adobe Photoshop or free online services such as TinyPNG to reduce file size without compromising quality.
If you are a 10Web user, you can take advantage of the 10Web Booster to compress images and optimize your website.
Limit stored files: Regularly review your media library and delete any files that are no longer needed. Unused themes and plugins should also be removed to free up space.
Move files off-site: Consider using a content delivery network (CDN) or external storage solutions for large files or media that can slow down your site.
Leveraging database optimization plugins
Your WordPress database can accumulate a lot of overhead with time, from post revisions and trashed posts to unused tags and spam comments. Plugins like WP-Optimize offer a user-friendly solution to clean up and optimize your database with minimal effort.
WP-Optimize can remove all the unnecessary data clogging up your database, including stale post revisions, spam comments, and transient options. This reduces database size and improves efficiency. The plugin also features image optimization tools that compress your site’s images, further enhancing load times. By storing static page versions in a cache, WP-Optimize can serve pages much faster than if they were generated dynamically upon each visit.
How to optimize with WP-Optimize
- From your WordPress dashboard, go to Plugins > Add New, search for WP-Optimize, install and activate it.
- Navigate to WP-Optimize > Database. Here, you’ll see a list of optimization options. Select the ones applicable to your site, and click Run all selected optimizations.
- Switch to the Images tab. WP-Optimize will list all images that can be compressed. Select the images and click Compress the selected images.
- Under the Cache tab, you can configure page caching according to your preferences. Enabling caching will store static copies of your pages, reducing server load and speeding up access for your visitors.
Clearing out unused files
A lean, mean, web-serving machine—your WordPress site should aspire to be just that. Over time, however, it’s easy for unused files to accumulate, bogging down your server and affecting your site’s performance. Whether it’s outdated images, redundant plugins, or themes you’ve moved on from, these digital dust bunnies can take up valuable space and slow things down.
Manual cleanup
For those who like to roll up their sleeves, diving into the server via a File Manager or an FTP client offers a direct way to delete unwanted files. This method is particularly useful for removing large files or folders that are no longer needed.
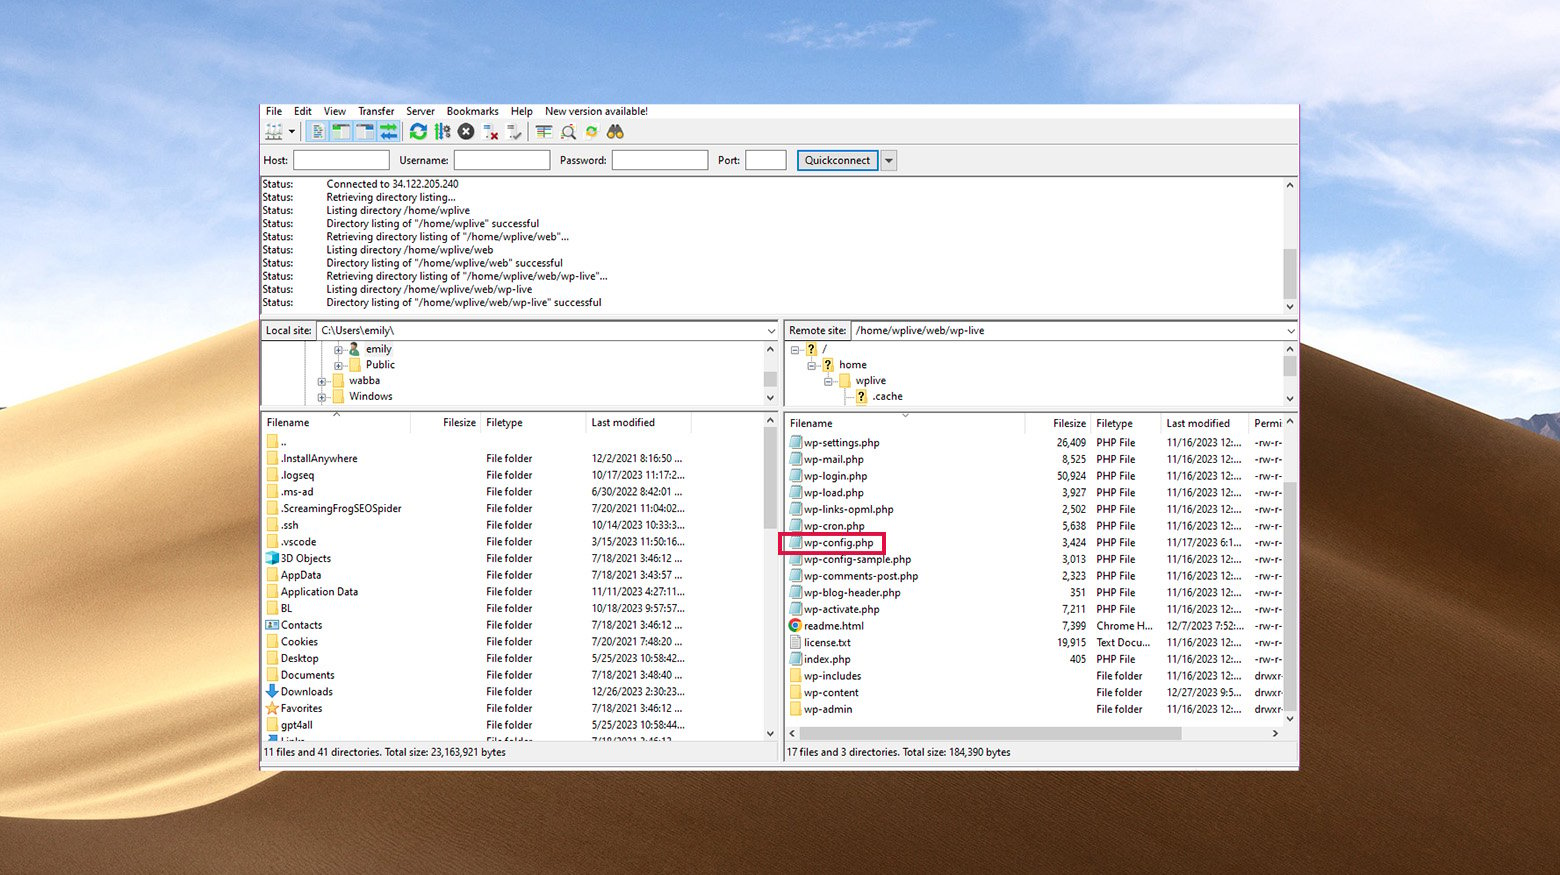
- Connect via an FTP client like FileZilla.
- Navigate through your directories. Look for clearly outdated folders or files, especially in the wp-content/uploads directory, where media files are stored.
- Once you’ve identified files or folders to delete, proceed carefully. Ensure that these files are genuinely unused and won’t affect your site’s operation if removed.
Remove unused plugins and themes
Plugins and themes that are no longer in use can still impact your site’s performance and security.
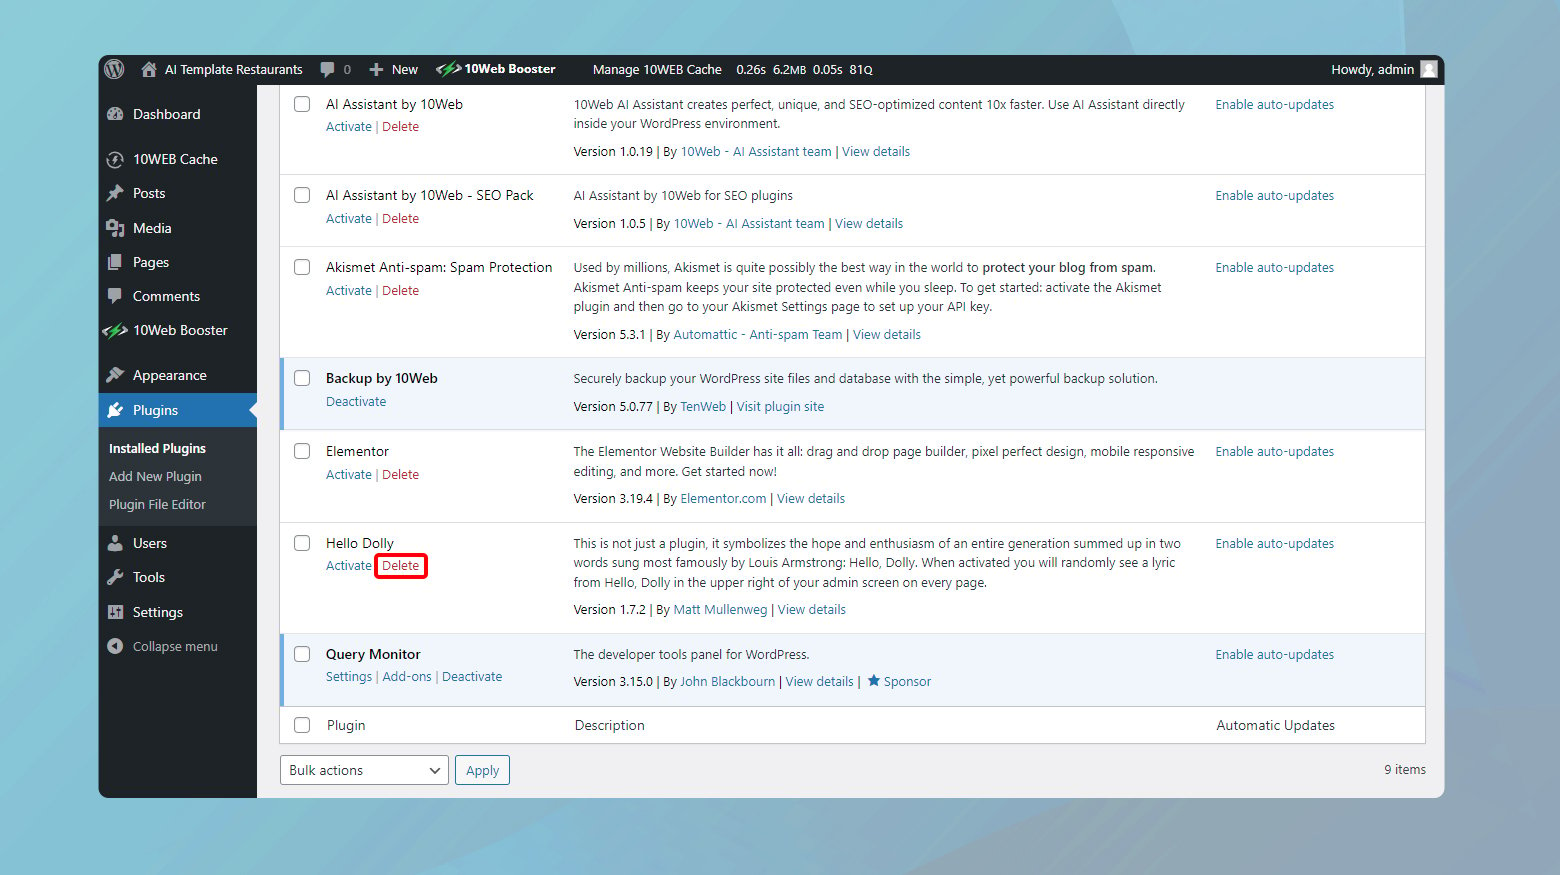
- From your WordPress dashboard, navigate to Plugins > Installed Plugins or Appearance > Themes.
- For plugins or themes you no longer use, first deactivate them (if active), then click Delete. Remember, it’s always a good idea to back up your site before removing plugins or themes.
Some hosting providers offer assistance with site maintenance, including file management. If you’re unsure about deleting files yourself or want to ensure nothing vital gets accidentally removed, reaching out to your host can be a safe move.
For a hands-off approach, plugins like Media Cleaner can automate the process of identifying and deleting unused media files from your WordPress Media Library.
Change your hosting plan
Hitting a bandwidth limit often signifies that your site’s traffic or data transfer demands have surpassed what your current hosting plan allows. While it’s a good problem in the sense that it may indicate growing visitor numbers, it necessitates immediate attention to keep your site up and running smoothly. If you find yourself frequently bumping up against these limits, it’s time to take a closer look at your hosting setup and consider the next steps. Here’s how you can effectively work with your hosting provider to resolve bandwidth issues.
Reach out to your hosting provider. They have the tools and insights to pinpoint the cause of your bandwidth overages. Many hosts offer 24/7 support channels, such as live chat, email, or phone support, making it easy to get the help you need when you need it.
Here’s what to discuss:
Bandwidth overages: Explain the situation, including any error messages (like a 509 status) you’ve received. Ask for details on what’s consuming the most bandwidth.
Troubleshooting steps: Inquire if there are other steps you can take to mitigate the issue.
Upgrade options: Discuss plan upgrades or add-ons that offer higher bandwidth limits. Ensure you understand the cost implications and how these changes will address your current issues.
Closing thoughts
Throughout this blog, we’ve explored a variety of strategies for tackling common website challenges, from resolving bandwidth limit issues and optimizing databases to managing file storage and preventing hotlinking. Each solution emphasized the importance of regular maintenance, the effective use of tools and plugins like WP-Optimize and Media Cleaner, and the crucial role of communication with your hosting provider. By applying these insights and strategies, you can enhance your website’s performance, ensure its security, and provide a better experience for your users. Remember, a proactive approach to website management can prevent many common issues and help your site run smoothly and efficiently.
Say goodbye to website errors
Achieve peace of mind with 99.99% uptime on 10Web Managed
WordPress Hosting, powered by Google Cloud.
Say goodbye to website errors
Fix all the website errors in one click
Migrate your website to the world's best Managed WordPress Hosting.