
Restarting the PHP on your website if something goes wrong takes but a button click. Switching to a different PHP version is yet another click away. This article is here to walk you through said clicks!
But first we’ll discuss what’s PHP, what your WordPress website needs it for, and why you might want to know how to restart it.
What is PHP?
PHP is an open source server-side programming language used for writing web applications. What’s a web application? It can be anything really, from the photo gallery on your website to forum software.
What does server-side mean? It means that the language runs on the web server, instead of client-side languages such as JavaScript, which run in the browser of the site visitor. There are quite a few advantages to server-side languages, so it’s no surprise most languages are server-side. Firstly, server-side languages are potentially more secure: The code isn’t accessible for all the visitors and remains in the server. Secondly, server-side languages tend to be more flexible in terms of what you can achieve with it. For example, working with files and databases is usually easier on the server side.
Being open source means that the PHP engine, that is the code which runs the PHP scripts from the server, is free to download and modify. That’s an important reason why PHP is so popular and the vast majority of Web hosting accounts support it.
Oh, and a final reason why PHP is convenient to use is that you can easily mix it with HTML, the most basic language of web programming. The engine will just run the PHP parts and leave HTML to the browser.
How does my WordPress website use PHP?
It comes as no surprise that WordPress extensively uses PHP. It’s a good match: both are open source, both are extremely popular in their niches. PHP is also web-specific, in contrast to some other languages which give you the option to code for Web but aren’t specifically created for that.
WordPress uses the PHP engine to “make sense of” the PHP code that’s integrated into the HTML code.
Although you can learn PHP if you’re interested in it, the overwhelming majority of WordPress users don’t know a thing about the programming language and don’t need to know.
Knowing how to restart PHP is quite another matter. Here’s why you might want to do that:
Reasons to restart your site’s PHP
It’s pretty rare that a user has to restart his or her WordPress website’s PHP engine, but sometimes PHP just crashes or you encounter a 502 Bad Gateway error or some site speed or connectivity issue needs a PHP reboot to be fixed.
In cases like that it’s reassuring to know how to restart your website’s PHP engine.
How to restart PHP
If you have a 10Web account, which is super easy and quick to get if you don’t, restarting PHP is not a problem.
See How 10Web Can Benefit You
Visit our homepage to learn more about the ultimate AI-powered website builder.

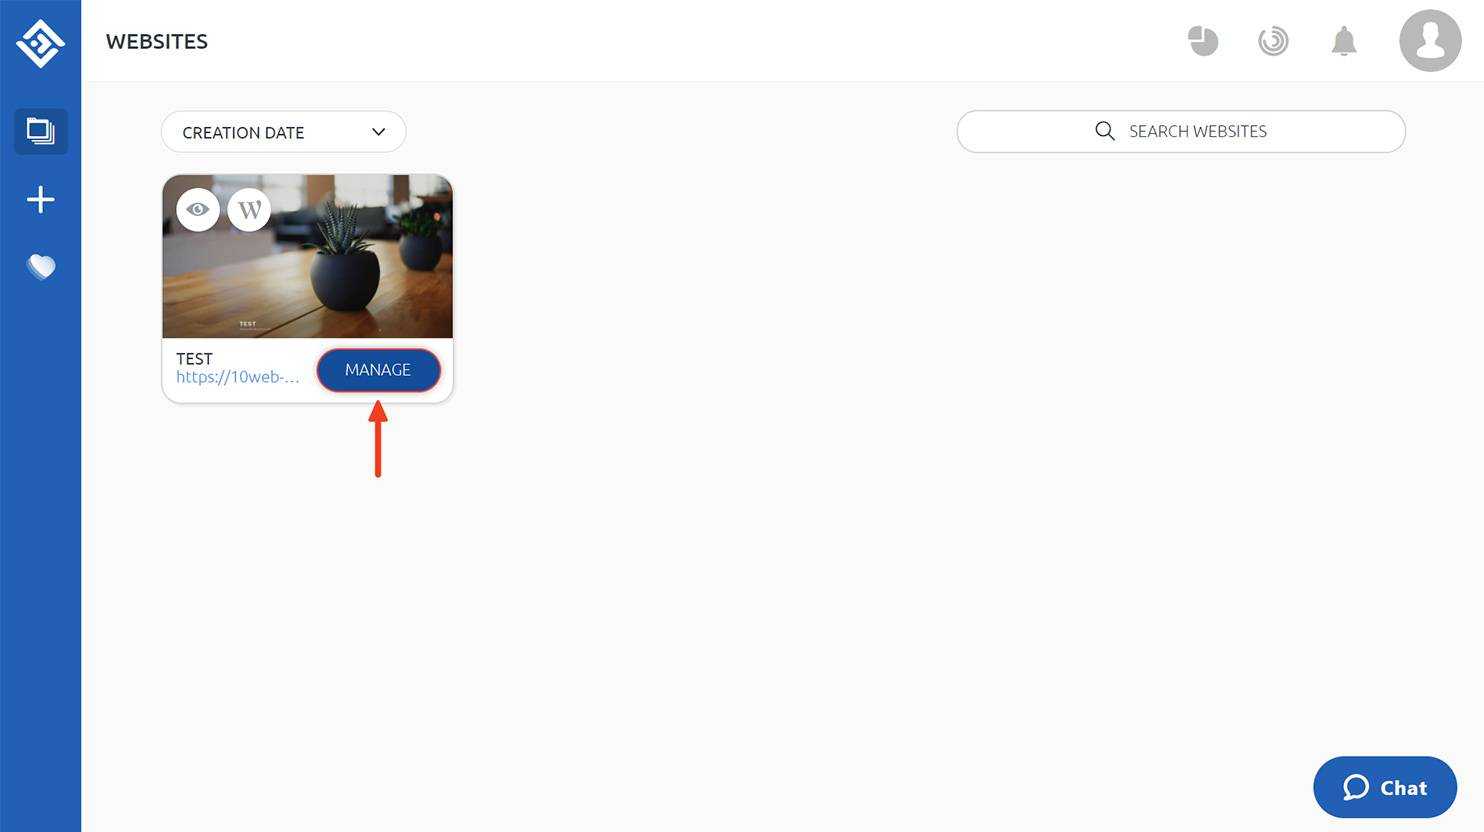
Just login to your 10Web dashboard, click “Manage website,” then “Tools” and click “Restart PHP.”
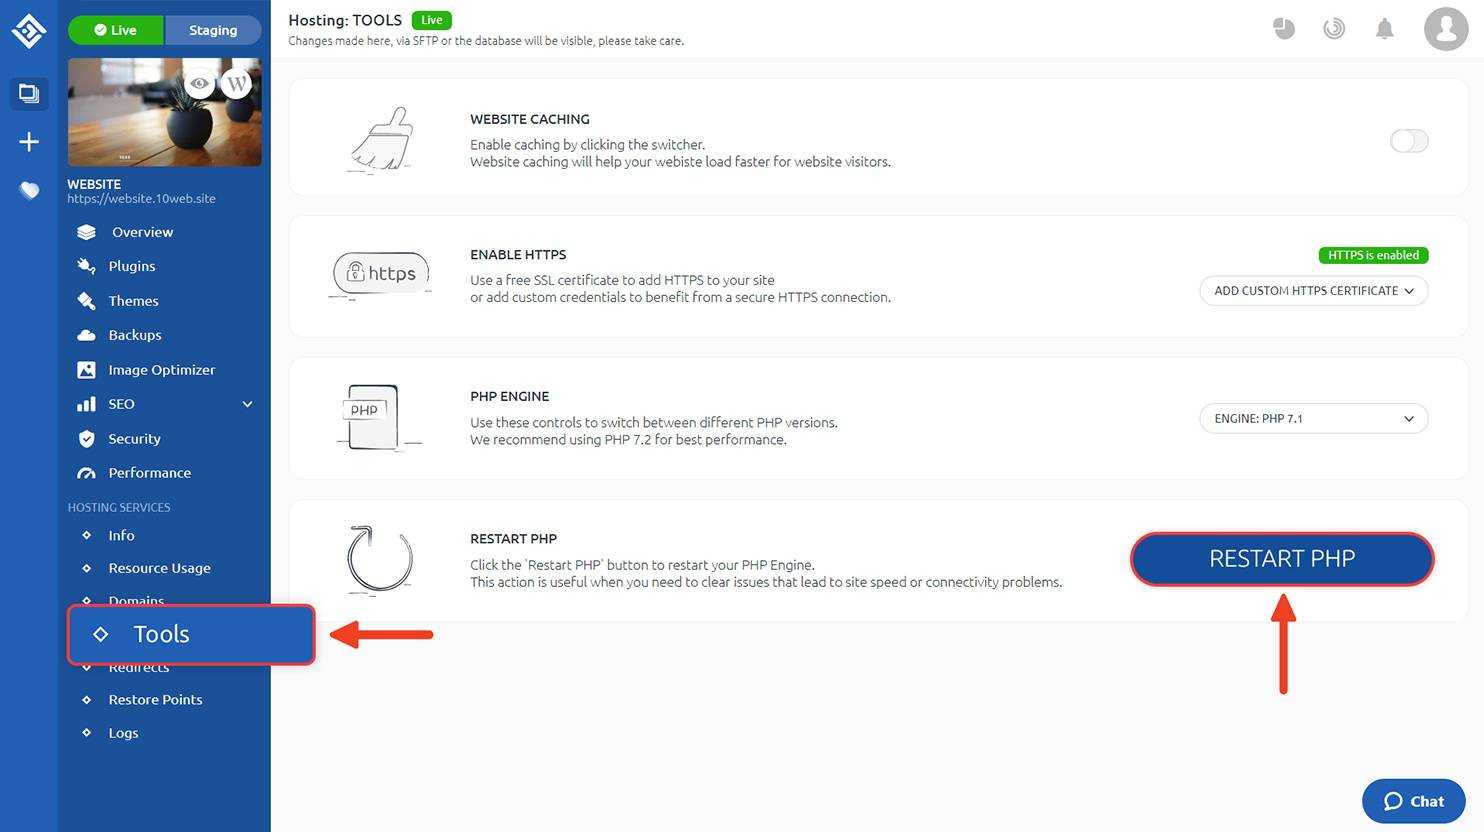
Done! You’ll get a message on your screen when the reboot is done. Also keep in mind that you need to clear cache afterwards to see the change.
How to change the PHP version
The older versions of PHP gradually move toward the end of their lives, so our recommendation is using at least PHP 7.2 for your site: not only is it much faster, but also gets up-to-date support and security.
So, if you’re running an older version and want to switch to a newer one, here’s what you need to do.
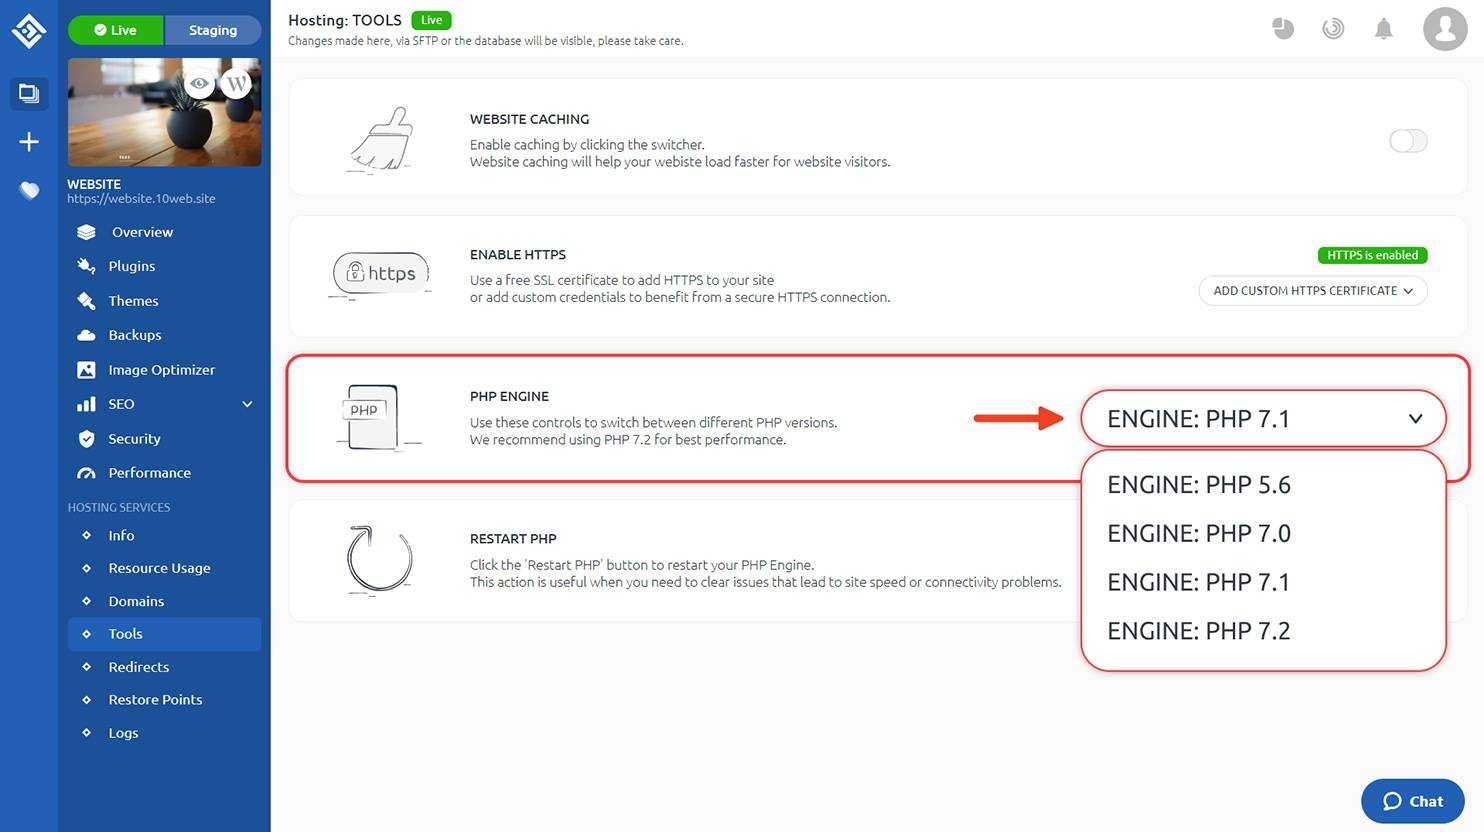
Login to your 10Web dashboard, click “Manage website” and then “Tools.” Select the version you want to change to from the dropdown menu on the right:
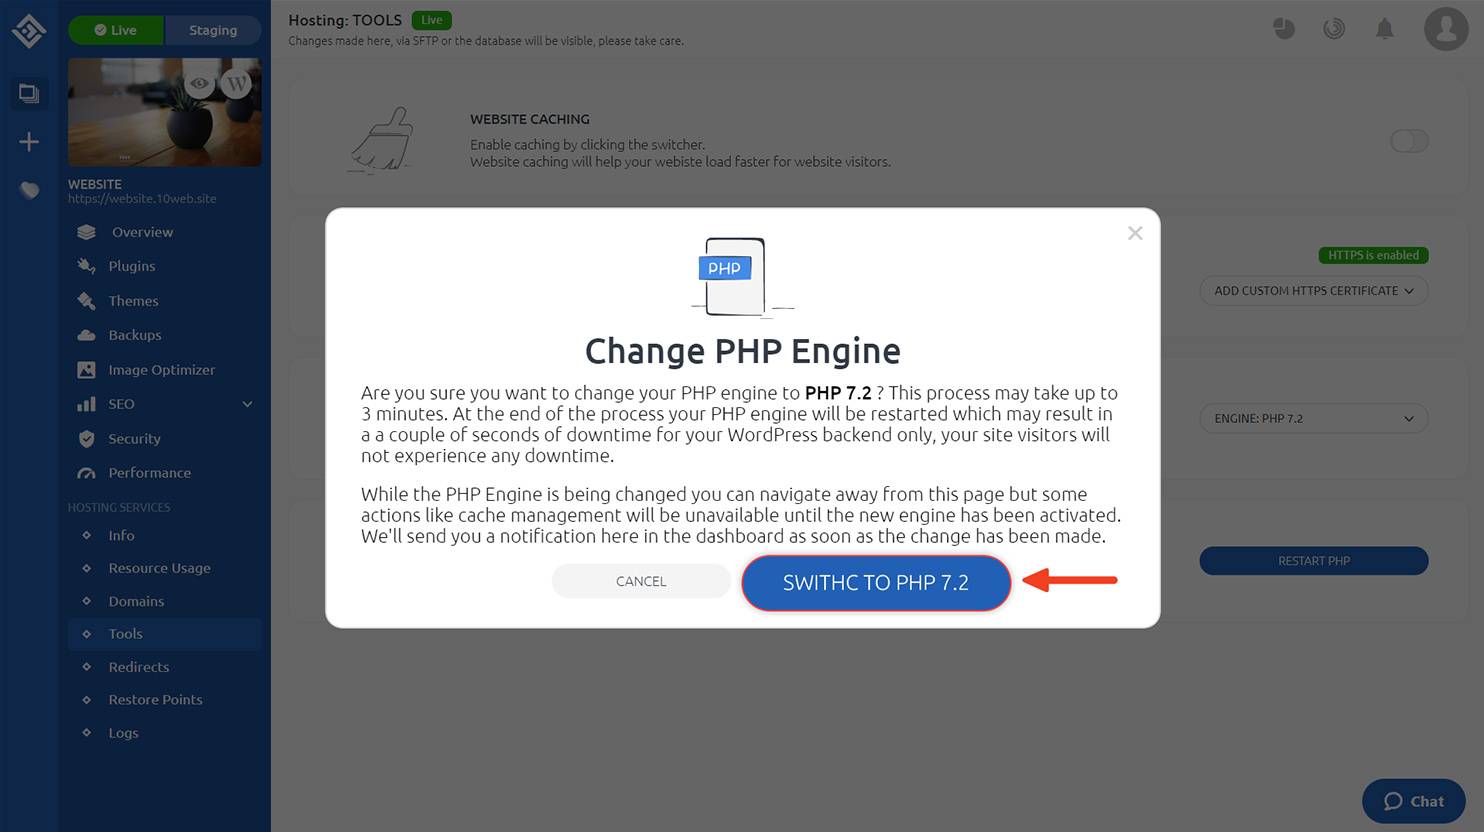
Basically, you can just read the message: the switch will take up to 3 minutes, there will be a few seconds of backend downtime, and cache management will be unavailable till the engine is activated.
Click “Switch to PHP 7.4” (or whatever the desirable version is) and wait for the notification that the change has been made.
That’s it. Congrats!
Ran into an issue when restarting PHP or switching to a different version? Let us know in the comments.
Simplify WordPress with 10Web
Simplify WordPress with 10Web
Skip manual work with 10Web Managed WordPress Hosting.
Simplify WordPress with 10Web
Simplify WordPress with 10Web
-
 Experience automated website management
 -
Keep your site up-to-date with automatic updates
-
Forget about security threats and malware
 Experience automated website management


How to install and activate ionCube loader?