It is common to encounter issues while navigating the web or loading web pages. One of the frequent obstacles that users face is the DNS_PROBE_STARTED error, which is linked to the Domain Name Server (DNS) system.
This error can disrupt your online activities but can be managed through several simple and effective strategies to restore seamless internet access.
In this article, we will explore the essence of the DNS_PROBE_STARTED error, its usual triggers, and six practical methods for rectifying it. Let’s get started!
Overview
- Understanding the DNS_PROBE_STARTED Error
- Primary Reasons Behind the DNS_PROBE_STARTED Alert
- Step-by-Step Solutions to Overcome the DNS_PROBE_STARTED Error
Deciphering the DNS_PROBE_STARTED error
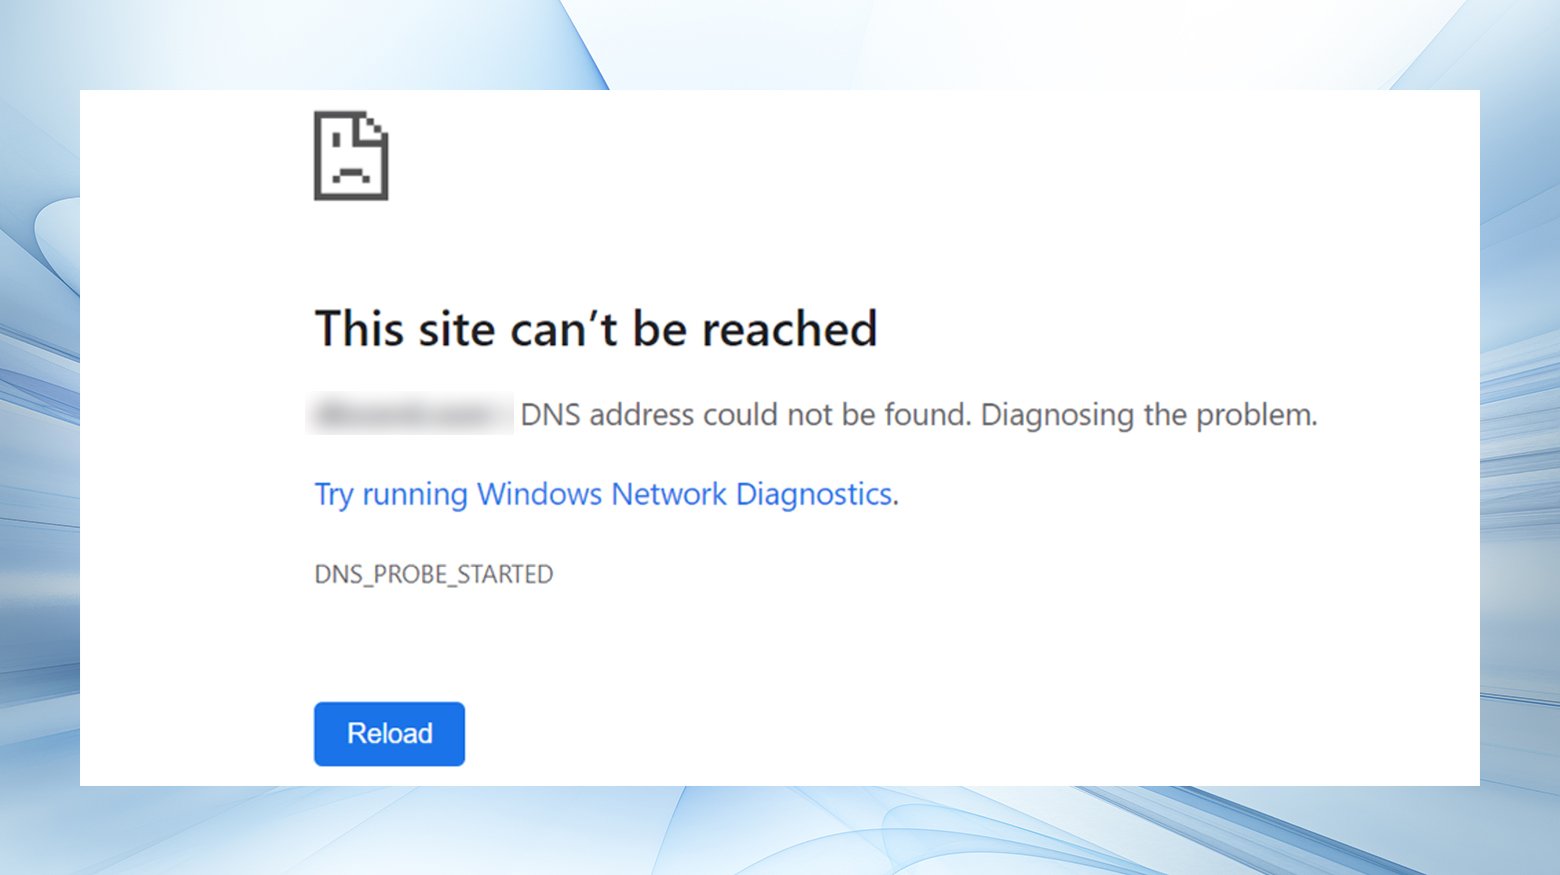
This error message usually appears when your device is having trouble connecting to a DNS server. It means a DNS probe diagnostic test has encountered issues while checking the device’s DNS connectivity.
DNS, which tracks domain names and their IP addresses, translates easy-to-remember domain names into numerical IP addresses. This allows us to access websites without having to remember their IP addresses.
A DNS probe is a diagnostic test that checks whether a website or IP address is accessible and whether the DNS servers work efficiently. There are various DNS-related errors, such as:
- DNS_PROBE_BAD_CONFIG
- DNS_PROBE_FINISHED_NXDOMAIN
- DNS SERVER NOT RESPONDING
DNS_PROBE_STARTED indicates explicitly that the diagnostic process has failed to initiate.
This issue is common in web browsers like Chrome but can occur on different platforms.
Common causes of the DNS_PROBE_STARTED error
If you see an error message that says “DNS_PROBE_STARTED, ” it means that your device is unable to connect to the DNS server. This can happen due to incorrect network or DNS settings, issues with network adapters or routers, or interference from antivirus or firewall applications.
Say goodbye to website errors
Achieve peace of mind with 99.99% uptime on 10Web Managed
WordPress Hosting, powered by Google Cloud.
Solutions for the DNS_PROBE_STARTED error
To fix this error, you must troubleshoot your browser, network, and device. The specific steps to follow may vary depending on the type of operating system and device you are using. However, the solutions provided apply to many operating systems, browsers, and platforms.
- Start by switching to alternative DNS servers for potential resolution.
- Clearing your DNS cache can eliminate outdated or incorrect DNS information, potentially solving connectivity issues.
- Clearing your browser’s cache and cookies might address the error by eliminating stored data that could be causing conflicts.
- Outdated or faulty network drivers could be to blame. Uninstalling and reinstalling them might rectify the problem.
- Sometimes, antivirus or firewall settings may inadvertently block DNS requests. Adjusting or temporarily disabling these can help identify if they’re the cause.
- In some cases, restarting your networking devices can refresh your connection to DNS servers and resolve the error.
Step-by-step instructions
1. Change your DNS server address
Changing your IPv4 or IPv6 DNS addresses can help bypass network congestion or issues with your current DNS server, potentially resolving the DNS_PROBE_STARTED error. Here’s how to do it:
For Windows:
- Open Control Panel and navigate to “Network and Internet”> “Network and Sharing Center”.
- Click on “Change adapter settings” on the left menu.
- Right-click your active network connection (Wi-Fi or Ethernet) and select “Properties”.
- Scroll down and select “Internet Protocol Version 4 (TCP/IPv4)” or “Internet Protocol Version 6 (TCP/IPv6)” and click “Properties”.
- Select “Use the following DNS server addresses” and enter the new DNS server addresses (e.g., Google DNS: 8.8.8.8 for Preferred and 8.8.4.4 for Alternate).
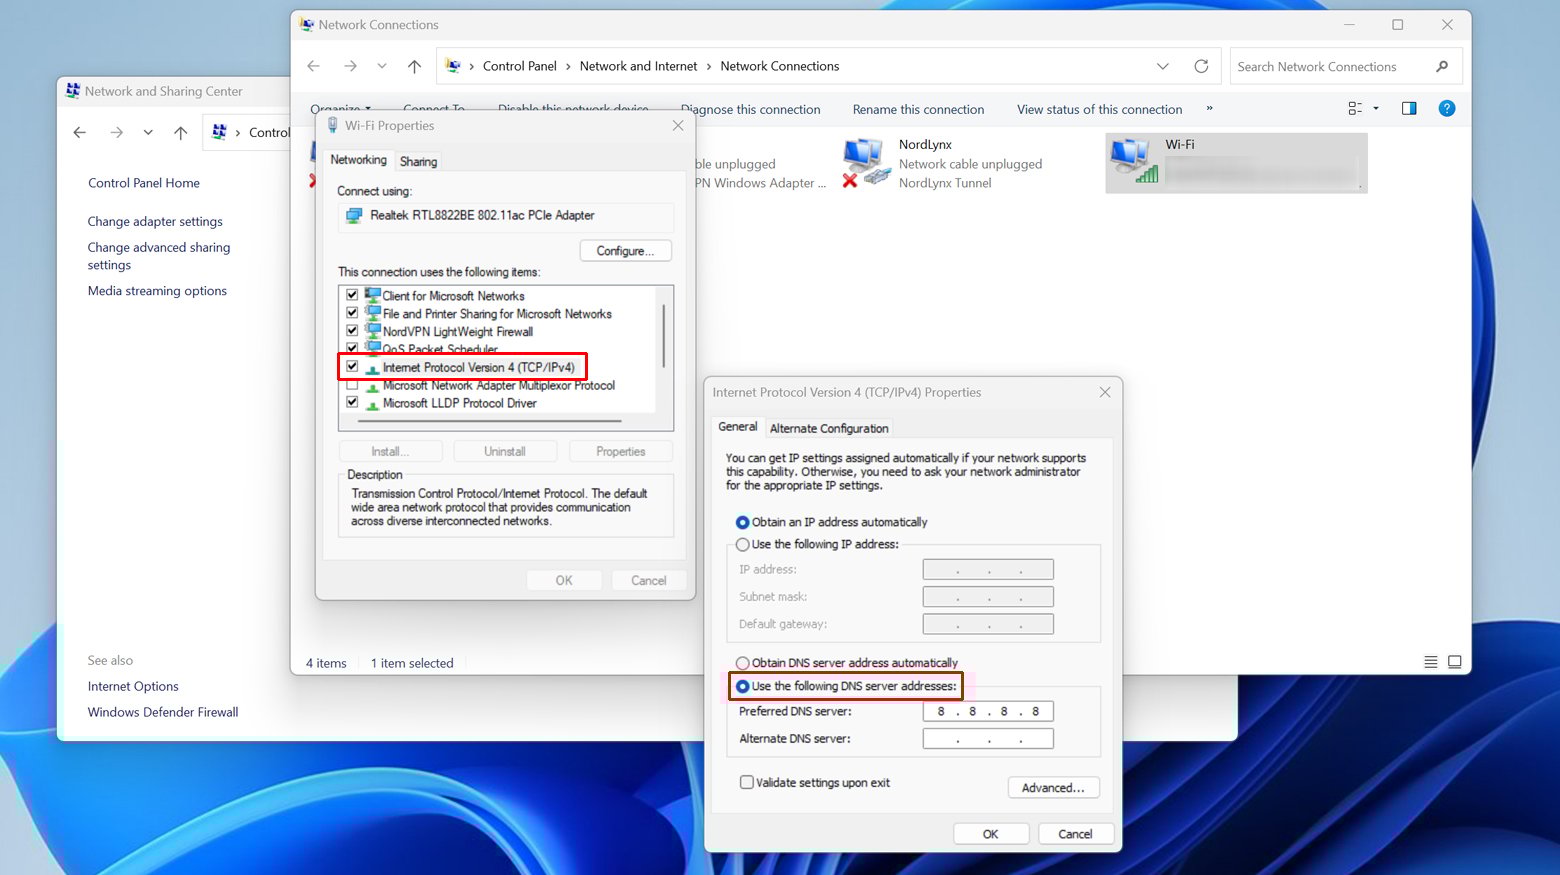
- Click “OK” to save your changes and close all windows.
For macOS:
- Go to System Preferences > Network.
- Select your active connection and click “Advanced”.
- Switch to the DNS tab.
- Click the “+” button to add new DNS servers and enter the DNS addresses.
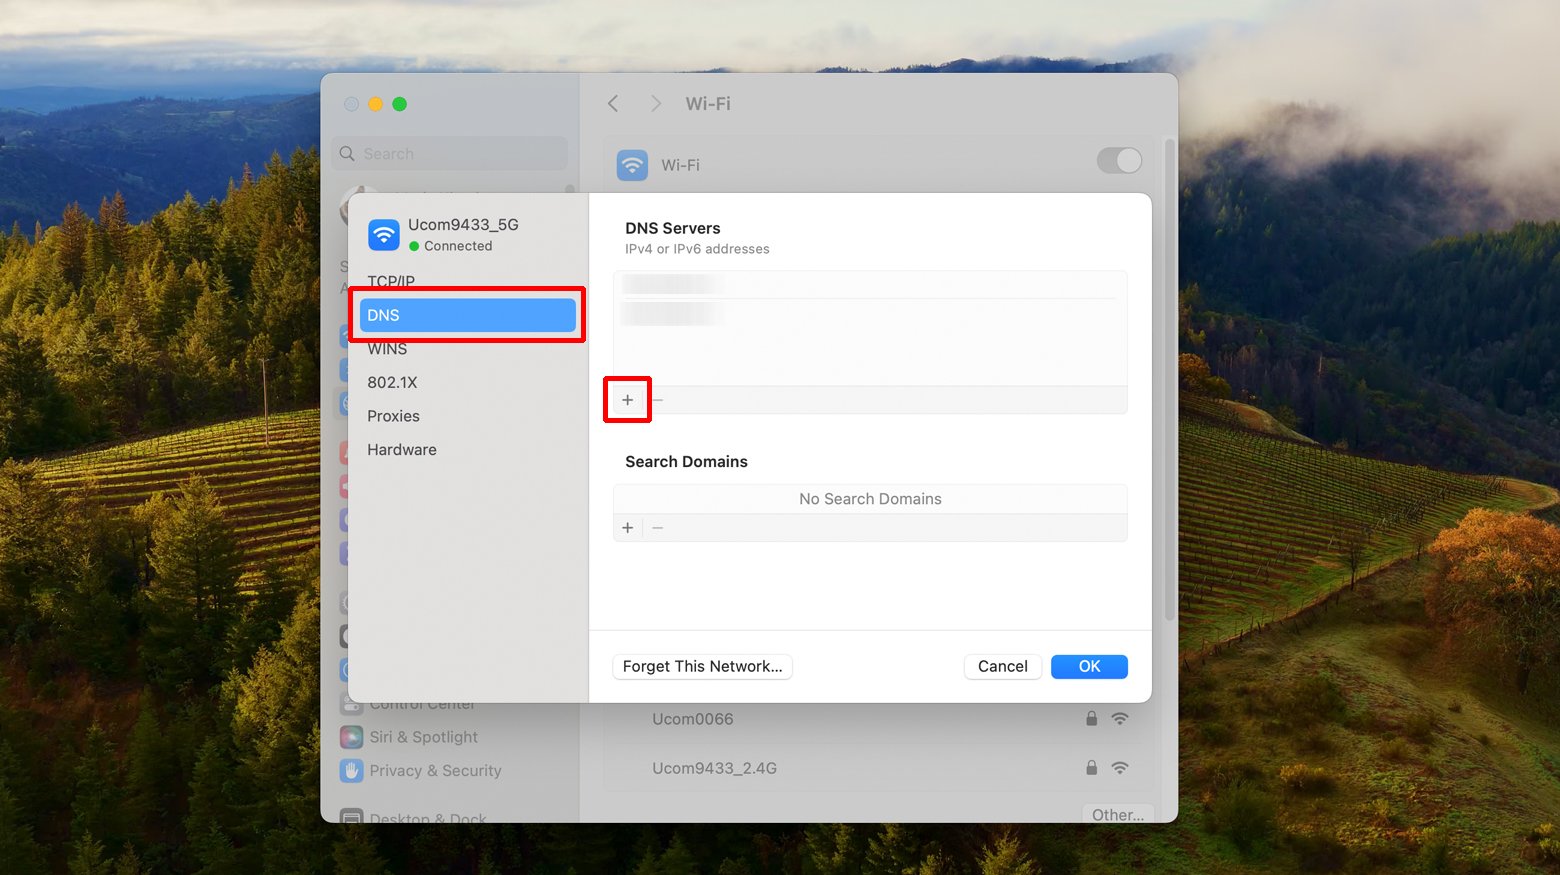
- Click “OK”, then “Apply” to save the changes.
2. Refresh Your DNS
Flushing your DNS cache removes outdated entries and can solve DNS-related errors by forcing your computer to update its DNS records.
Windows:
- Press Windows key + R, type “cmd”, and press Enter.
- Type `ipconfig /flushdns` and press Enter.
- Optional: Renew IP and re-register DNS with `ipconfig /renew` and `ipconfig /registerdns`.
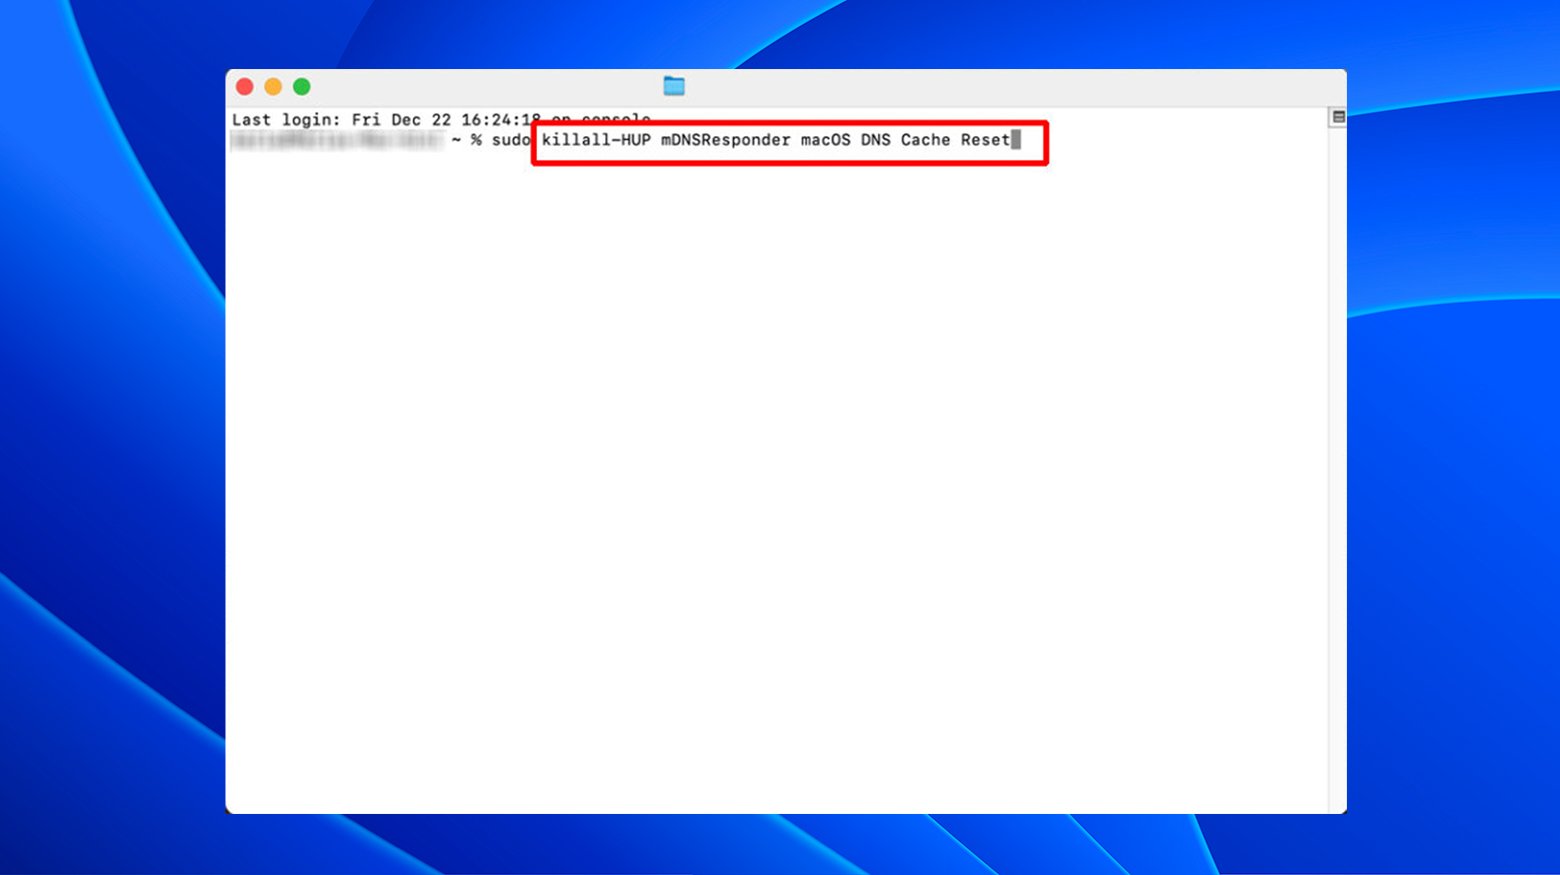
macOS:
- Open Terminal.
- Type `sudo dscacheutil -flushcache; sudo killall -HUP mDNSResponder` and press Enter. Enter your password if prompted.
3. Clear your browser cache and cookies
An outdated cache and cookies can cause DNS errors. Clearing them might resolve the issue.
Clearing cache and cookies on Chrome:
- Click the three dots in the upper right corner of Chrome to open the menu. Select “Settings.”
- Scroll down and click on “Privacy and security.”
- Click on “Clear browsing data.”
- In the “Basic” tab, check the boxes for “Cookies and other site data” and “Cached images and files.” You can also select the time range; to clear everything, select “All time.”
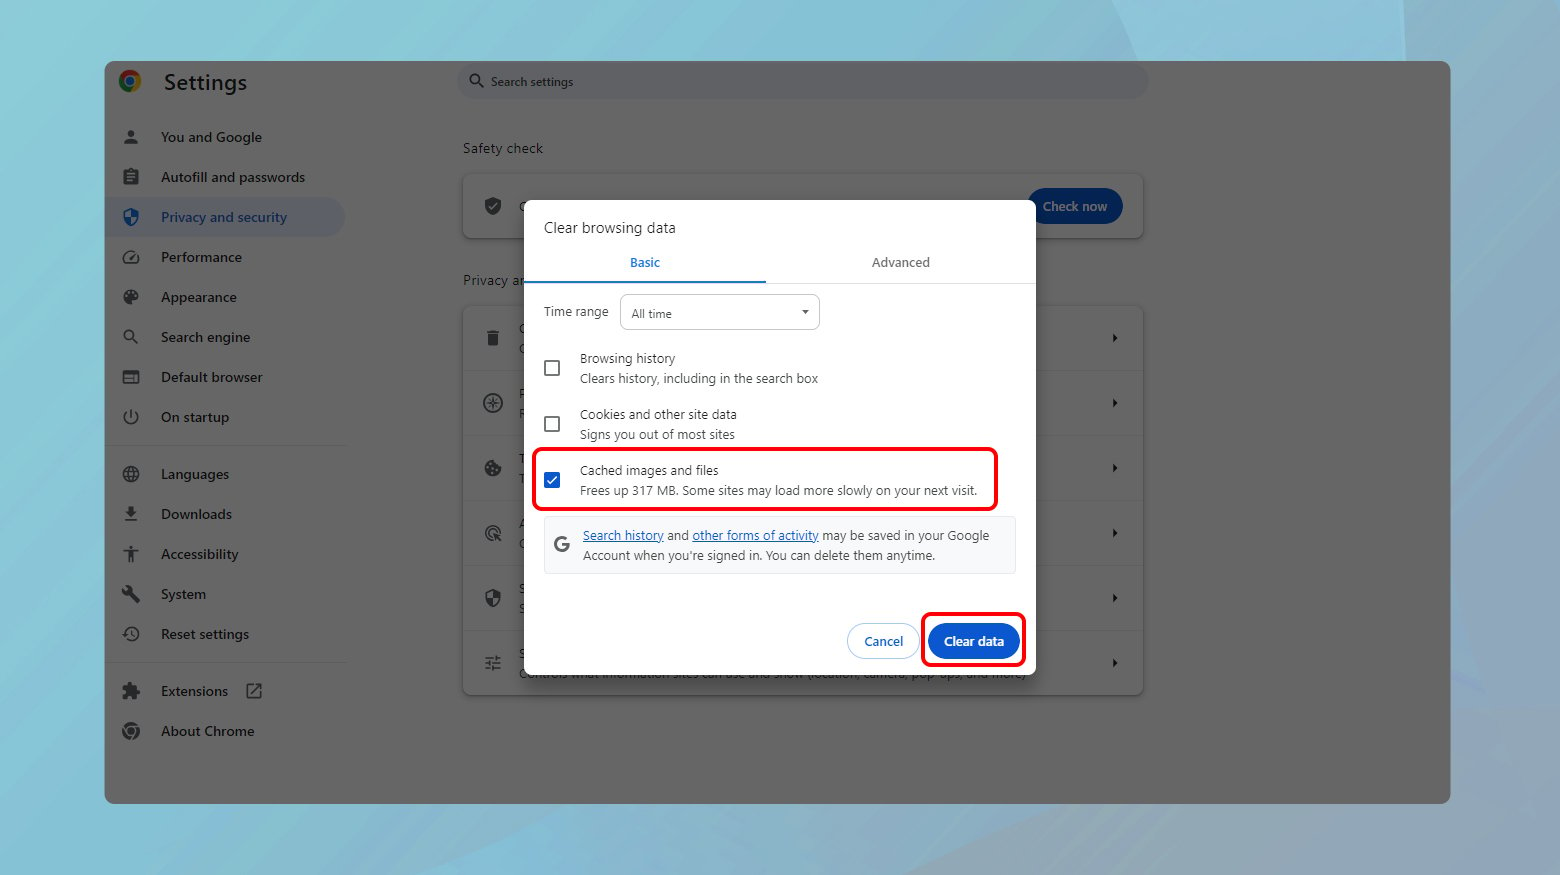
- Click the “Clear data” button to remove your selected browsing data.
For all browsers:
Access your browser’s settings to find the option to clear browsing data. Ensure that you select the option to clear cache and cookies and set the time range to “All time” or the maximum available option.
4. Uninstall and reinstall your network driver(s)
Outdated or corrupted network drivers could be the cause of DNS issues.
Windows:
- Press Windows key + R, type “devmgmt.msc”, and press Enter to open Device Manager.
- Expand “Network adapters,” right-click your network device, and select “Uninstall device.”
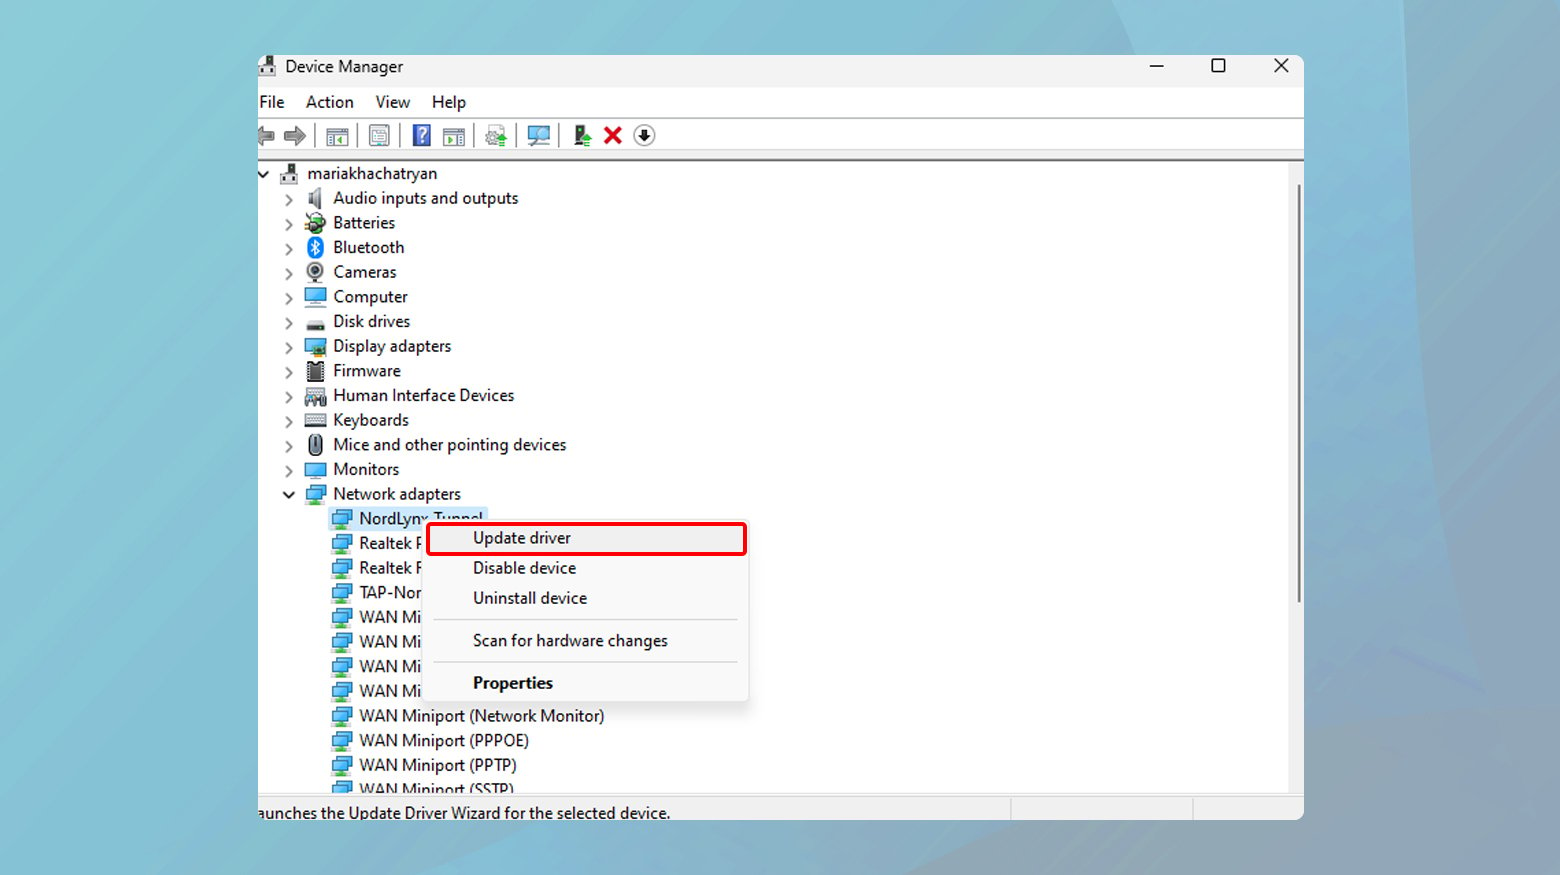
- Restart your PC. Windows will attempt to reinstall the network driver automatically.
macOS:
Network drivers are generally managed automatically by macOS, but ensuring your system is up to date can prevent or resolve issues.
5. Disable antivirus and firewall temporarily
Sometimes, security software might mistakenly block DNS requests.
Check your antivirus and firewall settings to ensure they’re not interfering with your network connections. Consider temporarily disabling them to test if this resolves the issue.
Remember to re-enable them afterward for your protection.
Disable Windows firewall:
- Press the Windows key, type “Control Panel,” and press Enter.
- Click on “System and Security,” then click on “Windows Defender Firewall.”
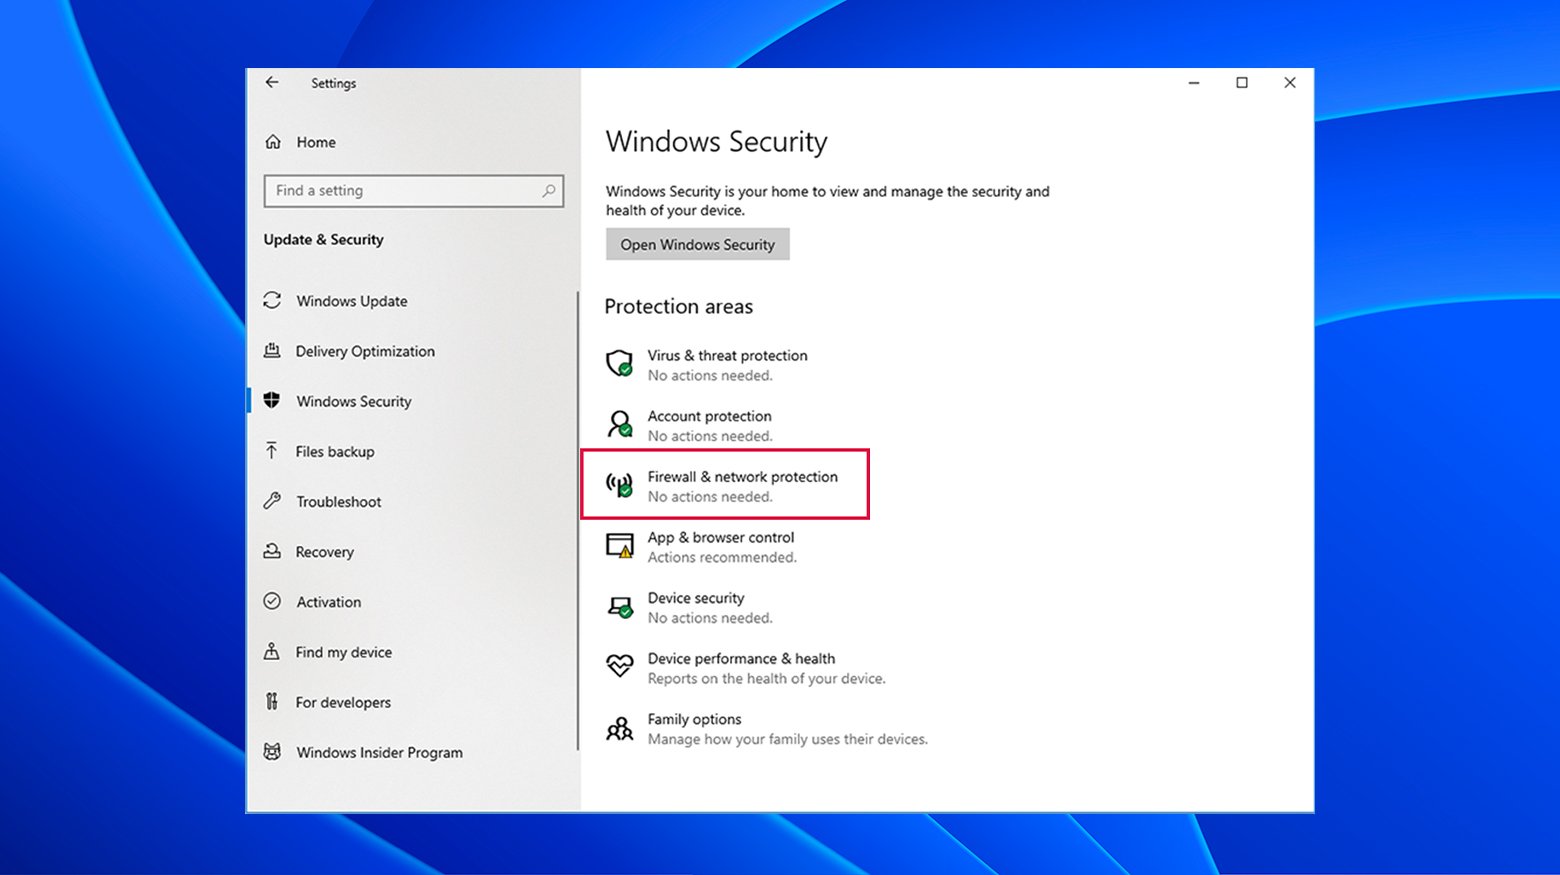
- On the left side, click “Turn Windows Defender Firewall on or off.”
- Under both “Private network settings” and “Public network settings,” select the “Turn off Windows Defender Firewall (not recommended)” option.
- Click “OK” to save your changes.
Disable antivirus protection in Windows:
The steps to disable antivirus software can vary depending on the antivirus program installed. Here’s a general guide:
- Click the upward arrow on the taskbar to open the system tray.
- Locate your antivirus icon; it may be Norton, McAfee, AVG, etc.
- Right-click on it and look for an option like “Disable,” “Stop,” “Turn Off,” or something similar. Sometimes, you might have to open the antivirus application and disable it from within the settings.
Disabling firewall on a Mac:
- Click on the Apple menu and select “System Preferences.”
- Click on “Security & Privacy.”
- Go to the “Firewall” tab.
- To make changes, click the lock icon in the bottom left corner (you may need to enter your admin password).
- Click “Turn Off Firewall” to disable the firewall.
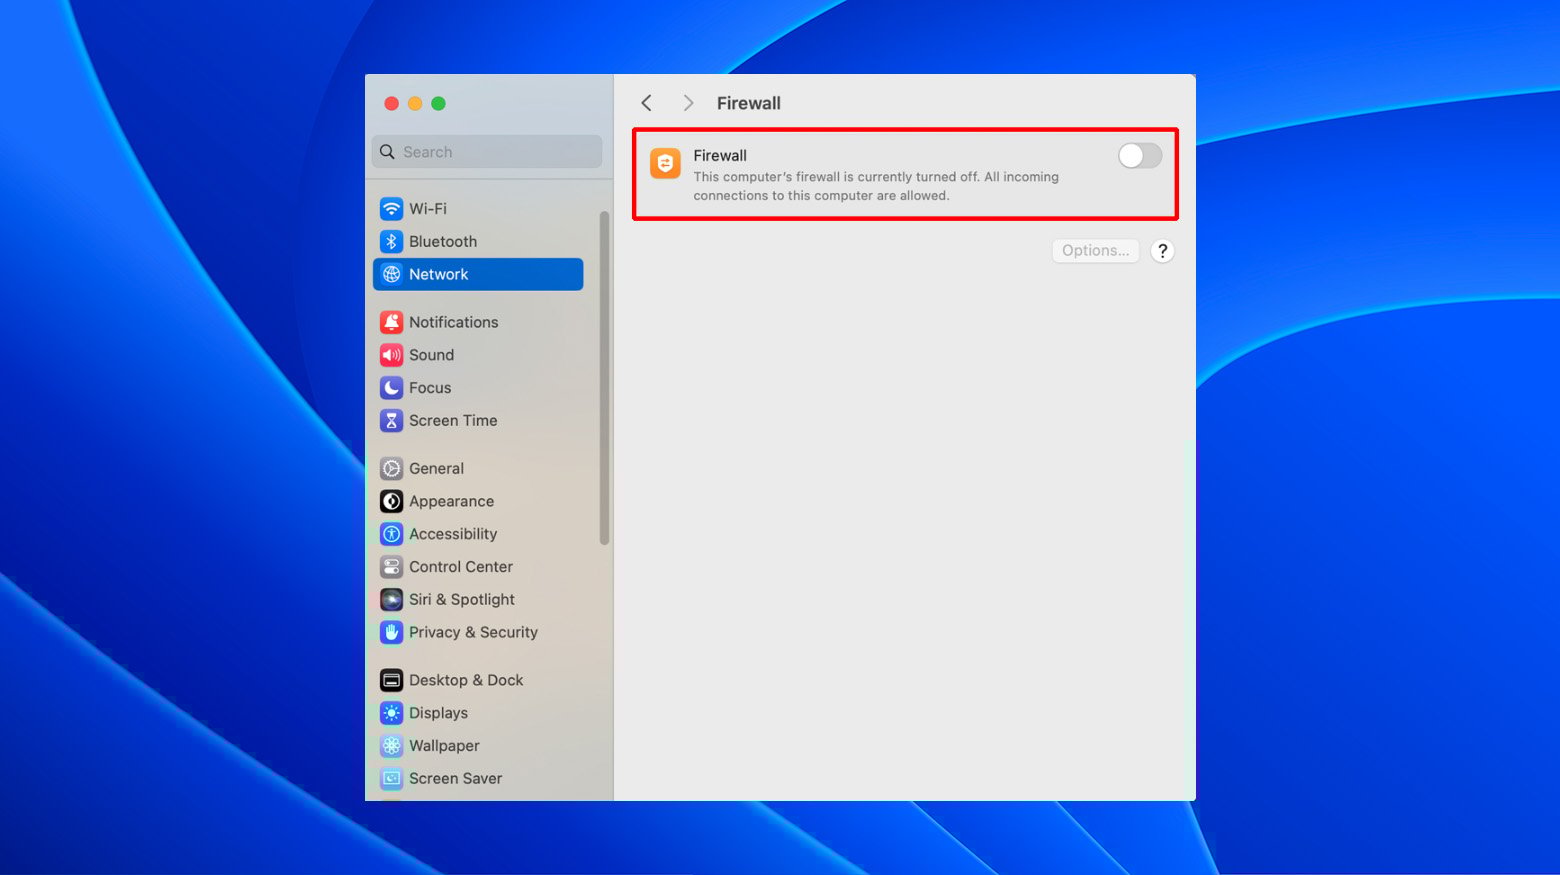
- Click the lock icon again to prevent further changes.
6. Restart your router/modem
A simple restart can resolve network connectivity issues by clearing any temporary glitches in the hardware.
Unplug your router and modem from their power sources, wait a minute, and plug them back in. Wait for all the lights to stabilize before testing your connection. It can also help to restart your device at this point.
Experience hassle-free hosting with 10Web
At 10Web, we understand that dealing with various website errors can be a daunting task. That’s why we offer a range of hosting solutions tailored to different needs, all designed to provide a smooth and reliable website performance. Our hosting plans come with a variety of features to ensure your website is always protected and operating at its best:
- Automated backups: Regular, hassle-free backups to keep your data safe.
- Real-time security: Continuous monitoring to protect your site from threats.
- One-click staging: Easily test changes before they go live.
- Lightning-fast speeds: Powered by Google Cloud for quick loading times.
- 24/7 customer support: Prompt assistance whenever you need it.
Switching to 10Web hosting means minimizing the time spent troubleshooting and maintaining your website. Our platform is optimized to handle a variety of website needs effortlessly, giving you more time to focus on growing your business. Plus, with our dedicated customer support, your concerns will be addressed promptly and efficiently.
Conclusion
Resolving the DNS_PROBE_STARTED error often involves a process of elimination, from refreshing your DNS settings to checking for broader network hardware issues. By following these detailed steps, you should be able to diagnose and fix the problem, restoring your access to the internet and specific websites without encountering this pesky error.
Still having trouble? Share your questions in the comments!
Say goodbye to website errors
Fix all the website errors in one click
Migrate your website to the world's best Managed WordPress Hosting.