Encountering the ERR_SSL_UNRECOGNIZED_NAME_ALERT error can perplex even the most seasoned website owners and developers. This SSL error signifies a hiccup in the secure communication channel established between a user’s browser and your server, essentially blocking access to your site – and preventing your visitors from viewing your content. The underlying issue typically lies within the SSL certificate’s configuration, making it a solvable problem with the right approach.
Say goodbye to website errors
Achieve peace of mind with 99.99% uptime on 10Web Managed
WordPress Hosting, powered by Google Cloud.
Understanding ERR_SSL_UNRECOGNIZED_NAME_ALERT
SSL certificates are crucial for encrypting data between a user’s browser and your website, safeguarding sensitive information from potential interceptors. When the ERR_SSL_UNRECOGNIZED_NAME_ALERT error surfaces, it points towards a misconfiguration or recognition issue with the SSL certificate, rendering the website “unavailable” rather than just displaying a warning.

That’s why correcting SSL errors like this one quickly is so important. Without a properly configured SSL certificate, visitors could be potentially discouraged from trying to visit when a website shows warnings or error messages. Furthermore, since having a functioning SSL certificate is a ranking signal, problems that cause errors like Err_ssl_unrecognized_name_alert can negatively impact your search performance.
Root Causes of ERR_SSL_UNRECOGNIZED_NAME_ALERT
This error predominantly arises due to:
- Using an invalid or untrusted SSL certificate.
- Misconfiguration within the certificate’s settings.
- Your website is not set up to load correctly over HTTPS.
While there are various SSL errors like SSL Handshake Failed or ERR_SSL_PROTOCOL_ERROR, the ERR_SSL_UNRECOGNIZED_NAME_ALERT specifically flags issues with certificate recognition or configuration.
Unfortunately, unlike other SSL errors, Err_ssl_unrecognized_name_alert error is not usually fixed by simply clearing the browser cache or flushing your computer’s DNS.
Resolving ERR_SSL_UNRECOGNIZED_NAME_ALERT errors (4 Methods)
Navigating the murky waters of SSL errors can be daunting, but with a systematic approach, you can clear the ERR_SSL_UNRECOGNIZED_NAME_ALERT error from your website. By following these steps, you can identify and resolve the issue, ensuring a secure and trustworthy site for your visitors. Let’s dive into the solutions:
1. Ensure you have a valid SSL certificate
The foundation of SSL security is a valid certificate issued by a trusted authority. This isn’t just about encryption; it’s about trust. Certificate authorities, like Comodo, DigiCert, GlobalSign, GoDaddy, Let’s Encrypt, and Cloudflare, are the gatekeepers of this trust. They undergo rigorous audits and checks to ensure they can be relied upon to issue secure certificates.
Verify that your SSL certificate is issued by a recognized authority. If you obtained your certificate from a source you’re unsure about, consider reissuing your certificate through a trusted provider. Hosting services like 10Web often offer integrated SSL solutions, including certificates from reputable authorities like Let’s Encrypt, making this process smoother.
10Web customers who are using a self-signed certificate or one from an untrusted source can try removing the certificate and adding a new SSL certificate from your dashboard.
2. Check your SSL configuration for errors
A misconfigured SSL certificate can lead to the ERR_SSL_UNRECOGNIZED_NAME_ALERT error just as easily as an invalid certificate can. Tools like the Qualys SSL Server Test come in handy here, offering a detailed report on your SSL certificate’s configuration and highlighting any potential issues. In addition, the tool provides a rating based on its analysis of how trusted your site will be by browsers.
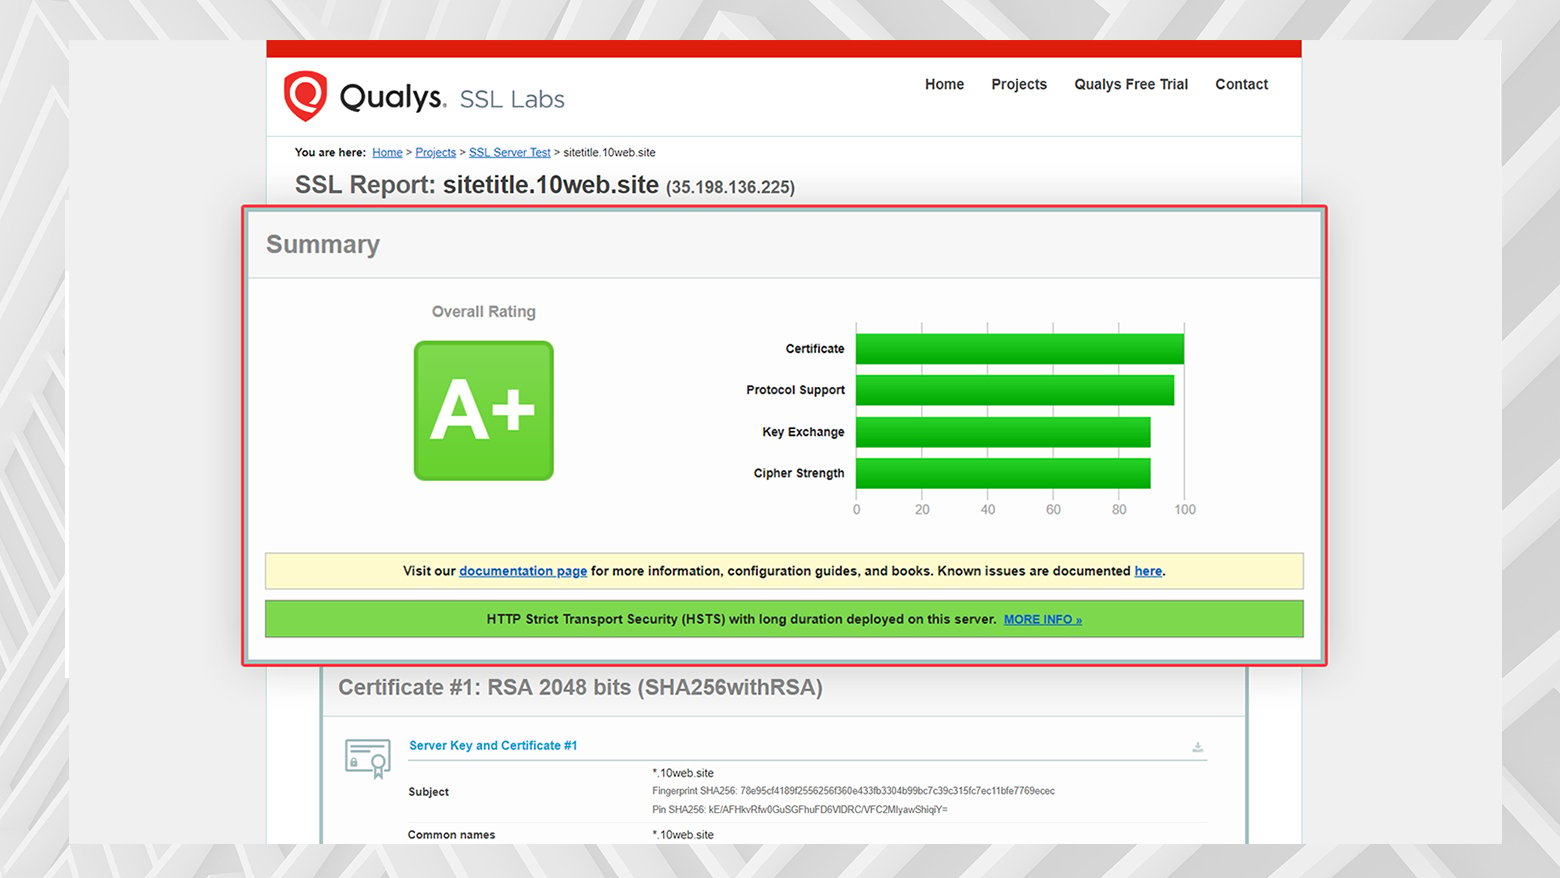
Use an SSL checking tool to scrutinize your certificate’s setup. Look for any flags regarding the issuer’s validity, the certificate’s expiration, and browser trust levels. This step can help pinpoint issues that aren’t immediately obvious but could be causing the error.
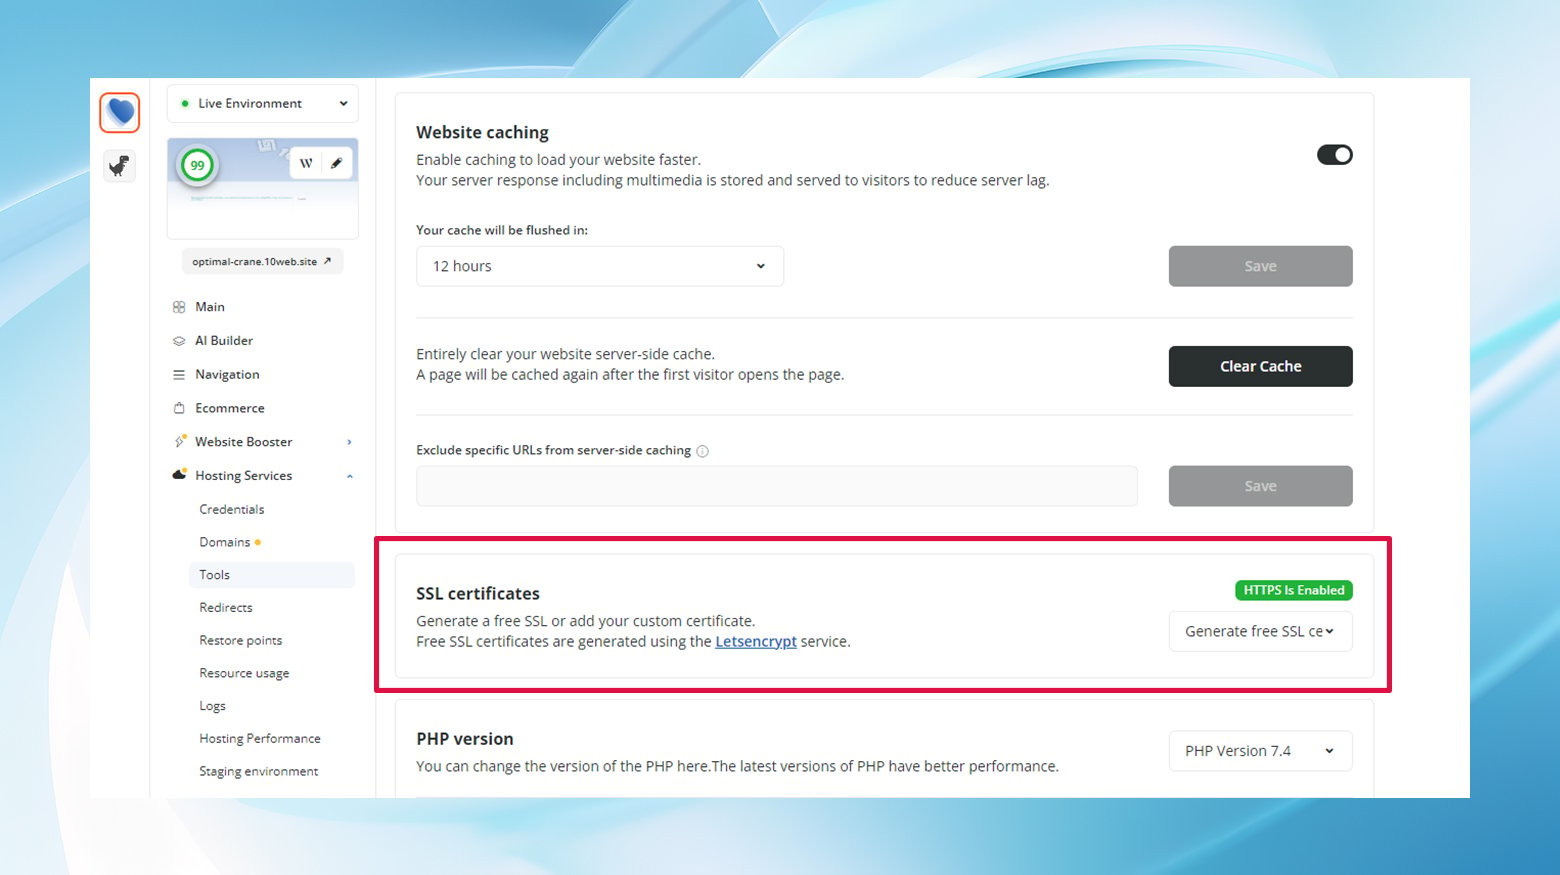
3. Configure your website to load over HTTPS
Merely having an SSL certificate isn’t enough; your website must be configured to use it correctly. This means ensuring all web traffic is directed over HTTPS, establishing a secure connection for all visitors.
If your hosting platform provides an option to force HTTPS (like 10Web does), make sure it’s enabled.
For those on Nginx servers, forcing HTTPS involves editing your Nginx config file to redirect HTTP traffic to HTTPS. Likewise, Apache users will need to tweak their .htaccess file accordingly.
Remember, direct server configuration changes should be approached with caution—back up your configurations before making any changes.
Steps to set up HTTPS redirection for Nginx and Apache servers.
For Nginx
Nginx is a high-performance web server that’s also used as a reverse proxy, load balancer, and HTTP cache. To redirect all HTTP traffic to HTTPS in Nginx, you’ll need to modify your site’s configuration file. Here’s how:
- Locate your Ngnix configuration file. This file is typically found at
/etc/nginx/sites-available/yourdomain.com, whereyourdomain.comis your website’s domain name. If you’re unsure, you can check the default file at/etc/nginx/sites-available/default. - Open the file with a text editor. If you’re using SSH, you might use
nanoorvim:sudo nano /etc/nginx/sites-available/yourdomain.com
- Within the server block for port 80 (HTTP), add a redirection directive to forward all traffic to HTTPS. Here’s an example configuration that listens for incoming connections on port 80 (the default for HTTP) and uses a 301 redirect to send all traffic to the HTTPS version of the site:
server { listen 80; server_name yourdomain.com www.yourdomain.com; return 301 https://$server_name$request_uri; } - Before applying the changes, it’s a good practice to test your Nginx configuration for syntax errors:
sudo nginx -t
- If the test passes without issues, reload Nginx to apply the changes:
sudo systemctl reload nginx
Apache
Apache is another popular web server known for its flexibility and wide support. Redirecting HTTP traffic to HTTPS on an Apache server involves editing the .htaccess file or the Apache configuration file directly. Here’s how to do it using the .htaccess method, which is often preferred for shared hosting environments:
- Locate or Create Your
.htaccessFile: This file is typically found in the root directory of your website. If it doesn’t exist, you can create a new one. - Open the
.htaccessfile with a text editor. If you’re accessing your server via FTP, you can download the file, edit it locally, and then upload it again. Add the following lines to the top of the file:
RewriteEngine On

RewriteCond %{HTTPS} off

RewriteRule ^(.*)$ https://%{HTTP_HOST}%{REQUEST_URI} [L,R=301]
This configuration enables the rewrite engine, checks if HTTPS is off (meaning the current connection is HTTP), and then redirects to the HTTPS version of the URL.
- After adding the redirection code, save the
.htaccessfile and upload it back to your server if you’re editing locally.
4. Reach out to your hosting provider
Sometimes, despite your best efforts, the issue persists. This is when enlisting the help of your hosting provider becomes invaluable. A good hosting provider can offer insights into potential server-side issues that might be causing the SSL error and assist in reissuing or reinstalling your certificate if needed.
When contacting support, be prepared with details of the steps you’ve already taken. This will help them narrow down the problem more efficiently. Highlight that you’ve verified the certificate’s validity, checked for configuration errors, and ensured your site is set to load over HTTPS.
Conclusion
SSL errors, especially ones like ERR_SSL_UNRECOGNIZED_NAME_ALERT, can deter users from accessing your site, affecting both trust and SEO rankings. Addressing this error involves verifying the SSL certificate’s authenticity, checking for configuration mishaps, ensuring HTTPS enforcement, and possibly consulting with your hosting provider. By following these steps, you can restore secure access to your site, reassuring users and search engines of your site’s legitimacy and security.
Say goodbye to website errors
Achieve peace of mind with 99.99% uptime on 10Web Managed
WordPress Hosting, powered by Google Cloud.
Say goodbye to website errors
Fix all the website errors in one click
Migrate your website to the world's best Managed WordPress Hosting.