In the context of WordPress websites, dropdown menus play a pivotal role in enhancing navigation, organizing content neatly, and ensuring visitors can easily navigate from page to page.
This comprehensive guide not only covers how to add a dropdown menu in WordPress but also offers best practices and tips on structuring your navigation intuitively.
FAQ
Can you add a dropdown menu in WordPress?
How do I add a dropdown menu to my website?
To add a drop-down menu to your WordPress website, go to Appearance > Menus in your dashboard. Create a new menu or select an existing one. Add items to the menu from your pages, posts, or custom links, and arrange them in a hierarchy by dragging and placing sub-items under main items. Save your menu and assign it to one of the theme’s menu locations.
How do I add a menu and submenu in WordPress?
To add a menu with submenus in WordPress, navigate to Appearance > Menus in your dashboard. Add items to your menu from the left-hand options panel. To create submenus, drag menu items slightly to the right beneath their parent menu items, creating a nested structure. Select the menu’s location, and save your changes to implement the menu and submenus on your site.
How do I add a toggle menu in WordPress?
To add a toggle menu, also known as an accordion menu, you can use a plugin that supports toggle functionality, such as “Accordion Menu” or “Max Mega Menu.” Install and activate the plugin, then follow the plugin’s instructions to create your toggle menu. Typically, this involves adding items to a menu and setting the menu type to “toggle” within the plugin’s settings.
How do I create a dropdown menu?
You can create a drop-down menu in WordPress through the Appearance > Menus section in your dashboard, where you can add and organize your menu items hierarchically. Alternatively, plugins like “Max Mega Menu” offer enhanced styling and functionality, or you can use custom PHP for more specific customization needs.
How do I create a custom dropdown menu?
Creating a custom drop-down menu often involves using additional CSS or JavaScript for styling and functionality beyond WordPress’s default options. Start by building your menu in Appearance > Menus. Then, use a custom CSS plugin or your theme’s Additional CSS section to style your menu. Alternatively, plugins like “UberMenu” or “Hero Menu” provide extensive customization options for creating unique drop-down menus without needing to write code.
What is a dropdown list plugin for WordPress?
How to create a dropdown menu in Elementor?
How to add dropdown content in WordPress?
Can I create a dropdown menu without a page?
How to create a dynamic dropdown menu?
Introduction to dropdown menus in WordPress
Navigational menus are essential for enhancing the user experience on a website, guiding visitors through your content, and ensuring they find what they’re looking for. Let’s explore some of the most popular types of navigational menus used across different websites:
Header menus
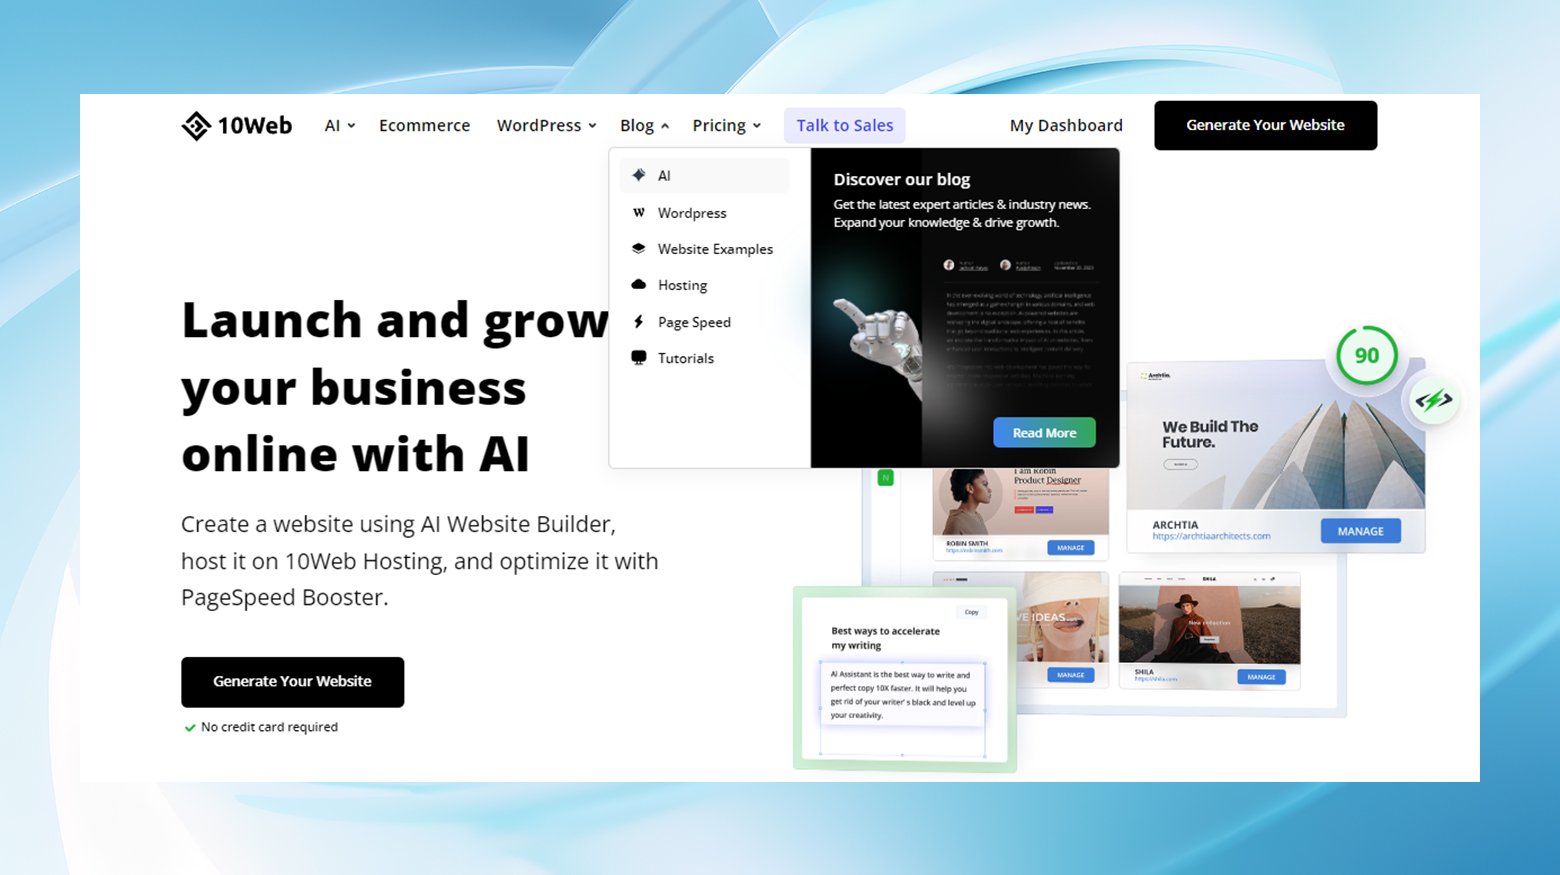
Header menus are arguably the most common type of navigation menu. Typically found at the top of a website, these menus are always visible, providing easy access to the site’s main sections. They often feature dropdown functionality, allowing for a cleaner design while offering deep navigation options.
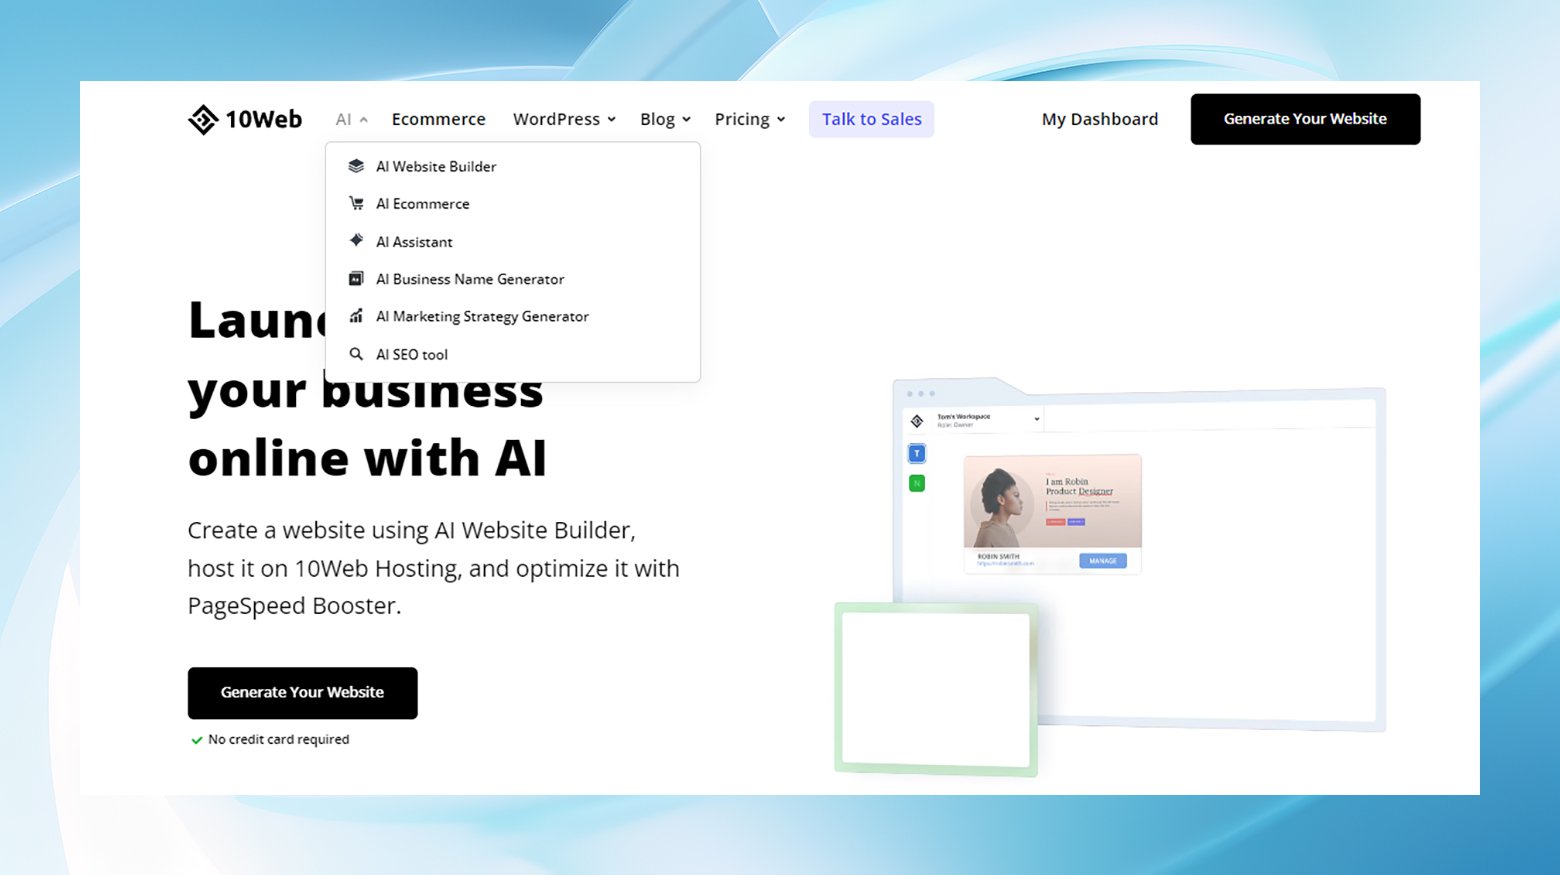
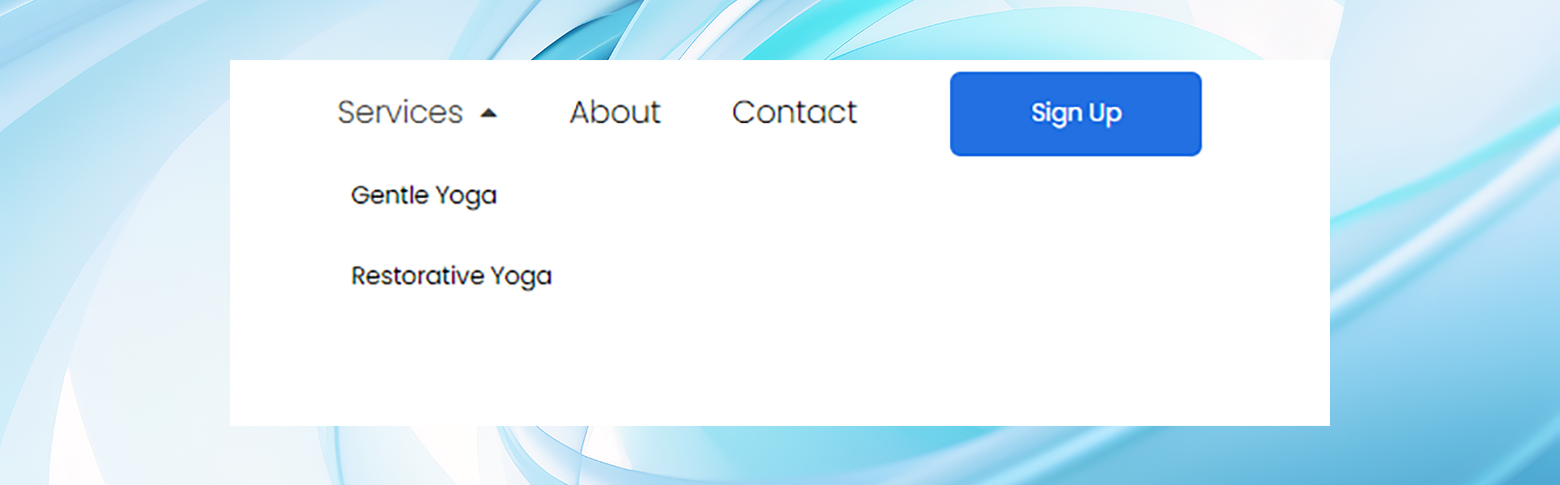
For example, adding a dropdown menu in the header of a website, like 10Web’s, showcases products or services, and hovering over the top level menu links displays additional dropdown menus or images.
Sidebar menus
Sidebar menus are prominent, especially on websites that require a more structured approach to navigation, such as ecommerce platforms or extensive blogs. Positioned at the side of a webpage, these menus offer vertical navigation options.
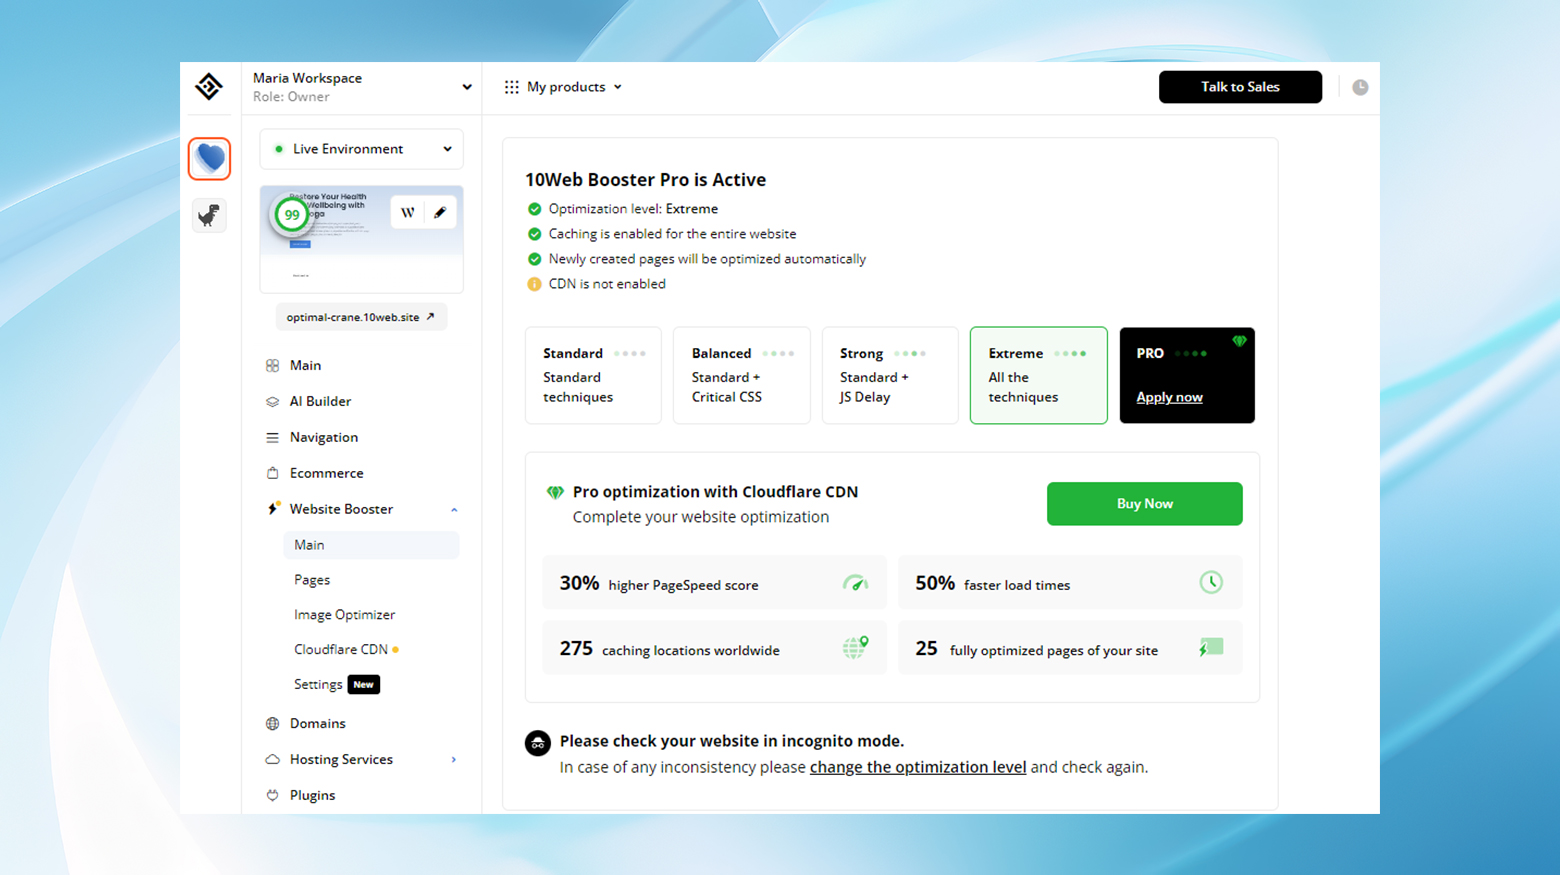
For instance, in the 10Web dashboard, sidebar dropdown menus organize links for account settings, hosting services, and staging options in a compact, easily accessible format.
Simplify WordPress with 10Web
Automate manual work with 10Web Managed WordPress Hosting and 10Web AI Website Builder. Optimize your WordPress website effortlessly.
Hamburger menus
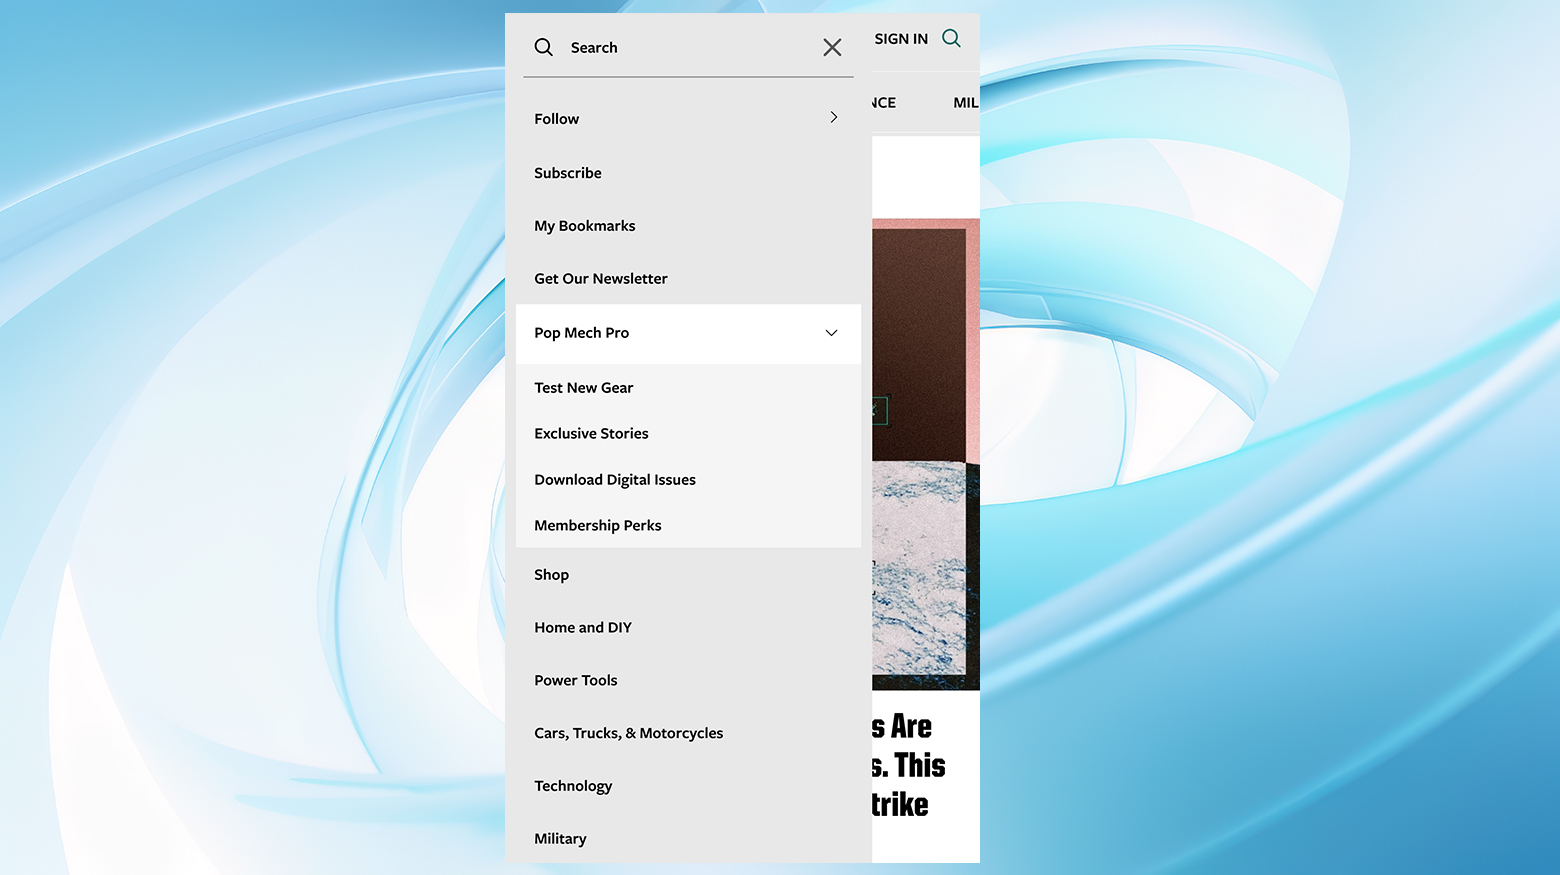
Hamburger menus are a staple on mobile sites but can also be found on full websites. Named after the iconic three-line menu icon resembling a hamburger, these menus are a space-saving solution, hiding the navigation options until the icon is clicked or tapped.
As an example, on the Popular Mechanics mobile site, the hamburger menu expands to reveal a list of navigation options. This economizes screen space while still making comprehensive navigation accessible.
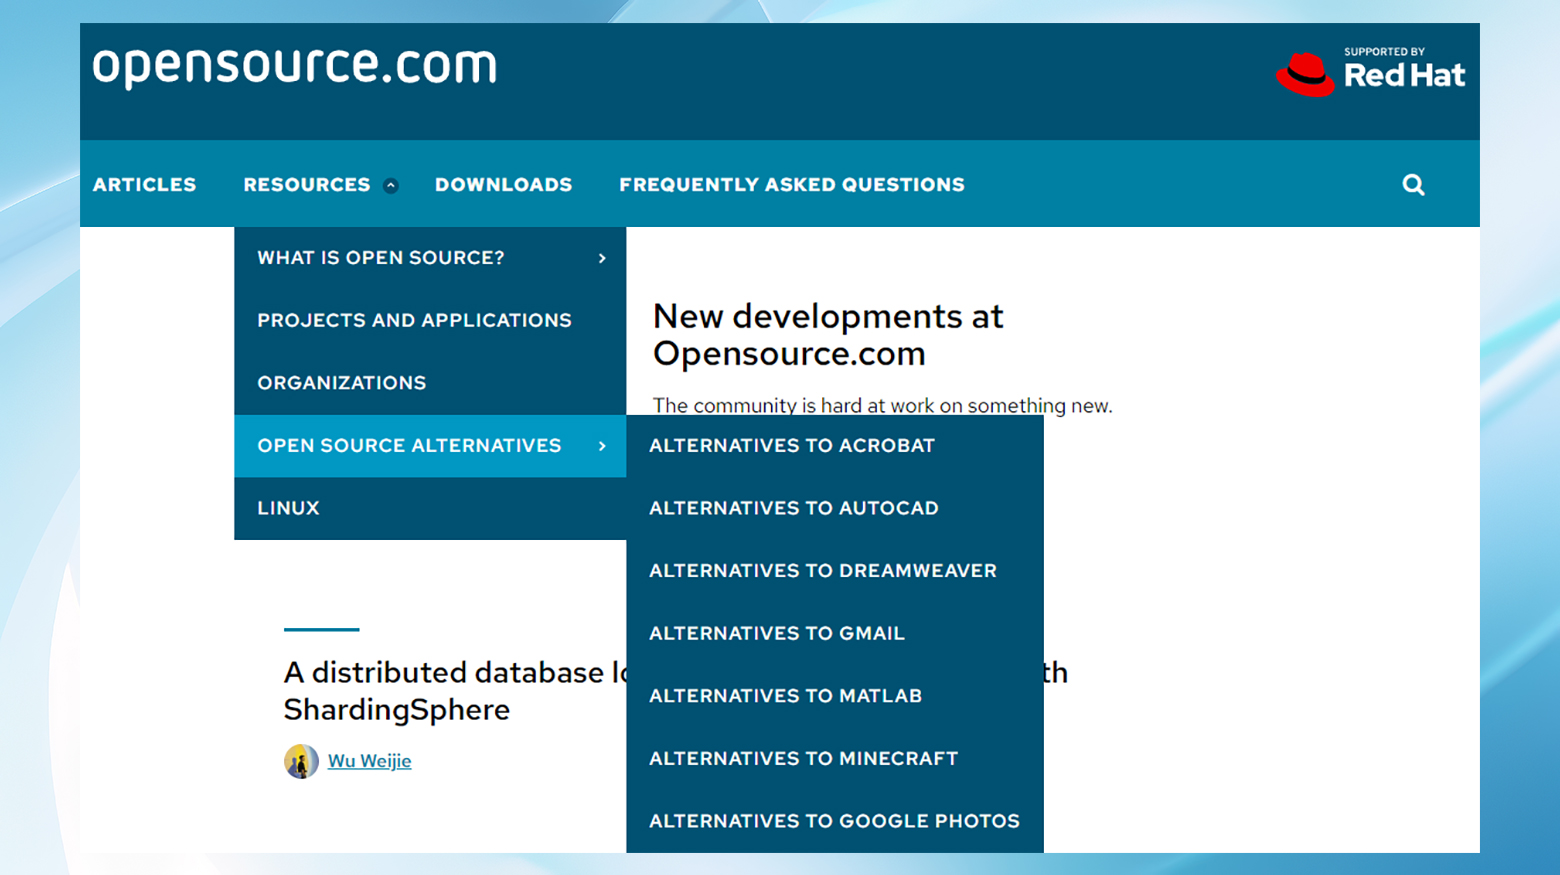
Dropdown navigation menus (Navbar)
Dropdown navigation menus, also called navbars, are similar to header menus but are designed to save screen space by using sub-menu functionality. This menu type is particularly effective for sites with a broad range of content categories or extensive navigation needs.
For example, Opensource.com features a dropdown navbar that hides away the various content categories, only displaying them when the user hovers over or clicks on the main navigation bar, thus keeping the interface clean and uncluttered.
Confirming theme support and customization options
Before implementing any of these menu types, you must ensure that your WordPress theme supports the specific navigation style you’re planning to use. Most themes will indicate their support for these menu types in their documentation. However, for themes that don’t natively support certain types of menus, custom HTML or CSS can be employed to create a tailored dropdown navigation menu that fits your site’s design and usability requirements.
Each navigational menu type offers distinct advantages depending on your website’s layout, content structure, and design goals. By choosing the right kind and ensuring it’s supported by your theme (or customizing it as needed), you can significantly enhance your site’s navigational experience, making it more intuitive, accessible, and engaging for your visitors.
Importance and utility of dropdown menus
Dropdown menus in WordPress are more than just a stylish navigation option; they are a cornerstone for improving user experience. By efficiently categorizing links and reducing the clutter on your site’s navigation bar, they help visitors find what they’re looking for with minimal effort. A well-implemented dropdown menu can significantly enhance the aesthetic appeal of your site, keep it organized, and potentially reduce bounce rates by encouraging visitors to explore more content.
Dropdown menus are a crucial component in the design and functionality of a WordPress website, serving not just as a design element but as a strategic tool for enhancing user navigation and overall site usability.
Streamlining user experience
The primary utility of dropdown menus lies in their ability to streamline the user experience. By consolidating information into a submenu format, these menus reduce the need for excessive scrolling and clicking, allowing visitors to access deeper sections of the site from a single access point. This efficiency not only speeds up the interaction but also makes the user journey smoother and more intuitive.
Enhancing site aesthetics
From a design perspective, dropdown menus contribute significantly to a clean and uncluttered website interface. They allow for a minimalistic navigation bar that doesn’t overwhelm the visitors with too much information at once. By hiding secondary options, dropdown menus help maintain an aesthetic balance on the page, focusing user attention on primary content while still providing easy access to more in-depth resources.
Improving content discoverability
Dropdown menus enhance content discoverability by smartly categorizing related topics or services under a unified heading. This logical grouping encourages users to explore areas of the site they may not have otherwise noticed. For example, a dropdown menu labeled Services might expand to reveal options like Consulting, Software Development, and Customer Support, each leading to further sub-categories or pages. This method not only exposes users to a wider array of your offerings but can also significantly improve the site’s SEO by structuring content more logically and interlinking related pages.
Simplify WordPress with 10Web
Automate manual work with 10Web Managed WordPress Hosting and 10Web AI Website Builder. Optimize your WordPress website effortlessly.
Reducing bounce rates
Well-designed dropdown menus can contribute to lower bounce rates. By providing visitors with immediate access to multiple related sections of your site, you give them a reason to stay and explore rather than leave after consuming a single piece of content. This deeper engagement not only improves the chances of converting visitors into customers or followers but also signals to search engines that your site delivers valuable content, potentially boosting your rankings.
Facilitating complex site navigation
Dropdown menus are indispensable for larger websites or those with a broad array of products or services. They make navigating complex site structures feasible without forcing users to revert to the search function or site map. Users can get a quick overview of what’s available on the website without the need to navigate away from their current page, significantly enhancing user satisfaction and the overall effectiveness of the site navigation.
Adapting to modern usability standards
In today’s mobile-first world, dropdown menus adapt seamlessly to different devices, maintaining usability standards across desktops, tablets, and smartphones. Modern dropdown menus are designed to be responsive, ensuring that navigation remains accessible and user-friendly, no matter the screen size. This adaptability is critical as mobile browsing continues to rise, requiring websites to deliver a consistent experience across all platforms.
How to add a dropdown menu in WordPress: 5 methods
Before you add a dropdown menu in WordPress, it’s important to plan your site’s menu structure. Think about your content’s main categories and how they can be logically organized. This step ensures that your site and visitors receive the best possible benefits from your dropdown menu.
Once your menu structure is planned out, there are several methods to add a dropdown menu in WordPress:
- Create a new menu or edit an existing one in the admin’s editor.
- Insert a Navigation block into a post or page.
- Use the Site Editor.
- Use a menu plugin.
- Manually add a dropdown menu using PHP.
Simplify WordPress with 10Web
Automate manual work with 10Web Managed WordPress Hosting and 10Web AI Website Builder. Optimize your WordPress website effortlessly.
Method 1: Using the built-in menu editor
WordPress has a user-friendly built-in menu editor, allowing you to craft these menus without needing additional plugins or coding expertise. First, we’ll review how to add a new menu and create a dropdown menu. Then, you’ll have the option to tweak the menu with custom CSS.
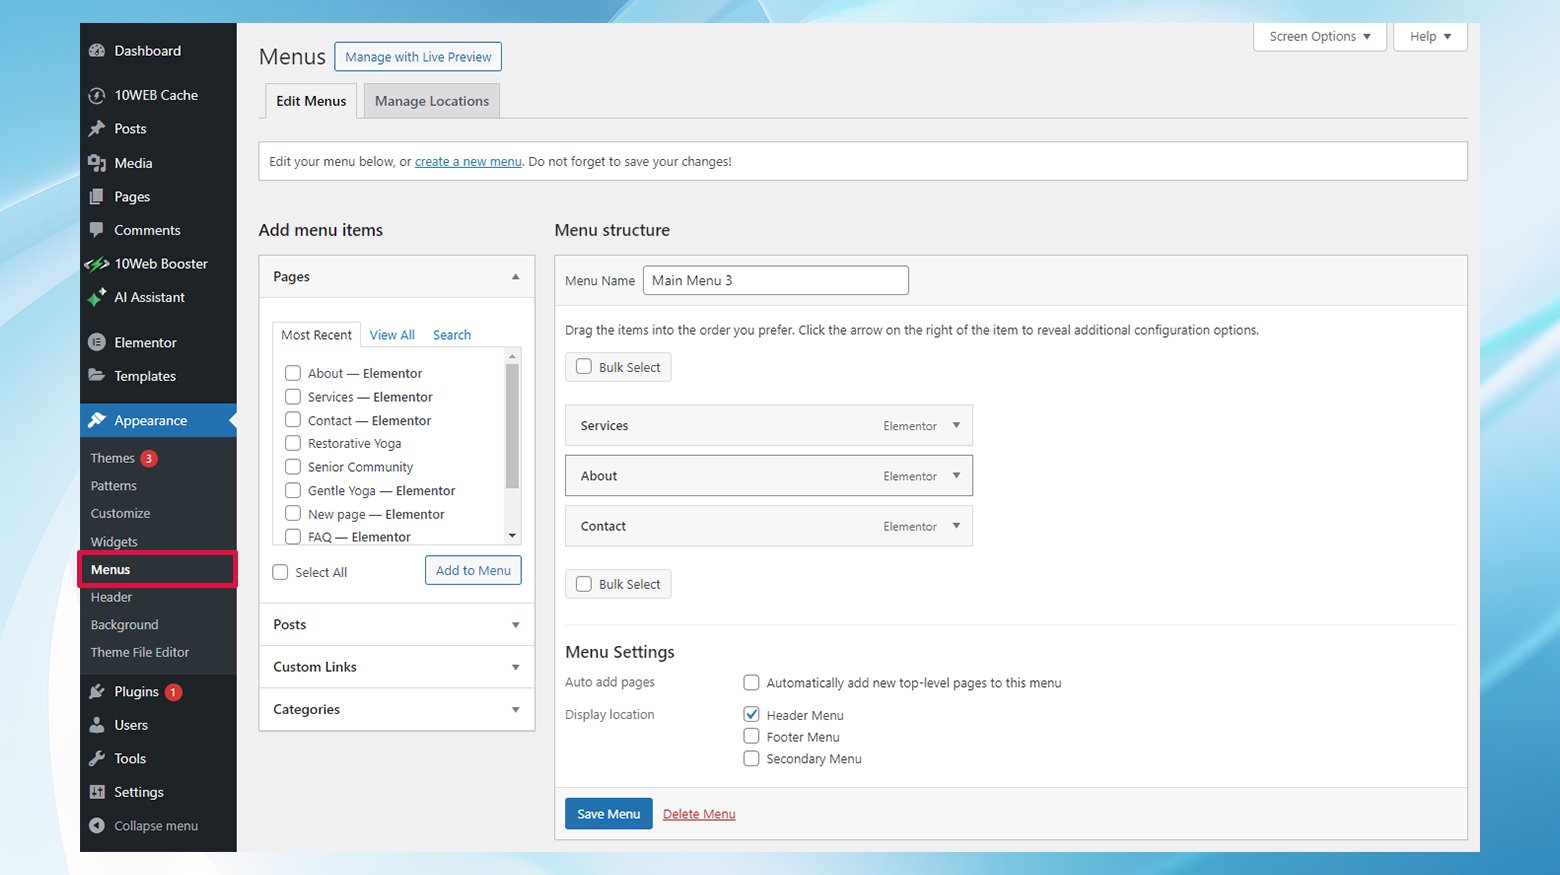
Step 1: Access the menu editor
First, you’ll need to log into the backend of your WordPress site. Once you’re in, navigate to your WordPress dashboard’s Appearance > Menus section.
Step 2: Create a new menu
Upon entering the Menus screen, click the Create Menu button to start crafting your new menu.
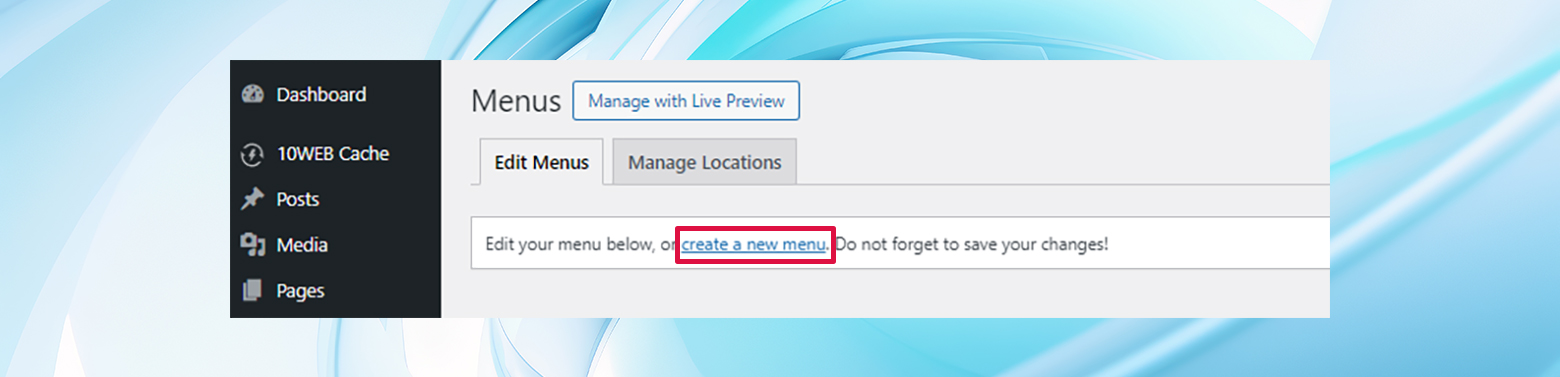
This step is the foundation of your menu structure, where you define how your menu will be organized and displayed on your site. Instead of creating a new menu, you can edit any existing menus you may already have to add a dropdown menu.
Step 3: Configure your menu
Give your new menu a descriptive name to help you identify it among other menus you might create.
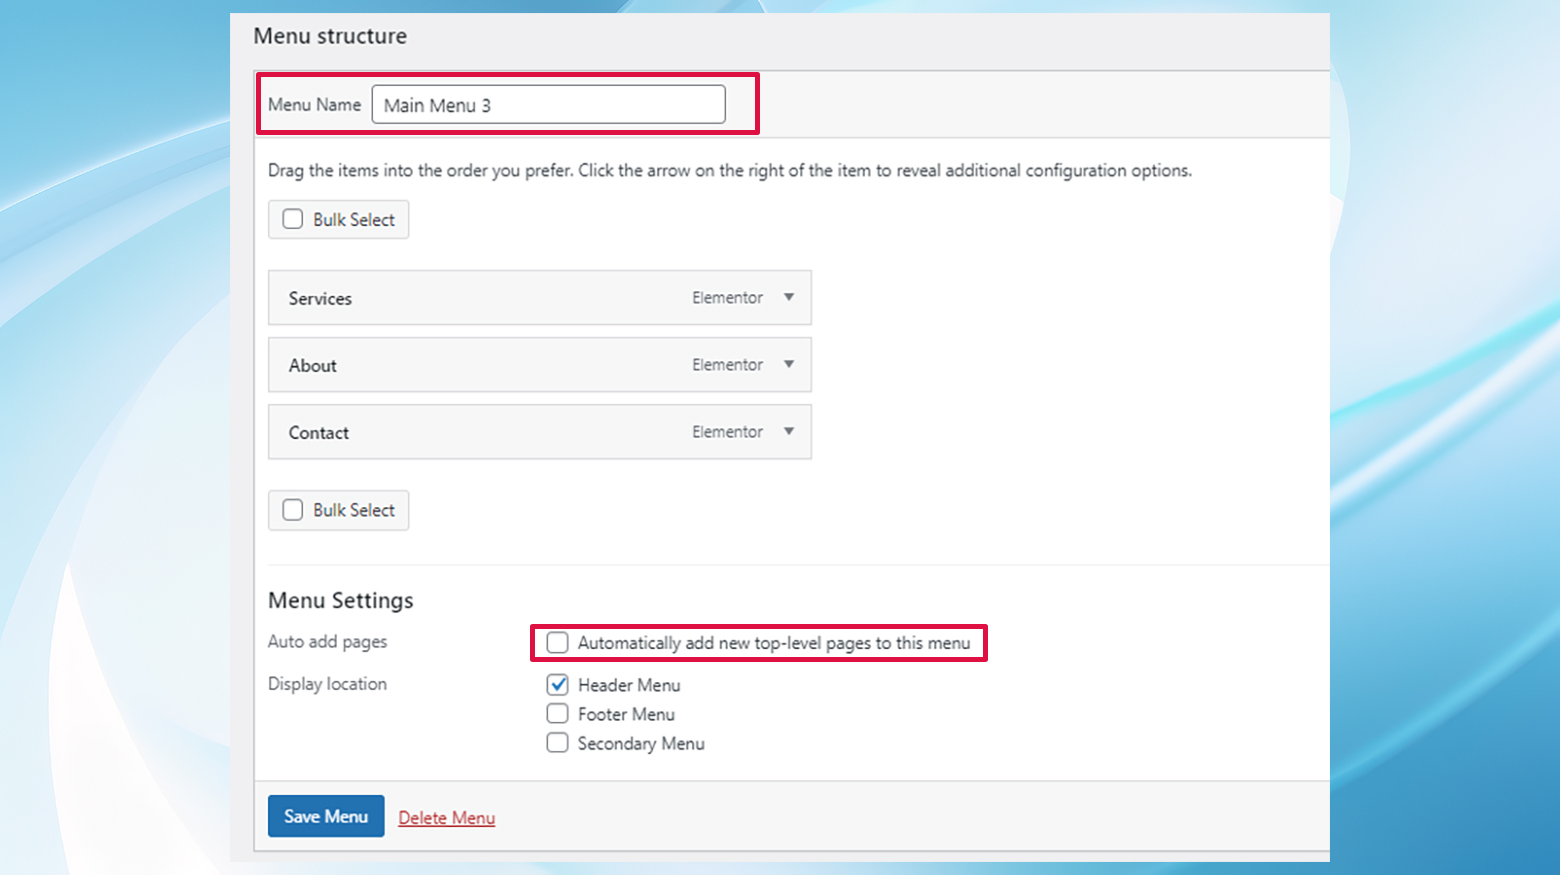
You can automatically add new top-level pages to this menu by checking the respective box. This feature is handy for maintaining up-to-date navigation as your site grows. However, exercise caution with this feature to prevent unintentionally cluttering your menu with too many items.
Step 4: Managing locations
Then, under the Menu Settings section, you can choose its location on your site. Most themes support multiple menu locations, such as the primary menu, footer, or social links menu.
The Twenty Twenty theme, for example, offers several menu areas, including:
- Desktop Horizontal Menu: Typically located in the site’s header, it is ideal for primary navigation.
- Desktop Expanded Menu: Offers an alternative layout for desktop navigation.
- Mobile Menu: Specifically designed for mobile users, ensuring your site is navigable on smaller devices.
- Footer Menu: Allows you to add secondary navigation links in your site’s footer.
- Social Menu: A special menu location for linking to your social media profiles.
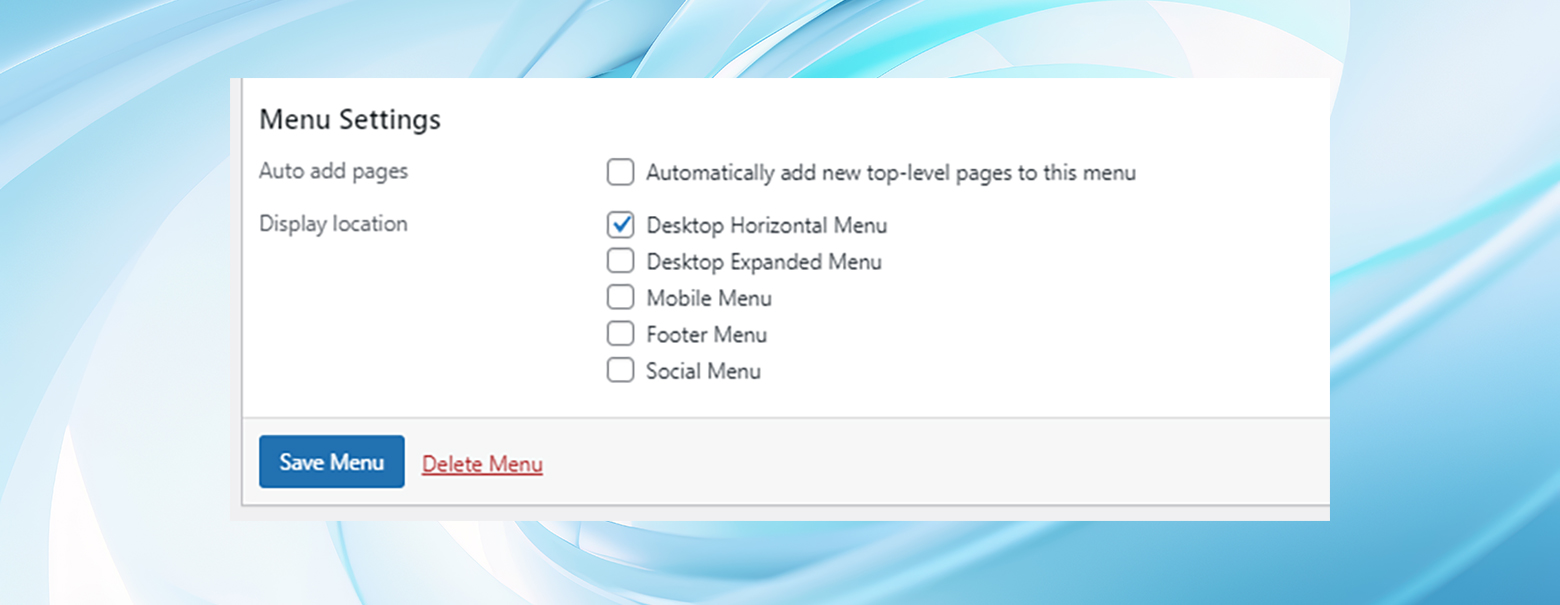
For most sites, especially those utilizing the Twenty Twenty theme, the Desktop Horizontal Menu location is most suited for your primary dropdown menu. This places your menu prominently in the site’s header, making it immediately accessible to your visitors.
For a more holistic view of where your menus are positioned or to assign different menus to specific locations, navigate to the Manage Locations tab within the Menus area of your dashboard.
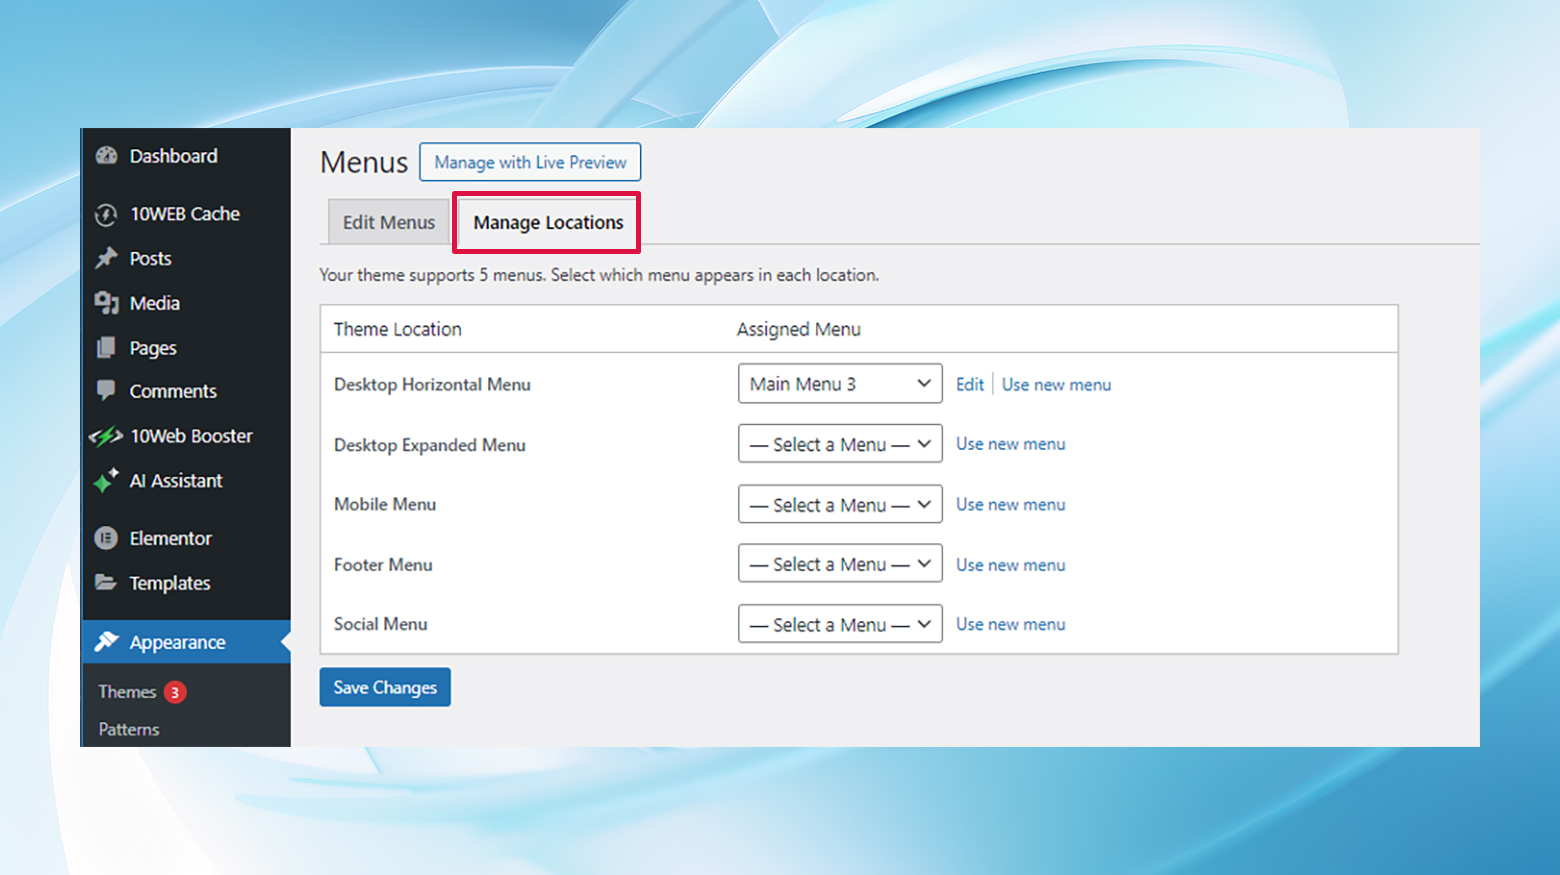
Here, you can see a comprehensive list of all the menu locations supported by your theme and which menu you’ve assigned to each one. This overview helps ensure your menus are correctly positioned to match your site’s design and usability goals.
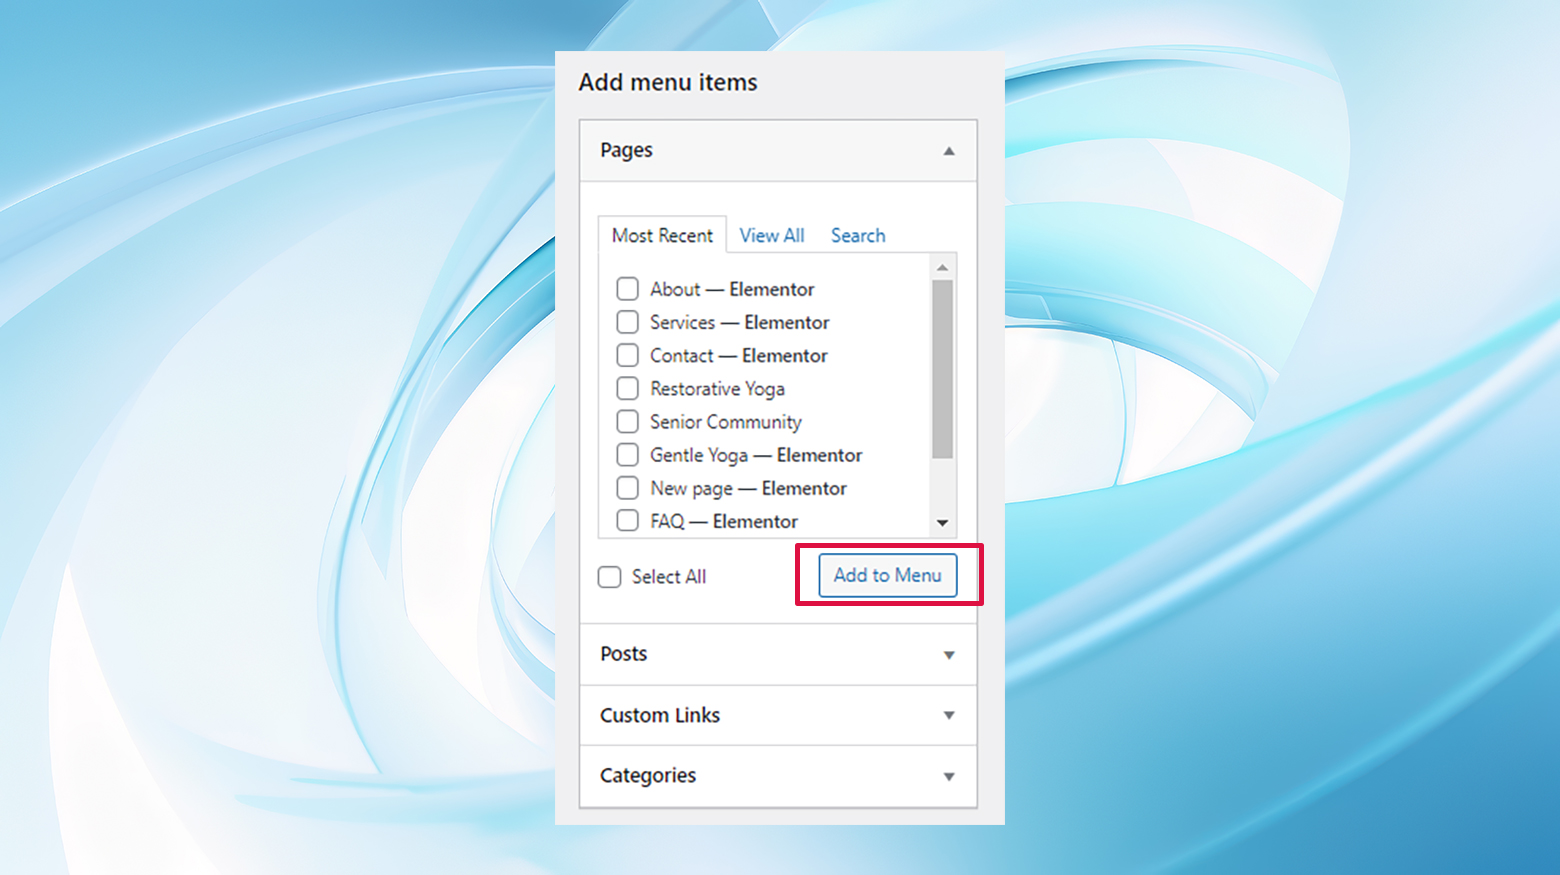
Step 5: Add menu items
Now, you’ll populate your menu with items. In the Add menu items section on the left side of the screen, select the pages, posts, custom links, or categories you want to include.
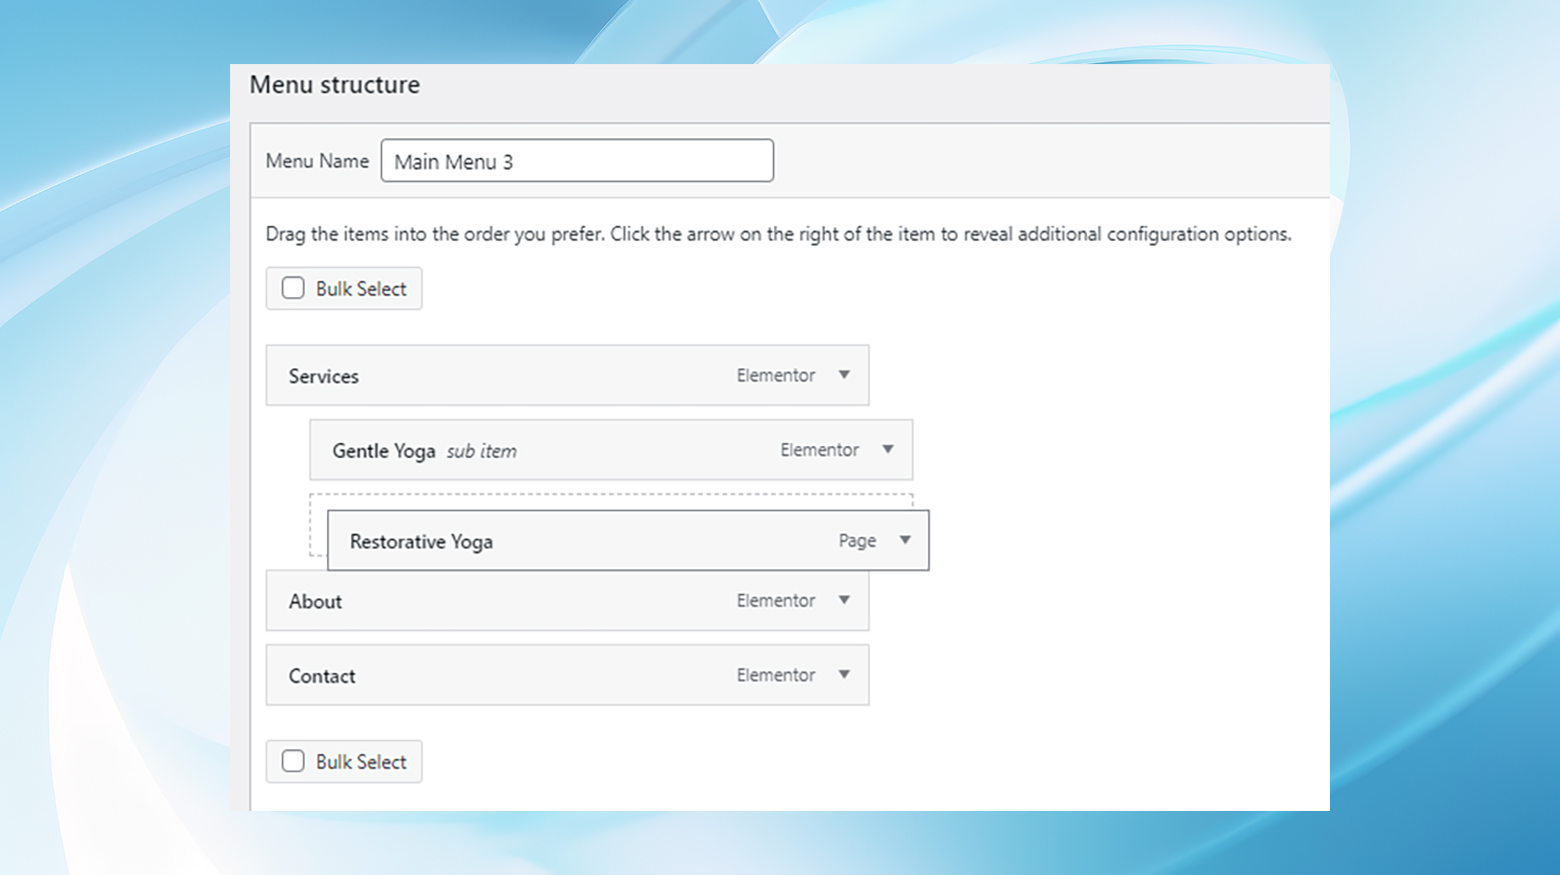
Step 6: Organize your menu
After adding items to your menu, you can arrange their order by dragging and dropping them on the right side of the screen.
To create a dropdown, simply drag a menu item to the right underneath the parent item, indicating it’s a submenu item. This visual drag-and-drop editor makes it straightforward to see the hierarchy and structure of your menu, allowing for easy adjustments.
Step 7: Save and review
Once satisfied with your menu’s structure and settings, click Save Menu. After saving, visit your website and check out the dropdown menu. Check that the dropdown functionality works as expected and that the menu’s aesthetics align with your site’s design.
By following these detailed steps, you’ll have a functional and stylish dropdown menu on your WordPress site without the need for extra plugins or technical modifications.
Method 2: Using the Navigation block
The Navigation block is a powerful tool that allows you to create complex navigation menus without touching a single line of code.
Adding a dropdown menu to your WordPress site using the Navigation block is a straightforward process, especially with the introduction of the Gutenberg editor, which makes site editing much more intuitive. Here’s how to add a dropdown menu in WordPress using this block:
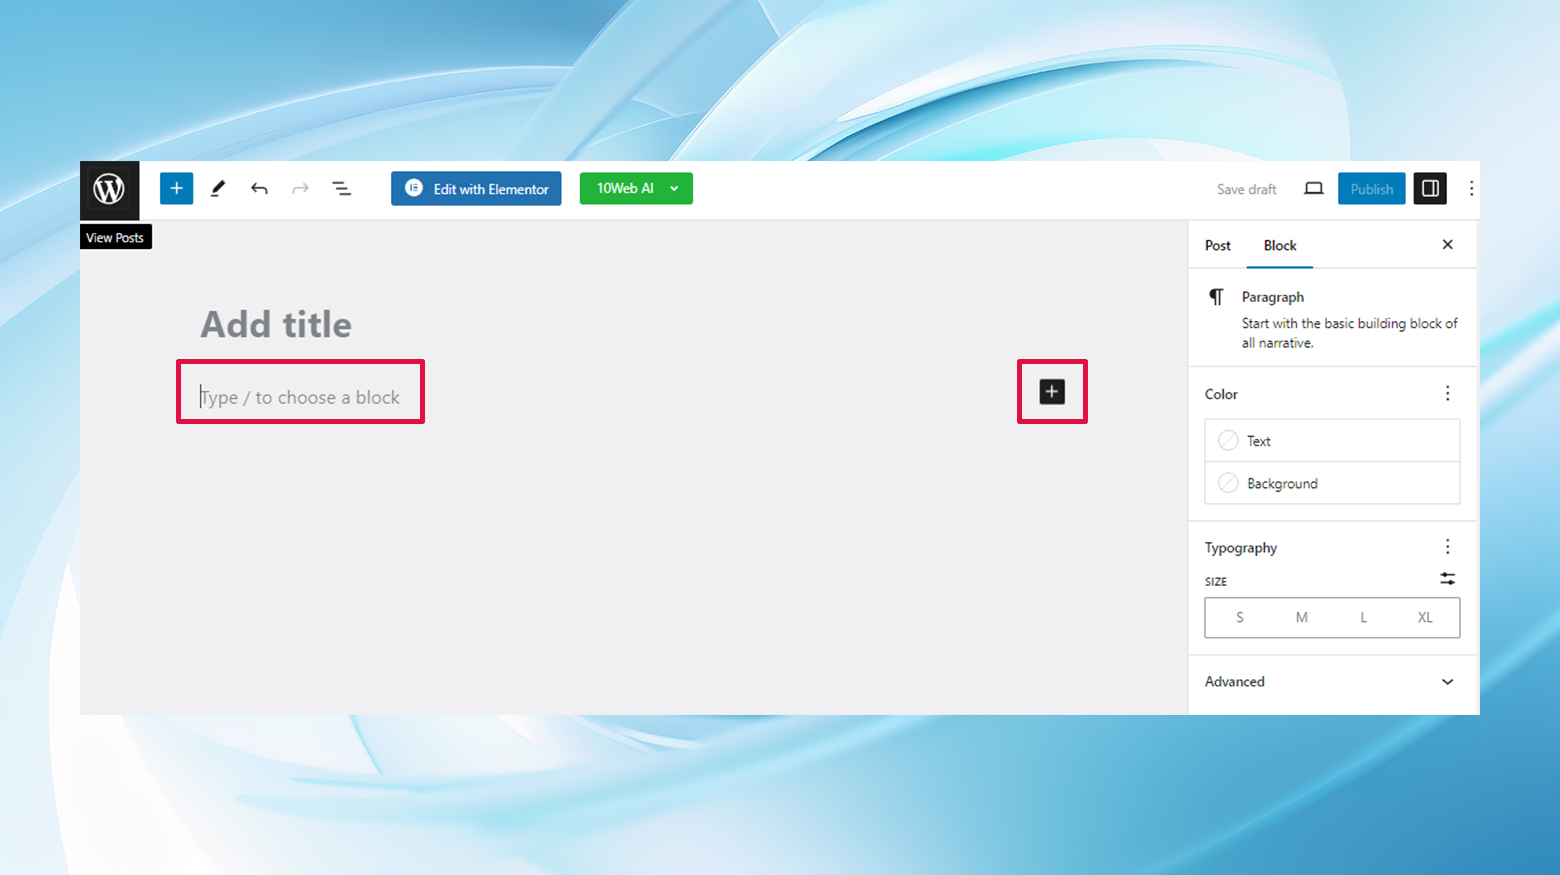
Step 1: Open the page or post editor
Navigate to the page or post where you want to add the dropdown menu. If it’s a new page or post, simply add a title and click on the + icon to start adding blocks. Alternatively, you can enter a forward slash and start typing navigation to add the block.
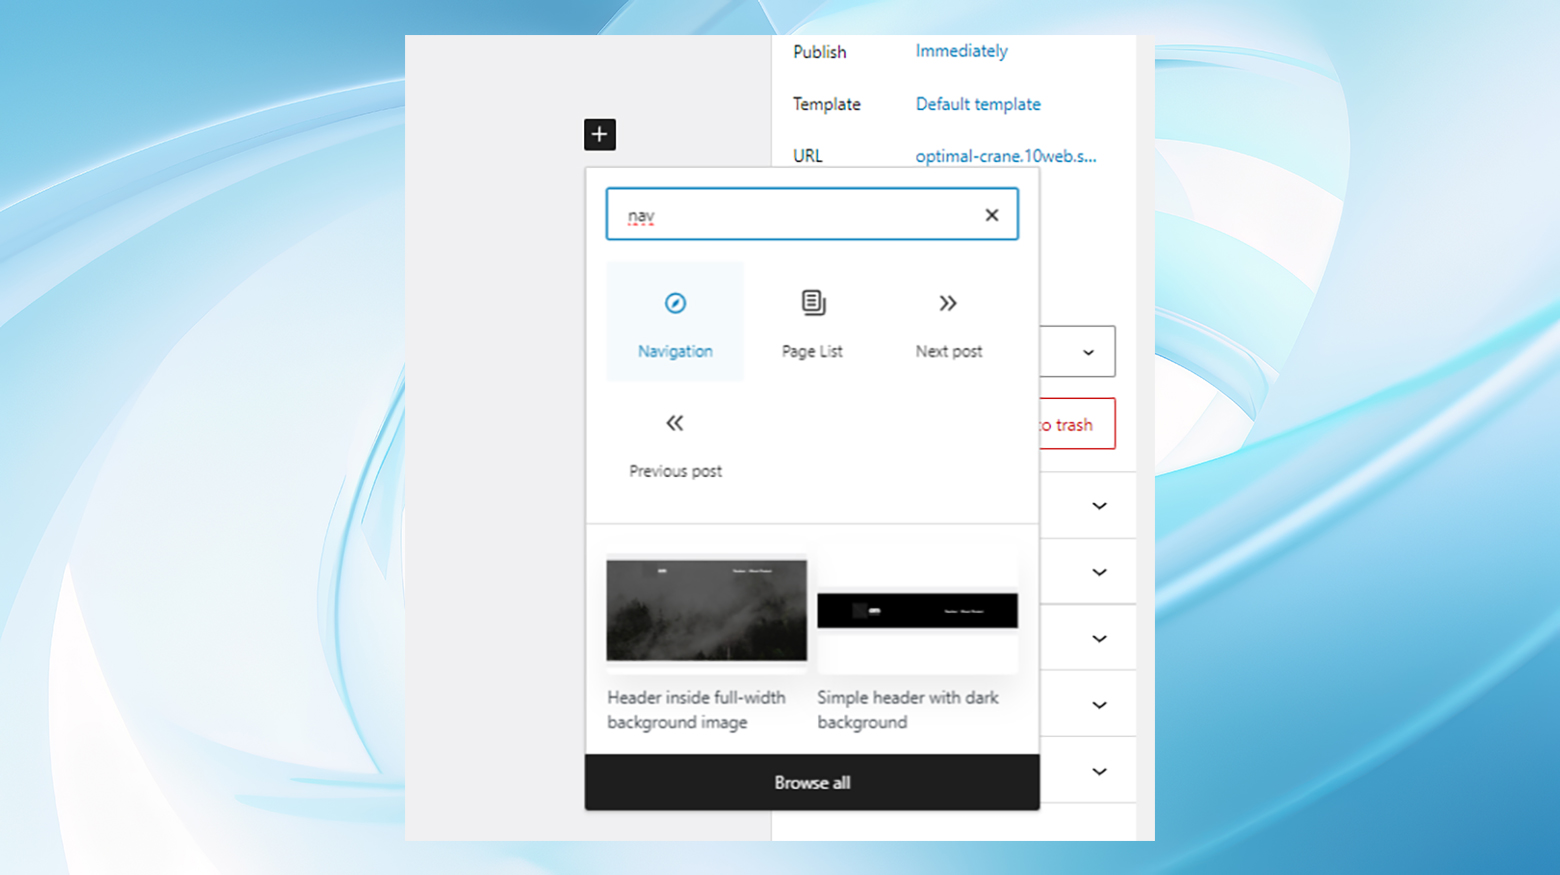
Step 2: Add the Navigation block
Click the + (Add Block) button in the editor to open the block library. Search for the Navigation block and click on it to add it to your page. The Navigation block can also be found under the Design category of blocks.
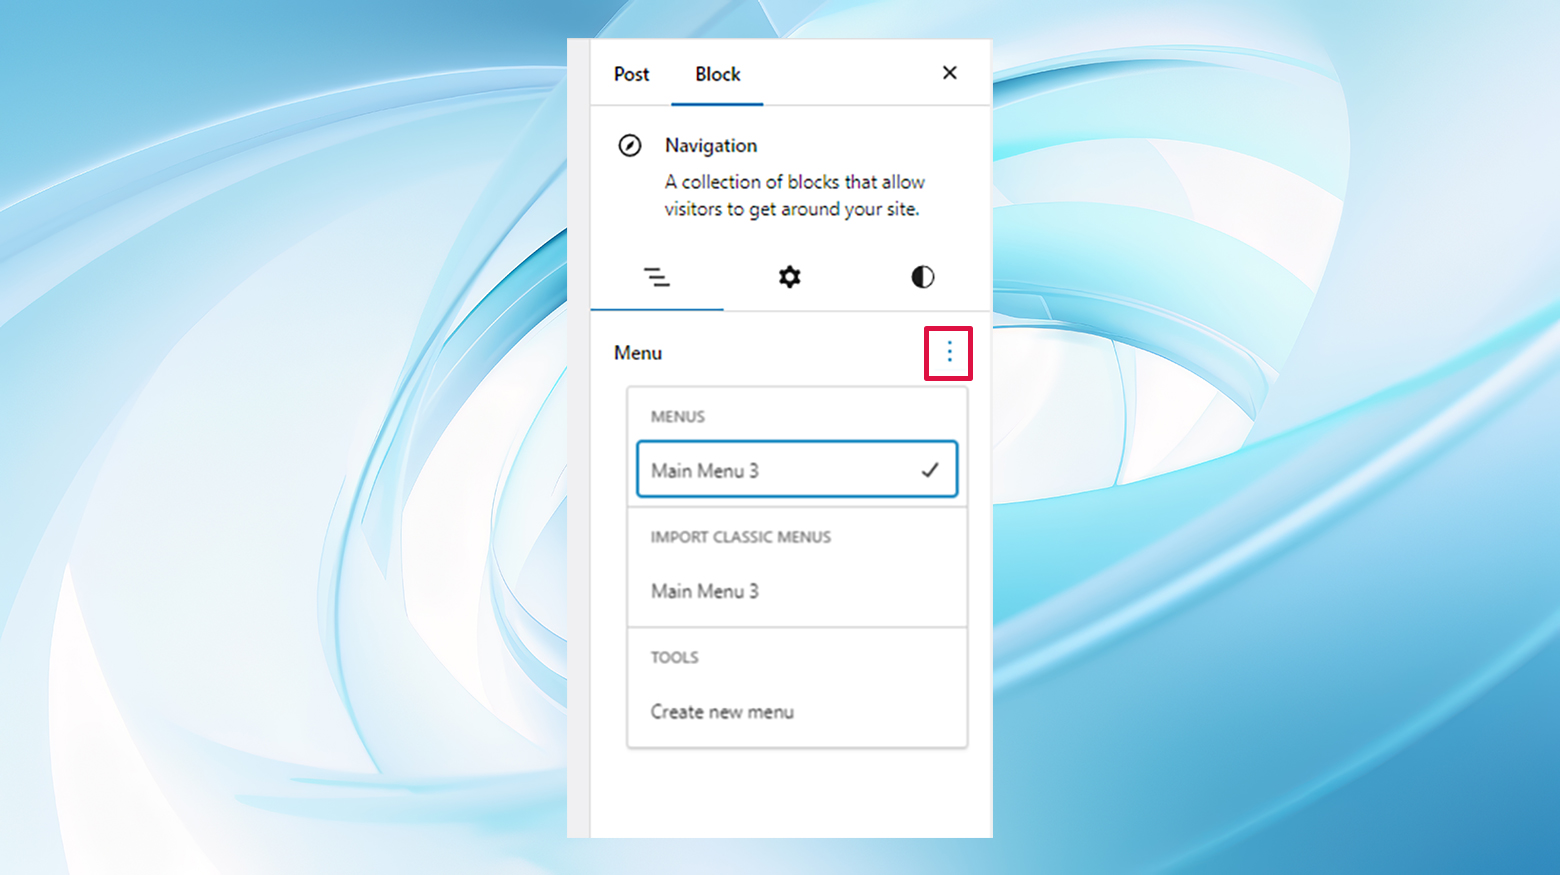
Step 3: Create your menu
Upon adding the Navigation block, you’ll have the option to with a new menu, choose an existing menu, or import a classic menu. Click the kebab menu in the block panel on the right. Then, you can switch to a different menu or select Create new menu.
Step 4: Add menu items
You’ll then begin adding items to your menu. Click the + button in the Navigation block to add new items.
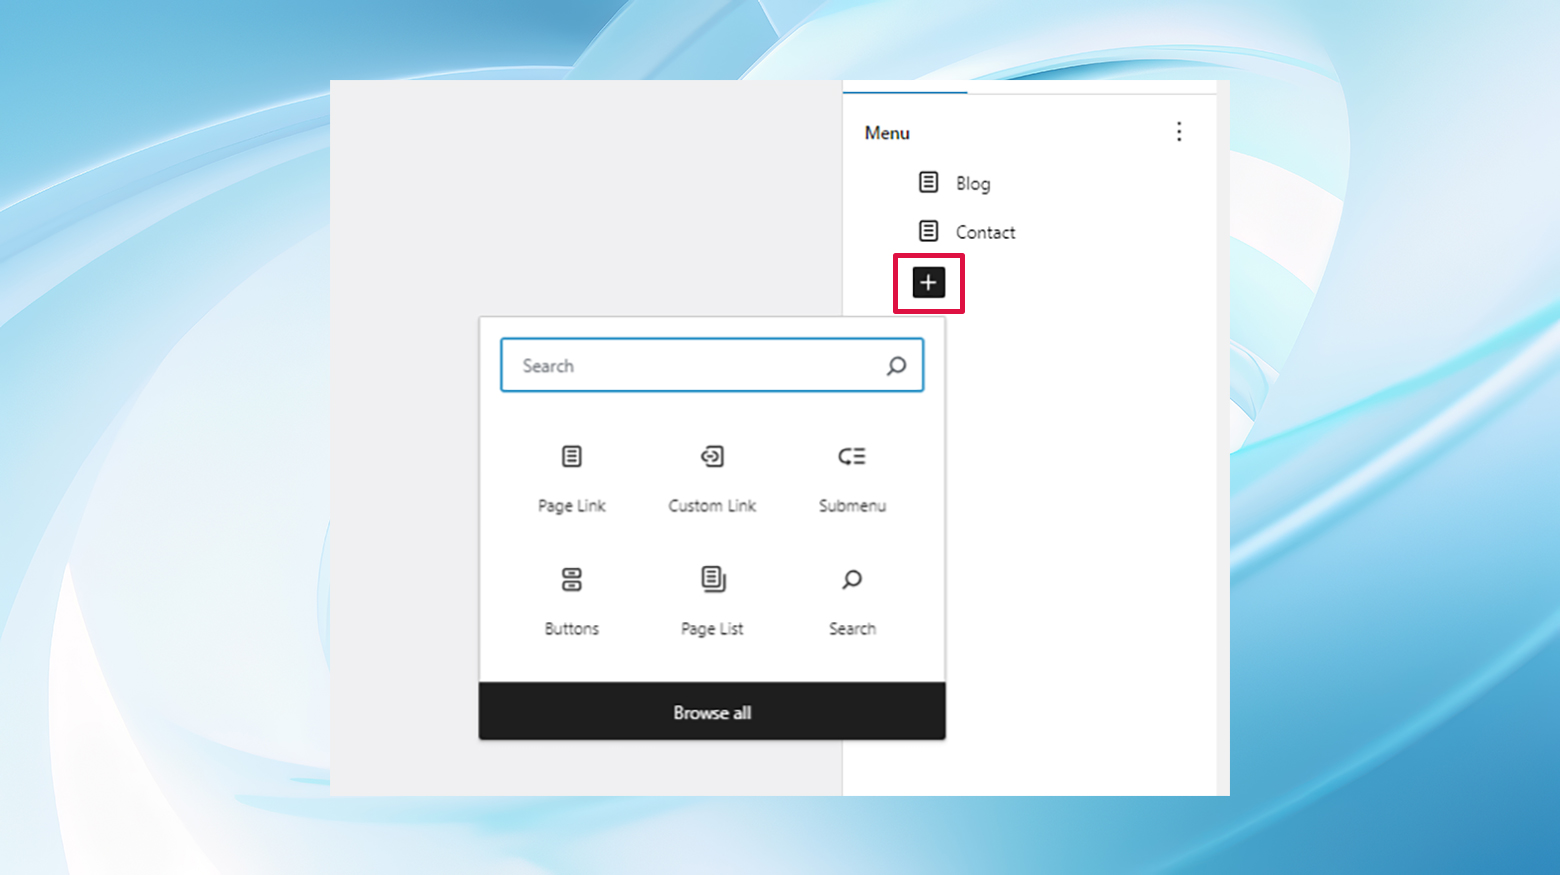
You can choose the type of link for each item in your menu: page, Post, Custom Link, or Category. To add a dropdown, you’ll typically use Pages or Custom Links. Select Page Link to add a page to your menu or Custom Link to add a custom URL.
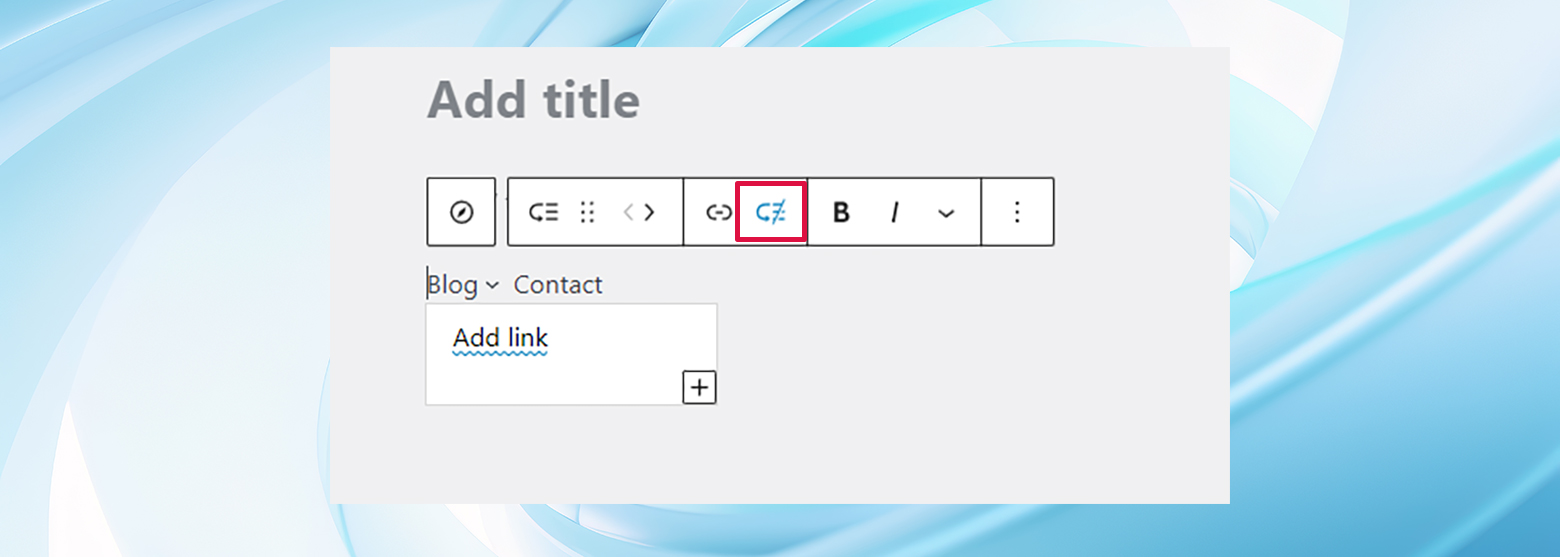
You can also add a submenu directly in the Navigation block by placing your cursor in a menu item and clicking the Add submenu icon.
Step 5: Indent dropdown items
To make an item a dropdown menu, add items beneath it and indent them. After adding an item you want to serve as a dropdown, click the + button again to add another item. Once the new item appears below the intended dropdown item, click and drag the six dots icon next to the new item to the right. This action indents the item, indicating it’s a sub-menu item of the dropdown.
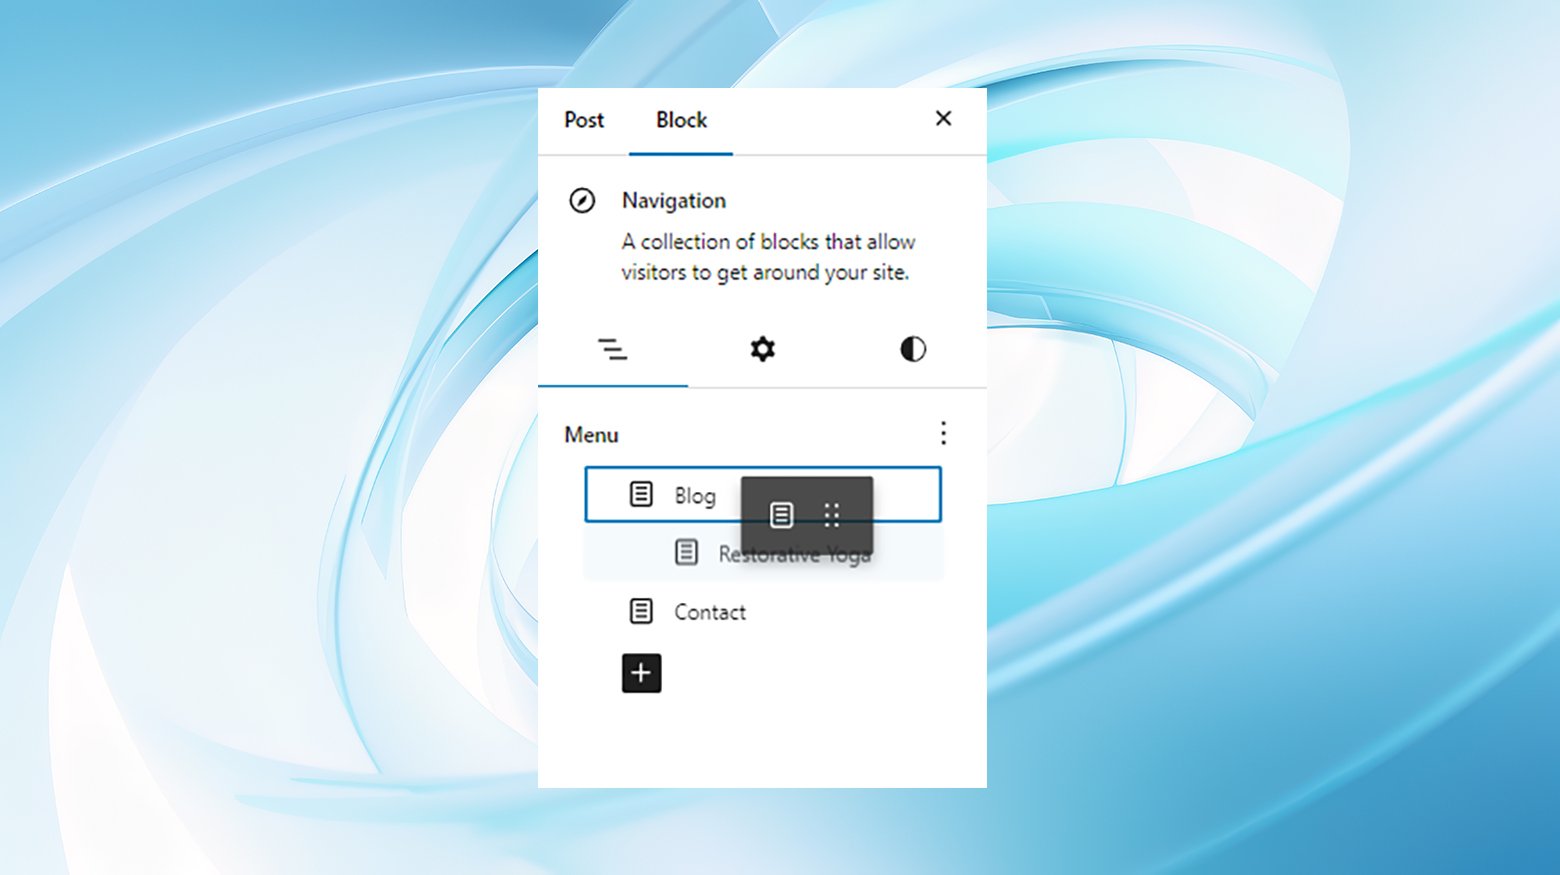
Repeat this process for each item you want to add to the dropdown. By indenting items further, you can even create nested dropdowns.
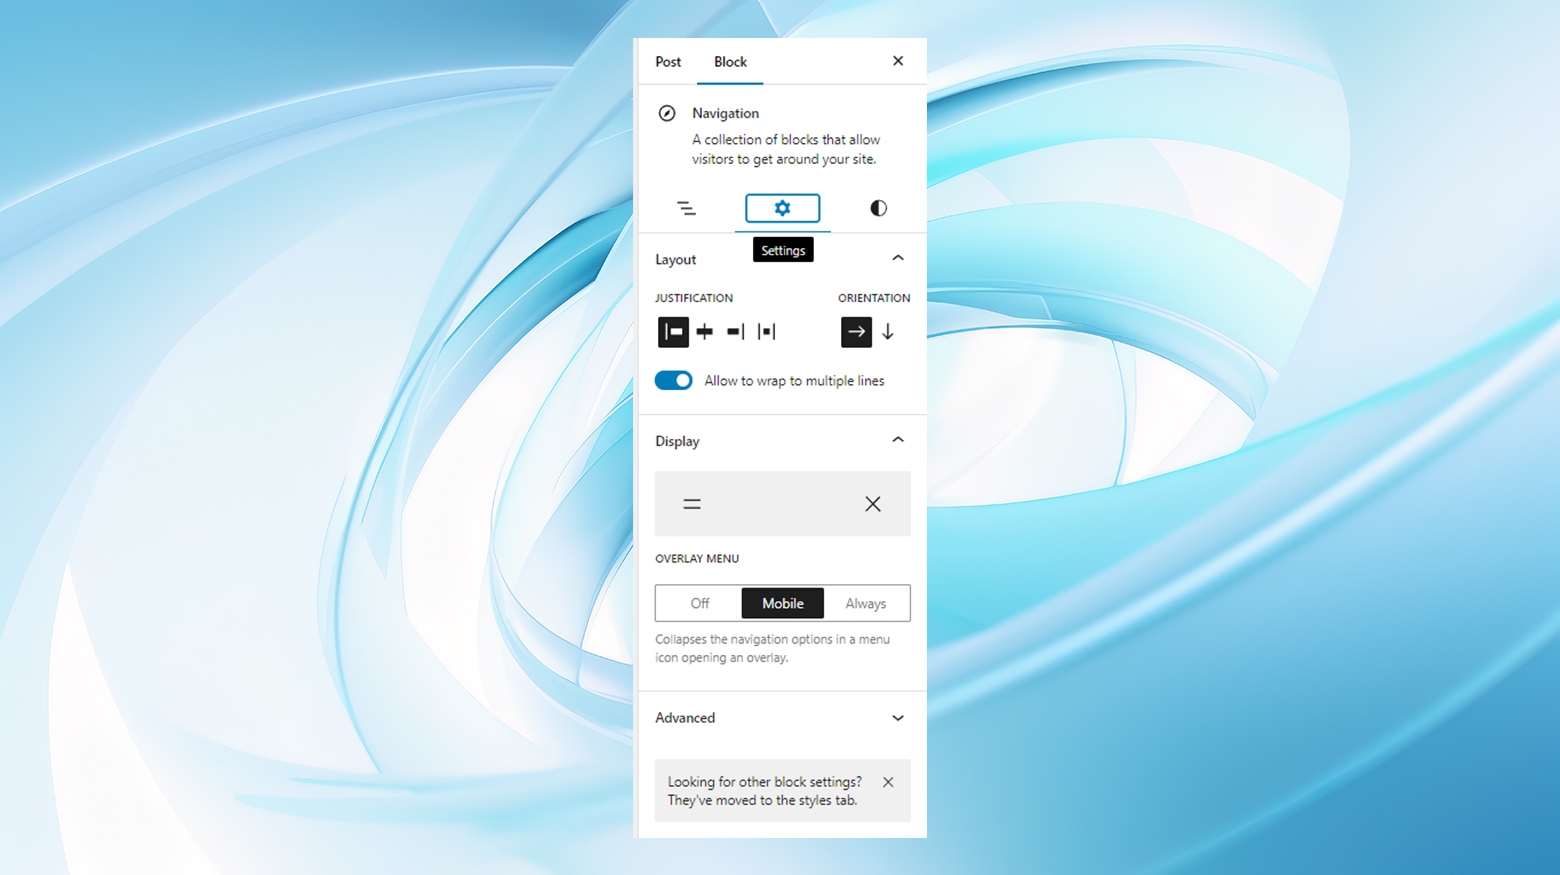
Step 6: Customize your Navigation block
With your items in place, you can customize the appearance of your Navigation block. Click on the block to reveal its settings in the sidebar. Here, you can adjust the orientation (horizontal or vertical), set colors, define the typography, and more. Each menu item can also be customized individually by selecting it and using the options in the sidebar.
Step 7: Save or publish your page
Once you’re happy with your navigation menu, save your draft or publish the page to make your new dropdown menu live on your site.
Method 3: In WordPress Site Editor
As the landscape of WordPress themes evolves, block-based themes have brought the convenience of the Site Editor to the forefront, allowing for extensive customization without getting into code. One such customization is the creation of dropdown menus.
Note that to add a dropdown menu in WordPress using the Site Editor, you must have a compatible block-based theme.
Here’s a step-by-step guide on how to add a dropdown menu in WordPress with the Site Editor.
Step 1: Accessing the Site Editor
Begin by navigating to Appearance > Editor in your WordPress dashboard.
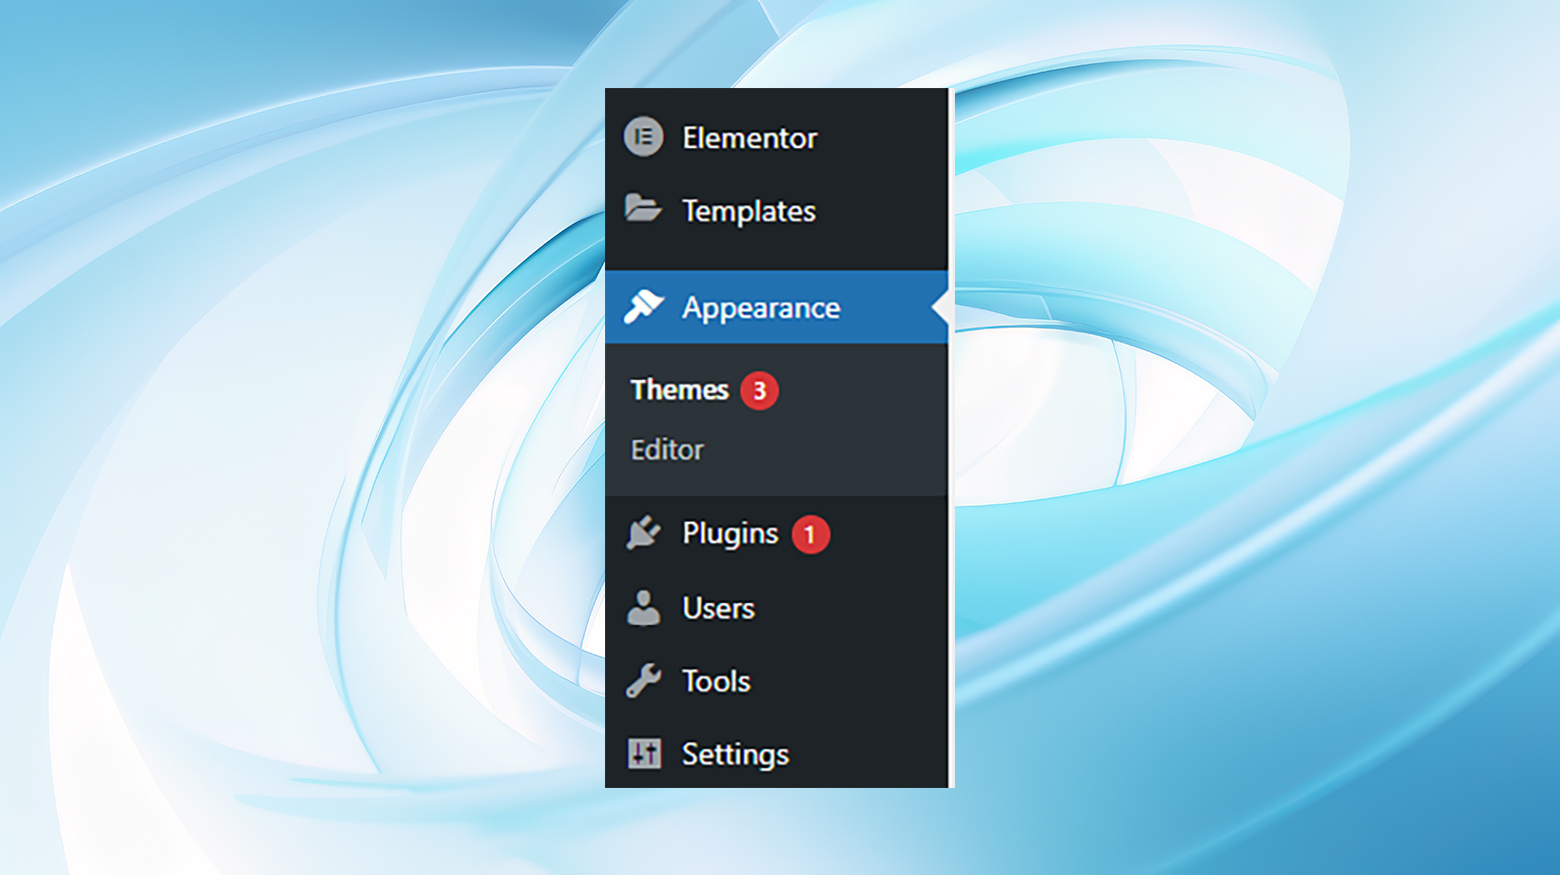
This pathway ushers you into the world of the Site Editor, where the possibilities of customization are nearly endless. Initially, you’ll be presented with your theme’s home template, but don’t let that limit your imagination.
Step 2: Choose your template or pattern
To customize a specific part of your website, such as adding a dropdown menu to the header, click Templates or Patterns. This section showcases all the templates or template parts that compose your WordPress theme. Select the area where you envision your dropdown menu living, typically the Header or Footer template part for a navigation menu.
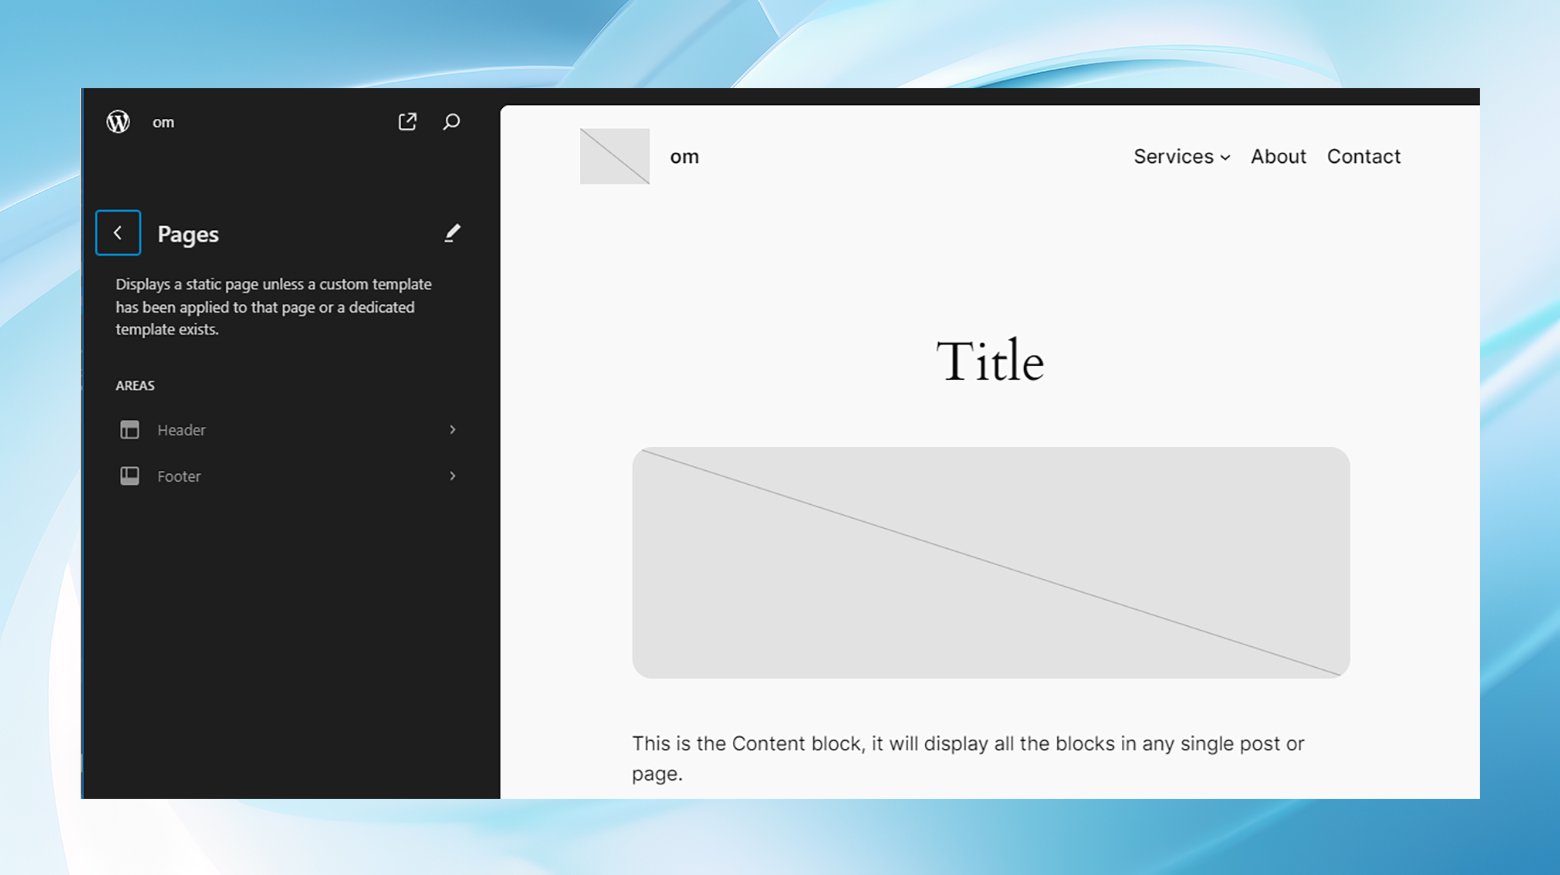
Step 3: Editing your selected template
Upon choosing your desired template, WordPress will display a preview. To start editing, look for and click on the small pencil icon. This action transitions you into the editing mode, where the real fun begins.
Step 4: Adding the Navigation block
When the template is ready for editing, click the blue + icon in the top left corner. A search bar will appear; type in Navigation to find the appropriate block.
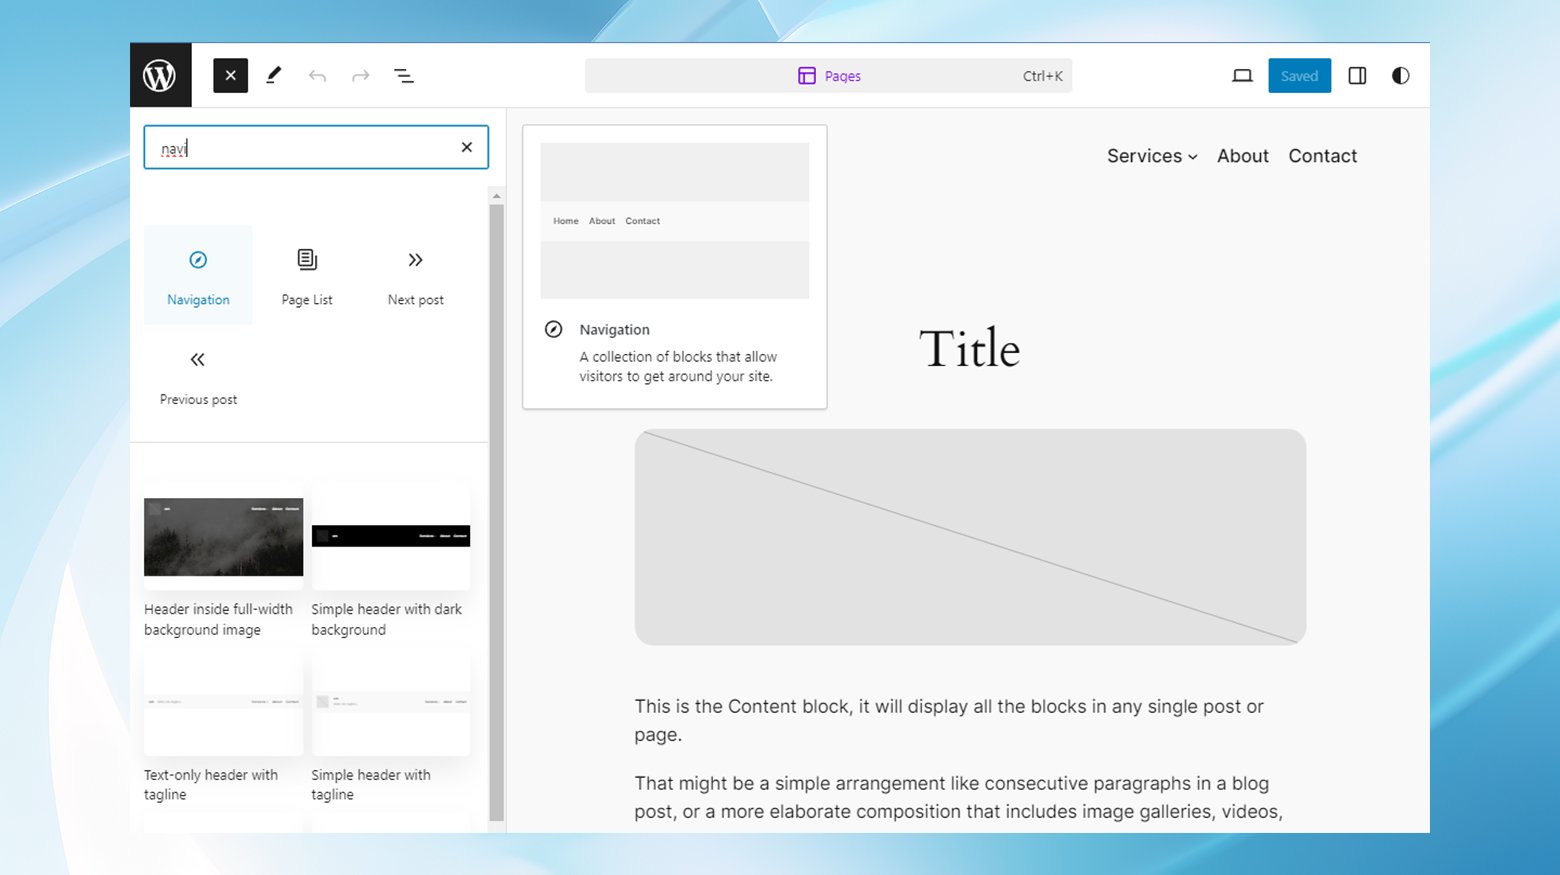
Drag and drop the Navigation block onto your design canvas. Selecting this block will reveal various customization settings, including layout options, display settings, and style adjustments for text color, background, and font size.
Step 5: Populating your menu
To add top-level pages to your menu, hit the + button within the Navigation block. Choose Page Link from the options. A popup will prompt you to type in the title or URL of the page you want to include. Once the correct page appears, click to add it to your menu. Repeat this step for all top-level items you wish to add.
Step 6: Adding a dropdown menu
To introduce a submenu to any parent item, click on the dotted icon next to the relevant parent item and select Add submenu link.

Like adding top-level pages, input the title or URL for the page you intend to display in the dropdown menu. Click to add it as a submenu item, and continue this process for each item you want in the dropdown menu.
Step 7: Saving your menu
After meticulously setting up your menu, don’t forget to save your changes by clicking on Save. You don’t want to lose all your hard work.
Once saved, take a moment to visit your website and witness your new dropdown menu in action.
Method 4: Using a plugin
Plugins can be a real game-changer when it comes to enhancing your WordPress website’s navigation with dropdown menus. They offer extended functionality, customizable options, and ease of use that might not be achievable through standard WordPress menu settings alone.
Here are a few of the most popular WordPress plugins, both free and premium, for adding a dropdown menu. Let’s review some of their key points to help you decide which one best suits your site’s needs.
Max Mega Menu
Max Mega Menu transforms your existing menus into mega menus. You can place widgets in the menus, restructure the layout with a drag-and-drop editor, and customize the styling directly within the WordPress customizer. It supports multiple menu locations, vertical and accordion menus, and is mobile-responsive.
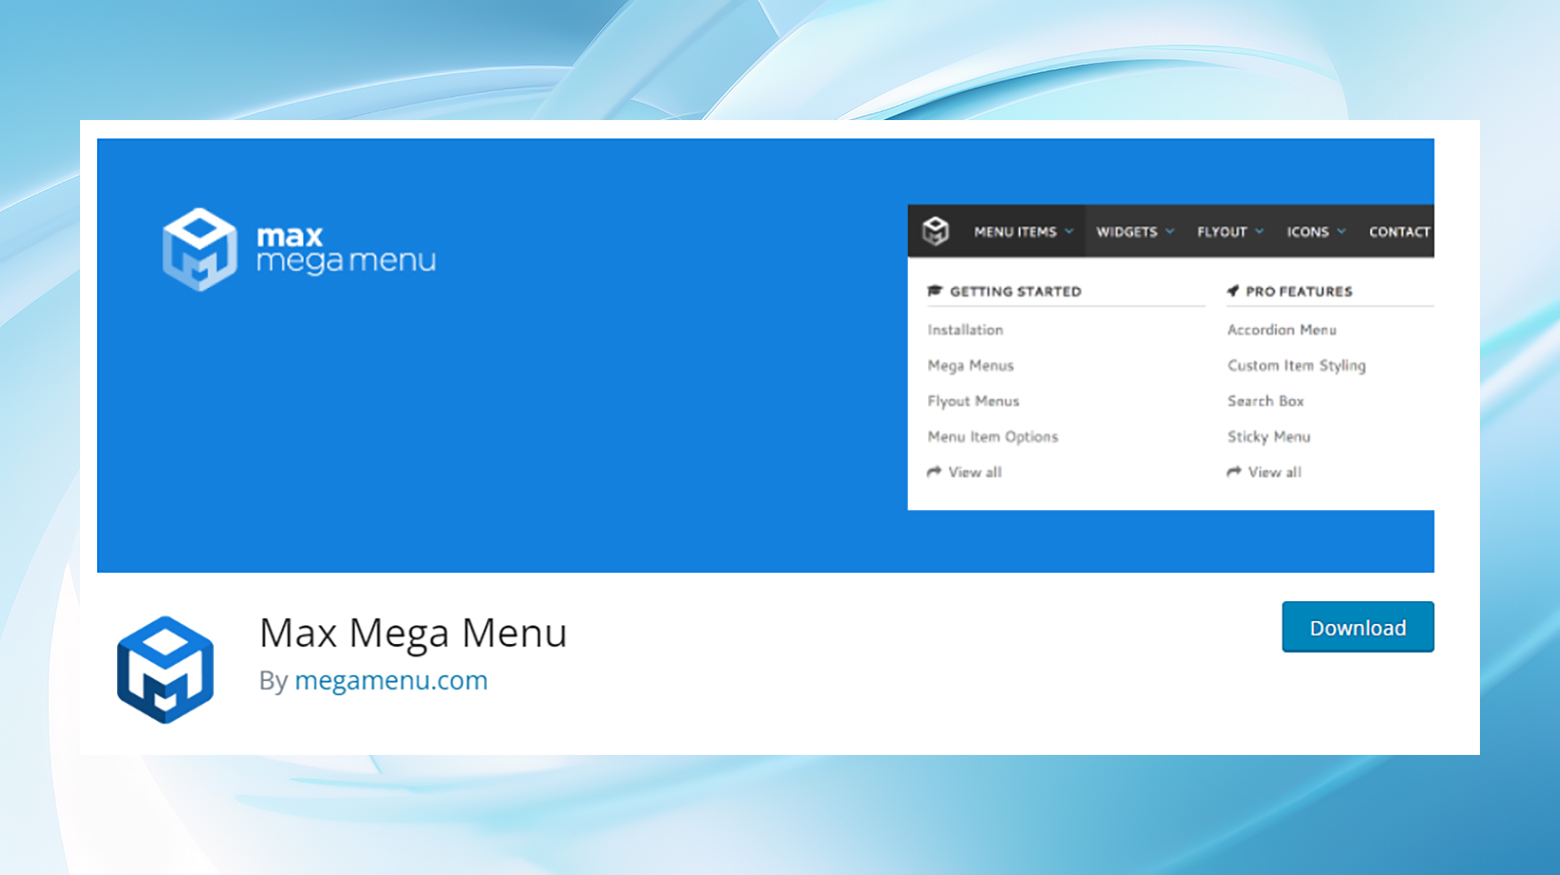
If you’re looking for a robust, feature-rich plugin that’s also free, Max Mega Menu is an excellent choice. It’s beneficial for sites requiring complex navigation structures without the need for coding skills.
Simplify WordPress with 10Web
Automate manual work with 10Web Managed WordPress Hosting and 10Web AI Website Builder. Optimize your WordPress website effortlessly.
Hero Menu
Hero Menu allows you to create custom dropdown menus with ease. It’s designed to be beginner-friendly but doesn’t skimp on the features. You can create mega and sticky menus and even integrate WooCommerce product listings directly into your navigation. Hero Menu offers various customization options to ensure your menus match your site’s design.
Choose Hero Menu if you prioritize ease of use but want the flexibility to create detailed, responsive menus. Its focus on responsiveness ensures your menus look great on any device, making it a solid choice for modern, mobile-first websites.
UberMenu
UberMenu is a premium solution that offers extensive control over your menu’s style, layout, and functionality. It includes features like dynamic item generation, image and icon integration, and Google Maps integration. UberMenu also supports tabbed submenus and vertical menus and has a powerful grid system for creating complex menu layouts.
UberMenu is ideal for those who need complete control over their menu design and functionality. Its extensive customization options make it perfect for sites requiring a high degree of navigation complexity and visual appeal.
Nested Pages
Nested Pages provides a drag-and-drop interface for organizing your pages and posts into a nested structure, simplifying the process of creating dropdown menus. It enhances the default WordPress page management by allowing you to organize your pages and posts more intuitively.
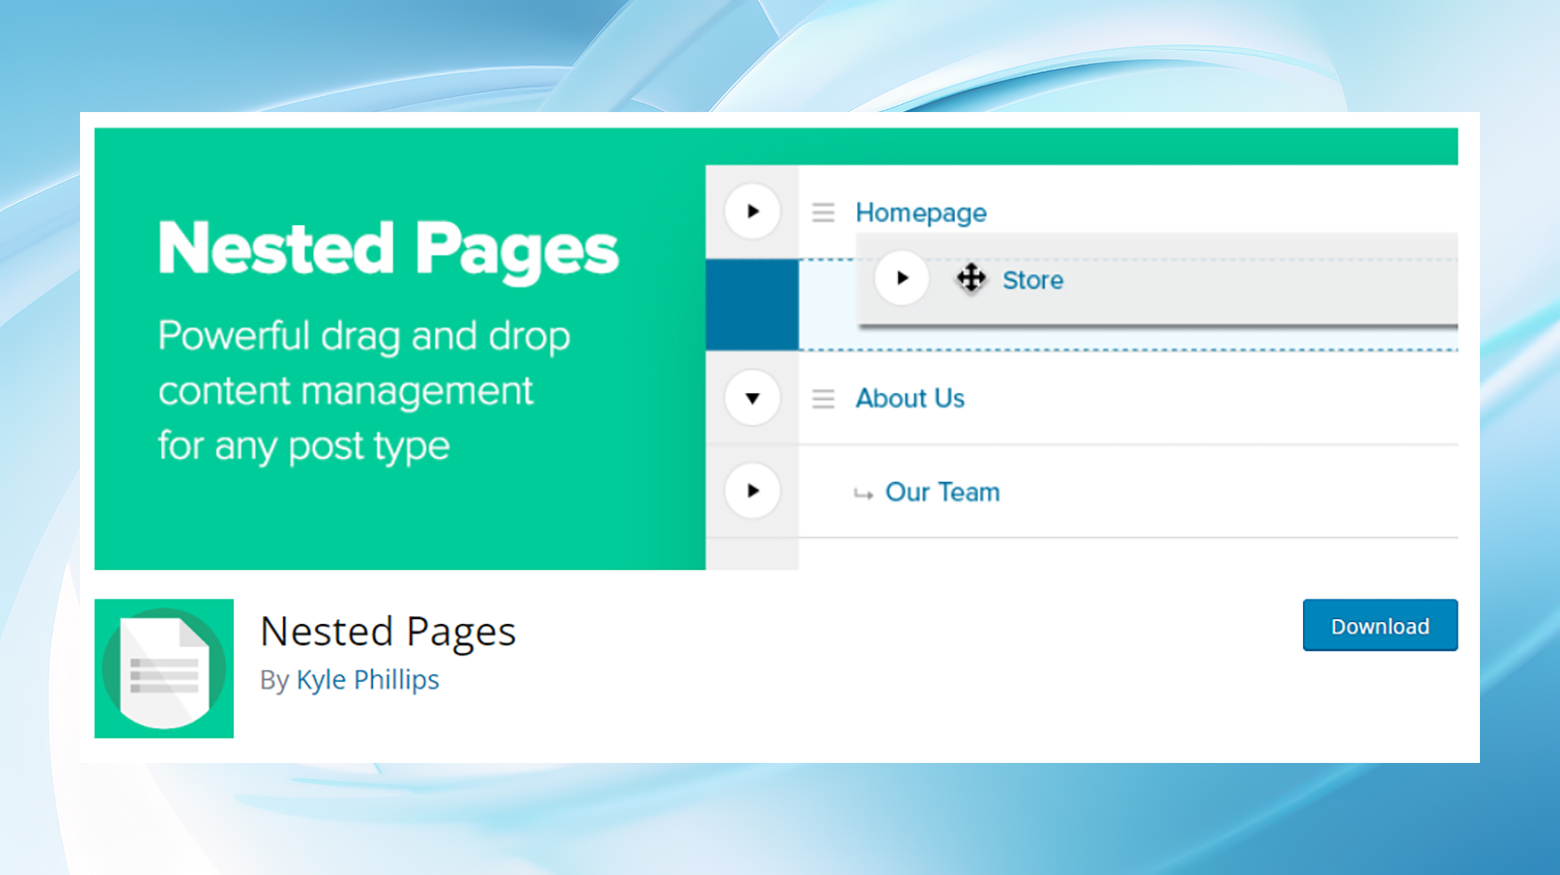
Suppose your site relies heavily on a structured page hierarchy, and you want an easier way to manage and create nested dropdown menus. In that case, WP Nested Pages is a straightforward solution that integrates seamlessly with WordPress.
WP Mobile Menu
WP Mobile Menu is designed to improve your mobile site’s navigation with a user-friendly, responsive mobile menu. It allows you to create slick, beautiful menus for your mobile visitors without compromising on functionality.
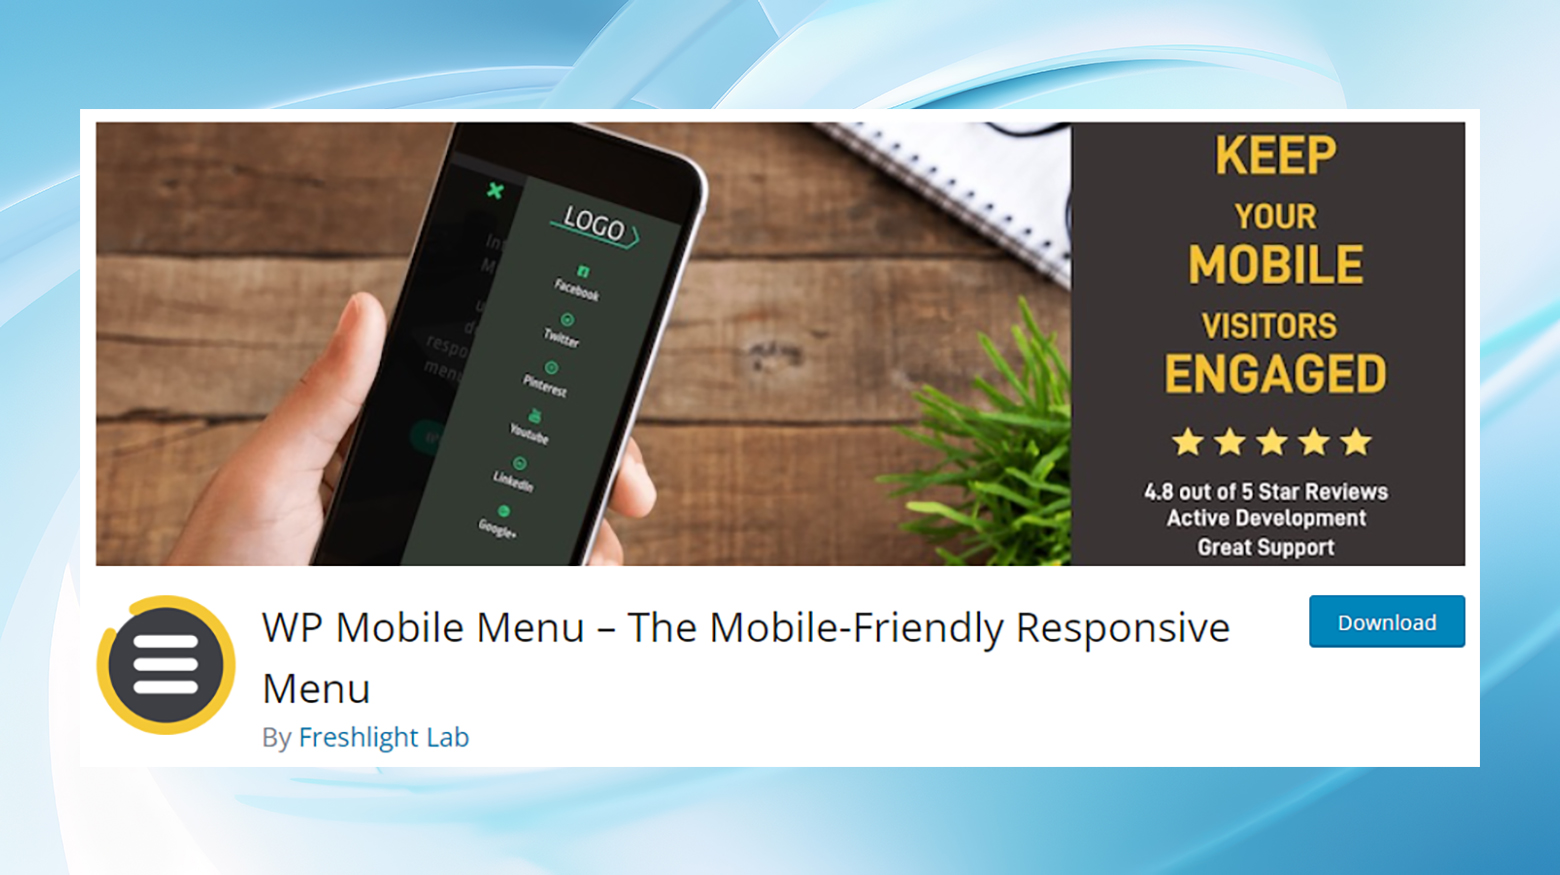
WP Mobile Menu is an essential plugin for sites that receive a significant portion of traffic from mobile devices. It ensures your mobile site navigation is as optimized and user-friendly as your desktop navigation.
Method 5: Manually with custom PHP
Adding custom PHP code to your theme’s functions.php file can enhance or modify the functionality of your WordPress menus. This approach is for advanced users and can enable dynamic menu items, conditional logic, and more.
Before you begin, back up your site before making any changes and test thoroughly to ensure a seamless user experience.
Here’s a step-by-step process on how to add a dropdown menu in WordPress using PHP.
Step 1: Register menu locations in your theme
Start in your theme’s functions.php file, where you will register a new menu location. This step tells WordPress where your menu will be placed within your theme.
Insert the following code snippet into functions.php:
function mytheme_register_nav_menu() {
    register_nav_menus(array(
        'primary' => __('Primary Menu,' 'theme-slug'),
    ));
}
add_action('after_setup_theme', 'mytheme_register_nav_menu');
This code defines a new menu location labeled as Primary Menu. Replace ‘theme-slug’ with your theme’s actual slug to ensure compatibility.
Step 2: Implement the menu in your theme
Next, navigate to your theme’s header.php file or whichever template file corresponds to where you’d like the menu to appear. To implement the menu, use the wp_nav_menu() function as shown below:
wp_nav_menu(array('theme_location' => 'primary', 'container_class' => 'main-nav'));
This function call tells WordPress to display the menu assigned to the primary location, wrapping it in a div container with the class main-nav. This class can be used later for styling purposes.
Step 3: Create and assign your menu
With the menu location registered and implemented, head over to the WordPress Admin Dashboard, specifically to Appearance > Menus. Here, create your dropdown menu by adding menu items and arranging them hierarchically for dropdown functionality. Once your menu is ready, assign it to the Primary location that you registered earlier.
Step 4: Style your menu
To ensure your dropdown menu matches the look and feel of your site, add custom CSS to your theme’s stylesheet. This could involve styling the .main-nav container class, as well as any other classes WordPress adds to menu items:
.main-nav { /* Container styles */ }
.main-nav ul { /* List styles */ }
.main-nav li { /* Item styles */ }
.main-nav li ul { /* Dropdown styles */ }
This CSS is just a starting point. Depending on your design, you may need to add more specific selectors and properties.
Step 5: Ensure dropdown functionality
For the dropdown to function, your theme must support it, which might require additional HTML, CSS, or JavaScript. Some themes already include this functionality, but if yours does not, you may need to integrate JavaScript or jQuery to handle the dropdown behavior:
jQuery('.main-nav ul li').hover(function() {
    jQuery(this).find('ul').stop(true, true).slideDown();
}, function() {
    jQuery(this).find('ul').stop(true, true).slideUp();
});
This simple jQuery script adds basic dropdown functionality. Remember, for custom JavaScript, you must enqueue the script properly in your functions.php file for custom JavaScript.
Tips and best practices for dropdown menu design
Designing effective dropdown menus involves simplicity, logical structure, and quick accessibility. Ensure your menus don’t overwhelm visitors with too many options, and use descriptive labels for clarity. Enhancing functionality can include adding search functionality within the menu or ensuring it’s mobile-responsive.
Here are some practical tips for designing helpful and user-friendly dropdown menus, ensuring visitors can easily find their way around and engage more deeply with your content.
Simplify WordPress with 10Web
Automate manual work with 10Web Managed WordPress Hosting and 10Web AI Website Builder. Optimize your WordPress website effortlessly.
Create multi-level dropdown menus
Going beyond the basics, multi-level dropdown menus allow for a more structured and hierarchical presentation of your website’s content, making it ideal for sites with extensive content or multiple content categories. This submenu approach is especially useful for ecommerce sites or those with complex categorization needs.
Here’s how to create a multi-level dropdown menu:
- Start by creating your primary dropdown menu, as described earlier.
- To add another layer, drag a menu item below a sub-item and move it slightly to the right, creating a new level under that sub-item.

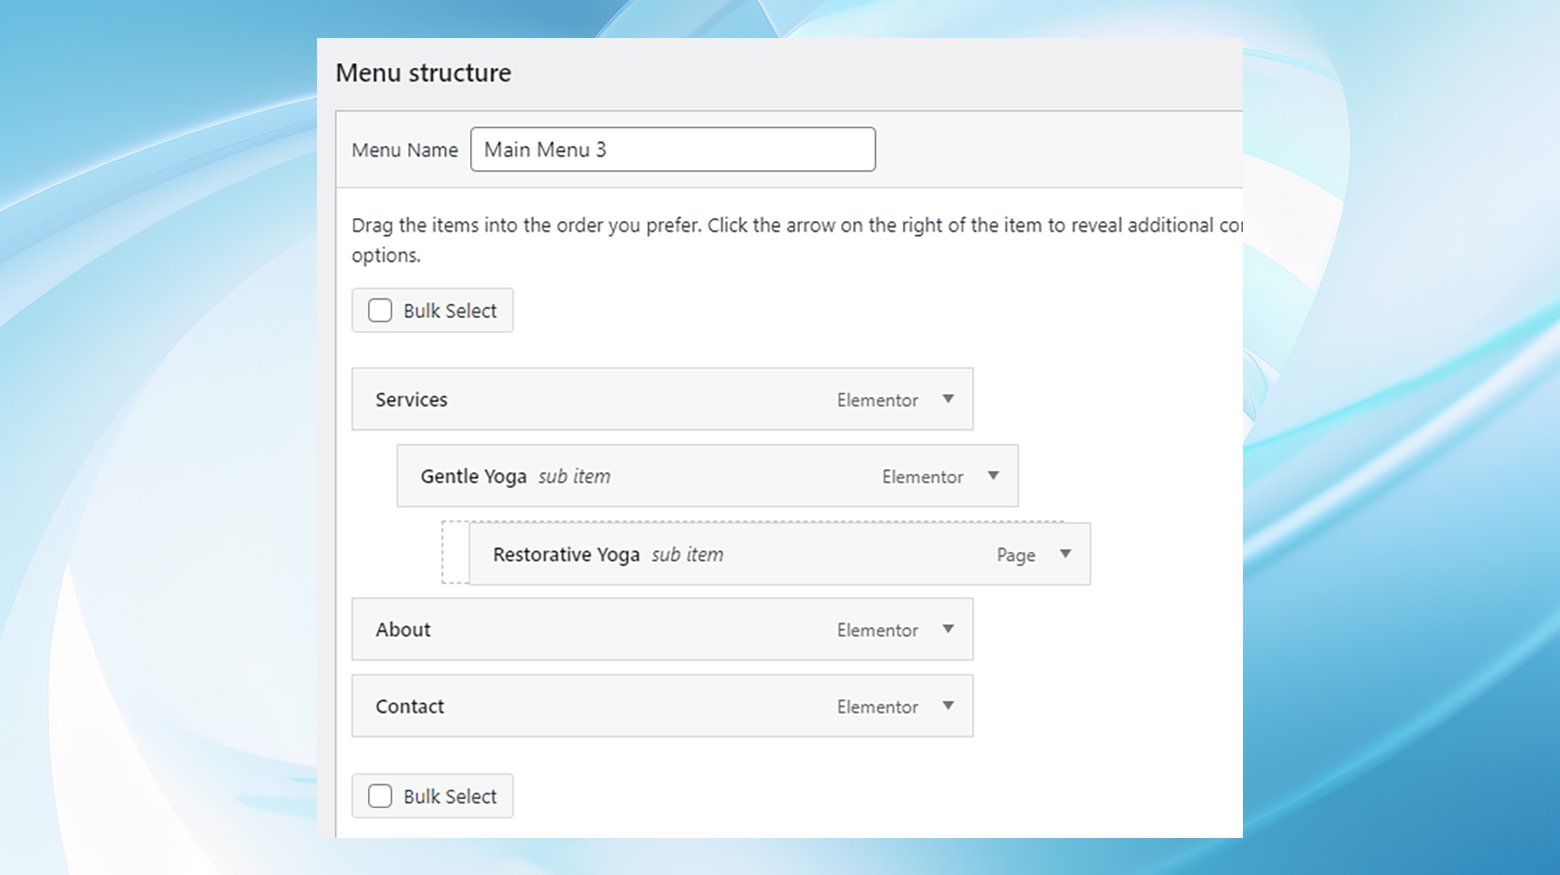
This method is particularly beneficial for categorizing products or content under broad categories and sub-categories, such as an Electronics category with a Laptops sub-category, which might include Apple laptops or Laptop bags and cases.
Create multiple dropdown menus
Adding dropdown menus for various sections or pages can benefit your website. For instance, an online marketplace might have one dropdown menu for product categories and another for different site areas, like the contact form and blog.
To implement multiple dropdown menus:
- Follow the steps to create a dropdown menu for each menu you need.
- Use the Location settings in the WordPress menu editor to assign each menu to different areas of your website.
This ensures that visitors see relevant navigation options depending on where they are on your site.
Create dropdown menus with live preview
For those who find the dashboard menu editor cumbersome, you can add a dropdown menu with a live preview feature in the WordPress customizer interface.
To create menus with a live preview:
- Navigate to Appearance > Customize to open the WordPress theme customizer.
- Click on the Menus tab, select your navigation menu, and use the drag-and-drop editor on the left side of the screen.
- As you make changes, you’ll see them reflected in the live preview on the right, allowing you to adjust your menu in real-time until it meets your needs.
Creating a large mega menu as a dropdown in WordPress
For websites with a significant amount of content, adding a standard dropdown menu might not suffice. In such cases, a mega menu can display a more detailed structure of your site, presenting more links, sub-menus, and items in a comprehensive dropdown format.
To create a mega menu:
- Consider using a plugin designed for creating mega menus, as WordPress does not support mega menus natively.
- These plugins allow you to design extensive dropdown menus that appear when users hover over a main menu item, offering a detailed overview of your website’s content structure.
Well-designed dropdown menus are a cornerstone of effective website navigation, significantly impacting user experience, conversions, and engagement. By following these tips and best practices, you can ensure that your WordPress site not only meets but exceeds user expectations for a smooth and intuitive navigational experience.
How to customize your WordPress dropdown menu with CSS
If you want to continue personalizing your WordPress site, adding custom styling to your dropdown menus through CSS elevates the visual appeal and enhances the user experience. Tailoring your site’s look to match your brand can set you apart from the crowd.
Here’s a step-by-step guide to adding personalization to your menus using CSS classes.
Step 1: Enable CSS classes in your menu
First, to weave in custom CSS, you must make CSS classes accessible in your menu editor. Look for the Screen Options tab at the top right corner of your WordPress dashboard.
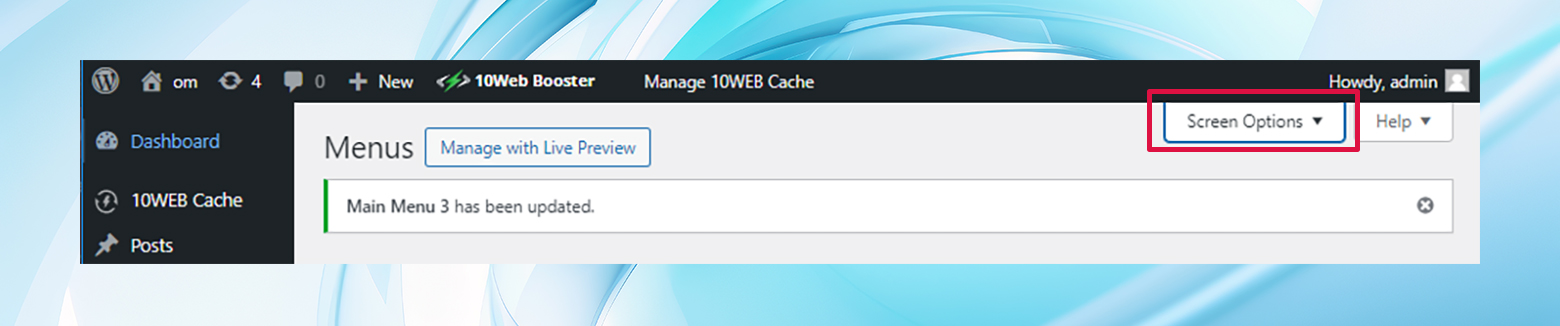
Clicking on this tab unfolds a panel with several checkboxes, revealing hidden options that you can toggle on or off depending on what you need for your editing session.
Step 2: Check the CSS classes option
Within the Screen Options panel, you’ll find an option labeled CSS Classes.

By selecting this checkbox, you essentially unlock the capability to assign custom CSS classes to individual items in your menu. This powerful feature lets you target specific menu items with unique styles, differentiating them from the rest of your site’s navigation elements.
Step 3: Adding custom CSS to your menu
With CSS classes now available, head back to your menu structure in the Appearance > Menus section. When adding or editing a menu item, you’ll notice an additional field named CSS Classes (optional). You can input one or more custom class names (separated by spaces) to create a unique identifier for this menu item.
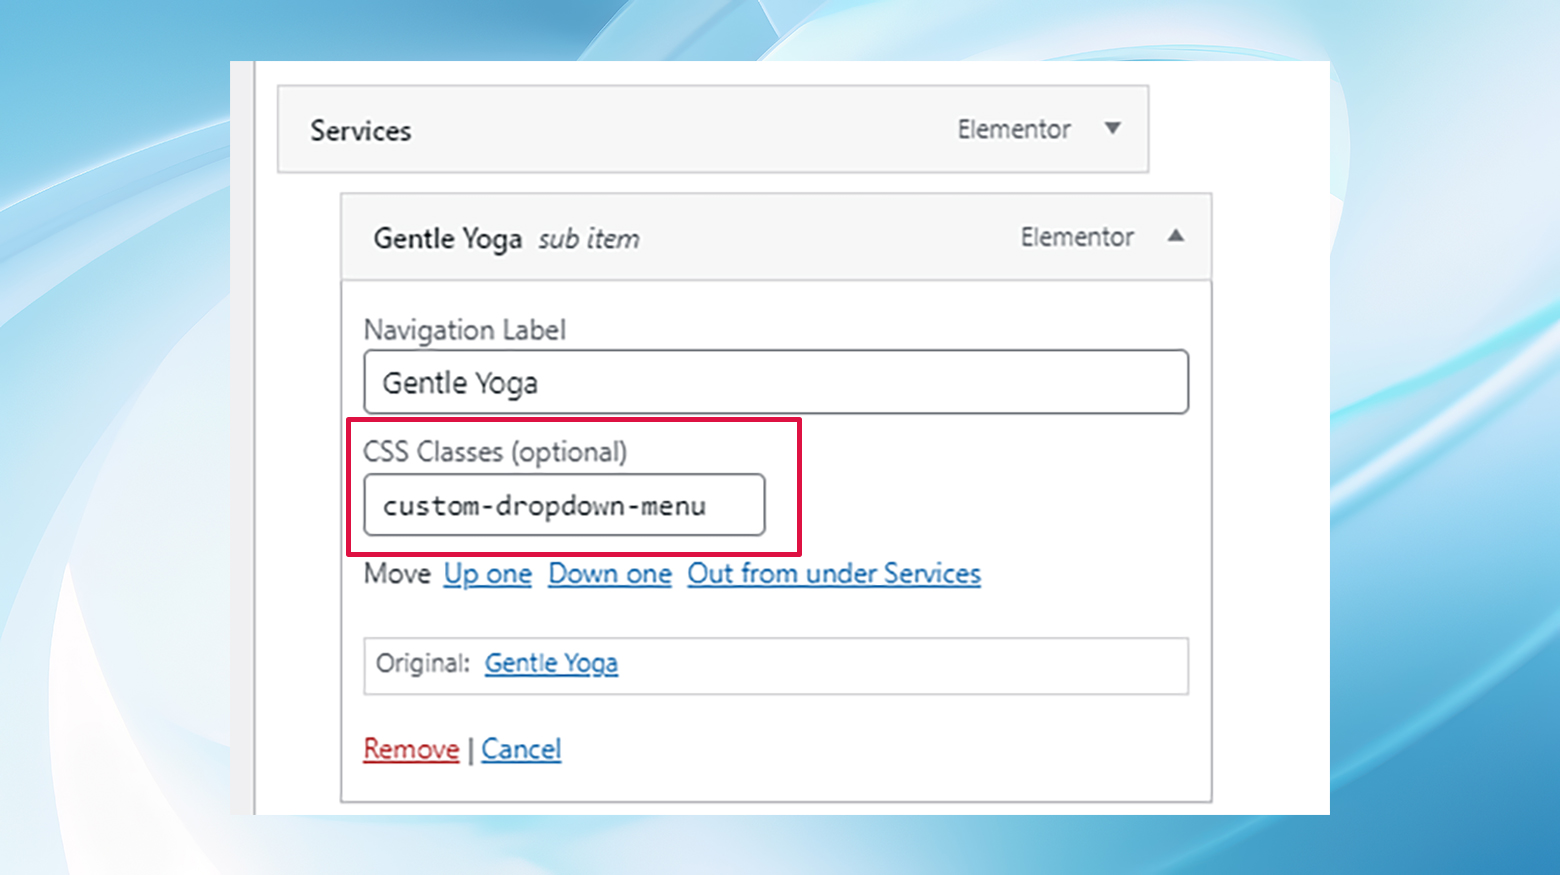
Click the Save Menu button after adding the CSS class(es).
Crafting your custom CSS
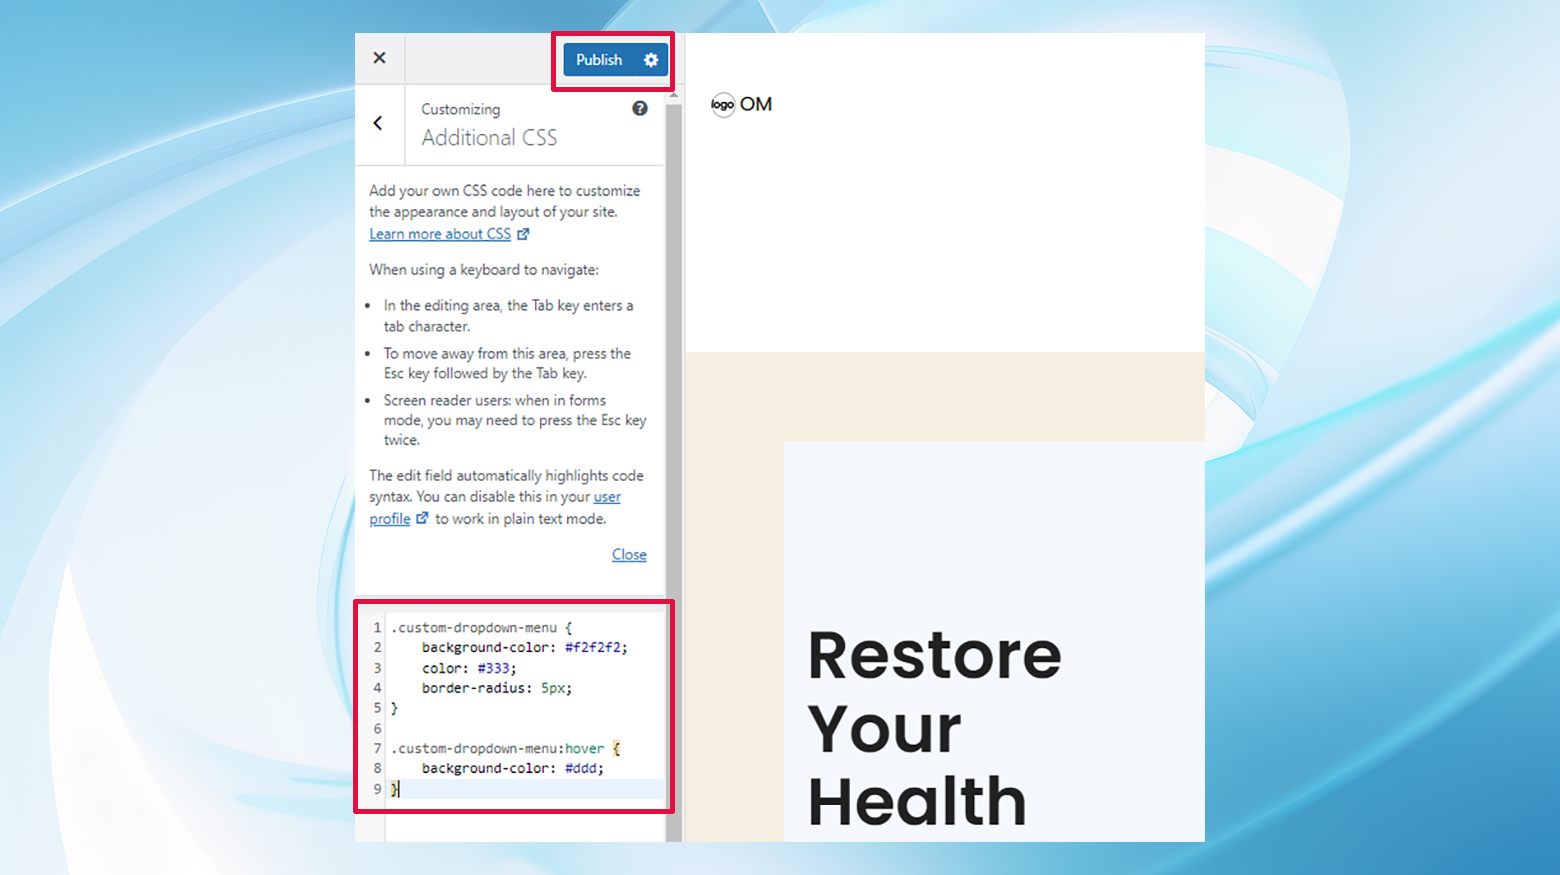
Having assigned custom classes to your menu items, the next step is to bring your styling vision to life. Navigate to your dashboard’s Appearance > Customize section and look for the Additional CSS option. This area is your canvas for all things CSS-related to your site. Enter your custom CSS rules here, targeting the class names you’ve previously set up. For example:
.custom-dropdown-menu {
    background-color: #f2f2f2;
    color: #333;
    border-radius: 5px;
}

.custom-dropdown-menu:hover {
    background-color: #ddd;
}
This CSS snippet changes the background and text colors and adds a slight border radius to menu items with the class .custom-dropdown-menu. It also changes the style on hover.

Paste the snippet in, then click the Publish button at the top of the page.
Adding icons or images to your dropdown menu
Enhancing your WordPress dropdown menus with visual elements like images or icons can significantly improve the user experience on your website. These visual cues can help users navigate your site more intuitively, making finding the content they’re looking for easier.
![]()
Plugins like Menu Image, Icons Made Easy aid users of all skill levels in adding these helpful visual elements.
Troubleshooting common dropdown menu issues
Troubleshooting your WordPress dropdown menu can be a tricky process, but by methodically checking each potential issue, you can identify and resolve the problem. Here’s a structured approach you can try to troubleshoot your dropdown menu:
Step 1: Switch to a default theme
The first step in diagnosing any WordPress menu issue is to eliminate theme-related problems. Switch your site to a default WordPress theme, such as Twenty Twenty or Twenty Twenty-One. If the menu functions correctly after switching, the issue likely lies within your theme. In this case, reaching out to the theme’s developer or support forum for help is advisable, as they may already have a solution or update available.
Step 2: Check for mistyped code
If you’ve added any custom CSS or JavaScript to enhance your dropdown menu, a small typo could be the culprit. Carefully review your code for any errors, paying close attention to syntax, missing semicolons, or incorrect class names. Utilize browser developer tools (accessible by pressing F12 in most browsers) to inspect your menu and see if any errors are being logged in the console.
Step 3: Investigate plugin incompatibility
Plugins enhance WordPress functionality but can sometimes conflict with each other or with your theme, leading to issues like malfunctioning menus. To test for plugin conflicts:
- Deactivate all plugins related to menu functionality or any recently installed or updated plugins.
- Check if the menu starts working correctly after each plugin is deactivated.
- Reactivate plugins one by one, testing the menu each time to pinpoint the offending plugin.
- Once identified, you may choose to seek an alternative plugin or reach out to the plugin developer for support.
Step 4: Update jQuery
WordPress and many themes and plugins rely on jQuery for dynamic content and effects, including dropdown menus. Ensure that your site is using the latest version of jQuery. If you’re not sure how to do this, the jQuery Updater plugin can help by automatically updating jQuery to the latest version. Remember, always back up your site before making any significant changes or updates.
Step 5: Use WordPress support forums
If you’ve tried the above steps and the menu still isn’t working, the WordPress Support Forums are a fantastic resource. When posting, provide as much detail as possible about your issue, including steps you’ve already taken to resolve it. The community is incredibly knowledgeable and can often offer solutions that may not be immediately apparent.
Conclusion
By learning how to add a dropdown menu in WordPress, you can blend functionality with aesthetics to enhance site usability. Various methods, such as WordPress’ built-in tools, plugins, or custom coding, can help you create dynamic navigation with submenus that elevate your website.
Remember, the goal is to maximize navigation efficiency and ensure your visitors have a smooth, enjoyable experience exploring your site.
Simplify WordPress with 10Web
Simplify WordPress with 10Web
Skip and automate manual work with 10Web Managed WordPress Hosting and the 10Web AI Website Builder.