Enhancing your WooCommerce store with a wishlist feature can significantly improve customer experience and boost sales. This guide covers everything you need to know about adding a wishlist in WooCommerce, from understanding its importance and choosing the right plugin to installation, configuration, and customization. By integrating this feature, you can help customers save items for future purchases, reduce cart abandonment, and gain valuable insights for targeted marketing.
Dive into our step-by-step instructions on how to add wishlist in WooCommerce and make your store more engaging and user-friendly.
FAQ
How to add Wishlist option in WooCommerce?
Does WooCommerce have a Wishlist function?
How to add Wishlist button in WooCommerce without plugin?
How do I add a Wishlist to a WordPress website?
What are WooCommerce wishlists
So many people visit online stores without making a purchase, wanting to buy something then forget it or leave their carts abandoned. WooCommerce wishlists are a powerful feature for your online store, allowing customers to select and save items for future purchases.
The importance of wishlists
Having a wishlist on your WooCommerce store is a convenient tool for customers who are interested in products but not ready to buy immediately. It enables them to save items to their personal list for later review or purchase. For you as a store owner, wishlists can reduce shopping cart abandonment, and give valuable insights into your customers’ preferences. This information can be used for targeted marketing campaigns to encourage customers to return to their wishlists and complete their purchases.
The wishlist feature
The wishlist feature in WooCommerce allows both guests and registered users to create and manage lists of products they desire. Guests can usually save wishlists for a short period, such as 30 days, while registered users can save them indefinitely.
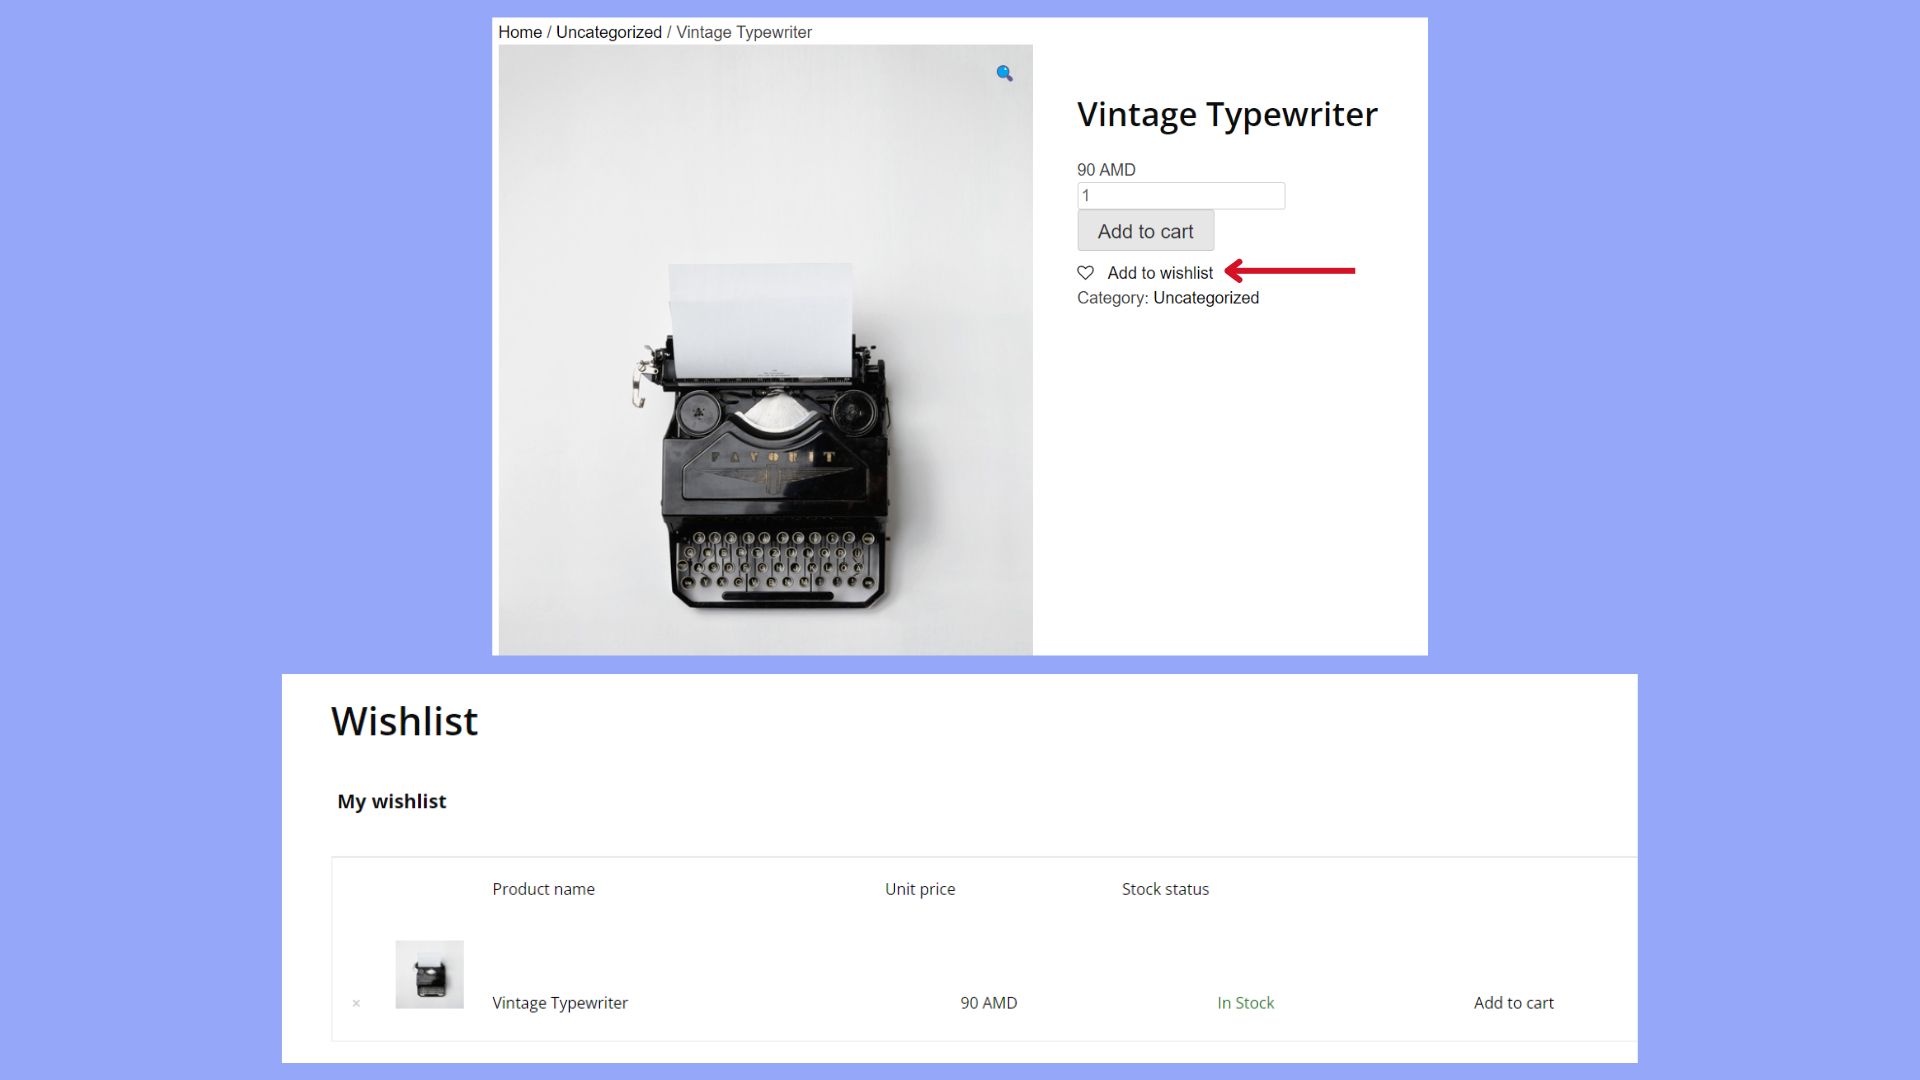
This feature is shown with the Add to wishlist button, which can be conveniently added to each product page. When customers click on this button, the item gets added to their wishlist, making it easy for them to find and consider buying these products later on. This feature helps in personalizing the shopping experience.
We will cover how to add wishlist in WooCommerce, including how to add wishlist button in WooCommerce and utilizing plugins for how to add wishlist in WooCommerce stores for a more engaging experience.
How to add wishlist in WooCommerce
Let’s discover the steps to adding wishlist in WooCommerce store to ensure your customers can easily save the products for later purchases.
Get a wishlist plugin for WooCommerce
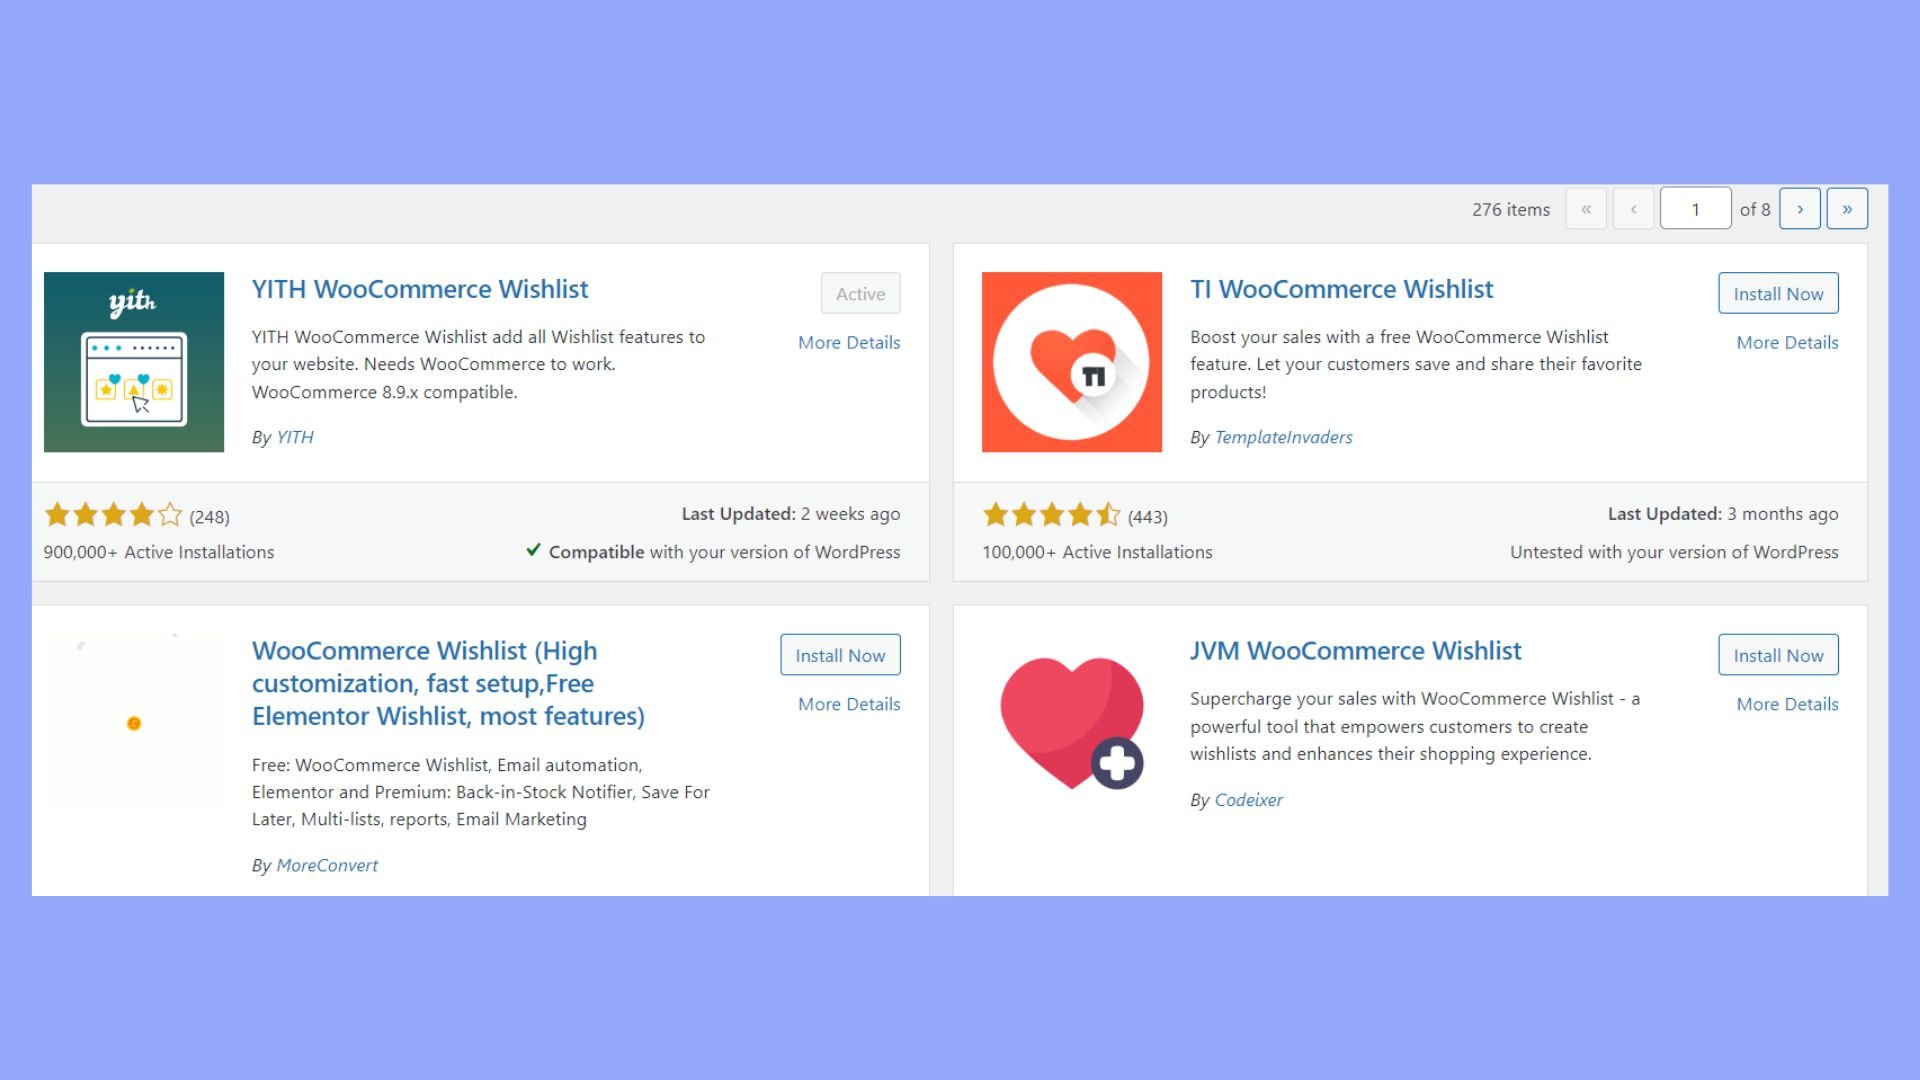
Since WooCommerce doesn’t have a built-in feature for wishlists, you need to get a plugin. Here are the steps to follow:
- Select a plugin to install. Popular options include YITH WooCommerce Wishlist and TI WooCommerce Wishlist. Both plugins offer a variety of features that can be tailored to meet your store’s needs.

- Install and activate the plugin.
Adjust the wishlist settings
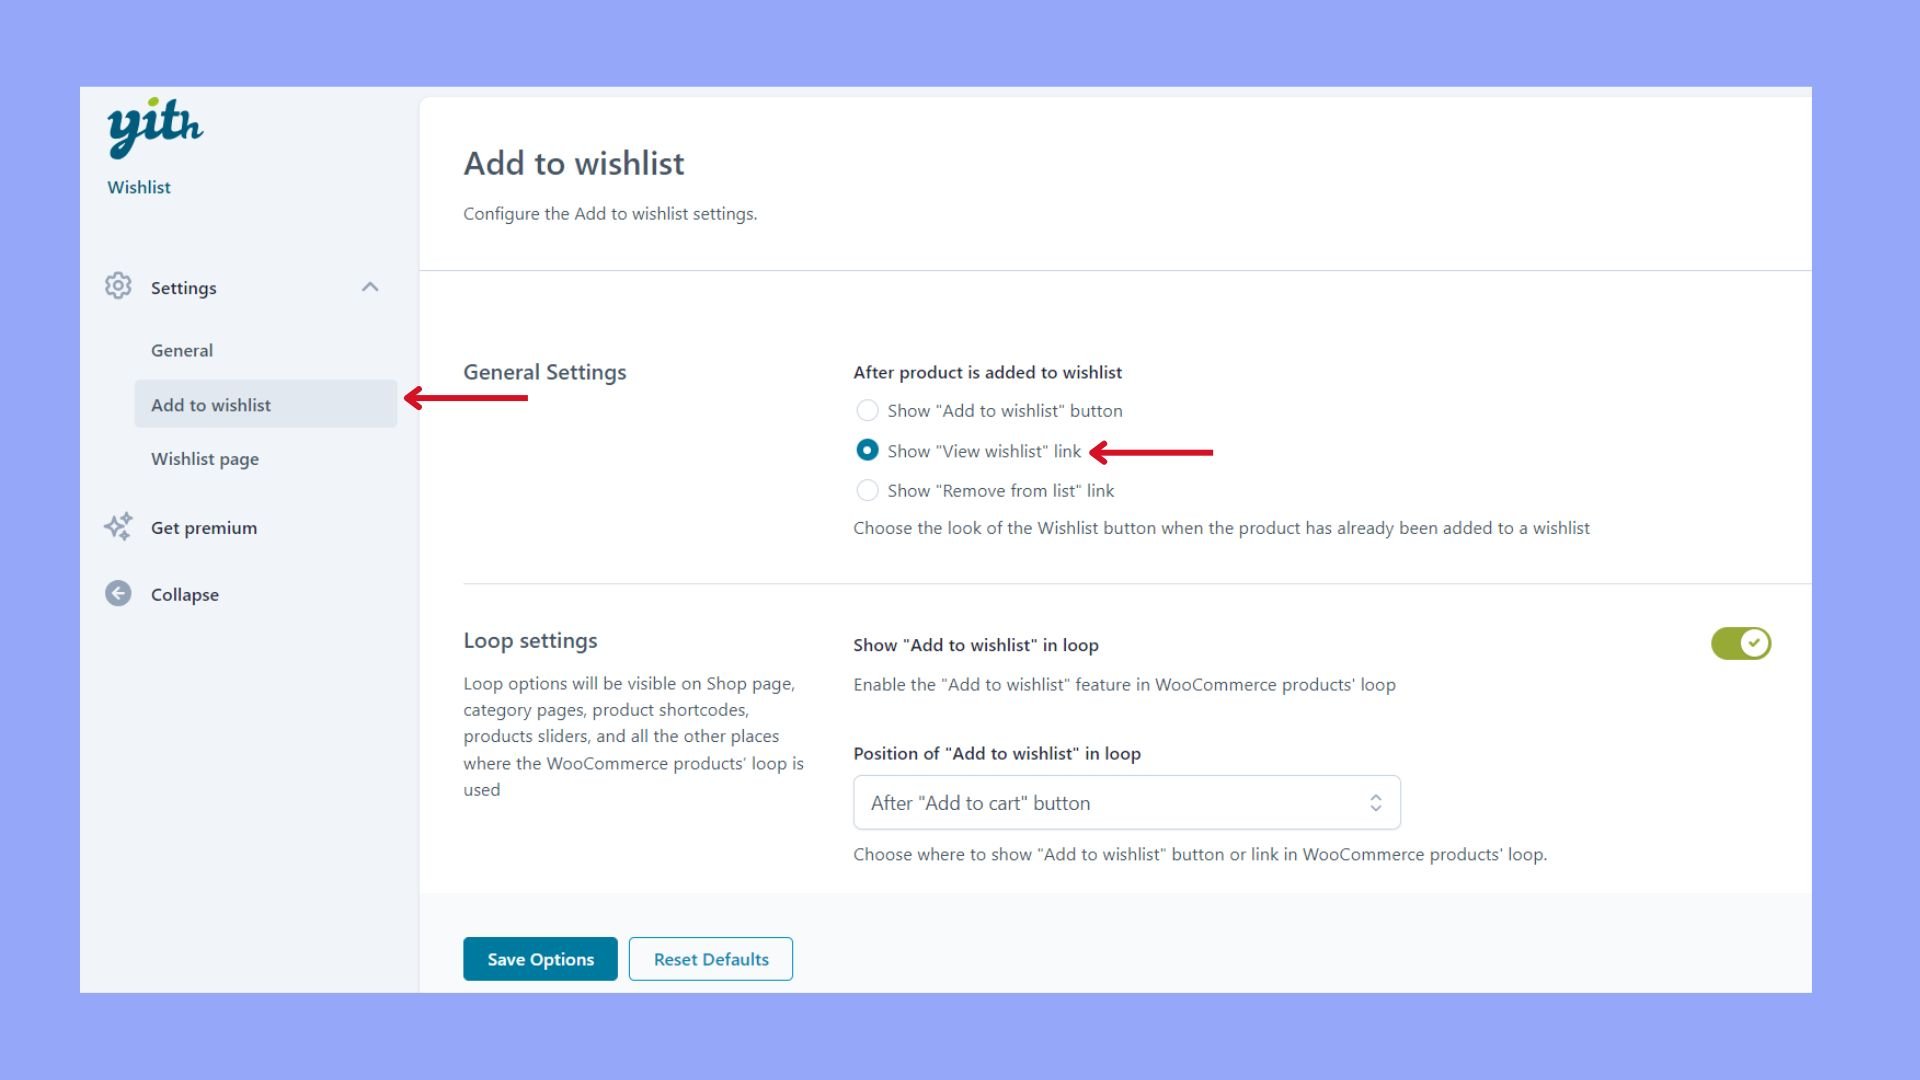
- Go to the plugin’s settings in your WordPress dashboard. If required, create a new page named ‘Wishlist’ and assign it to the plugin settings.
- Adjust the appearance of the wishlist button to match your theme and preferences.
- Choose whether wishlists are public, shared, or private, and configure user access settings accordingly. And decide what the page should include.
- Save your changes and ensure that the wishlist button appears on product pages.
Test the wishlist
After you have learned how to add wishlist in WooCommerce and set the page up through the plugin, it’s time to test.
- Log in to your ecommerce store as a guest or registered user.
- Click on a product to test.
- Test the functionality to ensure it works untroubled for your customers. As you see in the picture the Add to wishlist button is on the product page and when I click the product appears on my wishlist.
With these steps, you have added a plugin that supports wishlists for your ecommerce store.
Customizing your wishlist
When you have learned how to add wishlist in WooCommerce, enhancing its aesthetics and functionality to match your store’s style becomes a crucial next step. Here’s how you can tailor your wishlist features to create a seamless experience for your customers.
Design and style adjustments
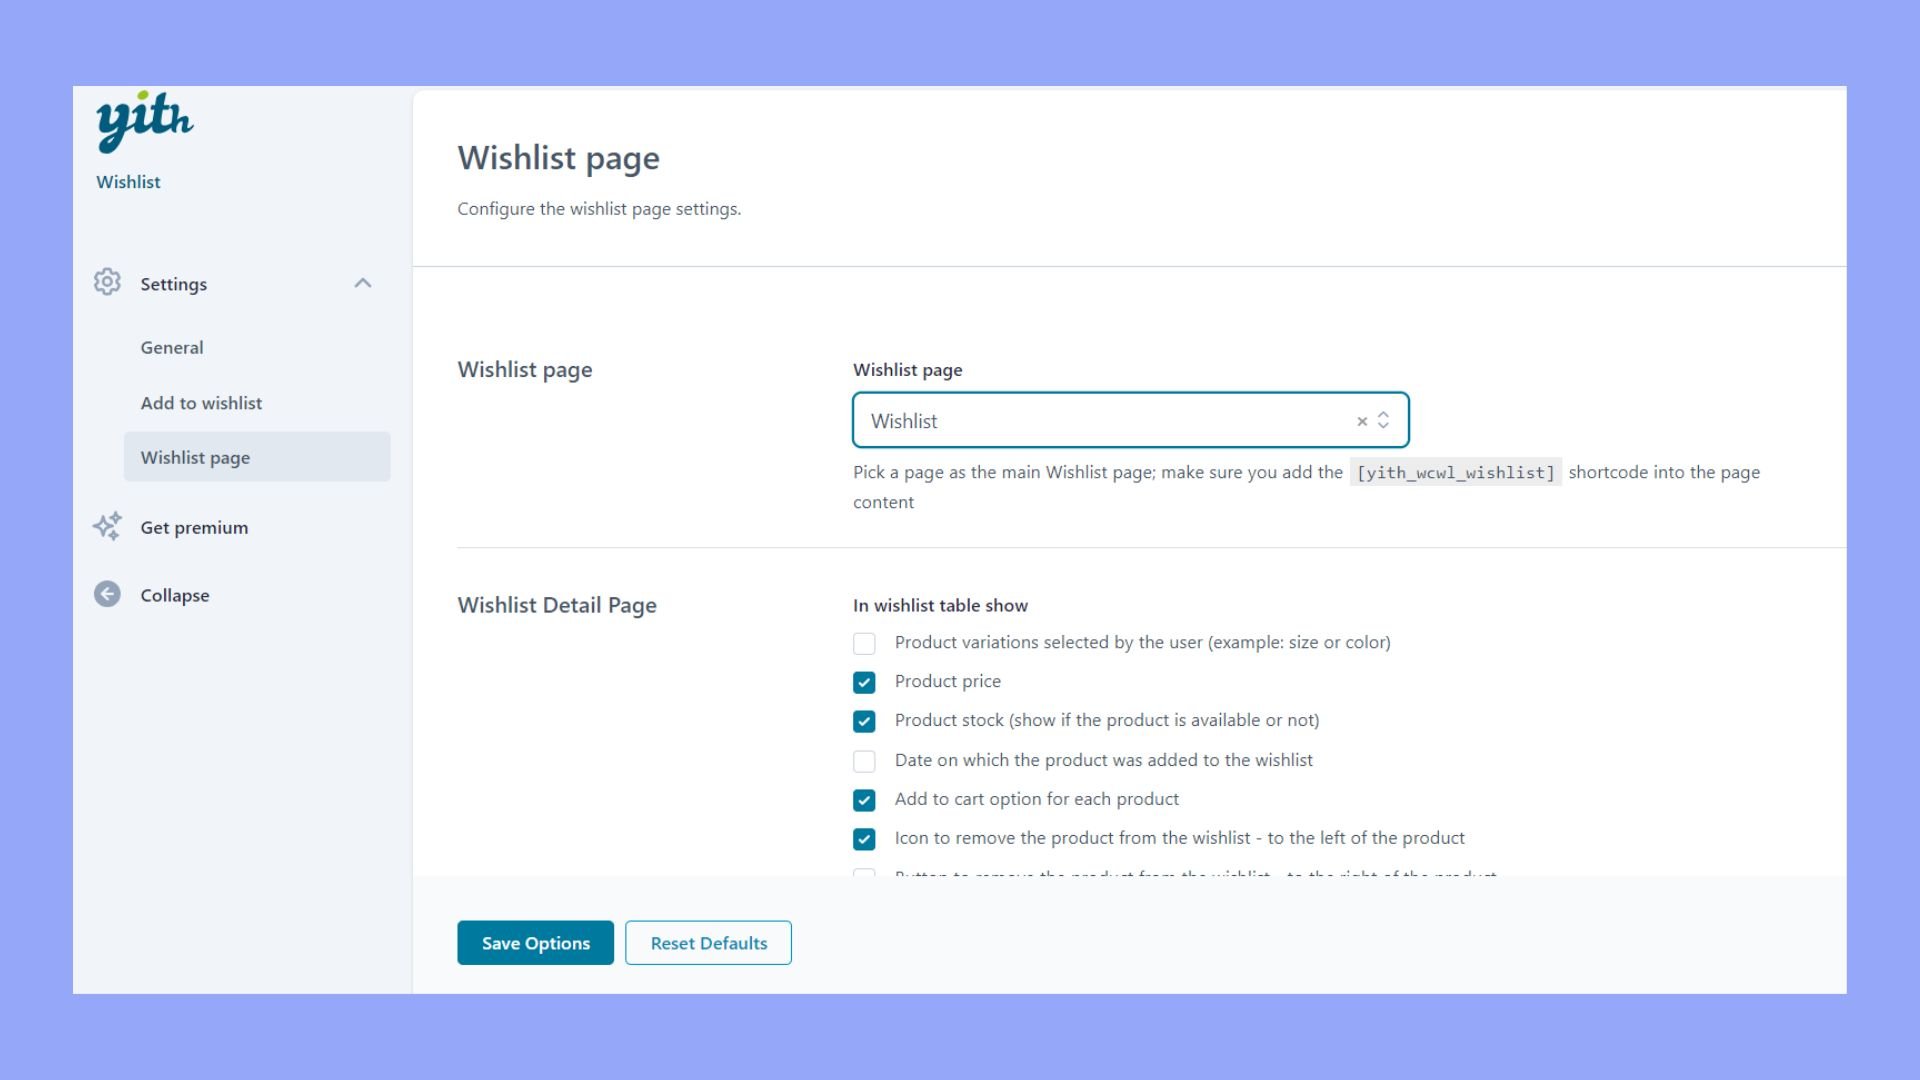
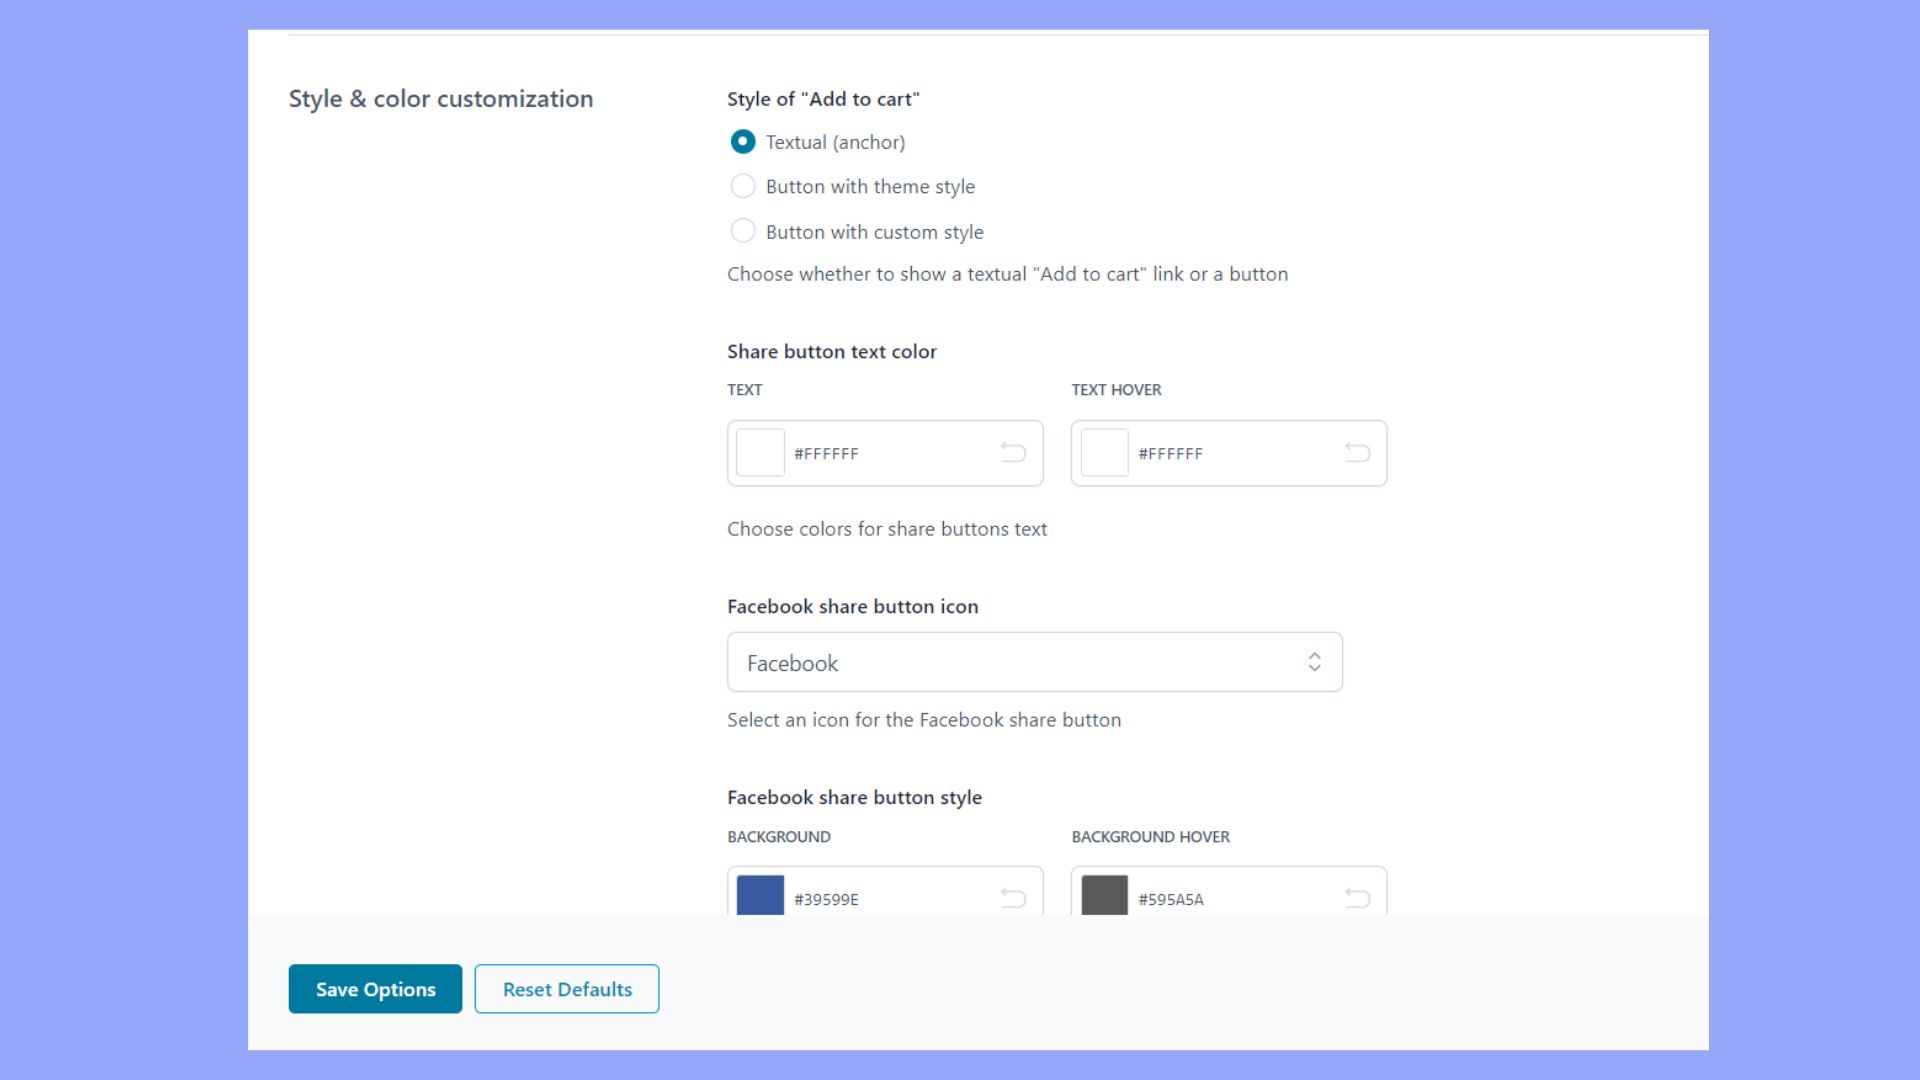
- To customize the appearance of your Add to wishlist button, go to the plugin’s settings you have installed.
- Look for settings to adjust the color, font, and size of the button to match your website’s theme. On the YITH WooCommerce Wishlist plugin, you can find the customization on the Wishlist page settings.
- Alternatively, use custom CSS if you want to apply more advanced style customizations to your wishlist features, including the wishlist icon and its placement on your product pages. Again, you can add it in the plugin’s settings.

Privacy settings for wishlist
- Access the settings of your wishlist plugin.
- Here, you can choose whether to make your customer’s wishlists public, private or shared with specific users.
- Set the default privacy level for new wishlists and provide options for users to change it per their preference on the My wishlist page.
Including multi-wishlist functionality
- If you’re using a plugin that supports multiple wishlists, you will find an option to enable this feature in the dashboard’s wishlist settings.
- Determine whether you want to allow users to create multiple wishlists and if so, how they can manage them on their wishlist page.
- Ensure you provide the option to add new wishlists and the ability to hide or delete them, offering complete control over their wishlist management.
Some of the features are supported by premium versions of the wishlist plugins. If you want to make the wishlists more functional, you may consider upgrading the plugin. Customers enjoy the process with a wishlist that feels personal and intuitive to use. With the above steps, you’ll enhance the shopping experience on your WooCommerce store enticingly and effectively.
Create your custom online store in minutes with 10Web AI Ecommerce Website Builder and take your business online. 
Looking to sell online?
Maximizing engagement and conversions
With wishlists, you can significantly enhance user engagement and boost your conversion rates. Let’s understand what’s next after you have learned how to add wishlist in WooCommerce.
Encourage social sharing from the wishlist
To make the most of your wishlists, offer social sharing options directly from the Wishlist page. You can add streamlined Share buttons for platforms like Facebook, Twitter, Pinterest, and WhatsApp to enable easy sharing of wishlist items. By sharing their selected lists, customers propagate your products organically to a wider audience, increasing brand visibility and potential conversions.
For instance, you can:
- Use a plugin that includes social sharing features.
- Enable the social sharing options in the wishlist page options.
- Customize the button text to prompt sharing, such as “Share your wishlist” or “Tell your friends”.
In the YITH Wishlist plugin, it’s in the Wishlist page settings.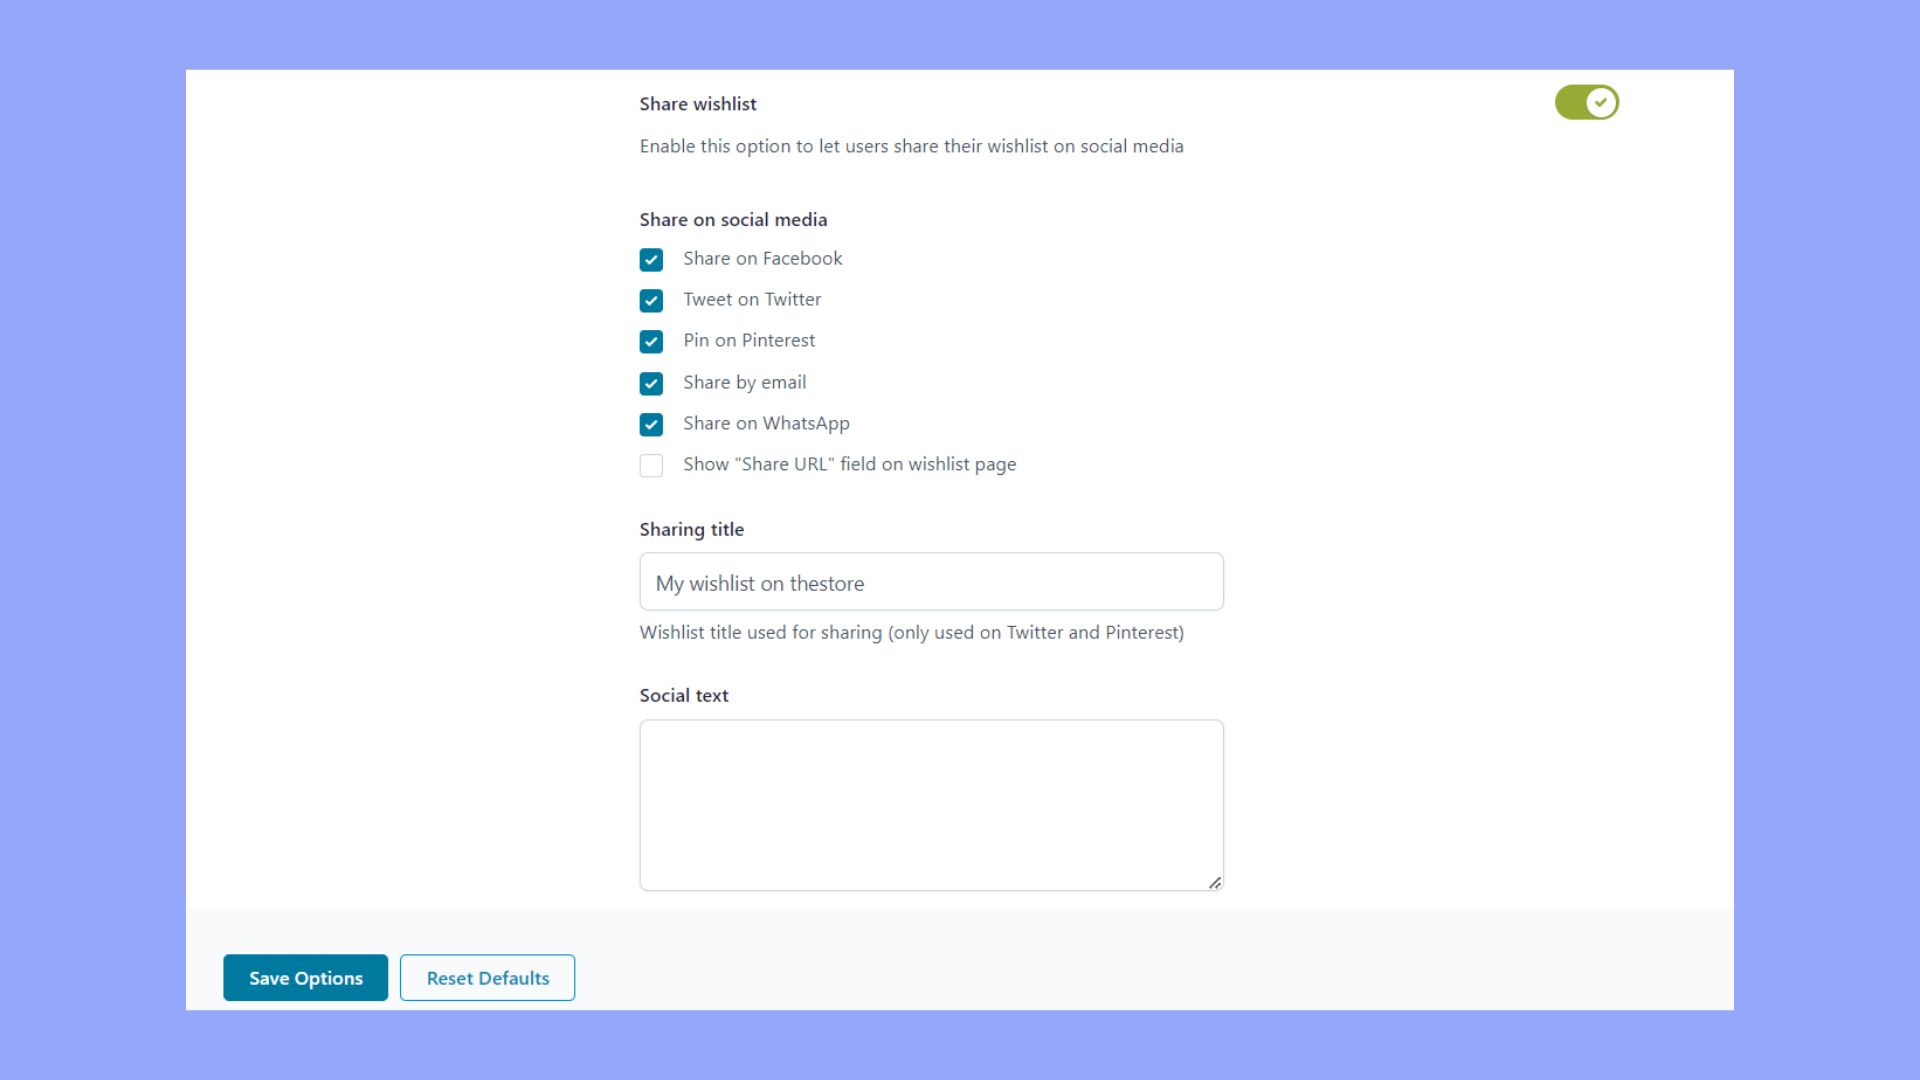
Integrate wishlist with marketing efforts
Connect your wishlist functionality with marketing strategies to personalize customer experiences and create targeted campaigns:
- Send reminder emails to customers who have items in their wishlists using a shortcode that brings them back to a pre-populated cart, hastening the checkout process.
- Analyze your wishlist data to understand user preferences and tailor your marketing content.
- Include wishlist items in email promotions showcasing price reductions or new stock arrivals.
Utilize discounts and special offers
Offering discounts and special offers to wishlist items can be a decisive factor for conversion:
- Create exclusive discounts for items in the wishlist, notifying users with a customized email to encourage sales.
- Introduce time-sensitive deals for wishlist items, prompting quicker actions towards the add to cart button.
A strategic placement of discounts and clear communication can lead to higher click-through and conversion rates from the wishlist to the checkout.
Conclusion
Adding a wishlist feature to your WooCommerce store can significantly enhance the user experience and drive customer engagement. Using plugins such as YITH WooCommerce Wishlist or TI WooCommerce Wishlist, you can easily integrate and customize this functionality without requiring extensive coding knowledge. Wishlists allow customers to save products for future purchases, reducing cart abandonment and providing valuable insights into customer preferences.
Through the steps mentioned above on how to add wishlist in WooCommerce, you’re not just adding a feature to your store; you’re cultivating a community around your brand and turning casual browsing into meaningful engagement and increased sales.
Create your custom online store in minutes with 10Web AI Ecommerce Website Builder and take your business online. Create your online store in minutes with 10Web AI Ecommerce Website Builder.
Looking to sell online?
Looking to sell online?
Create your online store in minutes


![]()