Do you have an ecommerce website? It’s time to create and customize your checkout page if you want the conversion to rise. Creating an effective checkout page in WooCommerce will directly enhance your online store’s efficiency and customer experience. This guide details the essential components and benefits of customizing your checkout page. You’ll learn how to create a checkout page in WooCommerce, modify, and optimize it. Let’s get started.
FAQ
How to make a checkout page in WooCommerce?
How do I add a field to the checkout page in WooCommerce?
How to create a WooCommerce cart page?
How to use WooCommerce one page checkout?
WooCommerce checkout pages: the basics
The WooCommerce checkout page ensures a smooth transaction for your customers. Before we get to learning how to create a checkout page in WooCommerce, let’s understand it a bit more deeply.
Checkout page requirements
To set up a checkout page on WooCommerce, you’ll need a few key elements to ensure a successful transaction process. Firstly, WooCommerce automatically generates a checkout page upon installation. This is where users can view their order details, enter their shipping and billing information, and make payments.
Your checkout page should include:
- Billing and shipping information: Fields for customers to enter their personal details and address.
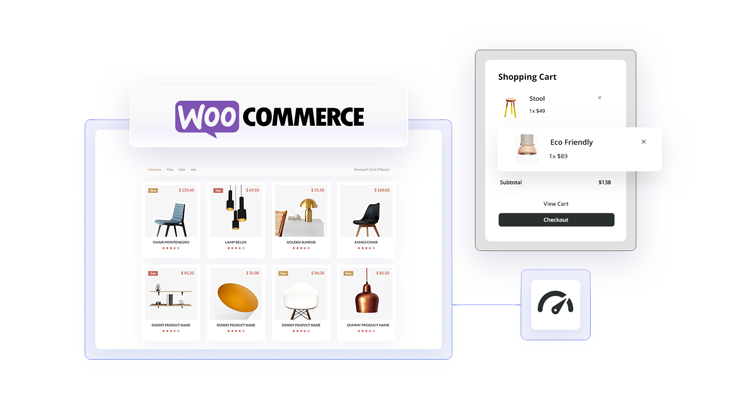
- Order summary: A clear and concise summary of what the user is purchasing.
- Payment options: Integrated payment gateways to handle transactions smoothly.
- Place order button: A bold Place Order button to submit the order.
- Customer note: An optional field for customers to leave notes about their order.
If you spend some time creating an intuitive and well-organized checkout page, it will significantly reduce cart abandonment and increase your sales. Keep your design simple and user-friendly to guide your customers through a hassle-free purchase.
Customized checkout page benefits
Creating a customized checkout page in WooCommerce offers several advantages for both your online store and your customers. Let’s look at some.
- Enhanced user experience: A customized checkout page means a smoother, more user-friendly experience. You can reduce the number of form fields, reorganize them to create a more logical flow, or even add informative tooltips to help customers through the process.
- Increased conversion rates: A more intuitive checkout can lead to fewer abandoned carts. When customers find the checkout process easy, they’re more likely to complete their purchase.
- Brand consistency: Customize the look and feel of your checkout page to match your brand. This consistency reinforces your brand identity and can increase customer trust and loyalty.
- Up-sell and cross-sell opportunities: By customizing your checkout, you can strategically place product recommendations or offers, increasing the average order value.
- Better data collection: Tailor the checkout fields to collect the information that’s most important for your order fulfillment and customer relationship management.
- Reduced checkout time: Minimize the number of steps and fields in the checkout to facilitate the process, which the return customers appreciate the most.
While a streamlined checkout is beneficial, it’s also crucial to balance simplicity with the need to collect relevant information and offer options like gift wrapping or special delivery instructions. Your checkout should be as individual as your shop, providing a clear purchase process that reflects your brand’s character and meets your customers’ needs.
How to create a checkout page in WooCommerce
You already have your ecommerce store ready and are about to learn how to create a checkout page in WooCommerce. Here’s a simple way to get the basics set up for your online store (if you don’t have it yet) and build your checkout page.
Use the default checkout page
Step 1: Set up WooCommerce
- Go to the Plugins section in your WordPress dashboard, click on Add New, and search for WooCommerce. Once you’ve found it, click Install Now followed by Activate.
- Upon activation, the WooCommerce Setup Wizard will guide you through essential steps like setting up currency, payment methods, and shipping information.
Step 2: Adjust the checkout page
- Go to WooCommerce > Settings in your dashboard to adjust any settings that the wizard may not have covered.
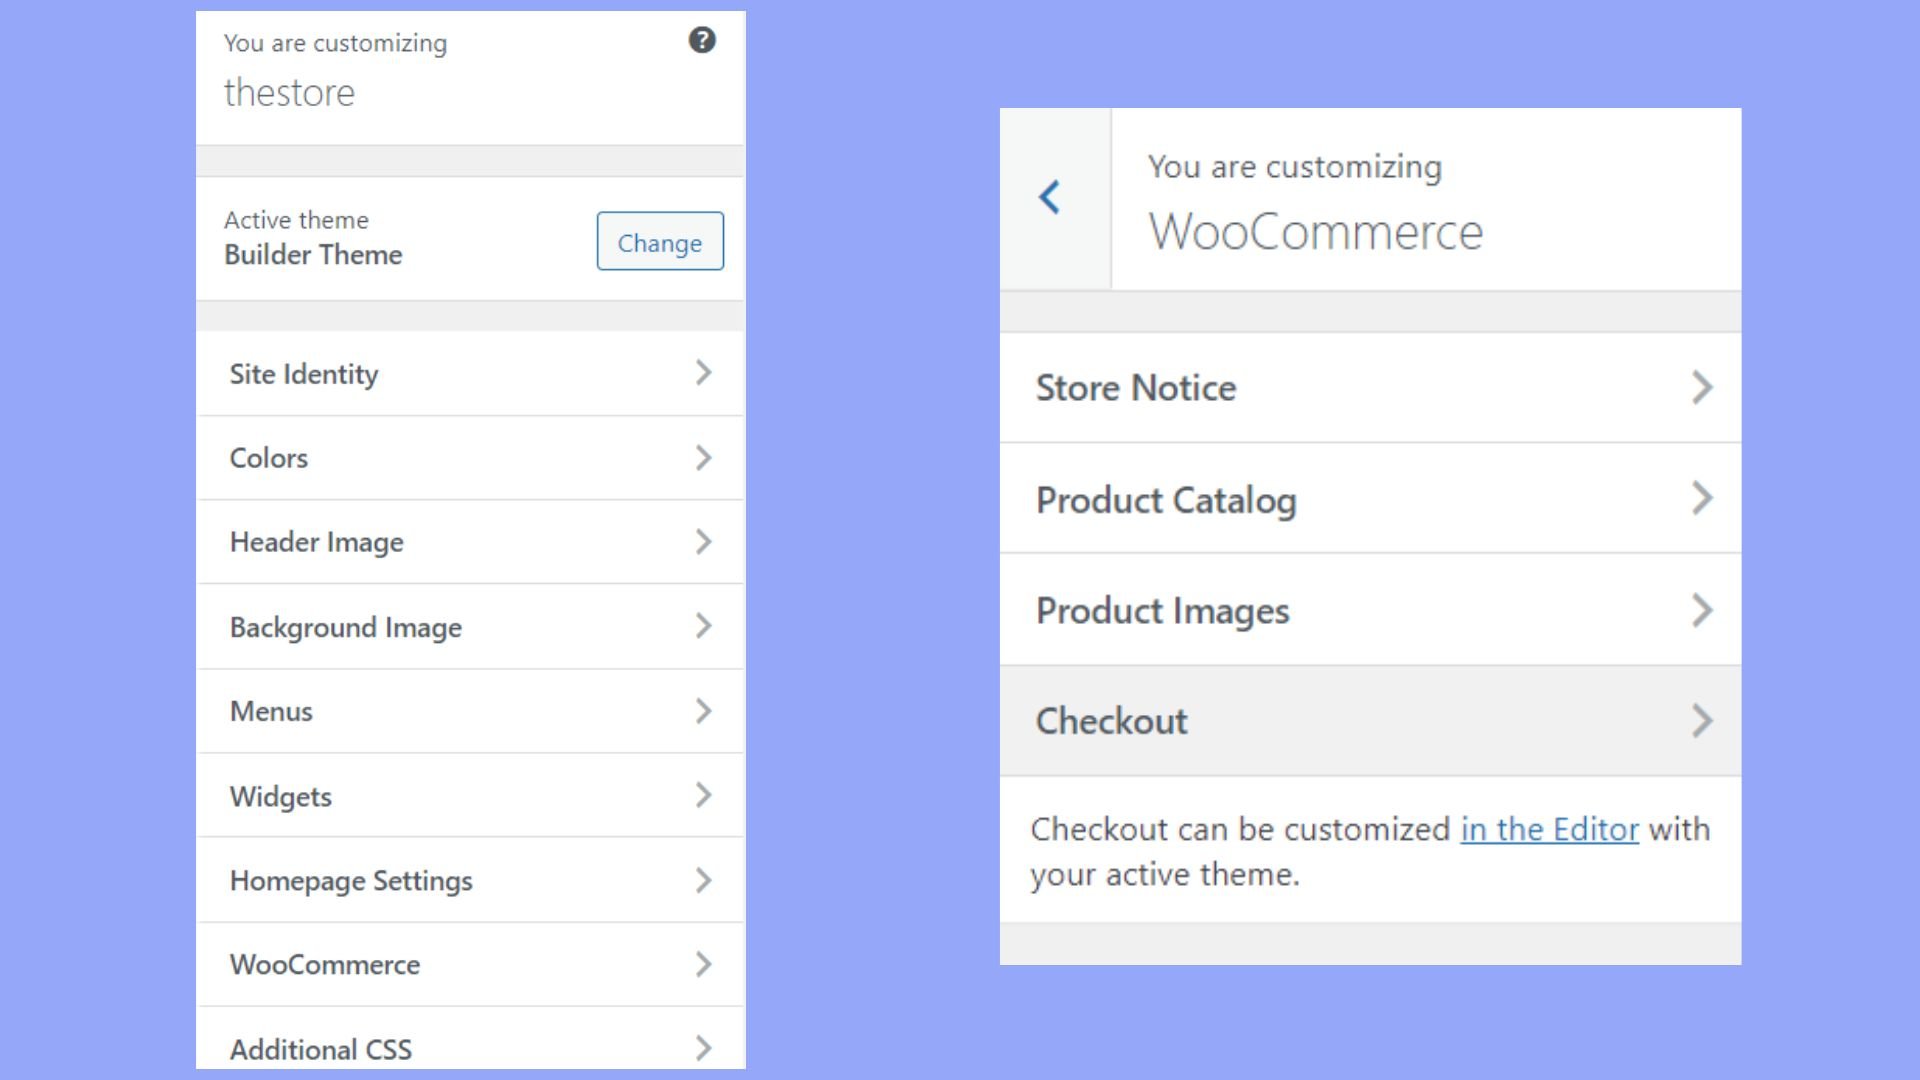
- If you wish to add or edit fields on the checkout page, look for the Customizer under the Appearance section. Some themes offer straightforward drag-and-drop editing for checkout fields.

- Sometimes, you may want to implement a one-page checkout for simplicity. To do this, use a shortcode provided by WooCommerce or a one-page checkout plugin. Place this shortcode on any page to create a customized checkout experience.
With these steps, you’ll have a strong foundation for your WooCommerce store, which you can build upon with further customization. Always test your checkout process before going live to ensure everything is running smoothly for your customers.
Create a custom checkout page
In addition to using the default checkout page, WooCommerce allows you to create a custom checkout page that you can fully tailor to your store’s needs. This can be particularly useful if you want to add unique features or design elements that aren’t available in the standard setup. Here’s how you can create and assign a custom page as your checkout page in WooCommerce:
Step 1: Create a new page
- Go to your WordPress dashboard > Pages > Add New.
- Title this page appropriately, such as “Custom Checkout”.
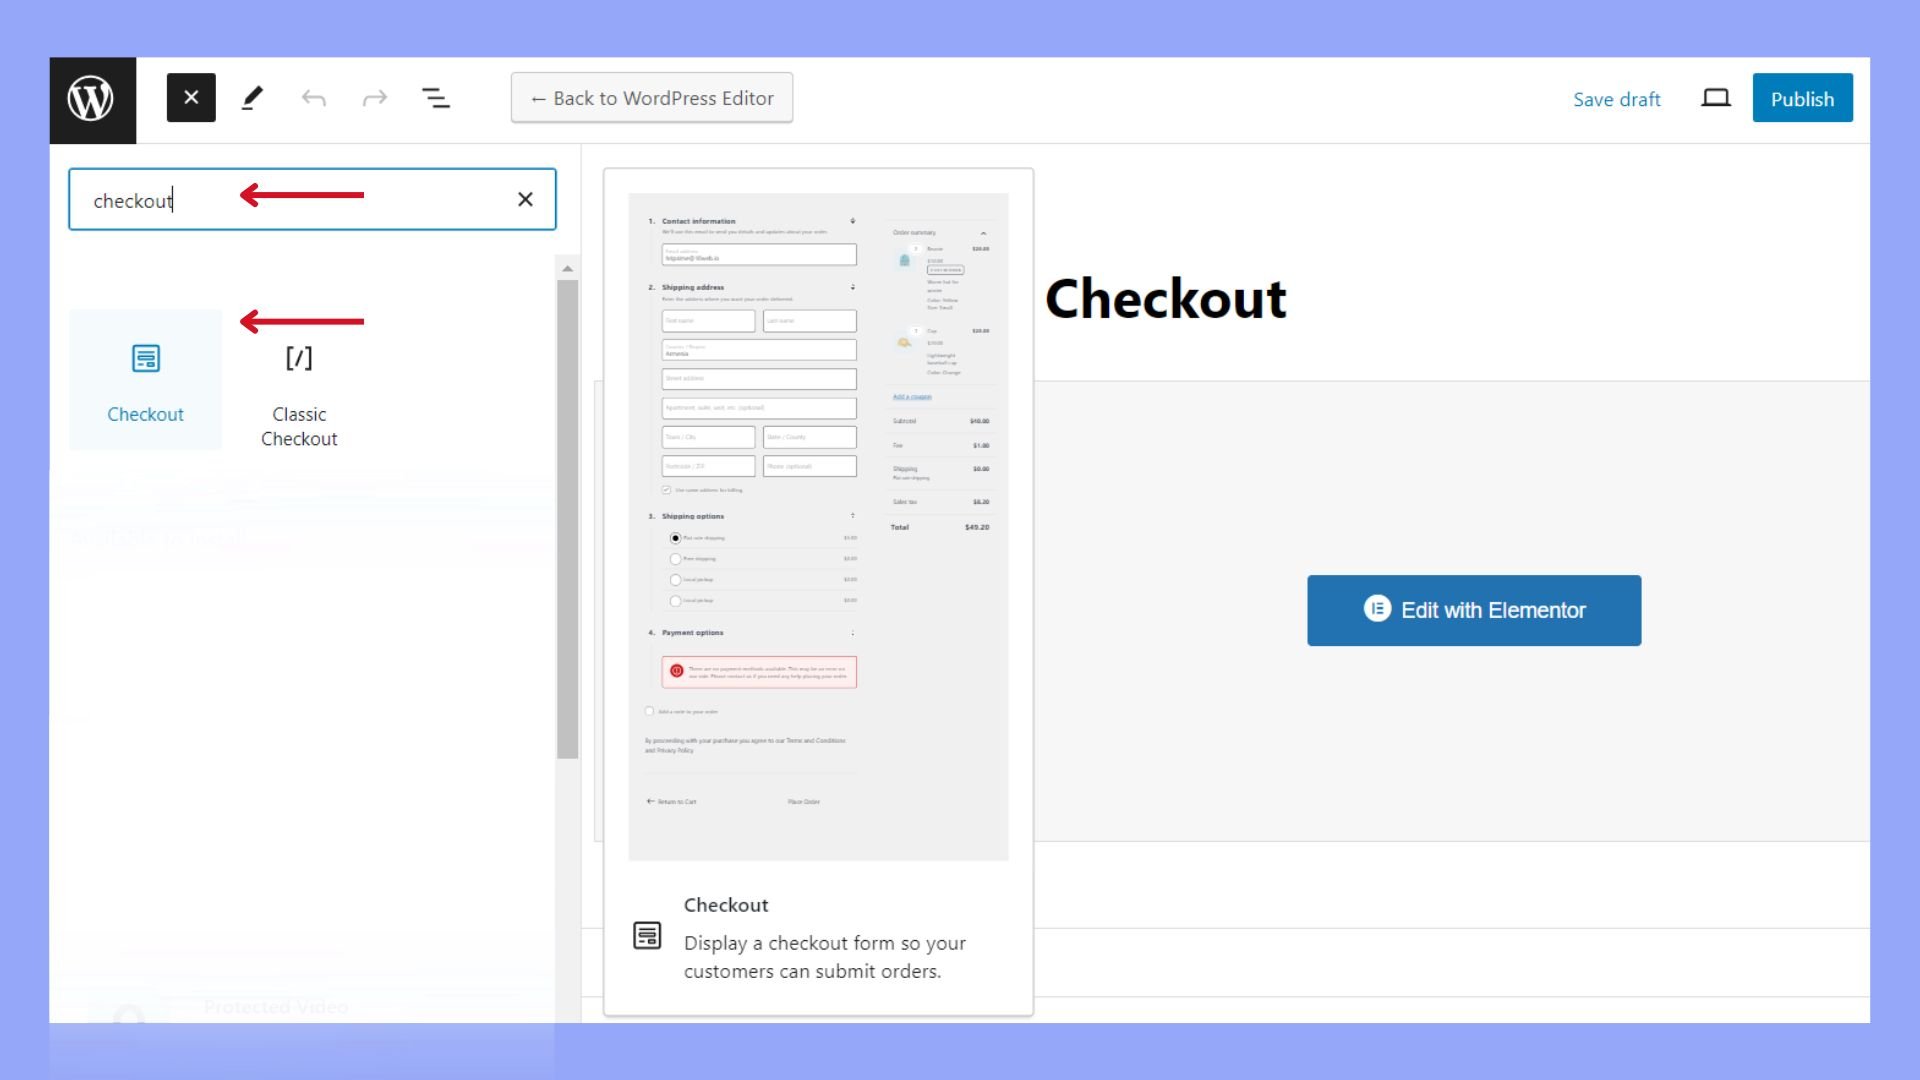
- In the page editor, add the WooCommerce checkout shortcode searching for checkout to display the checkout form.
Step 2: Customize the checkout page
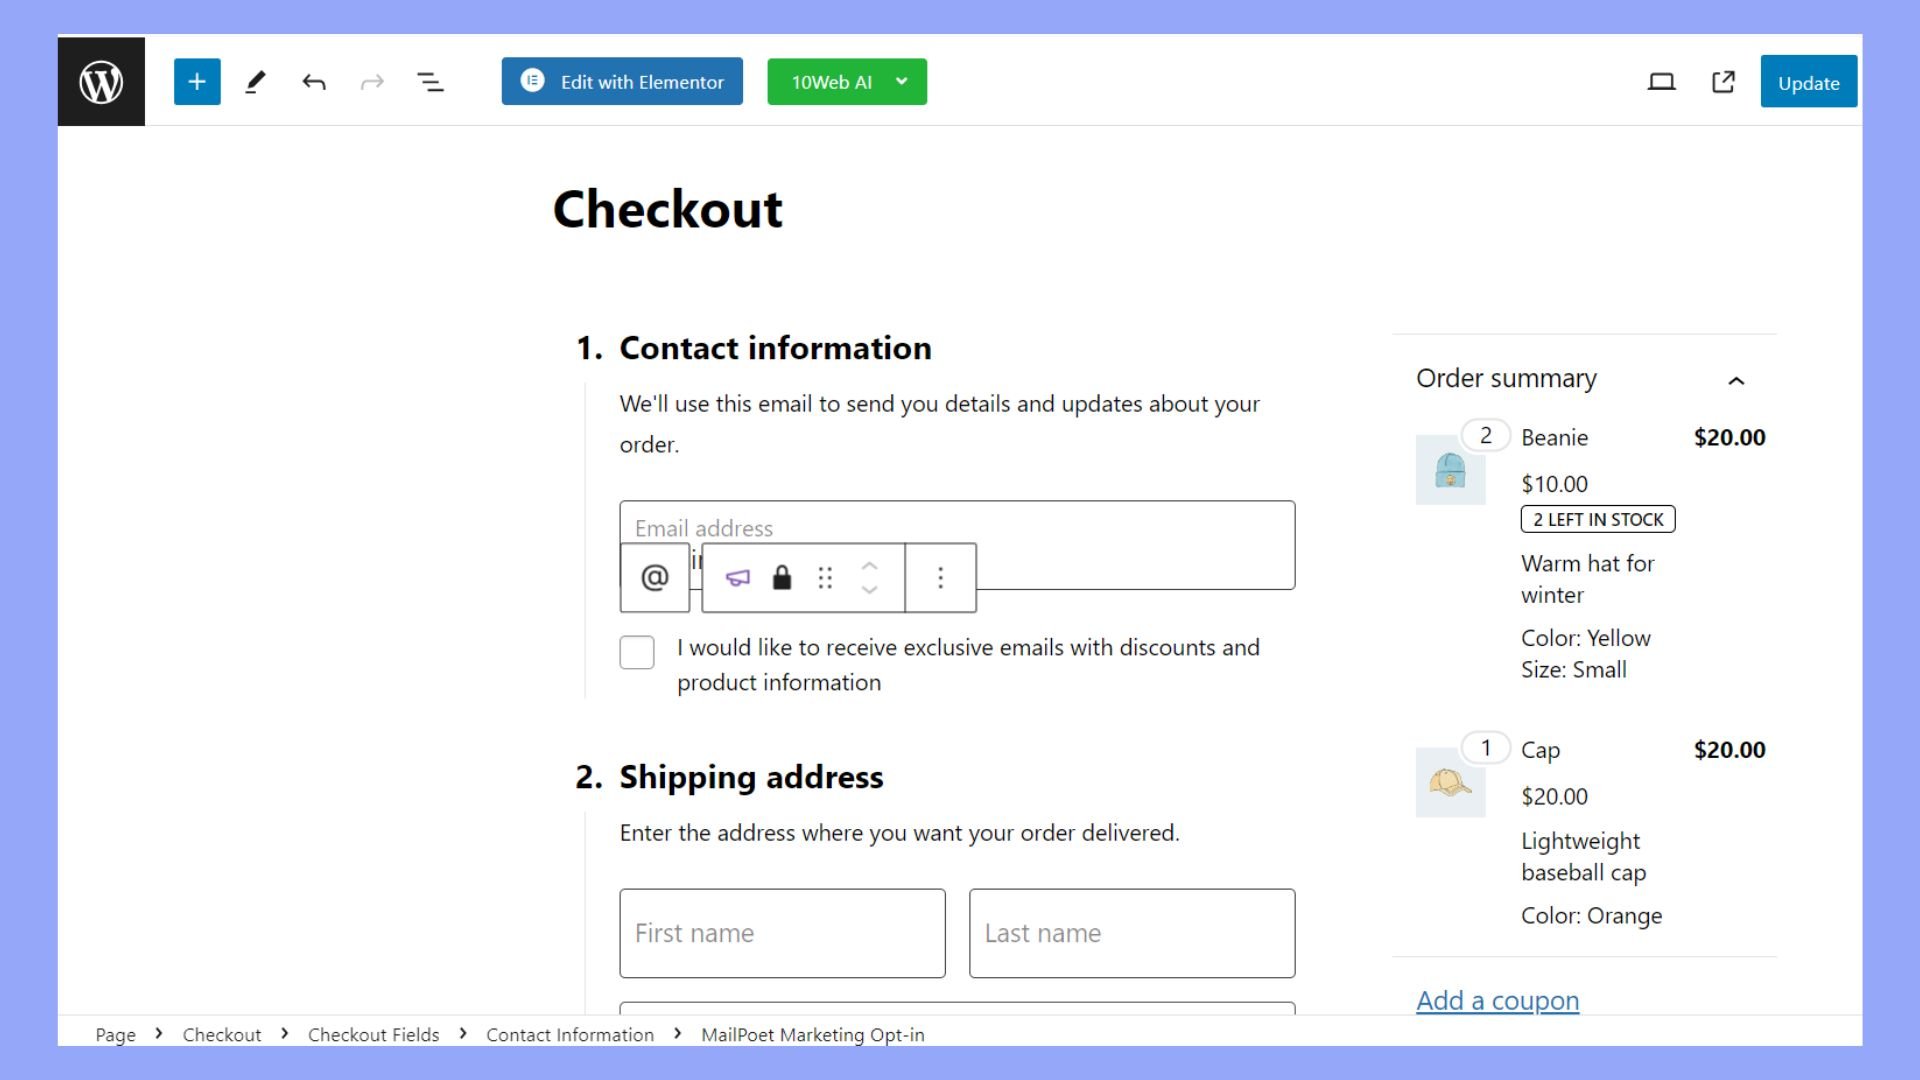
- Use the WordPress block editor or your preferred page builder (such as 10Web Builder) to add and arrange various elements around the checkout form.
- Customize the layout, colors, and typography to match your store’s branding.
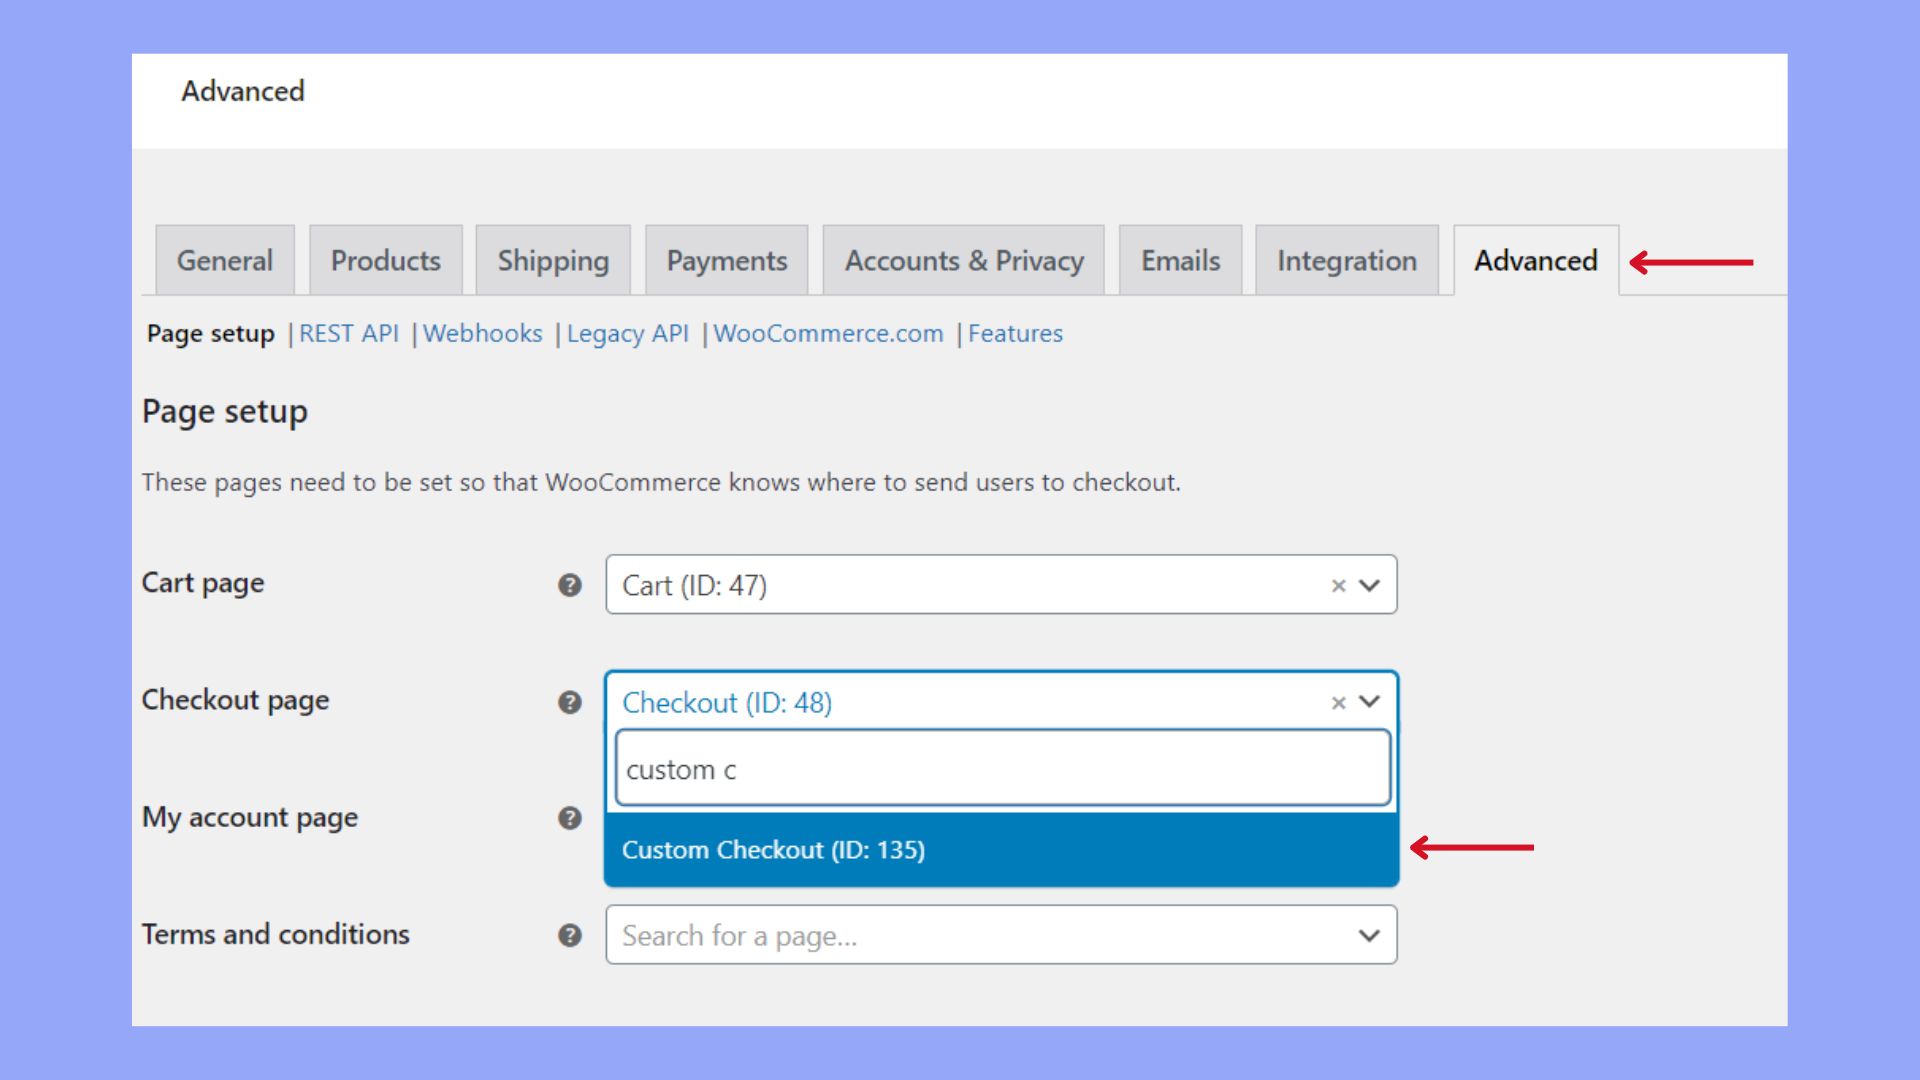
Step 3: Assign the custom page as the checkout page
- Go to WooCommerce > Settings > Advanced.
- Under the Page setup section, find the Checkout page dropdown.
- Select the page you just created from the dropdown menu.
Step 4: Add custom fields (optional)
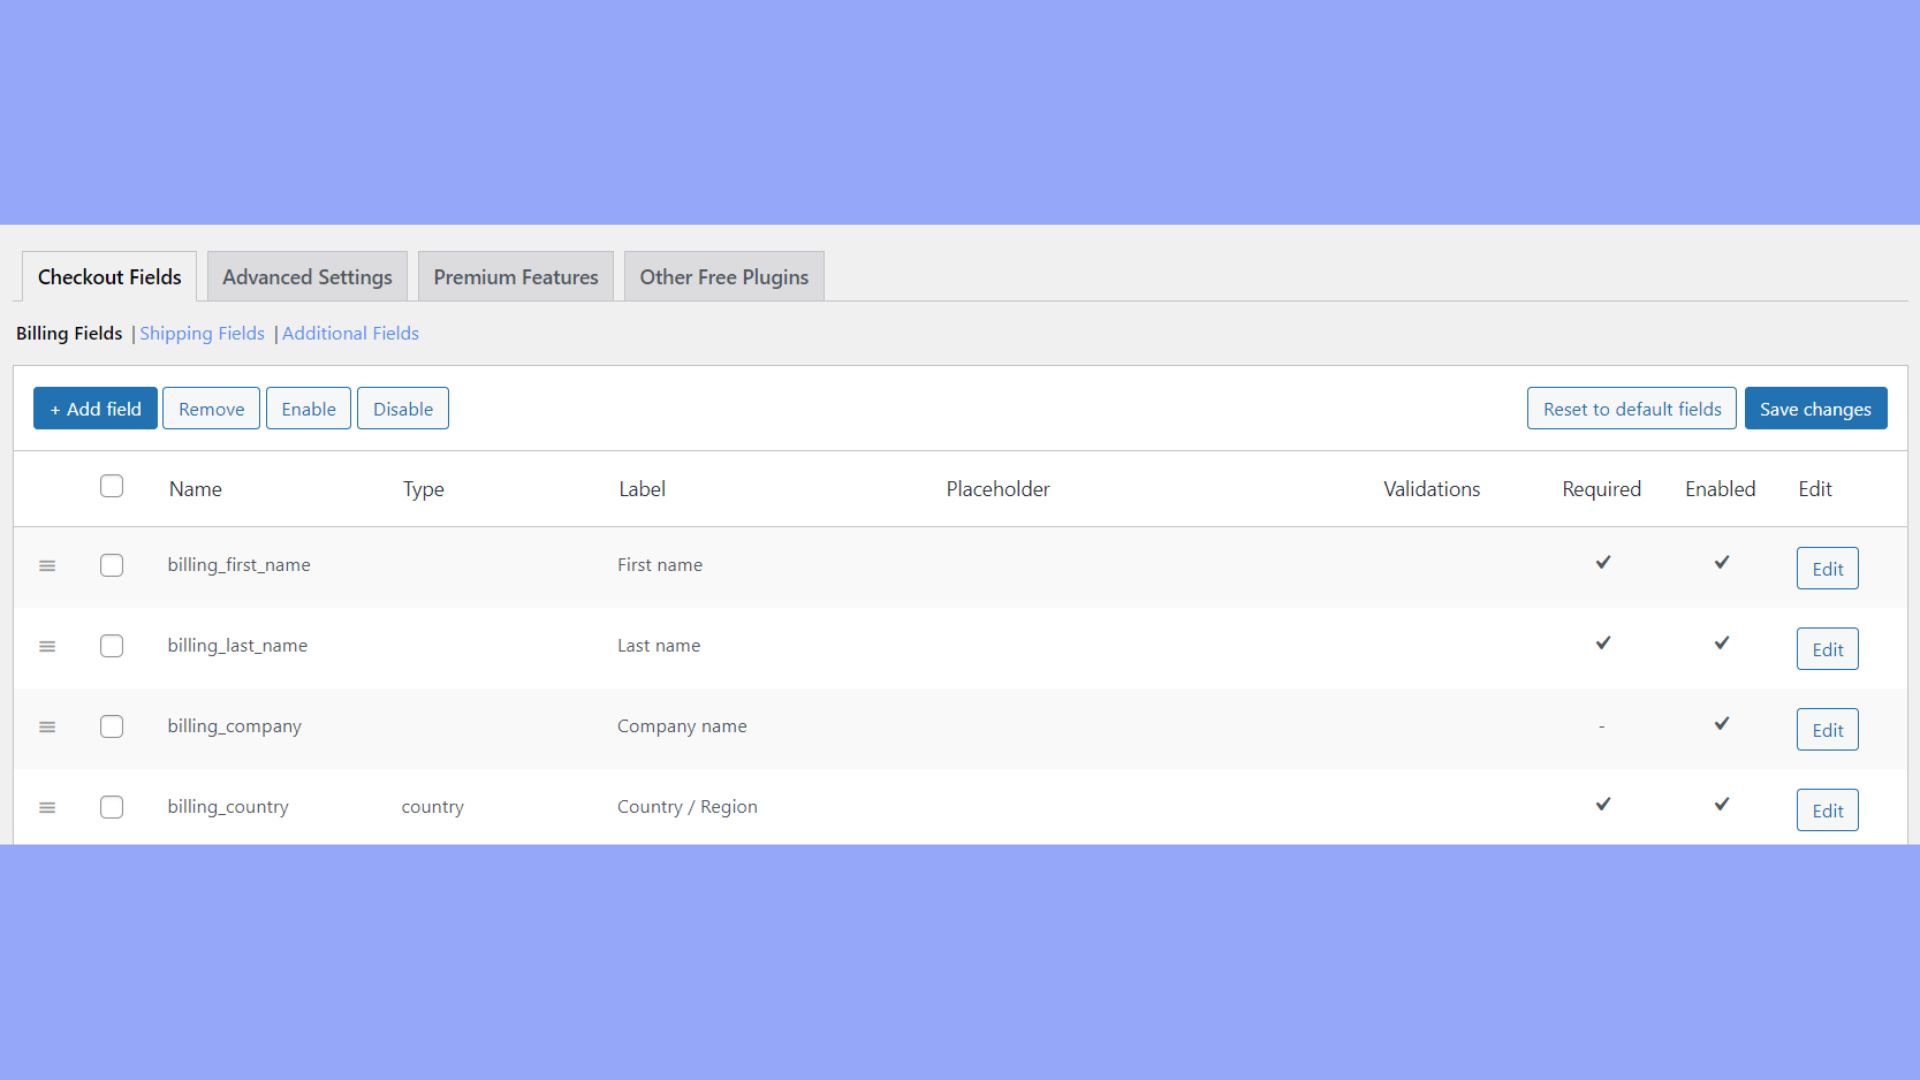
To add custom fields to your checkout page, you can use plugins such as Checkout Field Editor for WooCommerce.
After installing and activating the plugin, navigate to WooCommerce > Checkout Fields to add, edit, or remove fields.
Step 5: Test and go live
Before making your custom checkout page live, thoroughly test it to ensure that all elements are functioning correctly. Check for proper form submission, payment gateway integration, and overall user experience.
Once you’re satisfied with the custom checkout page, make it live by ensuring it is assigned correctly in the WooCommerce settings. Monitor the checkout process for any issues and gather customer feedback for further improvements.
If you choose to go with the method of creating a custom checkout page, you will have full flexibility and control over your checkout page and can customize it the way you wish.
Modifying fields with WooCommerce checkout field editor
The WooCommerce checkout field editor is your go-to tool for making changes to your checkout fields. It provides a user-friendly interface, which allows you to add or remove fields from your checkout form. This tool lets you alter the type, label, and placeholder of each field, all with just a few clicks. To mark a field as mandatory, simply set it as required. Here’s how you manage your fields:
- After setting up the Checkout Field Editor plugin, go to WooCommerce and select Checkout Forms.
- Choose a field to modify and click Edit.
- Adjust the field’s type, label, or required status as needed.
- Save your changes by clicking Update.
Adding custom fields and sections
If the standard checkout options don’t cover all your needs, you can add custom fields and sections. This is how you can collect additional information that may be vital for processing an order or enhancing customer experience. Follow these steps to introduce new fields:
- In the WooCommerce checkout field editor, find and click Add Field.
- Select the field type from options such as text, checkbox, and select dropdown.
- Enter the details for your new field, including label, placeholder, and default value.
- To create a new section, click Add Section and place your custom fields within it.
- Remember to drag and drop the field or section to rearrange its order on the checkout page.
- Once you’re done, make sure to Save changes.
Customize your thank you page
Start by adding a personal touch to your thank you page. You can ensure your customers feel appreciated by including dynamic elements like their name.
Include order details
Make sure the page clearly lists the order summary, showing what was purchased, along with billing details and shipping address. This allows customers to verify their information and creates transparency.
Enhance the customer journey
The thank you page is an opportunity to continue the customer journey. Offer suggestions for related products, ask for feedback, or provide discount codes for future purchases.
Practical steps
- Go to your dashboard and then your page editor.
- Use a page builder or edit the thankyou.php file to add custom code.
- Add widgets or elements that resonate with your brand.
Make sure to review your page on multiple devices to ensure it’s responsive and refine the design to make it visually appealing. Keep the tone heartfelt and consider providing options for continued engagement.
Enhancing user experience
Learning how to create a checkout page in WooCommerce isn’t just about collecting payments. It’s about delivering a smooth and enjoyable customer journey that encourages conversions. Let’s learn how you can do so.
Optimize checkout flow for conversion
To keep your customers moving smoothly through the purchase process, consider implementing a one-page checkout. This approach minimizes the steps required to complete a purchase, which can help increase your conversion rates. Here’s what you can do:
- Remove unnecessary steps and make sure that the user can complete the purchase with the least amount of clicks necessary.
- Include a visual progress indicator so customers know how far along they are in the checkout process.
- Allow customers to checkout as guests to speed up the transaction, making sure to offer a login option for returning customers to make their experience faster.
Improve form field design and functionality
The design and functionality of form fields play a crucial role in user experience. Here are some ways to improve these:
- Ensure that all form fields have clear and concise labels. This helps users understand what information is required.
- Utilize placeholders to give examples of the information that should be entered in the form fields.
- Ask only for essential information to complete the order to reduce user fatigue.
- Implement input masks on fields like phone numbers and credit card inputs to automatically format the entered data, reducing the chance of errors.
Your focus on these elements will make the checkout process more intuitive and user-friendly, reducing friction and potentially increasing the likelihood that customers will complete their purchases.
Set up multiple payment options
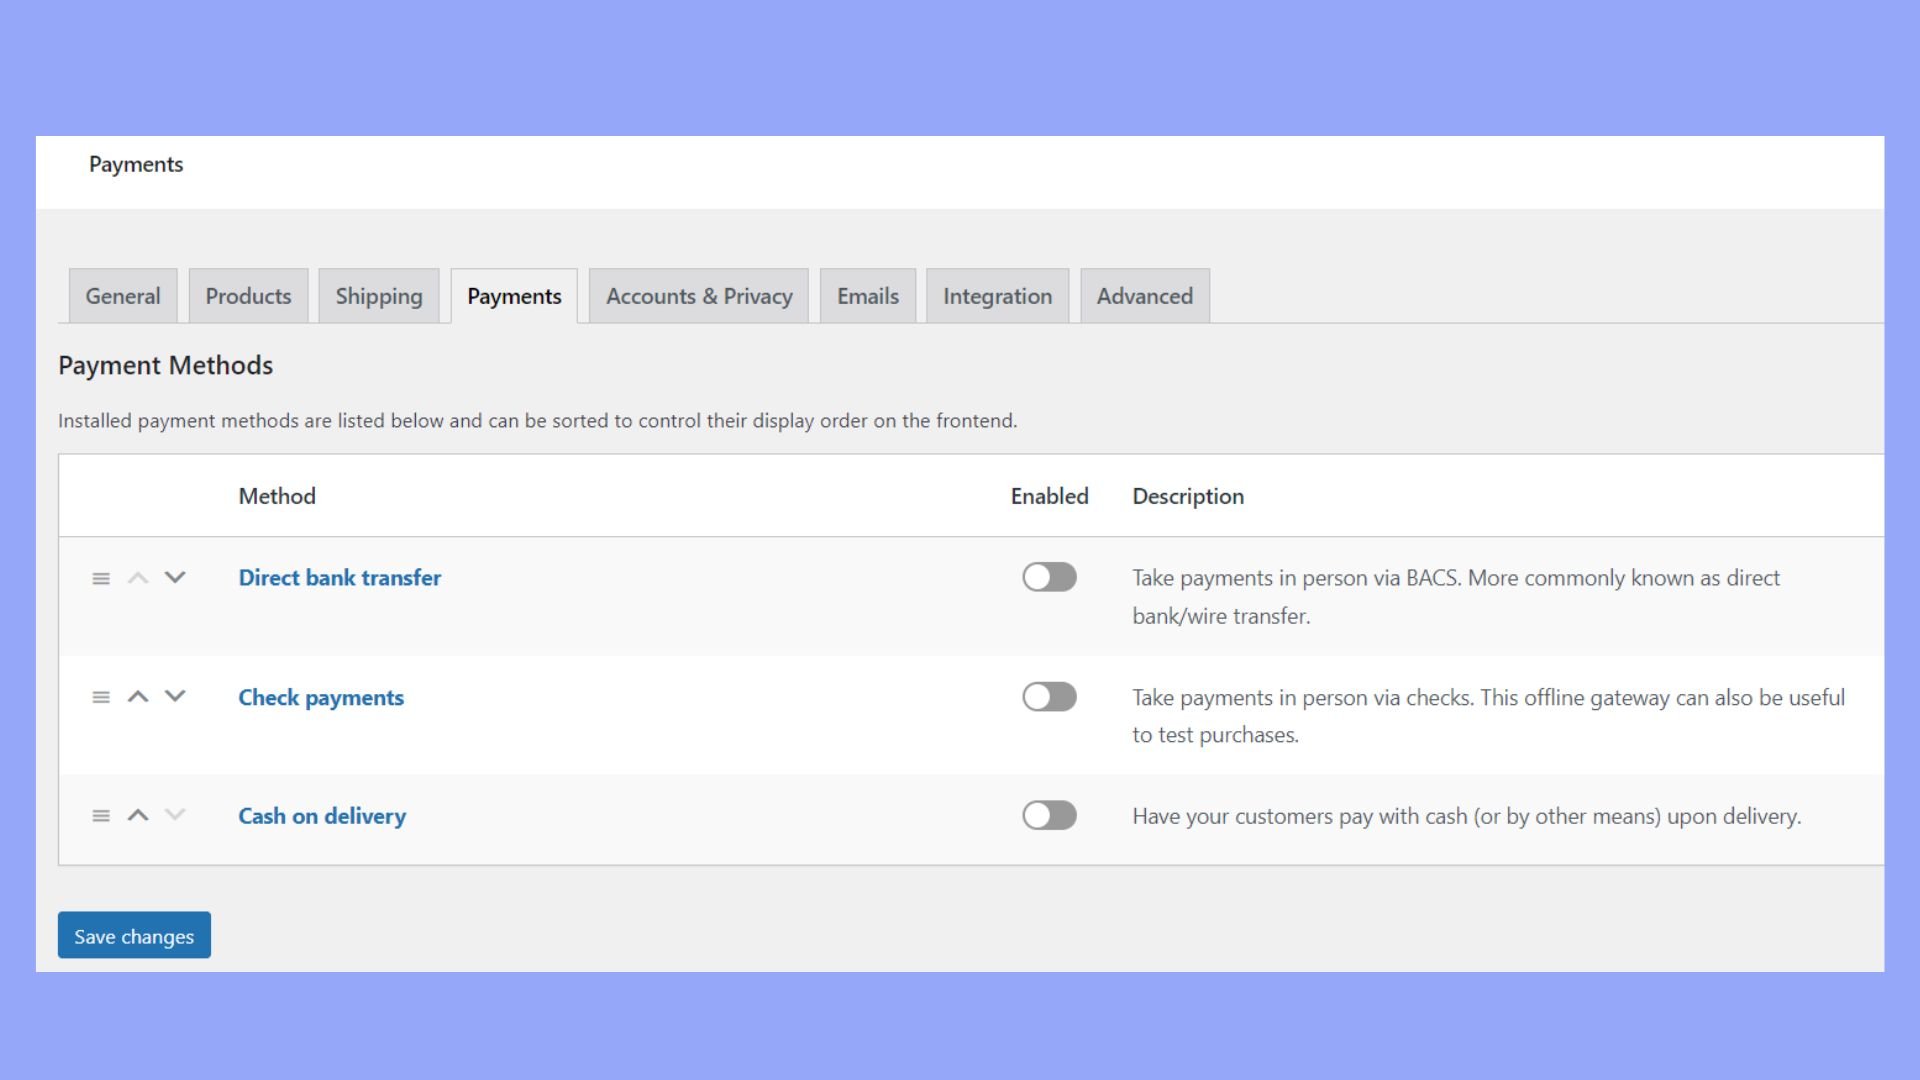
To offer multiple payment gateways in your WooCommerce store, you need to navigate to the WooCommerce settings and then click on the Payments tab. Here’s how you can add and manage different payment gateways:
- Go to your WordPress dashboard.
- Find and navigate to the WooCommerce > Settings > Payments.
- You’ll see a list of payment options. Each can be enabled with a simple toggle switch.
For a WooCommerce one-page checkout approach, ensure that your payment gateways are configured to process payments quickly and efficiently, as this keeps the entire transaction on a single page, reducing the potential for cart abandonment.
Handle different payment methods
Handling multiple payment methods smoothly is about ensuring a frictionless payment experience regardless of the customer’s choice. For instance, if you integrate a custom payment gateway, you need to:
- Make sure it’s compatible with the WooCommerce checkout blocks by creating an additional plugin that hooks into WooCommerce.
- Ensure the payment method’s interface is intuitive within the checkout process, providing clear instructions and feedback.
For smooth performance, confirm that your payment gateways are properly integrated and tested with WooCommerce’s checkout functionality. This allows for a hassle-free experience, whether your customers are paying by credit card, PayPal, bank transfer, or any other method you have enabled.
Leveraging page builders for checkout page design
When designing your WooCommerce checkout page, using page builders like Elementor, 10Web Builder, and Gutenberg can simplify the process with their intuitive drag-and-drop interfaces.
Customizing with Elementor and 10Web Builder
You can use Elementor by selecting the Edit with Elementor button. Once inside, tailor your checkout elements to match your site’s branding by dragging widgets into place and adjusting settings within the Elementor panel. With 10Web Builder, you select Edit with 10Web Builder and use similar drag-and-drop functions to design your checkout fields and refine visuals.

Looking to sell online?
Create your custom online store in minutes with 10Web AI Ecommerce Website Builder and take your business online.
Building checkout pages with Gutenberg
Gutenberg offers a more native feel to WordPress as it’s the platform’s default page editor. To customize your checkout page using Gutenberg, simply click on Edit Page while you are on the checkout page. Gutenberg uses blocks that you can add, move, or edit conveniently, matching the functionality of a page builder with a more streamlined, WordPress-centric approach.
Conclusion
Creating an optimized WooCommerce checkout page is essential for improving your online store’s efficiency and enhancing customer satisfaction. This guide has covered the key steps to set up, customize, and optimize your checkout page, offering a seamless shopping experience.
By focusing on user-friendly design, multiple payment options, and streamlined checkout processes, you can significantly reduce cart abandonment and boost conversions. Investing in a well-crafted checkout page ultimately leads to higher customer satisfaction and increased sales for your online store. Now you have learned how to create a checkout page in WooCommerce step-by-step. Good luck.
Looking to sell online?
Create your online store in minutes
Create your online store in minutes with 10Web AI Ecommerce Website Builder.


![Featured image for How to Make WooCommerce Faster [29 Tips and Tricks] article](https://10web.io/blog/wp-content/uploads/sites/2/2024/04/make_woocommerce_faster-742x416.jpg)