Customizing your WooCommerce registration form can significantly enhance user experience and streamline customer onboarding. This comprehensive guide on how to customize WooCommerce registration form covers essential steps and tools needed to tailor the form to your business needs. Discover techniques to add custom fields, modify existing ones, and improve the overall functionality of your registration process.

Looking to sell online?
Create your custom online store in minutes with 10Web AI Ecommerce Website Builder and take your business online.
FAQ
How do I customize my registration form in WooCommerce?
How do I customize my WordPress registration page?
How do I edit my WooCommerce login form?
How do I edit WooCommerce forms?
What does it mean to customize your WooCommerce registration form?
Customizing your WooCommerce registration form involves modifying the default fields and layout provided by WooCommerce. This can include adding new fields, removing unnecessary ones, changing field labels, or altering the form’s appearance to better align with your brand.
What is the purpose of doing it?
When you customize your WooCommerce registration form, you’re essentially streamlining the sign-up process to match your business requirements and branding strategy. This customization can lead to a more cohesive user experience and may even simplify the data entry process for both you and your customers.
1. Enhanced user experience
Enhancing the user experience is crucial for reducing cart abandonment and increasing conversion rates. A well-designed registration form can make the signup process smoother, more intuitive, and less time-consuming for users.
- Streamlining the process: Simplify the registration process by removing unnecessary steps and making it as easy as possible for users to sign up.
- Improving usability: Ensure the form is easy to understand and fill out, reducing potential frustration and confusion for users.
- Enhancing visual appeal: A visually appealing form can make the process more enjoyable and align better with your overall brand aesthetic.
2. Collect additional customer information
Collecting additional customer information can be invaluable for marketing, segmentation, and customer service. Custom fields allow you to gather data that can help tailor your offerings and communications to better meet customer needs.
- Marketing insights: Collect data on customer preferences, interests, and behaviors to create targeted marketing campaigns.
- Customer segmentation: Use the additional data to segment your customer base more effectively, allowing for personalized communication and offers.
- Enhanced customer support: Gather information that can help your support team assist customers more efficiently and effectively.
Looking to sell online?
Create your custom online store in minutes with 10Web AI Ecommerce Website Builder and take your business online.
3 methods on how to customize WooCommerce registration form
Customizing the WooCommerce registration form can be approached in several ways, each offering different levels of control and ease of use. Whether you prefer hands-on coding, leveraging WooCommerce’s built-in hooks, or utilizing user-friendly plugins, there’s a method that suits your technical comfort level and specific requirements. Below, we explore three effective methods to enhance and personalize your WooCommerce registration form to better serve your customers and business needs.
Method 1: Add custom registration form fields using code
Customizing the WooCommerce registration form through code offers the most flexibility. Here’s a detailed step-by-step guide:
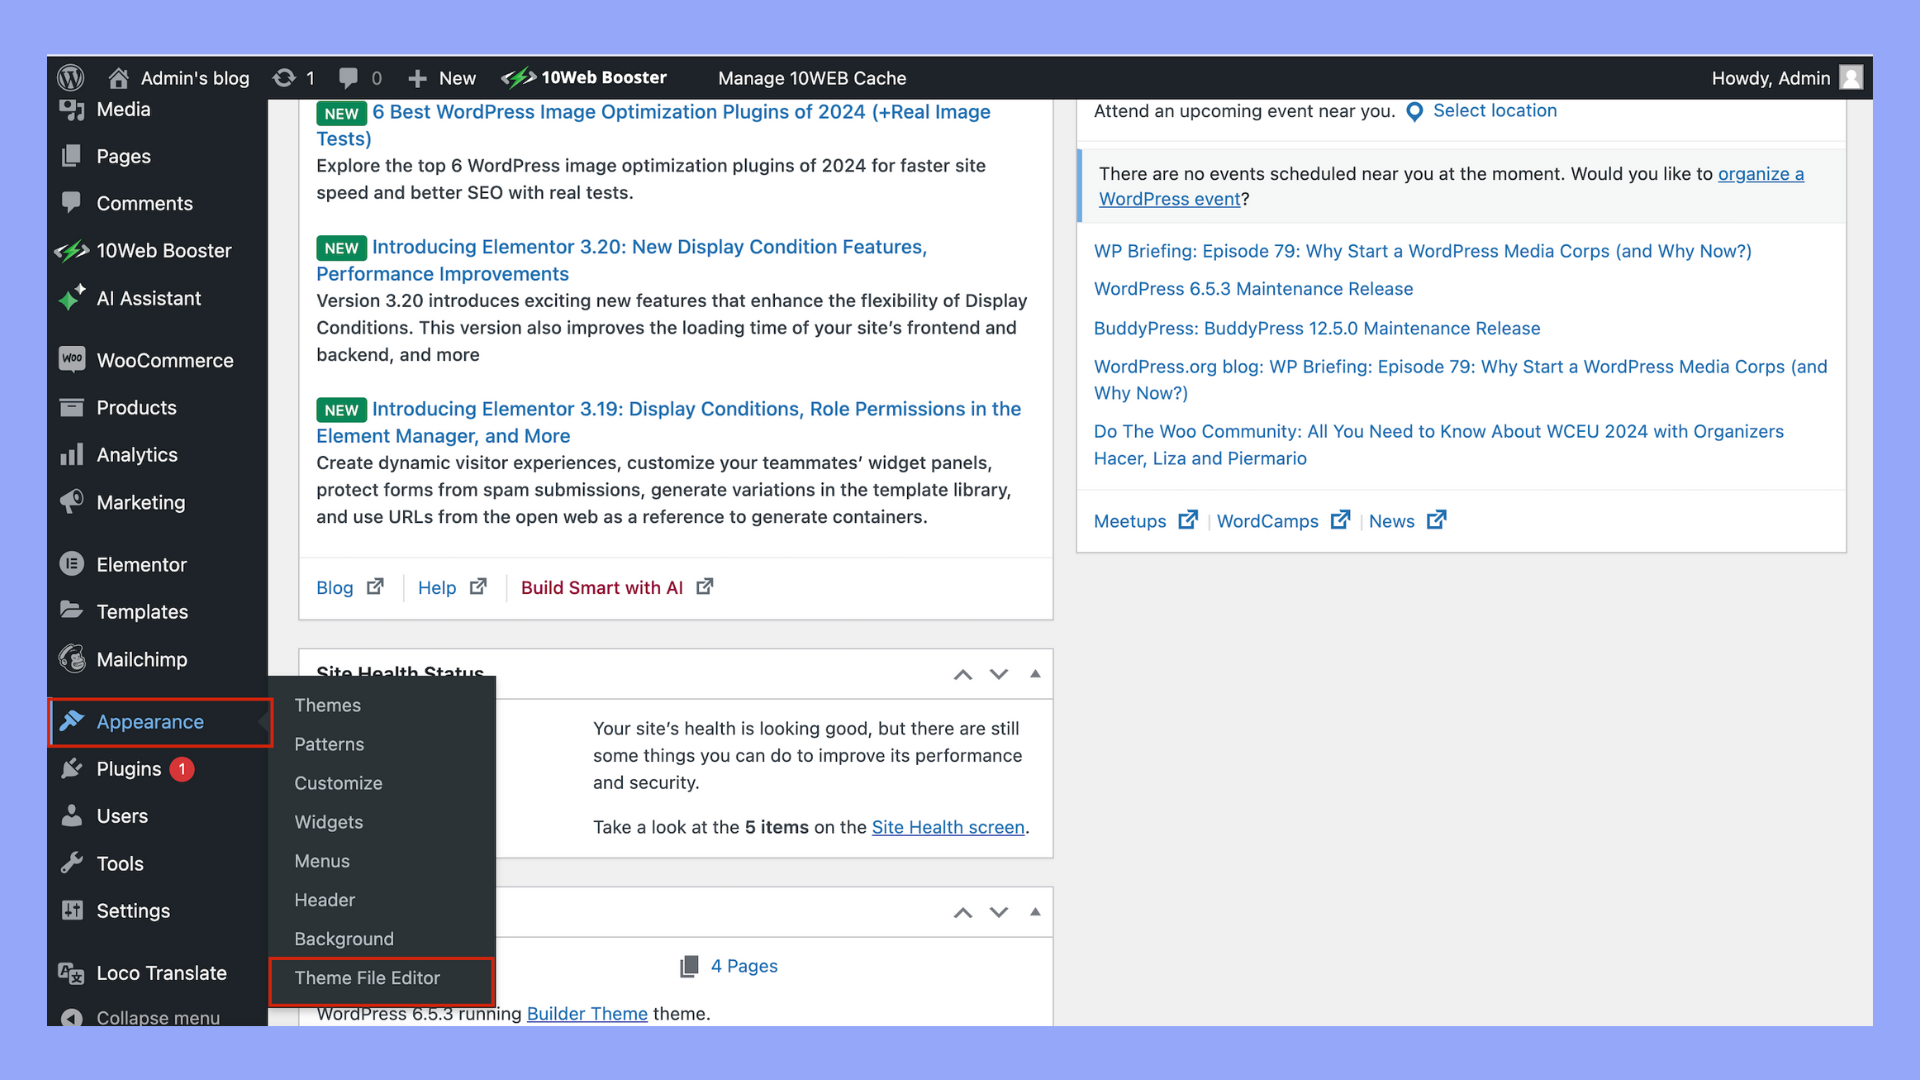
- Go to your WordPress dashboard.
- Navigate to Appearance > Theme Editor > functions.php.

- It’s recommended to use a child theme or a site-specific plugin to avoid losing changes when the theme is updated.
- Use the following code snippet to add custom fields:
add_action( 'woocommerce_register_form_start', 'add_custom_registration_fields' );

function add_custom_registration_fields() {

    ?>

    <p class="form-row form-row-wide">

        <label for="reg_phone"><?php _e( 'Phone Number', 'woocommerce' ); ?> <span class="required">*</span></label>

        <input type="text" class="input-text" name="phone" id="reg_phone" value="<?php if ( ! empty( $_POST['phone'] ) ) echo esc_attr( wp_unslash( $_POST['phone'] ) ); ?>" />

    </p>

    <?php

}


add_action( 'woocommerce_created_customer', 'save_custom_registration_fields' );

function save_custom_registration_fields( $customer_id ) {

    if ( isset( $_POST['phone'] ) ) {

        update_user_meta( $customer_id, 'phone', sanitize_text_field( $_POST['phone'] ) );

    }

}
- After adding the code, test the registration form to ensure the new field appears and works correctly. Make sure the new field data is saved in the user’s profile and can be accessed as needed.
Method 2: Add custom registration form fields using WooCommerce hooks
WooCommerce hooks provide a flexible and safe way to customize the registration form without directly editing theme files. Here’s a detailed, step-by-step guide on how to use WooCommerce hooks to add custom fields:
What are WooCommerce hooks
WooCommerce hooks are tools that let you add your own code to WooCommerce without changing the core files. They work like checkpoints where you can insert custom functions to modify or add to the existing features. Hooks are divided into two types: actions and filters. Actions let you add new code, while filters let you change existing code. Using hooks is a safe way to customize WooCommerce because your changes won’t be lost when you update the plugin. Here are the steps you can follow to add custom registration form fields in WooCommerce:
Steps to add fields with hooks
- Log in to your WordPress admin dashboard.
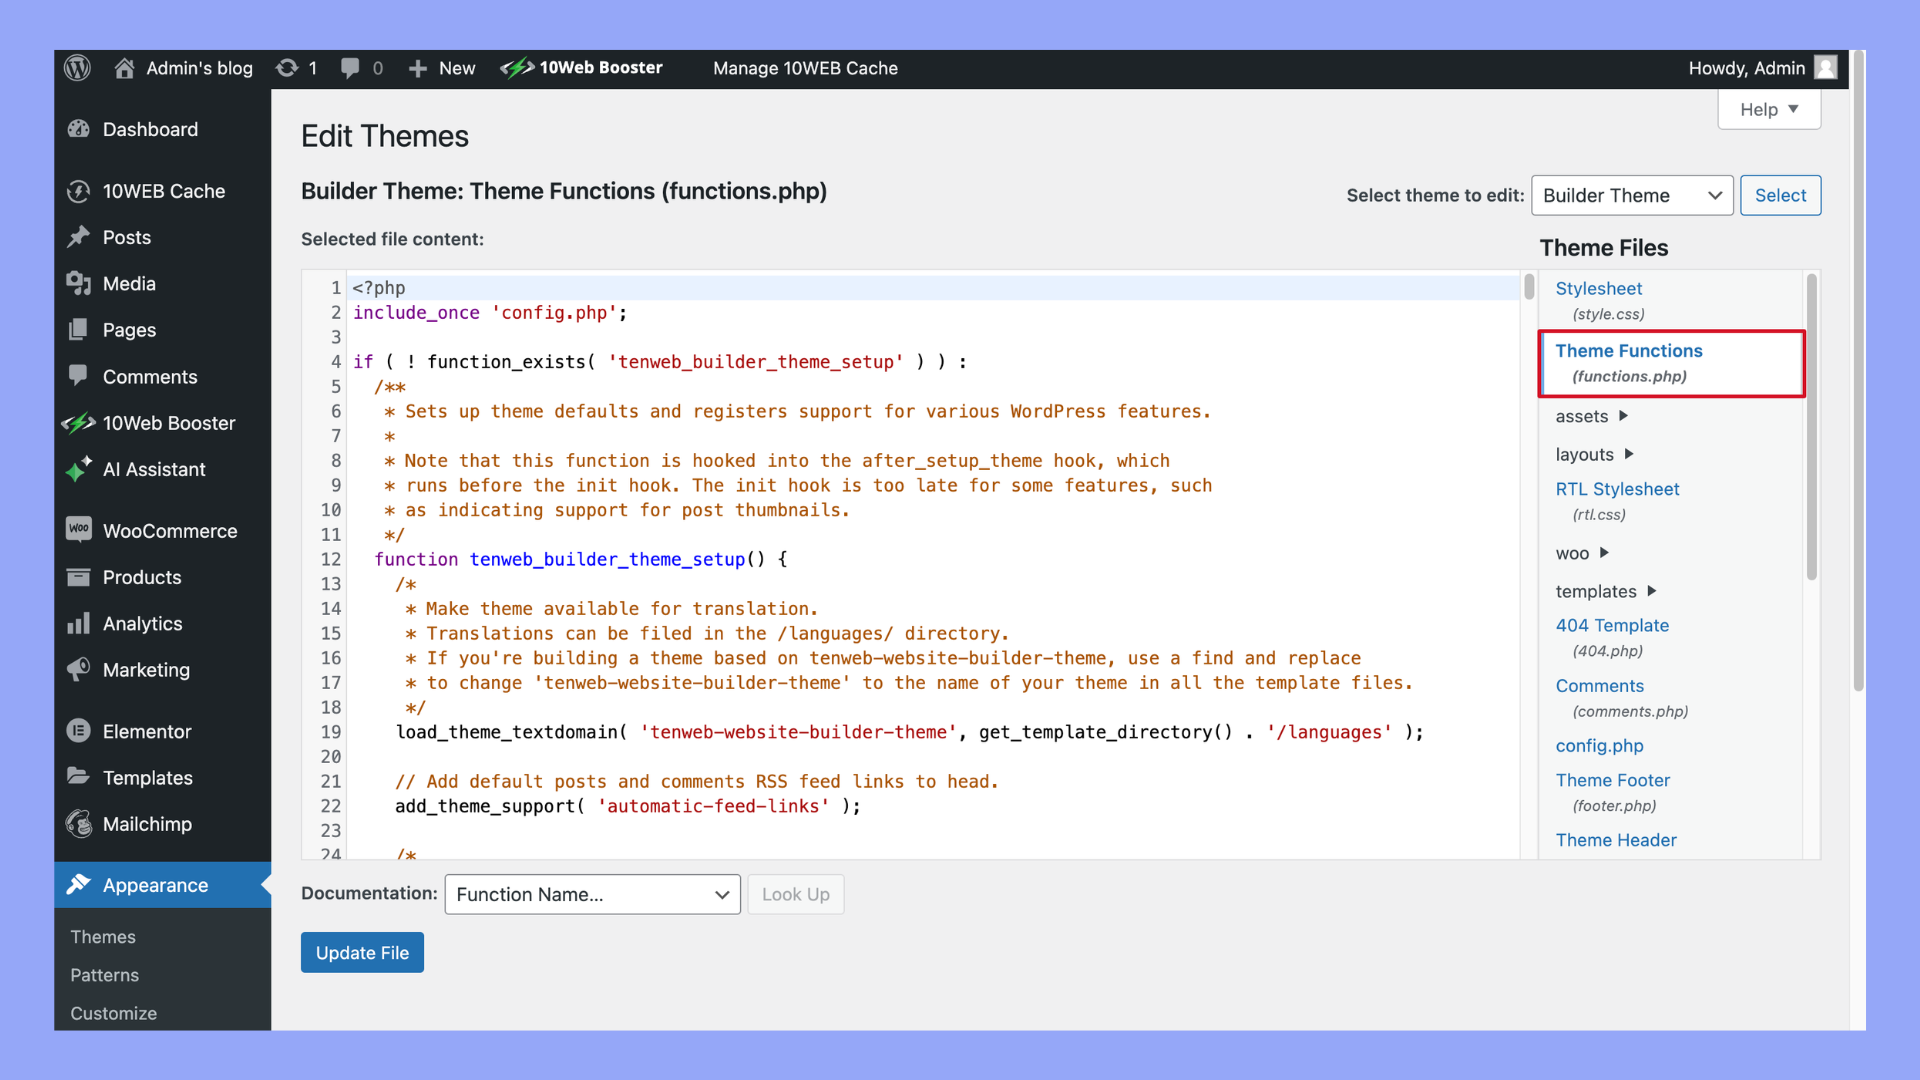
- Go to Appearance > Theme Editor.It’s recommended to use a child theme or a site-specific plugin to avoid losing changes when the theme is updated.
- In the Theme Editor, find and click on Theme Functions (functions.php) from the list of theme files on the right-hand side.
- Add the following code snippet to the functions.php file to create and save a custom field:
// Hook to add custom fields to the WooCommerce registration form

add_action( 'woocommerce_register_form', 'add_custom_fields_with_hooks' );


function add_custom_fields_with_hooks() {

 ?>

 <p class="form-row form-row-wide">

 <label for="reg_address"><?php _e( 'Address', 'woocommerce' ); ?></label>

 <input type="text" class="input-text" name="address" id="reg_address" value="<?php if ( ! empty( $_POST['address'] ) ) echo esc_attr( wp_unslash( $_POST['address'] ) ); ?>" />

 </p>

 <?php

}


// Hook to save the custom fields data when a new user registers

add_action( 'woocommerce_created_customer', 'save_custom_fields_with_hooks' );


function save_custom_fields_with_hooks( $customer_id ) {

 if ( isset( $_POST['address'] ) ) {

 update_user_meta( $customer_id, 'address', sanitize_text_field( $_POST['address'] ) );

 }
- After adding the code, click Update File to save the changes.
- Go to your WooCommerce registration page and check if the Address field appears.
- Fill out the form to ensure the data is saved correctly in the user profile.
- Go to Users > All Users in your WordPress dashboard.
- Click on a user to edit their profile and verify that the custom Address field data is saved and displayed correctly.

By following these steps, you can effectively use WooCommerce hooks to add and manage custom fields in the registration form, enhancing the user experience and collecting additional customer information without modifying core WooCommerce files. This method provides a flexible, update-safe way to tailor the registration process to better fit your business needs.
Method 3: Add custom registration form fields using plugins
Plugins provide a user-friendly way to customize the WooCommerce registration form without touching code.
Benefits of using plugins
- Ease of use: Most plugins offer a drag-and-drop interface, making it easy for users without coding skills to customize the form.
- Time-saving: Plugins can be quicker to implement than manual coding, allowing for faster deployment of custom fields.
- Maintenance: Plugins are regularly updated by developers, reducing the risk of compatibility issues with future WooCommerce updates.
Recommended plugins
To help you customize the WooCommerce registration form with ease, here are two highly recommended plugins presented in a table format:
| Plugin name | Features |
| WooCommerce Custom Fields for Registration | – Drag-and-drop builder Conditional logic Field validation |
| User Registration | – Customizable form templates Multi-step forms User role selection |
These plugins offer user-friendly interfaces and powerful features, making it easy to enhance the WooCommerce registration form without requiring advanced coding skills.
Steps to add custom registration form using plugins
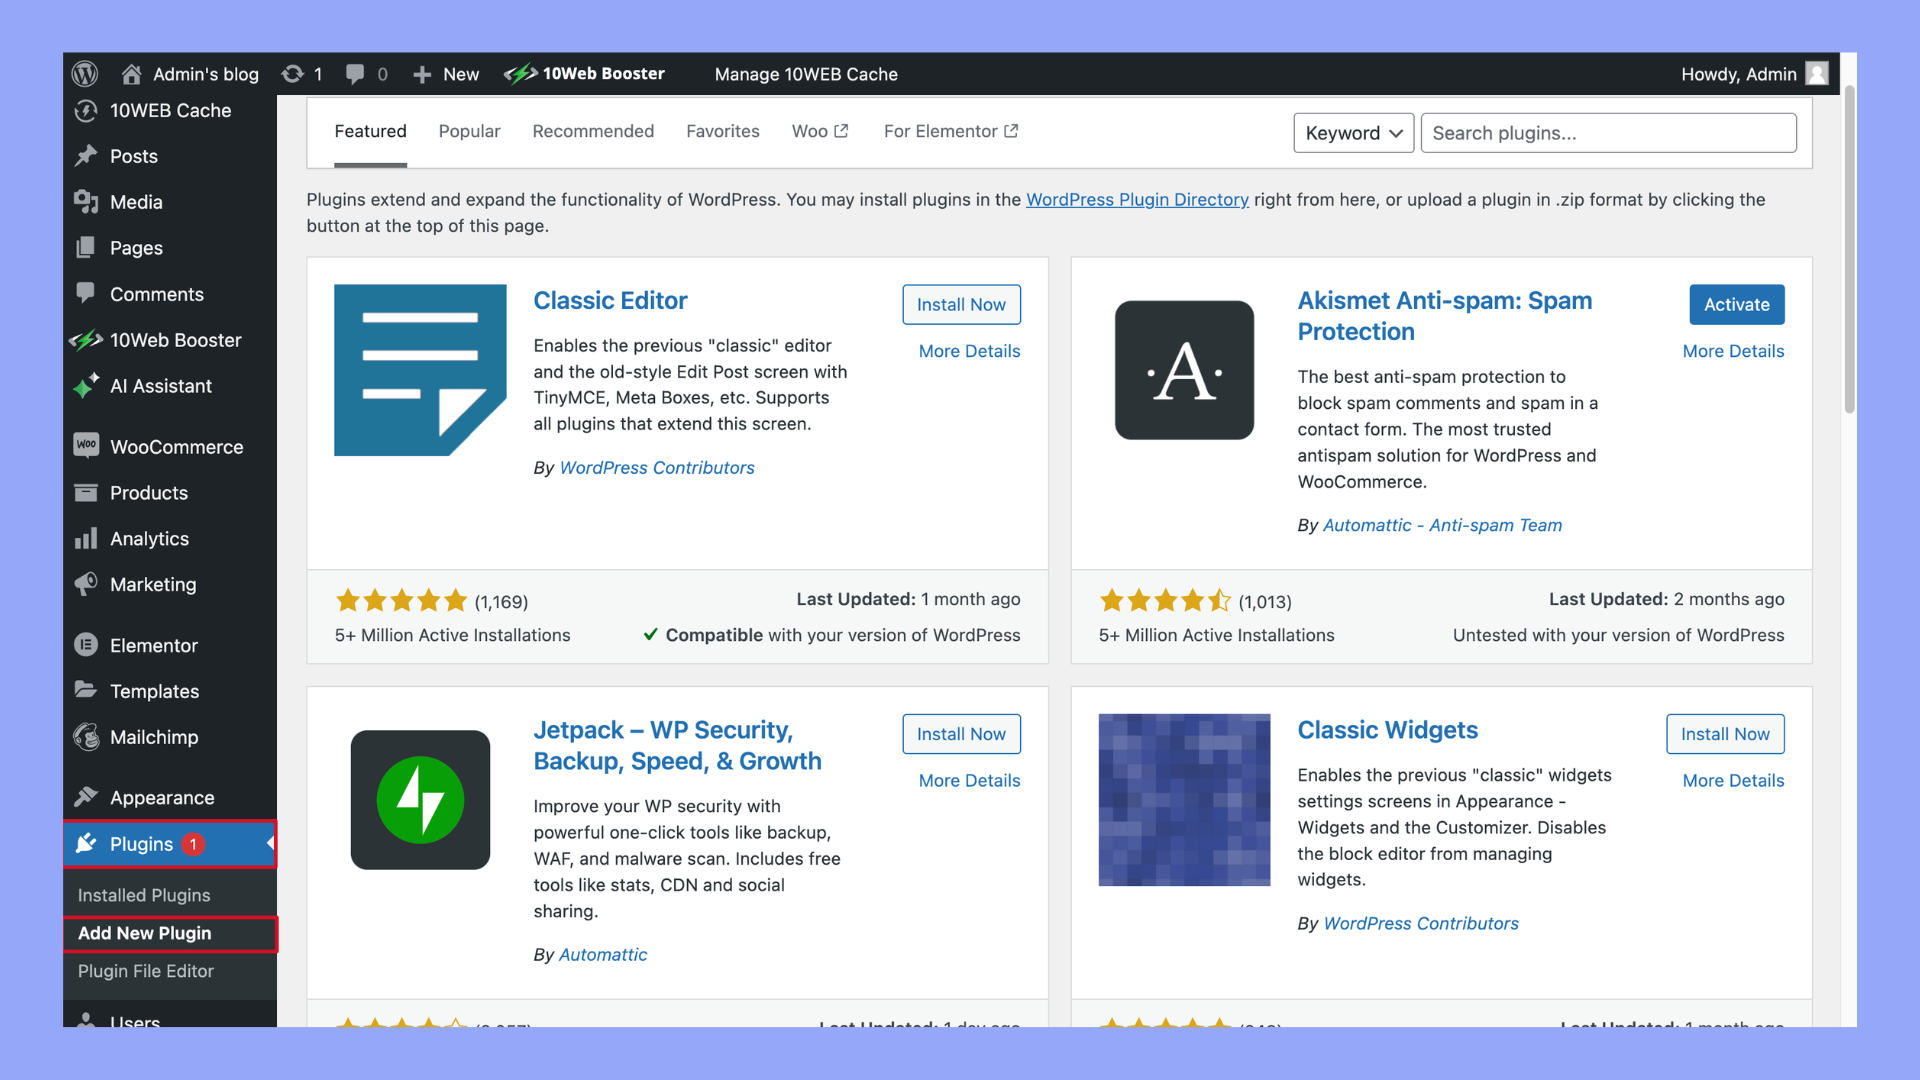
- Go to Plugins > Add New.
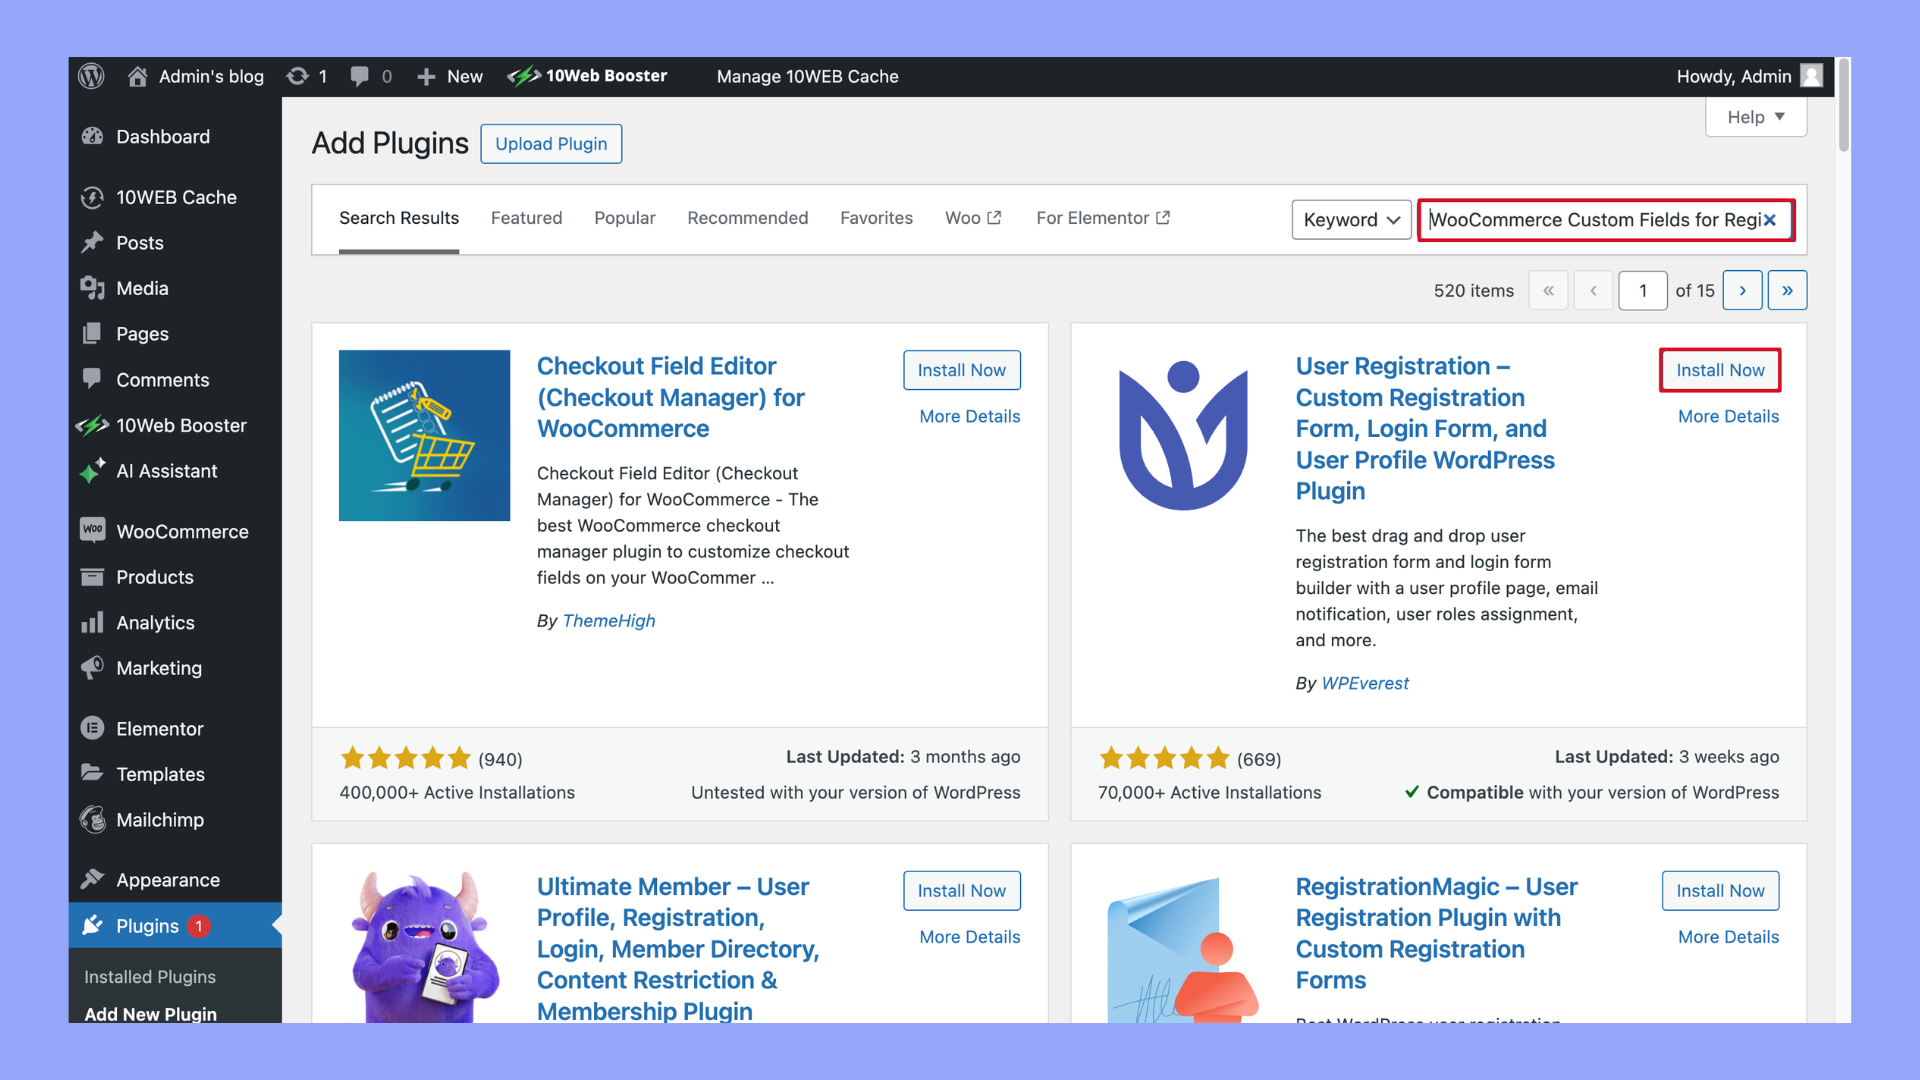
- Search for the desired plugin (e.g., WooCommerce Custom Fields for Registration).
- Install and activate the plugin.
- Navigate to the plugin’s settings page.
- Use the interface to add, remove, or modify fields as needed.
- Save changes and test the form.
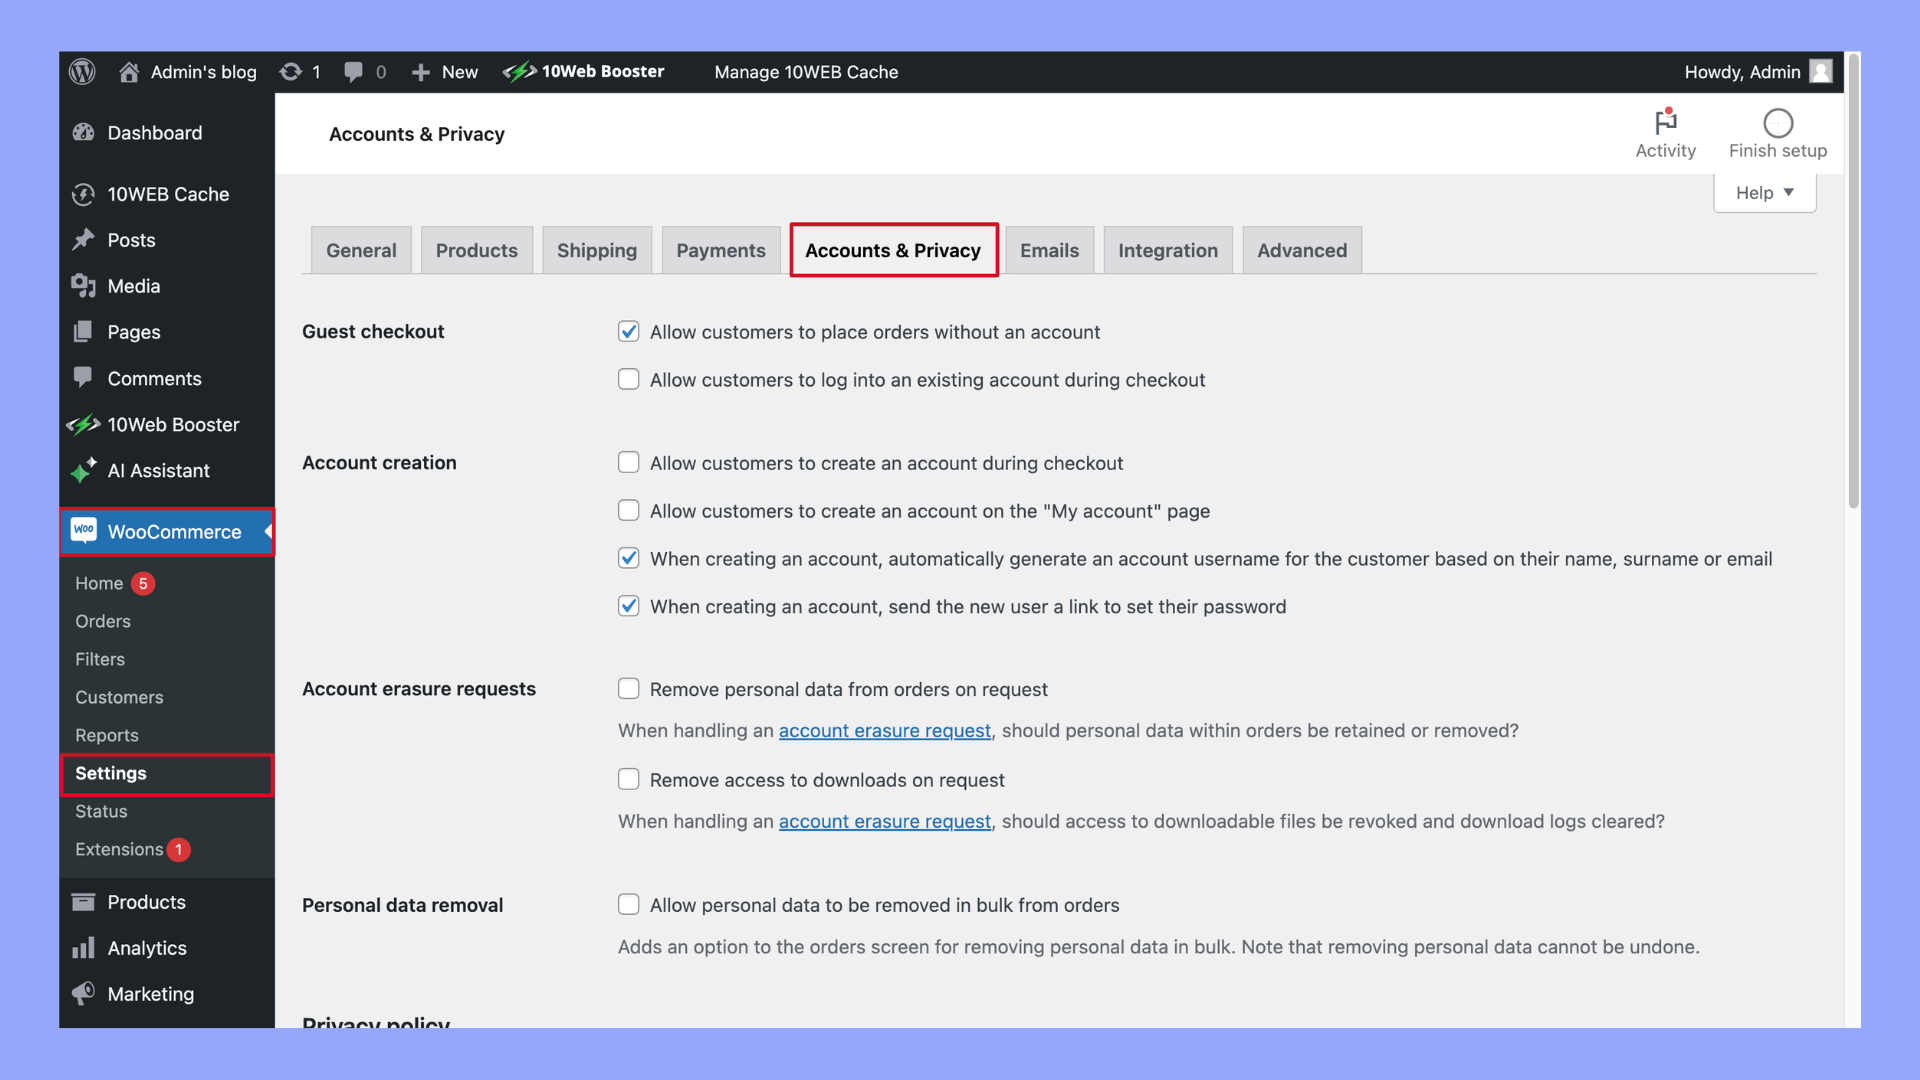
Method 4: Add custom registration form fields from the WooCommerce dashboard
WooCommerce itself provides some options to customize the registration form directly from the dashboard.
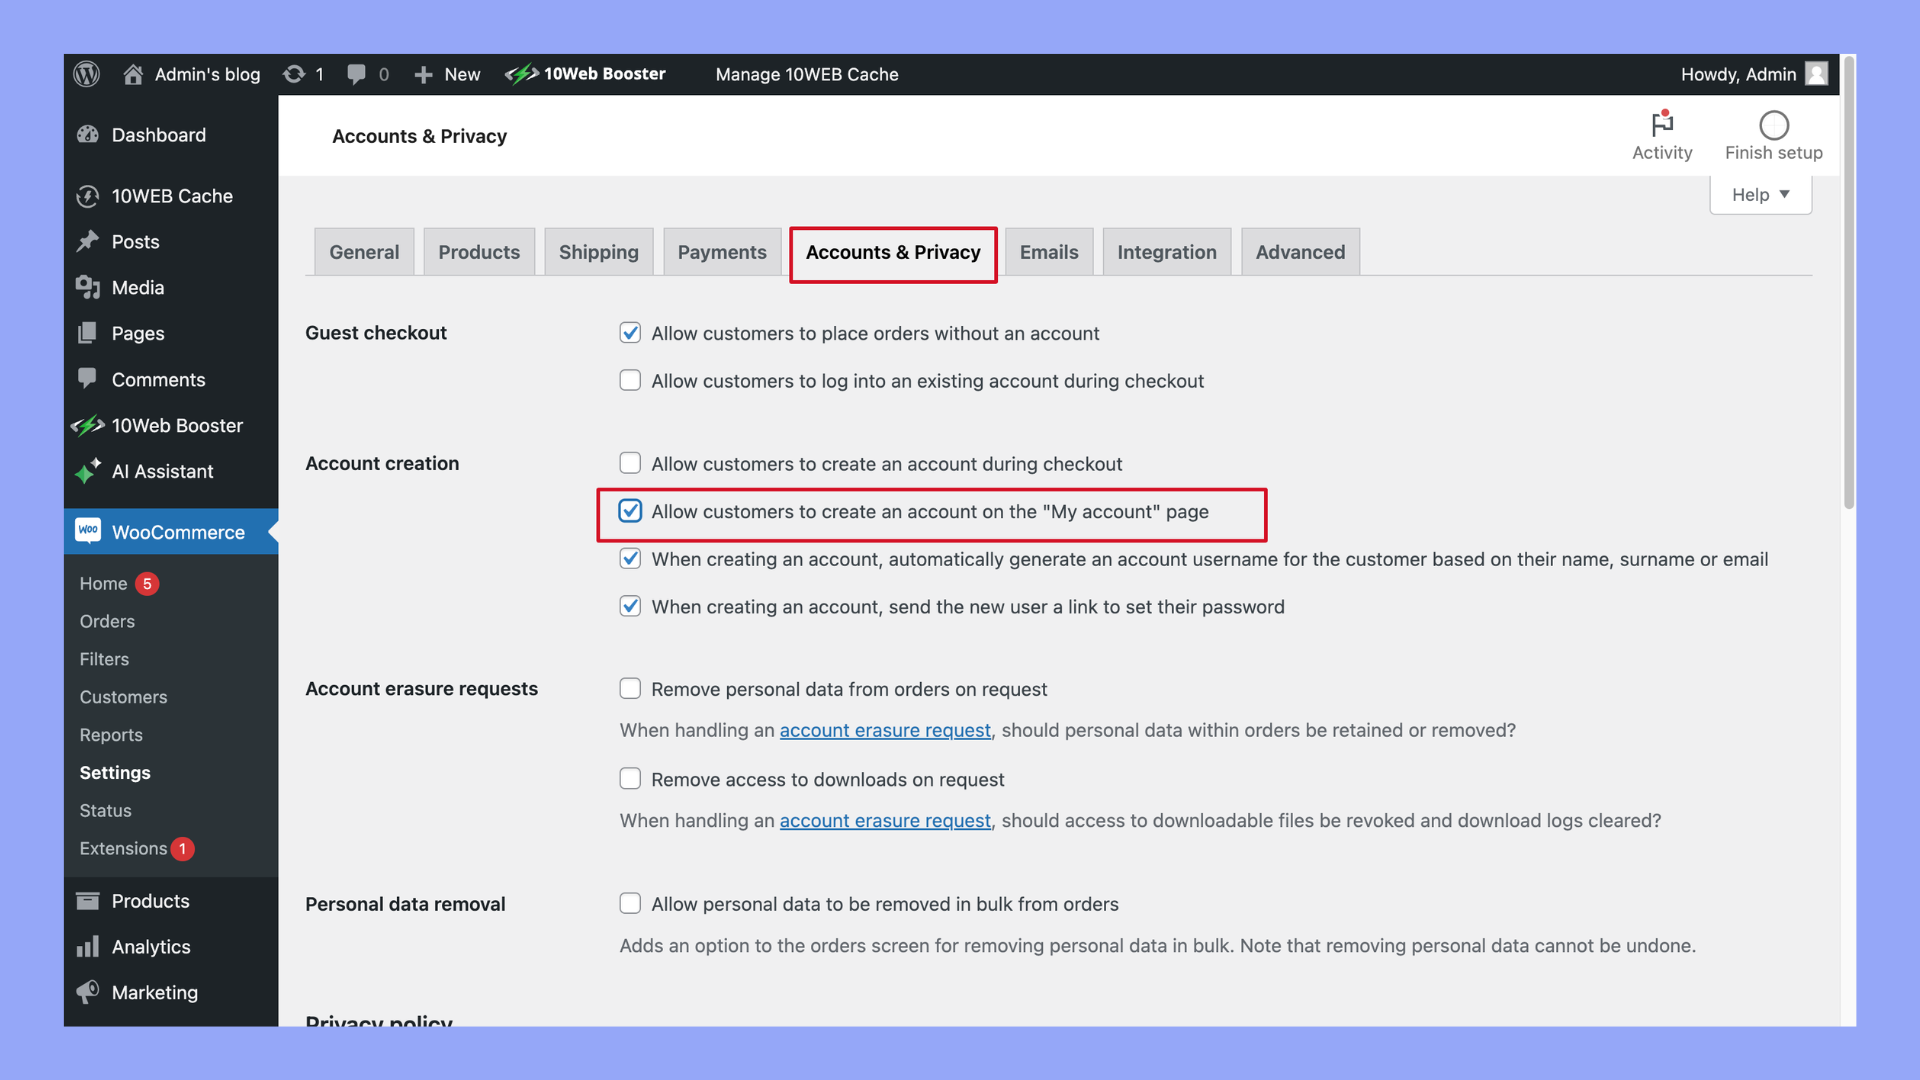
- Go to WooCommerce > Settings > Accounts & Privacy. This section contains settings related to customer accounts and privacy preferences.
- Check the box labeled Allow customers to create an account on the My account page.
4 advanced customization techniques
Once you’ve mastered the basics of customizing the WooCommerce registration form, you can take your form to the next level with advanced customization techniques. These methods will help you create a more dynamic, user-friendly, and efficient registration process. By implementing these advanced techniques, you can optimize user flow, enhance data collection, and ensure a seamless user experience. Let’s explore four powerful strategies to further enhance your WooCommerce registration form.
1. Redirects and user flow
Enhancing user flow through custom redirects can improve user experience and ensure users are guided to relevant pages after registration.
Redirect New Users to a Welcome Page
Use the following code to redirect users after registration:
add_action( 'woocommerce_registration_redirect', 'custom_registration_redirect' );

function custom_registration_redirect( $redirect ) {

    $redirect = home_url( '/welcome' );

    return $redirect;

}
Benefits: A welcome page can provide new users with a friendly introduction to your site, highlight important features, and guide them towards making their first purchase.
2. Conditional fields
Display fields based on user input to create a more dynamic and responsive form.
Example:
- If a user selects Yes for a newsletter subscription, display an email preferences field.
- Use JavaScript or a plugin with conditional logic capabilities to show or hide fields based on user choices.
3. Styling custom fields
Enhance the appearance of custom fields using CSS to ensure they blend seamlessly with your site’s design.
Example CSS:
.woocommerce .form-row input[type="text"] {

    border: 1px solid #ccc;

    padding: 10px;

}

.woocommerce .form-row label {

    font-weight: bold;

}
Tips: Use your theme’s customizer or a custom CSS plugin to add these styles, ensuring they are not overwritten during theme updates.
4. Validations and error handling
Add custom validations to ensure data integrity and provide clear error messages to users.
Example Code
add_action( 'woocommerce_register_post', 'validate_custom_fields', 10, 3 );

function validate_custom_fields( $username, $email, $validation_errors ) {

 if ( isset( $_POST['phone'] ) && empty( $_POST['phone'] ) ) {

 $validation_errors->add( 'phone_error', __( 'Phone number is required!', 'woocommerce' ) );

 }

}
Benefits: Custom validations help ensure users provide the required information in the correct format, reducing the likelihood of errors and improving data quality.
Testing and optimization
To ensure your efforts in learning how to customize WooCommerce registration form fields lead to a flawlessly functioning form, thorough testing and optimization are essential. Testing helps identify any issues or inconsistencies that could affect user experience, while optimization ensures the form performs efficiently across all devices and platforms. This section will guide you through best practices for testing and optimizing your registration form, ensuring a seamless and user-friendly experience. By following these steps, you can enhance the overall effectiveness of customizing your WooCommerce registration form features.
1. Test different scenarios
Ensure the form works across various devices and browsers to provide a consistent experience for all users.
- Cross-browser testing: Check the form on major browsers like Chrome, Firefox, Safari, and Edge.
- Mobile responsiveness: Ensure the form is fully functional and easy to use on mobile devices.
2. Use analytics
Track form performance and user behavior using tools like Google Analytics to identify areas for improvement.
- Form abandonment: Monitor the percentage of users who start but do not complete the form.
- Field analysis: Identify which fields may be causing friction and leading to abandonment.
3. A/B testing
Test different form layouts and fields to see what works best for your audience.
- Experiment with field order: Try placing the most important fields at the top to see if it improves completion rates.
- Test different CTA buttons: Experiment with different call-to-action text and colors to see what resonates most with users.
Looking to sell online?
Create your custom online store in minutes with 10Web AI Ecommerce Website Builder and take your business online.
Common issues with WooCommerce registration form fields
Even with careful customization, you might encounter some common issues with the WooCommerce registration form fields. These problems can affect the functionality and appearance of your registration form, potentially impacting user experience and data collection. Understanding these issues and knowing how to resolve them is crucial for maintaining a smooth and efficient registration process. By addressing these challenges, you can ensure a seamless experience when learning how to customize WooCommerce registration form fields.
| Issue | Solution | Common causes |
| Fields not saving | Ensure the field names are correct and match the database columns. Check your code or plugin settings to verify fields are being saved properly. | Incorrect field names, missing database columns, plugin conflicts |
| Validation errors | Review and update custom validation code to ensure it accurately checks the input fields. Provide helpful error messages. | Misconfigured validation rules, missing error messages, conflicts with other plugins |
| Compatibility issues with plugins | Test plugin compatibility with your theme and other plugins. Update plugins regularly. Consult support forums for known issues. | Outdated plugins, conflicts with other plugins or themes, incorrect plugin settings |
| Styling issues | Use custom CSS to fix layout and design issues. Test changes across different devices and browsers to ensure consistency. | Theme conflicts, missing CSS rules, incorrect CSS selectors |
Looking to sell online?
Create your custom online store in minutes with 10Web AI Ecommerce Website Builder and take your business online.
Conclusion
In conclusion, learning how to customize WooCommerce registration form empowers you to create a more personalized and efficient user experience. By following this guide, you can effectively add custom fields, modify existing ones, and enhance the form’s functionality, ultimately leading to improved customer satisfaction and engagement with your online store.
Looking to sell online?
Create your online store in minutes
Create your online store in minutes with 10Web AI Ecommerce Website Builder.