Why am I seeing a 403 forbidden error
When you encounter a 403 Forbidden error while browsing the web, it means the website’s server received your request, knows what you want to do, but has denied access. Essentially, it’s a digital no entry sign, indicating that you’re not allowed to access the specific web page. There are two main possibilities: either the website owner tweaked the settings to prevent certain actions or they simply got the permissions wrong. There are other potential causes behind this error as well.
Let’s take a look at a few:
Missing homepage – Sometimes, it’s as simple as the website’s homepage not being named index.html or index.php.
WordPress plugin – If you’re using WordPress and some plugins are causing trouble or not working well together, that can trigger a 403 error.
IP Address mix-up – Your computer might think the website is in one place when it’s actually somewhere else, thanks to an outdated IP address.
Malware issues – If the site has been infected with malware, it can mess up the .htaccess file. To fix it, you’ll need to clean out the malware first.
Changed web page links – Sometimes, the website owner shuffles things around, so the old link you have doesn’t work anymore.
Same error different message
Here is a variation of the messaging for the same error.
- Error 403: Forbidden
- 403 Forbidden: nginx
- 403 Forbidden: Access is denied
- 403 Forbidden: Authentication required
- 403 Forbidden: Unauthorized IP address
- 403 Forbidden: Insufficient permissions
- 403 Forbidden Error: You are not allowed to access this address
Say goodbye to website errors
Achieve peace of mind with 99.99% uptime on 10Web Managed
WordPress Hosting, powered by Google Cloud.
How to fix the 403 Forbidden error
Refresh the page and verify the URL
In the world of tech glitches, sometimes the easiest fixes are the most effective. If you stumble upon a 403 error, give these a shot:
- It might sound too simple, but sometimes a quick refresh can do wonders. The 403 error can be temporary, so hitting that refresh button could work like magic.
- Make sure you’ve typed the website address correctly. If you’re trying to access a directory and not a specific web page, a small typo can lead to a 403 error. Double-check your URL for any slip-ups, like missing slashes or typos.
Clear your browser cache and cookies
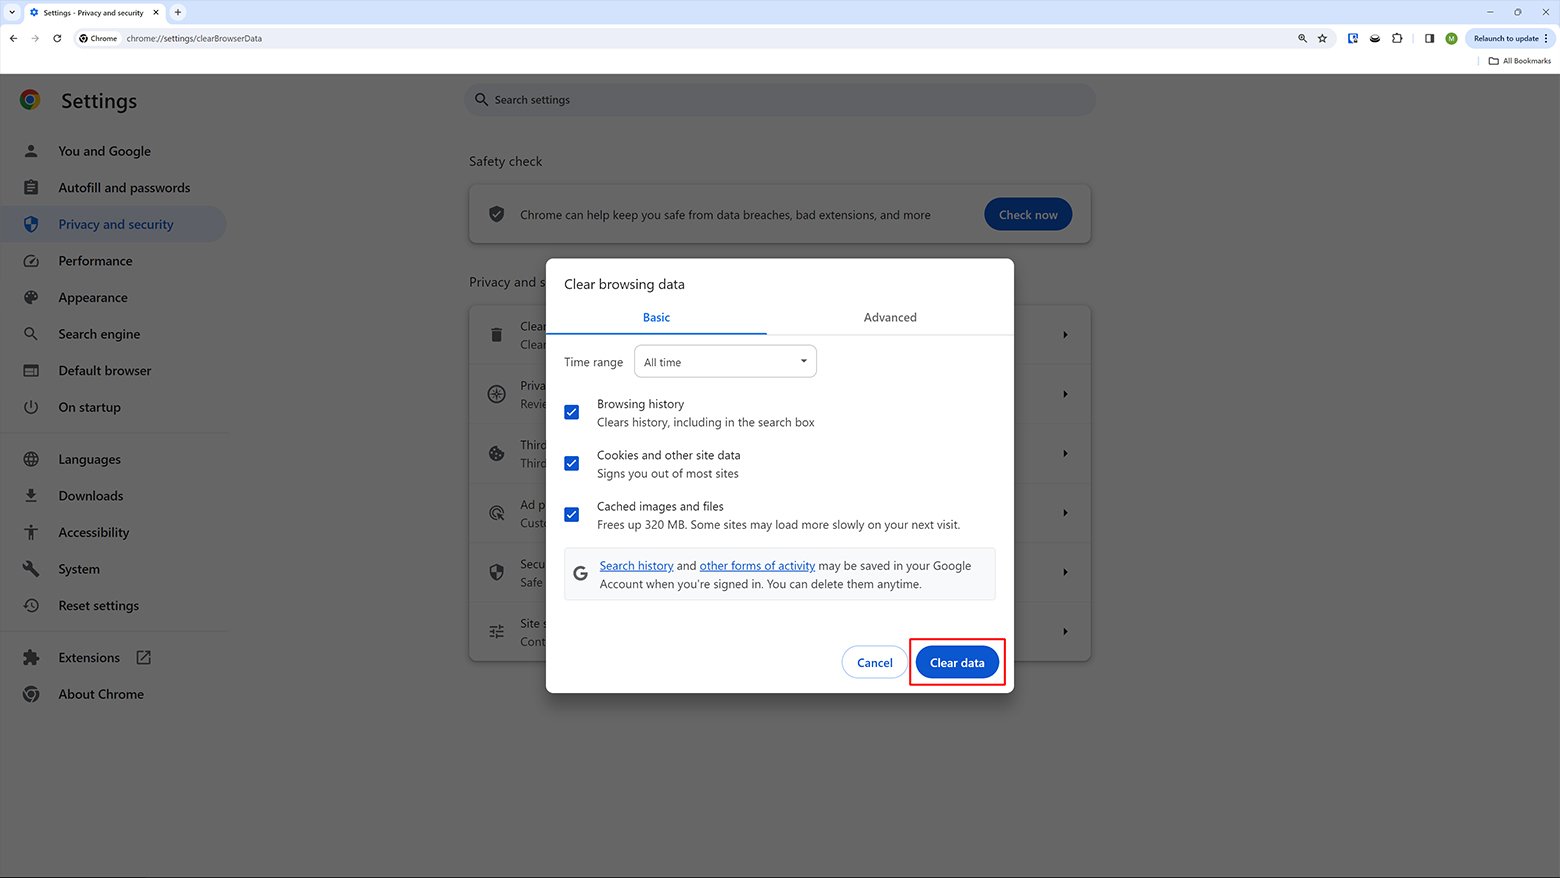
Ever wondered why websites load faster the second time you visit? It’s because of your browser’s ‘cache.’ But sometimes, it can backfire, leading to a 403 Forbidden error. Here’s how it works: when you visit a website, your browser stores some of its data to make future visits faster. In the meantime, if a website changes, your browser’s stored version might not match the real thing, causing errors. Another reason can be ‘cookies.’ They make your online life easier, but sometimes they go rogue, causing a 403 error. Clearing your browser’s cache and cookies can often do the trick. Here’s how to clear your browser cache and cookies on Google Chrome:
- Open Google Chrome
- Click on the three dots up in the corner and select Settings.
- Find Privacy and security > Clear browsing data.

- In the pop-up, choose All time
- Select Cookies and other site data and Cached images and files.
- Hit Clear data, and you’re good to go.

Relaunch the site to see if the error has resolved.
Run a malware scan
When malware infiltrates your WordPress site, they often inject bad code into the .htaccess file, causing the 403 Forbidden error. And here’s the kicker: fixing the .htaccess file won’t help if the malware keeps coming back. If your site is hosted at 10Web, we’ve got your back. 10Web offers a free malware removal program. In the case that your site has been compromised contact customer support via live chat.
Delete and renew your .htaccess file
The .htaccess file, often tucked away in your website’s directories, is a powerful tool that configures your Apache web server. It can set up redirects, control access, and more. However, one tiny mistake in this file can lead to issues like the 403 Forbidden error. If your website is hosted at 10Web, and you are getting the 403 forbidden error, you should troubleshoot elsewhere, as .htaccess files are specific to Apache, and 10Web uses Nginx, which employs a different syntax for rewriting rules. If your website is hosted elsewhere and they use the Apache web server, then the 403 error might be caused by a mistake in your .htaccess file. The simplest way to fix this issue is to create a new .htaccess file in WordPress. Here is how to do that: You will need to access your websites files and folders by your method of choice. For our purposes, we will use an FTP client.
-
- Open up your FTP client and connect to your server
- Locate the .htaccess file in your website’s root folder
- Make sure to download a copy of your .htaccess file to your computer – just in case
- Now, delete the .htaccess file from your server

If your .htaccess file was the issue, then you should be able to access the website where the 403 error occurred after deleting the .htaccess file.
- Next, go to your WordPress dashboard, head over to Settings > Permalinks
- Without making any other changes, click Save Changes at the bottom of the page
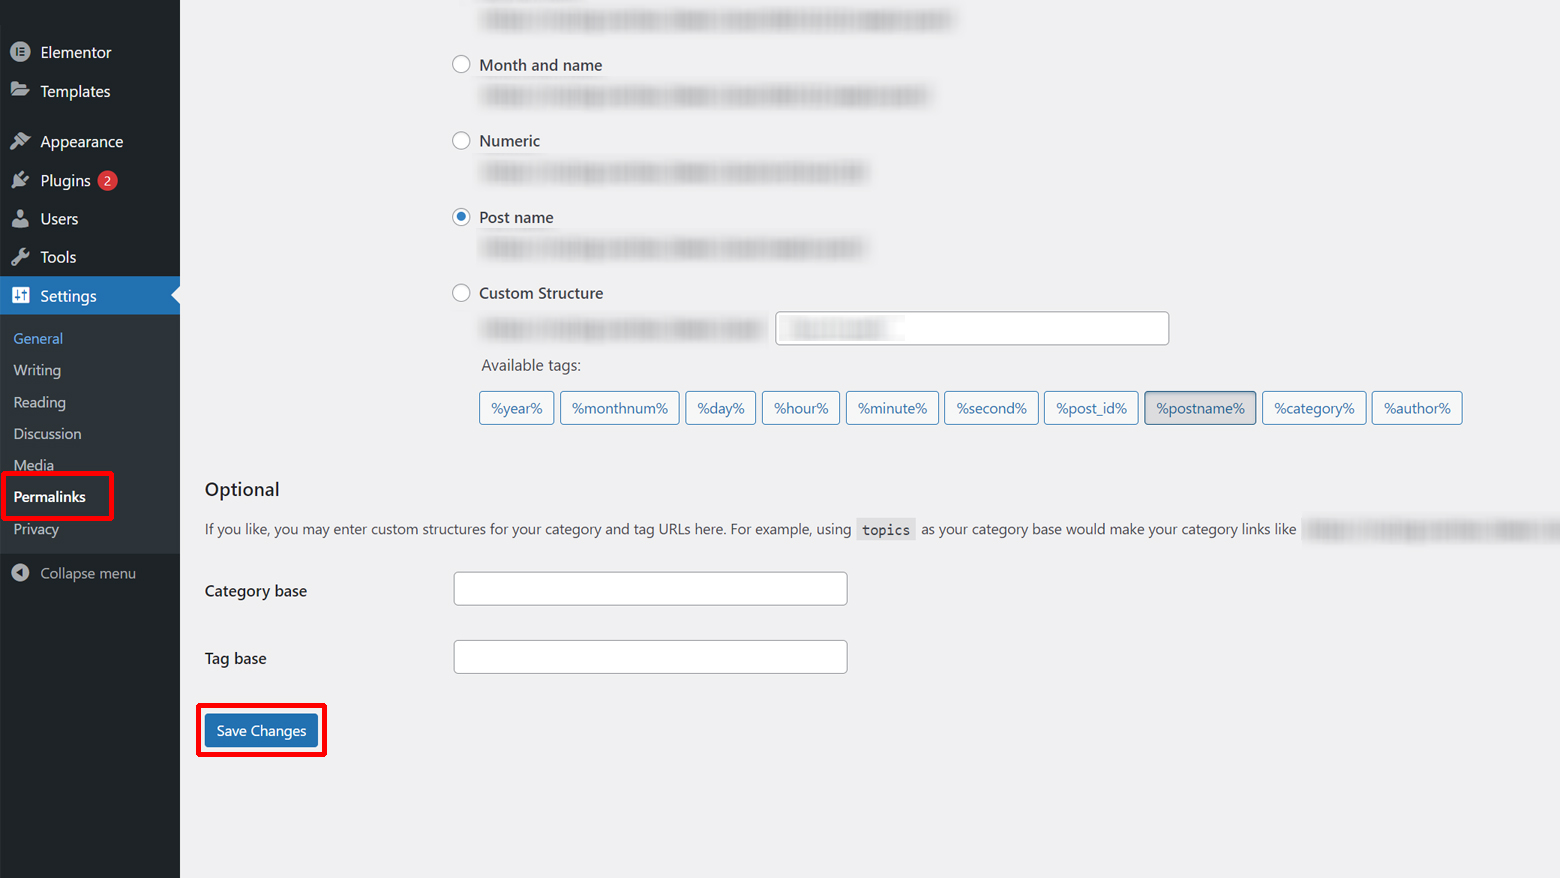
This will generate a new .htaccess file.
Review and revise file and directory permissions
Each part of a website, every file and folder, has its own set of keys, or file permissions. These keys determine who can see, change, or run things on the website. Now, if these keys get mixed up or broken, it can lead to a ‘403 Forbidden’ error.
To access your files and directory:
- Make sure you’re connected to your website using FileZilla
- Right-click on the public_html folder and choose File Attributes
- In the Numeric value box, type 750 or 755 and choose Apply to directories only
- Click OK
- Now, do the same for files, but this time use 640 or 644 in the Numeric value box
- Check Recurse into subdirectories and select choose Apply to files only

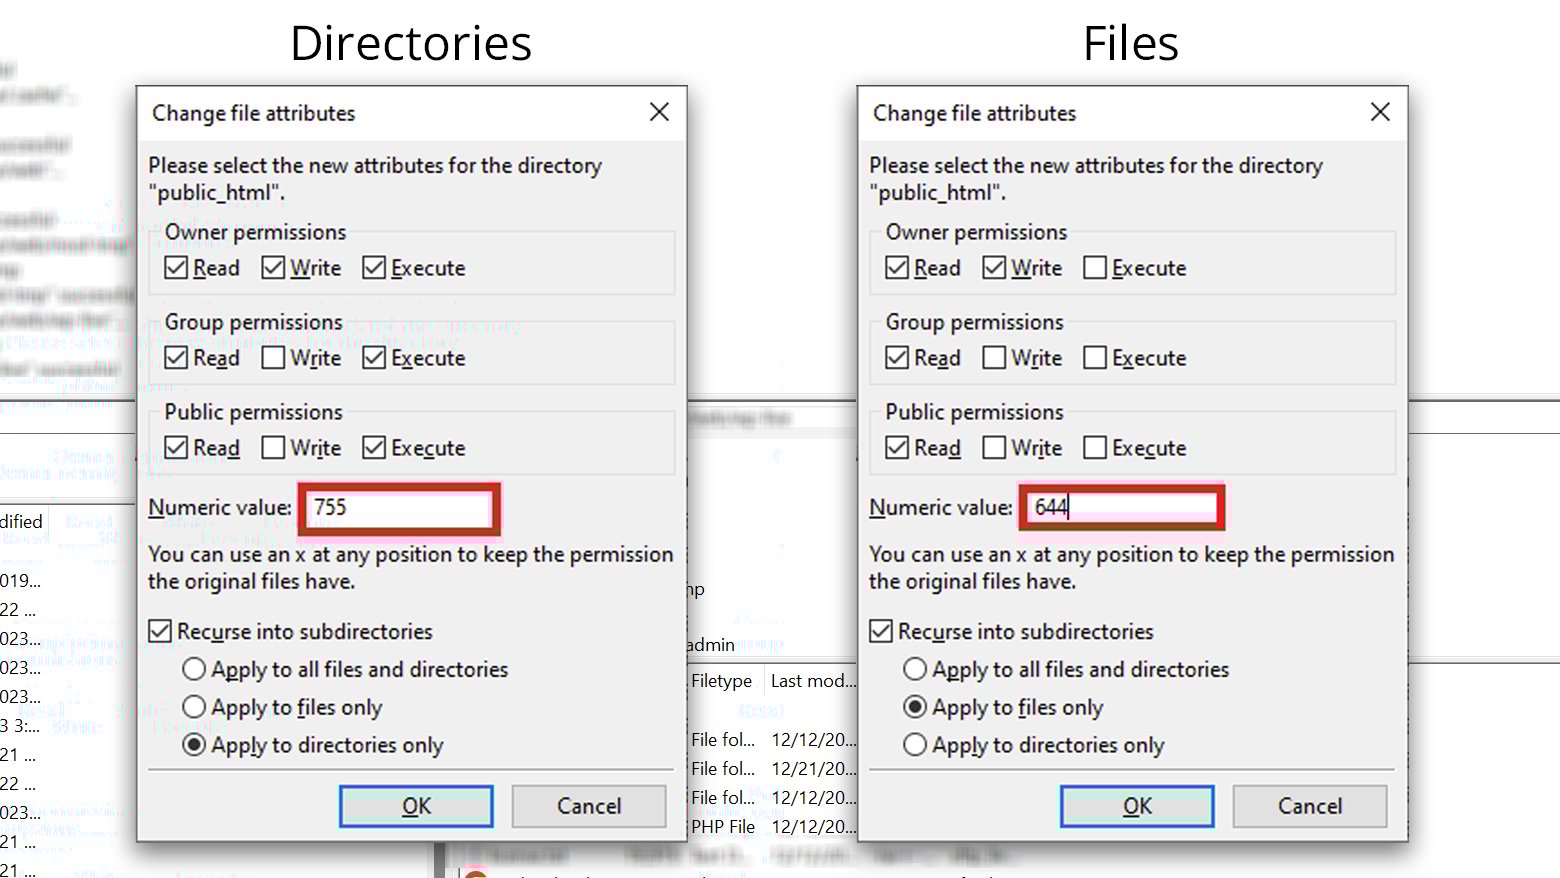
Double check that your wp-config.php file permissions are set to 440. Once you’ve sorted out these permissions, try visiting your website to see if the 403 error is gone.
Deactivate WordPress plugins
Sometimes, the reason behind the 403 Forbidden error is a plugin gone rogue. It could be a bug in one of them or incompatibilities between different plugins. Here is the shortest way to determine if the reason behind the error is a plugin and which plugin it is. First, we’re going to hit the pause button on all your plugins. If you can access your WordPress dashboard, head to the Plugins section and do this from there. If you’re locked out of WordPress, you will need to use FTP/SFTP to get things done.
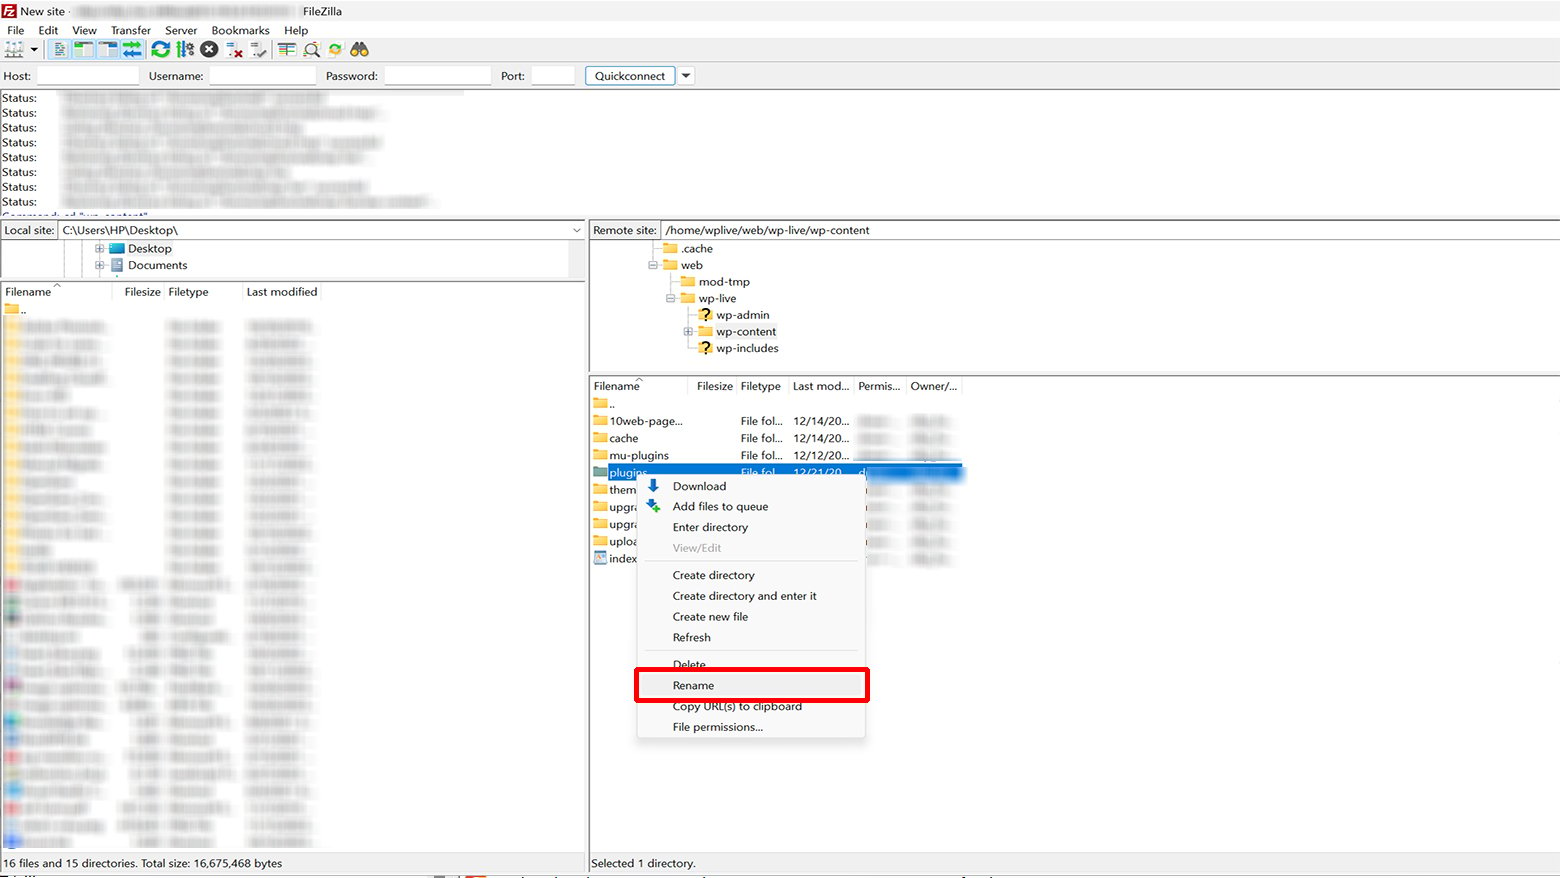
- Connect to your website server using an FTP client like FileZilla
- Find the wp-content folder
- Look for the plugins folder inside wp-content
- Right-click on plugins and choose Rename
- Give it a new name, like plugins-deactivated
By renaming the folder, you’re basically deactivating all your plugins. Now, try accessing your website again. If it’s back up and running, we’ve got a problematic plugin.
Find the problematic plugin
After renaming the plugins folder, you might see some error messages in your WordPress dashboard.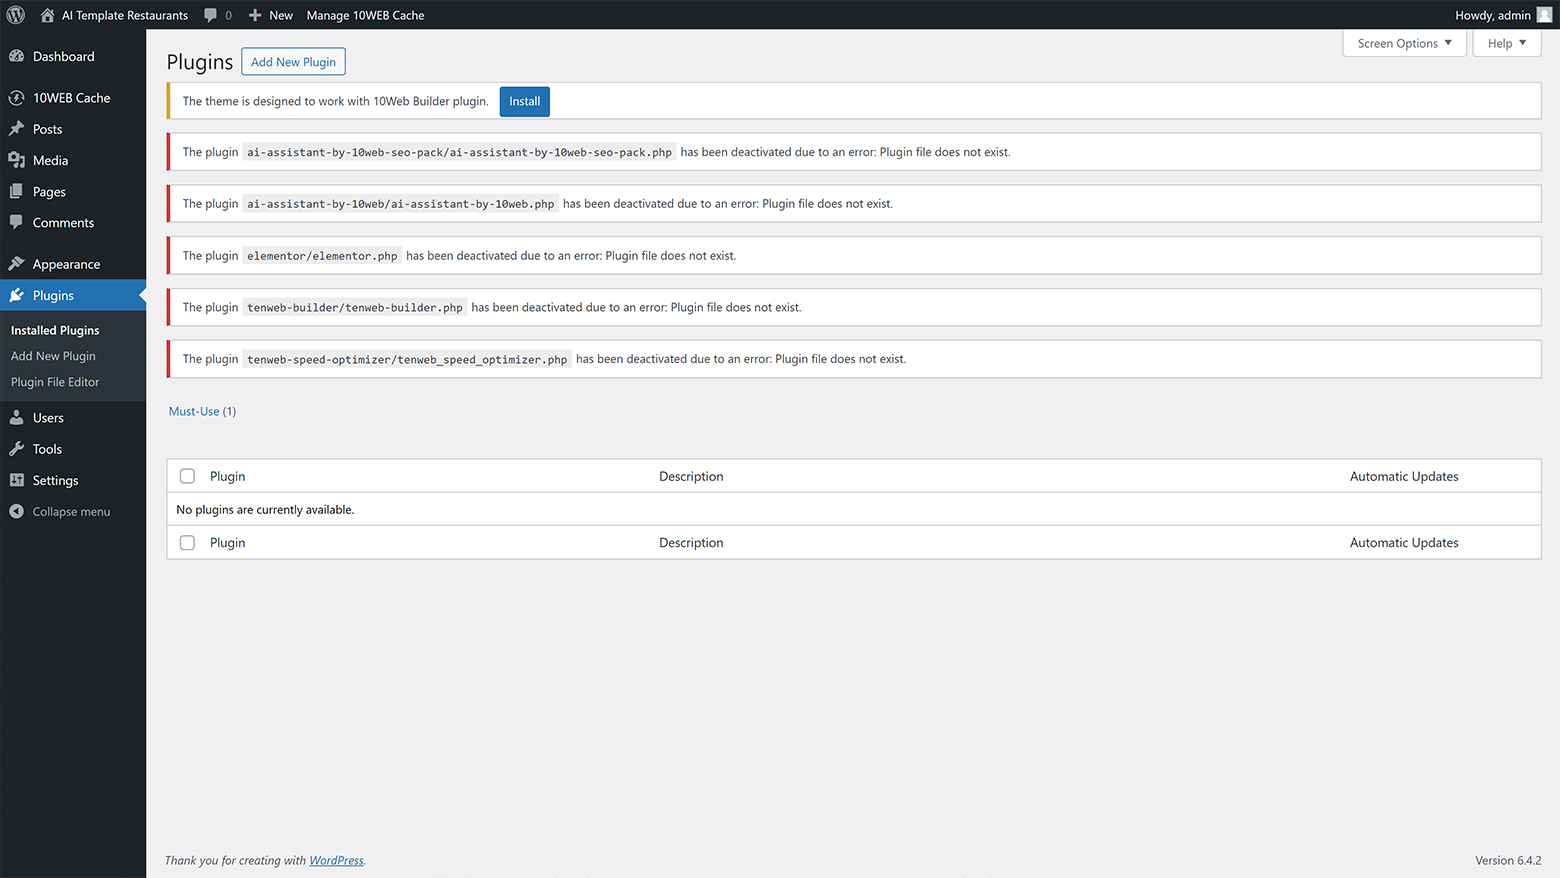 Don’t worry; this is normal. By renaming the plugin folder, you have deactivated all of your plugins. Change the folder name back to plugins. You will now be able to see the list of your plugins in your WordPress dashboard. You will also notice that the plugins are inactive. Start reactivating your plugins one by one until you find the one causing the trouble.
A record verification and nameserver update
You may get the 403 forbidden error if your domain name is pointed to the wrong IP address. To make sure that this is not the case, double check your DNS records with your domain registrar or hosting company. If your website is hosted at 10Web, here is a comprehensive guide on how to manage your DNS records at 10Web and how to point your domain to 10Web. If you have recently changed where your website lives, you will need to make sure that your nameservers are updated and correctly pointed to your new host. If this is not done in time, you may get the 403 forbidden error. To check that all is up to date, double check the DNS records of your website.
Temporarily disable CDN
If you’re seeing the 403 forbidden error on things like images, JavaScript, or CSS, it might be your content delivery network (CDN). You can turn it off temporarily and see if that clears up the problem.
Hotlink configuration
Hotlinks are like when someone borrows a cool picture for their site, but the picture still lives on someone else’s site. To stop this, some folks use hotlink protection with their hosting or CDN provider. Now, when hotlink protection is working, it might serve up a 403 forbidden error – that’s fine. But if you’re getting that error where it shouldn’t be, it’s time to make sure your hotlink protection is set up just right.
VPN
Some sites bar VPN users. This may be the reason you’re seeing a 403 forbidden error. To find out if this is the case, simply disconnect from your VPN and try reaching the site without it. If that works, great! If not, you can also try switching to a different server from your VPN service.
Experience hassle-free hosting with 10Web
At 10Web, we understand that dealing with various website errors can be a daunting task. That’s why we offer a range of hosting solutions tailored to different needs, all designed to provide a smooth and reliable website performance. Our hosting plans come with a variety of features to ensure your website is always protected and operating at its best:
- Automated backups: Regular, hassle-free backups to keep your data safe.
- Real-time security: Continuous monitoring to protect your site from threats.
- One-click staging: Easily test changes before they go live.
- Lightning-fast speeds: Powered by Google Cloud for quick loading times.
- 24/7 customer support: Prompt assistance whenever you need it.
Switching to 10Web hosting means minimizing the time spent troubleshooting and maintaining your website. Our platform is optimized to handle a variety of website needs effortlessly, giving you more time to focus on growing your business. Plus, with our dedicated customer support, your concerns will be addressed promptly and efficiently.
Conclusion
In a nutshell, we’ve tackled the 403 Forbidden error from every angle. From checking your file permissions to giving those plugins a timeout, and even verifying your domain’s GPS, we’ve covered it all. Remember, while these fixes might seem difficult, we’ve created this comprehensive guide to help you through it and make it doable for everyone.