WooCommerce powers a significant portion of online stores today, offering extensive customization options to meet diverse business needs. One critical area for customization is the WooCommerce category pages, which can significantly impact user experience, SEO, and ultimately sales. Beside answering your question on how to customize WooCommerce category page, this comprehensive guide will also walk you through the reasons to customize these pages, using both code-free solutions and more advanced techniques.
FAQ
How to edit WooCommerce product category page in Elementor?
How to customize a WooCommerce page?
How do I change categories in WooCommerce?
Understanding WooCommerce category pages
A WooCommerce Category Page is essentially a specific type of archive that groups similar products together. This could be anything from clothing items grouped by style (e.g., “Men’s T-Shirts”) to electronics sorted by function (e.g., “Cameras”). Customizing these pages allows you to tailor the way products are presented and can help customers find what they’re looking for more quickly and efficiently.
Reasons to customize WooCommerce category pages
- Boost sales: Customized category pages can enhance the shopping experience by making it easier for customers to browse and find products, potentially increasing conversion rates.
- Improve SEO: Well-organized and optimized category pages can help your store rank better in search engine results, attracting more organic traffic.
- Make your store more eye-catching: Aesthetic enhancements and personalized touches can make your store stand out from the competition.
- Display extra information: Custom pages can include additional details like sales banners, FAQs, or unique selling propositions that are relevant to specific categories.
- Accommodate multiple variations: For products that come in various options, customized category pages can help in showcasing these variations effectively.
- Enhance presentation of non-visual products: For items that aren’t immediately visually appealing, a well-designed category page can help in illustrating their benefits more effectively.
Method 1: How to customize WooCommerce category page without coding
This method offers a straightforward guide on how to customize WooCommerce category page in WordPress without any coding. By following these steps, you can easily choose both the layout and the design of your WooCommerce archive page. Let’s dive in!
Step 1: Install Elementor page builder and ShopEngine
To begin editing the WooCommerce product category page in Elementor, you’ll need two WordPress plugins:
- Elementor Page Builder

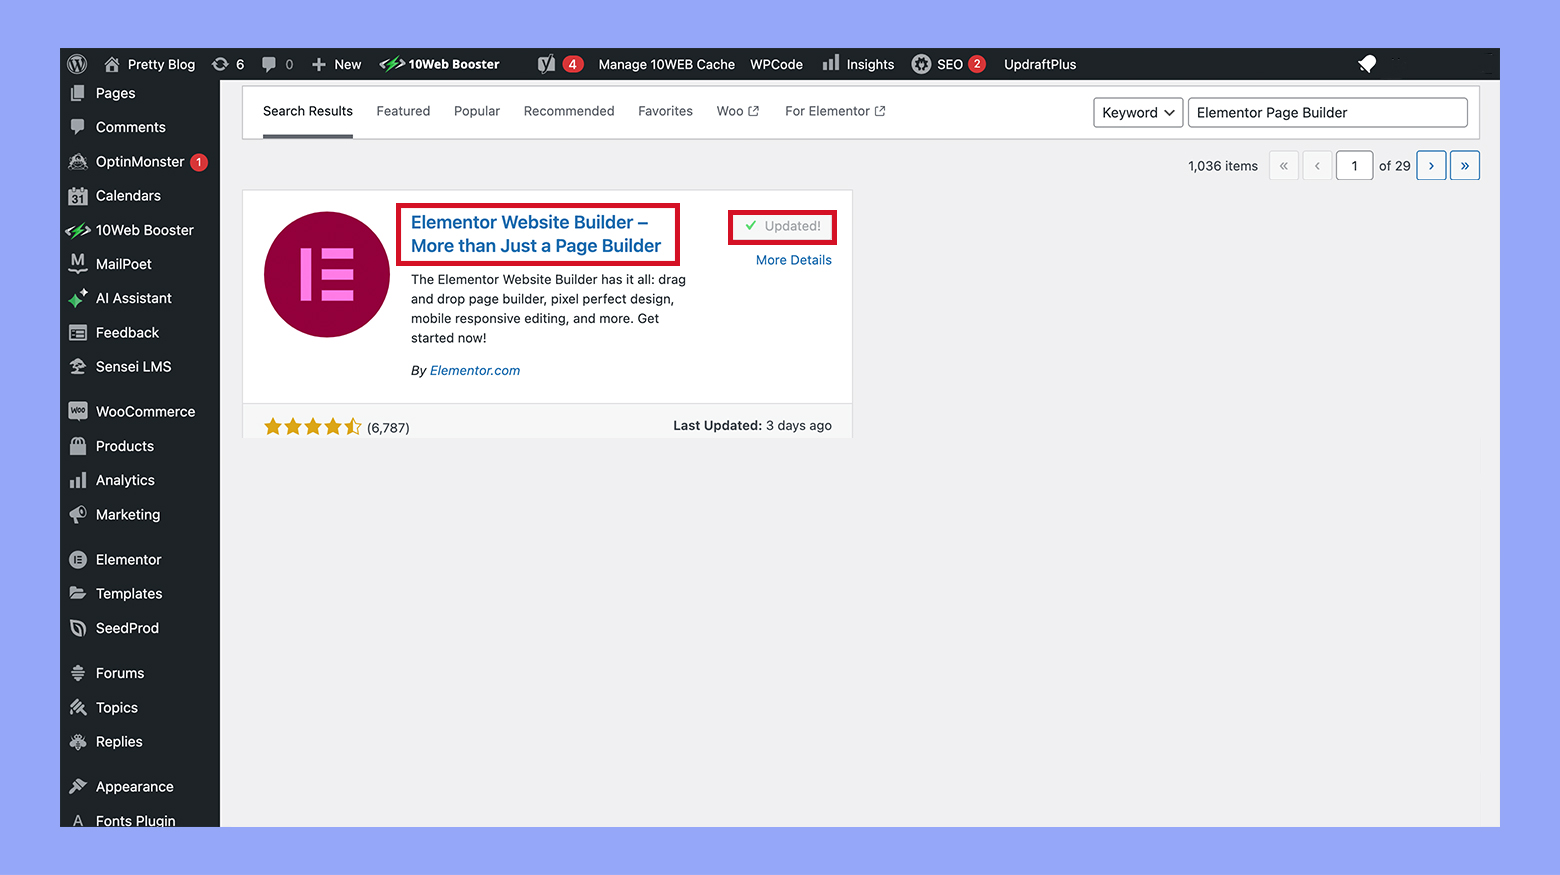
- ShopEngine and ShopEngine Pro
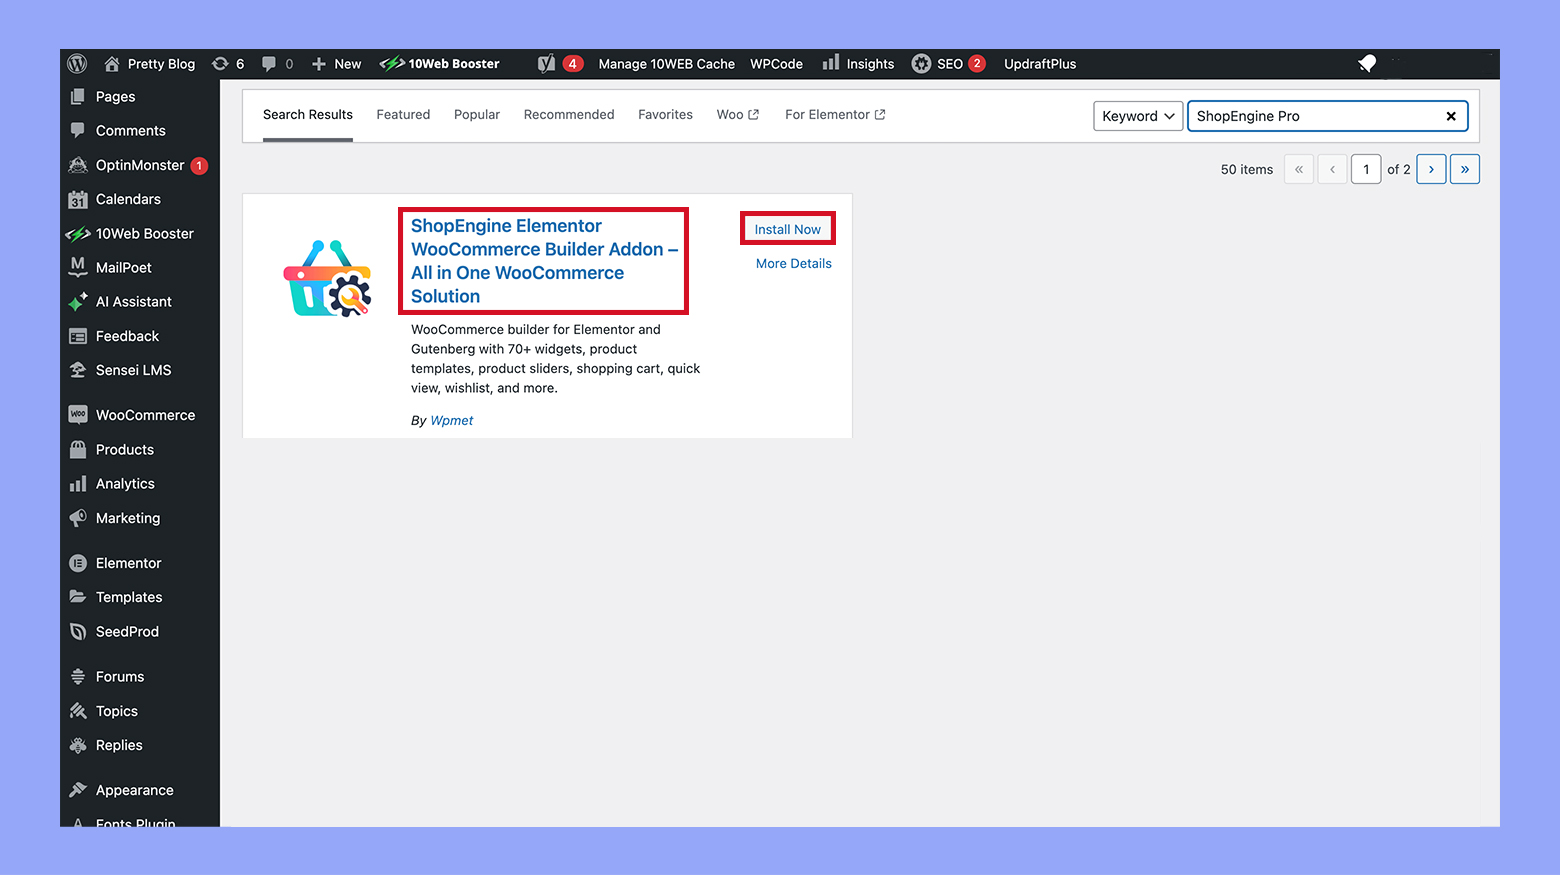
ShopEngine enhances Elementor, the ultimate drag-and-drop page builder, by providing a vast array of widgets and modules designed to simplify WooCommerce customization.
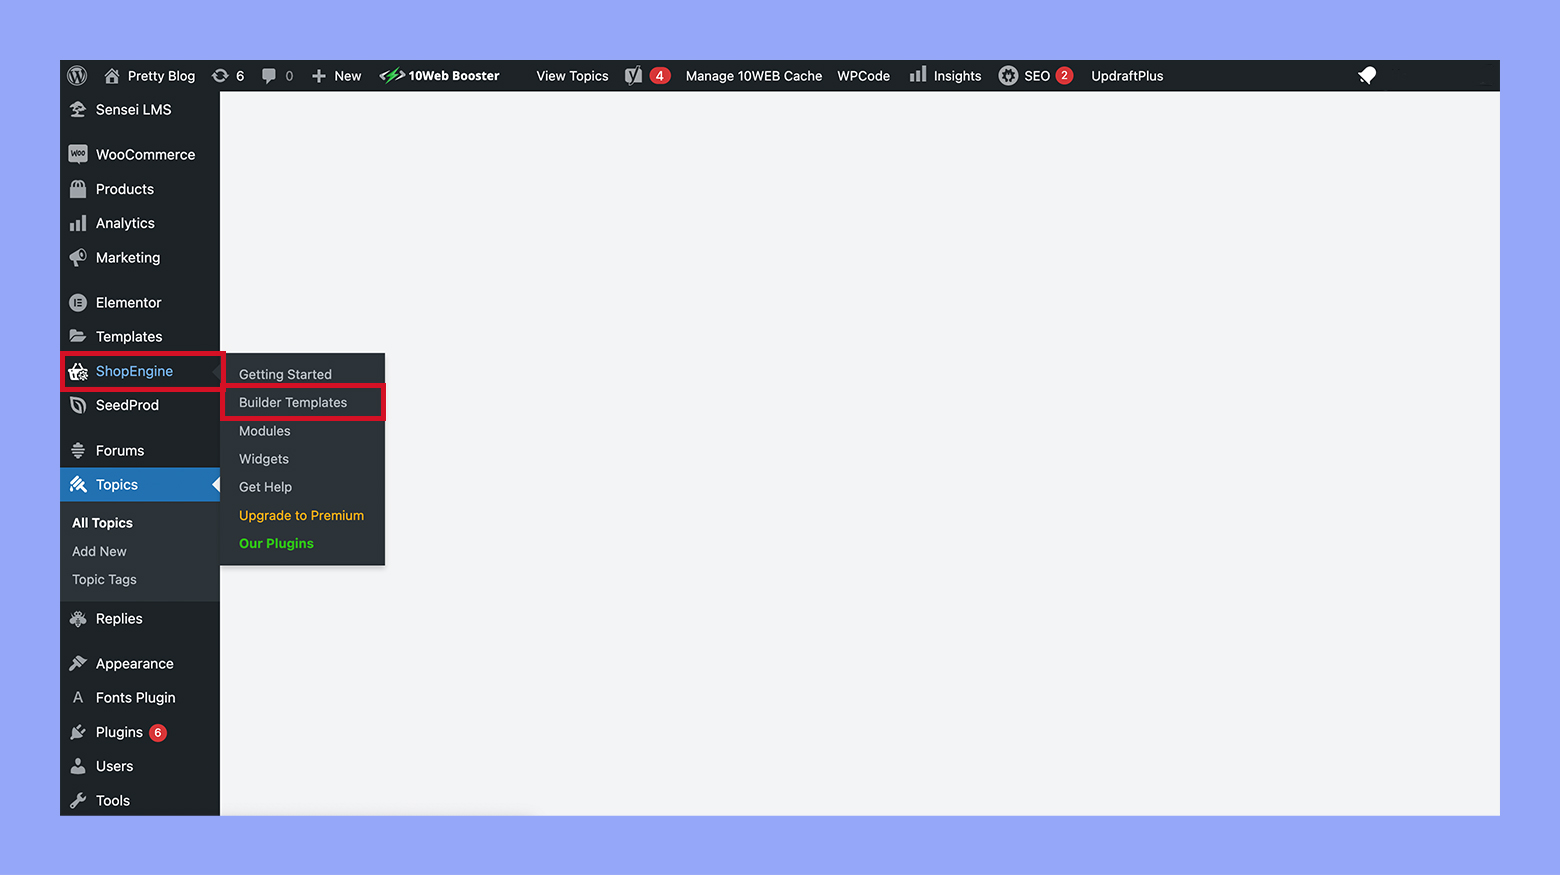
Step 2: Create a custom WooCommerce category page template
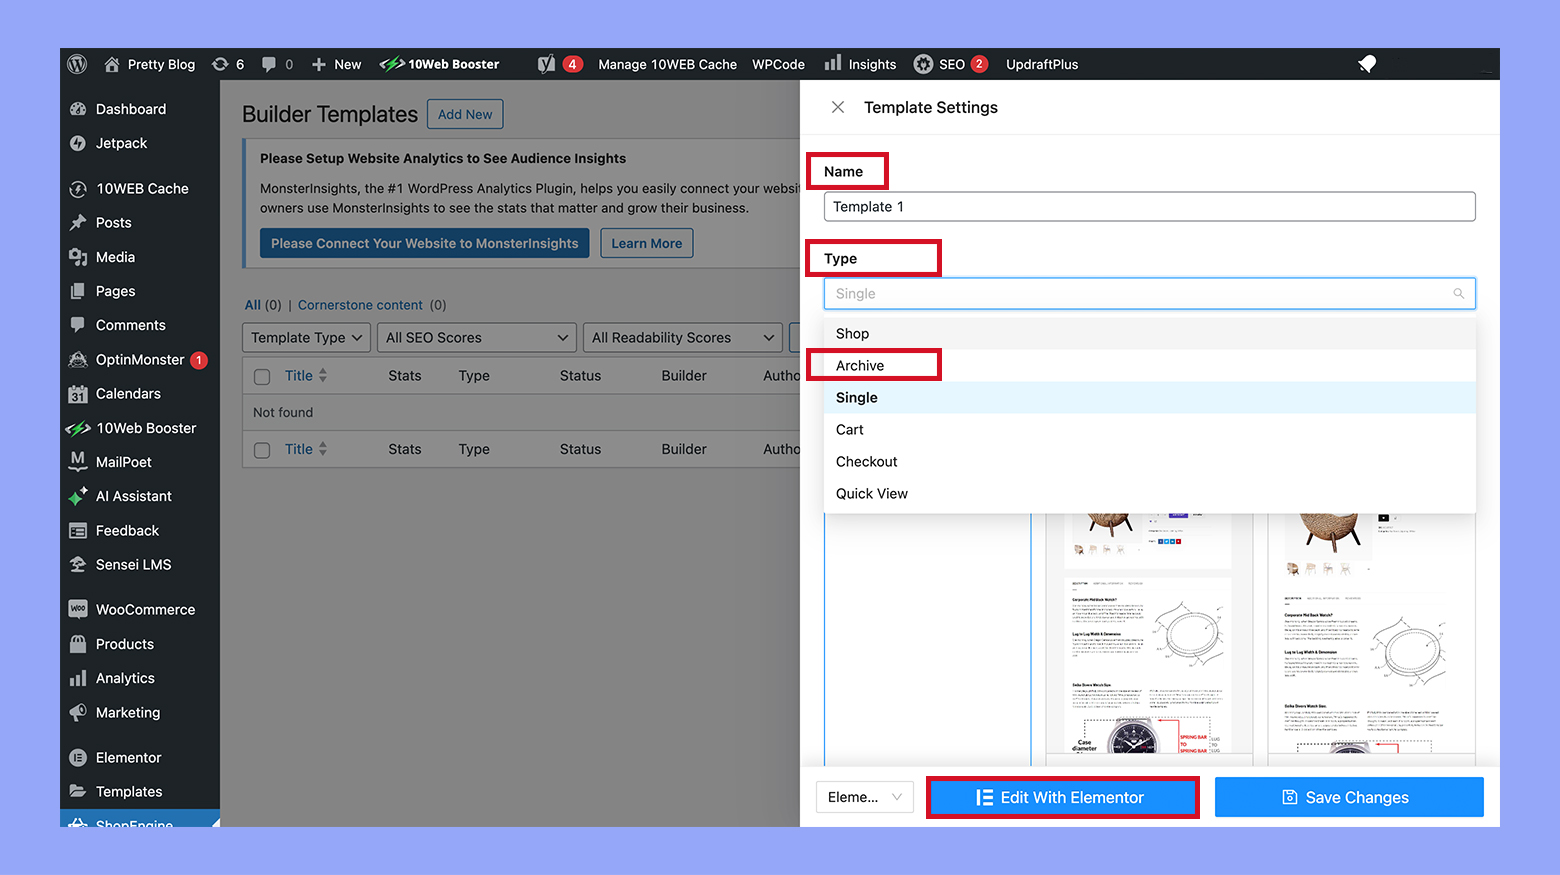
After installing and activating the required plugins, you need to create a Category Template by following these steps:
- Navigate to ShopEngine > Builder templates.
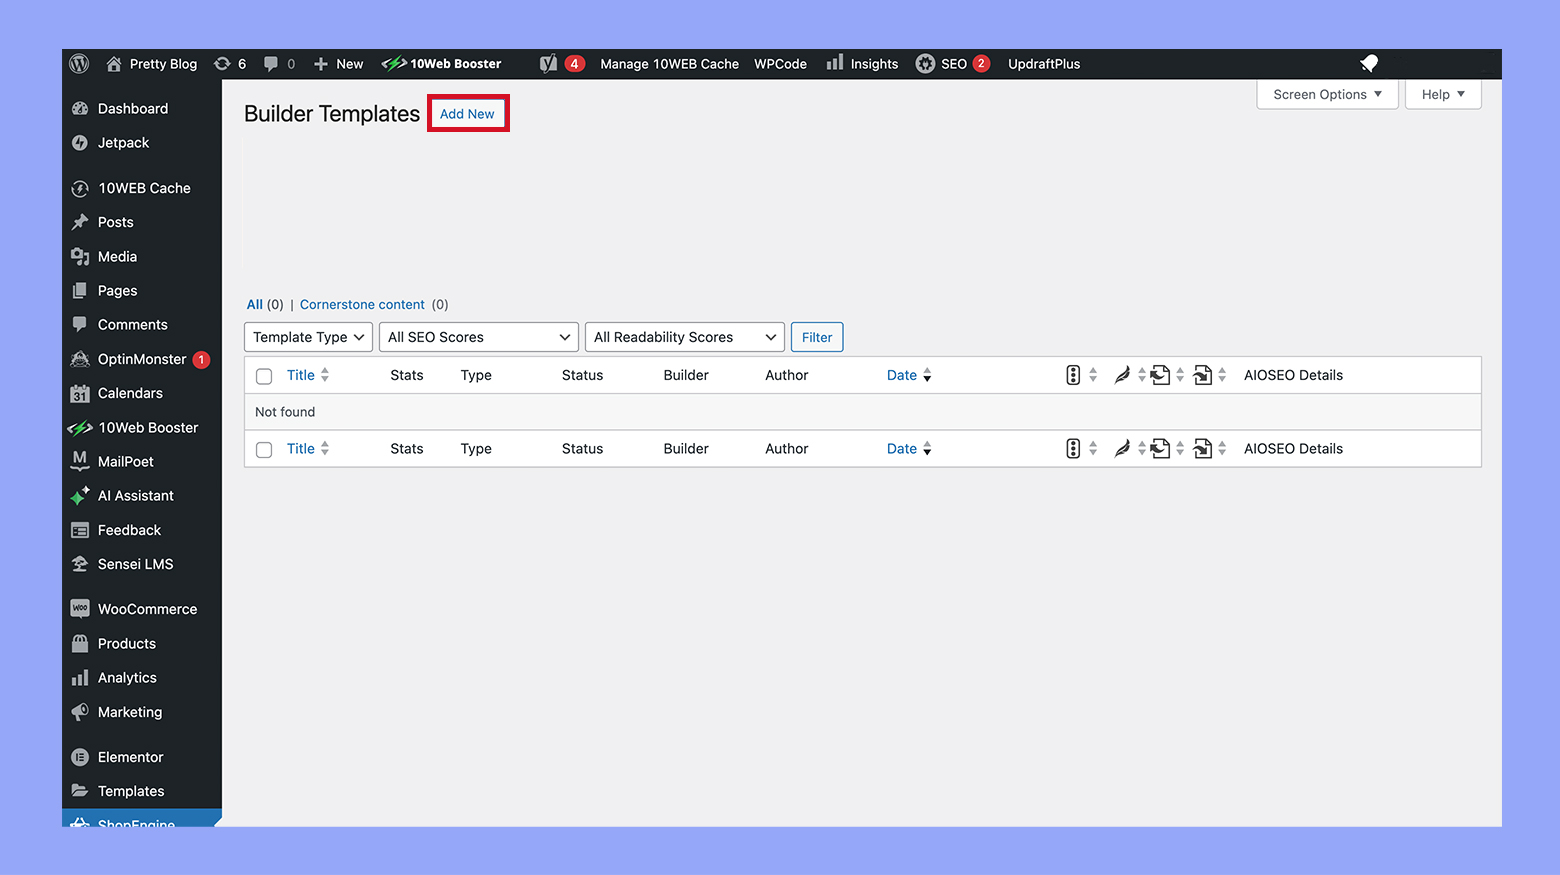
- Click on Add new.
- Enter a template name.
- Select Archive from the type dropdown.
- Keep the Applicable category field unchanged to apply the template universally.
- Activate the Set default option to override any existing templates.
- Choose the blank option under Sample Design and click on Edit with Elementor to start building your template.
Note: Selecting the blank option allows you to build a custom category page from scratch. ShopEngine also offers multiple pre-built templates if you prefer a quicker setup.
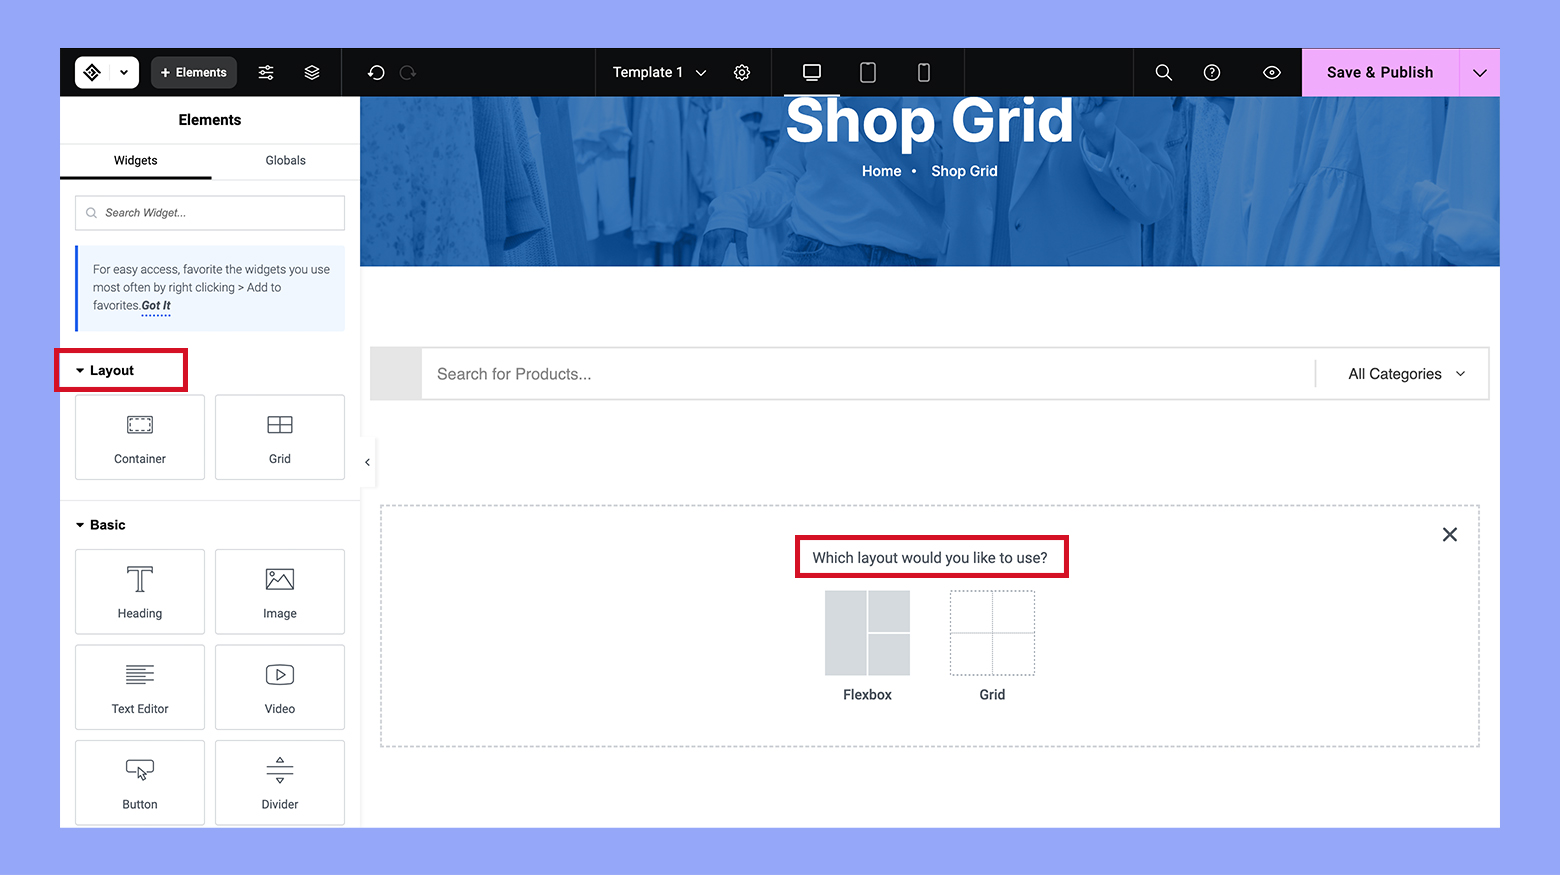
Step 3: Choose a layout/structure for the WooCommerce category page
In the editor mode, select a structure for your category page by clicking on the + icon and choosing your preferred layout.
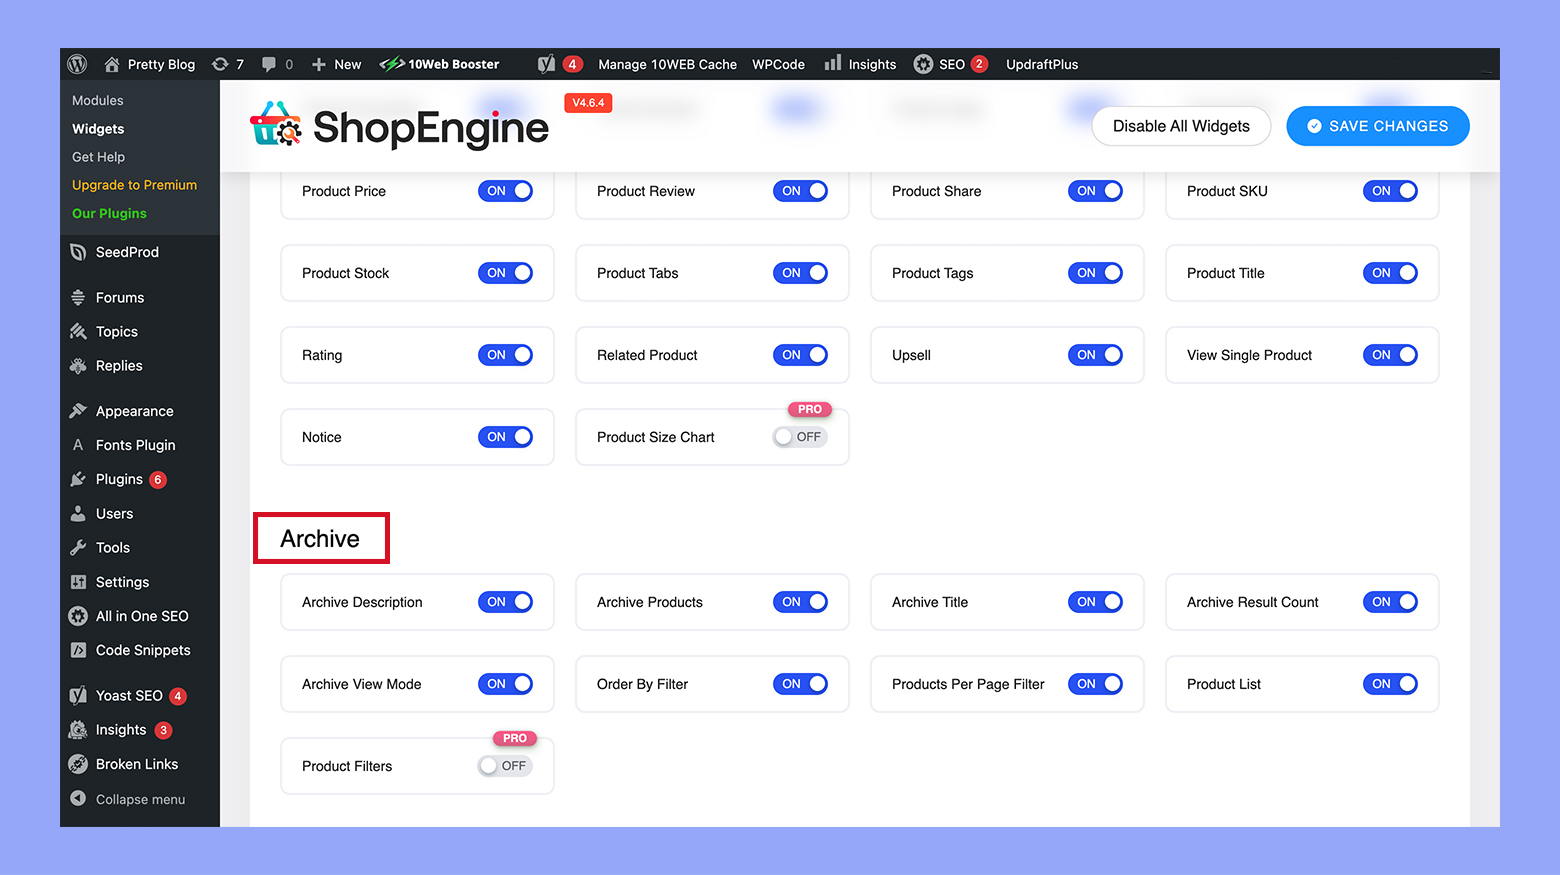
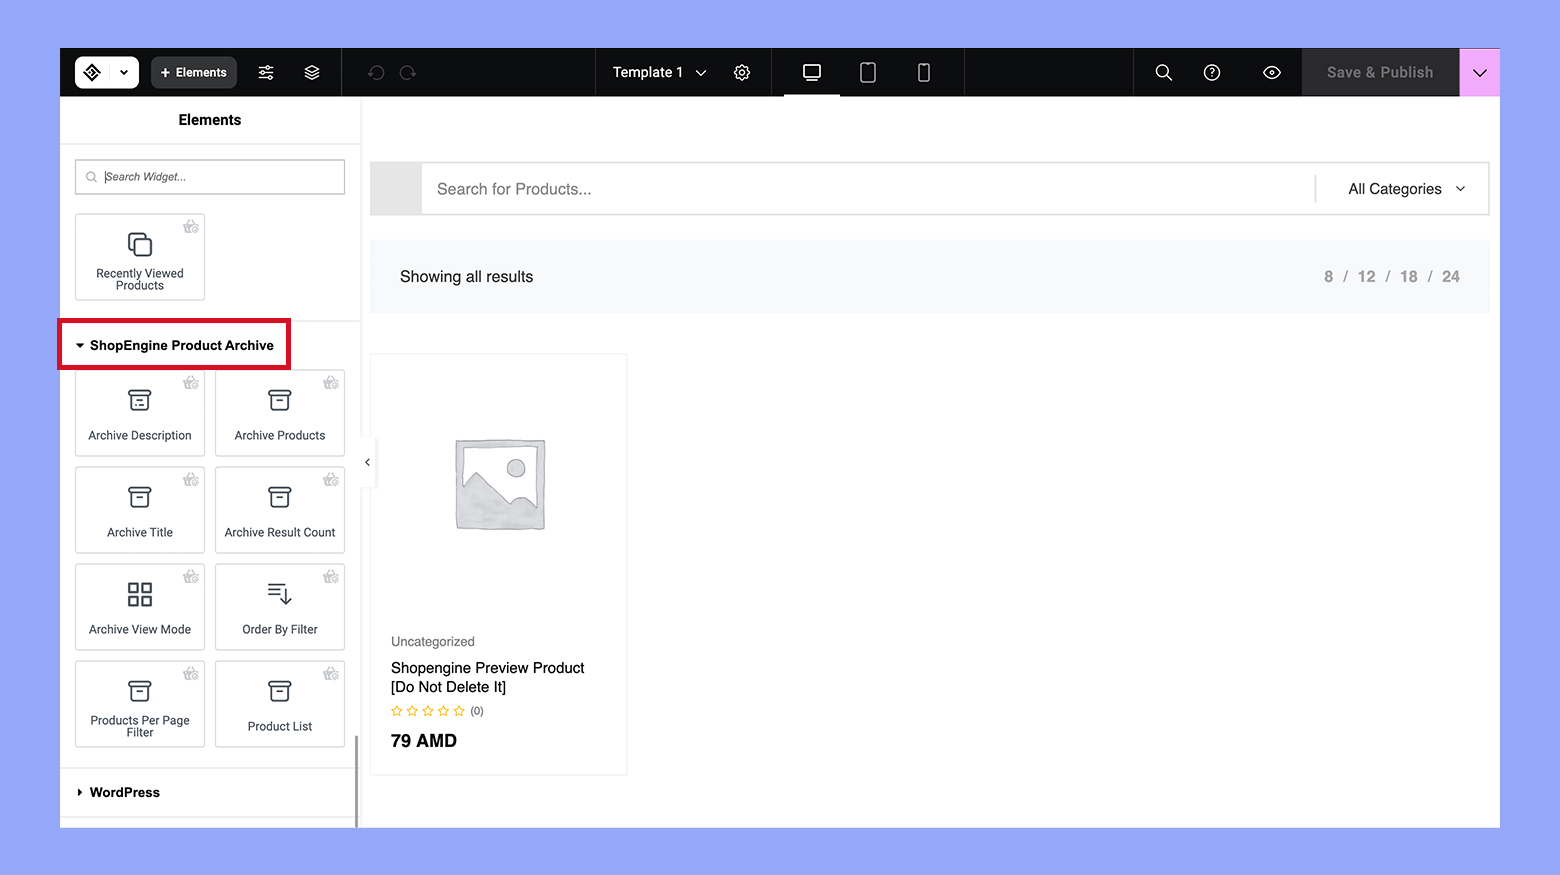
Step 4: Drag and drop ShopEngine widgets and customize settings
ShopEngine offers more than eight dedicated widgets for building custom WooCommerce archive pages. Activate and use these widgets by navigating to ShopEngine > Widgets and enabling the ones you need. For example, use the Advanced Search and Archive Result Count widgets for enhanced functionality.
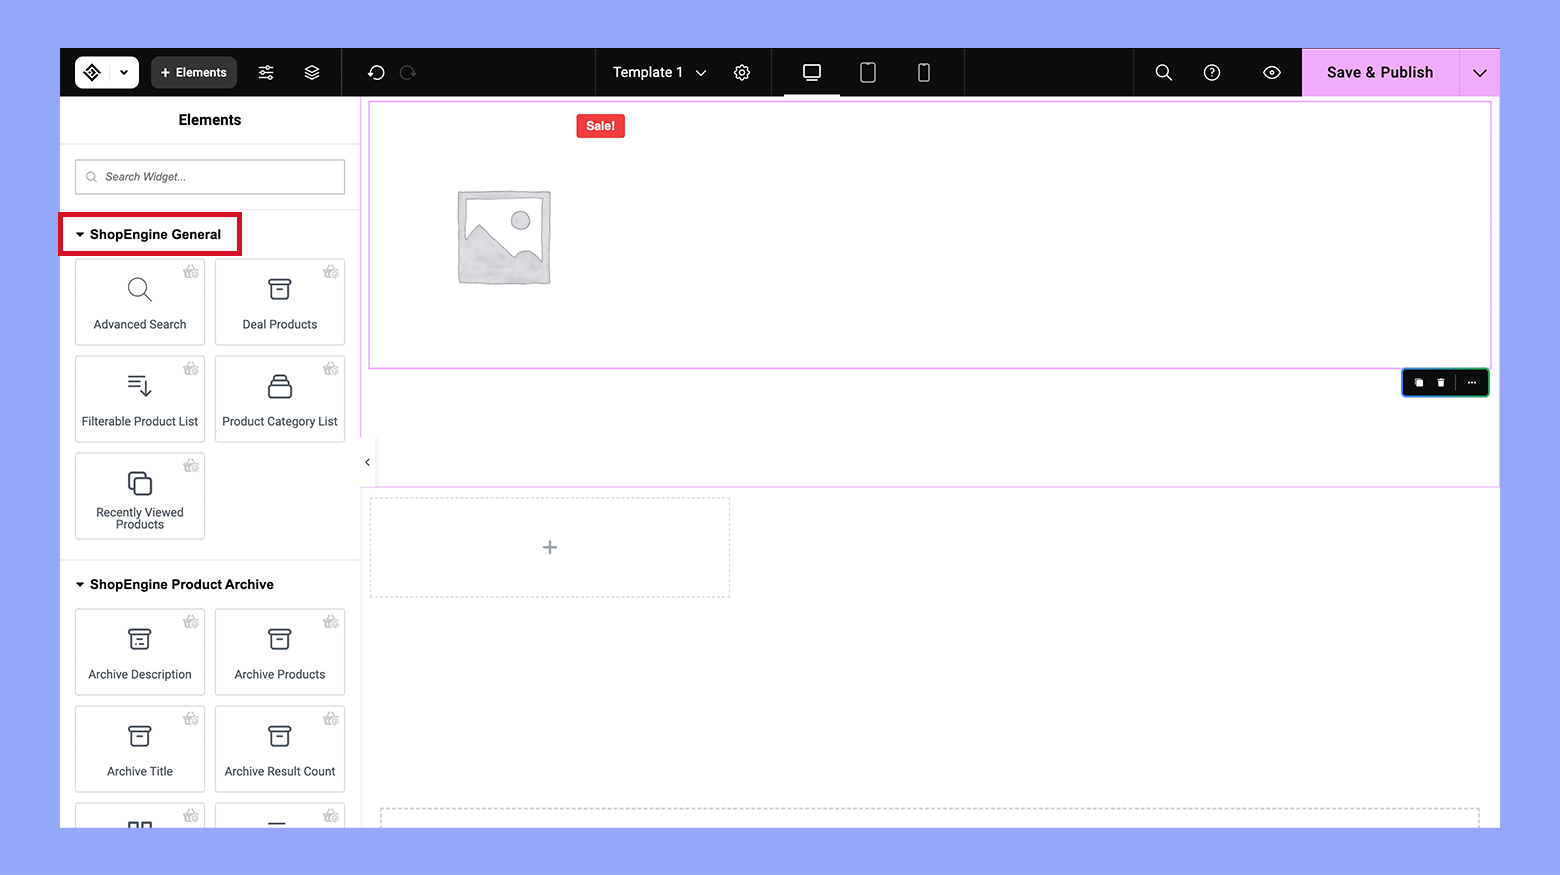
If you are using 10Web hosting, you can take advantage of the WooCommerce widgets it offers.

Step 5: Customize WooCommerce archive page’s style settings
Once you have placed your widgets, customize their style settings in Elementor. This includes adjusting the design of the Search form, Product Filters, Archive Products, and more, to align with your brand’s aesthetic.
Update and Preview the WooCommerce custom category page template. If satisfied, your new category page design will now be active across your store.
Step 6: Creating custom designs for specific categories
If you wish to design unique pages for specific categories, simply adjust the Applicable Category field in Step 2 to the desired category. This ensures that your custom design applies only to selected categories, maintaining a unique look across different sections of your store.
This process not only simplifies customization but also enhances your store’s functionality and aesthetic appeal, catering to specific business needs without requiring coding skills. Create your custom online store in minutes with 10Web AI Ecommerce Website Builder and take your business online.

Looking to sell online?
Method 2: How to customize WooCommerce category page with coding
To customize a WooCommerce category page with coding, you typically need to modify your theme’s files or create a child theme to avoid losing changes on theme updates. Here’s a general approach:
- Create a child theme: First, ensure you have a child theme set up. This is important for safely making theme modifications without affecting the ability to update your parent theme.
- Override WooCommerce templates: Copy the WooCommerce template files related to category display from wp-content/plugins/woocommerce/templates to your child theme in a directory named woocommerce. Typically, you’ll be interested in modifying archive-product.php for the product archive or category pages.
- Edit template files: Within archive-product.php, or any specific template part files it includes (like content-product.php), you can make changes directly in the HTML structure, PHP code, or insert new functions. Use WooCommerce hooks like woocommerce_before_shop_loop or woocommerce_after_shop_loop_item to add or modify content without changing template files directly.
- Customize using actions and filters: Add custom functions to your child theme’s functions.php. You can hook into WooCommerce actions or modify outputs with filters to change or add new functionalities. For example, changing the number of products displayed per page, customizing product data, or modifying layout elements.
- Add custom CSS/JS: Use your child theme’s style.css to add custom styles or scripts.js to add JavaScript. This is useful for visual tweaks and interactive elements without altering core functionality.
- Test your changes: Always test your changes on a staging site before applying them to your live site to avoid disrupting the shopping experience.
This method provides a robust way to customize your WooCommerce category pages directly through coding, offering flexibility and control over the customization.
Most common use cases for customizing category pages
Customizing category pages on a website, especially an ecommerce site or a content-rich portal, is an important strategy for improving user experience, SEO, and conversion rates. Here are some key scenarios when you might consider customizing these pages:
- Business expansion or restructuring: When adding new product lines or services, or restructuring existing ones, category pages may need to be redesigned to accommodate the changes and ensure they align with business goals.
- Low conversion rates: If analytics indicate that category pages are not converting visitors into buyers at an expected rate, it might be necessary to customize these pages to make them more appealing or user-friendly.
- SEO performance issues: If category pages are underperforming in search engine results, customizing them with better SEO practices, such as optimized headings, meta descriptions, and keyword-rich content, can improve visibility.
- Feedback and user behavior changes: Based on customer feedback or shifts in how users interact with your site, customizing category pages to meet their preferences and shopping behaviors can enhance satisfaction and retention.
- Technological updates: When implementing new technologies or features (like AR/VR, advanced filtering, etc.), category pages might need customization to fully leverage these advancements for improved customer interaction.
- Handling large inventories: For websites with extensive inventories, custom category pages can simplify the product discovery process. This could mean creating sub-categories, or even dynamic categories based on popularity, price ranges, or other criteria.
- Seasonal and promotional needs: During special promotions, sales, or seasonal events, custom category pages can highlight relevant products, making it easier for users to find deals and new items which might interest them.
- Localization needs: If your business operates in multiple regions, customizing category pages to cater to local tastes, cultural nuances, and languages can significantly boost relevance and engagement.
Advanced customization tips
When advancing into customization of category pages, especially for ecommerce or content-heavy websites, you can leverage several sophisticated techniques to enhance functionality, user experience, and ultimately, conversion rates. Here are some advanced customization tips:
- Dynamic content personalization:
- Utilize user data and browsing history to dynamically display products or content that aligns with individual user preferences.
- Implement machine learning algorithms to predict and show products users are likely to be interested in based on their past behavior.
- Progressive loading and infinite scroll:
- Instead of traditional pagination, implement infinite scrolling where additional products load as the user scrolls down. This can lead to increased engagement by keeping users on the page longer.
- Use lazy loading for images and content, which only loads these elements as they come into the browser’s viewport, improving page load times.
- Enhanced filter and sorting options:
- Provide multiple, easy-to-use filters that allow users to narrow down their choices by various attributes such as price, brand, rating, and more.
- Implement AJAX (Asynchronous JavaScript and XML) to refresh the product listings instantly when filters are applied, without reloading the entire page.
- Aesthetics and layout enhancements:
- Employ a grid or list view options for product displays, allowing users to choose their preferred viewing mode.
- Optimize visual elements like colors, fonts, and spacing to ensure the category pages are aesthetically pleasing and align with your brand identity.
- SEO and content optimization:
- Each category page should have unique, keyword-rich meta titles and descriptions to improve SEO.
- Integrate schema markup to help search engines better understand the content of your pages, potentially boosting visibility in search results.
- Interactive elements:
- Add interactive elements like sliders, hover effects, or quick view modals that allow users to see more product details without leaving the category page.
- Incorporate video content or 360-degree product views to enhance the user experience and provide more comprehensive product information.
- Analytics and user feedback:
- Regularly analyze user interaction data on category pages to identify pain points and opportunities for further customization.
- Set up heatmaps to see where users click most frequently and adjust your page layout and content placement based on these insights.
- Mobile optimization:
- Ensure that category pages are fully optimized for mobile devices, considering different screen sizes and touch interfaces.
- Prioritize mobile-first design, given the increasing prevalence of mobile e-commerce shopping.
- Localization and internationalization:
- Customize category pages based on geographical data to cater to local market preferences, seasonal trends, and languages.
- Consider local currencies, payment methods, and shipping options to make the shopping experience as seamless as possible for international customers.
- Cross-selling and upselling:
- Integrate smart recommendations for related products on category pages to increase the average order value.
- Display bundled offers or products that complement each other to encourage additional purchases.
Conclusion
Customizing your WooCommerce category page is not just about making your site look good—it’s about creating a seamless and engaging shopping experience that drives conversions and builds your brand. We hope that our guide answered your question on how to customize WooCommerce category page effectively. With the right tools and a strategic approach, you can significantly enhance the effectiveness of your online store. Continuously test and tweak your designs to keep up with evolving customer preferences and technological advancements, ensuring your WooCommerce store remains competitive and appealing. Create your online store in minutes with 10Web AI Ecommerce Website Builder.
Looking to sell online?
Create your online store in minutes


![]()