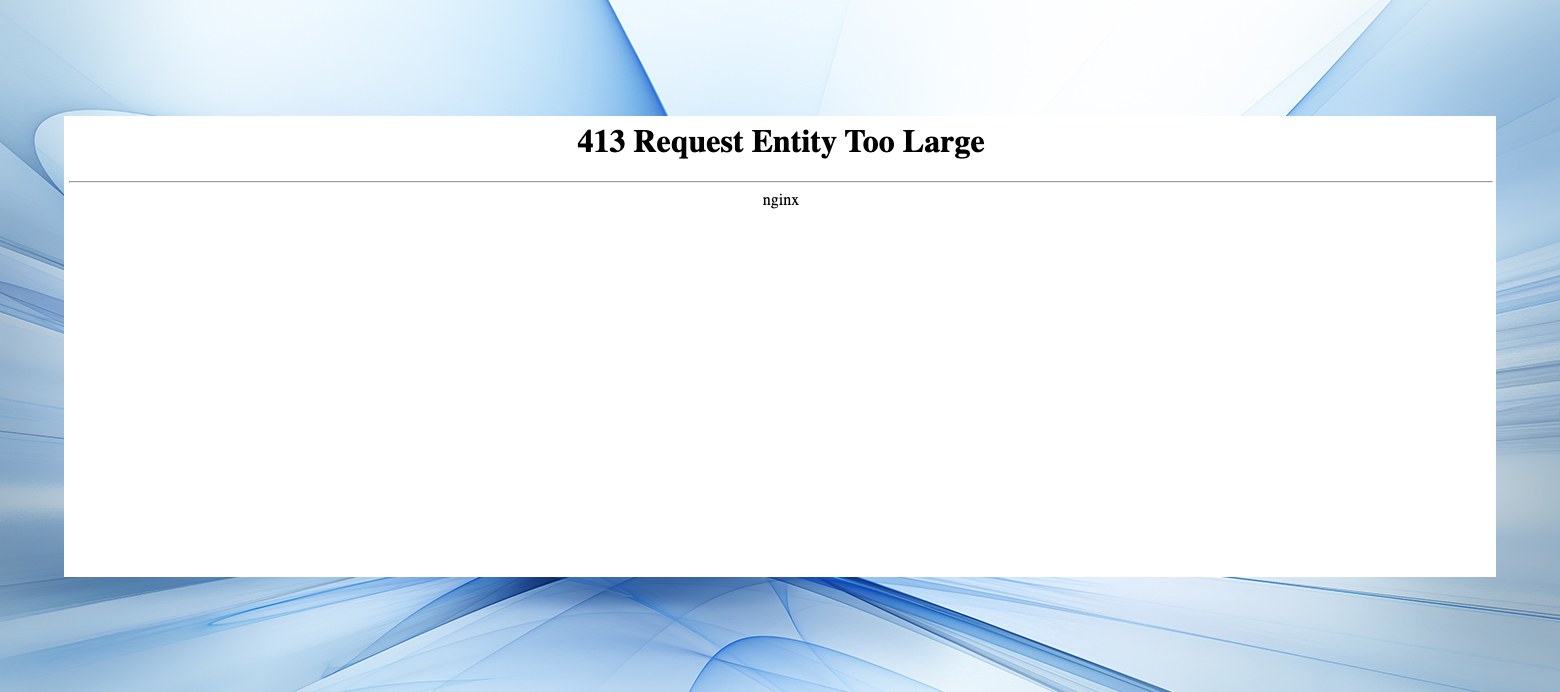
The “413 Request Entity Too Large” error in WordPress is like hitting a roadblock when you’re trying to upload content to your site. It signals that the file you’re trying to upload is, well, too large for the server to handle. But don’t worry, you’re not at a dead end. With a few tweaks to your server’s settings, you can clear the path and continue uploading your content without a hitch.
Say goodbye to website errors
Achieve peace of mind with 99.99% uptime on 10Web Managed
WordPress Hosting, powered by Google Cloud.
Understanding the “413 Request Entity Too Large” error
The “413 Request Entity Too Large” error, which you might stumble upon while navigating the web or uploading content, essentially tells you that the server is putting a cap on the size of the file you’re trying to upload. It’s a protective measure to prevent the server from being overwhelmed by too large a request.
But let’s dive a bit deeper and dissect what each part of this error message signifies:
413: This number places the error within the 4xx family of HTTP status codes, which generally indicates an issue arising from the client’s end that the server is unable to process.
Request Entity: Here, “entity” refers to the data payload the client (you or your web application) is attempting to send to the server.
Too Large: The server deems this data payload larger than what it’s configured to accept or process.
Interestingly, this error has undergone a name change for greater specificity and clarity. It’s now officially called the “413 Payload Too Large” error. However, you’ll likely encounter the traditional “413 Request Entity Too Large” label more frequently in practice.
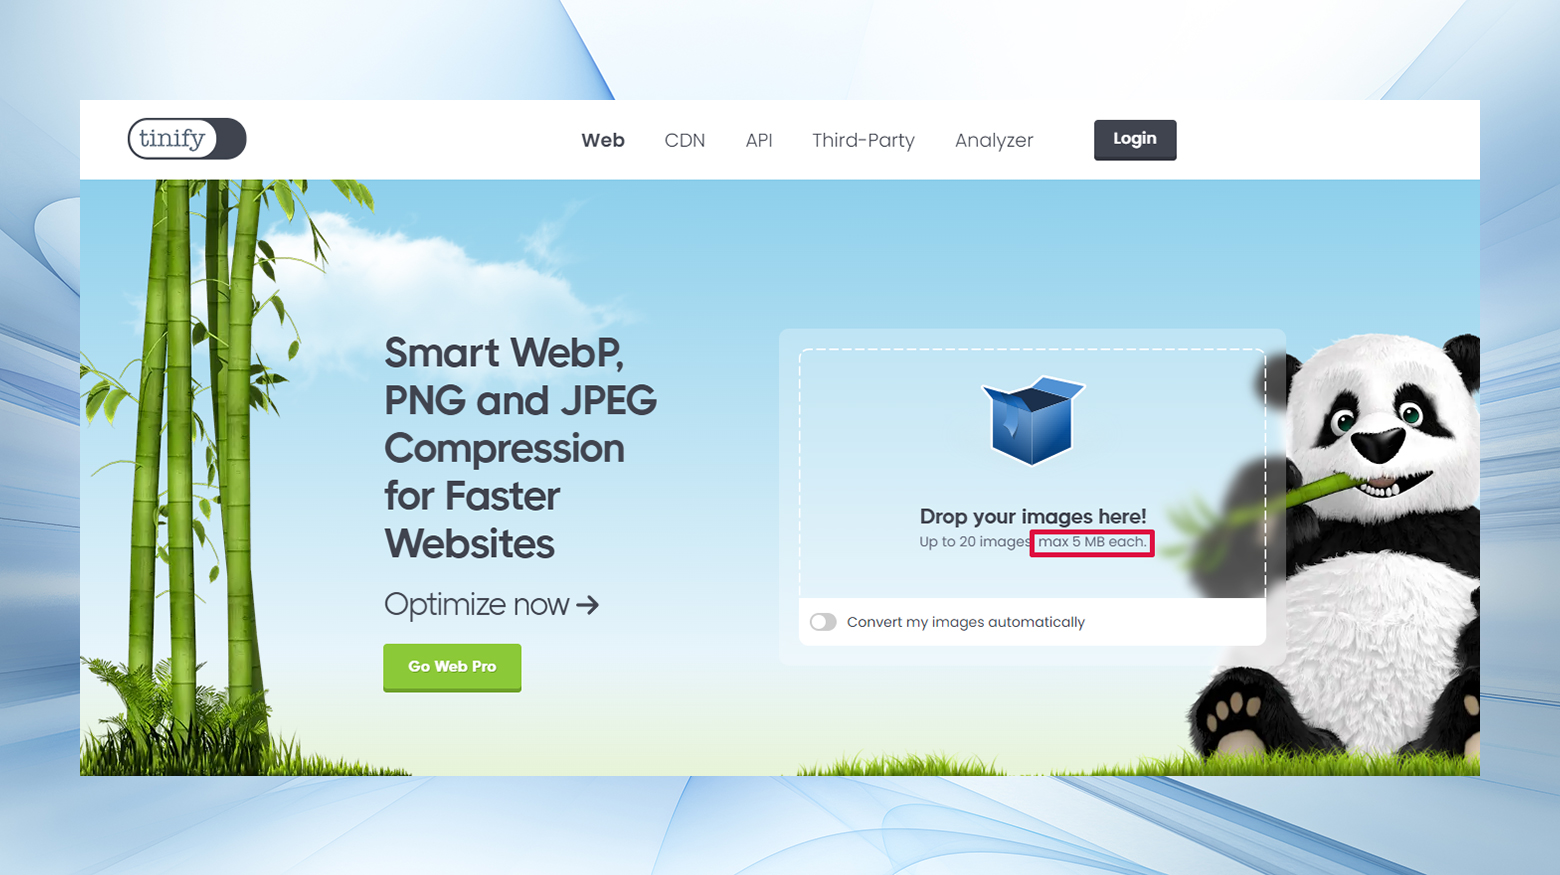
The root cause of this error is pretty straightforward. Servers have predefined limits on the size of the data they accept in a single request. This limit is a safeguard to prevent overload and ensure the server can serve all requests efficiently. Imagine trying to upload a hefty file to a service like TinyPNG, which explicitly states a maximum upload size limit.
This is a common practice across many platforms to manage server resources effectively.
However, encountering the “413 Request Entity Too Large” error suggests that the server’s validation mechanisms to block oversized uploads might not be as foolproof as expected. It indicates a discrepancy between the client’s actions and the server’s capacity or rules for handling requests, necessitating adjustments to accommodate larger payloads without triggering errors.
Gearing up to tackle the 413 Request Entity Too Large error
Before you dive in, you’ll need a few tools and access rights, including:
- Administrator access to your server
- An SFTP client to connect to your server
- Basic familiarity with using SFTP
- A text editor for tweaking configuration files
- A recent backup of your site, just in case things go sideways
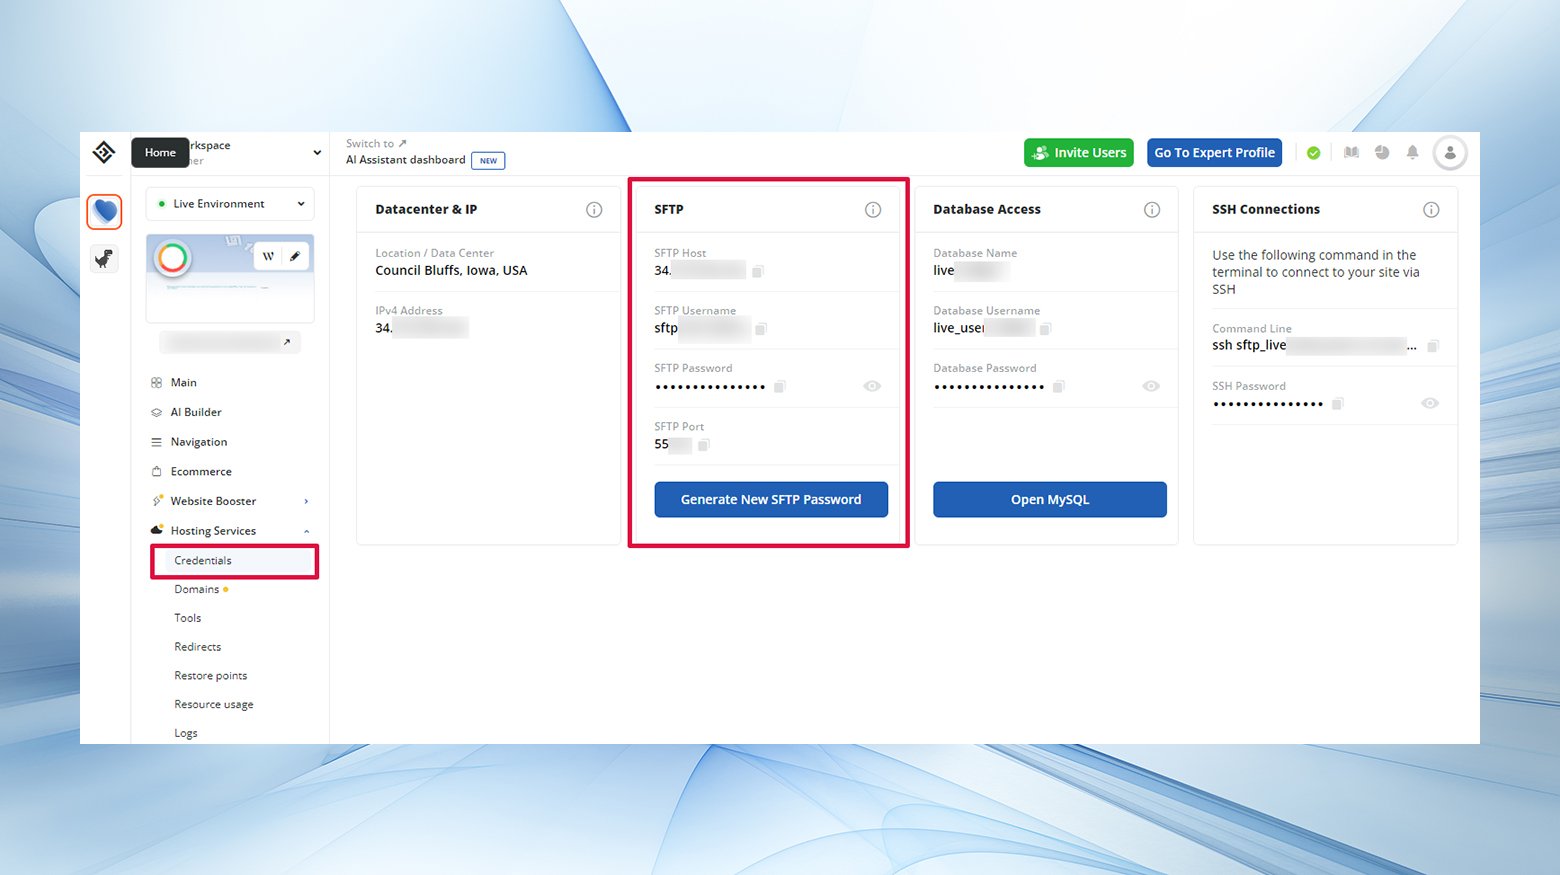
10Web users can access their SFTP user credentials from the dashboard’s Hosting Services > Credentials section.
Preliminary steps before the fix
You can potentially avoid the need for further troubleshooting by trying these initial steps:
- Upload via SFTP: Directly uploading the file to your server via SFTP can sometimes bypass the error since you’re working with the server and avoiding the frontend.
- Check Permissions: Make sure the user trying to upload the file has the correct permissions. Restricted permissions can sometimes manifest as this error.
- Start fresh with a new FTP user: Try removing your FTP user and creating a new one. This rules out any possible issues with the current user’s permissions.
Say goodbye to website errors
Achieve peace of mind with 99.99% uptime on 10Web Managed
WordPress Hosting, powered by Google Cloud.
Resolving the “413 Request Entity Too Large” error
Tackling the “413 Request Entity Too Large Error” on your WordPress website can feel like a daunting technical challenge, especially if you’re not familiar with the backend of websites. However, fear not! This error typically occurs when the file you’re trying to upload exceeds the maximum upload size defined by your WordPress hosting environment. Fortunately, there are several ways to resolve this issue.
Here’s how to lift the server’s file size restriction and get back to business:
1. Edit Your WordPress functions.php file
The `functions.php` file in WordPress is a powerful tool for customizing your site’s functionality. By adding a few lines of code, you can increase the maximum file upload size, thus resolving the “413 Request Entity Too Large Error.” Here’s how to do it:
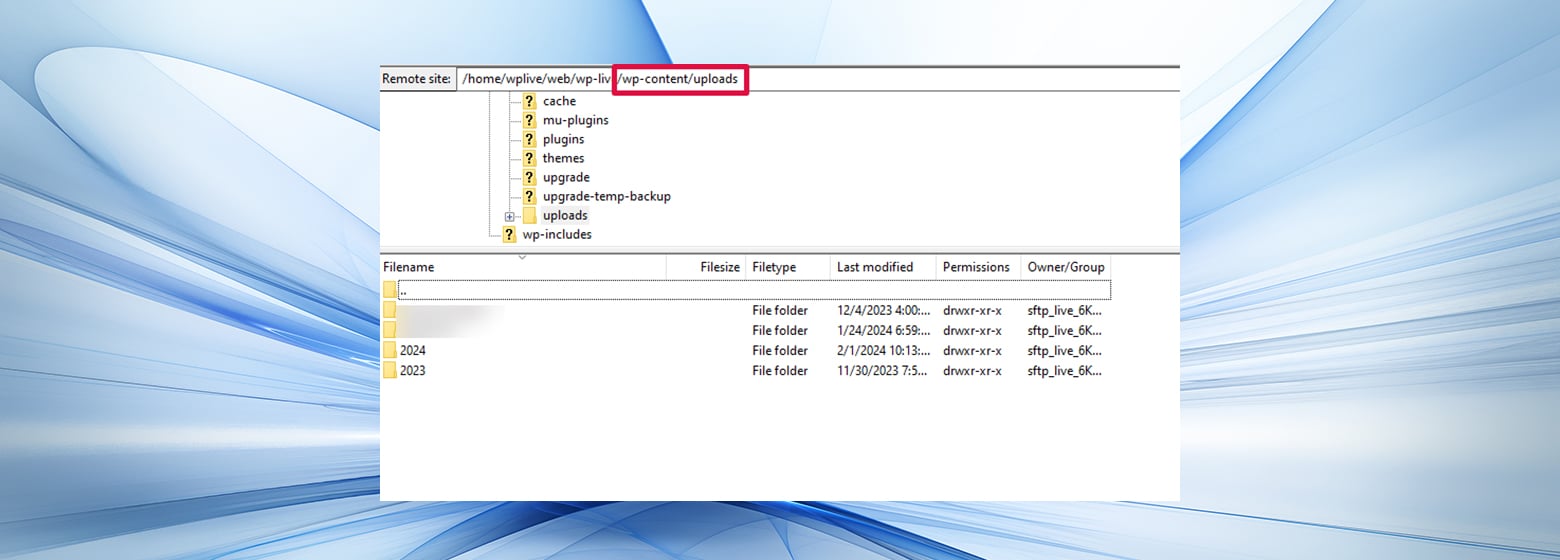
- Connect to your website using SFTP (Secure File Transfer Protocol). You’ll find your SFTP credentials in your hosting account’s control panel.
- Navigate to the root directory of your WordPress installation. This is often named `www`, `public_html`, or something similar.
- Locate the `functions.php` file within your theme’s folder. If you’re using a child theme (which is recommended for customizations like this), edit the child theme’s `functions.php` file.
- Add the following code at the end of the file:
@ini_set( 'upload_max_size' , '64M' );

@ini_set( 'post_max_size', '64M');

@ini_set( 'max_execution_time', '300' );
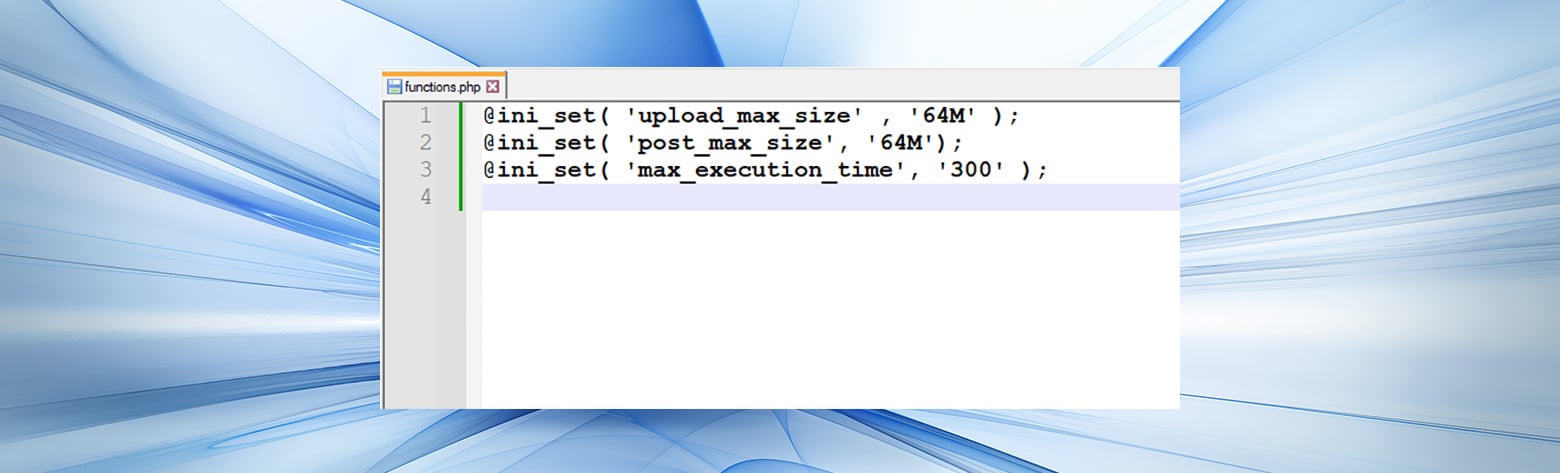
This code attempts to increase the maximum upload size and execution time for your site. If you need a larger maximum upload size, you can change the value in the @ini_set( ‘upload_max_size’ , ’64M’ ); line to whatever you need.
Remember, the effectiveness of this method depends on your hosting provider’s configuration. Some hosts may restrict the ability to override these values from the functions.php file.
10Web customers can adjust the PHP configuration settings conveniently in the dashboard’s Hosting Services > Tools > Advanced settings section. Here, you can edit the values for max upload and post size, execution time, and memory limit.
The next two methods involve editing server configuration files to increase the max upload size. Due to the technical nature of modifying server configuration files, it’s crucial to have a backup of your configurations before making any changes. If you’re uncomfortable performing the next actions yourself, consider reaching out to your hosting provider’s support team for assistance.
2. Modify your WordPress .htaccess file
10Web uses Nginx servers for the best performance, and so do not rely on an .htaccess file. If you’re a 10Web customer, you won’t find this configuration file in your website’s files. In that case, you can skip ahead to the next section. For those using Apache web servers, the .htaccess file is another avenue to adjust the maximum file upload size.
This method directly influences server settings and can be effective if the `functions.php` method doesn’t yield results:
- Again, connect to your site via SFTP and navigate to the root directory.
- Look for the `.htaccess` file. If you can’t find it, make sure your SFTP client is set to show hidden files, as files starting with a dot (.) are hidden by default on Unix-like systems.
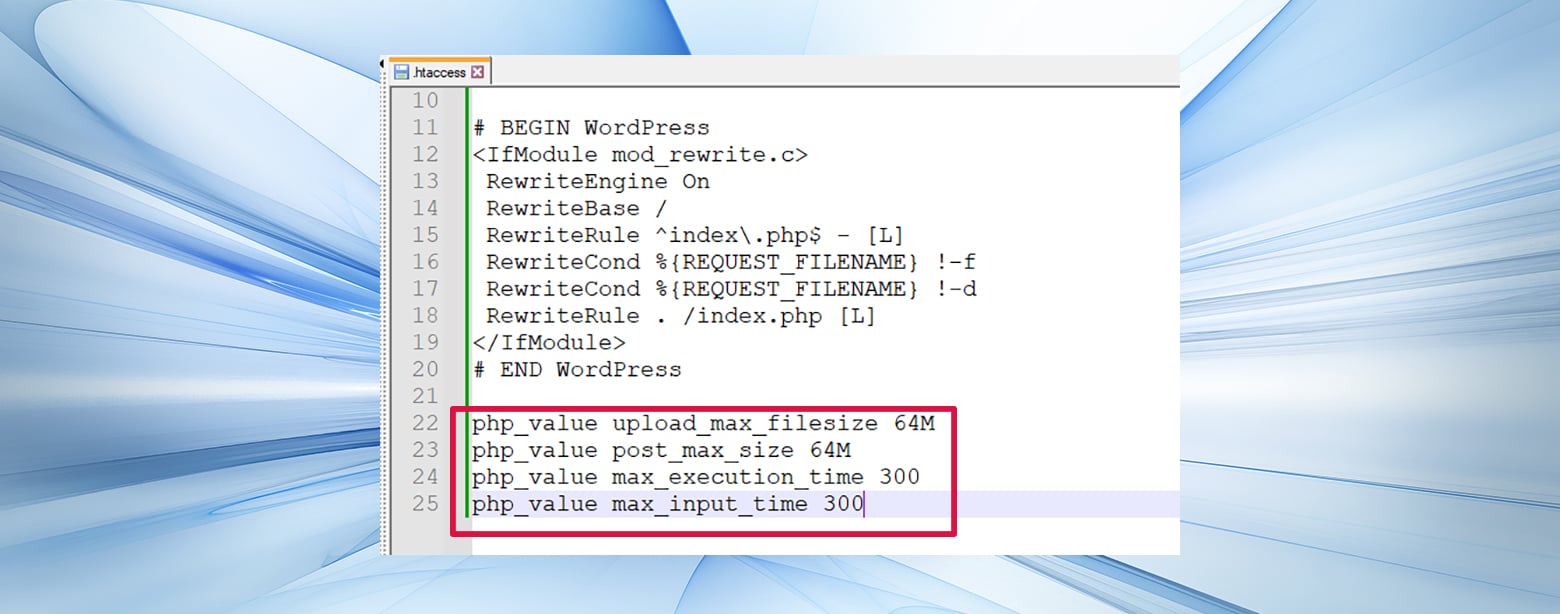
- Edit the `.htaccess` file and add the following lines at the end of the file:
php_value upload_max_filesize 64M

php_value post_max_size 64M

php_value max_execution_time 300

php_value max_input_time 300
This approach directly sets the desired PHP values through the Apache configuration. You can change the max upload size to cover larger files if necessary.
As with the previous method, some hosting environments may not allow these overrides, so it’s essential to consult with your hosting provider if you encounter issues.
3. Change your Nginx server configuration
For WordPress sites running on Nginx servers (like those hosted by 10Web), you’ll need to adjust the server configuration files directly, a task usually reserved for those with server access and the necessary permissions:
- Access your server’s configuration. For Nginx, this typically involves accessing the nginx.conf file. You’ll likely need SSH access to your server, which is provided by your hosting company.
- Locate the nginx.conf file, often found in `/etc/nginx/nginx.conf` or a similar directory, depending on your server’s setup.
- You’ll want to add or modify the client_max_body_size value to increase the maximum upload size. For example:
client_max_body_size 64M;
This line allows files up to 64MB to be uploaded. Adjust the value according to your needs.
After making changes, save the file and restart Nginx for the changes to take effect. This usually requires executing a command like `sudo systemctl restart nginx` or `sudo service nginx restart` from the command line.
Wrapping up
Resolving the “413 Request Entity Too Large Error” in WordPress is achievable through a step-by-step approach. Start with the least invasive methods and move towards more direct server configuration changes if necessary. Each method targets increasing the maximum file upload size from different angles, whether through WordPress itself or server configuration files.
Remember, when dealing with server settings or code, always back up your files to prevent data loss. If you find yourself stuck or if the problem persists, contacting your hosting provider for support is a wise next step. They can offer specific advice tailored to their server environment and help you resolve the issue efficiently.
Say goodbye to website errors
Achieve peace of mind with 99.99% uptime on 10Web Managed
WordPress Hosting, powered by Google Cloud.
Say goodbye to website errors
Fix all the website errors in one click
Migrate your website to the world's best Managed WordPress Hosting.