WooCommerce Blocks streamline the process of setting up and customizing your WordPress eCommerce site. This blog guides you on how to use WooCommerce blocks, covering everything from installing the essential plugin to utilizing advanced blocks for product display and customization. By integrating these tools, you can enhance your online store’s functionality and user experience, ensuring a dynamic and tailored shopping environment for your customers.
FAQ
How do I add a block in WooCommerce?
To add a block in WooCommerce, navigate to your page or post in the WordPress editor, click on the + button to add a new block, and search for WooCommerce to find all the specific blocks related to WooCommerce, like products, categories, or recent products.
How do I use content blocks in WordPress?
In WordPress, use content blocks by clicking on the “+” button in the Gutenberg editor. You can search for specific blocks such as paragraphs, images, or videos, and add them to your page or post. Customize each block as needed using the options in the right sidebar.
How do I use WooCommerce blocks in Elementor?
To use WooCommerce blocks in Elementor, first ensure both WooCommerce and Elementor are installed and activated. Open Elementor by editing a page, then drag and drop the WooCommerce widget from the Elementor panel into your layout. Customize the block settings within Elementor to tailor the appearance and functionality.
Getting started with WooCommerce blocks
Before you begin using WooCommerce Blocks, it’s important to understand what they are and how to correctly install the plugin. These blocks are integral for customizing your WordPress eCommerce site, providing a seamless editing experience within the Gutenberg editor.
Introduction to WooCommerce Blocks
WooCommerce Blocks are the building blocks for your WooCommerce online store within the WordPress environment. They allow you to add, organize, and display products or product categories on your pages or posts with ease. Here’s how you get started:
- Make sure you have WooCommerce installed on your WordPress site; it’s a prerequisite for WooCommerce Blocks.
- Navigate to the WordPress dashboard where you manage your site’s plugins and content.
How to use WooCommerce blocks
WooCommerce blocks allow you to showcase your products in an organized and attractive way. Here’s how to put them to work on your shop page.
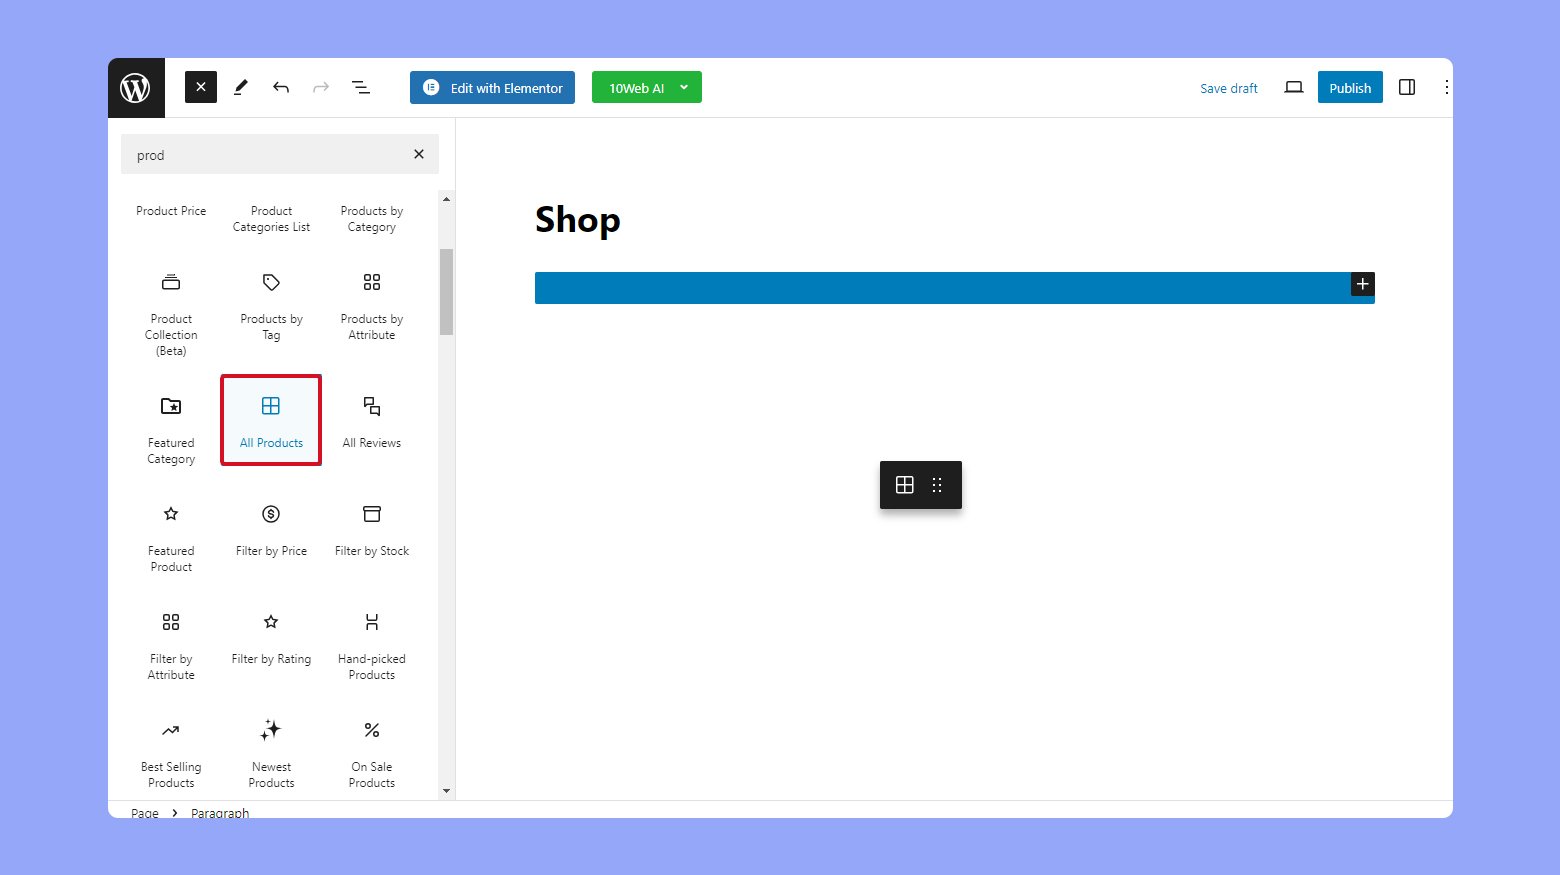
When you’re looking to enhance your shop page, managing WooCommerce blocks effectively is key. Start by navigating to your Pages and selecting the Shop page to edit.
- Click on the + button to add a new block.
- Type products into the search bar to find various WooCommerce blocks.
- Choose a block that suits your shop’s style and needs.
- Drag and drop the selected block into your shop page layout.

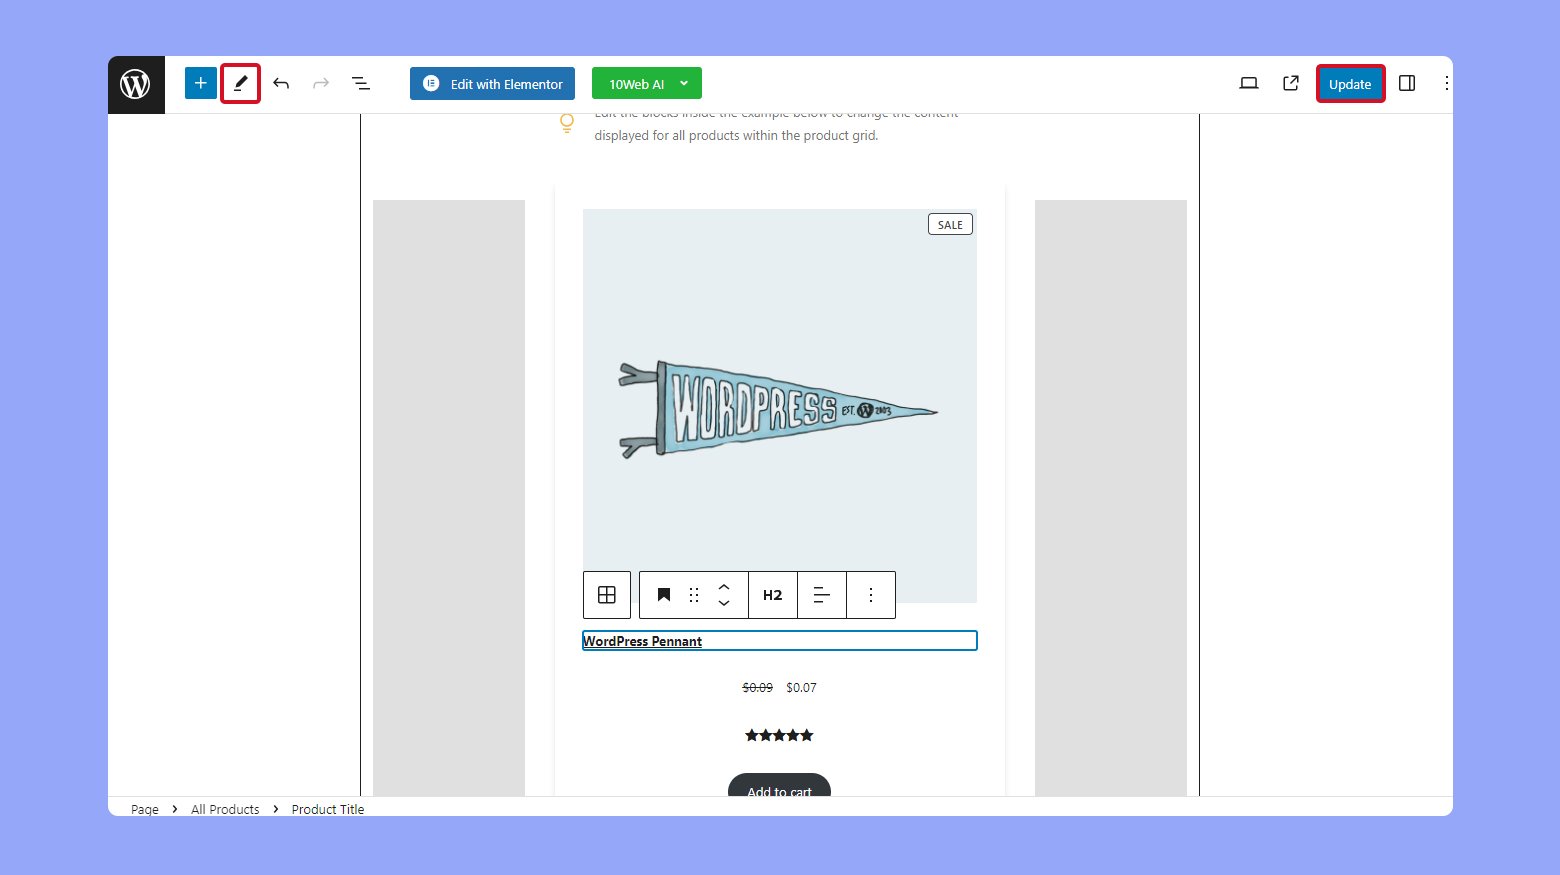
Customizing the product grid block
To adjust the appearance of your product listings, the Product Grid Block offers customization:
- Click on the All Products block on your page.
- Hit the Edit icon to open the customization options.
- Here, you can modify elements like product image, title, rating, and price according to your preferences.
- To save, click Update.
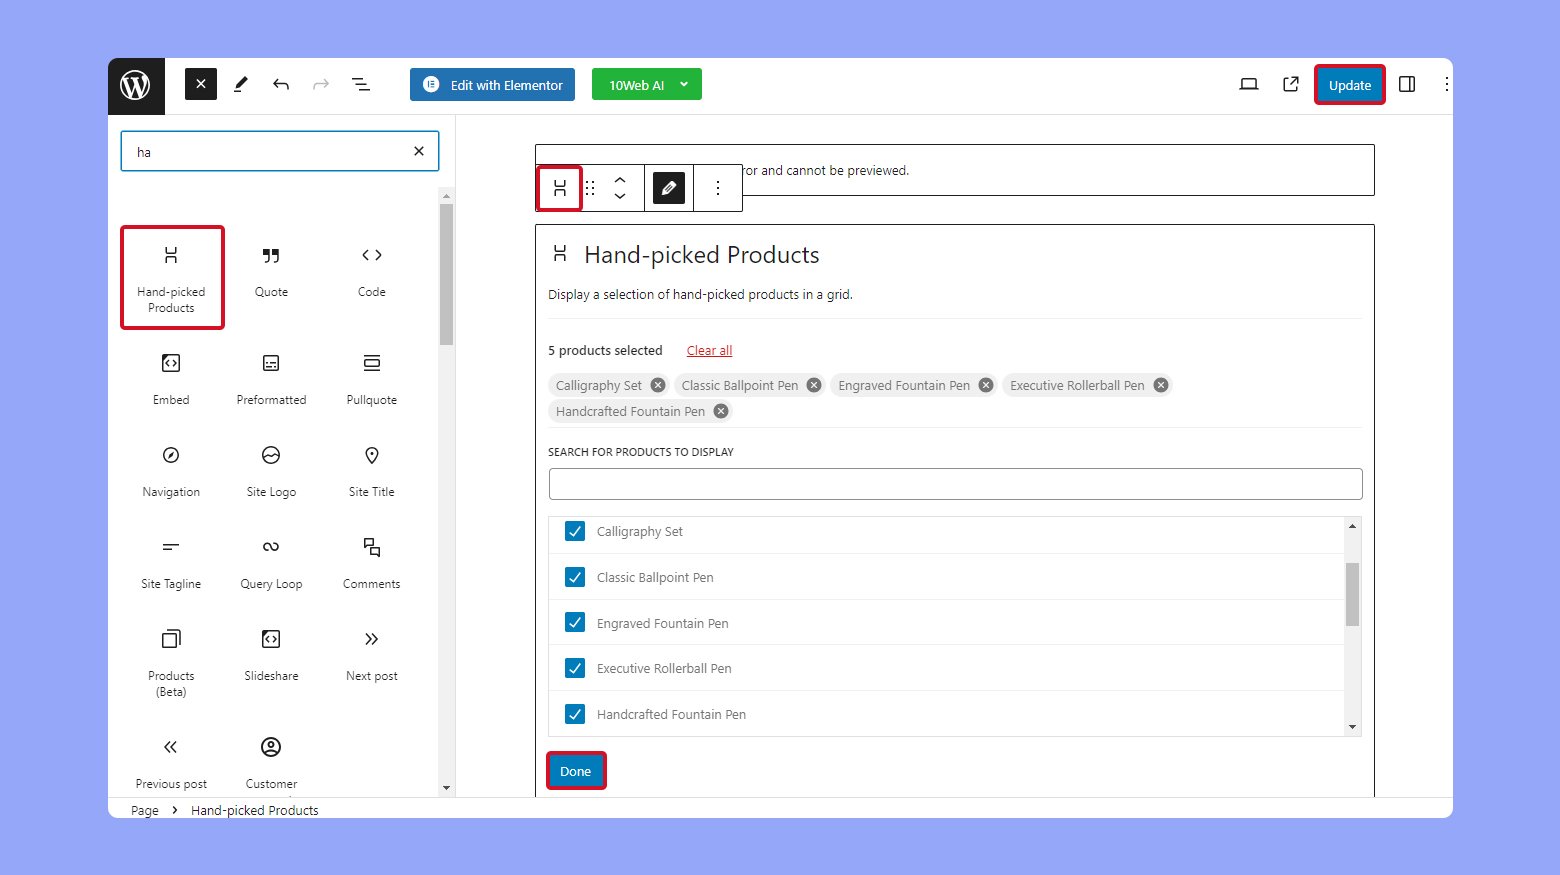
Using the hand-picked products block
For a curated touch, the Hand-Picked Products Block showcases specific items of your choice:
- Add the block by selecting it from the block inserter.
- In the block’s settings, search and select the products you wish to feature.
- Adjust display settings like the number of columns and the layout.
- Update your page to apply the changes.
Displaying products by category
Organize your offerings with the Products by Category Block to make shopping more intuitive: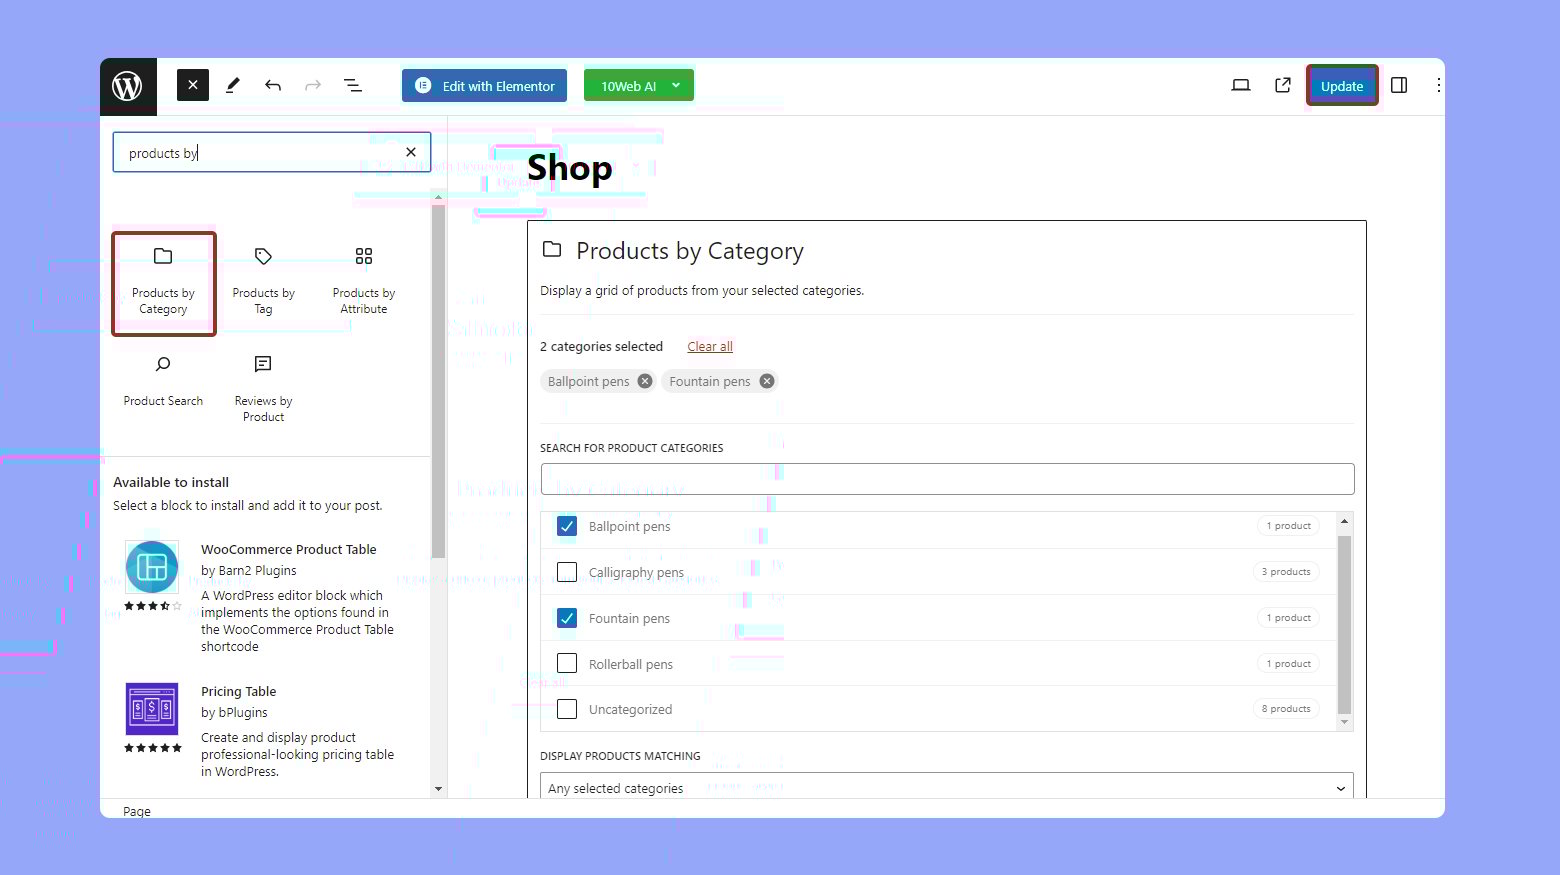
- Add the block to your shop page.
- Use the block settings to select the categories you want to display.
- Configure layout options, such as column count and number of products.
- Click Update to save and display your category-specific product grid.
Enhancing product discovery
Making your WooCommerce store’s products easily discoverable can significantly improve the shopping experience. Let’s look at how to refine product visibility with filters and search functionality.
Adding product filters to your store
- Navigate to your WordPress dashboard and click on Pages.
- Select the Add New Page or edit an existing page where you want the filters to appear.
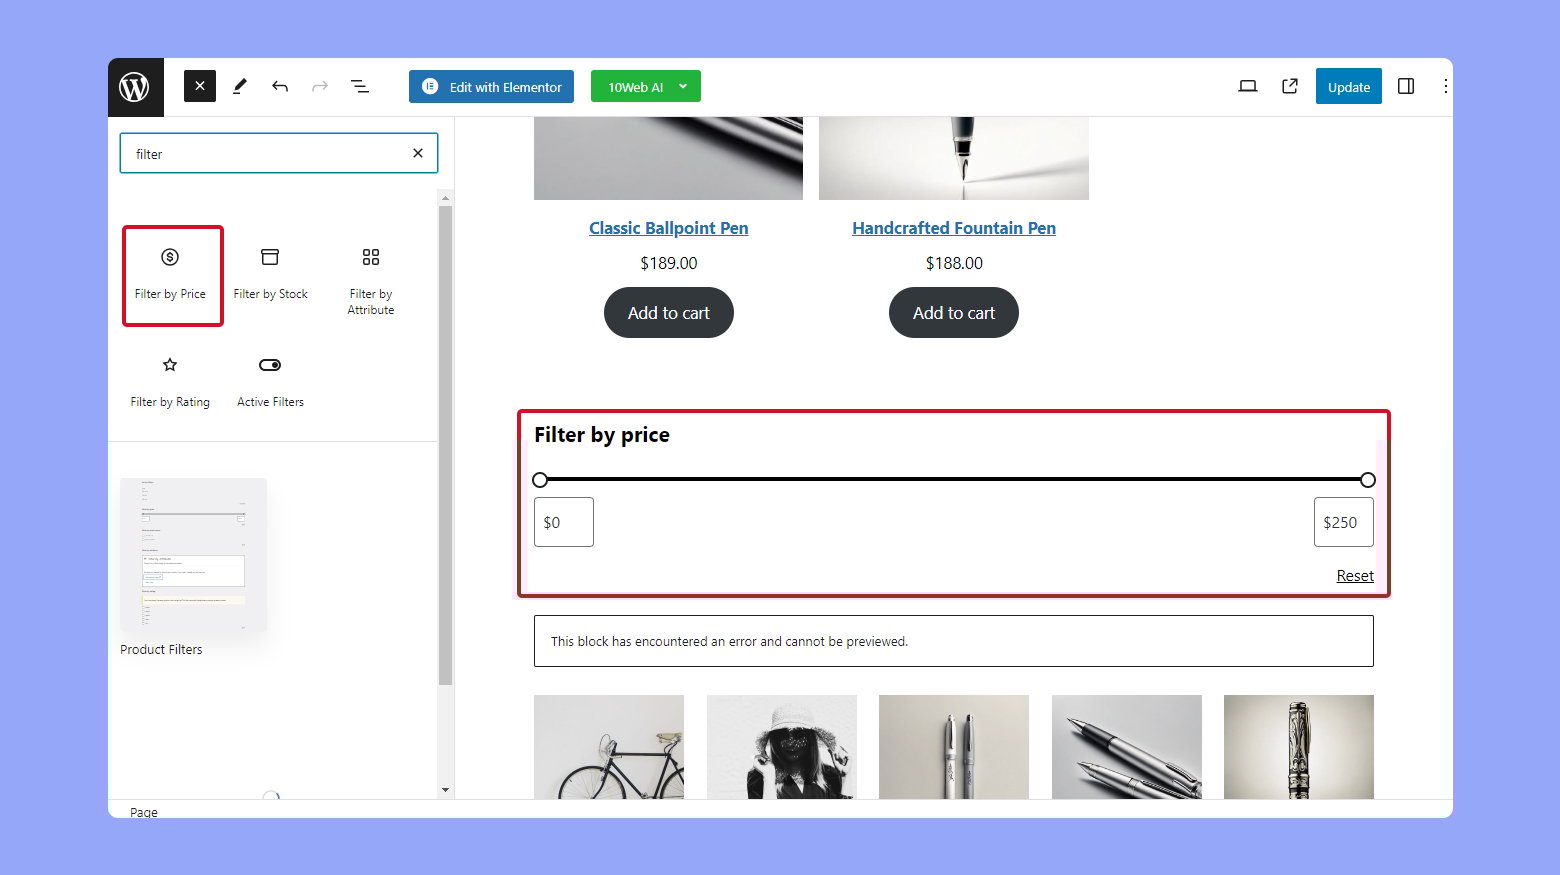
- Click the + button to add a block and search for the Filter Products by Attribute or Filter Products by Price blocks.
- Choose a filter type, such as filter by price or filter by attribute, to help customers find products within a specific price range or with certain attributes like size or color.
- Configure the filter settings to match your inventory and publish or update the page to apply the filters to your store.
Utilizing the product search block

- Go to the page or post where you want to insert the product search.
- Click the + button and find the Product Search block under the WooCommerce section.
- Add the Product Search block to your page. This gives your customers a search bar for quick product searches.
- Adjust the settings of the Product Search block, such as placeholder text or whether to display product images in search results.
- Publish or update the page to enhance your site with efficient product searching capabilities.
By incorporating these blocks, you give your customers powerful tools to filter and search for products, leading to a more streamlined and satisfying shopping experience.
Maximizing sales and engagements
Utilizing WooCommerce blocks effectively on your online store can dramatically increase sales and customer engagement. By prominently featuring certain products, and highlighting sales and top-rated items, you create a dynamic and attractive shopping experience that encourages purchases.
Creating a featured product showcase
A Featured Product Block is a powerful tool for showcasing products that you want to bring special attention to. Here’s how you can set it up on your site: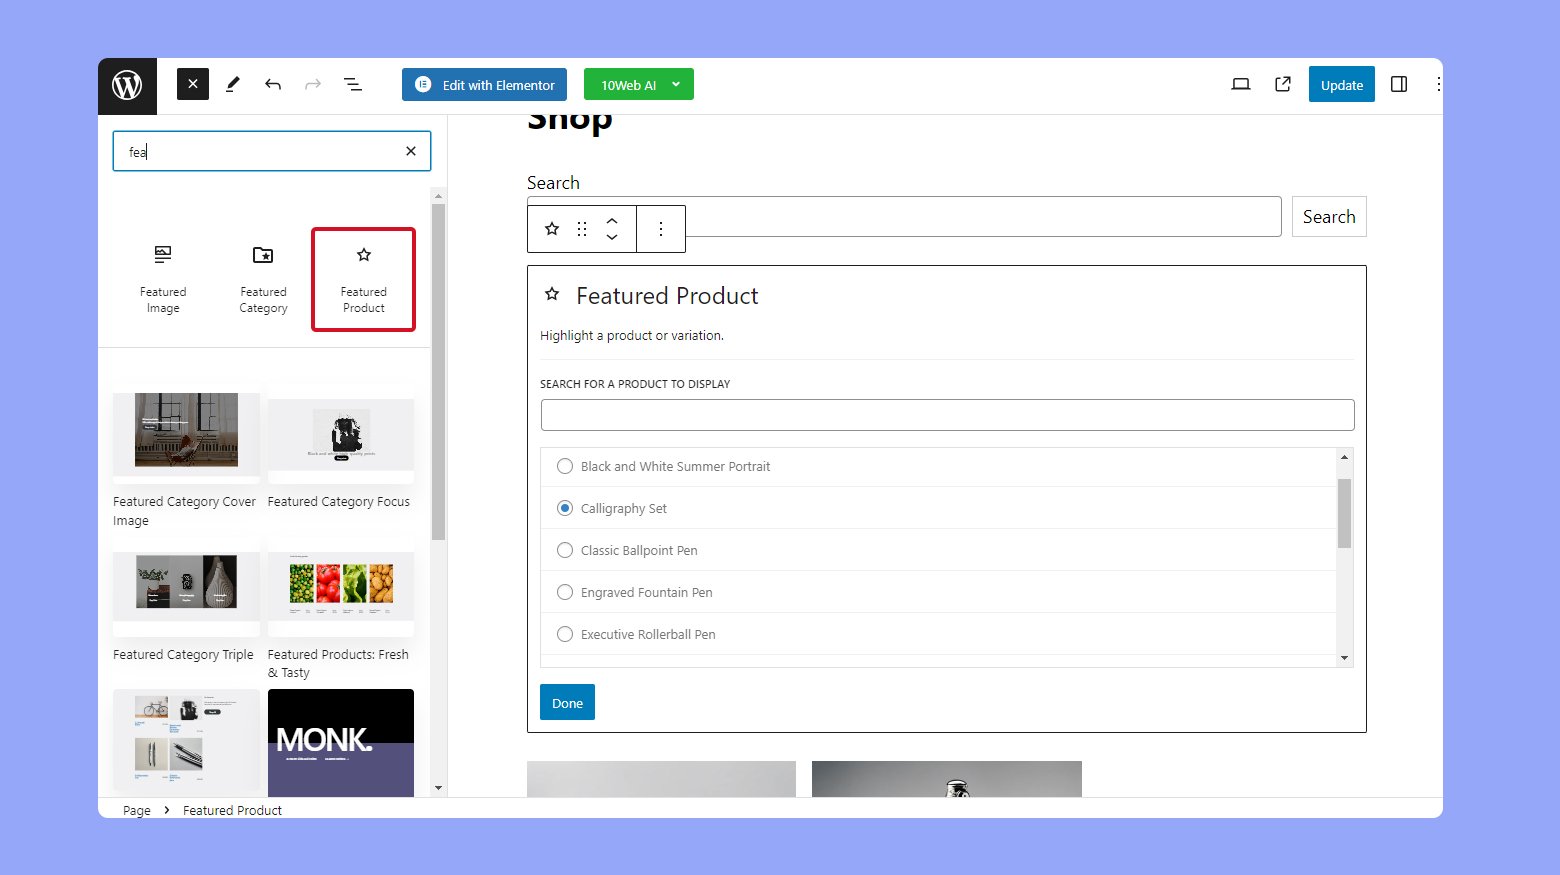
- Open the page where you want your featured product to appear.
- Click the + button to add a new block and select the Featured Product Block.
- Choose the product you want to feature from the dropdown list.
- Configure the block settings to display the price, product rating, and add-to-cart button as desired.
- Update the page to save your changes.
By following these steps, your featured product will stand out to customers, potentially increasing its sales.
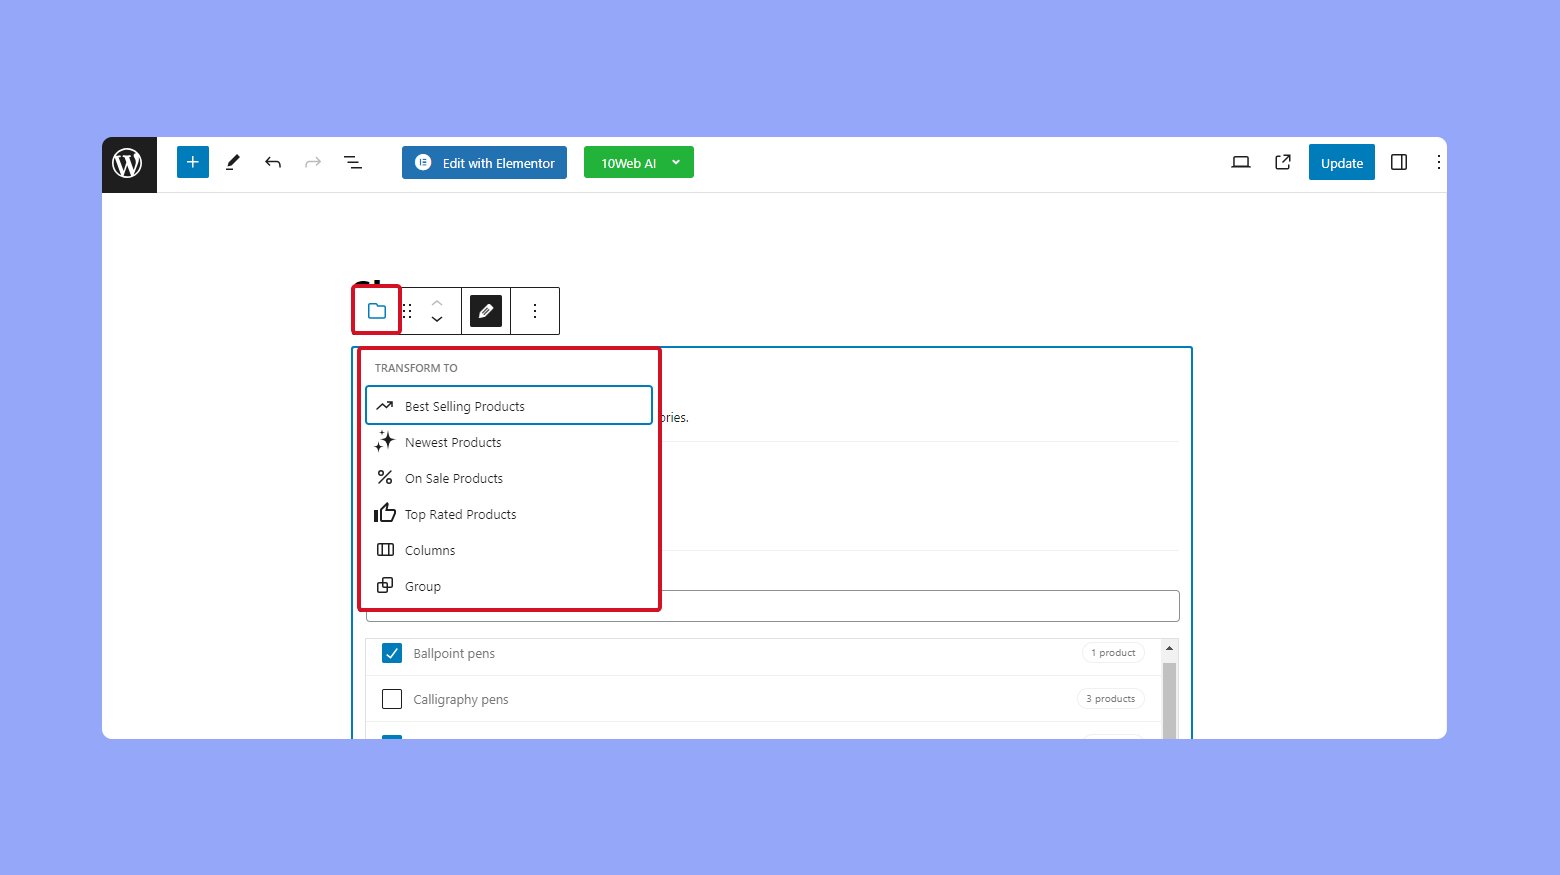
Highlighting on-sale and top rated products
To draw attention to on-sale and top-rated items, use the dedicated blocks designed for these purposes.
For on-sale products: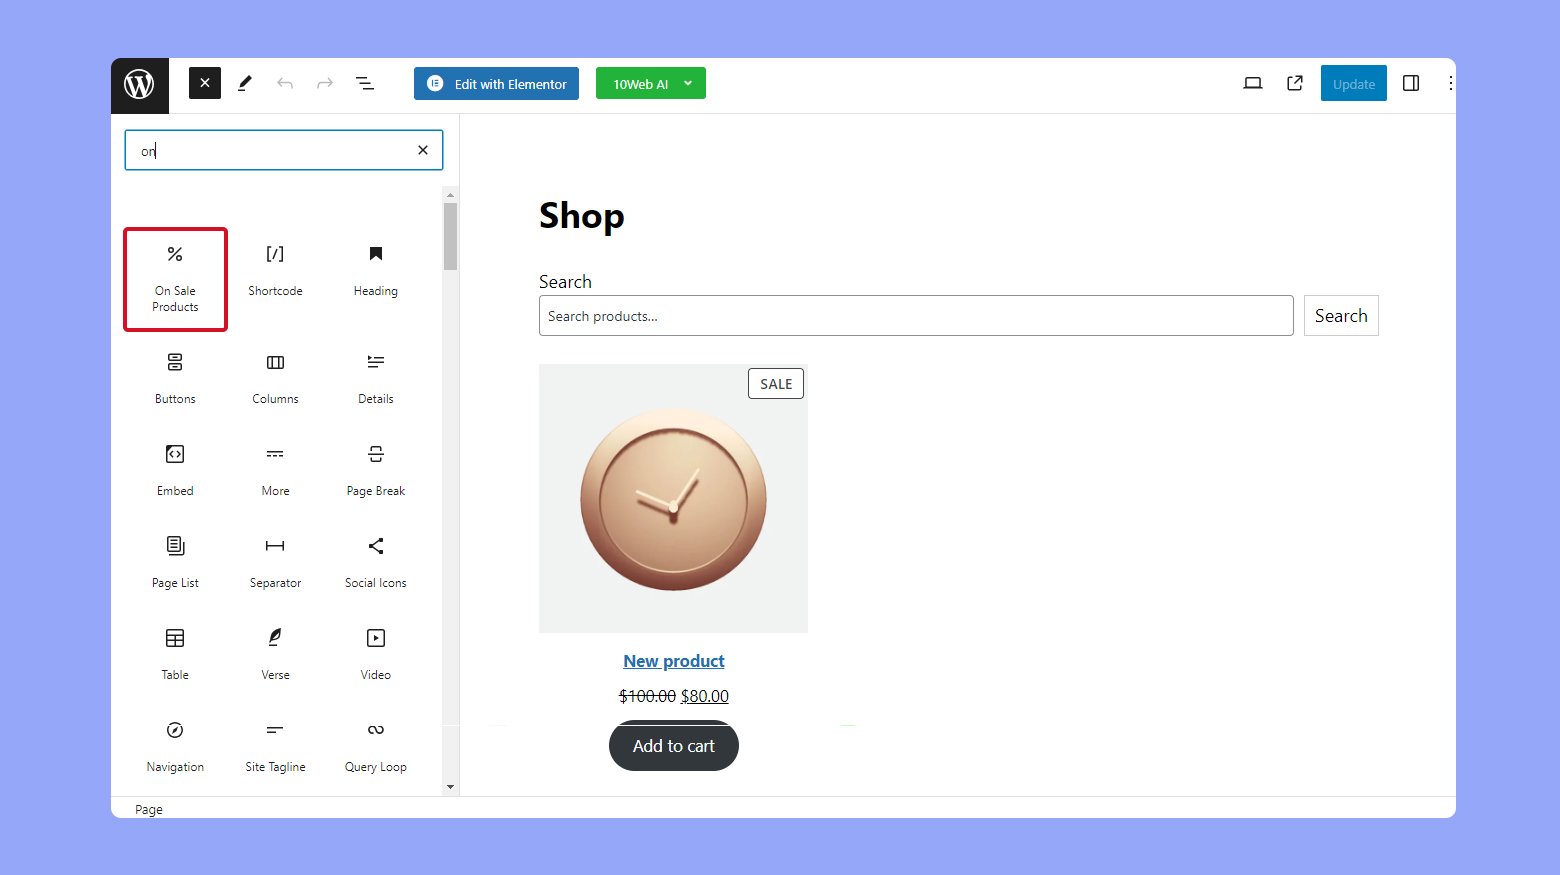
- Add the On Sale Products Block by clicking the + button.
- Choose how many products to display and in what order.
- Customize the appearance, such as the number of columns and whether to show or hide the sale badge.
- Save the page to apply the changes.
To showcase top rated products: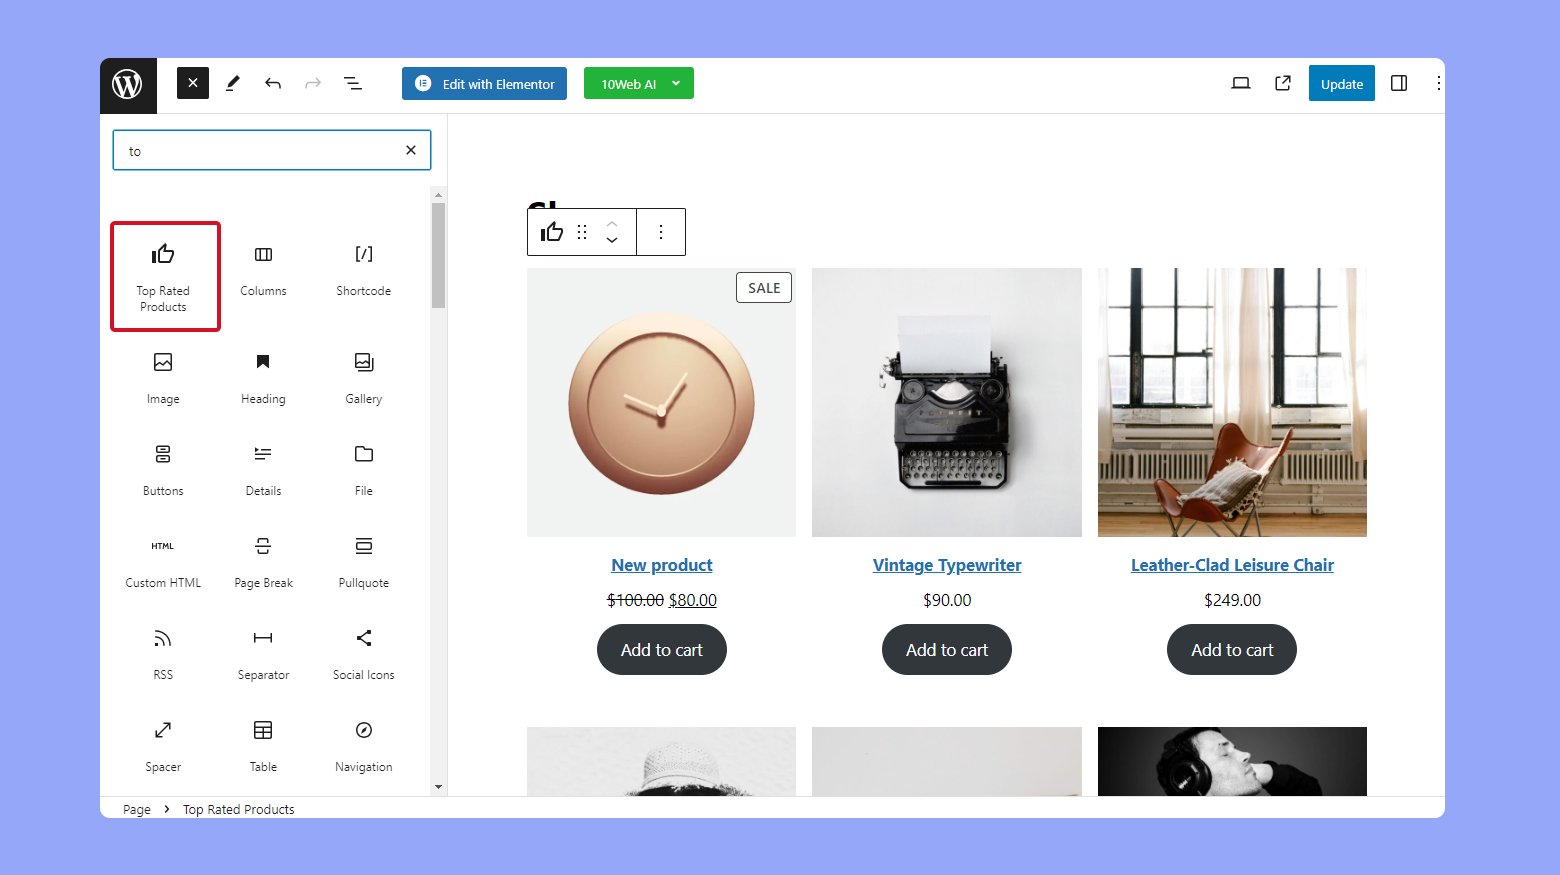
- Insert the Top Rated Products Block the same way you added the on-sale block.
- Decide on the number of products and sorting criteria.
- Adjust display options like columns and image sizes.
- Update the page to publish these insights.
Strategically placing these blocks can lead to increased sales and engagement by making it easier for customers to find the best deals and highest quality products in your store.
Gathering and displaying customer reviews
Customer reviews are crucial for your WooCommerce store as they build trust with potential buyers and provide social proof. Implementing and showcasing reviews can be efficiently managed using specialized WooCommerce blocks.
Integrating reviews by product and category
To begin incorporating reviews on your store’s pages, you need to decide whether to aggregate them by individual products or by categories.
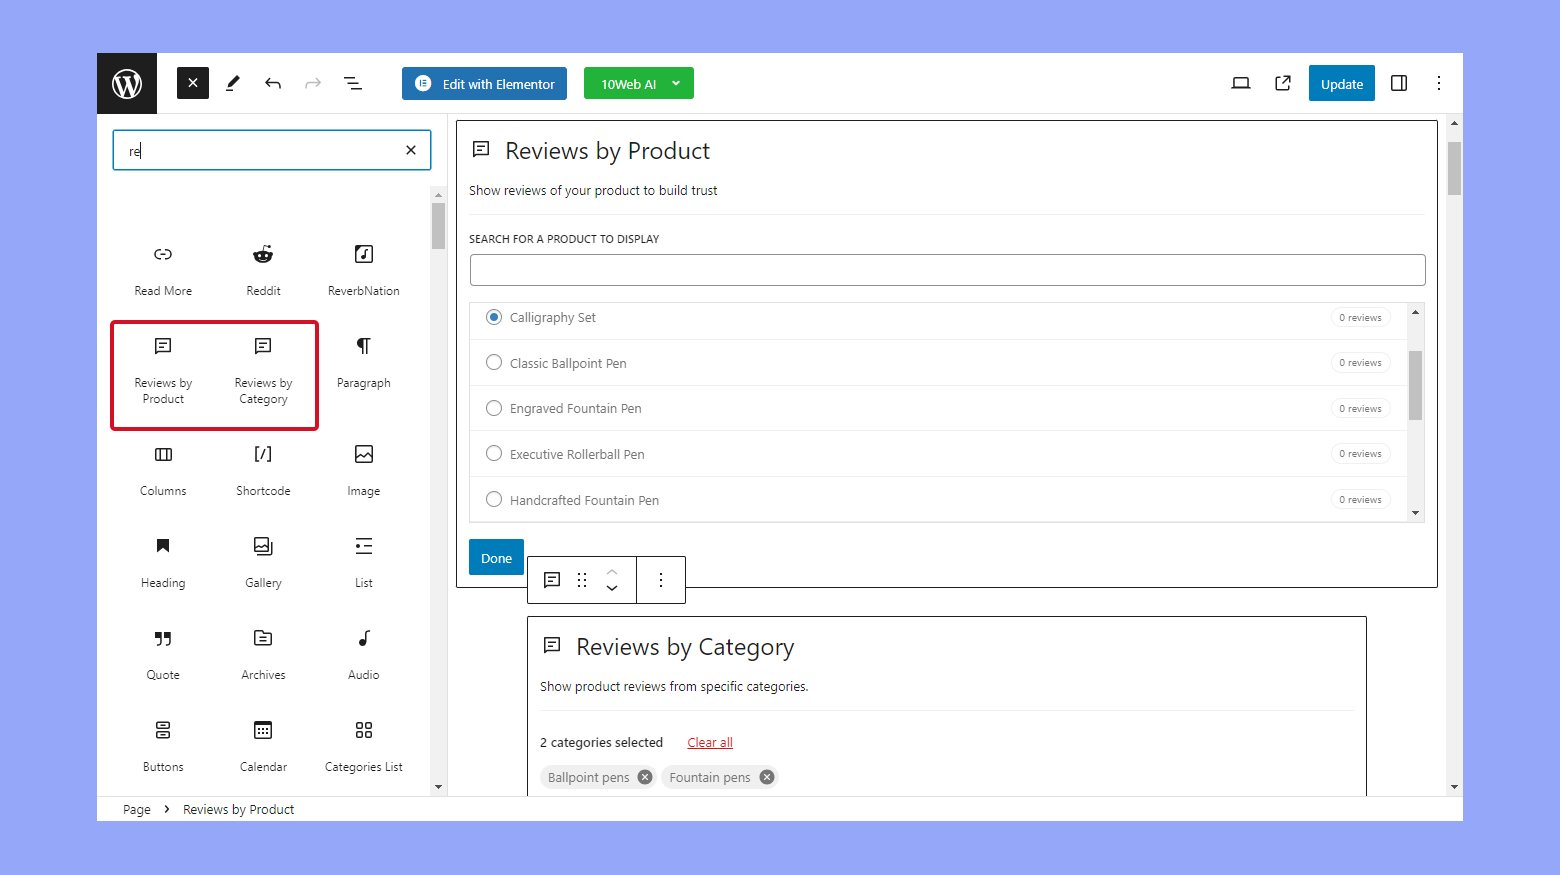
- If you choose reviews by product block, start by navigating to the post or page where you want the block to appear.
- Click on the + icon to add a new block and search for Reviews by Product.
- After inserting the block, use the block’s settings to filter the reviews to specific products.
Likewise, for the reviews by category block, use the following steps:
- Open the desired page and add a new block, then select Reviews by Category.
- In the block settings, determine which categories you’d like to display reviews for to ensure that feedback is relevant to the shopper’s interest.
Handling all reviews and building trust
Showcasing a list of all product reviews throughout your store is powerful and can significantly increase consumer confidence.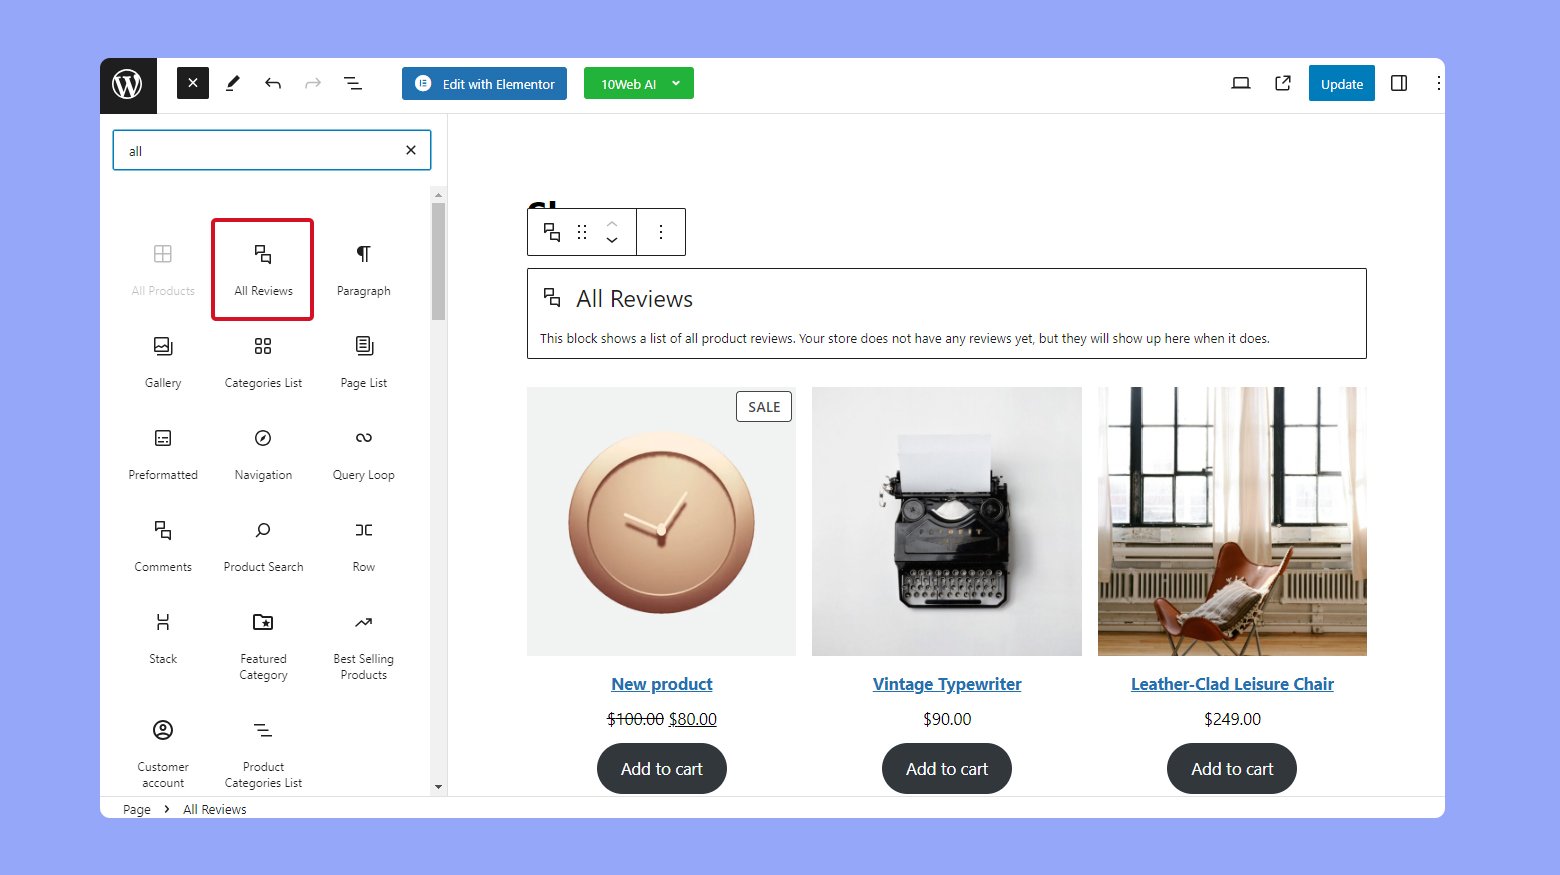
- To employ the all reviews block, edit a page or post where you would like all reviews to appear.
- Hit the + button to add this block and type All Reviews.
- You can then use the block’s settings to sort reviews, choose what content to display, or adjust image types and list configurations.
By using these blocks, you make it easier for shoppers to find relevant testimonials and leverage positive customer experiences to bolster your store’s credibility.
Streamlining the checkout experience
Making the checkout process as smooth as possible is essential for retaining customers in your online store. WooCommerce’s block-based checkout tools offer you a chance to enhance user experience by customizing the checkout flow to fit your customers’ needs.
First, let’s focus on integrating the Checkout Block into your page: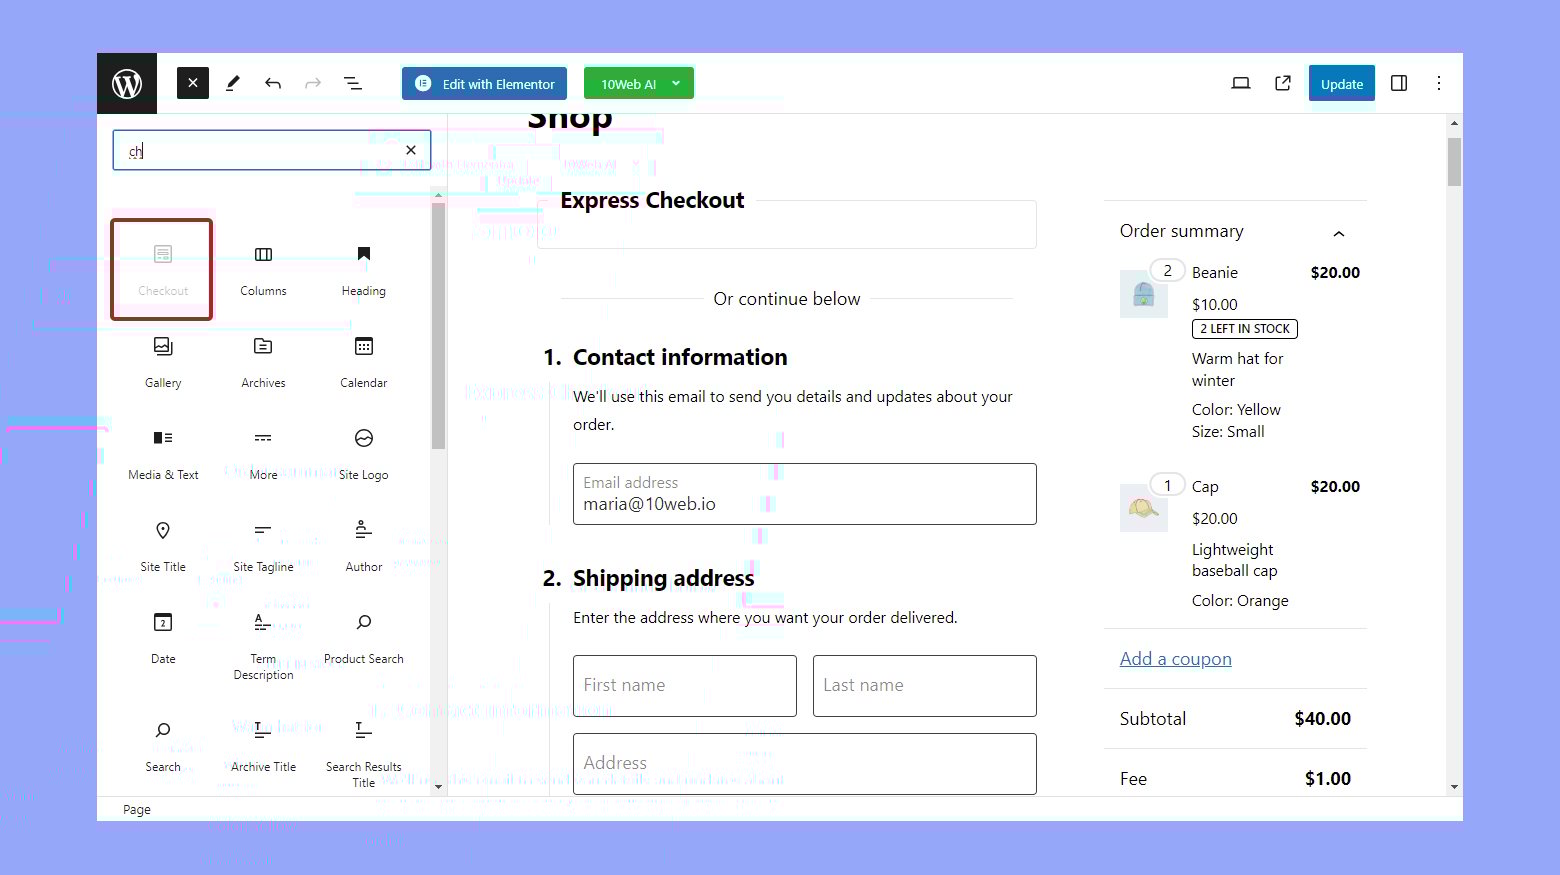
- Go to the page where you aim to edit the checkout experience.
- Open the block editor by clicking the + button at the top bar.
- Search for Checkout Block or find it in the WooCommerce blocks section.
- Insert the Checkout Block to see a preview on your Checkout page.
To enable customers to easily review items they’re purchasing, add the Mini Cart Block.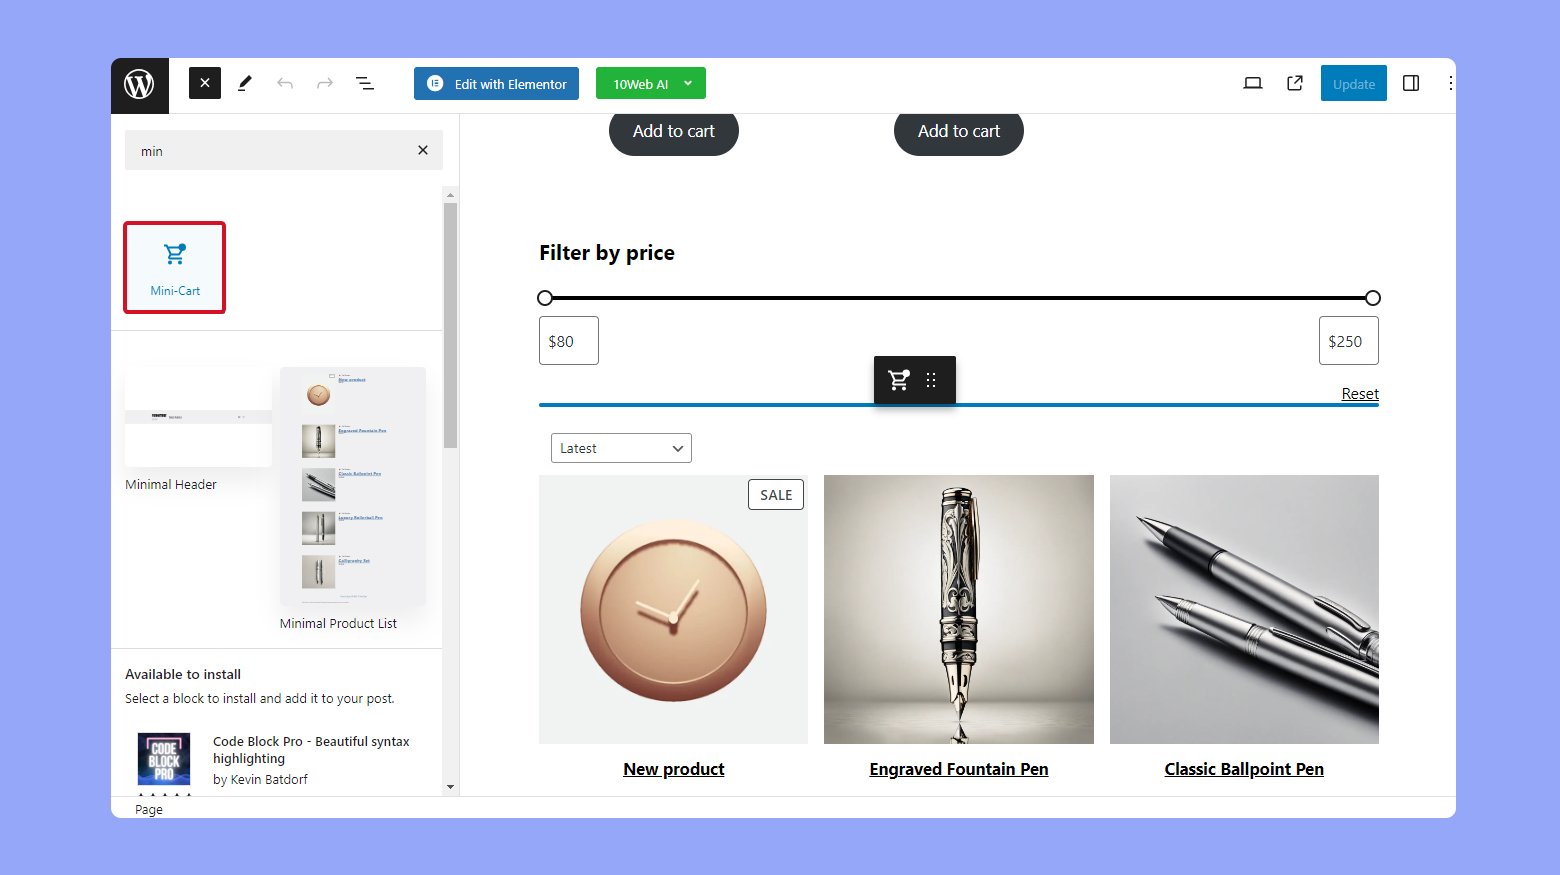
Adjust settings for a personalized experience:
- With the Checkout Block selected, utilize the settings on the sidebar to modify its features, such as color scheme and layout.
- Make sure to Save your changes to keep the new configurations.
By implementing the Checkout Block, you grant your customers a pleasant final step in their purchasing journey. Alongside the Mini Cart Block, buyers can effortlessly inspect their cart contents without leaving the checkout page, making for a seamless transition from shopping to purchase completion.
Conclusion
WooCommerce Blocks provide a powerful toolset for customizing and enhancing your WordPress eCommerce site, allowing you to seamlessly integrate product displays and improve the shopping experience.
Starting with the installation of the essential plugin, this guide walks you through the usage of various blocks to display products, utilize filters, and showcase special items or categories effectively. Utilize these blocks to create an organized, attractive shop that makes products easily discoverable and simplifies the checkout process.
Implementing these strategies will not only streamline your setup but also potentially boost sales and customer engagement, giving you a dynamic and responsive online store tailored to meet the needs of your customers.