What is an HTTP 405 error?
The 405 Method Not Allowed error is a standard HTTP response status code that indicates a web server has received and recognized a client’s request but has rejected that particular method for the requested resource.  This means the method – such as GET, POST, PUT, DELETE, etc. – used in the request line is not supported by the resource identified by the request’s Uniform Resource Identifier (URI). As a result, the browser can’t load the page and shows a 405 error message instead.
405 Method Not Allowed errors in a nutshell: The 405 Method Not Allowed error arises when a web server’s setup prevents a particular action on a specific URL. This error, an HTTP response status code, signifies that although the server recognizes the request method, it is not permitted for the intended resource.
Say goodbye to website errors
Achieve peace of mind with 99.99% uptime on 10Web Managed
WordPress Hosting, powered by Google Cloud.
Variations of the HTTP 405 error
The HTTP 405 error can manifest in various forms, depending on the web server, browser, or device. Here are some common variations you might encounter:
- 405 Method Not Allowed
- HTTP Error 405 – Method Not Allowed
- 405 Not Allowed
- Error 405: Method Not Allowed
- HTTP 405 Error
- 405 HTTP Method Not Allowed
- Method Not Allowed Error
- The requested method POST is not allowed for the URL
- This page isn’t working – HTTP ERROR 405
- Server Error 405 – HTTP Verb used to access this page is not allowed
Here’s what your site’s visitors will see instead of the page they requested, as displayed in different browsers.
Chrome
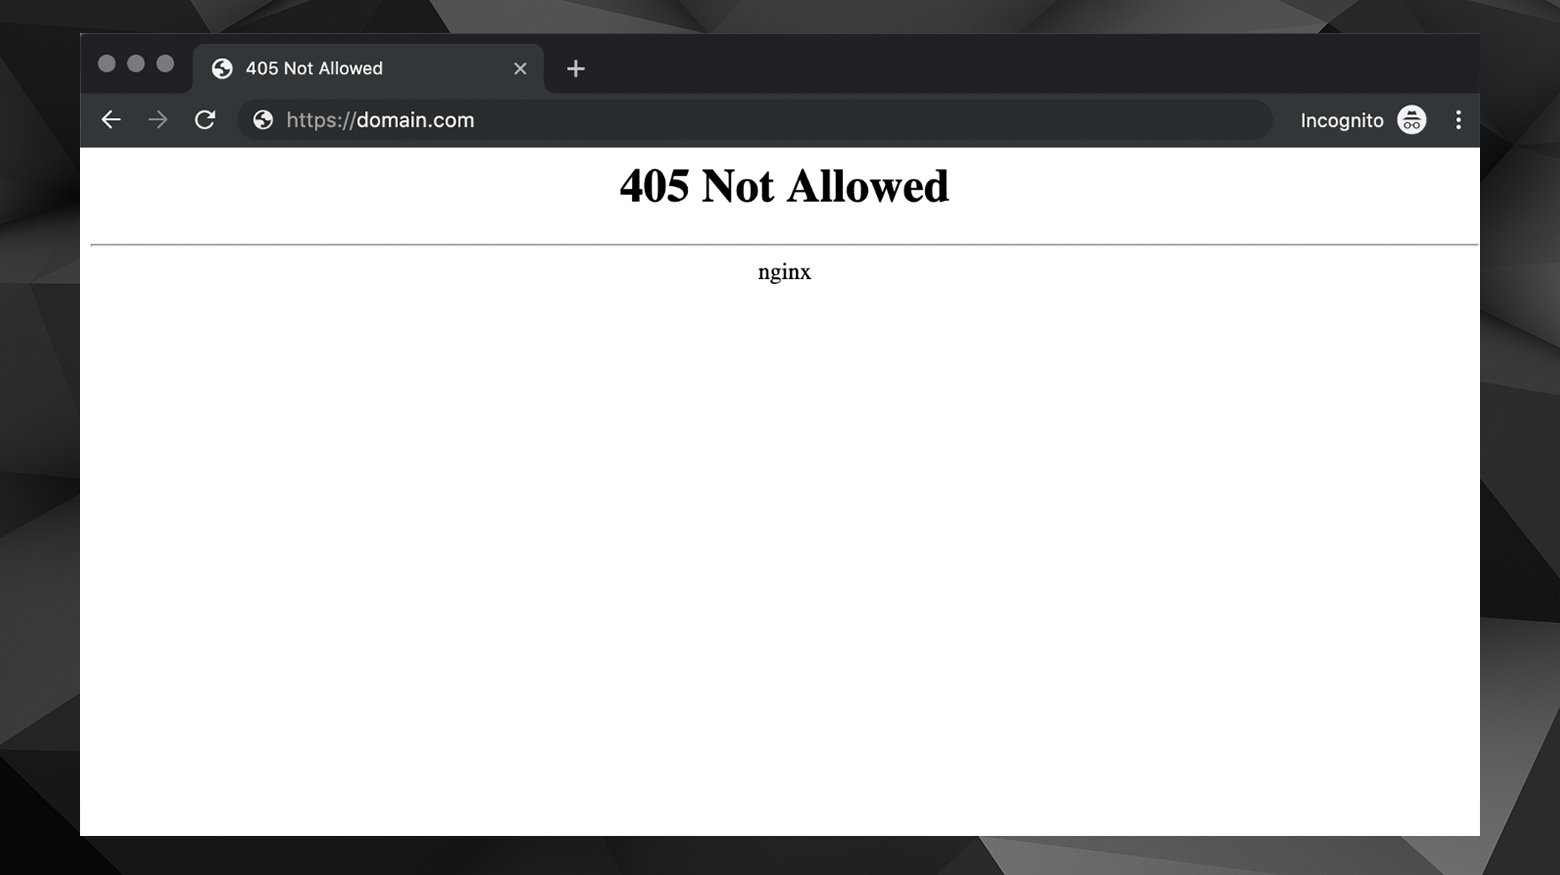
Google Chrome displaying a 405 Not Allowed Nginx error.
Edge
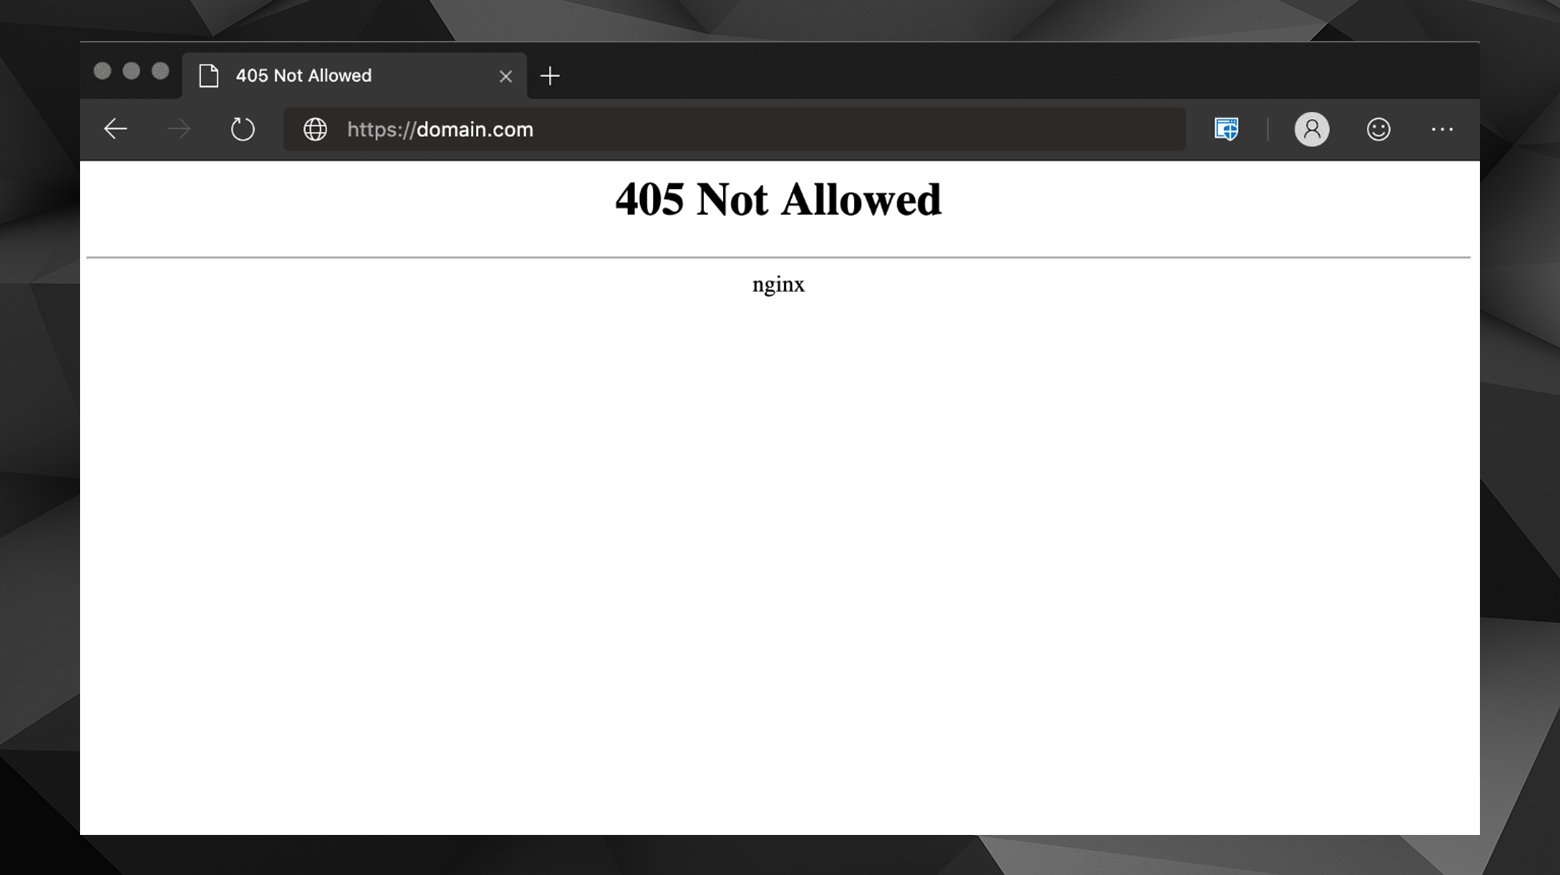
Microsoft Edge browser displaying a 405 Not Allowed error.
Firefox
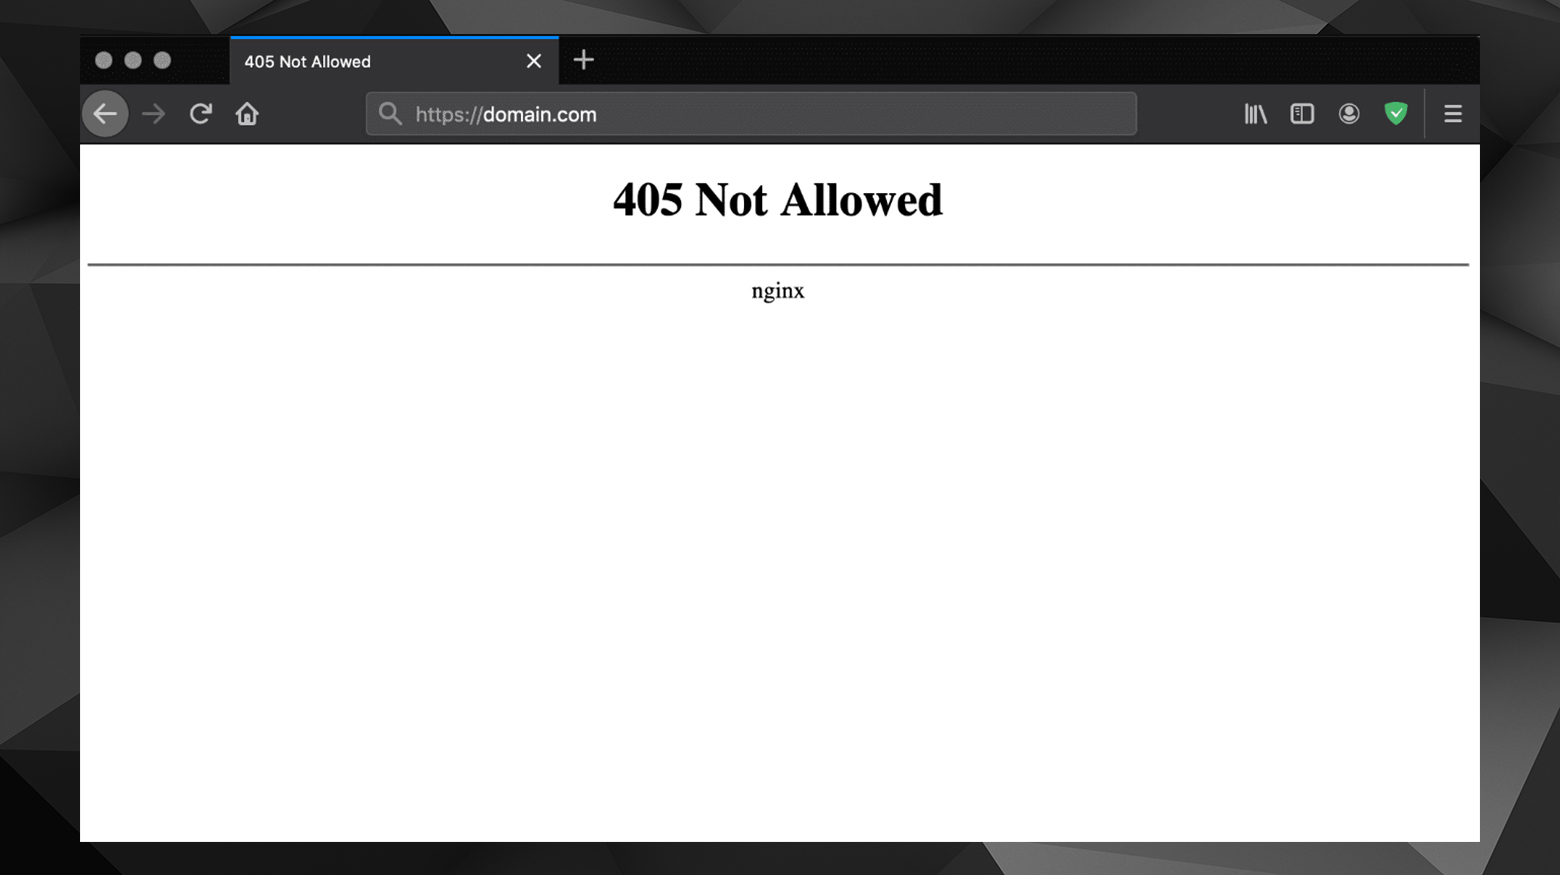
Firefox showing a 405 Not Allowed Nginx error.
Safari
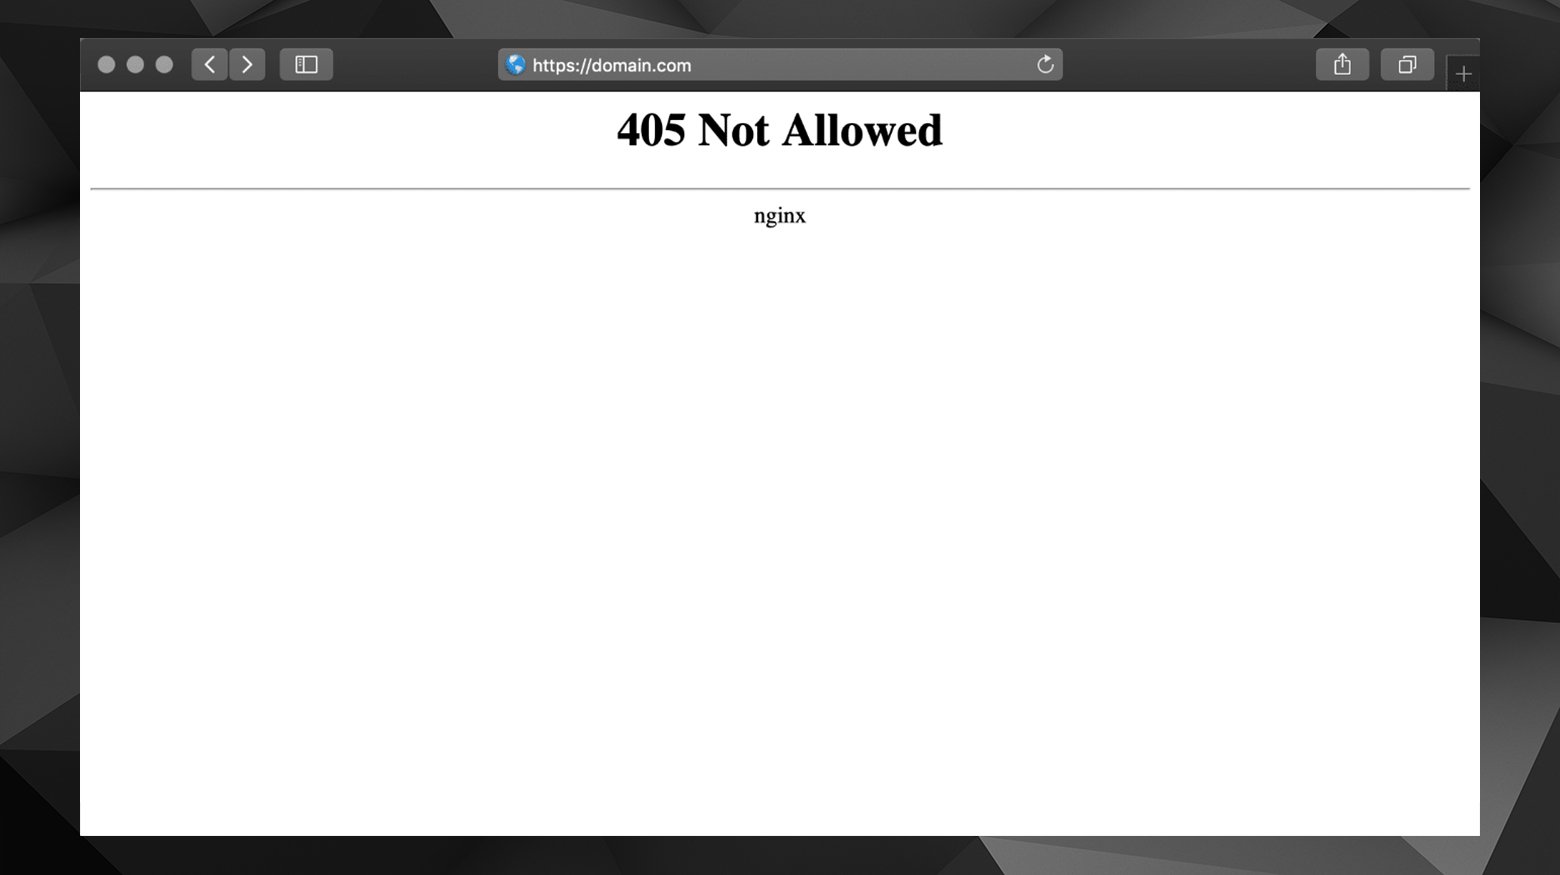
Safari displaying a 405 Not Allowed error.
Reasons why 405 errors occur
The 405 error can be triggered by several reasons:
Incorrect method usage
This is the most fundamental cause. It occurs when the HTTP method (GET, POST, PUT, DELETE, etc.) used in the request doesn’t align with what the resource is configured to accept.
Misconfigured server
The server might be set up incorrectly, causing it to reject valid methods. This misconfiguration can happen in various server files, such as `.htaccess` in Apache or `nginx.conf` in Nginx.
Faulty scripting or code
If server-side scripts or code that handle requests are not written to process different HTTP methods correctly, they can trigger a 405 error.
Incorrect URL
Sometimes, the URL might be correct, but the resource it points to is not set up to handle the method used, leading to this error.
Web server software updates
Updates or patches to web server software can sometimes change settings or configurations, resulting in unexpected 405 errors.
Firewall or security settings
Security measures or firewalls might mistakenly block specific HTTP methods, causing a 405 error.
Resource constraints
Certain resources might be limited to specific methods due to the nature of their operation or security considerations.
API restrictions
If the URL points to an API endpoint, the 405 error could be due to restrictions set on the API. Some APIs limit the methods allowed based on user permissions or the resource state.
Cross-Origin Resource Sharing (CORS) issues
In web applications using CORS, if the server is not configured to handle requests made between different domains, it might return a 405 error.
Load balancers or reverse proxies
In more complex architectures, intermediaries like load balancers or reverse proxies can misinterpret or incorrectly forward HTTP methods, leading to this error.
Caching issues
Sometimes, caching layers or mechanisms might serve outdated or incorrect responses, leading to a 405 error, especially if the caching system doesn’t correctly handle the variety of HTTP methods.
HTTP method overload
Sometimes, the server might be set up to allow only a subset of HTTP methods for a resource to prevent overload or abuse, leading to an HTTP 405 error for disallowed methods.
Plugin or theme conflict
On platforms using plugins or middleware, a conflict or misconfiguration in these components can result in incorrect handling of certain HTTP methods.
Content negotiation misconfiguration
This occurs when the server is configured to serve different versions of a resource based on headers like `Accept`, but it’s not set up to handle this negotiation for all HTTP methods.
Say goodbye to website errors
Achieve peace of mind with 99.99% uptime on 10Web Managed
WordPress Hosting, powered by Google Cloud.
Resolving a 405 error
Resolving this error can be difficult due to the lack of information in the error message. As the website owner, it’s usually up to you to figure this out. If you’re simply a visitor experiencing a 405 error, you can still try a few things to get past this error. Start with the basics, then move on to more technical troubleshooting steps if needed.
- Check network connectivity
- Check the URL for typos or misspellings
- Clear your browser cache or try another browser.
- Revert any recent updates
- Troubleshoot plugins and themes
- Check for database issues
- Check server logs
- Check server configuration
- Try .htaccess with the default WordPress rules
- Confirm file ownership and permissions
- Check server-side scripts and code for errors
- Review firewall and security settings
- Confirm A record configuration
- Restore from backup
- Contact your host
1. Restart network hardware and your computer
Network issues can often cause various errors, including a 405 error. Ensuring a stable connection and restarting network devices can refresh your network’s settings and resolve temporary connectivity issues. Here are some general steps to try out:
- Ensure your computer is connected to the internet.
- Restart your router/modem by unplugging it, waiting for 30 seconds, and plugging it back in.
- Restart your computer.
2. Check the URL
Typos or misspellings in URLs can lead to the wrong server or resource, causing errors like 405.
- Carefully retype the URL in your browser’s address bar.
- Ensure there are no extra characters or missing parts.
3. Clear browser cache or try another browser
Cached data might be outdated or corrupt, leading to errors. Here’s how to clear the cache on Safari and Chrome.
Mac (Safari):
- Click ‘Safari’ in the menu bar.
- Select ‘Preferences’, then ‘Privacy’.
- Click ‘Manage Website Data’ and ‘Remove All’.
Windows (Chrome):
- Click the three-dot menu in the top right corner.
- Select ‘More tools’> ‘Clear browsing data’.
- Choose ‘All time’ as the time range and select ‘Cookies and other site data’ and ‘Cached images and files’.
- Click ‘Clear data’.
Alternatively, you can switch to a different browser or device to rule out browser or device issues.
Solutions for WordPress sites:
You may still see the 405 error after attempting some basic troubleshooting. In that case, it’s time to consider what recent changes have taken place on the site. Before moving on, making a full site backup is a good idea. 10Web customers can take care of that in the dashboard. Other hosting providers may provide similar tools to help with that task.
4. Revert recent updates
Recent updates to software or your website might have compatibility issues, causing the 405 error. To address the HTTP error 405 that can arise after updating your website, it’s recommended to undo recent updates. This includes modifications to your website’s main platform and any extensions, modules, or plugins used. These updates can result in server-side alterations that trigger the error.
Different platforms and applications have unique methods for reversing updates. For instance, WordPress users can utilize the WP Downgrade plugin to revert their WordPress version, helping to prevent permanent changes.
To prevent HTTP error 405 from persisting, it’s crucial to check your website following any updates routinely. This practice helps detect and resolve any issues caused by the updates.
You’ll want first to identify any recent updates to website software, the website’s CMS, etc. Revert these updates one by one to check if the error resolves. If rolling back the changes didn’t resolve the 405 error, be sure to restore your backup or bring everything up to date again.
5. Troubleshoot plugins and themes
Plugins and themes can conflict with each other or the server, causing errors. Recent updates or newly installed themes or plugins may also be to blame. To resolve a 405 error caused by plugin or theme conflicts on your website, start by uninstalling any new plugins or themes.
Uninstall new plugins
Begin by uninstalling or deactivating any recently installed plugins, then recheck the error. If the error disappears, reinstall or activate them one at a time to pinpoint the problematic plugin.
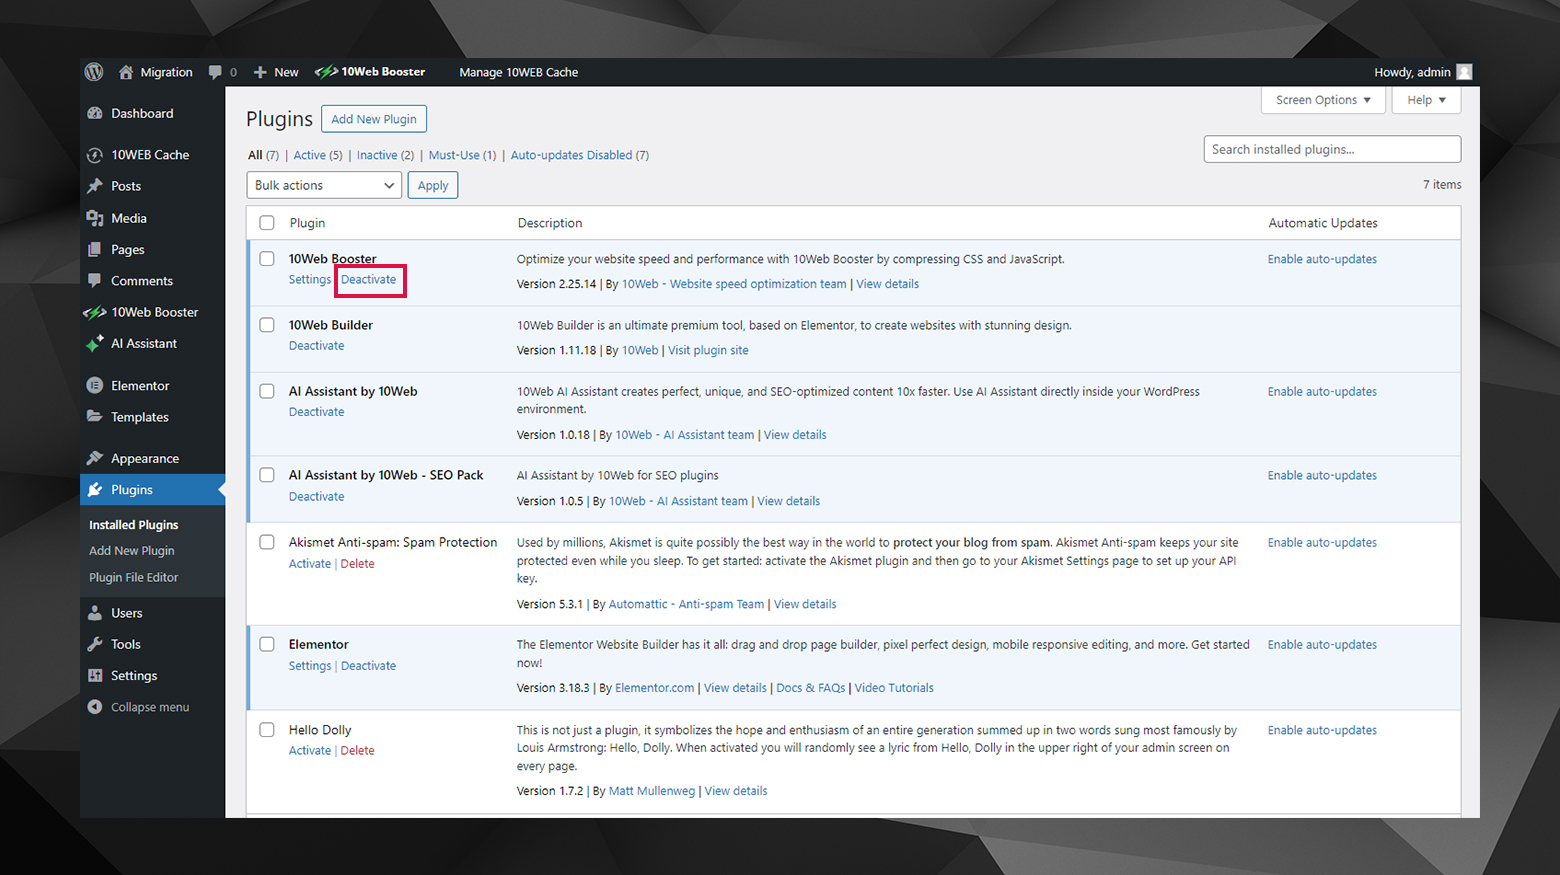
Testing plugins when you can access the WordPress admin:
- Access your site’s admin area by visiting yoursite.com/wp-admin.
- Go to the ‘Plugins’ page within your WordPress dashboard.
- Choose ‘Deactivate’ next to the newest plugin(s).

- Test your site to see if it resolves the issue.
- If the site works, reactivate each plugin one at a time.
- After each activation, check for the 405 error.
- Once the error reoccurs, the last activated plugin is likely the culprit.
- Contact the plugin developer or seek help in the WordPress support forum for that plugin or theme.
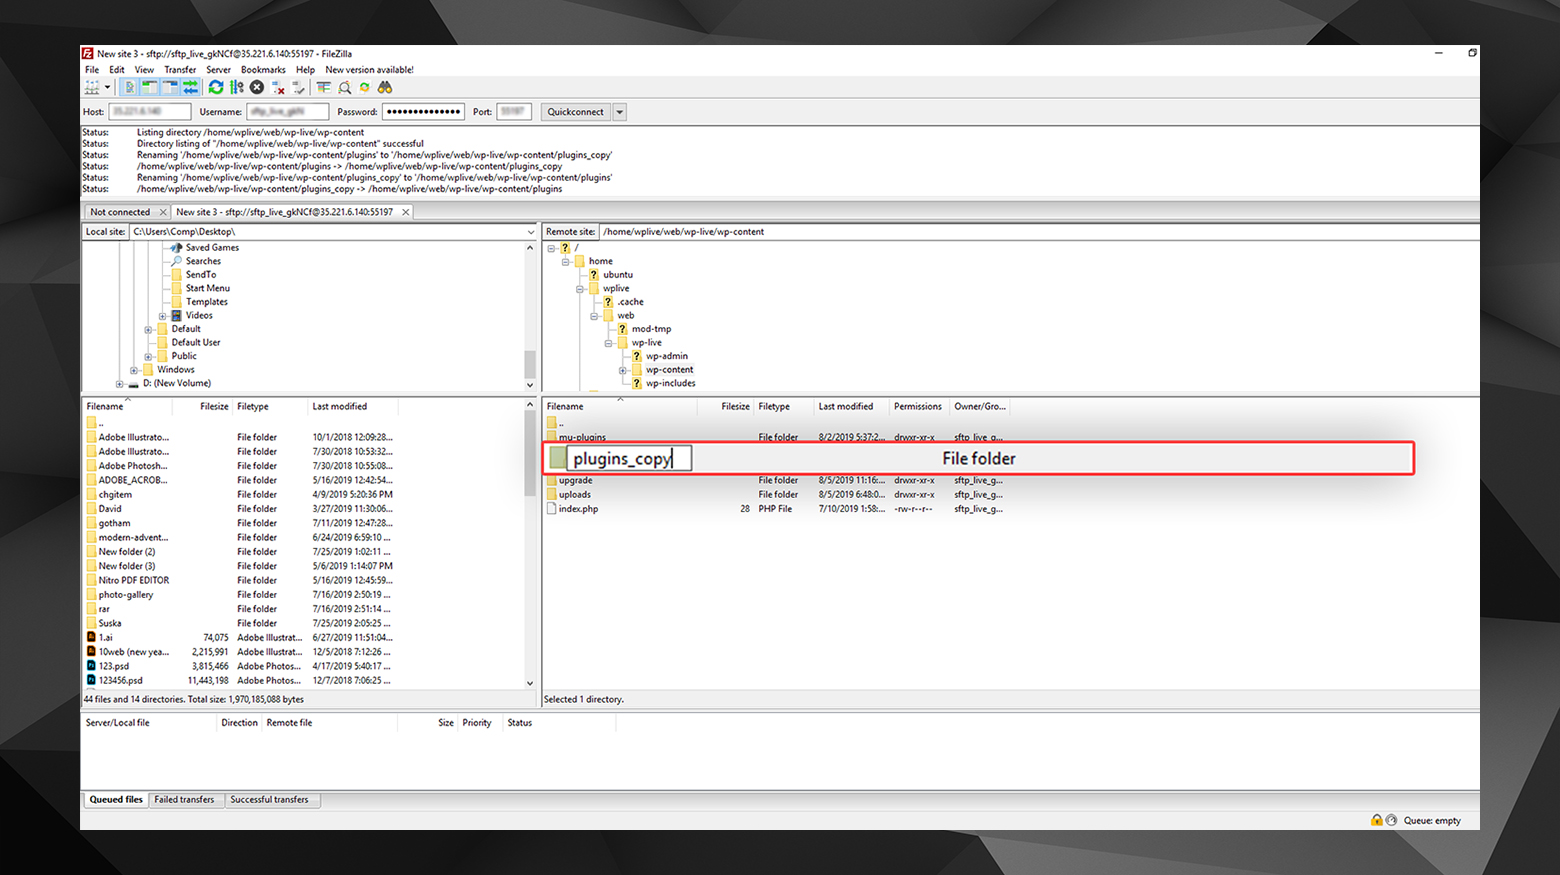
Testing plugins when you can’t access the WordPress admin:
- Obtain your FTP credentials from your web hosting provider.
- Use an FTP client like FileZilla to access your website’s files.
- Go to your WordPress folder inside your website files.
- Rename the ‘wp-content/plugins’ folder to disable all plugins. If a specific plugin or theme was identified in the error log, rename that particular folder instead.
- With the plugins disabled, check if the site is working.
- If the site works, restore the folder name to ‘plugins’ to reactivate them.
- Repeat the renaming process for individual plugins or theme folders.
- After each change, test the site for the error.
- Continue until you identify the plugin or theme causing the issue.
Recent updates can cause similar issues. If you don’t find a culprit among new plugins, try uninstalling any recently updated plugins.
Check your theme
Repeat the same process with your themes. You can also try temporarily changing to a default WordPress theme, such as Twenty Twenty-One. This helps determine if the issue is related to your current theme. By uninstalling new themes and using a standard theme, you can effectively isolate and identify if the problem is theme-specific.
6. Check for database issues
The 405 Method Not Allowed error can also stem from a corrupted database or recent changes made to your database. Many plugins have access to your database, allowing them to alter it. It’s important to note that simply uninstalling plugins or extensions may not undo the changes they have made to the database. The leftover database changes can be challenging to track down. Actionable tasks to consider if you suspect a plugin’s changes to the database caused the HTTP 405 error:
- If you’re not confident in your ability to handle technical tasks, seeking assistance from an expert or your web host is an excellent place to start.
- Create a backup before running queries or editing the database.
- Use tools like phpMyAdmin to review the most recent changes in the database.
- Confirm the database’s integrity.
- Repair or restore the database if issues are found.
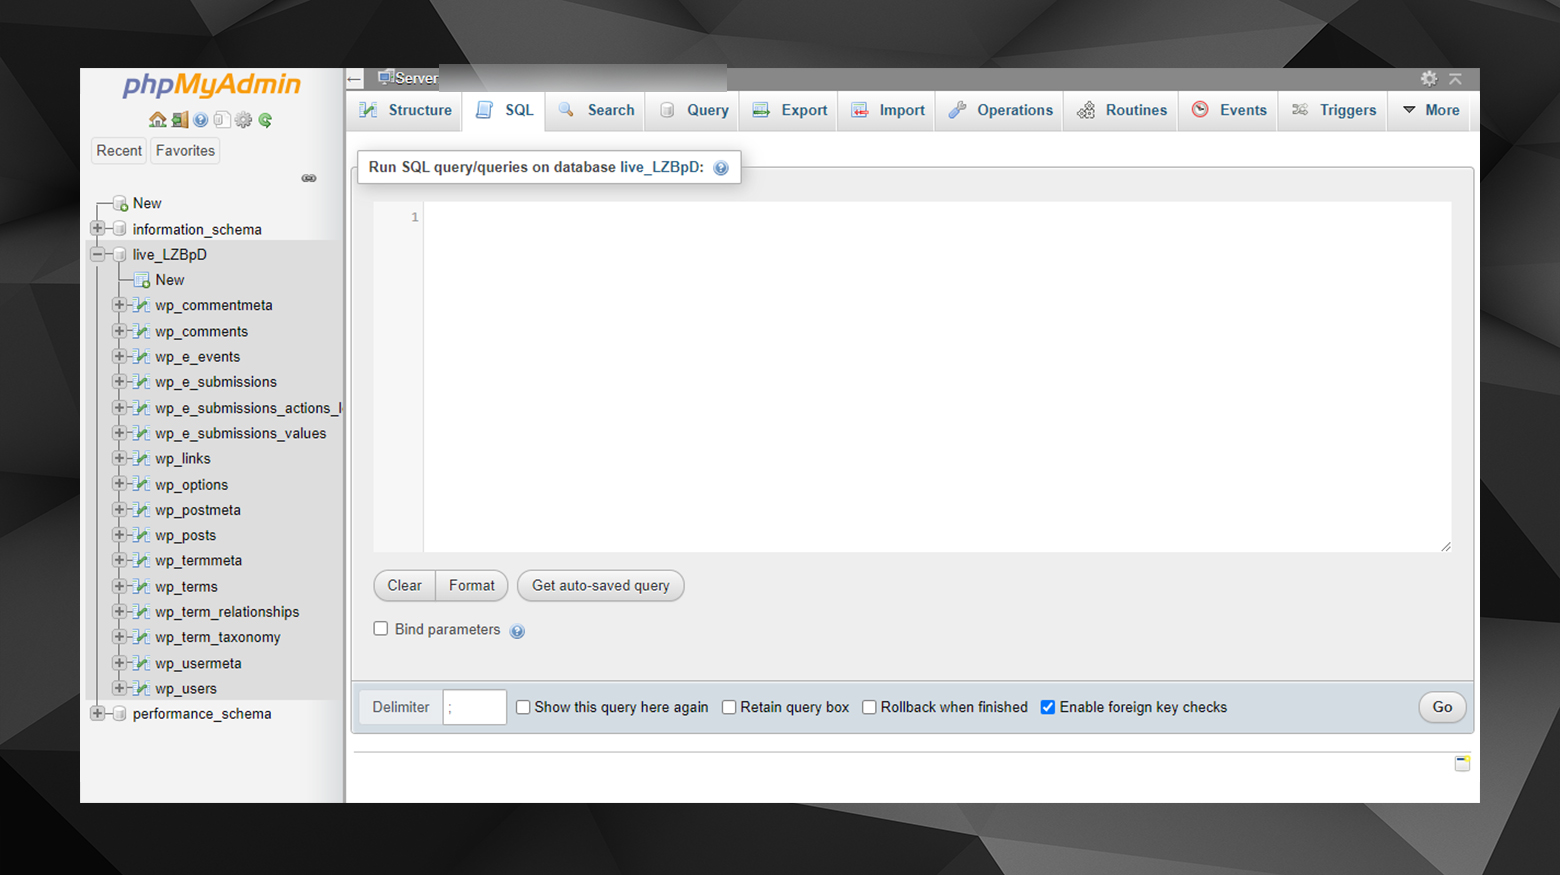
To scan for the most recent changes in a WordPress site’s database, you can run an SQL query in phpMyAdmin. The exact process to access phpMyAdmin varies depending on your web host. Generally, you should log in to your web hosting control panel and access phpMyAdmin from there.
To review recent changes in your database:
- On the left side of phpMyAdmin, you’ll see a list of databases. Click on the database associated with your WordPress site.
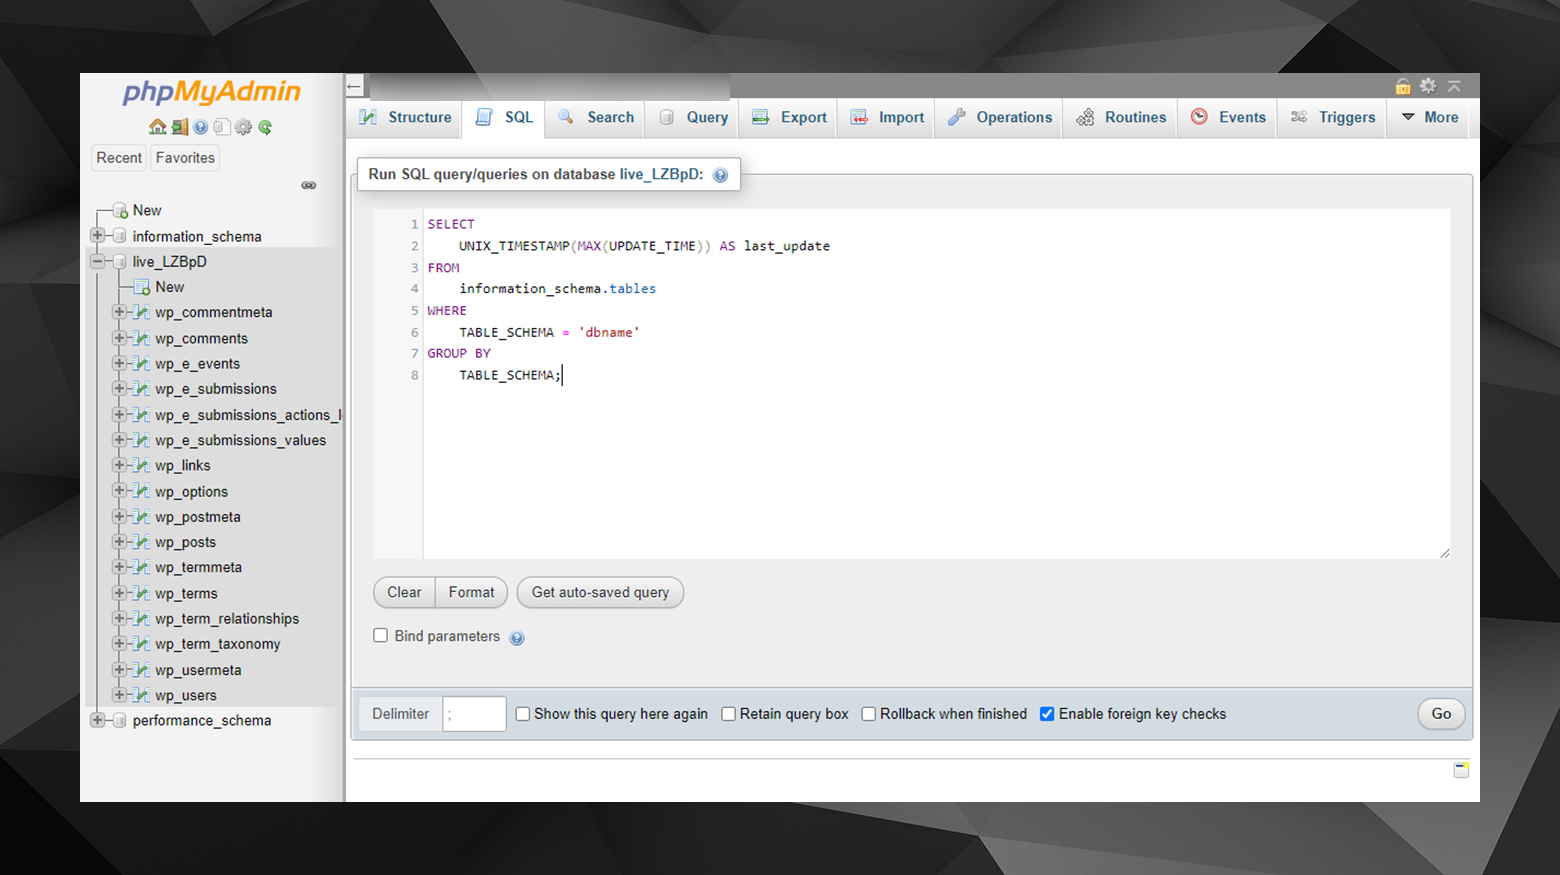
- Once you’ve selected the database, click the ‘SQL’ tab to run a custom query.
- Use the following SQL query to find the most recent changes:
SELECT TABLE_NAME, MAX(UPDATE_TIME)
FROM information_schema.tables
WHERE TABLE_SCHEMA = 'your_database_name'
GROUP BY TABLE_NAME
ORDER BY UPDATE_TIME DESC;
- Replace “your_database_name” with the name of your WordPress database.
- Click on the ‘Go’ button to execute the query.
- The query will return a list of tables in your database, sorted by their last update time. This can help you identify which tables were most recently modified.
- If you identify a table that may have been recently altered, click on its name in phpMyAdmin to view its contents.
- If available, compare the data with your backups or known good states to identify specific changes.
If you have a WordPress activity log plugin installed, check its records. These plugins track changes within your WordPress site and can provide detailed information about database modifications.
Check for server-side issues
7. Check logs
On WordPress sites, server logs like Access.log and Error.log track everything that happens on the server. Look at the server logs for specific details about the error occurrences, which can help pinpoint the cause or provide clues for troubleshooting. You can often view these logs from within your hosting control panel. If not, you must access your website’s files via FTP.
- Using a client like FileZilla, sign in to your website’s files.
- Navigate to the logs folder, which is typically in your site’s root folder.
- Look for Access.log and Error.log, then open the file in a text editor.
- Scan the logs for entries that mention 405, any other errors, or irregularities.
8. Server configuration
Web administrators should check the server’s configuration files (like `.htaccess` for Apache or `nginx.conf` for Nginx) to ensure the method is not wrongly restricted.
- Check configuration files like httpd.conf or .htaccess for incorrect directives.
If your application is hosted on a shared server, you’ll usually have a unique username for your account. Commonly, the root directory of your application is located at the following path:
/home/public_html/
Consequently, you can find the .htaccess file at:
/home/public_html/.htaccess
After locating the .htaccess file, open it with a text editor and search for lines containing Rewrite directives. These directives are part of Apache’s mod_rewrite module and are used to create text patterns. These patterns are matched against the URLs entered on your site. When a visitor requests a URL matching a pattern, the RewriteRule will redirect them as specified.
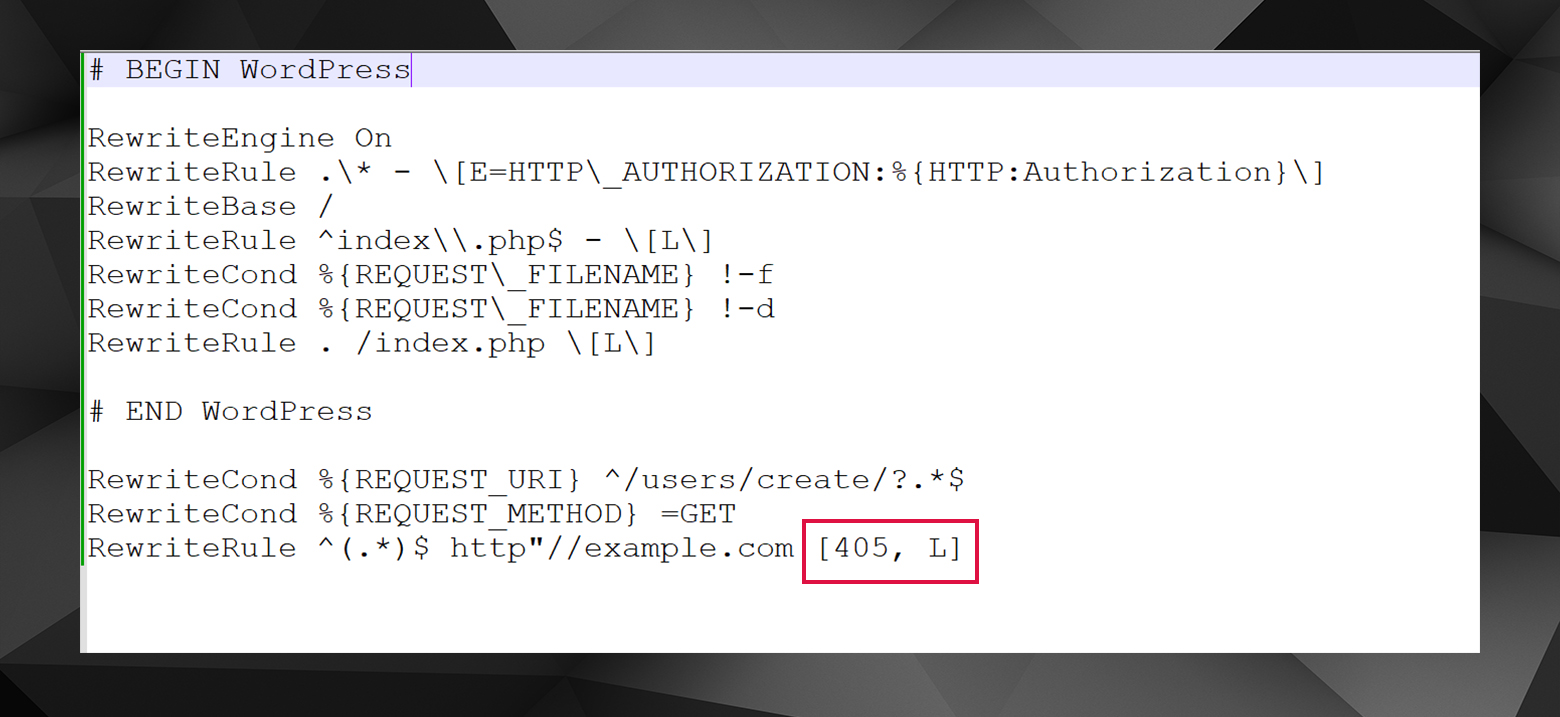
- Review the htaccess file for any strange rewrite rules or references to 405. For example:
RewriteRule ^(.*)$ https://google.com [R=405, L]
- Comment out any suspicious rewrite directives or rules containing a 405 flag by adding a # at the beginning of the line.
- Consult with your hosting provider if you need more help.
If you suspect a server configuration issue with your 10Web-hosted site, our customer support team can help.
WordPress hosting that's fully automated
Host on 10Web's high performance infrastructure and enjoy all the benefits of a secure Google Cloud Partner hosting and website building with AI.
 No credit card required
9. Try .htaccess with default WordPress rules
A corrupted or misconfigured .htaccess file can cause errors, particularly on a WordPress site. Resetting it to default WordPress rules can resolve these issues.
- Rename the current .htaccess file to create a backup.
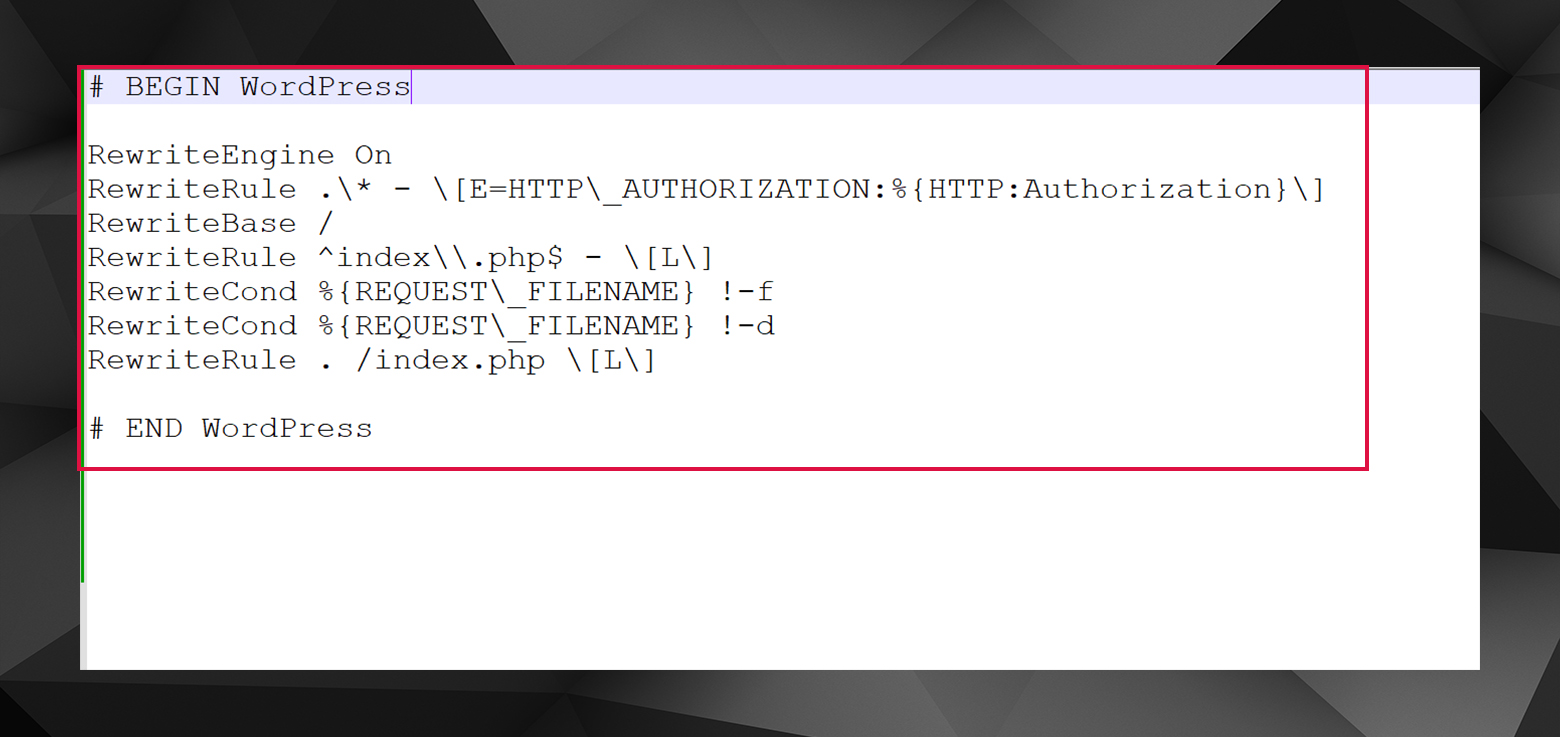
- Create a new .htaccess with default WordPress rules:
# BEGIN WordPress

RewriteEngine On
RewriteRule .\* - \[E=HTTP\_AUTHORIZATION:%{HTTP:Authorization}\]
RewriteBase /
RewriteRule ^index\\.php$ - \[L\]
RewriteCond %{REQUEST\_FILENAME} !-f
RewriteCond %{REQUEST\_FILENAME} !-d
RewriteRule . /index.php \[L\]

# END WordPress
10. Confirm file ownership and permission
A further cause of the HTTP method error on your site could be improperly set permissions. Each file and folder on your website is assigned specific permissions. Correcting the file ownership settings can resolve these permission misconfigurations.
- Check file and directory permissions via FTP or a file manager.
- Adjust permissions according to your host’s recommended settings.
11. Check server-side scripts and code
Server-side script errors can lead to various HTTP errors. Ensure that any server-side scripts or programs correctly handle HTTP methods. This involves checking the code for errors or misconfigurations. You’ll want to set up a development environment or staging site so you can test everything on the website. Here, you can reproduce the conditions where you see the HTTP 405 error so that you can see exactly what’s happening when the error occurs. Examine the most recent changes in scripts or code and identify any other possible causes. Depending on the site’s complexity, it may be best to bring in a developer to help with debugging.
12. Review firewall and security settings
Overly restrictive security settings can block legitimate requests, causing errors. Examine firewall and security settings to ensure they are not blocking certain HTTP methods.
13. Confirm A record configuration
Incorrect DNS settings can lead to errors by directing traffic to the wrong server. To address the HTTP method issue, reviewing your Domain Name System (DNS) records is essential. Specifically, examine the A records to ensure all information is accurate. An A record is a fundamental DNS record that directs a domain or subdomain to an IP address. The method for accessing your DNS records and hosting details varies depending on your domain registrar and web hosting service. For example, 10Web users can find their hosting details and IPv4 address in the dashboard. These details should match the domain’s A record. Typically, you can view and edit your DNS records through your domain registrar. Ensure your A records include the following details:
- The DNS record type should be set to ‘A’.
- Use ‘@’ if your domain or subdomain redirects to a different IP address.
- Confirm that the domain or subdomain is correctly pointing to the intended IP address.
- Time to Live (TTL) is the duration for which the DNS resolver stores the query cache for your domain. Typically, hosting providers set this to 14400 seconds, or 4 hours.
Fully restore your website from backup
If none of the fixes stop the 405 error, starting fresh from a backup may be best. The steps to restore a website using a backup depend on the platform.
Contact your hosting provider
If all else fails, try contacting your hosting provider for assistance. They can help with any issues on their end and may point you in the right direction for fixing your site.
To summarize
No matter how well-optimized your website is, occasional error messages may occur. Prompt resolution of these errors is crucial to maintaining visitor engagement on your site. While potentially perplexing, the 405 Method Not Allowed error can often be resolved through straightforward troubleshooting. To address a 405 error on your WordPress site, here are seven strategies you can use:
- Verify that the URL you’ve entered in the address bar is correct.
- Revert recent WordPress updates to check if they are the root of the problem.
- Sequentially uninstall newly added plugins or themes to identify any conflicts.
- Check for any unplanned changes in your database.
- Review and confirm your server’s configuration settings.
- Examine WordPress’ server-side logs for insights.
- Engage in debugging your application’s code or scripts.
If you have more questions about the 405 Method Not Allowed error, or if you can share what worked for you, please let us know in the comments!
Say goodbye to website errors
Achieve peace of mind with 99.99% uptime on 10Web Managed
WordPress Hosting, powered by Google Cloud.
Say goodbye to website errors
Fix all the website errors in one click
Migrate your website to the world's best Managed WordPress Hosting.