The HTTP 422 Error, known fully as the 422 Unprocessable Entity error, is a unique challenge in the world of web development and management, particularly within WordPress environments. This error code essentially communicates that the server understands the request you’ve made but is unable to process it.
The crux of the issue usually lies in a semantic error, often within a PHP or JavaScript file involved in the request. What makes the 422 Error notably troublesome is its persistence and lack of specificity.
Unlike some other HTTP errors, it doesn’t simply resolve with a page refresh or minor tweak. It continues to occur until the precise issue in the request is identified and corrected. The error itself doesn’t give away much about what’s causing the problem, making troubleshooting a bit of a detective job.
Say goodbye to website errors
Achieve peace of mind with 99.99% uptime on 10Web Managed
WordPress Hosting, powered by Google Cloud.
Variations of the HTTP 422 error
The HTTP 422 Error can surface in WordPress in different guises, depending on factors like plugins, themes, or specific server configurations. Common variations include:
- WordPress HTTP 422 Unprocessable Entity
- Error 422 on WordPress site
- WordPress REST API Error 422
- WordPress Unprocessable Entity during upload
- 422 Error when updating posts in WordPress
- WordPress JSON request 422 Unprocessable Entity
Common causes of the HTTP 422 error
Semantic errors in code: One of the most common causes is an error within the code of your WordPress files. This could be a PHP file related to a theme or plugin, or a JavaScript file that’s part of your site’s frontend. These errors aren’t about syntax (the code is correctly written), but about semantics (the logic or function of the code is flawed in some way).
Corrupt database tables: WordPress relies heavily on its database, and if there’s a corruption issue within one of the tables, it could lead to a 422 error. This might happen due to issues during data writing, plugin conflicts, or unexpected server issues.
Troubleshooting the HTTP 422 error
Disable plugins and themes
If you recently made changes to your site’s PHP or JavaScript files (like a new theme or plugin installation), revert those changes and see if the error persists. This method effectively isolates the problematic component causing the HTTP 422 error. By deactivating all plugins and switching to a default theme, you’re creating a clean baseline environment. If the error resolves in this state, it indicates that the issue is with one of the plugins or the theme. Reactivating them one at a time helps you pinpoint exactly which plugin or theme reintroduces the error. By systematically identifying the problematic component, you can either seek an alternative solution, update the plugin or theme, or reach out to the developer for support.
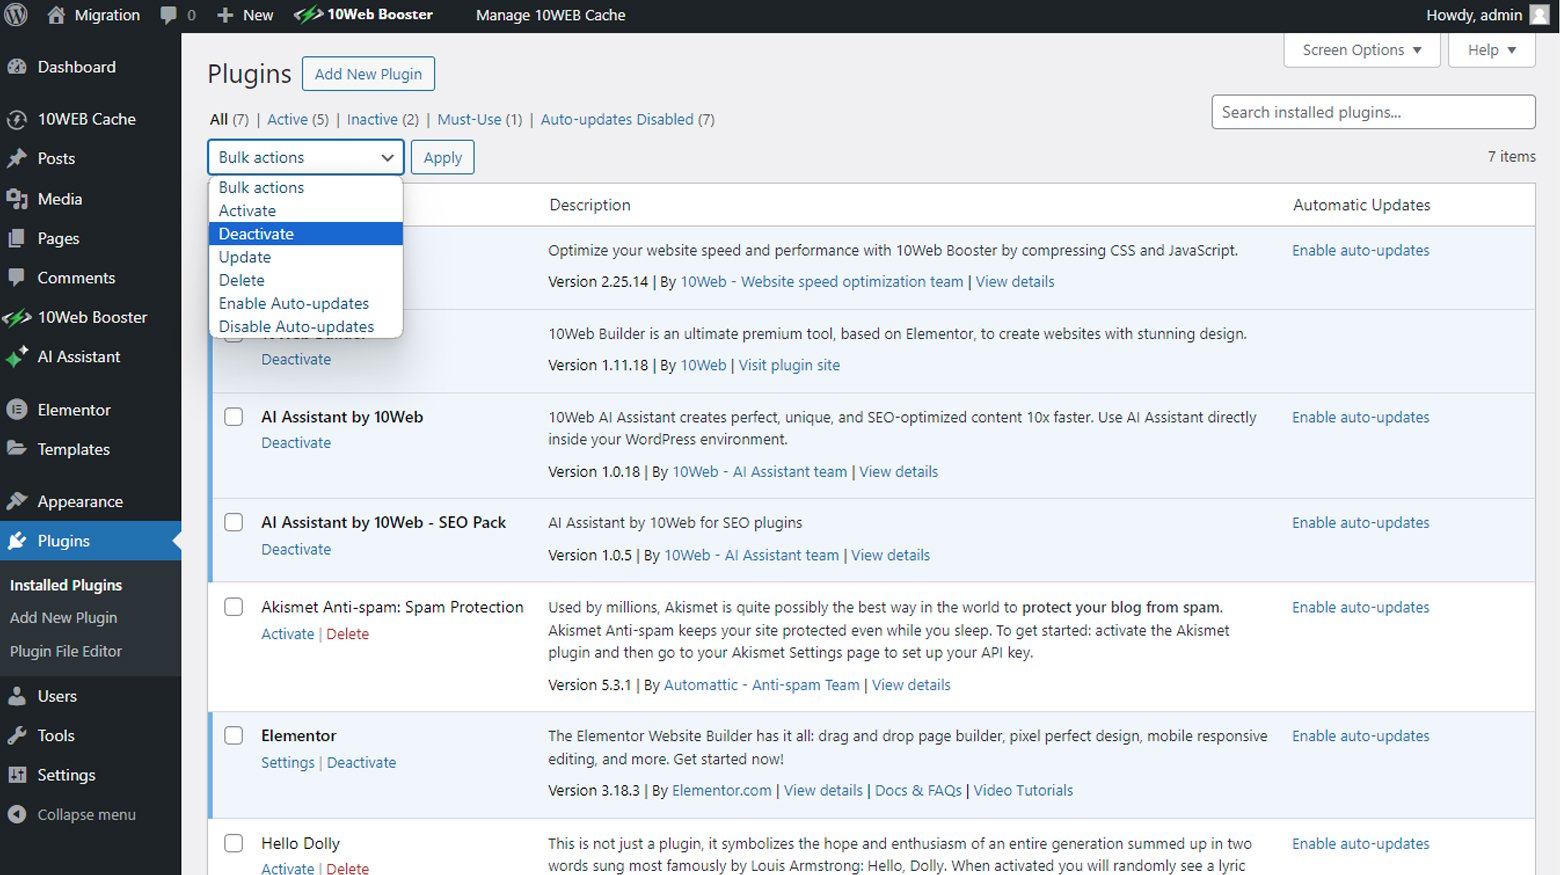
Deactivate plugins
- Log in to your WordPress admin area.
- Go to the Plugins page.
- Check the box at the top to select all plugins.
- From the Bulk Actions dropdown, choose Deactivate and apply. This deactivates all your plugins at once.
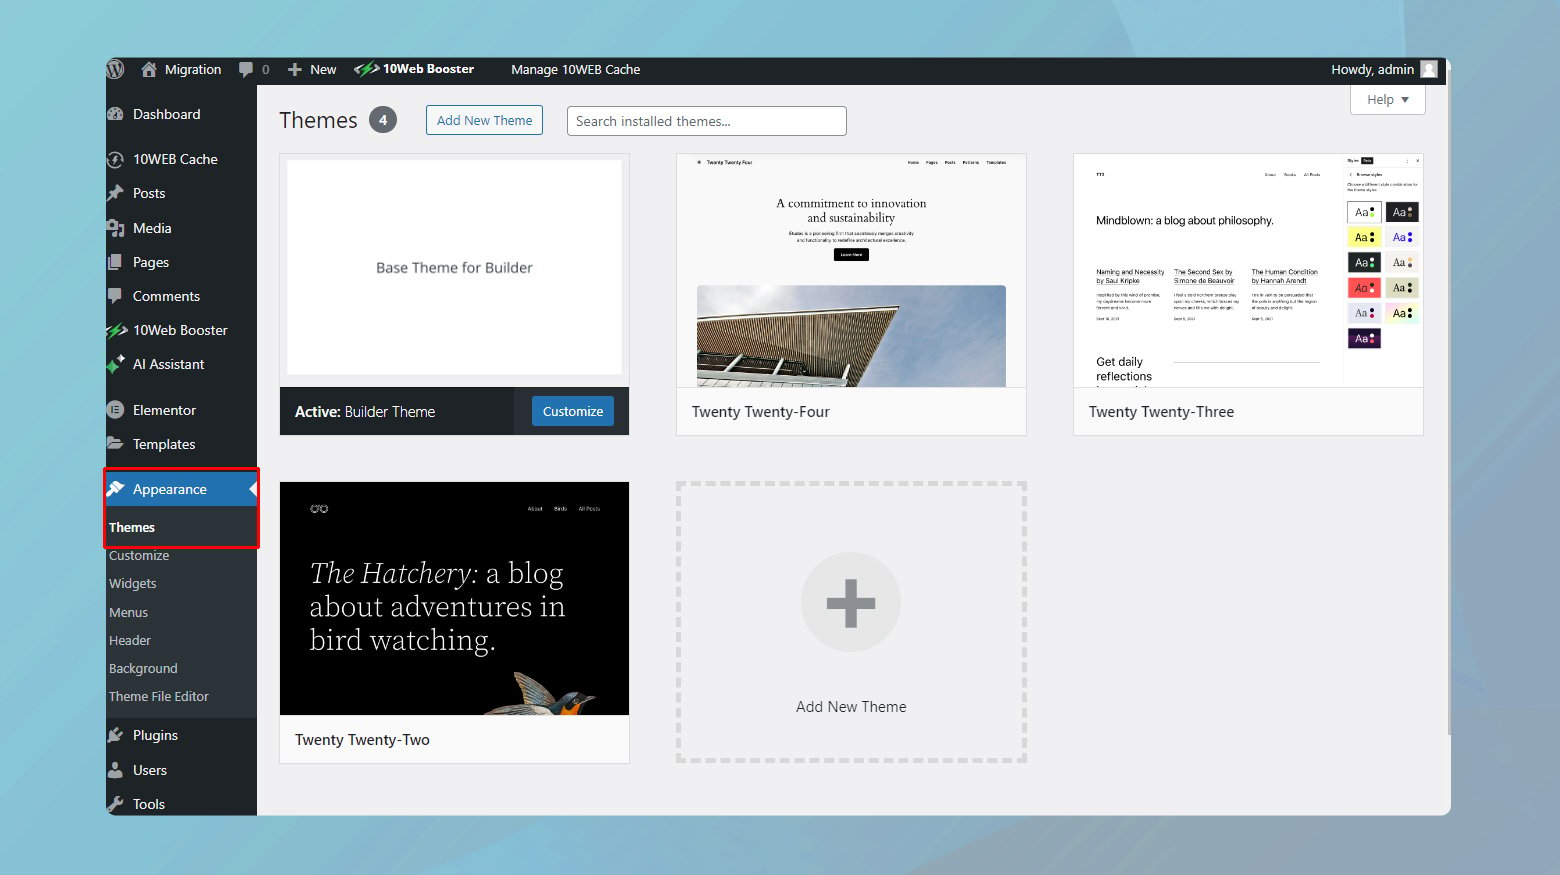
Switch to a default WordPress theme
- Go to Appearance > Themes.
- Activate one of the default WordPress themes, such as Twenty Twenty-One or Twenty Twenty-Two.
- After deactivating all plugins and switching the theme, revisit your site to see if the HTTP 422 error is resolved.
Reactivate plugins and theme one by one
- If the error is resolved, start reactivating your plugins one at a time.
- After activating each plugin, check your site for the error.
- Repeat this process until you identify the plugin that causes the error to reappear.
- Follow a similar process for your theme if necessary.
Check WordPress error logs
When encountering the persistent HTTP 422 error in WordPress, a more investigative approach is needed to identify the root cause. Since manually checking each WordPress file for semantic errors is impractical due to their sheer number, leveraging the WordPress debug feature becomes a crucial step. This feature allows you to access detailed error logs that can pinpoint the specific issue. To enable the WordPress debug mode manually:
-
- Use an FTP client to connect to your website.
- Navigate to the root directory of your WordPress installation.
- Find the wp-config.php file in the root directory.
- Open the file for editing.
- Add the following lines of code before the line that says /* That’s all, stop editing! Happy blogging. */:
- define(‘WP_DEBUG’, true);
- define(‘WP_DEBUG_LOG’, true);
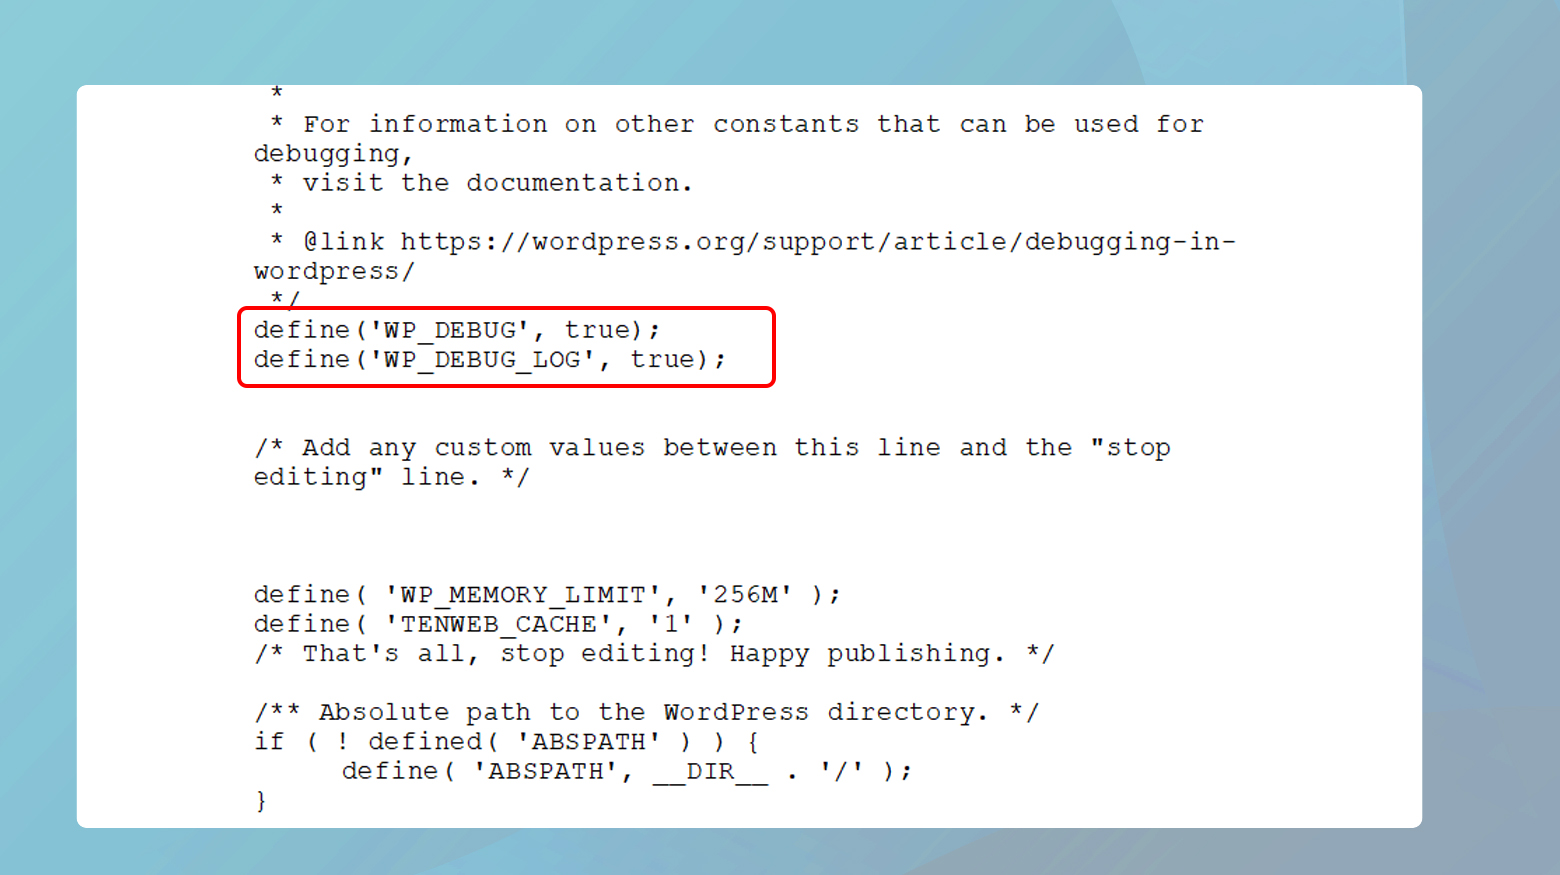
- If a WP_DEBUG line already exists and is set to false, change it to true.
- Save the changes to the file.
- Refresh the page on your website that is showing the 422 error.
- Return to the FTP client and navigate to the wp-content folder within your WordPress root directory.
- Locate and open the debug.log file with a text editor.
- Look for error messages related to the HTTP 422 error, specifically mentioning the problematic file and the line number of the error.
Using WP-DBManager plugin
The WP-DBManager plugin simplifies the process of database repair by providing a user-friendly interface within WordPress. It automates the technical process of checking and repairing each database table. When you select Repair, the plugin executes commands that check for inconsistencies or errors within the tables and attempts to fix them. The plugin is effective because it handles the complexities of database repair, making it accessible even to those without technical expertise in database management. To start:
- Go to your WordPress dashboard.
- Navigate to Plugins > Add New.
- Search for WP-DBManager, install, and activate it.
- Once activated, locate the Database tab in the dashboard.
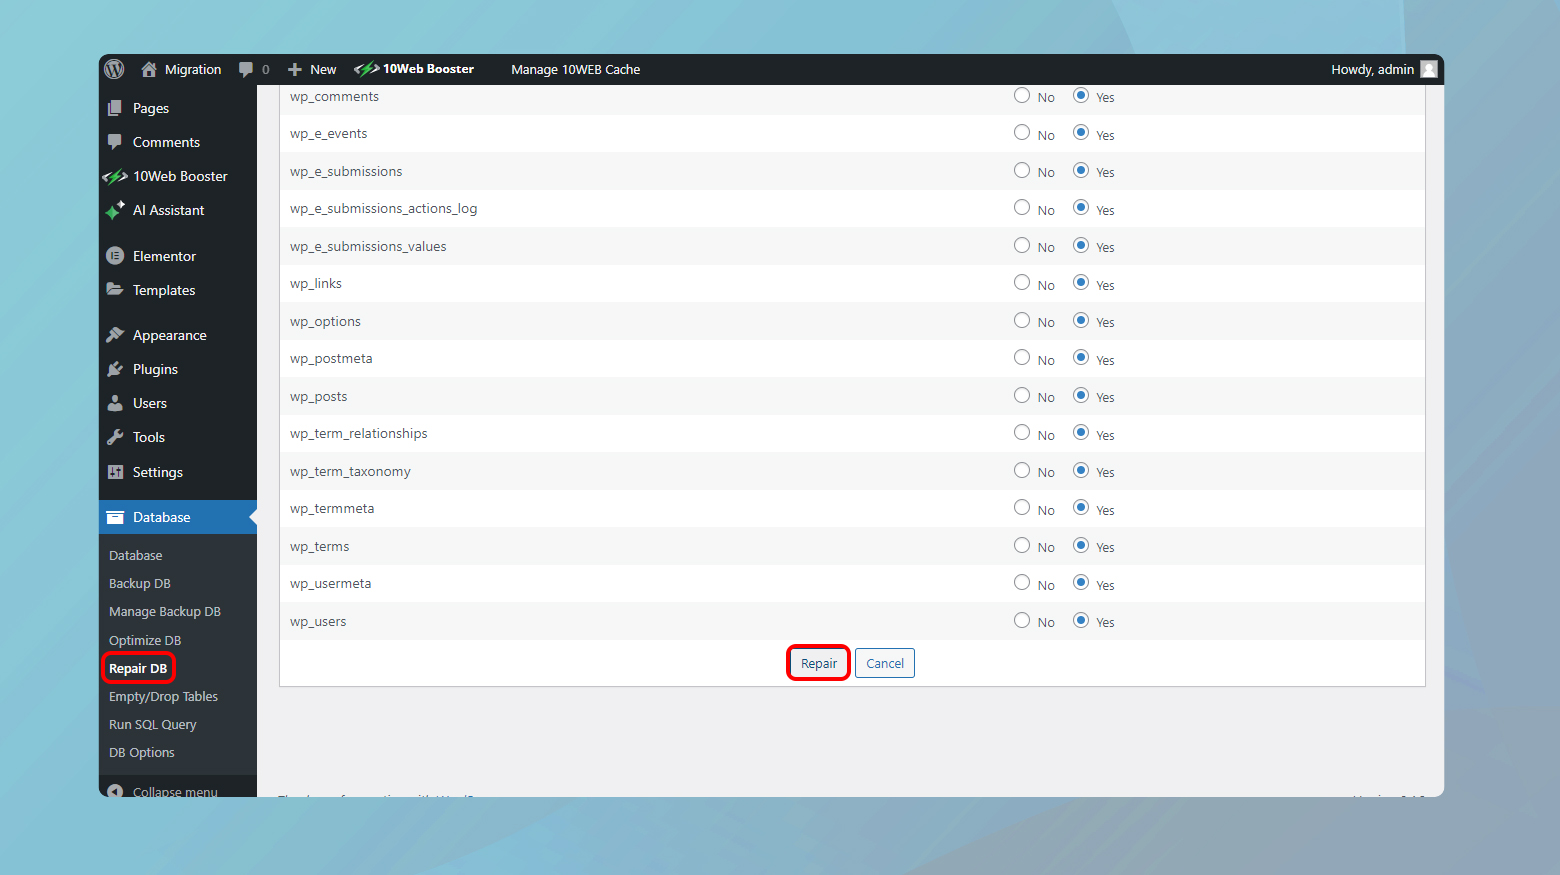
- Click on Database > Repair DB.
- In the Repair DB tab, you’ll see a list of database tables.
- Select all tables (as identifying the corrupted one might be difficult).
- Click on Repair.
The process is usually quick, and you’ll see a success message upon completion. Revisit the page that was showing the 422 error to check if the issue is resolved.
Repairing the database manually
If you don’t have access to your WordPress dashboard, you will need to repair the database manually. Manually repairing the database through phpMyAdmin involves directly interacting with the database tables and executing repair commands. With this approach you will be performing manual maintenance on a complex machine, where each part (table) is individually checked and fixed. The ‘Repair table’ command in phpMyAdmin scans each selected table for errors and attempts to fix them. This method is particularly effective when you cannot access the WordPress admin area due to the error. It provides a more hands-on and direct approach to database repair, allowing for immediate intervention at the database level. To manually repair your database:
-
- Log in to the control panel provided by your hosting service (like cPanel or Plesk).
Here is a detailed guide for websites hosted on 10Web.
- Find and open phpMyAdmin in your control panel.
- In phpMyAdmin, locate and click on your WordPress database from the list on the left.
- Select all the tables in your database.
- From the dropdown menu (usually below the list of tables), choose Repair table.

After the repair process, revisit your website to see if the error persists.
HTTP header checker tool
HTTP headers are like a conversation between your website and a visitor’s browser. They contain status codes and metadata that provide insights into how requests and responses are being handled. An HTTP Header Checker acts as an interpreter for this conversation, translating technical details into understandable information. By analyzing these headers, you can gain insights into server behavior and potentially identify issues causing errors. It’s a non-intrusive diagnostic tool that provides real-time data, aiding in pinpointing specific problems with server response.
Consult server logs
Server logs are the detailed journal of everything happening on your server, providing a historical record of events, errors, and operations. Accessing these logs allows you to trace back to the exact moment when an error occurred and understand what went wrong. This process is crucial for diagnosing issues that are not immediately apparent, as it offers a comprehensive view of server-side events. It’s particularly effective for identifying recurring issues or errors that are not easily visible on the front end of the website. Here is what to do:
-
- Log in to your web hosting account .
- Find the section for website/server logs. This could be under Server, Advanced, or Logs.
- For 10Web customers, your logs are located under Hosting Services > Logs.
- Click on Error Logs or a similar option.
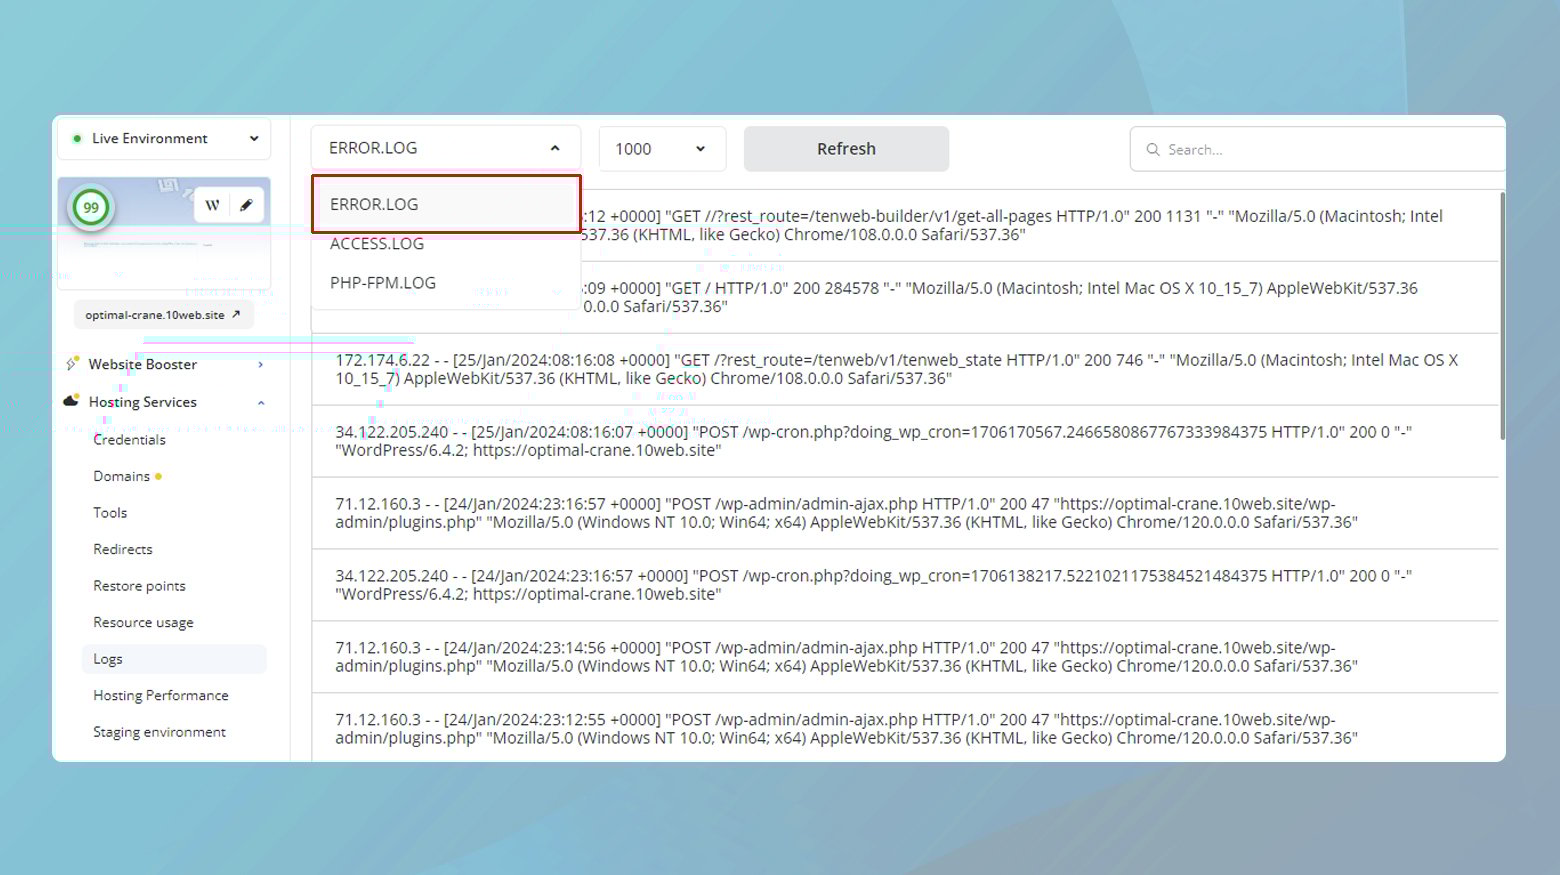
- Browse through the log entries, focusing on the timestamps that correspond to your issue.
- Look for error messages or patterns that coincide with the problem.
- Identify the types of errors and any specific file paths or scripts mentioned.
Conclusion
Troubleshooting an HTTP 422 Error in WordPress is a complex task that requires examining several aspects of your website. It involves a deep dive into recent code changes, database integrity, and the use of specialized tools to diagnose and understand the nature of the error. By reverting recent code modifications, you eliminate new bugs or conflicts. Inspecting and repairing the database ensures the data’s integrity, vital for proper site functioning. Utilizing debugging tools offers a detailed view of internal processes and server-client interactions, pinpointing specific issues. Reviewing server logs provides a historical insight into server activities and errors, which is crucial for identifying persistent or complex issues. This comprehensive approach enhances the likelihood of effectively identifying and resolving the root cause of the HTTP 422 error, ensuring the smooth operation of your WordPress site.
Say goodbye to website errors
Achieve peace of mind with 99.99% uptime on 10Web Managed
WordPress Hosting, powered by Google Cloud.
Say goodbye to website errors
Fix all the website errors in one click
Migrate your website to the world's best Managed WordPress Hosting.