Caching is a technique that is used to improve the performance and speed of websites and other online applications. It works by storing copies of frequently accessed data in temporary storage called cache so that it can be quickly served to users when requested. This can help reduce the amount of time and resources required to generate, improving the overall performance and user experience of a website or application.
There are several types of cache that can be used to improve the performance of a website or application, including server cache, browser cache, and application cache. If you are experiencing a high volume of traffic or generating a large amount of data within a website or application, caching is a good option.
In this article, we will see how to clear the WordPress cache safely and efficiently. It’s important to note that clearing the cache in WordPress can have an impact on the performance of your website, as it will temporarily disable the cache and cause your website to generate new cached versions of your pages and posts. However, in most cases, the benefits of having a fresh and up-to-date cache will outweigh any temporary performance issues.
FAQ
What happens when you clear the WordPress cache?
After the cache has been cleared, your website will continue to generate new cached versions of your pages and posts as they are accessed by users. This can help improve the performance and speed of your website by reducing the amount of time and resources required to generate web pages on the fly.
Is it safe to delete the cache folder in WordPress?
Deleting the cache folder can cause issues with your caching plugin or tool, as it may not be able to function properly without the cache folder in place. This can lead to performance issues or other problems with your website.
It’s generally a better idea to clear the cache in WordPress using the tools and options provided by your caching plugin or tool. This will allow you to safely and efficiently clear the cache and avoid any unintended consequences or issues with your website.
Does WordPress automatically cache?
Does clearing the cache remove anything important?
If clearing the cache breaks a webpage or entire site, it may mean that there is an error in the site. Cache just shows the recent working version of the site, while in reality, currently your site is broken. Try to disable the cache and see if the problem persists. If so, it is not a caching problem (because there is no cache anymore), but some error in the site itself.
How often should I clear my WordPress site's cache?
However, if your website has a large amount of content or generates a lot of data, you may want to clear the cache less often to avoid putting too much strain on your server resources. Make sure that your caching solution automatically triggers cache purge when you modify webpages, e.g. when you edit pages or change the WP theme. And use advanced options and clear cache per page, only for modified pages.
In general, it’s a good idea to clear the cache in WordPress periodically to ensure that your website is running smoothly and efficiently.
In This Article
Server Cache vs. Browser Cache
A server cache is a type of caching technique that stores the cached data on the website’s server. It works by storing copies of frequently accessed web pages and resources in a cache so that they can be quickly served to users when requested.
The server-side cache is helpful when you are rendering web pages on the server side instead of the client browser or while fetching the data from the server with the help of GET APIs. In server-side rendering, the server takes the load of generating the HTML pages which are then cached on the server for future requests. This technique allows the browser to retrieve these generated web pages directly without putting a burden on the server to generate these pages. This speeds up the loading of web pages because it saves time on DB calls and backend script execution.
Also, while fetching the data from the server (backend) using the GET APIs we usually cache this data as well on the server. This helps in reducing the number of requests made to the database.
The above mentioned helps improve the overall performance and speed of a website by reducing the number of requests made to the database, the time required to get this data from the server, and the resources required to generate the web pages.
Browser cache, on the other hand, is a type of caching technique that stores the website’s cached data on the web browser. It uses the local computer hard drive to store the data. It works by storing copies of frequently accessed web pages and resources so that they can be quickly served to the user when requested.
Both server cache and browser cache are useful for improving the performance and speed of a website, but they work in slightly different ways. The server cache is typically managed by the website owner or administrator, while the user’s web browser manages the browser cache.
Server cache can store a larger amount of data than browser cache. Browser cache, on the other hand, is stored inside the browser and can only be accessed by a single user.
In general, server cache is more effective for improving the overall performance of a website, as it can store a larger amount of data and is typically more efficient at serving web pages and resources to users. However, browser cache can also be useful for improving the performance of a website, particularly for users who access the same web pages and resources frequently.
Below are several key differences between server cache and browser cache that are worth noting.
| Server Cache | Browser Cache |
| Stored on the same server where the entire backend resides | Stored on the client’s browsers |
| Managed by the website owner or administrator | Managed by web browser |
| Can store a larger amount of data | Is stored inside the browser and can only be accessed by a single user |
| Is typically more efficient at serving web pages and resources to users | Is more useful for users who access the same web pages and resources frequently |
Server cache and browser cache are both useful techniques for improving the performance and speed of a website and can be used together. Usually, when saying WordPress cache, we mean server cache, and not browser cache.
Why and how often should you clear the WordPress Cache?
Several reasons can determine when and how often you might want to clear server cache WordPress.
- If you make changes to your website, such as publishing a new blog post or updating an existing page, clearing the cache can help ensure that users see the most up-to-date version of your website. Good caching plugins usually clear the cache for these cases automatically. However, sometimes issues may happen that require manual cache cleaning after updating the content.
- If you are experiencing issues with your websites, such as broken links or incorrect content, clearing the cache can help resolve these issues.
- If your website is running slow or experiencing other performance issues, clearing the cache can sometimes help improve the performance of your website.
In general, it’s a good idea to clear the cache in WordPress periodically, especially if you are making frequent updates to your website or if you are experiencing issues with your website. However, the specific frequency with which you should clear the cache will depend on your specific needs and the tools and plugins you are using to manage the cache.
Usually, web servers and caching plugins allow you to set an expiration time for cached data so that the cache is automatically cleared after a certain period. This can help ensure that your website always has a fresh and up-to-date cache.
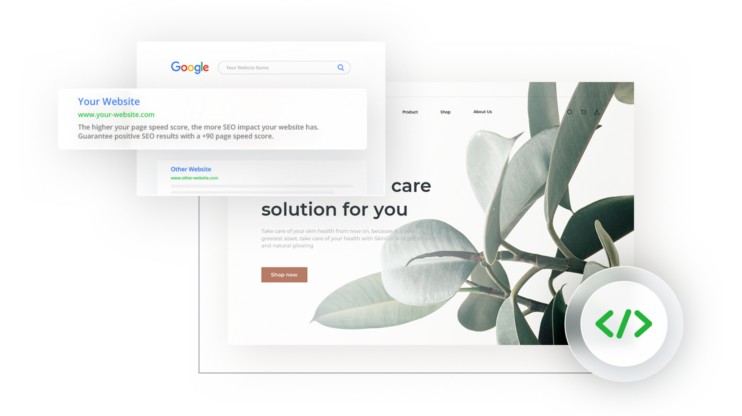
Want to speed up your website instantly?
Get 90+ PageSpeed Score automatically with 10Web Booster ⚡
On any hosting!
How to clear WordPress cache with and without a plugin
At times clearing the cache manually can be intimidating. It takes time, effort, and technical knowledge to clear WordPress cache manually.
How to clear WordPress cache without a plugin
The object caching mechanism also known as WP_Object_Cache is the only built-in caching mechanism for WordPress. Although, this feature only stores data for the duration of the request in the memory. In case, if you are not using any caching plugin then this is how by default WordPress will perform the caching. Since the data is stored only for the duration of the request it is not a great way to speed up the website.
Web hostings may have page and file caches enabled, depending on subscription plans and server configuration. Usually, they cache static assets (file cache), such as Javascript, CSS files or images, and static webpages (page cache).
There are two ways in which you can clear or purge the hosting cache in WordPress without a plugin: through the hosting provider and through the hosting plugin via the WordPress admin panel.
Purge the WordPress cache through the hosting provider
Nowadays, few hosting providers allow to purge WordPress cache settings directly from their hosting cpanel. If you are from those users whose hosting provider offers such a service then you can simply go to your hosting cpanel and clear the WordPress cache settings.
On the other side, there are various other hosting providers as well that don’t provide such convenience. In that case, you can purge the WordPress cache through the WordPress admin panel or by using a plugin. We will go through both of them in the sections below.
In the majority of cases, if hosting has a page cache, it provides some type of plugin integration, that resets the cache when you edit and update the pages from the WordPress dashboard. Here is an example, of how to clear WordPress cache by using the LiteSpeed Cache plugin supported by the Hostinger platform. The Hostinger cache manager is based on LiteSpeed caching technology.
- From the WordPress admin panel under the “Plugins” section, you need to install the LiteSpeed Cache plugin.
- Download and Activate the LiteSpeed Cache plugin from the WordPress plugins page.
- After you have activated the plugin it will enable the cache option.
- In case, If you want to change cache settings then you can do it within the “Cache” section.
- When you make any new change to the site you can purge the cache generated by the LiteSpeed plugin so that the new change is reflected to all the users.
For other hostings, you need to locate the plugin responsible for caching. Usually, it is preinstalled, often as a must-use plugin. Use its settings and interface to trigger cache purge manually.
Please make a note that if you don’t properly clear your cache then it can result in a broken website.
How to clear WordPress cache with a plugin
Using caching plugins to manage the WordPress cache makes the process of clearing the cache a lot easier. You don’t need to worry about anything when you are using plugins to clear your WordPress cache. In this section, you will see how to clear the WordPress cache using various plugins.
LiteSpeed Cache
LiteSpeed Cache is an all-in-one acceleration plugin that provides server-side caching and optimization features. It is a WordPress multisite plugin that works with plugins like WooCommerce, bbPress, Yoast SEO and ClassicPress.

Steps to clear WordPress cache with LiteSpeed Cache to auto clear cache using wordpress plugin:
- Download and Activate the LiteSpeed Cache plugin from the WordPress plugin page.
- After you have activated the plugin it will enable the cache option.
- In case, If you want to change cache settings then you can do it within the “Cache” section.
W3 Total Cache
W3 Total Cache is another speed optimization and caching plugin that improves the SEO, Core Web Vitals score and overall user experience of your site. This helps in increasing website performance and reducing page load times.
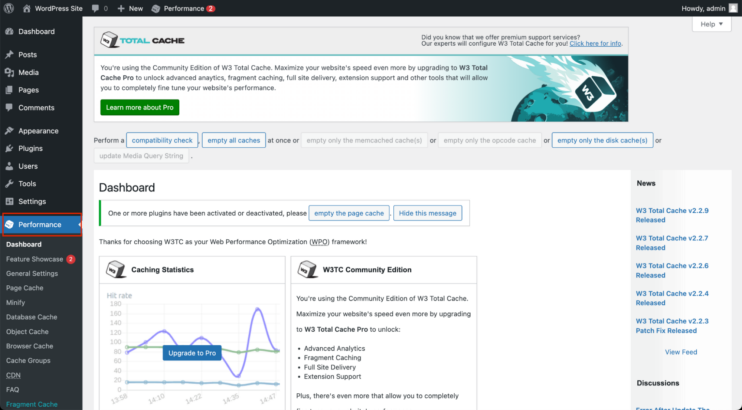
To purge WordPress cache with W3 Total Cache you can manage the cache settings from the “Page Cache” section of the plugin.
WP Super Cache
WP Super Cache plugin is specifically designed to cache the content of the webpage on the server side. This plugin helps generate static HTML files so that they can be served to the user requesting the webpage instead of processing heavier and more expensive WordPress PHP scripts.
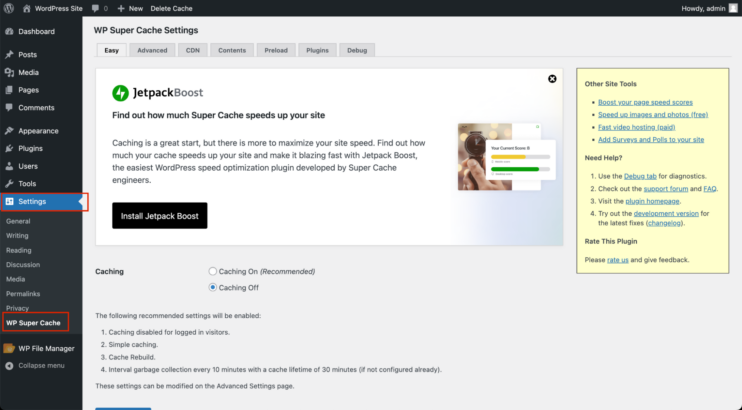
To clear WordPress cache settings with WP Super Cache, go under “Settings” and then select “WP Super Cache”. Here, you have to select the “Caching On (Recommended)” option to enable caching.
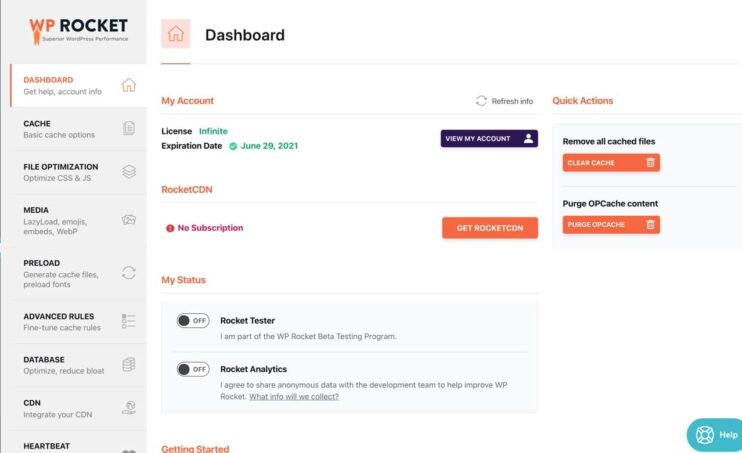
WP Rocket
WP Rocket is an all-in-one web performance plugin that provides various features, including the server-side caching to help enhance the speed and optimize the site. They do not provide a free version of their plugin. You need to buy a plan from their official site to download the plugin.
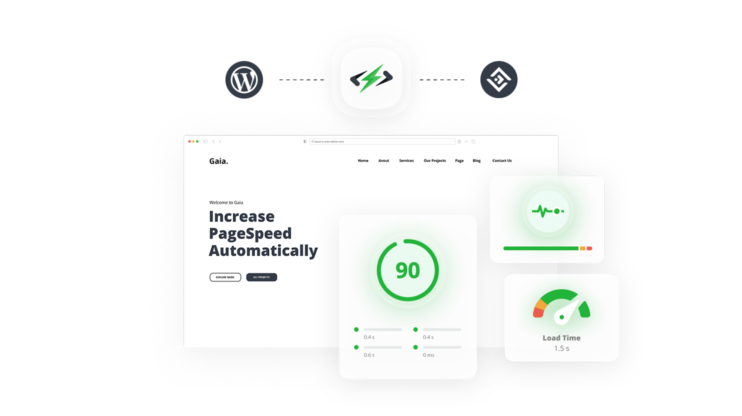
10Web Booster
10Web Booster is an all-in-one speed optimization plugin for improving the overall performance of the website. It has a built-in caching mechanism which makes it easier to clear the WordPress cache generated by the 10Web Booster plugin with just a click of a button. 10Web Booster performs both page caching and file cache. The caching affects the First Contentful Paint (FCP), Time to Interactive (TTI), and all metrics of the Core Web Vitals (CWV).
Follow the below steps to clear or purge the WordPress cache with the 10Web Booster plugin.
- Open the 10Web dashboard as shown in the image.
- After you have entered the dashboard you can then click on the “Settings” tab in the 10Web Booster menu. By default, the caching will be enabled for your plugin. To clear the cache, just click on the “Clear Cache” button that will clear your website’s cache.
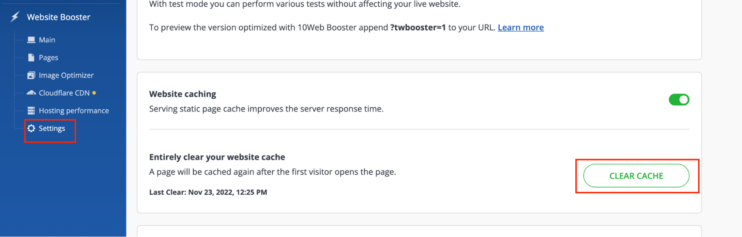
This is how easy it is to clear the cache via the 10Web Booster plugin.
Want to speed up your website instantly?
Get 90+ PageSpeed Score automatically with 10Web Booster ⚡
On any hosting!
How to clear browser cache
It’s really easy to clear the browser cache. Follow the steps below to clear the cached data in Chrome browser which is the most popular and widely used one.
- Open the browser for which you want to clear the cache, in this case Chrome.
- Press “F12”or “Option-Command-I” (for Mac) on the keyboard to open the Dev tools.
- Now long press the refresh button of the browser until you get a list of options.
- You will get the following 3 options: Normal reload, hard reload, and empty cache, hard reload.
- Out of the 3 options, click on the option that says “Empty cache and hard reload” to clear the entire cache of your browser and perform a hard reload that will reload the page.
| Normal Reload | It’s the same as reloading the browser page by pressing the reload button or pressing the F5 key. |
| Hard Reload | It tells the browser to re-download the entire data for the webpage from the server without taking it from the browser’s cache. |
| Empty Cache and Hard Reload | It first clears the browser’s cache data completely and then re-downloads the entire data for the webpage from the server. |
Conclusion
Clearing the cache in WordPress is a useful technique for ensuring that users see the most up-to-date version of your website. There are several ways of clearing the cache in WordPress. To clear server-side cache you can use a plugin or use the cpanel if your hosting provides it. To clear your browser cache use the Dev tools feature in your browser.
We discussed when to clear the cache and how to easily do it using popular plugins and hostings. In the case of 10Web Booster, that’s a simple automated experience. Use 10Web Booster to speed up your site and avoid caching issues.
Finally, you can test your website after clearing the cache to ensure that everything is working as expected. If you are using the 10Web Booster plugin then you can be 100% sure that it will not break your site and you can safely and efficiently clear the cache in WordPress and improve the performance and user experience of your website.
Want to speed up your website instantly?
Speed up your website automatically
Get 90+ PageSpeed Score automatically with 10Web Booster. On any hosting!


Speed up your website instantly
Speed up your website instantly
-
 Automatically get 90+ PageSpeed score
 -
Experience full website caching
-
Pass Core Web Vitals with ease
 Automatically get 90+ PageSpeed score