One should always start with a why. At least, that’s what they say. So let’s start with all the possible “why” -s.
Why do you need a website for your photography portfolio in the first place and why go with WordPress?
Why not simply use Facebook, Instagram, Flickr, and other platforms to promote your work?
The thing is, even though social media is helpful, a website will give you all the freedom you need to pick and choose how to publish your content, which layout to go with, how exactly to plan your success with SEO and just in general have your personal space and manage it on your own.
Need more motivation? I suggest taking a look at several examples of successful photography portfolios created with WordPress:
After the why always comes the how. So let’s get started!
Step 1: Choose a domain and hosting.
When a baby is born, it gets a name and a place to live. Same works for a website. Everything starts with choosing the domain and the hosting.
The domain is your website’s ID card, the personalized name that makes your site unique and recognizable, while the hosting is the physical place, the computer where you upload all your data: pictures, texts, etc. There are lots of sites where you can purchase your ideal domain name.
I would recommend namecheap.com for its ease of use. There are numerous hosting options out there, too.
Bluehost is one of the most popular ones if you have a hard time choosing.

Step 2: Install WordPress.

Now that you have the domain and hosting, it’s time to install WordPress itself, which is super easy if you follow the instructions.
Step 3: Choose the perfect theme.
“Don’t judge a book by its cover,” they say. Forget it! In the end, we all do: appearance matters, especially when it comes to your site.
You need to make it as appealing as possible to be competitive. And that’s exactly where themes come in.
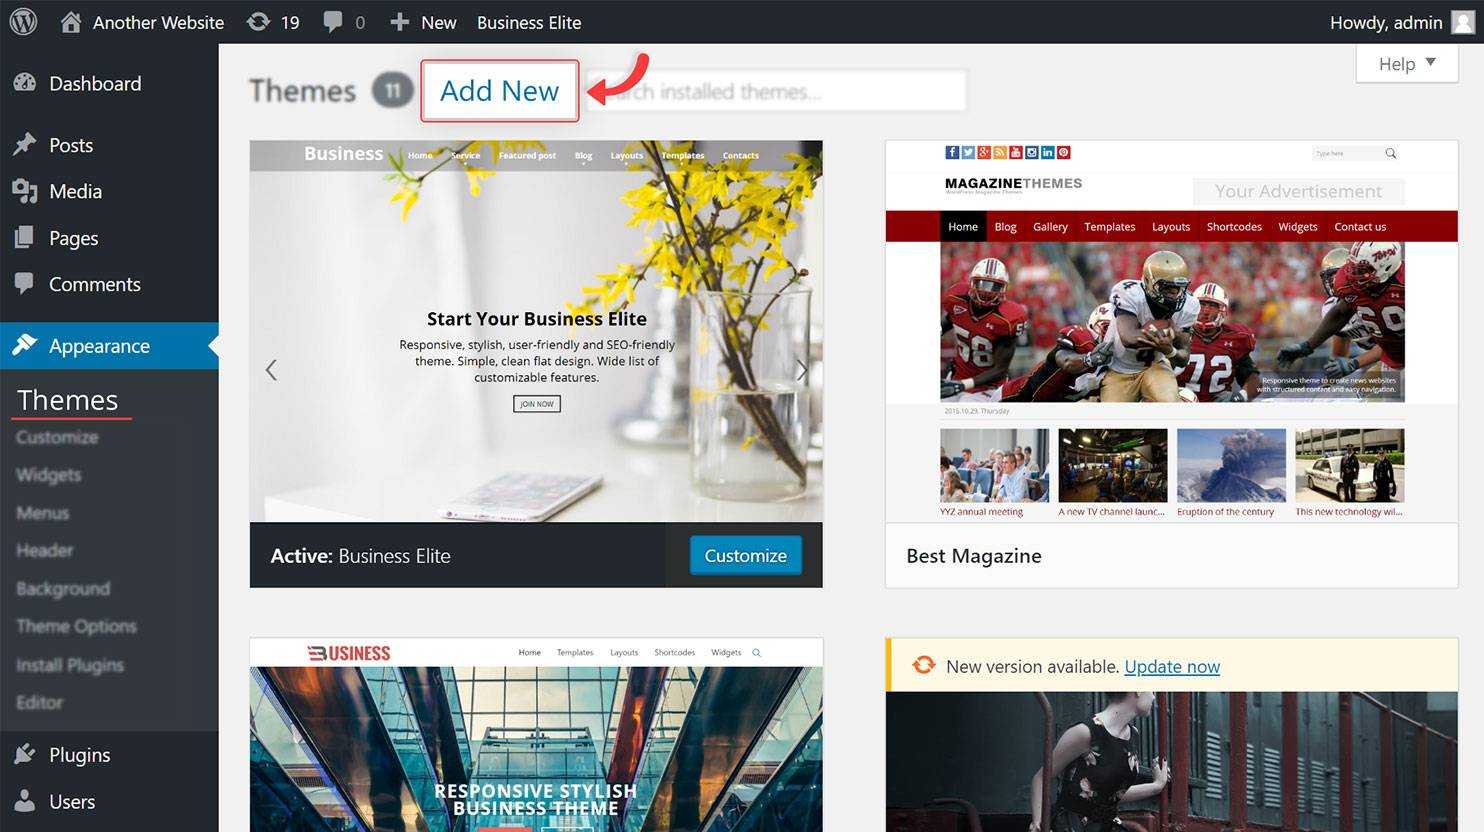
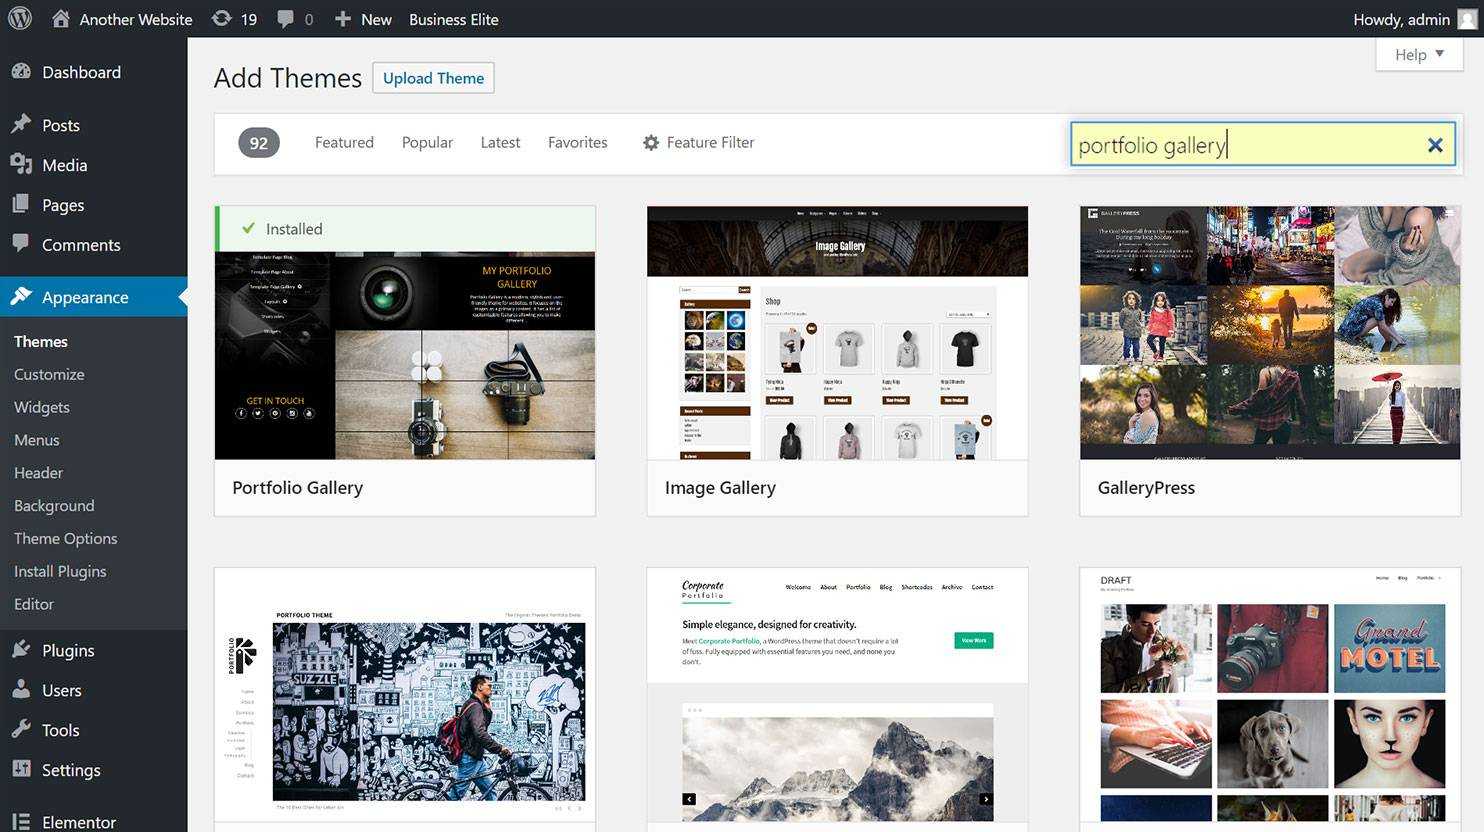
The easiest way to install one is to go to the appearance section of your admin page, select Themes and add a new theme with the “Add New” button on the top of the screen.
There is a huge variety of themes to choose from, both free and paid. I recommend choosing a free theme and customizing it to fit your signature colors, fronts and the spirit of your photography.
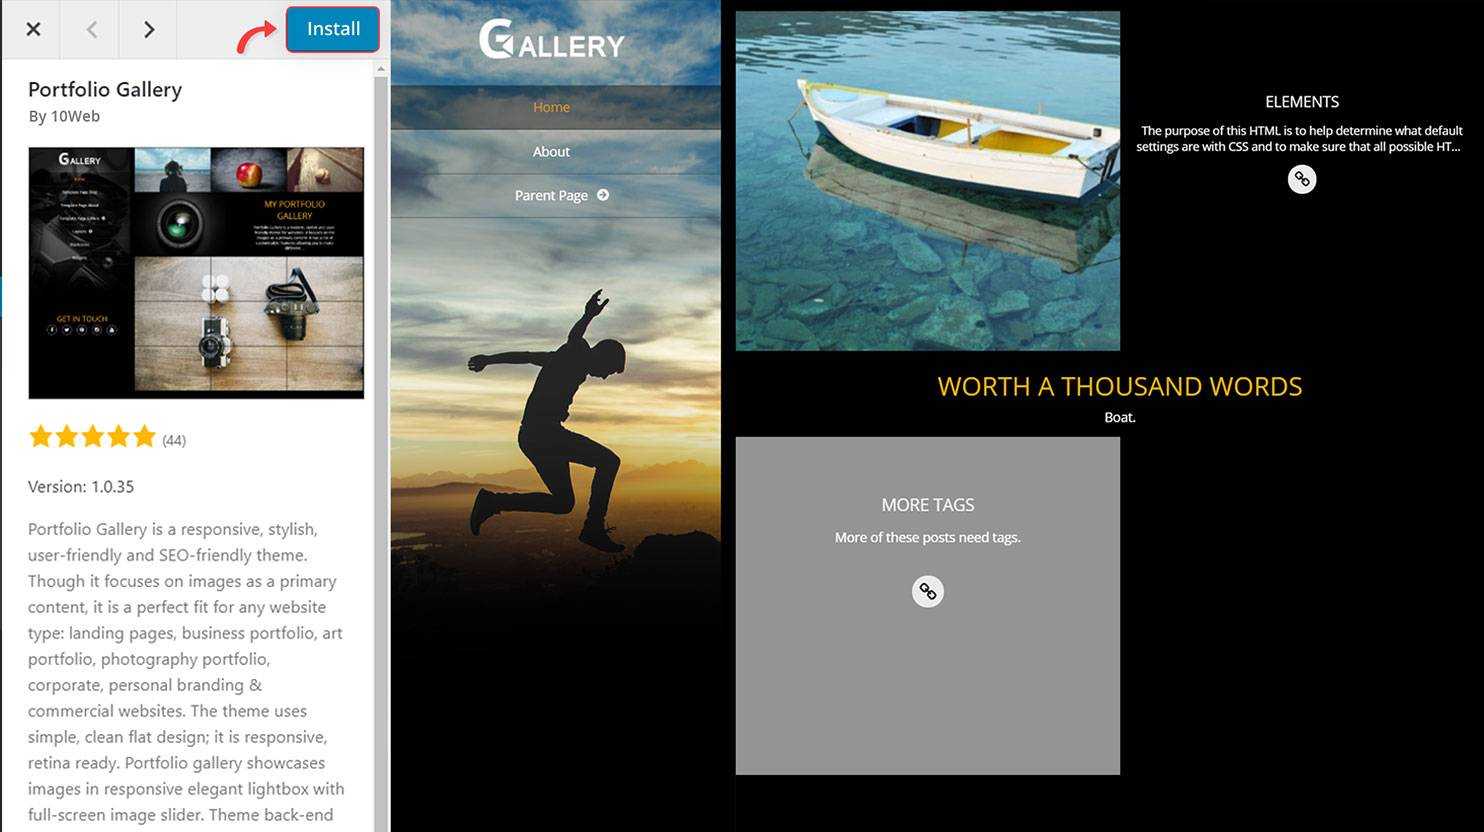
There are even free themes especially for photographers. Personally I would go for one of the following themes, as the are simple, manageable, and responsive. To install it you just have to search it in your themes and hit the install button:
Step 4: Select the best gallery plugin.
 Step 4: Select the best gallery plugin.
A plugin adds a small package of functionalities to your WordPress site, so choosing the best one is pretty important.
When it comes to photo gallery plugins, there are about 1000 of them available on WordPress.org. I want to talk about a “magical cure” that will ultimately abolish lots of problems photographers encounter while creating portfolio websites.
In my modest opinion, you should consider Photo Gallery plugin by 10Web. Its installation process is very simple. If you run into any difficulties, give this step-by-step guide a read. You can download Photo Gallery for free.
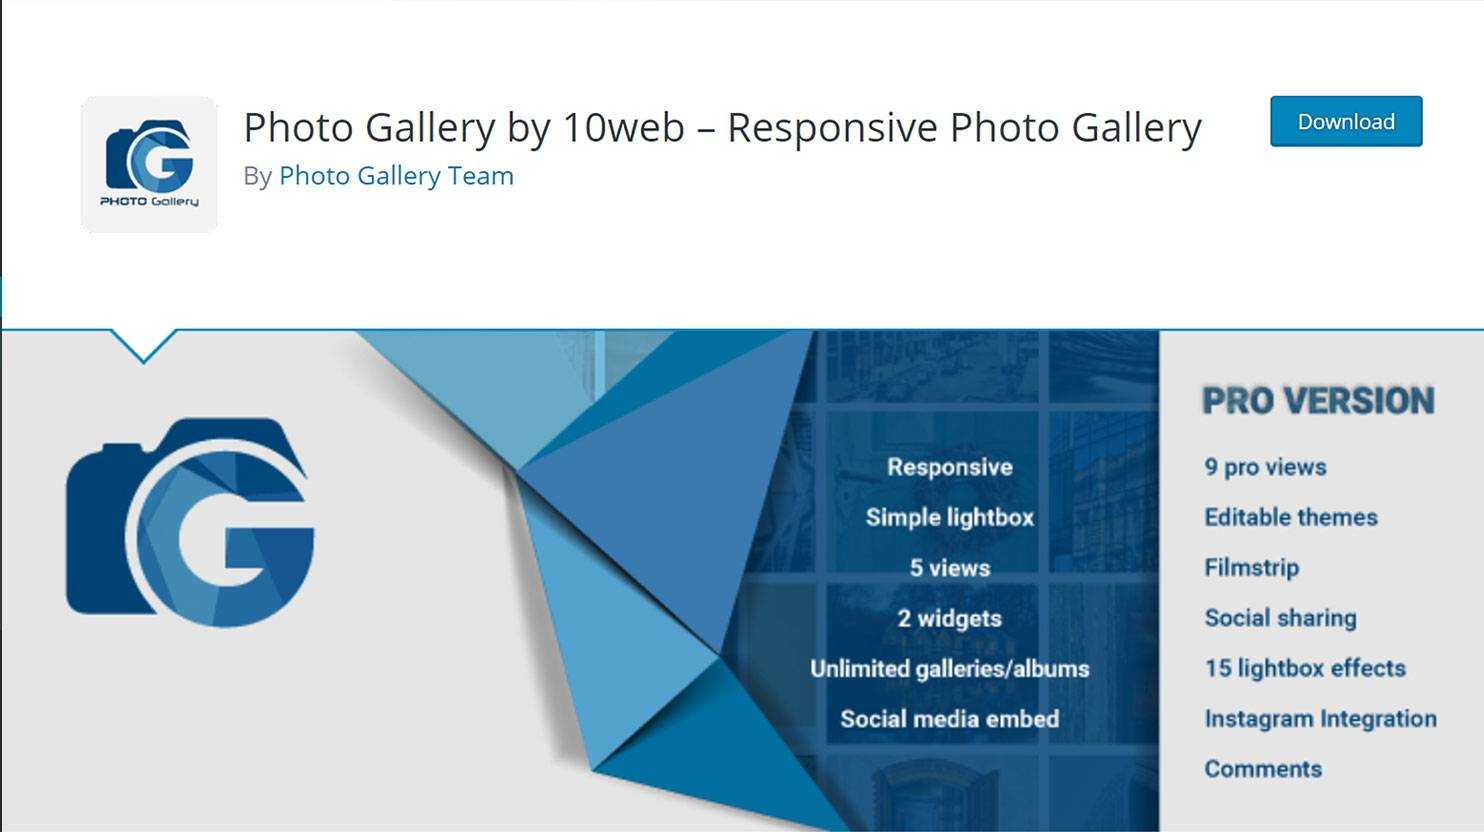 Photo Gallery by 10Web is arguably the best because it is:
Popular:
Wise people, as the saying goes, learn from the mistakes of the others. So let’s trust the experience of other users. The plugin has over 300000 active installations and over 1100 reviews, about 85% of the which are 5 stars. With that many users, community support is available when you need it. Besides, 10Web Customer Care Team is always there to answer your technical questions.
Functional:
The best thing about it is it’s fully customizable, so you get absolute control of your content and presentation. This plugin will help you easily upload images, create galleries and gallery groups, and manage them however you want.
You can also upload videos right along the photos.
Moreover, there are plenty of add-ons that add various functionalities, for example, for importing images from your Facebook account or another page. To sum up, the plugin has an intuitive interface and extensive functionality. Here you’ll find the plugin’s user guide with detailed instructions.
Beautiful:
Finally, the look — the website is exhibiting your art, after all! Apart from your theme and colors, fonts and design, there is so much more you can customize with Photo Gallery plugin.
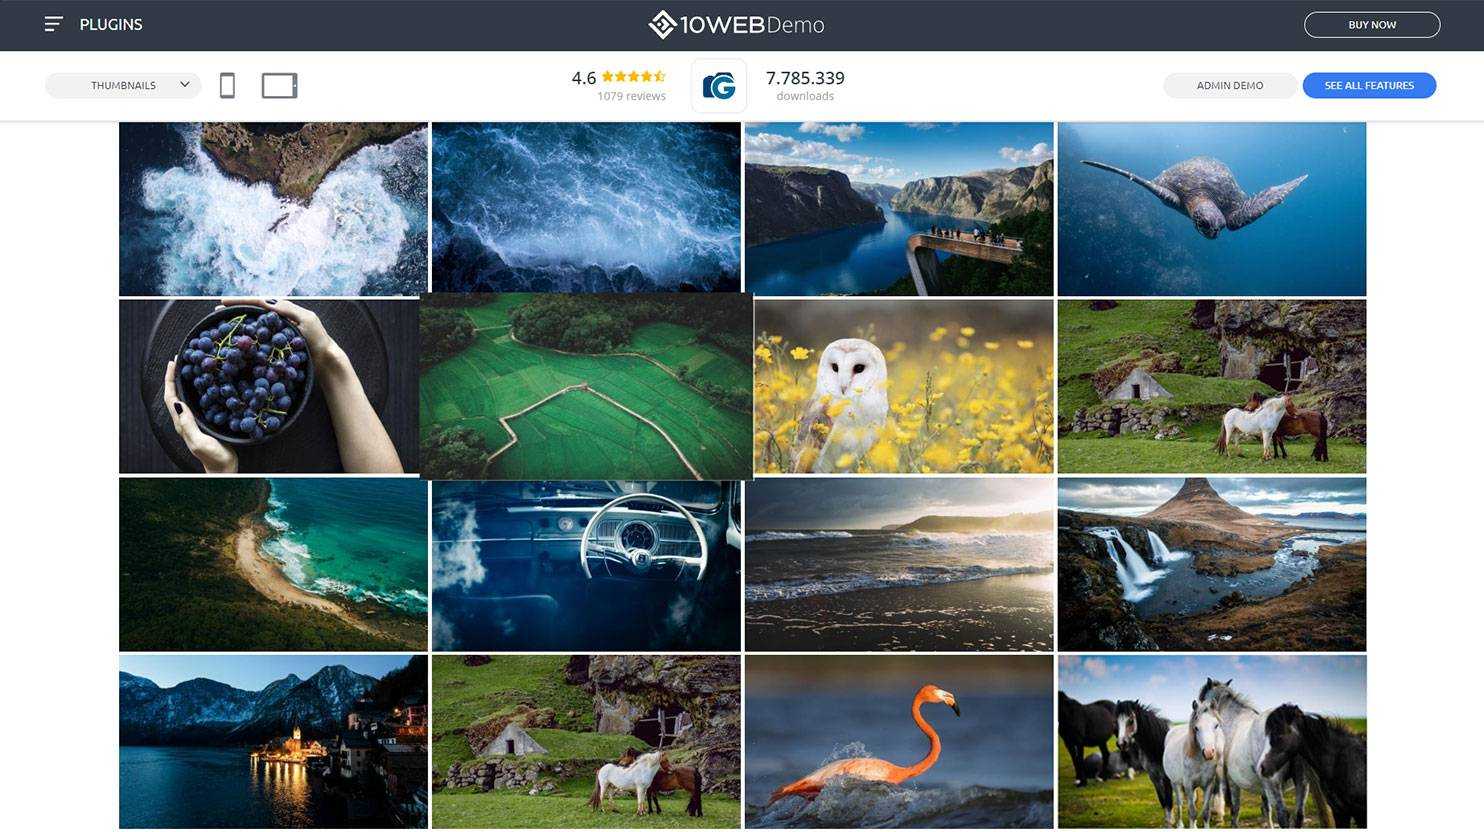
For example, the plugin offers several page layouts to choose for depending on the topic and style of your photography. The main views are:
Thumbnail: The simplest and most professional-looking view: all the images are evenly distributed between rows and columns as thumbnails. This could be amazing when displaying or advertising a product, as well as for event photography.
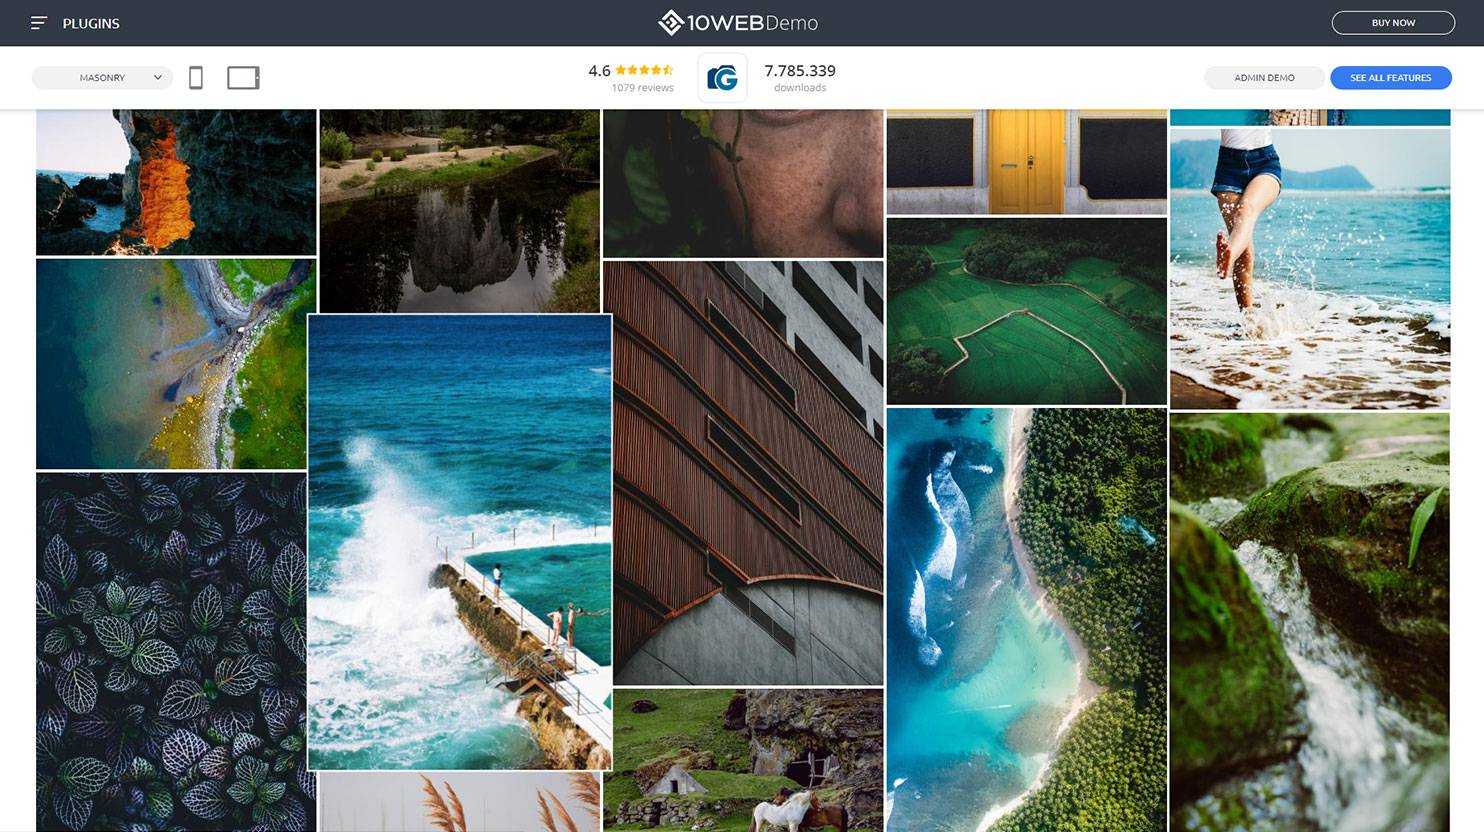
Masonry: Images differ in height and width. The page ends in a cut line. This view is perfect for nature/landscape photography.
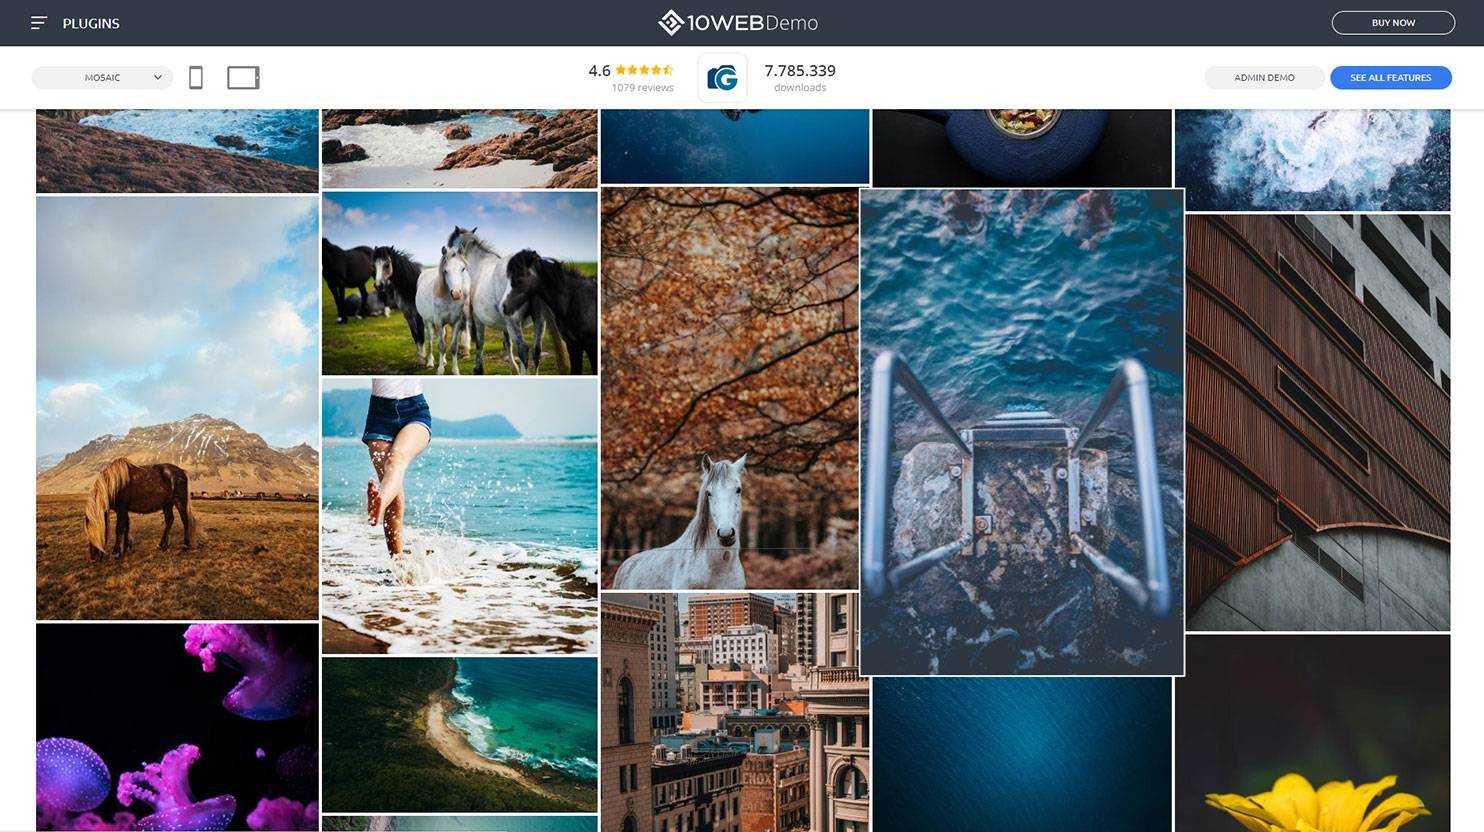
Mosaic: Same as masonry, but the page ends in a straight bottom line. This layout is great for wedding/family photography. It also works really well with storytelling photography, emphasizing the dramatic aspect.
Slideshow: The images are viewed as a slideshow. If you want to display only a few photos, the slider is a wonderful tool for making it look neat and appealing.
Blog Style: A title and a description can be added to each image. This style works for any topic as long as you have what to say.
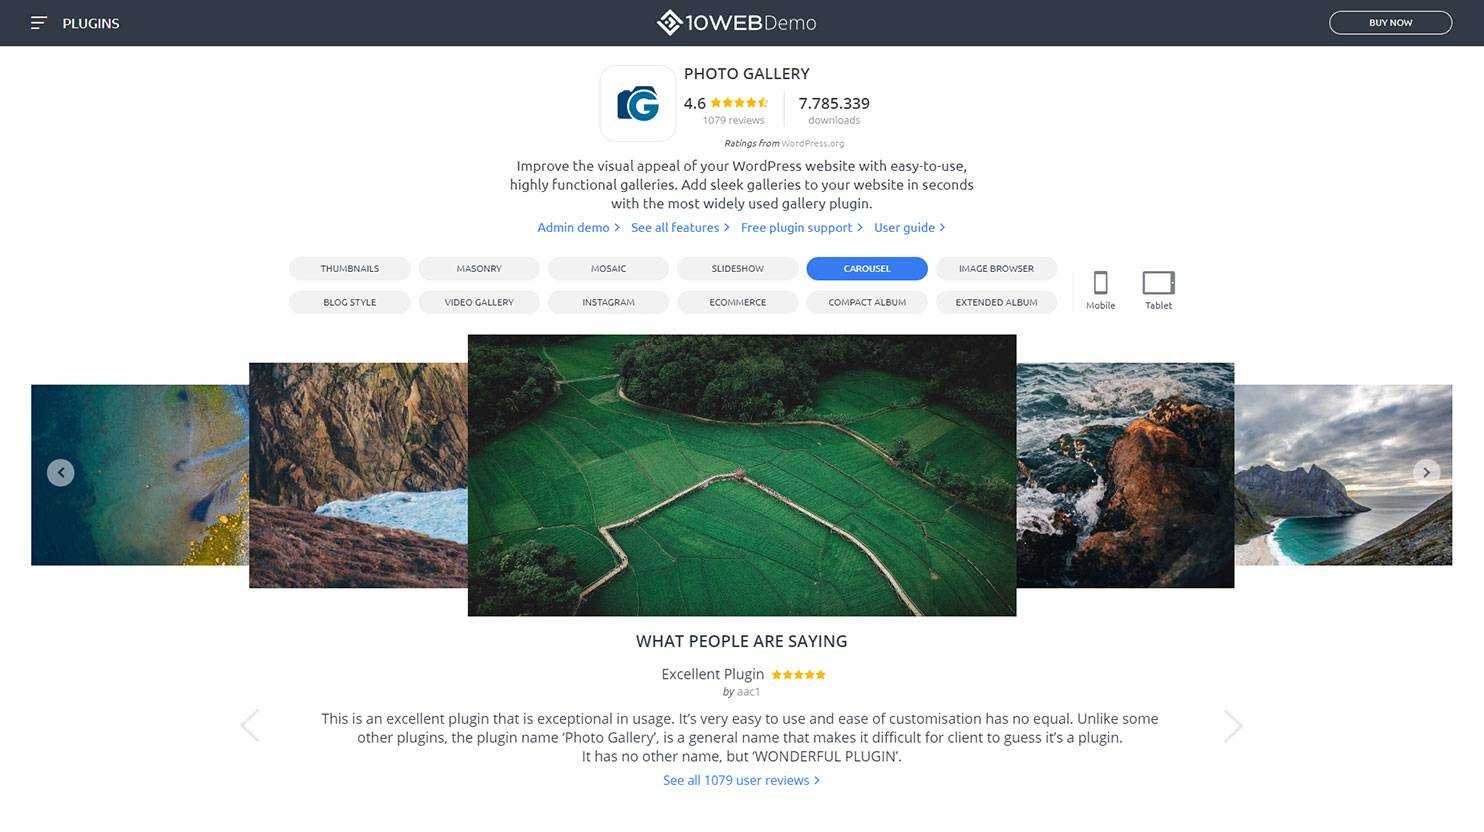
Carousel: Similar to the slideshow but with the carousel effect. This effect could be used for portrait/infant photography.
Step 5: Image Optimizer.
One of the standard problems photographers face is the huge amount of high-quality images with high resolution. They cause issues such as a lack of space and increased import time lowering the search ranking of the website because of low speed.
You’ll definitely need a proper image optimizer to survive.
The best solution is our Image Optimizer service. It’s an amazing tool that lets you optimize up to 50,000 images each month, maintaining their high quality. Basically, what happens is you select the images that need to be optimized and the service compresses them, making them smaller in size while maintaining the quality.
You can optimize both the images already on your site and newly uploaded ones. The cool thing is that you can optimize your images up to 80% depending on the compression method you choose, with minimum loss.
You can find more about the service and why one needs it here.
Step 6: SEO is important.
Great content is very important but it’s not enough. In order to make your website visible to potential clients, you first need to make it visible to search engines.
It’s obvious we all want our websites to become popular and frequently pop up on top positions of search engines.
That’s what SEO (search engine optimization) is all about.
Firstly, to better understand what SEO is and what you should do, check out this beginner’s guide.
Step 7: Start selling.
Suppose you created an amazing website, posted your photos, and gained an army of fans and followers. I dare to assume that the ultimate intention is to sell your photography.
I suggest coming back to the Photo Gallery plugin: it has the solution. There’s this important add-on E-commerce that lets you sell your photography immediately on your website, both as downloadable images and printouts. You can literally convert your website to an online art store.
Related Articles
Step 8: Speed up your website with 10Web performance service.
Because time is the most expensive resource, 10Web Performance Service is another bonus tool you’re almost guaranteed to fall in love with.
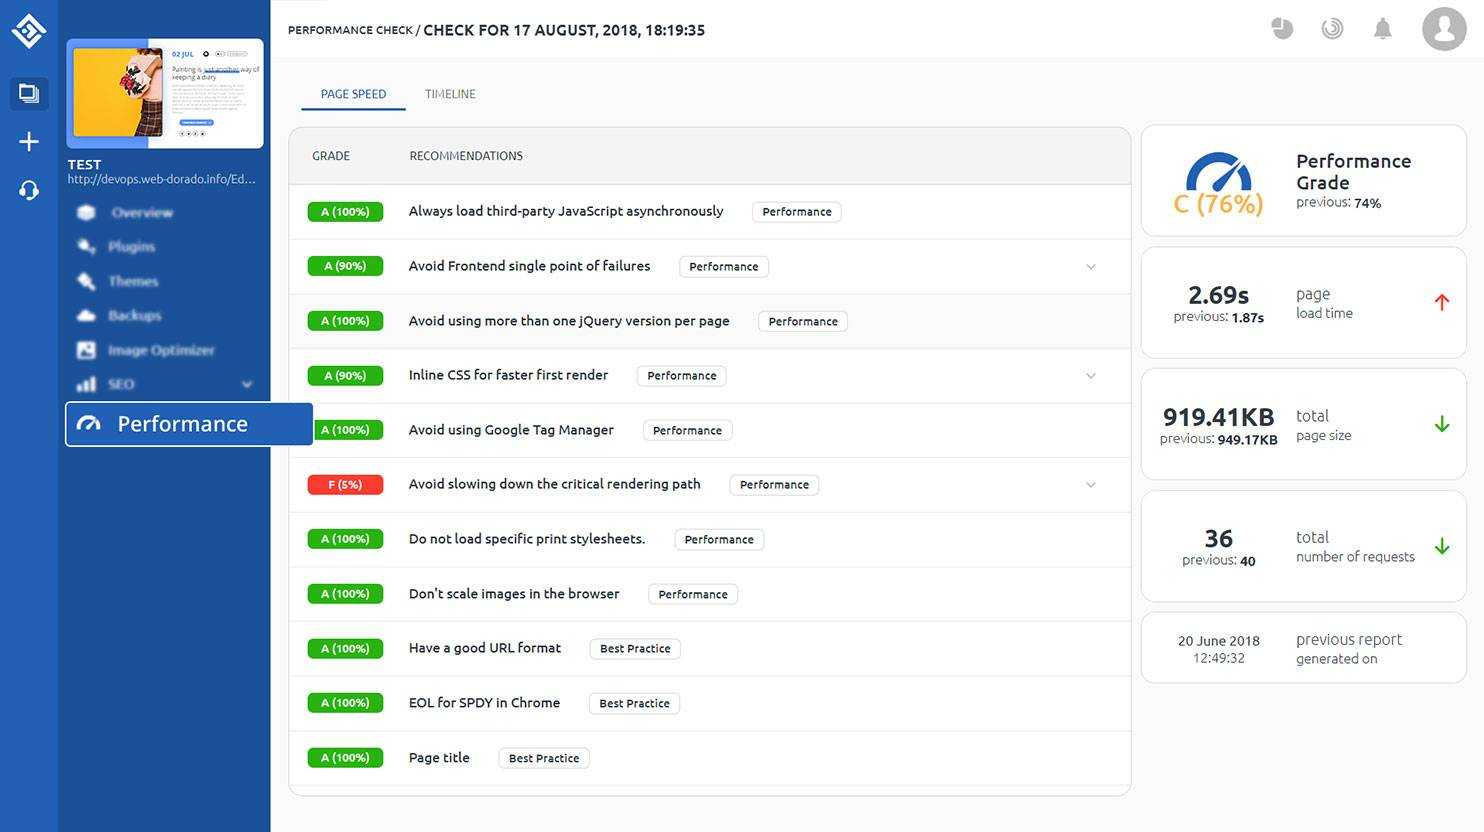
A few mouse clicks will tell you a lot about your site’s performance and the reasons for loading issues you might be having. You can also check the timing of the page load or compare your pages and posts to draw conclusions.
This service will also analyze your site’s performance and give actual advice and recommendations on making it faster and more optimal. The detailed reports will look like this:
In addition, once you get to a more advanced level, 10Web Photo Gallery plugin has an amazing premium version that has the potential to become your best friend.
You can get it in two formats: as a single product or as a part of the 10Web platform.
The first option is better if you only want to add or enhance a gallery. But, if you want to improve the website overall, the 10Web Automated WordPress Platform might come in handy because it offers an automated AI website builder, premium automated hosting, a number of services, and 60+ premium plugins and extensions, including image optimization of up to 1500000 images a month, and more.
Hopefully, upon finishing this article, you have enough motivation and guidance to rock your career. As a bonus, check out the cliches found in the portfolios of a lot of amateur photographers to make yours infallible.
Good luck with the process! Don’t forget to share your opinion about the plugin and, of course, link your final portfolio below. We’d love to see your work.
Simplify WordPress with 10Web
Simplify WordPress with 10Web
Skip manual work with 10Web Managed WordPress Hosting.

Simplify WordPress with 10Web
Simplify WordPress with 10Web
-
 Experience automated website management
 -
Keep your site up-to-date with automatic updates
-
Forget about security threats and malware
 Experience automated website management