Learning how to add product variations in WooCommerce is essential for any online store owner aiming to offer a diverse product range. This guide provides beginners with multiple methods for adding and managing product variations, enhancing the shopping experience by seamlessly enabling different sizes, colors, and attributes.

Looking to sell online?
Create your custom online store in minutes with 10Web AI Ecommerce Website Builder and take your business online.
FAQ
How do I create a variation of a product in WooCommerce?
How do I get a variable product in WooCommerce?
How do I get available variations in WooCommerce?
How do I add product options in WooCommerce?
Understanding product variations in WooCommerce
Adding product variations in WooCommerce allows you to offer a range of options for a single product, such as different sizes, colors, or other attributes. This is particularly useful for products that come in a variety of choices, providing a better shopping experience for your customers.
When you add product variations in WooCommerce, you essentially set up a base product with multiple attributes. Here’s a quick rundown of the basic steps:
- Define attributes in Product > Attributes, or the product page. These could be things like size or color.
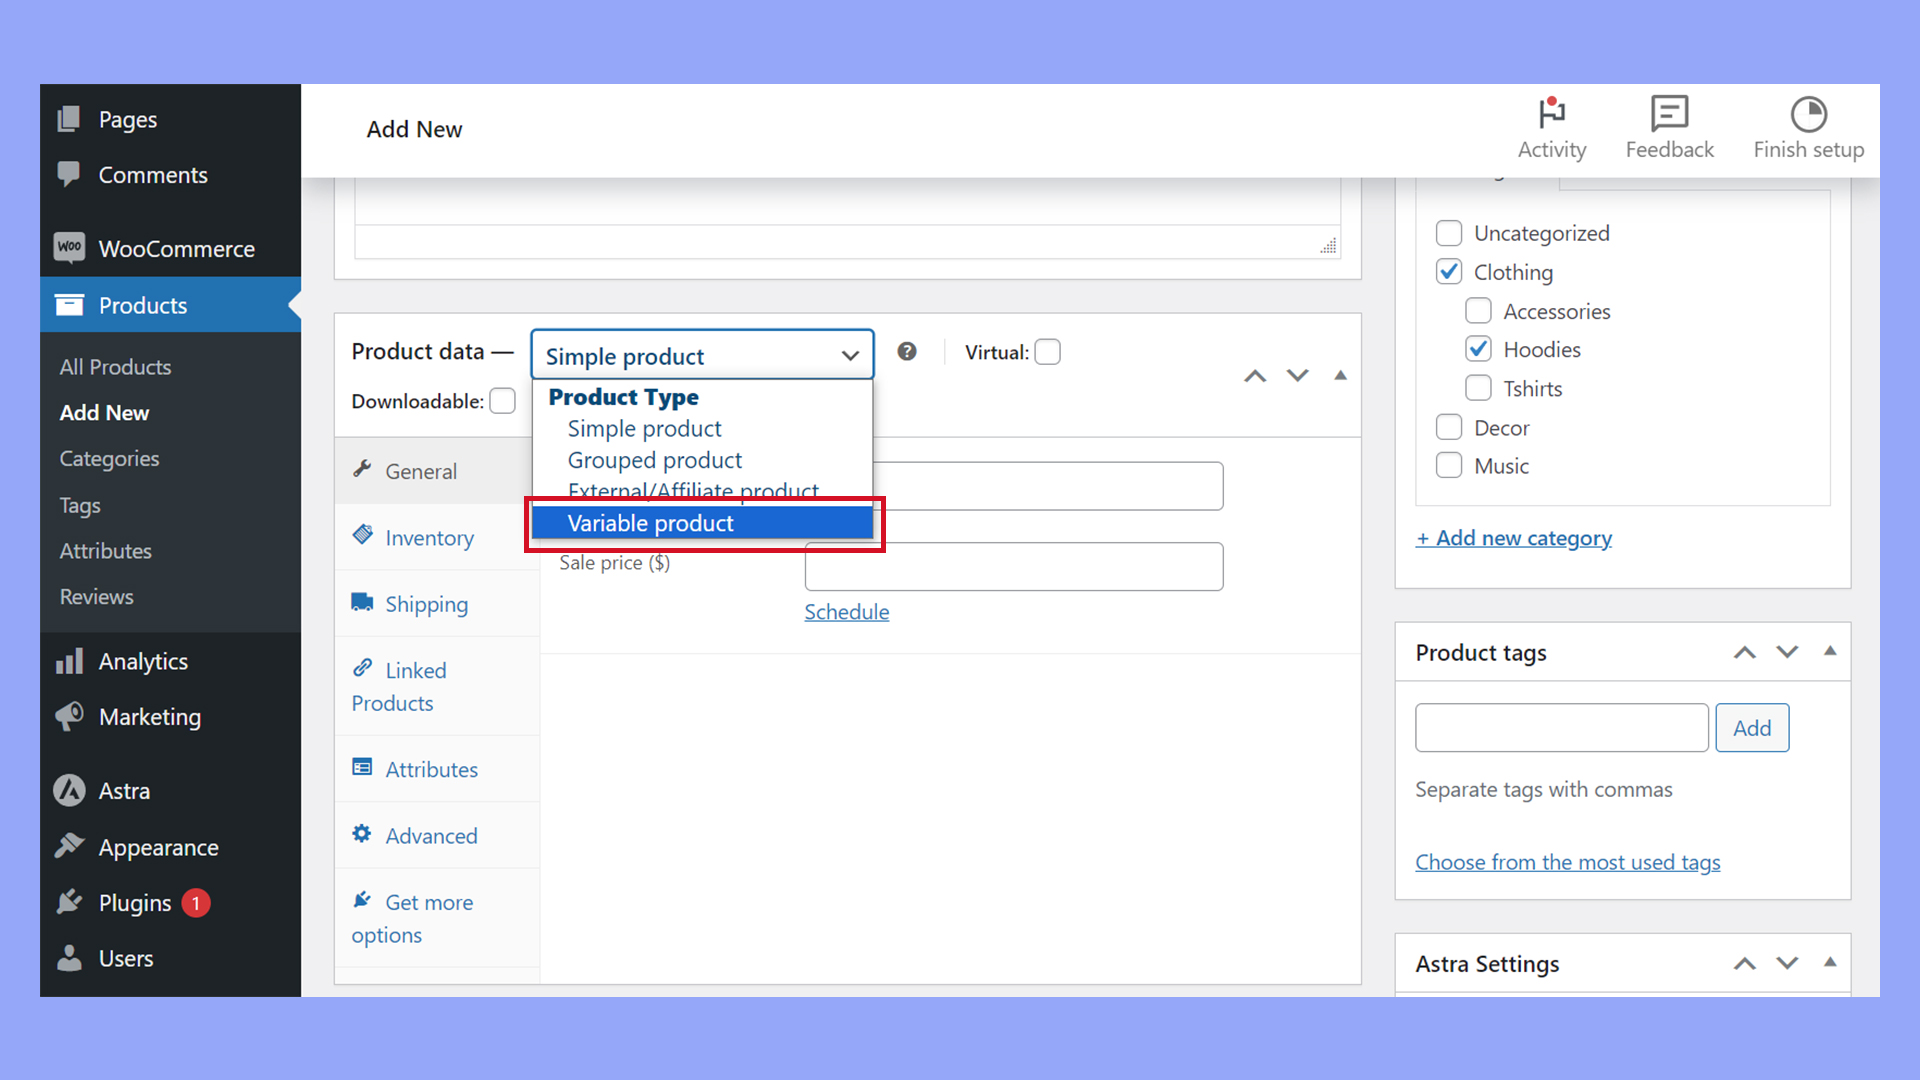
- Add a new product, and set its product type to Variable product in the Product data dropdown.
- Under Product data, click on the Attributes tab. Here, you’ll assign to the product the attributes you’ve already created.
- Enable the attributes by ticking the Used for variations box to tell WooCommerce you’ll be making variations with these attributes.
- Next, move to the Variations tab. You have the option to add variations manually or let WooCommerce create all possible combinations for you.
Customizing your product variations gives you control over aspects like stock, prices, and images for each variation.
When you add product variations in WooCommerce, you can set different prices for different sizes or colors, manage inventory for individual variations, and even show different images when your customers select different options.
By providing a clear and straightforward structure for your product variations, you will enrich your product pages and streamline the shopping process.
Configuring product variations accurately means your customers will see the correct price, available stock, and specific images based on their selection, which helps in making an informed purchase decision.
Setting up attributes for variations
Before you add product variations in WooCommerce, you must set up attributes that define your items’ characteristics, such as size, color, or material.
Creating global attributes
With WooCommerce, you can create global attributes that apply to multiple products. To get started:
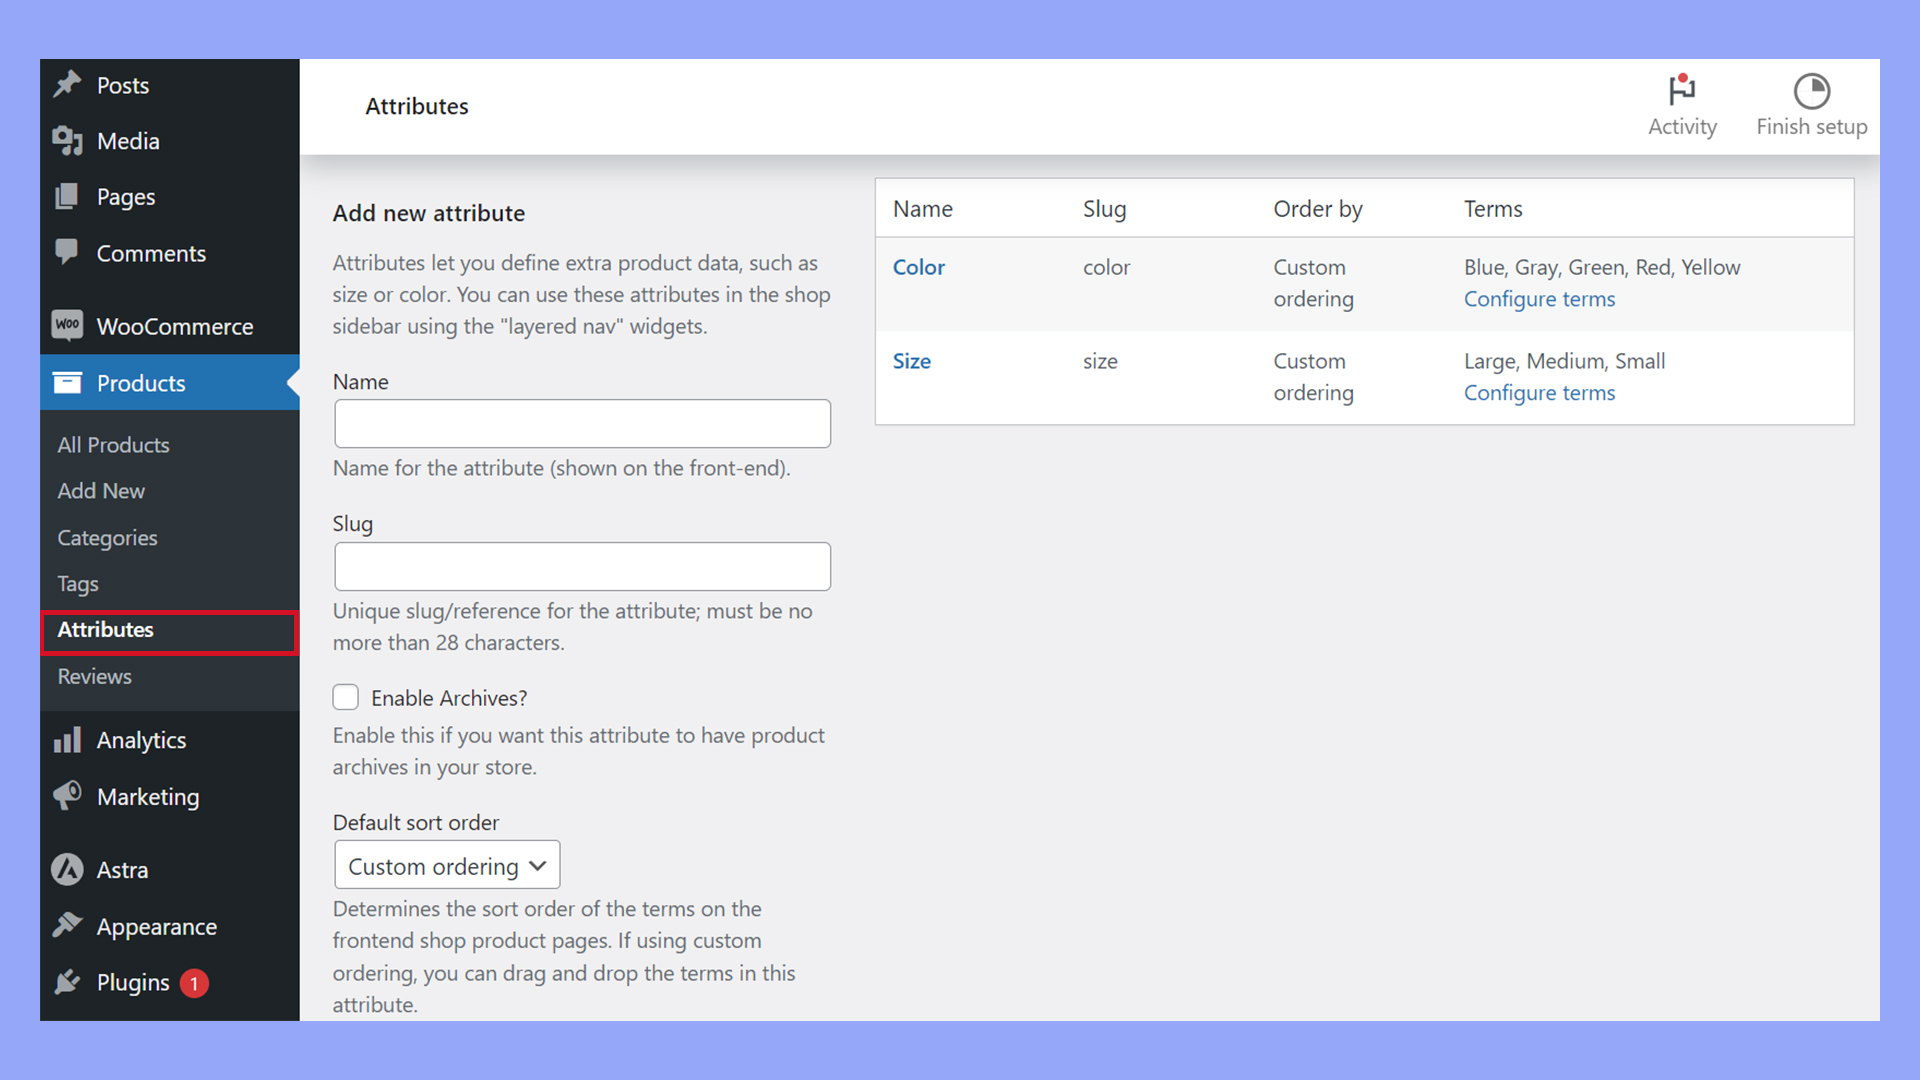
- Navigate to Products and then Attributes.

- Here, enter a Name for the attribute, such as “Color.”
- Optionally, configure the Slug or leave it for auto-generation.
- Choose the Default sort order for this attribute’s terms from the dropdown menu.
- Click Add attribute.
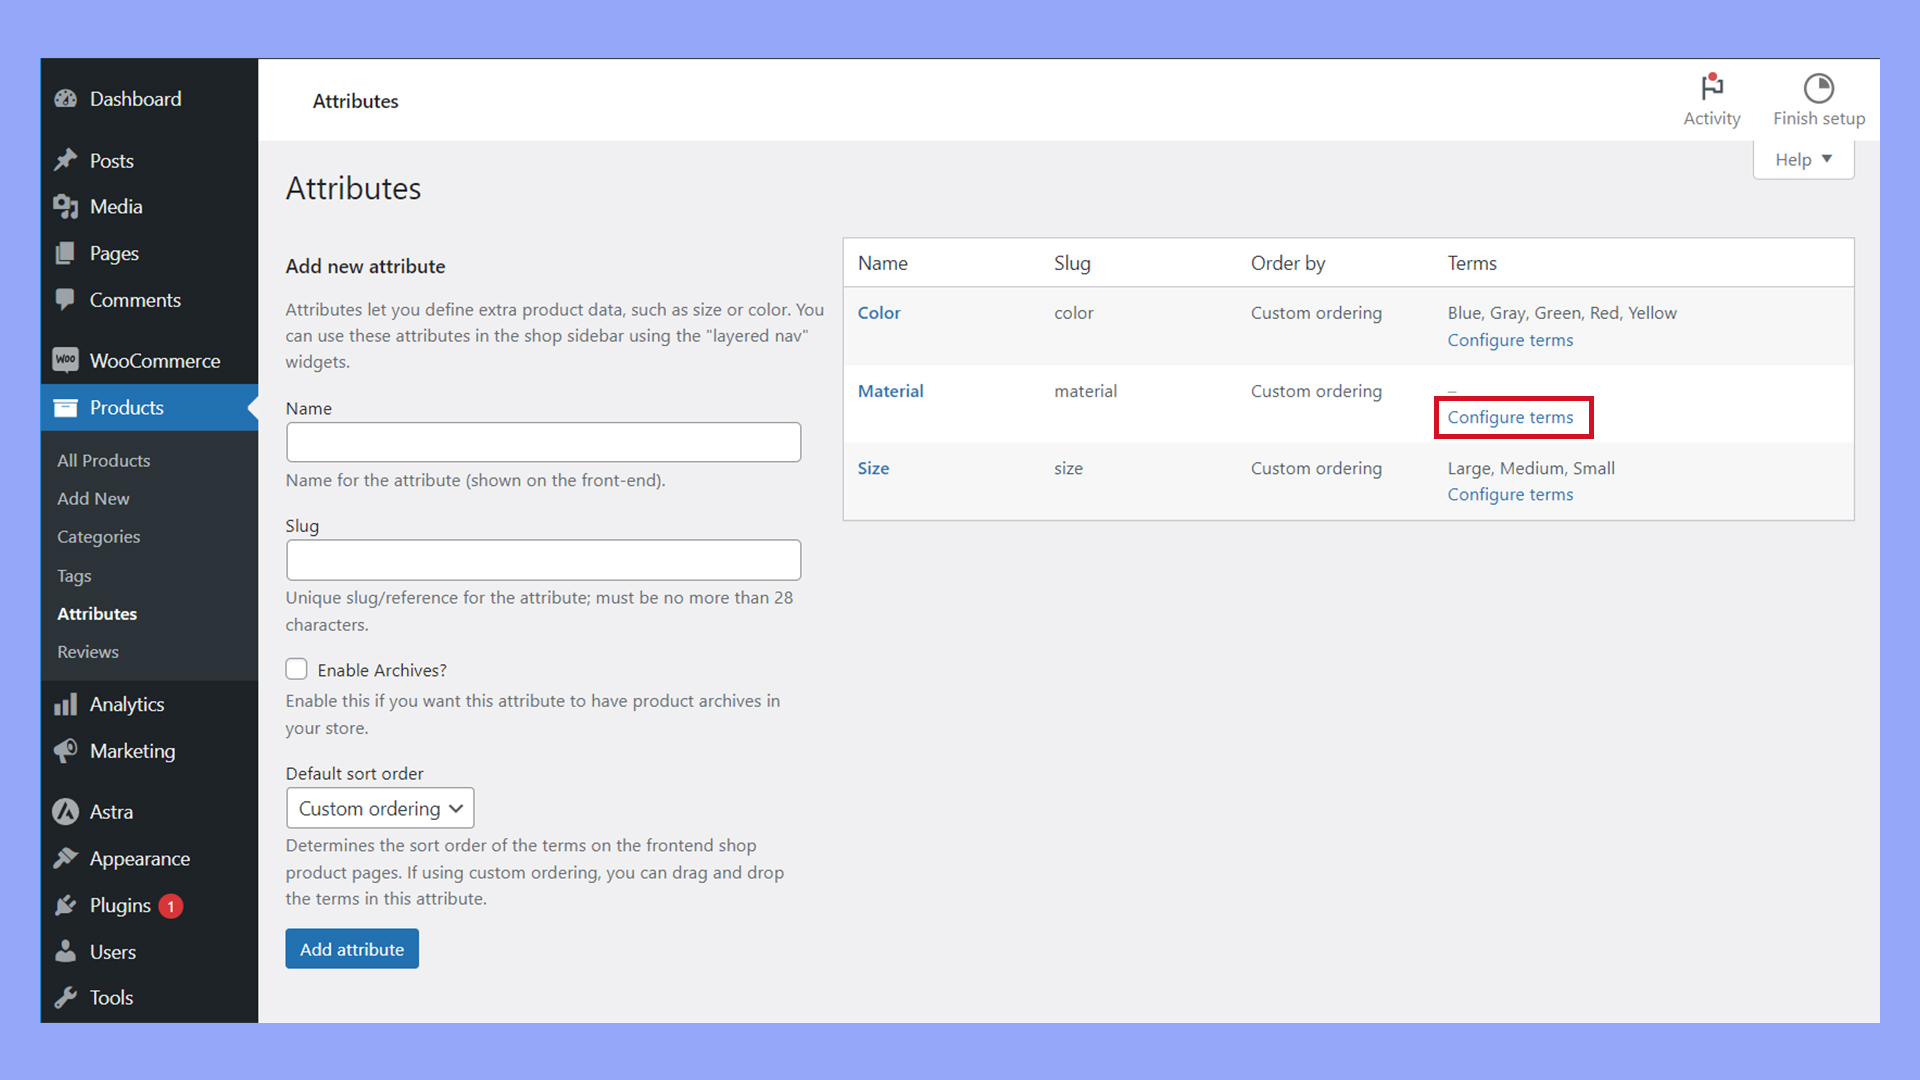
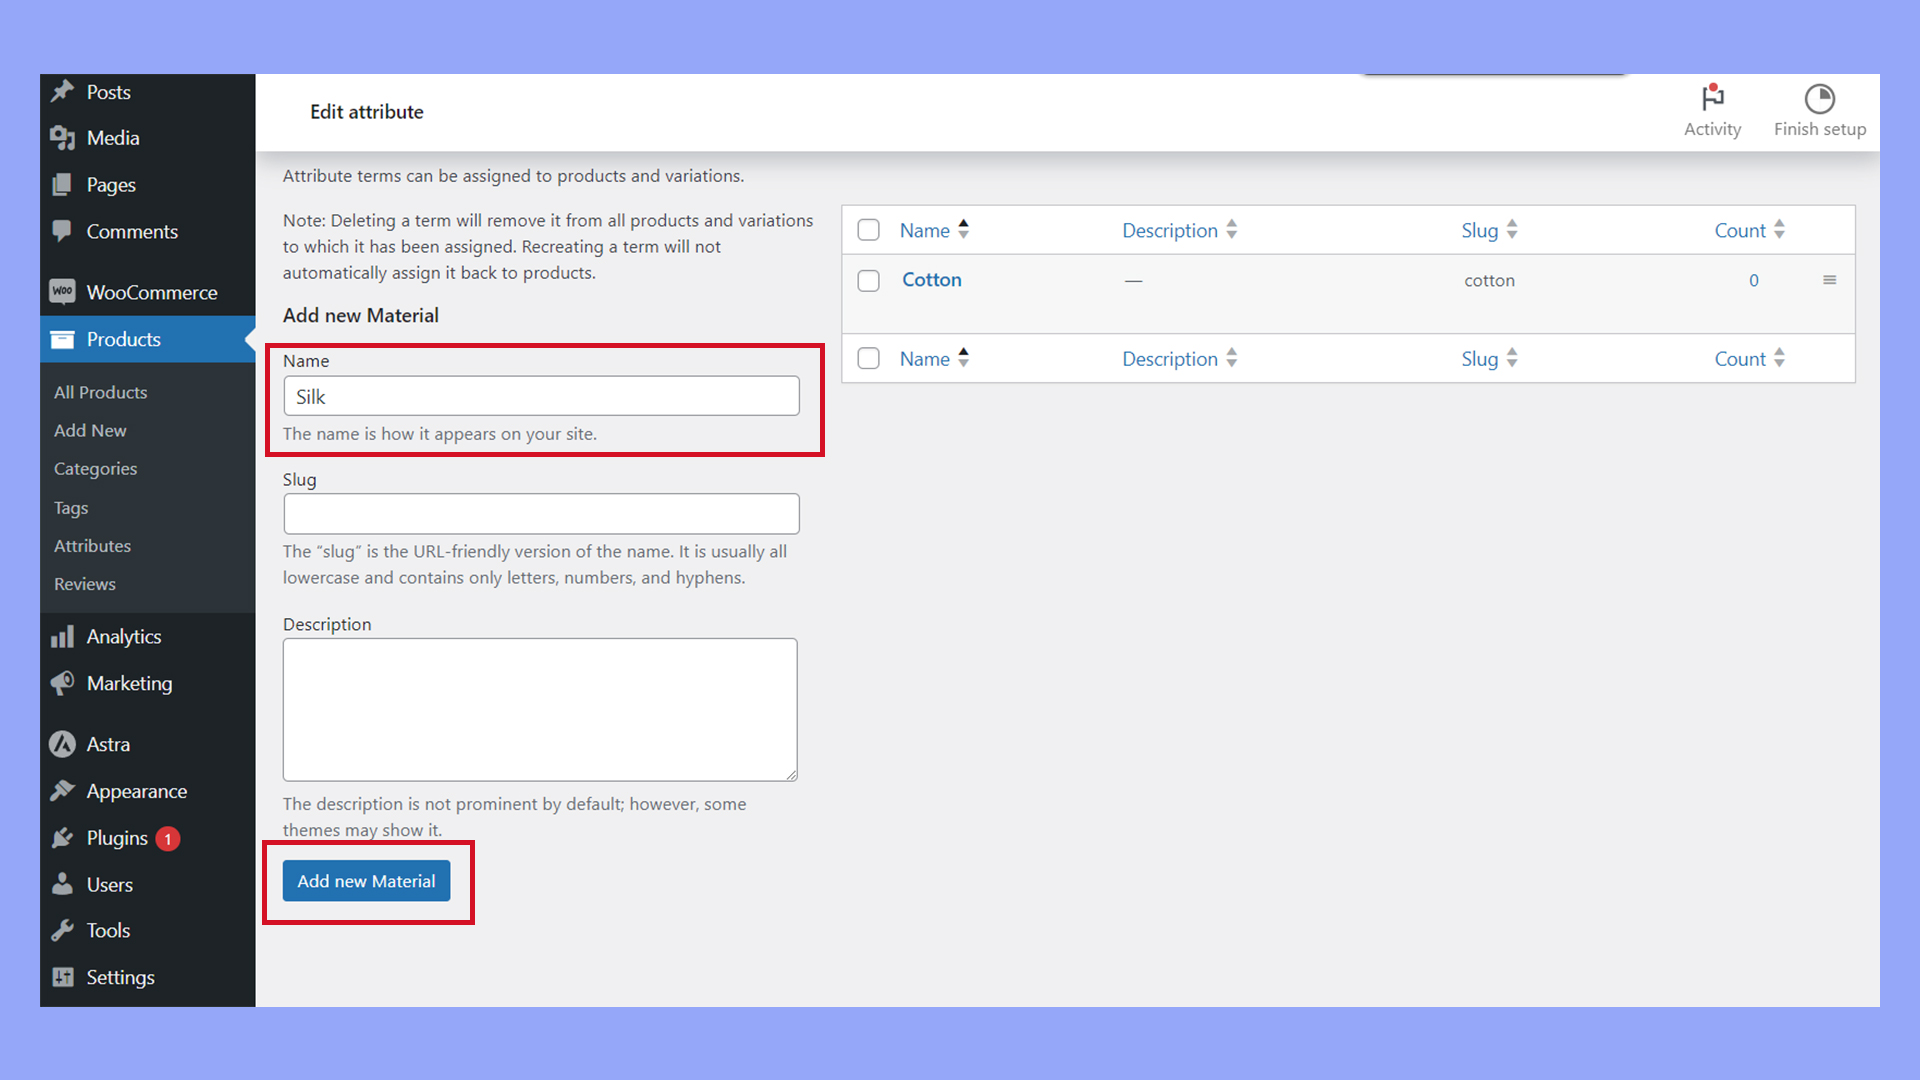
- Select Configure terms to add attribute values like “Red” or “Blue.”
- Enter the term’s Name and click the Add new [attribute-name] button.
- After adding the first term, you can add as many values as needed by repeating step 7.
Use global attributes for descriptors that are common across various products. This way, you save time and maintain consistency in your store.
Adding custom attributes
Sometimes, products require unique descriptors that are not shared with others. For these situations, custom attributes are perfect.
- Edit or add a Variable product: use the Product data dropdown menu to select Variable product.
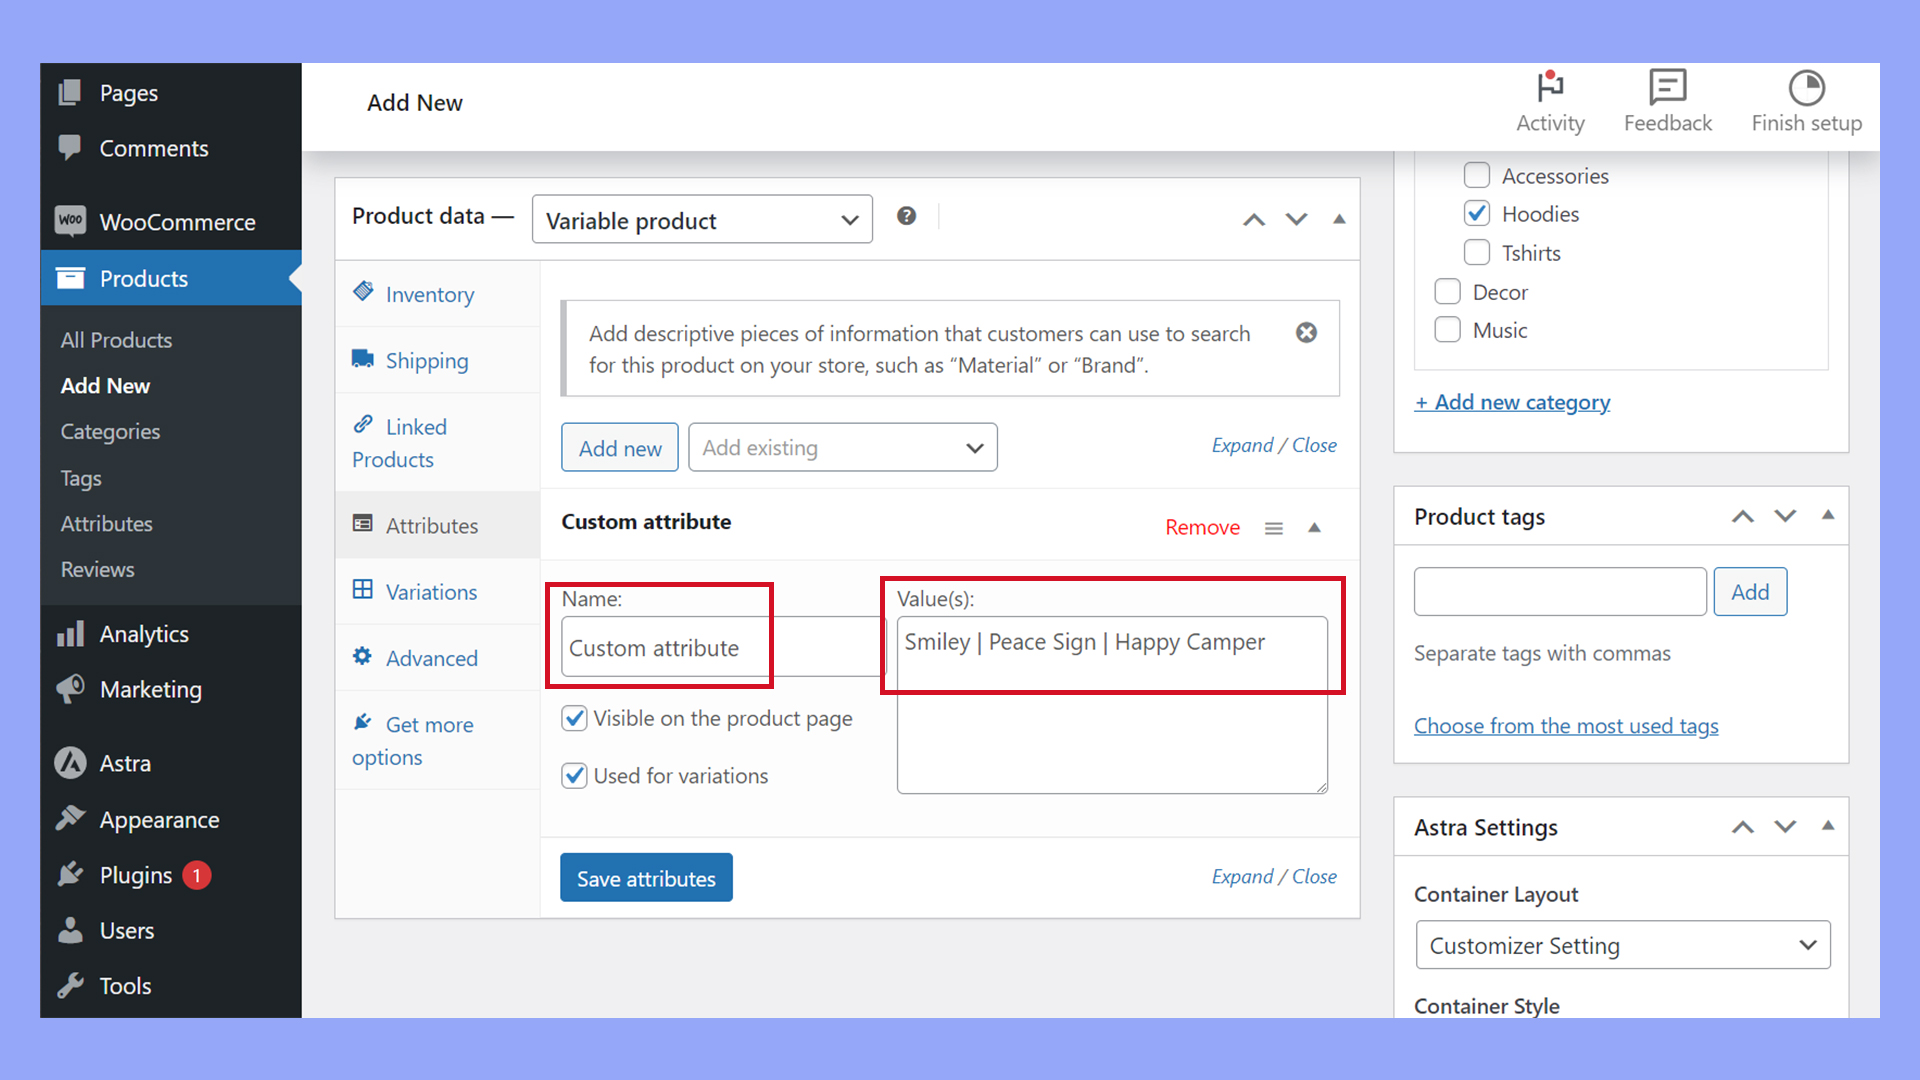
- Go to the Product data section and switch to the Attributes tab.
- Enter the new attribute Name and Value(s). You can use the pipe symbol ( | ) between terms to enter multiple values.
- Check the Used for variations box,
- Click Save attributes.
Once you have assigned product attributes, you can use the Generate variations button on the Variations tab to create product variants. Custom attributes allow you flexibility and specific control over the variations for each individual product.
Configuring variable products
When you’re setting up an online store with WooCommerce, you can enhance your product offerings by using variable products. This allows you to offer variations of a product with different attributes, such as sizes or colors. Let’s walk through the process of how to add product variations in WooCommerce.
Assigning attributes to products
First, you need to assign attributes to your products.
In the Product data section, click on the Attributes tab. Here, you can create new attributes or use existing ones.
Make sure to check the options Used for variations and Visible on the product page if you want customers to see the choices available and be able to select different variations of the product. Once done, save the attributes.
Adding individual variations
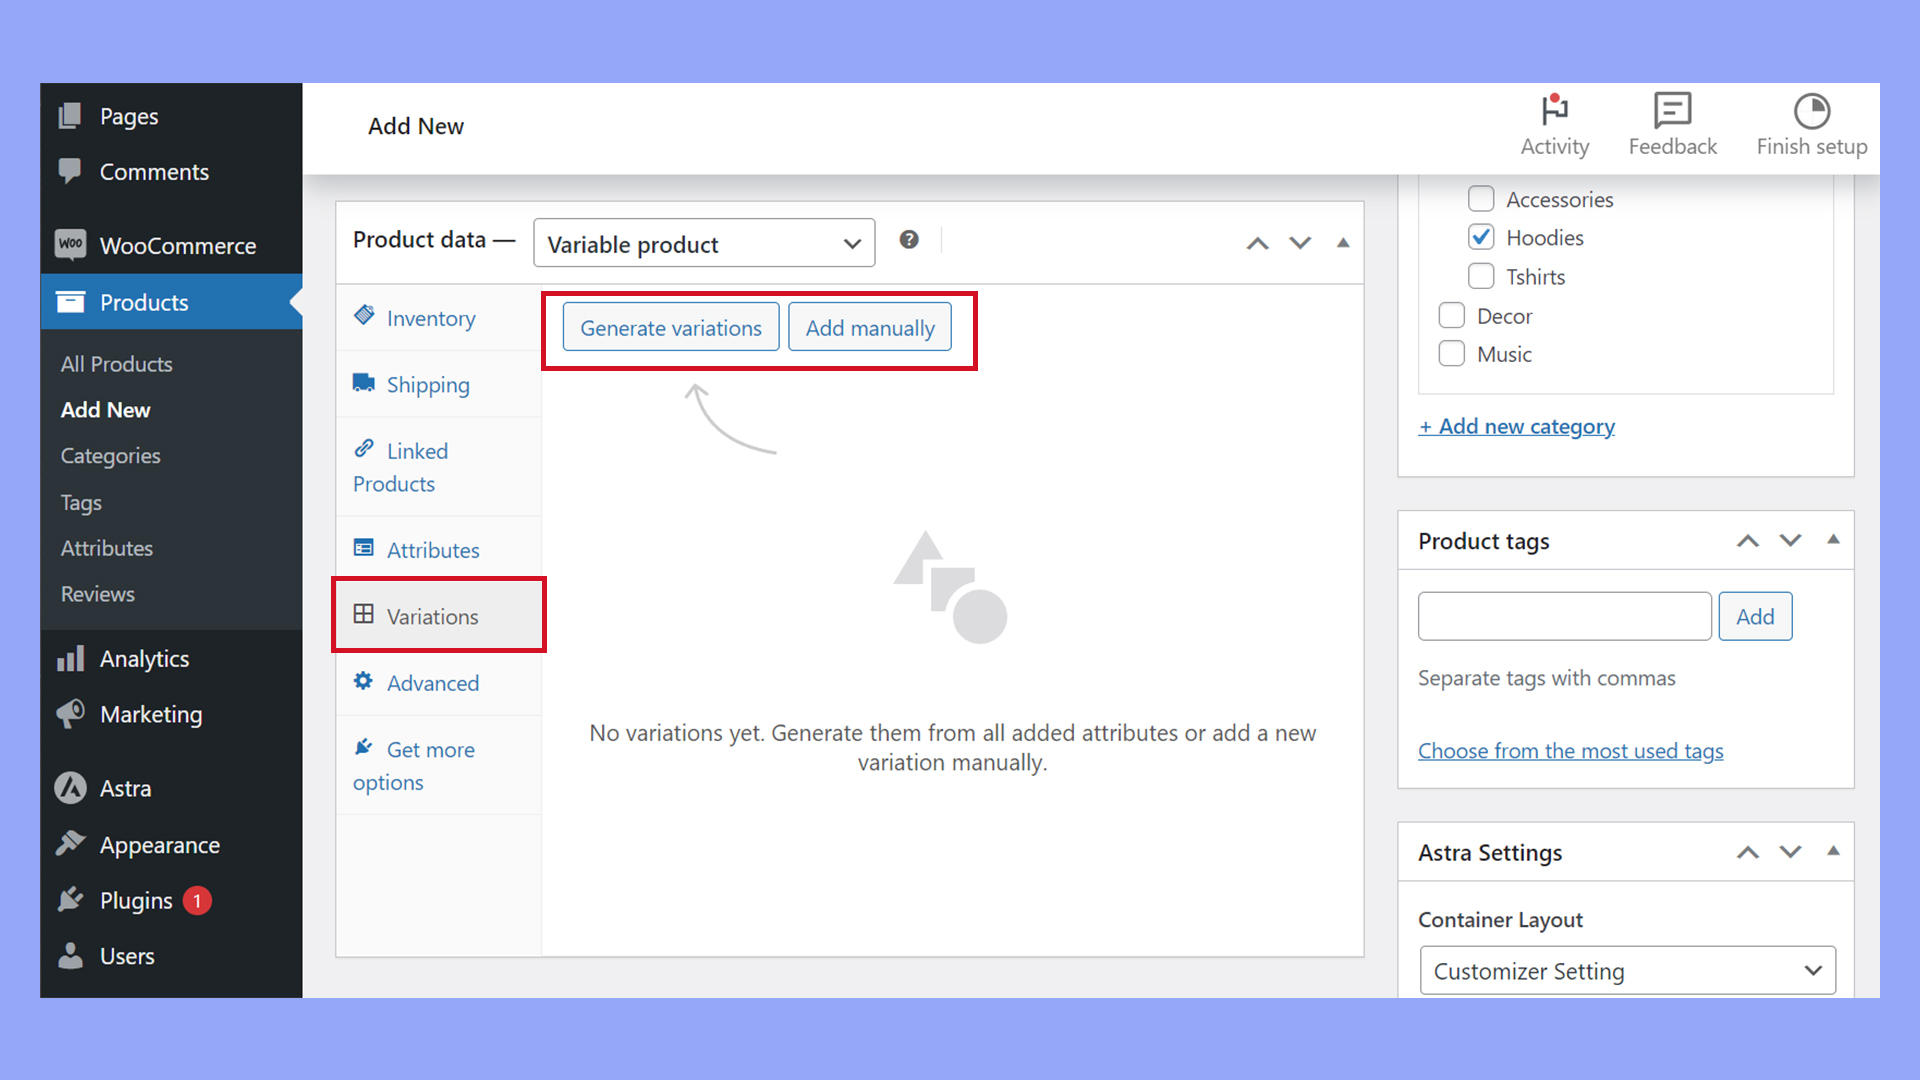
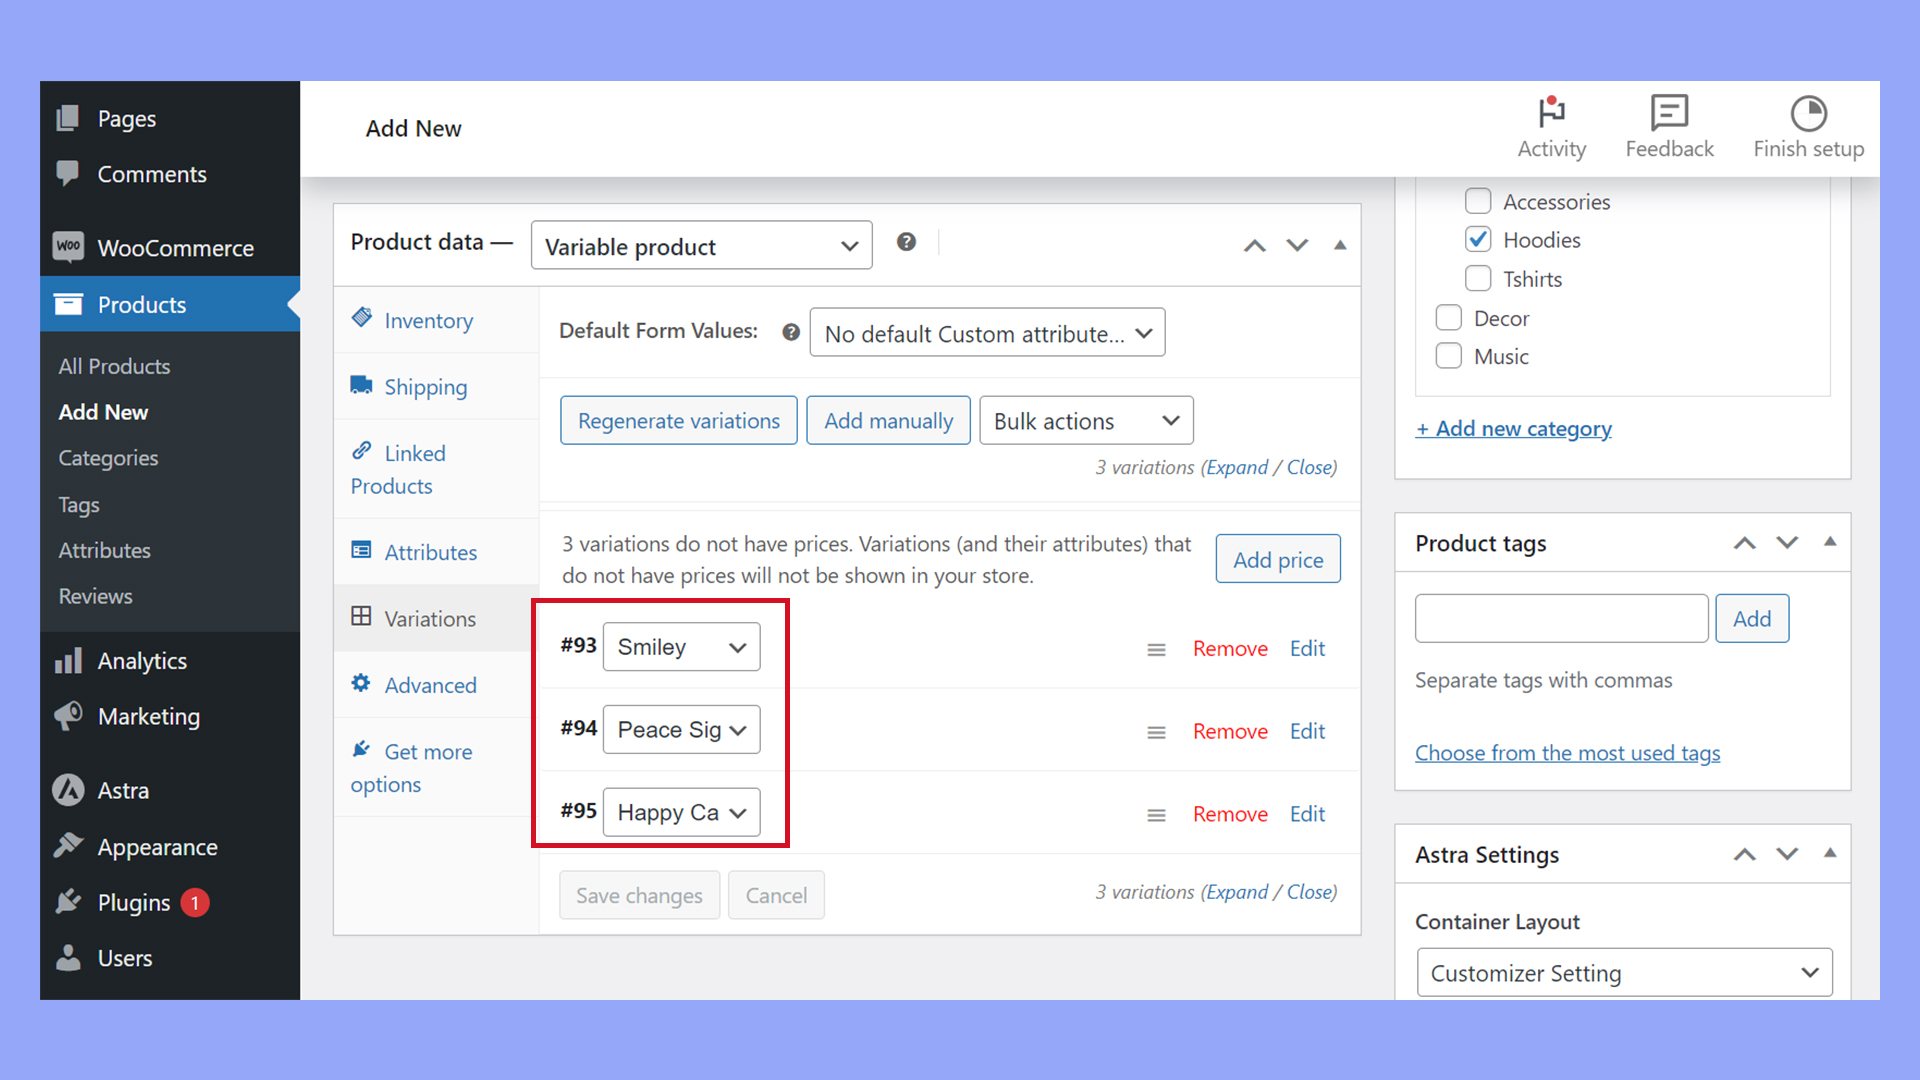
The Variations tab within the Product data section allows you to generate variations automatically from the product’s attributes or add variations manually.
- Click Variations.
- To generate variations automatically, click the Generate variations button. Alternatively, click Add manually to set up product variations manually.
- Generating automatically creates all combinations from the assigned attributes.
- Click on a product variant to expand the options. Here, you can set unique regular and sale prices, assign unique SKUs, and even add specific variation images for each variant.
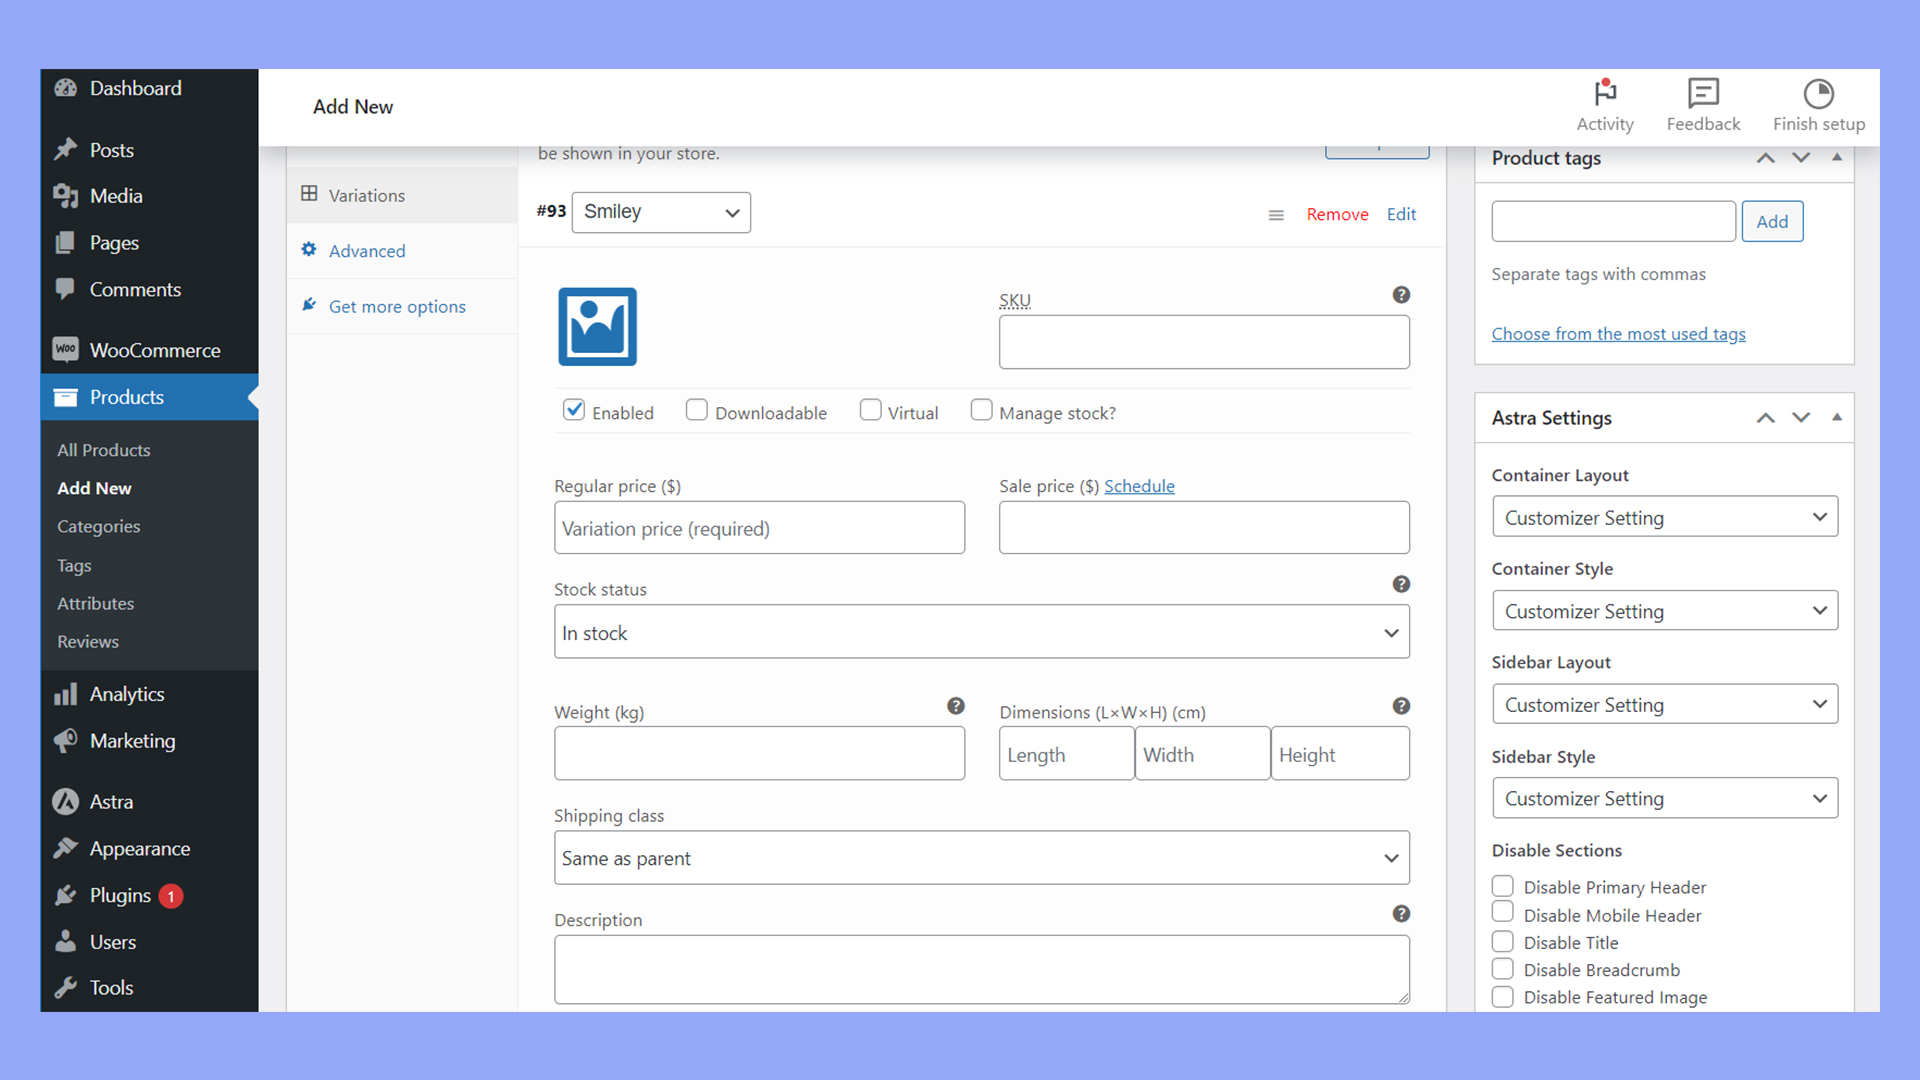
Remember to click Save changes for each variation you configure.
Managing stock for variations
Stock management is crucial for variable products.
In the Variations section of each variation, you have the option to manage stock individually by specifying the stock quantity and stock status.
WooCommerce’s Inventory management system lets you track stock for each variation, helping you keep a close eye on your inventory levels.
How to add product variations in WooCommerce with a plugin
Adding product variations in WooCommerce provides customers with more ways to shop. Variable products allow your customers to select different variations of a product, like size, color, or material, providing a more flexible shopping experience.
Customizing these options can be done effectively using plugins designed for WooCommerce.
Choosing the right plugins for variations
Finding the right plugin is crucial for enhancing your product variation customization. There are several WooCommerce plugins that you can use:
- Variation Swatches for WooCommerce: This plugin transforms your product variation select dropdown into color, image, or label swatches. It makes the display of product variations much more engaging and user-friendly.
- Product Variations Table for WooCommerce: If you have a product with numerous variations, this plugin is helpful. It organizes your variations into a table, making it easier for customers to view and select options.
- WooCommerce Products Bulk Edit: This tool is especially useful when you have a large inventory and need to edit multiple product variations at once. You can easily filter and edit attributes like size, price, weight, and more in bulk.
How to set up product variations using the Variation Swatches plugin:
- Install and activate the Variation Swatches for WooCommerce plugin on your WordPress site.
- Navigate to GetWooPlugins > Swatches Settings to configure the plugin settings to your preference.
- Go to the Products section and select a product you wish to edit or create a new one.
- In the product data pane, switch the product type to Variable product in the dropdown menu.
- Under the Attributes section, input details like color, size, and material. Make sure to select the Used for variations checkbox.
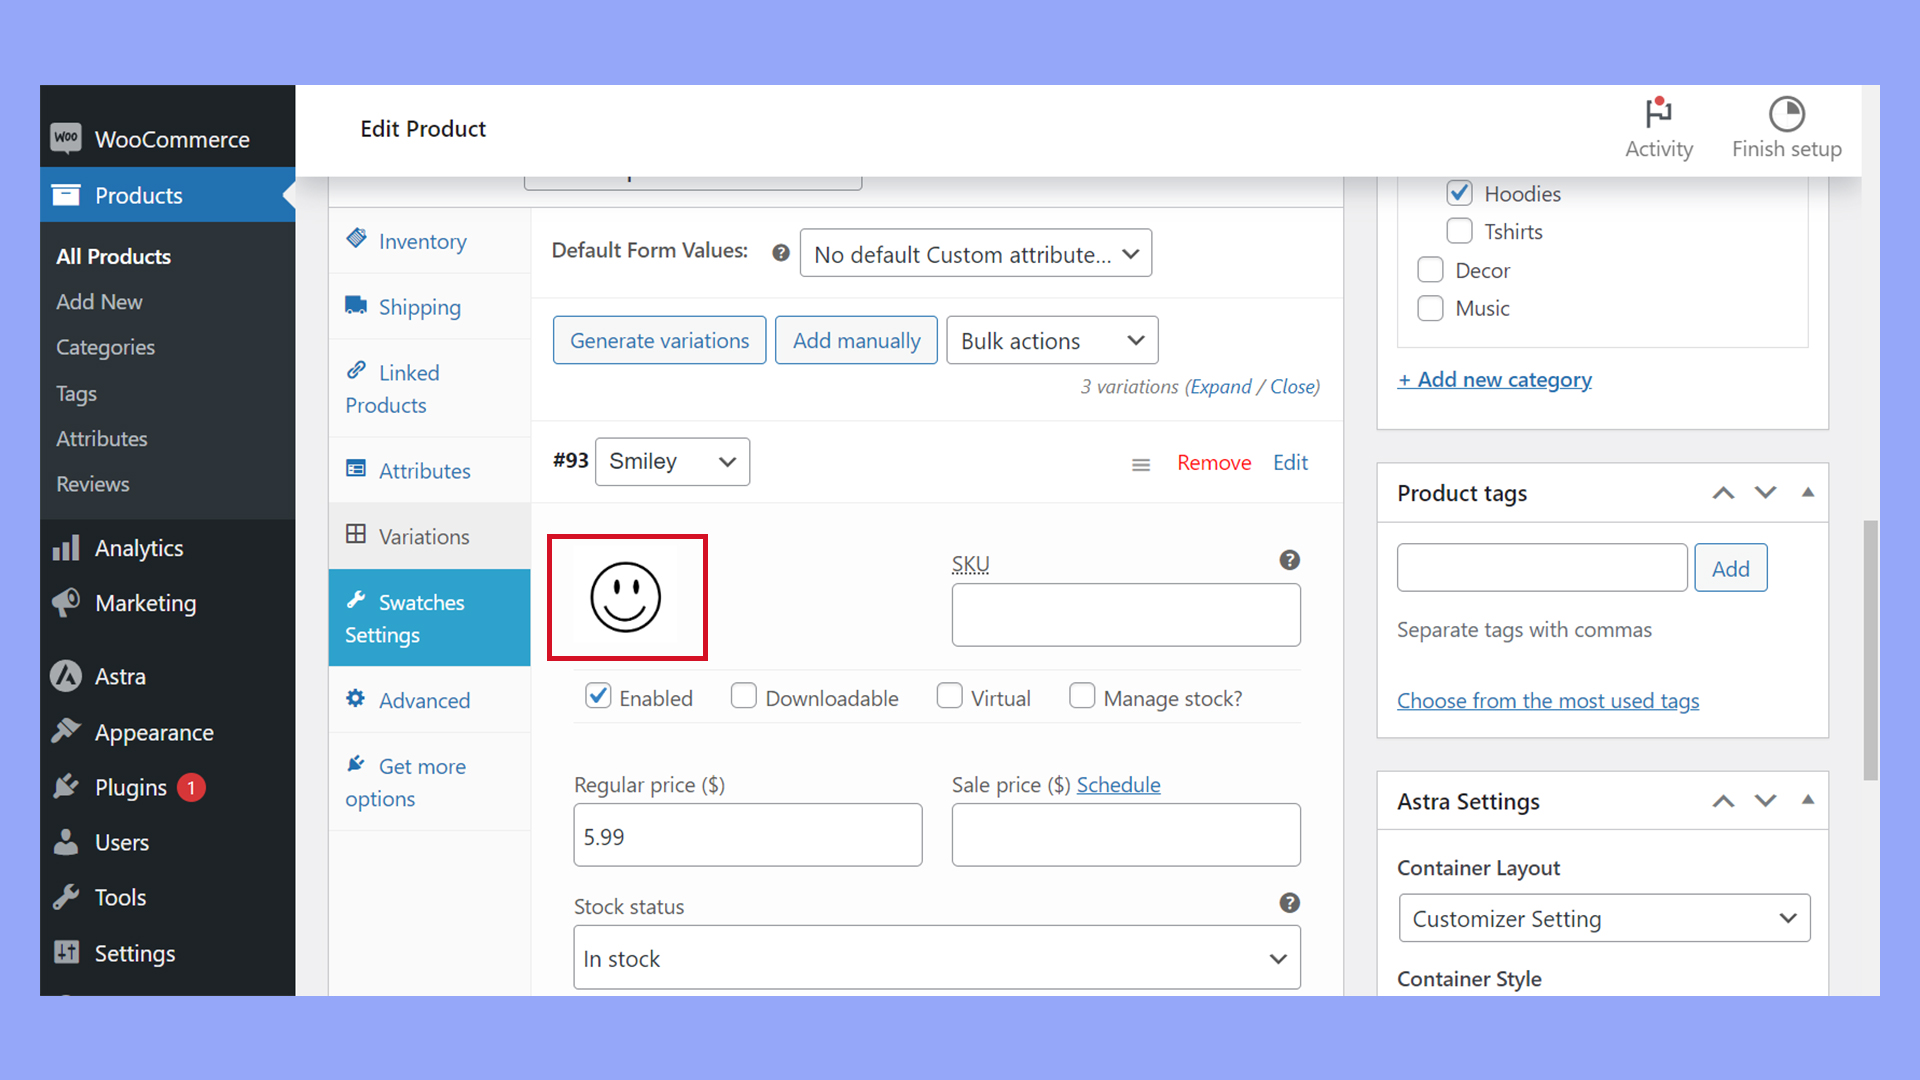
- With the attributes set, click on the Variations tab. Here, you can add new variation data using the attributes you have created.
- Configure each variation’s unique details, such as pricing, stock, and variation image.
- Save your changes to update the product with enhanced variation swatches that your customers can interact with on the product page.
This approach leverages the power of plugins to improve the visual representation of your variable products – a smart move when adding product variations in WooCommerce to enrich the online shopping experience on your store.
Managing product variations using custom code
When managing an online store, leveraging advanced custom coding techniques can introduce enhanced flexibility and control over your WooCommerce product variations. If you have some coding knowledge, this approach can streamline your inventory management and provide your customers with a more tailored shopping experience.
Looking to sell online?
Create your custom online store in minutes with 10Web AI Ecommerce Website Builder and take your business online.
Bulk editing product variations
If you have a substantial number of products, editing each one individually is inefficient. Bulk edit offers a solution for updating numerous product variations at once. This is particularly useful when you need to adjust prices or modify stock levels across a range of products.
For bulk editing using custom code, you’ll typically interact with WooCommerce’s functions directly in your theme’s functions.php file or in a custom plugin.
Key functions to use are wc_get_product($product_id) to retrieve the product object, and new WC_Product_Variation($variation_id) to interact with specific variations.
A typical bulk edit operation could loop through a set of product IDs, apply changes, and then save those changes back to the database. Here’s a simplified example:
foreach ( $product_ids as $product_id ) {
    $product = wc_get_product( $product_id );
    $variations = $product->get_children();
    foreach ( $variations as $variation_id ) {
        $variation = new WC_Product_Variation( $variation_id );
        // Set prices or stock.
        $variation->set_regular_price( '19.99' ); // For price updates
        $variation->set_stock_quantity( 10 ); // For stock updates
        $variation->save();
    }
}
Note: Always back up your data before performing bulk operations to prevent any loss of information. It’s best to try out new changes like these in a staging environment instead of your live site.
Handling variable products in bulk
Adding variable products in bulk requires a nuanced approach. This ensures each variation meets the demand without impacting the overall product integrity. WooCommerce flexibility allows you to handle variations by programmatically checking and setting attributes and other properties.
For instance, to add a new variation, you’d typically:
- Check if the attribute exists; if not, create it.
- Set the attribute on the parent variable product.
- Create a product variation with specific details such as price and stock.
Below is an example snippet that outlines the process:
function handle_product_variations( $product_id, $variations_data ) {
    foreach ( $variations_data as $variation_data ) {
        create_product_variation( $product_id, $variation_data );
    }
}

function create_product_variation( $product_id, $variation_data ) {
    // Your code to create a variation.
    // It uses functions like wc_get_product(), new WC_Product_Variation(),
    // and update_post_meta().
}
This pseudo-code represents the iteration over multiple variations to automate the additions. Using functions like wc_get_product() and new WC_Product_Variation(), you can manipulate both parent and child products establishing a robust inventory management system.
By utilizing these advanced techniques, you ensure your store is scalable. Your product offerings are dynamic, and you can react promptly to market demands or inventory changes. Remember, while flexibility in WooCommerce is a strong asset, always test custom code on a staging environment to avoid any disruptions on your live store.
Enhancing variation display on product pages
Adding product variations in WooCommerce can significantly enhance the shopping experience on your website. By improving how variations are presented, you make it easier for customers to view and select options that best suit their needs.
Utilizing variation swatches
Variation swatches introduce a visual aspect to your product options, allowing customers to see colors, textures, or patterns directly from the product page. Instead of standard dropdown menus, the WooCommerce Variation Swatches plugin adds a more intuitive interface where swatches can replace select fields.
For example, if you’re selling apparel, you can present color options in swatches, showing actual colors rather than just names.
Displaying variation images
With WooCommerce, you can assign different images to each variation. This allows customers to see what the individual product looks like in each selectable option.
To set this up, navigate to Add variation within the product’s Variations tab and upload an image for each.
As choices are made by the customer, the main product image updates to reflect their selection, giving a clearer visual confirmation of their choice.
Optimizing the shopping experience
Creating a customer-friendly shopping experience on your WooCommerce online store is essential for customer retention and conversion rates. This section will guide you on how to add product variations in WooCommerce to enhance your customers’ shopping experience.
Integrating filters for simple navigation
You can significantly streamline the shopping process by implementing Product filters. This enables your customers to easily find what they’re looking for by filtering product variations based on attributes like size, color, or price.
In WooCommere, add filter widgets to your shop pages, ensuring the filters reflect the attributes applied to your variable products.
Improving the checkout process
Streamline your checkout process to be as painless as possible. An efficient checkout page should offer clear information and a straightforward path to purchase.
In WooCommerce, utilize the Checkout settings to customize fields, allowing for a quicker checkout. Also, consider integrating one-click purchase options to reduce cart abandonment.
Setting default variations
To improve customer experience, set Default variations for your products. This means when a customer lands on a product page, a pre-selected variation is already chosen, saving them the step of selecting a variant.
In WooCommerce, edit your variable product, navigate to the Variations tab, and use the Set default form values to choose which variation will appear by default.

Managing downloadable product variations
If your store offers downloadable products, managing these efficiently can enhance the post-purchase customer experience.
Within each product variation, you can set Downloadable files, Download limits, and Download expiry. These settings ensure that customers have a clear understanding of what they’re purchasing and that you maintain control over the distribution of digital goods.
Conclusion
By effectively adding product variations in WooCommerce, you can significantly enhance your online store’s functionality and customer satisfaction. Implementing these strategies will streamline inventory management, improve product presentation, and create a more engaging shopping experience, ultimately driving higher sales and customer retention.
Looking to sell online?
Create your online store in minutes
Create your online store in minutes with 10Web AI Ecommerce Website Builder.