Learning how to add social media icons to WordPress boosts visibility and user engagement by facilitating easy access to your social profiles. The strategic placement of these icons ensures they are effective in building your social media presence and attracting followers.
This guide covers multiple methods, including adding social media icons with the WordPress Site Editor, plugins, and custom HTML, providing a versatile approach to enhancing your site’s social connectivity.
FAQ
How do you add social media icons to your WordPress website?
How to add social media icons to WordPress without a plugin?
How do I add social media icons to my WordPress top bar?
How do I add floating social icons in WordPress?
Leveraging social media for engagement
By incorporating social media icons, you enable quick access to your social media profiles. This encourages visitors to connect with you across various platforms. This connectivity is vital for fostering community and growing your base of followers.
Displaying social media icons offers several advantages:
- Simplifies the process for users to follow your brand on social media.
- Increases the likelihood of shares and likes, enhancing engagement with your content.
- Born from direct social interactions, user-generated content can promote and enhance your site’s value.
- Demonstrating social proof and trust through active social media engagement.
- Providing additional channels for customer support and interaction with your brand.
Position these icons strategically across various locations, such as your header, footer, or sidebar, to maximize visibility and usage. By doing so, you create multiple touchpoints for engagement, deepening the opportunity for your audience to connect and interact with your brand.
How to add social media icons to WordPress
Several methods are available to add social media icons to WordPress. Each can help you place links to your social media right where you need them the most.
When deciding how and where to add social media icons, consider the site’s overall user experience. In particular, what do visitors see when they:
- Arrive at your most popular landing page,
- Use the main navigation,
- Reach the end of the page, or
- Decide to leave your website?
Once you have an idea of where to place your icons it will help determine which method or combination of methods suits your needs.
Using the WordPress customizer or Site editor: If your website is using a block theme, you can add social media icons directly through the Site Editor by navigating to Appearance → Editor. You can include these icons in areas like the header or footer by selecting the Social Icons block. Adjust individual social icons by adding the desired URL and pressing Enter to confirm.
With a plugin: Leveraging plugins such as Social Media Share Buttons & Social Sharing Icons is a straightforward approach. After installing from the Plugins → Add New section, customize through the plugin’s settings page by selecting your desired social media platforms, configuring their actions, and deciding on their placements within your site.
With a page builder: Many drag-and-drop page editors offer a way to add social media icons in various places on your website. For example, the 10Web Builder’s social icons widget provides a method to link social profiles. Add new items to the list through the Content Tab within the 10Web Builder. You can select various social platforms, including less common ones, and define their links and appearances in a few clicks.
Using custom icons: Lastly, if you prefer a tailored appearance or use a classic WordPress theme, using custom icons offers flexibility. This involves obtaining icons, uploading them to your media library, and inserting them into your pages through the Custom HTML block within the Widgets section. Customize the HTML code with the URLs of your social media profiles for a unique look.
How to add social media icons with the Site Editor
The Site Editor is a user-friendly tool integrated into WordPress that enables you to add features to your site without coding. It is particularly effective for inserting social media icons in locations like the header or footer.
Only block themes support the Site Editor.
Adding the icons
- Navigate to Appearance → Editor to enter the Site Editor.

- Within the Site Editor, go to Patterns → Template parts → Footer.
- Click anywhere on the footer to open it in the editor.
- If social icons are present, click on an icon to edit the link and text.
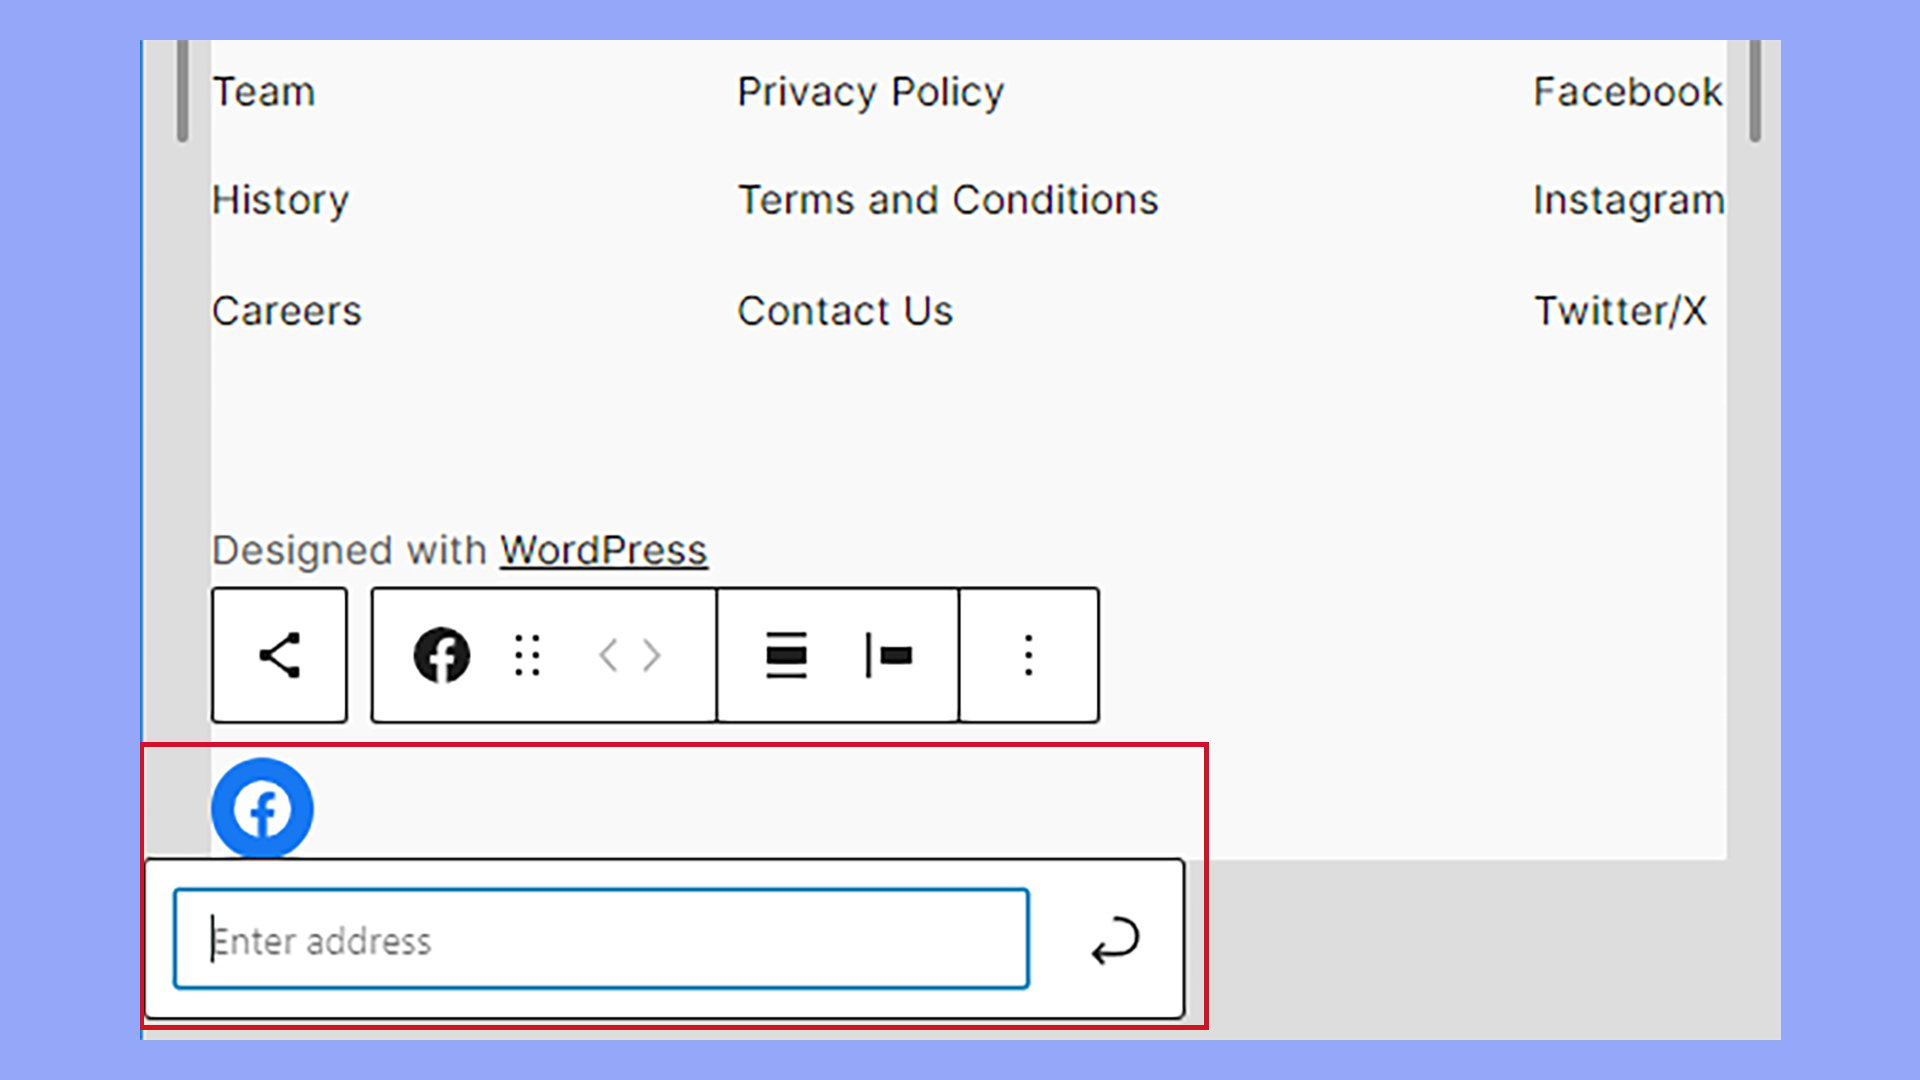
- To add new social icons, click the (+) sign to open the block inserter and insert the Social Icons block.
- By default, platforms like Facebook, Twitter, Instagram, and GitHub may be available. To add a new platform like YouTube, click the (+) sign inside the Social Icons block and select the desired icon.
- Enter the URL of each social media profile after choosing the icon and press Enter.
- For platforms not listed by default, search for the icon using the block inserter and then customize as needed.
If you’re not using a block theme, inserting the Social Icons block within widgets is another method:
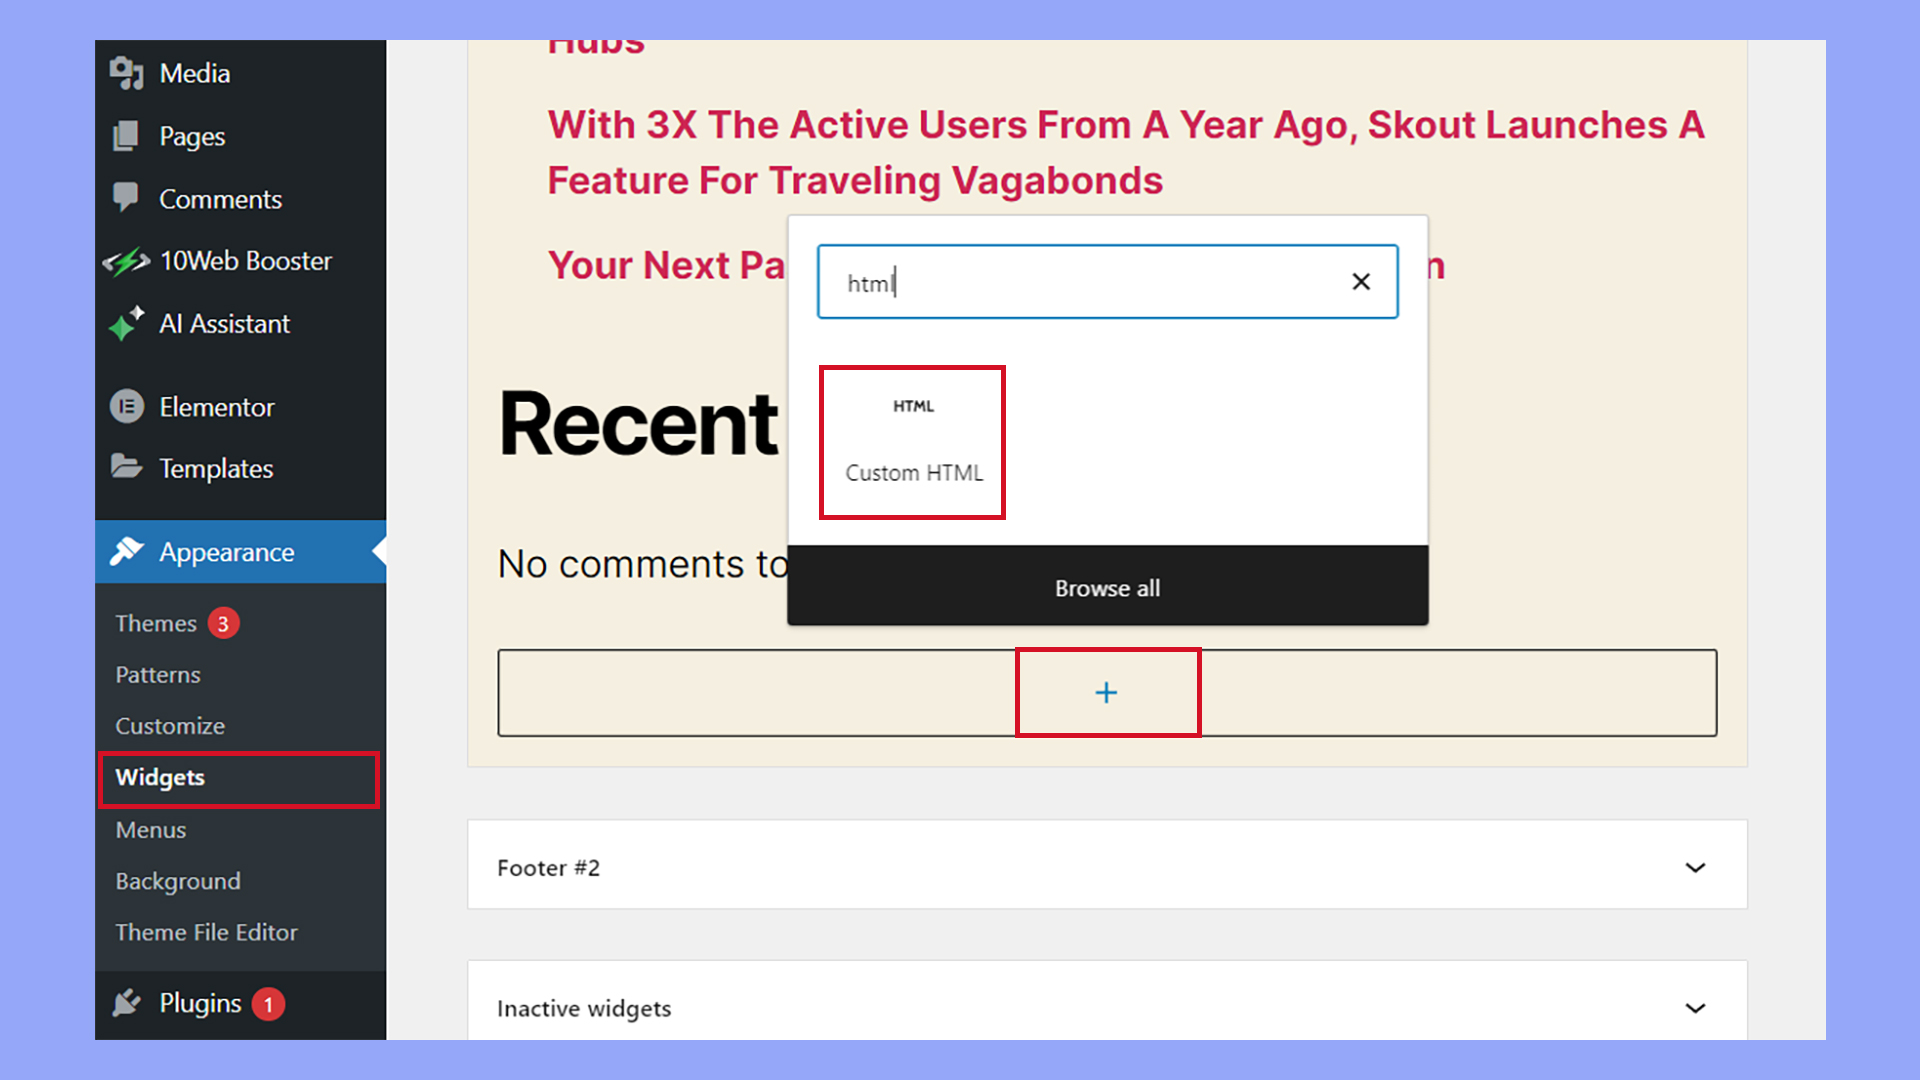
- Go to Appearance → Widgets.
- Click the (+) button to search for and add the Social Icons block.
- Click on the newly added block to add an icon and input the corresponding social media profile URLs.
- Press Enter to save each URL.
- Add additional social media platforms by repeating the previous steps until your social media suite is complete.
How to add social media icons with a plugin
Adding social media icons to your WordPress site through a plugin simplifies the integration process, providing you with a variety of design and placement options, without needing to write any code.
Plugins often have features like customizable styles, easy placement across your website, and support for major social media platforms such as Facebook, Twitter, Instagram, YouTube, LinkedIn, and Pinterest.
Installing a social media icon plugin
To get started, navigate to your WordPress Dashboard, go to Plugins → Add New, and search for a social media plugin. This example uses Social Media Share Buttons & Social Sharing Icons. Click on the plugin’s Install button and then proceed by clicking Activate to enable the plugin on your WordPress site.
![]()
Configuring the plugin settings
Upon activation, you will see a new menu item on your dashboard labeled Ultimate Social Media Icons. Here you can:
Step 1: Choose your social media icons
In the settings menu, start by selecting which social media platforms you want to include. You can choose from a wide range of social networks like Facebook, Twitter, Instagram, Pinterest, LinkedIn, and more.
![]()
After selecting the platforms, you can also choose the design of the icons from pre-designed styles.
Step 2: Customize your icons
Customize the behavior and appearance of the icons. You can set their alignment, size, and whether they should follow the user as they scroll.
Decide if you want the icons to appear on all pages or only specific pages.
![]()
Step 3: Placement of icons
Choose where on your website you want the icons to appear (e.g., header, footer, sidebar).
Use the provided options to align them as desired within the selected area.
Step 4: Preview and adjust
Utilize the preview function to see how the icons look on your site.
Adjust any settings if needed to ensure the icons fit well with your site’s design and user experience.
Step 5: Save changes
Once you are satisfied with the setup and appearance, click the Save Changes button to apply your settings.
Visit your website to see the social media icons in action. Ensure they work correctly by clicking on each icon to confirm they link to the correct social pages.
Remember to click Save to save your changes after each adjustment. With these steps, your social media icons will be integrated into your WordPress site, making it more connected and interactive for your visitors.
How to add social media icons with page builders
Adding social media icons via page builders greatly simplifies the process, utilizing a more intuitive, drag-and-drop interface to customize your website’s social presence effectively.
Using page builders, social media icons are typically added with dedicated widgets that encapsulate functionality such as adjusting icon sizes, colors, and linking to social profiles without needing to deal with code. The visual interface provides immediate feedback on how these icons will appear on the live site, making it easier to achieve the desired aesthetic.
How to add social media icons using the 10Web Builder
The 10Web Builder optimizes the process through its Social Icons widget. Follow the steps below to integrate your social media icons:
- Navigate to the page where you want to include the icons and Edit with 10Web Builder.
- From the widget panel, drag and drop the Social Icons widget onto the desired section of your page.
- In the Content Tab, click Add Item to insert a new social media icon.
- For each item, you’ll see fields to fill in the social media URL that corresponds to the icon.
- Customize the look of your icons by changing their size, shape, and colors through the Style Tab.
- Hit Publish or Update to save your changes and make the social icons visible on your site.
How to add custom social media icons
Custom social media icons serve as a powerful tool for distinguishing your brand from others. By using unique designs tailored to your brand’s identity, customers can easily recognize and feel more connected to your business.
They are particularly useful when the default icons provided by your theme or plugin do not match your company’s branding or when you wish to maintain a consistent appearance regardless of theme changes on your WordPress site.
Adding Custom Social Media Icons with a Text Widget
For those who are proficient with HTML, custom social media icons can be set up using the Custom HTML widget. Here’s a step-by-step guide for you to follow:
- Find custom social media icons that are available for use, ensuring they align with your brand. Download them to your computer.
- Log in to your WordPress dashboard and navigate to Media → Add New.
- Upload your chosen icons here.
- Once uploaded, click on an icon to view its details and copy the File URL.
- Head over to Appearance → Widgets.
- Here, select the widget area where you would like the icons to appear.
- Click the + button to add a Custom HTML widget to the chosen area.
- In the Custom HTML widget, insert the HTML code for your social media icons:
<div class="social-icons">
    <a href="http://your-instagram-profile-link.com"><img class="social-icon" src="your-instagram-icon-url" alt="Instagram"></a>
    <a href="http://your-twitter-profile-link.com"><img class="social-icon" src="your-twitter-icon-url" alt="Twitter"></a>
</div>- Replace
your-instagram-profile-link.comwith the URL to your Instagram profile,your-instagram-icon-urlwith the File URL from the Media Library, and do the same for each social media platform. - If you’re comfortable with CSS, you can add custom styles. Otherwise, ensure your images are properly sized before uploading.
- After filling in the necessary links and URLs, click Update to save and publish the changes.
How to add social media icons to menus
Adding social icons to your menus allows visitors to connect with your social media profiles easily. This method capitalizes on the visibility of your menu areas, like the header or footer, enhancing your WordPress site’s interactivity and encouraging more followers across social platforms.
Using a plugin to add social media icons to menus
Begin by installing and activating the Menu Image, Icons made easy plugin.
Once activated, navigate to Appearance ➜ Menus to access your WordPress menus.
Select the menu where you wish to add the social icons.
Next, click on Custom Links to add your social media URLs. Enter the URL and Link Text for each social profile and click Add to Menu.
![]()
After adding, expand the menu item to click on the Add Image / Icon button to associate an icon.
For icons, you can choose between using images from your WordPress media library or Font Awesome icons. The Fontawesome option offers a vast selection of social media icons.
Adjust the Title position according to your preference, or opt to hide it for a cleaner look.
The sizes of icons can be tweaked under Image Size; experiment with different dimensions for a perfect fit in your menu.
End by clicking Save Menu to apply the changes.
Including social media icons in posts and pages
To insert social media icons into your content, you’ll first need to access the block inserter within the WordPress editor. This tool allows you to add a variety of blocks to your posts and pages, including social icons.
- Click on the + Block Inserter icon at the top of the editor.
- Type /social into the search bar or navigate through the blocks to find the Social Icons block.
- Click on the Social Icons block to add it to your post or page.
Once the Social Icons block is in place, you can begin adding each social media icon:
- Click on the block to reveal the option to add new social icons.
- An input field will appear where you can paste the URL for your social media profile.
- Press Enter to add the icon. Repeat this process for as many social media profiles as you want.
You can customize each icon’s style and size directly from the block’s toolbar. This allows for a seamless integration with your site’s design. To further personalize these icons, click on each one to access individual settings. Here, you can adjust the icon’s size, link settings, and even add custom CSS classes if needed.
Summary
In conclusion, adding social media icons to your WordPress site is a straightforward yet powerful way to enhance your online presence and user engagement.
Whether through the WordPress site editor, plugins, or custom HTML, each method offers specific benefits that can be tailored to fit your site’s design and functionality needs. By adding social media icons to WordPress, you not only make it easier for visitors to connect with you on various social platforms but also significantly increase the chances of boosting your site’s interaction and visibility.
Start implementing these steps today to transform your site into a more engaging and socially connected platform.