Setting up an online store with WordPress becomes a breeze using WooCommerce for robust ecommerce capabilities and Elementor for flexible, code-free design. This guide walks you through how to use WooCommerce with Elementor starting with the installation and customization processes for both tools, ensuring full compatibility and enhanced functionality.
With WooCommerce, you can easily manage products and transactions, while Elementor allows for visual customization of your store to match your brand’s aesthetic, ultimately improving user engagement and conversion rates.This combination provides a powerful platform for building a successful online store.
FAQ
Can you use Elementor and WooCommerce together?
Yes, you can use Elementor and WooCommerce together. Elementor provides specific widgets and templates designed to work seamlessly with WooCommerce, allowing you to customize your online store.
How do I create a WooCommerce shop page with Elementor?
To create a WooCommerce shop page with Elementor, first ensure that both WooCommerce and Elementor are installed and active. Then, edit the shop page with Elementor, and use WooCommerce widgets such as Product Categories, Product Grids, and Add to Cart buttons to design your page.
What is the best WooCommerce builder for Elementor?
The best WooCommerce builder for Elementor is Elementor Pro. It offers extensive WooCommerce integration and widgets specifically designed for building and customizing WooCommerce pages, including dynamic product and category layouts.
Why can't I edit my WooCommerce shop page with Elementor?
You might not be able to edit your WooCommerce shop page with Elementor if you’re using the free version of Elementor, as it lacks WooCommerce integration. Upgrading to Elementor Pro can provide the necessary WooCommerce widgets and capabilities to edit your shop page.
Getting started with WooCommerce and Elementor
In this section, you’ll learn about setting up WooCommerce and Elementor on your WordPress site to create a strong foundation for your online store.
What is WooCommerce
WooCommerce is a powerful and customizable ecommerce platform for WordPress, enabling you to sell products and services online. It’s designed to work seamlessly within WordPress as a plugin, transforming your website into a fully functional online store.
What is Elementor
On the other hand, Elementor is a dynamic drag-and-drop page builder that allows you to design your WordPress site visually, without needing to code. Elementor Pro is the premium version, offering advanced design capabilities and additional e-commerce features.
Compatibility between WooCommerce and Elementor
WooCommerce and Elementor are fully compatible, thanks to Elementor’s robust support for WordPress plugins and WooCommerce’s flexibility as an e-commerce platform. Elementor offers a dedicated set of WooCommerce widgets and features that are designed to work seamlessly with WooCommerce, allowing users to visually customize and manage their online shops without touching a line of code.
Benefits of using Elementor with WooCommerce
Visual customization: Elementor’s drag-and-drop interface simplifies the customization of product pages, category pages, and other essential WooCommerce elements. You can visually design the layout and aesthetics of your store, ensuring that every pixel aligns perfectly with your brand identity.
Enhanced product displays: With Elementor, you can create custom product layouts that go beyond the basic options provided by WooCommerce. This includes sliders, tabs, and multimedia content that can help showcase your products in a more engaging and informative way.
Improved conversion rates: Elementor’s widgets for WooCommerce, like Add to Cart, Product Rating, and Price, can be placed strategically to enhance usability and aesthetics, potentially improving conversion rates through better user experience and clearer call-to-action placements.
Streamlined store management: Elementor can make managing your store simpler by allowing you to create global widgets that can be reused across your site. This means you can update multiple parts of your store from one place, saving time and reducing effort.
Create your custom online store in minutes with 10Web AI Ecommerce Website Builder and take your business online. 
Looking to sell online?
Specific enhancements Elementor brings to WooCommerce sites
Customized checkout processes: You can tailor the checkout process to meet your business needs, creating a smoother checkout experience that can reduce cart abandonment rates. Elementor lets you add, remove, or rearrange fields in the checkout form, incorporate upsells, and even personalize the styling to match your store’s theme.
Dynamic widgets: Elementor provides a variety of WooCommerce-specific widgets that are dynamic and can pull in data directly from your product database. For example, the ‘Products’ widget can display latest products, best sellers, or products from specific categories dynamically.
Responsive design: Mobile responsiveness is crucial for an online store’s success. Elementor facilitates the creation of responsive e-commerce sites that adapt smoothly to any screen size, improving the shopping experience for mobile users.
Marketing integrations: With Elementor, you can integrate marketing tools and platforms directly into your WooCommerce store to drive more traffic and sales. This includes adding subscription forms, implementing conversion-focused pop-ups, and even linking to social media platforms.
Installing WooCommerce on your WordPress site
To install WooCommerce:
- Navigate to Plugins > Add New in your WordPress dashboard.
- Type WooCommerce into the search bar.
- Click Install Now on the WooCommerce plugin that appears.
- After installation, click Activate.
- The WooCommerce setup wizard will launch to guide you through the basic configuration of your online store.

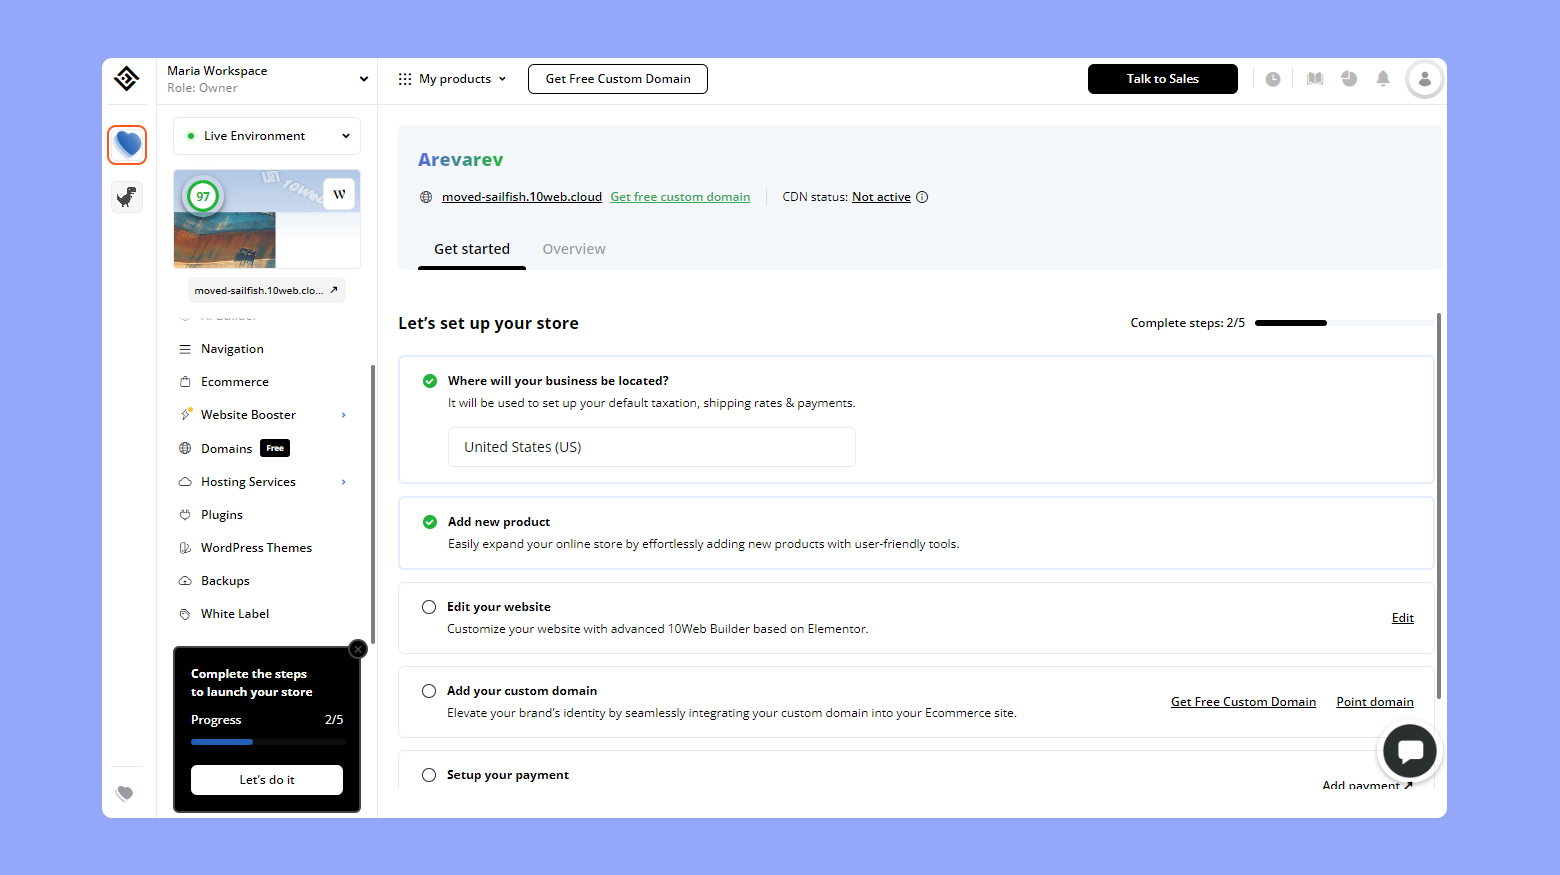
If you are a 10Web user, you can complete your WooCommerce setup from the 10Web dashboard.
Installing Elementor and Elementor Pro
- Go to Plugins > Add New in the WordPress dashboard.
- Search for Elementor and install it.
- Activate the plugin upon installation.
- For Elementor Pro, purchase the plugin from the Elementor website, then upload and activate it on your site.
Activate Elementor’s WooCommerce widgets

Go to Elementor > Settings > Integrations.
Make sure WooCommerce integration is enabled to unlock specific widgets for your online store.
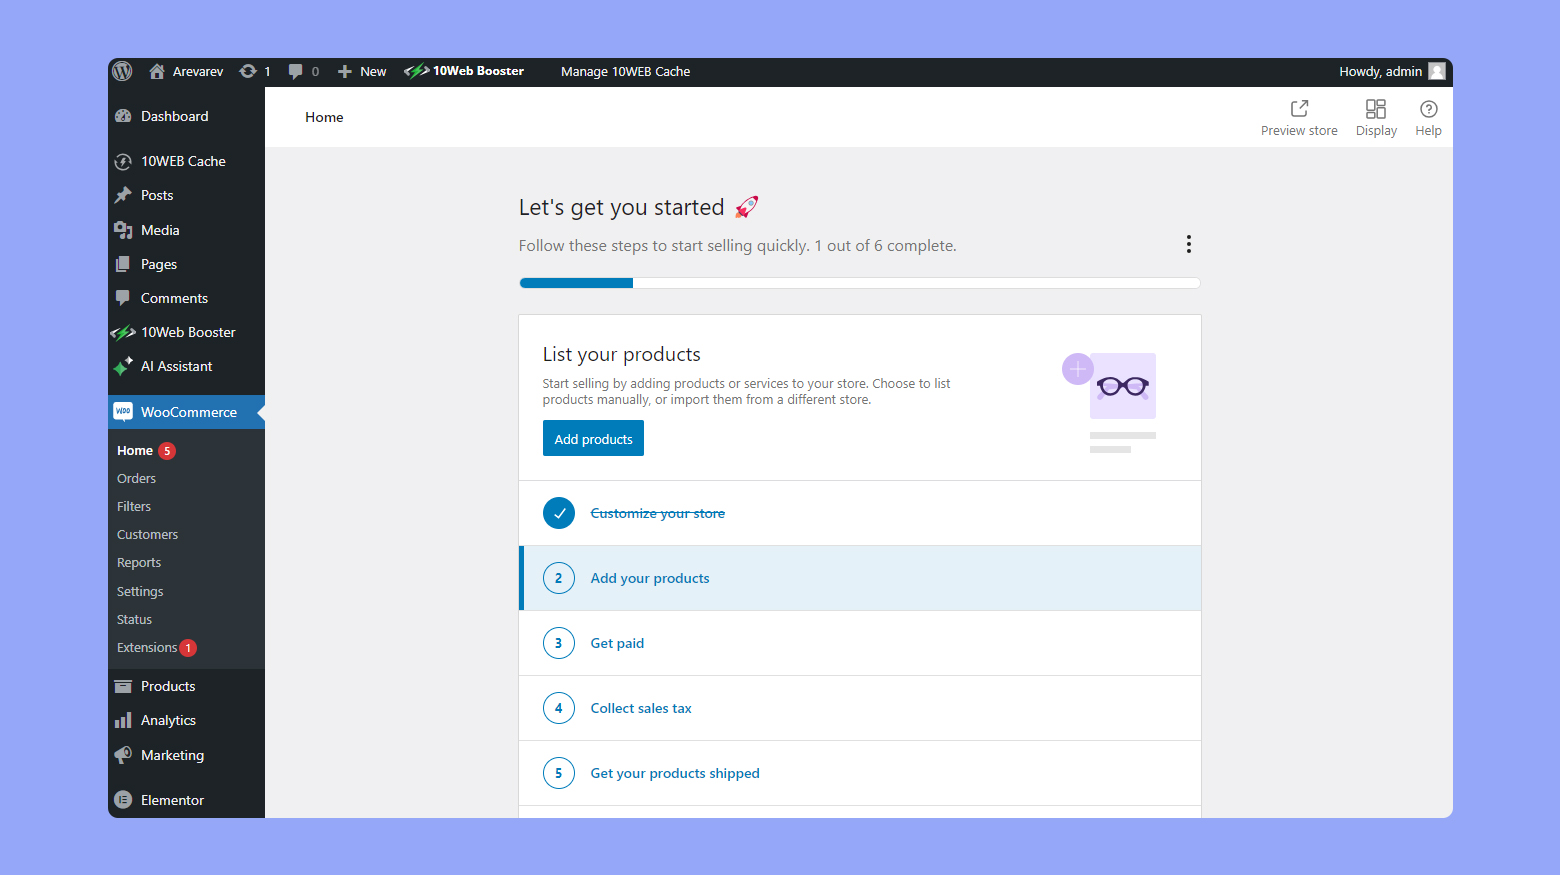
Exploring the WooCommerce dashboard
After completing the installation, familiarize yourself with the WooCommerce dashboard. Here you’ll find everything you need to manage your store, including product setup, order handling, and reports. Navigate to WooCommerce > Home to view your store’s activity and access the store setup.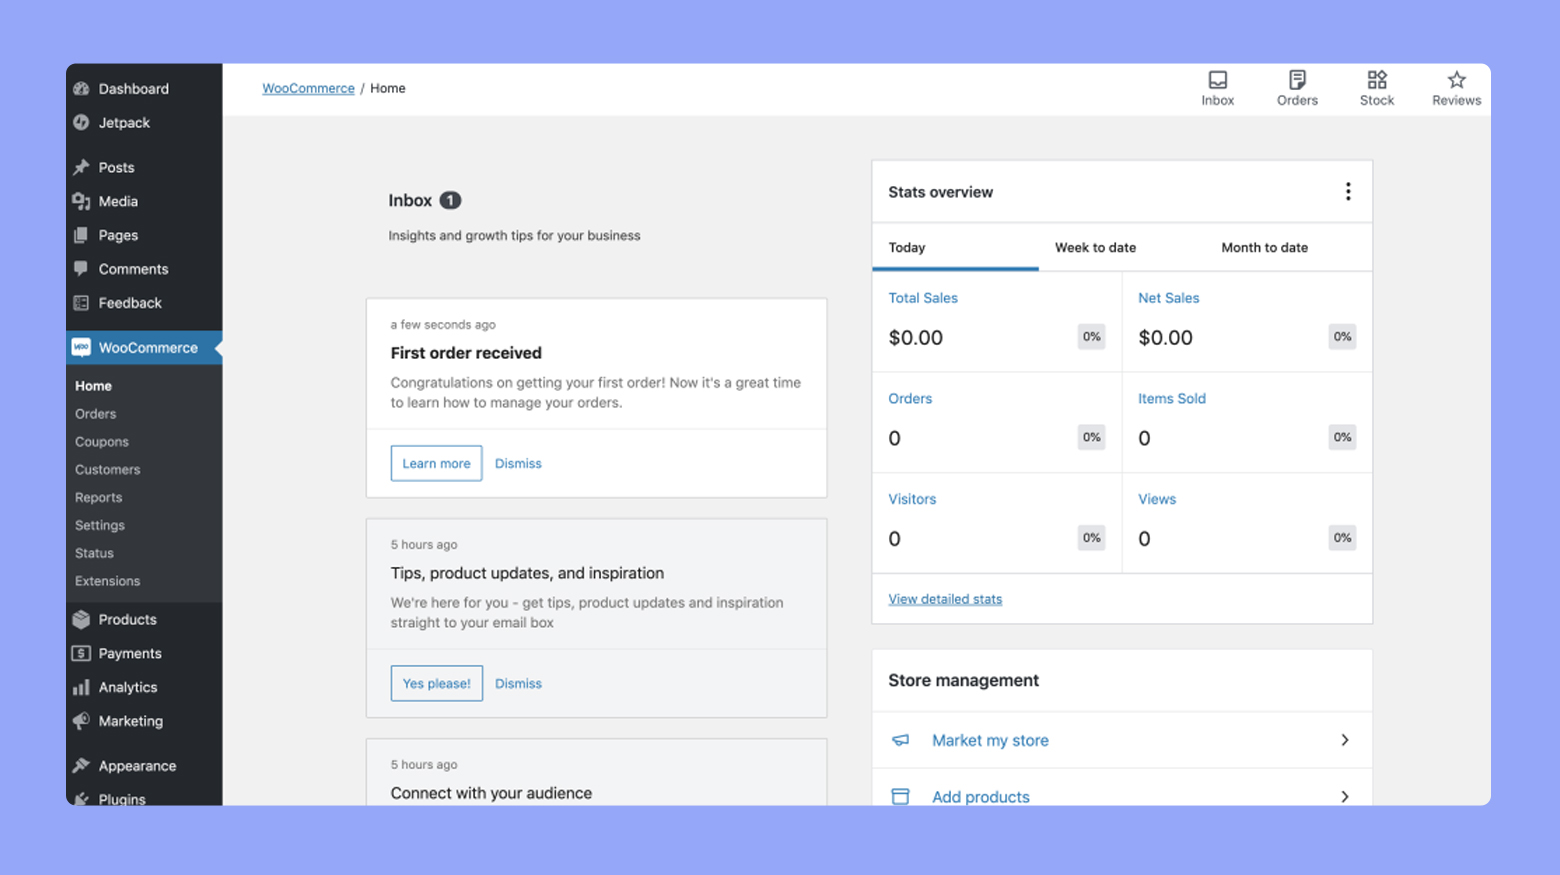
With these steps, you’re now ready to customize and manage your online store using WooCommerce and Elementor’s powerful features.
Create your custom online store in minutes with 10Web AI Ecommerce Website Builder and take your business online.
Looking to sell online?
Designing your online store
When building your ecommerce site using WooCommerce and Elementor, it’s essential to focus on aesthetics, functionality, and user experience. Your design choices will directly impact your customers’ shopping experience.
Choosing and applying a WooCommerce Elementor theme
Selecting the right theme for your ecommerce website is more than just about aesthetics; it’s about ensuring that your online store is both functional and user-friendly. It structures your content and functionality in a way that appeals to your target audience, making navigation intuitive and shopping straightforward. This ease of use can help reduce bounce rates and increase conversion rates, as customers find it simpler to browse products and make purchases. Here’s how to pick and apply the right theme for your store.
Selecting the theme
When choosing a theme, it’s important to focus on both form and function. Here are detailed steps and considerations:
Look for specific compatibility: Start by searching for themes that are explicitly designed for WooCommerce and are compatible with Elementor. This compatibility ensures that you will have access to necessary eCommerce features and the ability to customize them extensively.
Check feature support: Ensure that the theme supports all key WooCommerce functionalities such as product display options, shopping cart integrations, and checkout processes. This step is crucial for providing a smooth shopping experience.
Responsiveness and mobile optimization: With a significant portion of online shopping done via mobile devices, selecting a responsive theme that adapts well to various screen sizes is essential. This adaptability enhances user experience and aids in SEO.
Sources to consider: Reputable sources for themes include the WordPress theme repository for free options and marketplaces like ThemeForest for premium themes. These platforms offer themes that are regularly updated and supported.
Applying the theme
Once you’ve selected a theme, the next step is to apply it to your site. Here’s how you can do this effectively:
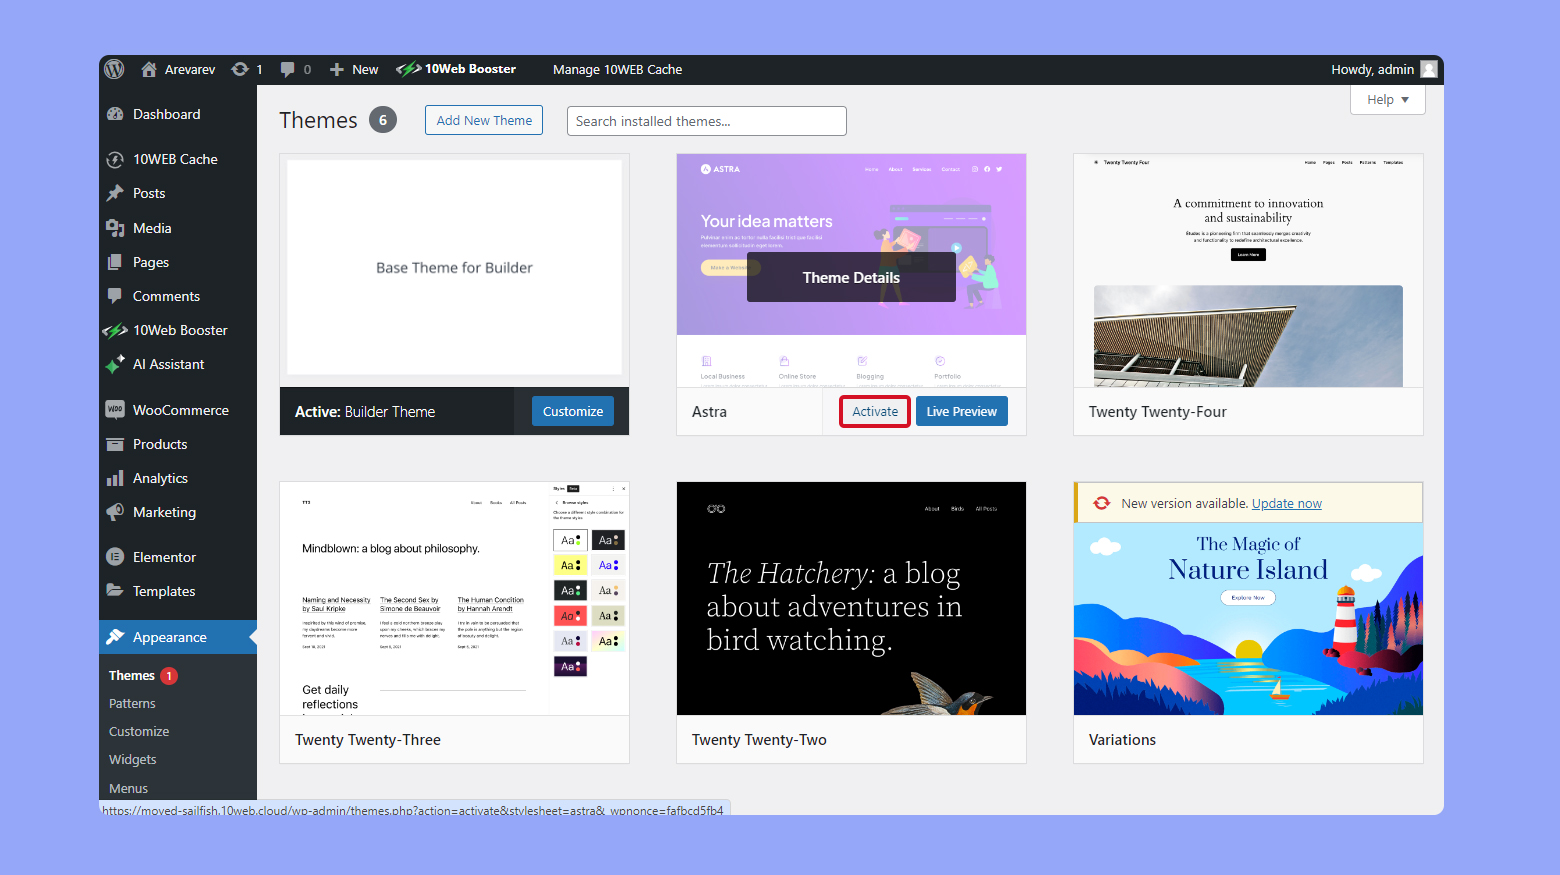
- In your WordPress dashboard, navigate to Appearance > Themes.
- Click Add New at the top of the page and search for your theme or upload one you have chosen.
- To upload, click on Upload Theme at the top of the page, select your theme’s .zip file, and click Install Now.
- Once installed, click on Activate to set your new theme as the active theme for your website.
Customization of key pages using Elementor
After applying your theme, the next crucial step is customizing your key pages. Elementor’s drag-and-drop interface simplifies this process, allowing you to personalize your site effectively.
Start by creating the essential pages that every eCommerce site needs:
- Home page: This is your storefront’s front door. It should highlight your brand, best-selling products, and any current promotions.
- Shop page: This page showcases your product catalog. It should be easy to navigate and include filters for sorting products by various criteria.
- Product pages: Each product needs its own page with detailed descriptions, pricing information, and high-quality images.
- Cart and checkout pages: These pages facilitate the purchase process and should be streamlined to prevent cart abandonment.
- My account page: Allows returning customers to manage their information, view past orders, and track current orders.
Customizing the shop page with Elementor
To adjust the look of your shop page, access Elementor’s customization features. Navigate to Pages, and select the Shop page to edit. With Elementor, you can drag and drop elements to design your store’s layout. Customize fonts, colors, and add special widgets designed for WooCommerce to enhance your shop page’s functionality.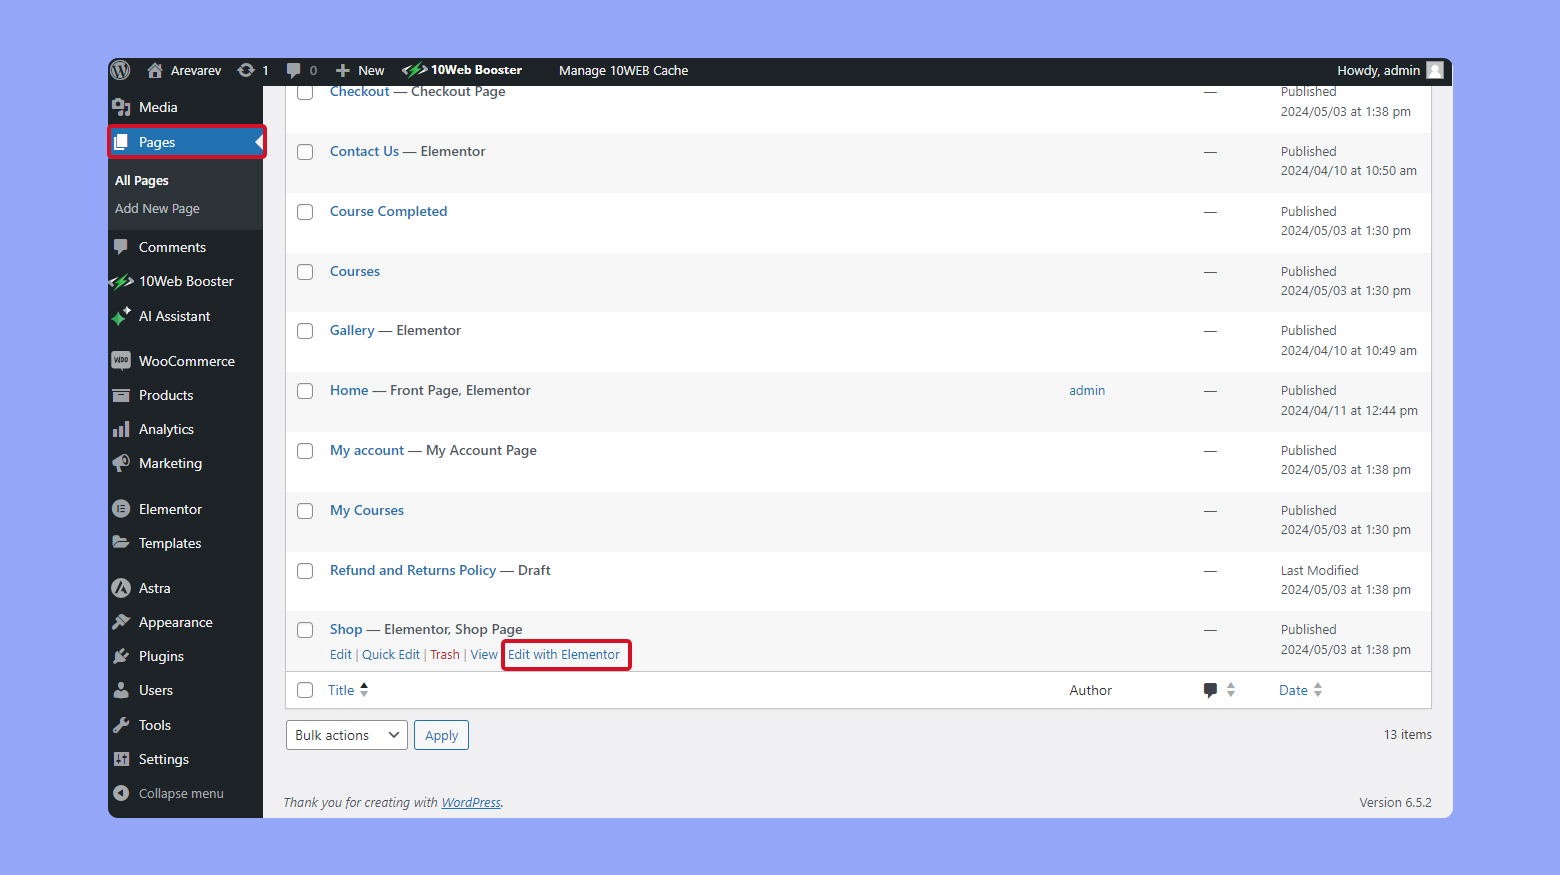
Creating custom product pages
For crafting distinct product pages:
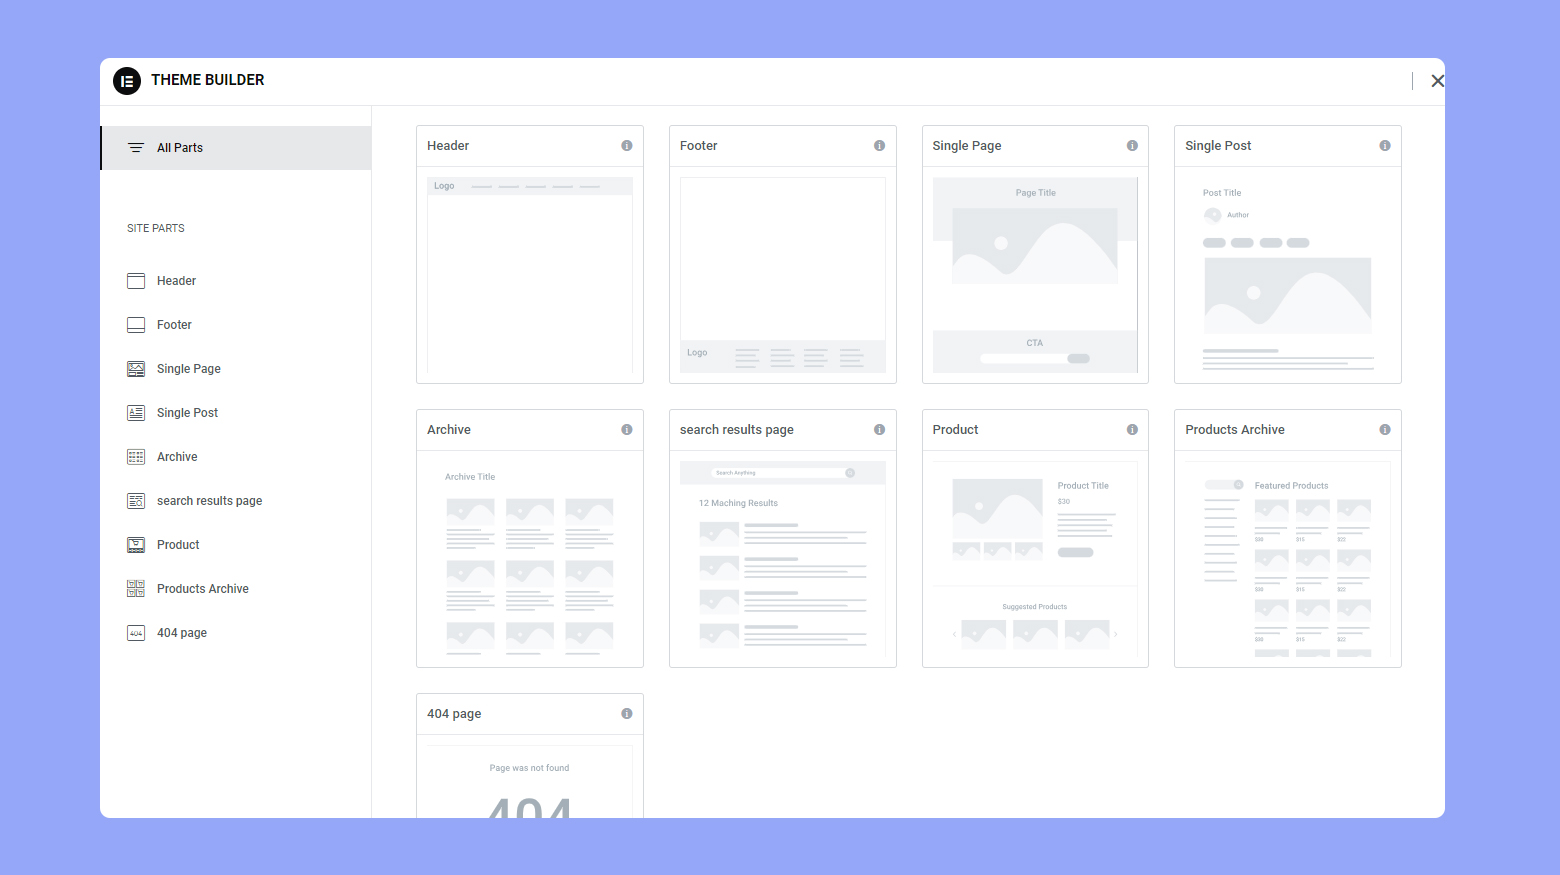
- Go to Templates > Theme Builder.
- Click on Add New and choose the Single Product template.
Use Elementor’s widgets to include product titles, images, descriptions, and add-to-cart buttons. Personalize each element to align with your brand, ensuring a unique shopping experience for your customers.
Designing checkout and cart pages
To maintain a consistent design throughout your online store, customize your checkout and cart pages with Elementor. Navigate to WooCommerce > Settings > Checkout to begin customizing. Incorporate brand colors and fonts for a uniform look that instills confidence during the checkout process.
Utilizing templates and addons
Elementor offers pre-designed templates and a variety of addons that can speed up the design process. These resources provide you with professional layouts and additional functionality, such as product filters or quick view modals. You can locate these templates within the Elementor editor or through the dedicated addons section for additional features.
Create your custom online store in minutes with 10Web AI Ecommerce Website Builder and take your business online.
Looking to sell online?
Managing products and content
When integrating WooCommerce with Elementor, your ability to manage products and content efficiently is key to creating an inviting online store. This section will help you navigate through the steps necessary to add products, categorize them, set up their variants, and enhance product pages using widgets.
Adding and managing physical and digital products
WooCommerce allows you to offer a wide range of products, whether they’re physical items that need shipping or digital downloads.
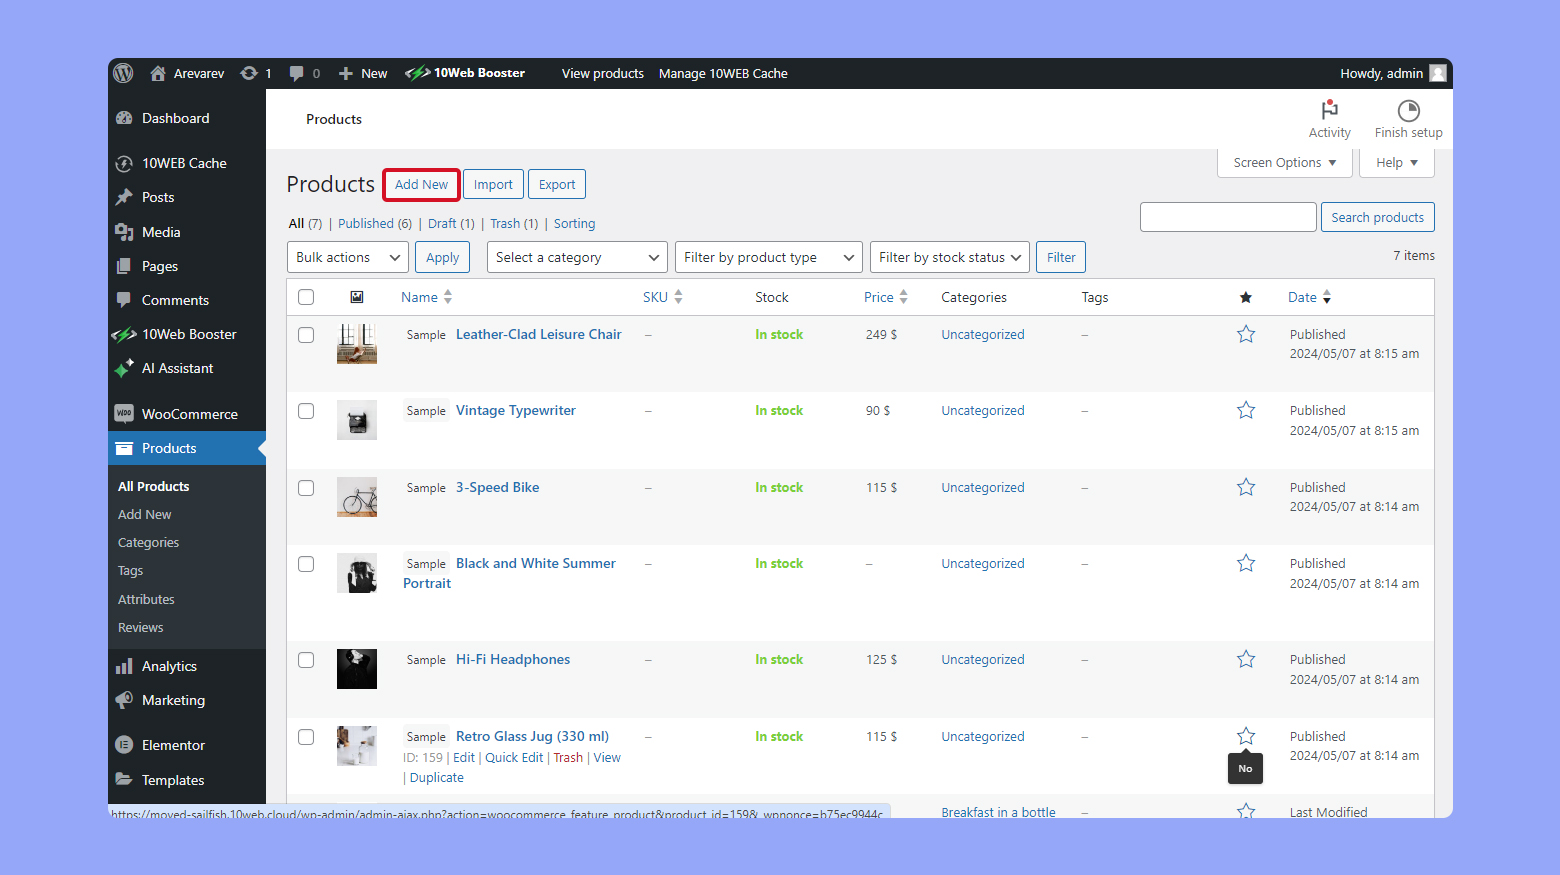
To add a new product, go to your WooCommerce dashboard and select Products >Add New. Here you can provide product details such as title, description, price, and images. Be sure to specify whether the product is physical or digital under the Product data section. If it’s digital, you’ll have the option to upload the file that your customers will receive after purchase.
Configuring product categories
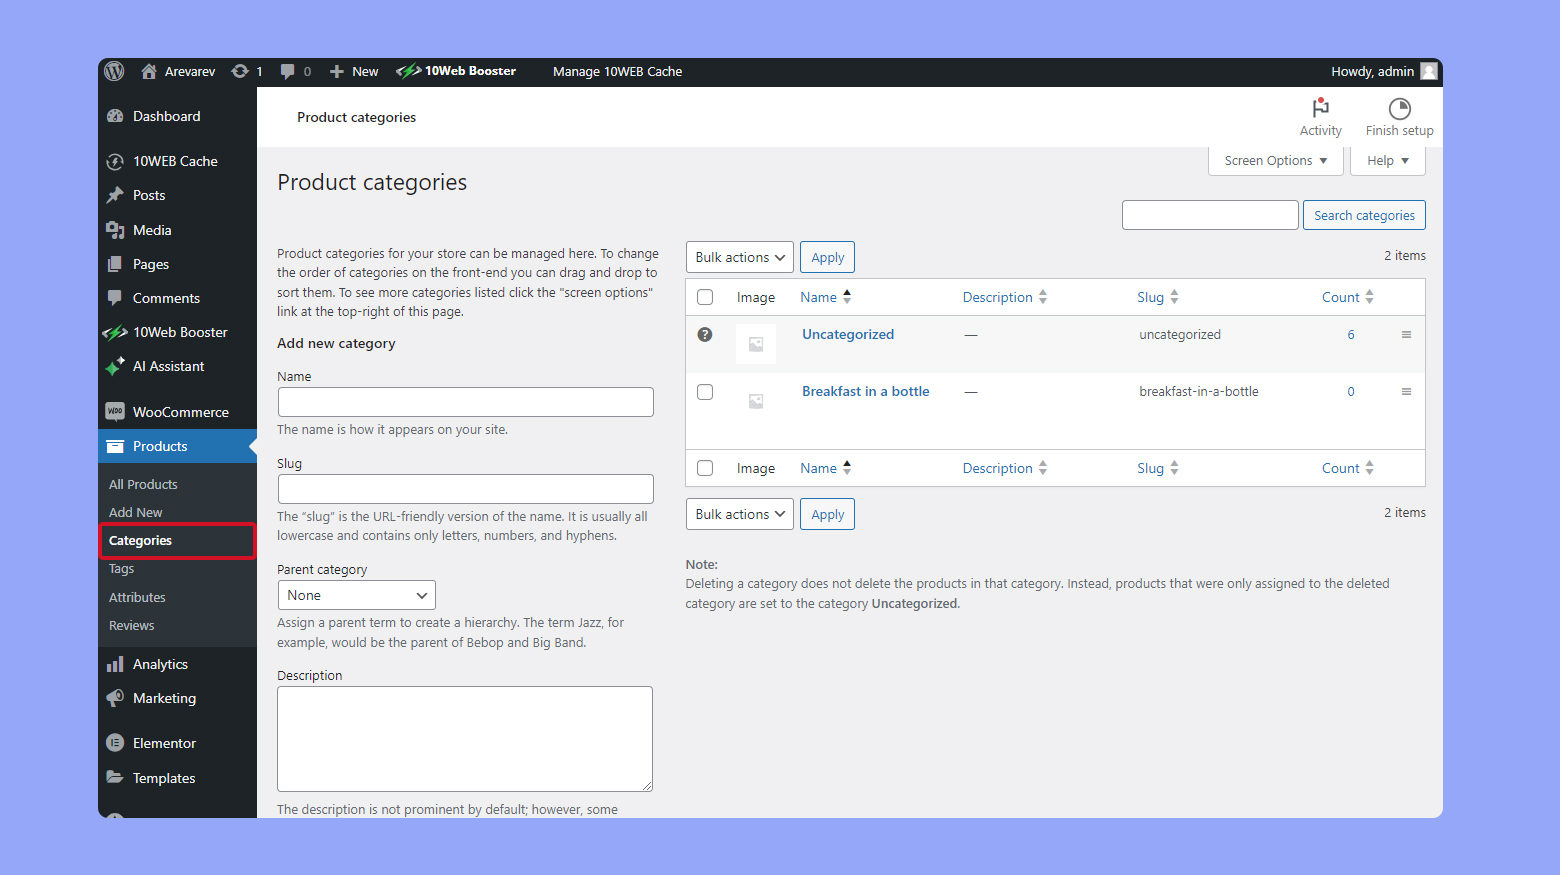
Organizing your products into categories is crucial for a user-friendly shopping experience. To create a new category, navigate to Products then Categories. Enter the name for your new category, add an optional description, and if relevant, an image. Categories help customers find what they’re looking for quickly and allow you to display specific groups of products on your WooCommerce shop page using Elementor widgets.
Setting up product variants and attributes
If your products come in various options like size or color, you’ll use attributes and variants. On the Add New Product page, select Product data, then choose Variable product from the dropdown menu.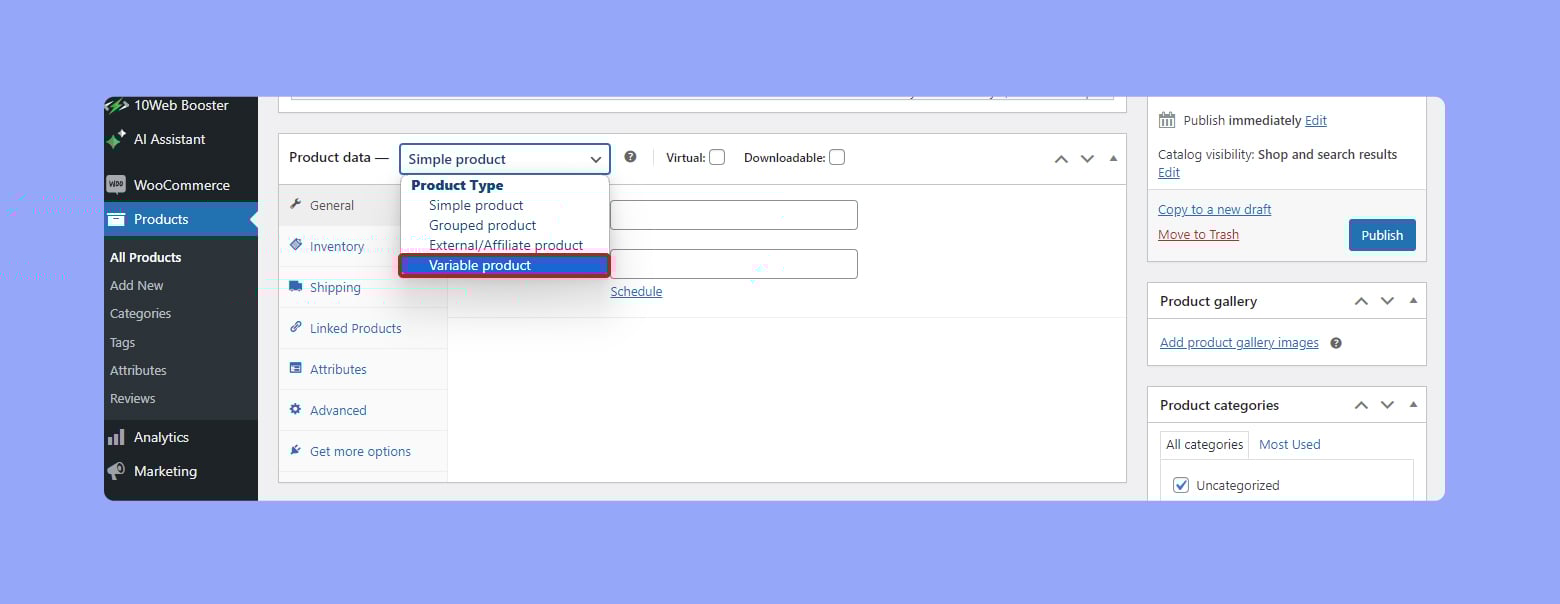
Under the Attributes section, you can add details such as size or color, and then use the Variations tab to define specific combinations of these attributes which bear different SKU, price, or stock level.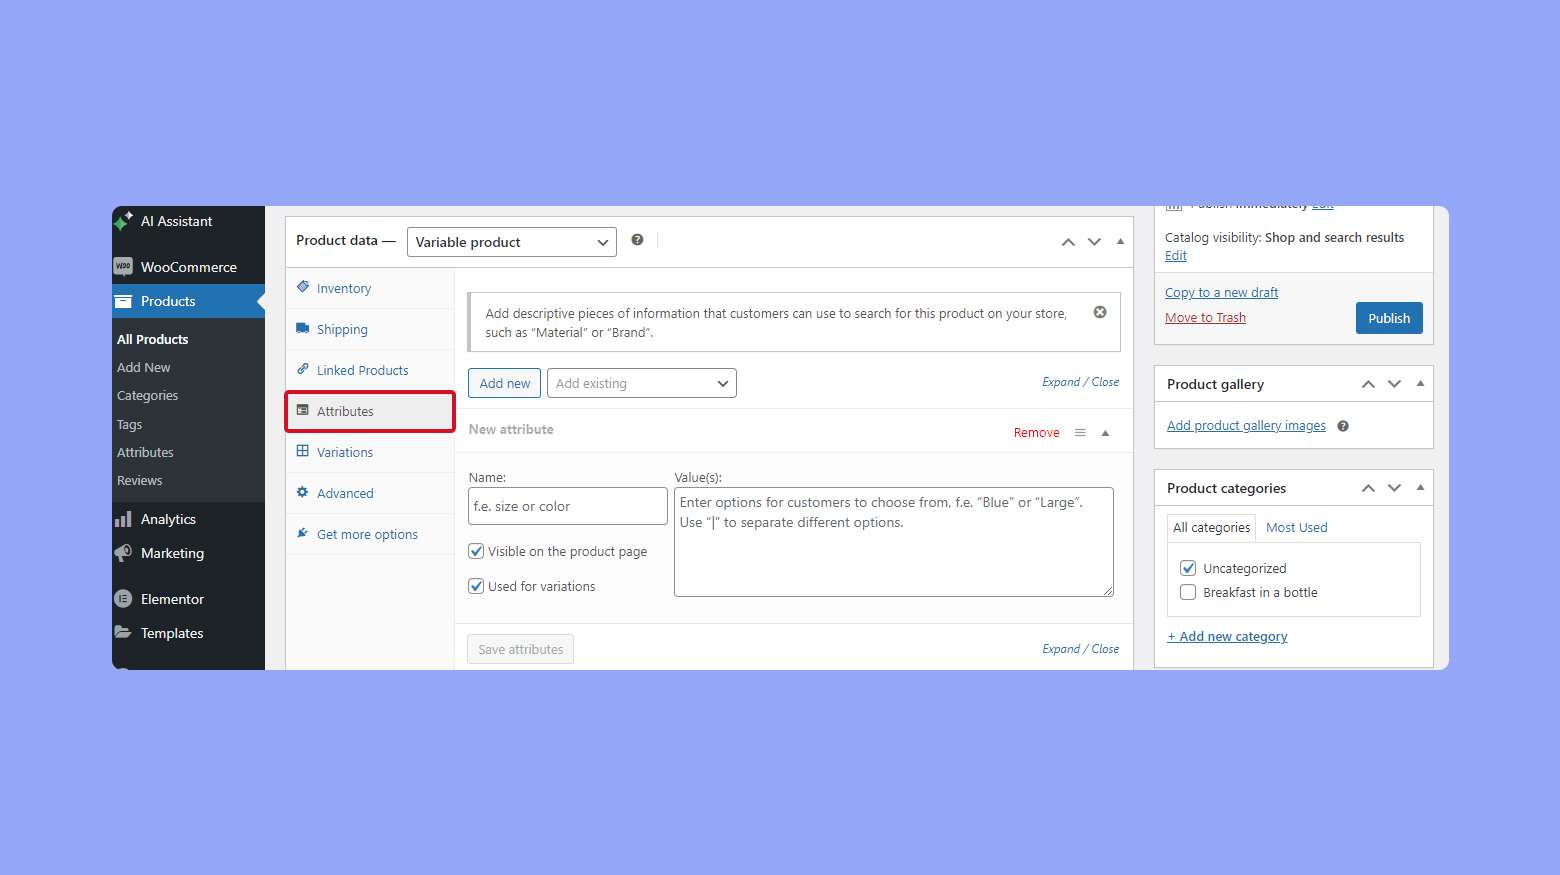
Enhancing product pages with widgets
Elementor’s robust widgets can enrich your product pages beyond the standard WooCommerce layout. Go to the desired product page and click Edit with Elementor. Using Elementor’s drag-and-drop interface, you can customize product titles, images, price, and the add to cart button. Widgets specific to WooCommerce, such as product rating and related products, can be added to enhance your product archive pages and individual product displays.
Optimizing the shopping experience
Creating a shopping experience that’s smooth and intuitive is crucial in encouraging purchases and reducing cart abandonment. Elementor provides a suite of tools that you can use to enhance your WooCommerce store.
Streamlining the checkout process
The checkout process should be fast and fluid to maintain customer interest. Use Elementor Pro’s Checkout widget to design your checkout page visually. Here, you can remove unnecessary fields and steps, allowing your customers to glide through the purchase process with features like autocomplete address fields, saving precious time.
Incorporating shipping and payment options
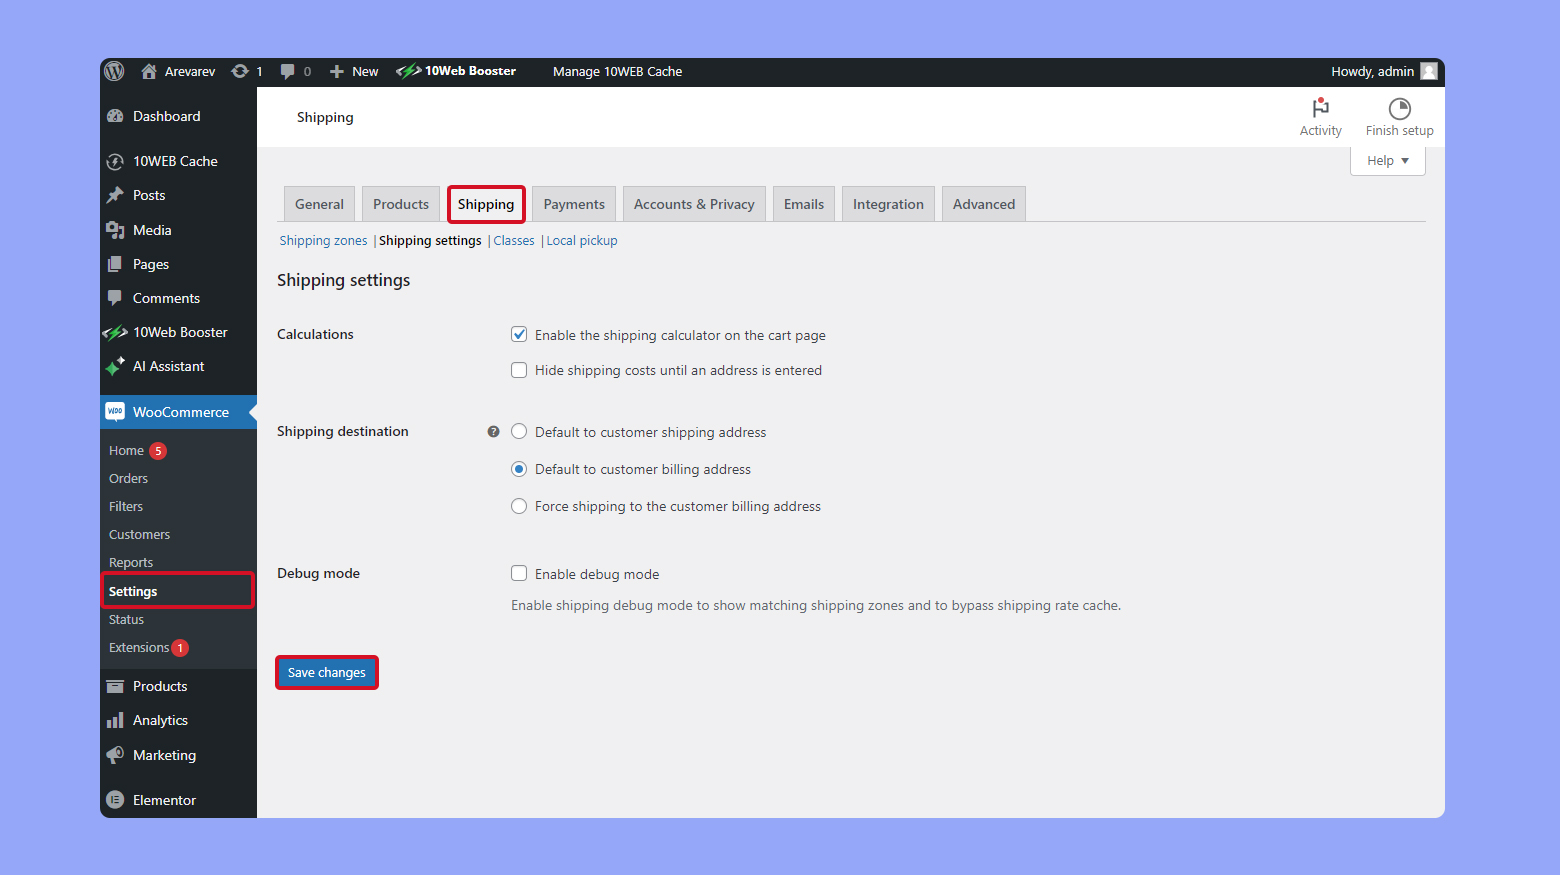
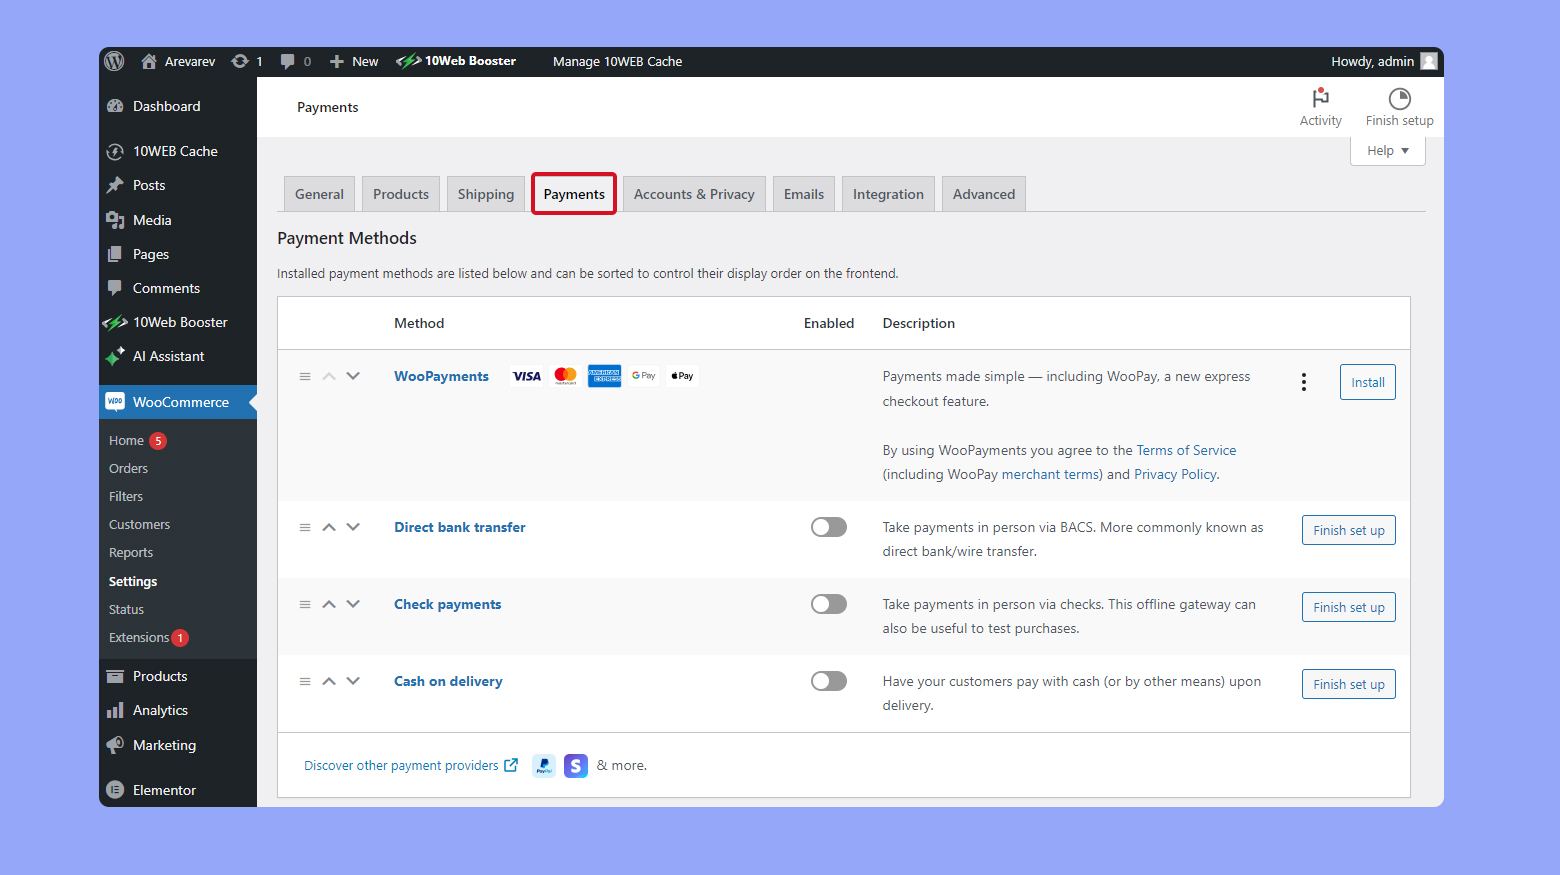
Making it simple to choose shipping and payment during checkout is essential. Customize your shipping options within WooCommerce settings, and then display them clearly on the checkout page designed with Elementor. Integrating multiple payment gateways to provide various options like credit cards, PayPal, and others ensures that your customers can pay the way they prefer.
Implementing upsells and related products
Boost your revenue by offering related products or upsells. Place Add to Cart buttons for related items or upgrades intelligently around your site, especially on product pages and during the checkout process. Elementor allows for strategic placement and customization of these suggestions to match your overall design and enrich the customer’s shopping cart contents.
Adjusting for mobile and tablet views
A significant amount of ecommerce traffic comes from mobile devices. Ensure your WooCommerce store is responsive on all devices with Elementor’s visual design tools. Test your designs on multiple screen sizes and adjust the layout and elements such as text sizes and buttons to maintain a user experience that’s as seamless on a phone or tablet as it is on a desktop.
Create your custom online store in minutes with 10Web AI Ecommerce Website Builder and take your business online.
Looking to sell online?
Integrations and enhancements
As you dive into the world of ecommerce with WooCommerce and Elementor, integrating external services and harnessing analytics can enhance your store’s performance. Securing your site further protects your business and builds customer trust.
Connecting with external services
You can connect your WooCommerce store with various external services to expand your store’s capabilities. This includes adding payment gateways like PayPal or Stripe, setting up shipping through services like FedEx or UPS, and even syncing with marketplaces such as Amazon to broaden your reach. With Elementor Pro, it’s straightforward to incorporate subscription services and manage your domain and hosting requirements.
- Payment Gateways: Include PayPal, Stripe.
- Shipping Services: Connect with FedEx, UPS.
- Marketplaces: Sync with Amazon for increased exposure.
- Subscriptions: Manage recurring payments via Elementor Pro.
Leveraging analytics for performance insights
Analytics play a critical role in understanding your ecommerce performance. By integrating tools like Google Analytics with WooCommerce, you can track and analyze customer behavior, which helps you make data-driven decisions. The analytics reports available provide valuable insights into your website’s traffic, conversion rates, and sales patterns.
- Google Analytics: Track customer behavior, conversion rates.
- Performance Reports: Gain insights into traffic and sales patterns.
Securing your ecommerce site
Security is non-negotiable in the e-commerce sphere. An essential step is to ensure your website has an SSL certificate for encrypting data. This helps protect sensitive information such as customer details and payment transactions. For WooCommerce, regularly update your plugins and themes to keep your site safe from vulnerabilities, ensuring a secure shopping experience for your customers.
- SSL certificate: Encrypt customer data, secure transactions.
- Regular updates: Keep WooCommerce, Elementor, and other plugins updated for security.
Finalizing and launching your store
Before you launch, it’s crucial to ensure that your online store is fully optimized and functioning correctly. This will help maximize your store’s performance and provide a smooth shopping experience for your customers.
Reviewing your store’s performance
Review your store’s performance by checking your website speed and ensuring your product pages load quickly.Slow load times can affect conversions, as customers may become impatient and leave your site. Use tools like Google Analytics to monitor your ecommerce store’s performance metrics such as page views, bounce rate, and conversion rates.
Ensuring proper functionality of pages
Do a thorough check across all pages of your online store, including the homepage, product pages, and checkout pages. Make sure the ecommerce plugin, generally WooCommerce, is functioning correctly. Test all the features, such as adding products to the cart, applying discount codes, and progressing through the checkout process. Confirm that order confirmation emails are being sent out once an order is placed.
Launching and promoting your store
Once everything checks out, it’s time to launch your website. Using your dashboard, ensure all settings are correctly configured and hit the Launch button to take your site live. After launching, focus on promoting your ecommerce store through social media, email marketing, and other channels to attract visitors and drive traffic. Keep an eye on initial orders and address any issues that arise promptly to maintain a reputation for excellent customer service.
Advanced WooCommerce and Elementor techniques
For those looking to push the boundaries of their online stores, advanced techniques in WooCommerce coupled with Elementor’s widgets and theme builder can elevate your shop’s design and functionality. Here’s how you can harness these tools for a more tailored shopping experience.
Customizing headers and footers
With Elementor Pro’s Theme Builder, you have the power to design and customize your site’s headers and footers beyond the constraints of your active theme.
- Navigate to Templates > Theme Builder.
- Choose Add New.
- Select Header or Footer from the dropdown menu, and click Create Template.
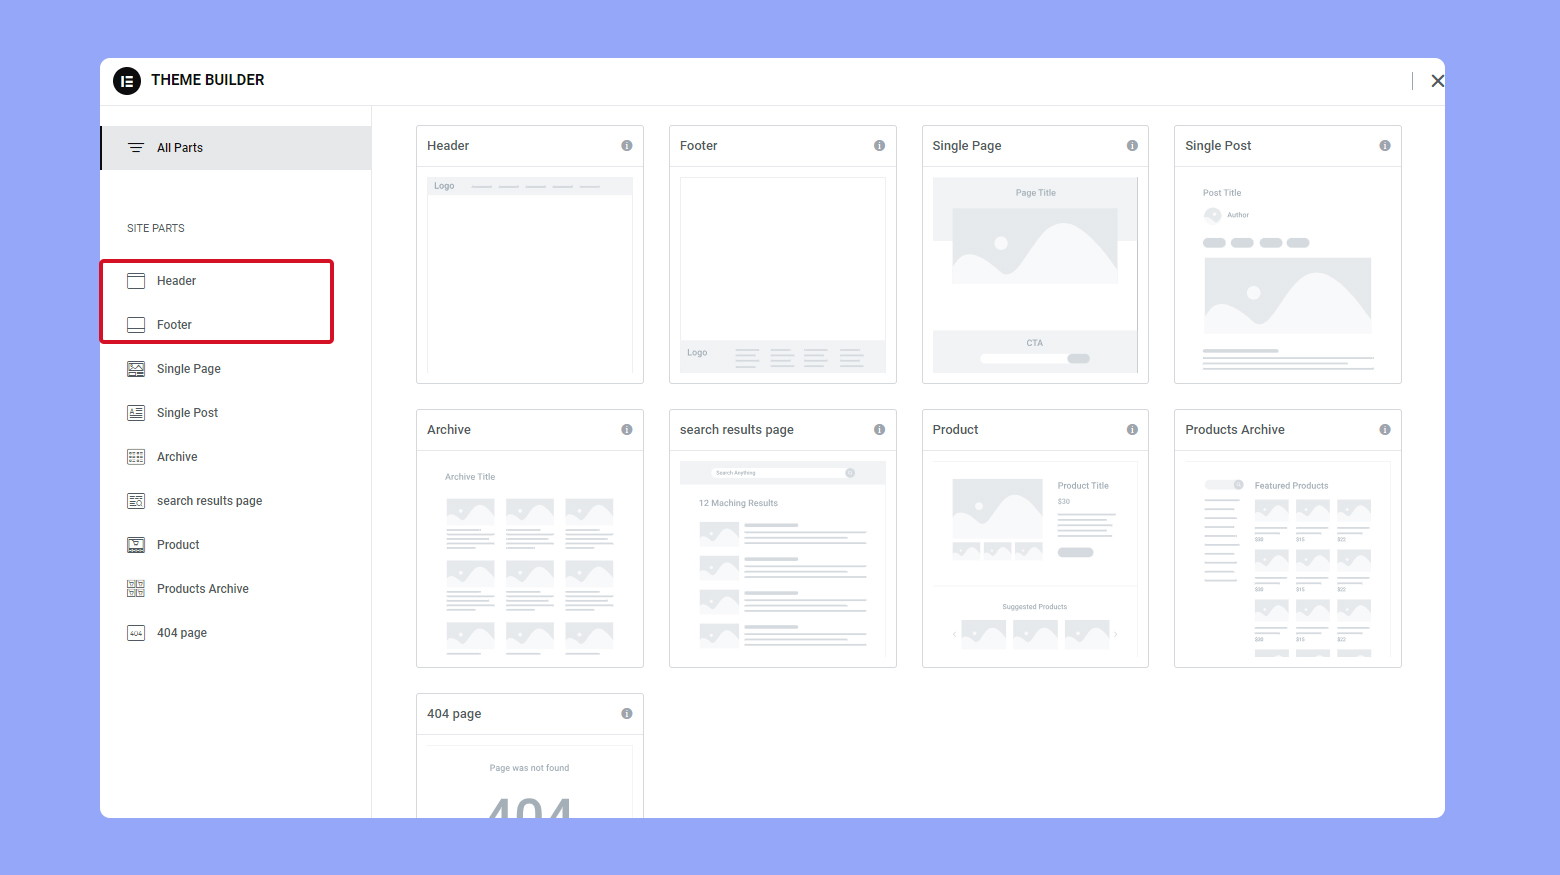
You can then drag and drop different widgets into your template to match your store’s branding.
Employing advanced widgets for customization
Elementor provides a variety of advanced widgets that greatly enhance the customization of your WooCommerce shop page. Make sure you’re using Elementor Pro for access to exclusive widgets integrated with WooCommerce.
These widgets include Woo Products, Woo Categories, and Add to Cart buttons. You’ll find these by clicking on the Widgets menu when you’re editing a page with Elementor’s page builder. Drag your chosen widget onto the canvas and tweak the settings to fit your needs.
Maximizing eCommerce functionality
To truly maximize your store’s ecommerce capabilities, dive into the WooCommerce settings available within Elementor. For example, leverage the Products & Categories widget for dynamic product display. Customize your Single Product and Product Archive pages by selecting them under Templates. This enables you to have distinctive product layouts, which can improve the shopping experience and potentially increase conversions. Remember, detailed customization of these elements can require some knowledge of CSS, especially if you’re aiming for a highly unique look.
By mastering these advanced techniques, you’ll ensure that your online store stands out in a competitive eCommerce landscape, providing your customers with a seamless and memorable buying experience.
Conclusion
Using WooCommerce with Elementor to set up an online store offers a streamlined and highly customizable approach to ecommerce. WooCommerce provides robust tools for managing products and transactions, while Elementor enhances visual customization, allowing you to design a store that reflects your brand’s aesthetic. This combination not only improves user engagement and conversion rates but also simplifies management through features like dynamic widgets and responsive designs.
This blog has looked at the key steps to integrate these tools, from installation to designing responsive, aesthetically pleasing product pages. Utilizing the specific features and advanced techniques of both tools, you can maximize your store’s efficiency, streamline management processes, and boost conversion rates. Now, you’re equipped to apply this knowledge to create a customized, functional, and successful online store that resonates with your brand and attracts more customers.
Create your online store in minutes with 10Web AI Ecommerce Website Builder.Looking to sell online?
Create your online store in minutes


![]()